

Page 1
Crux Interfacing Solutions
6860 Canby Avenue, Suite 116,
Reseda, CA 91335
www.cruxinterfacing.com
tel. #: (818) 609-9299
fax #: (818) 996-8188
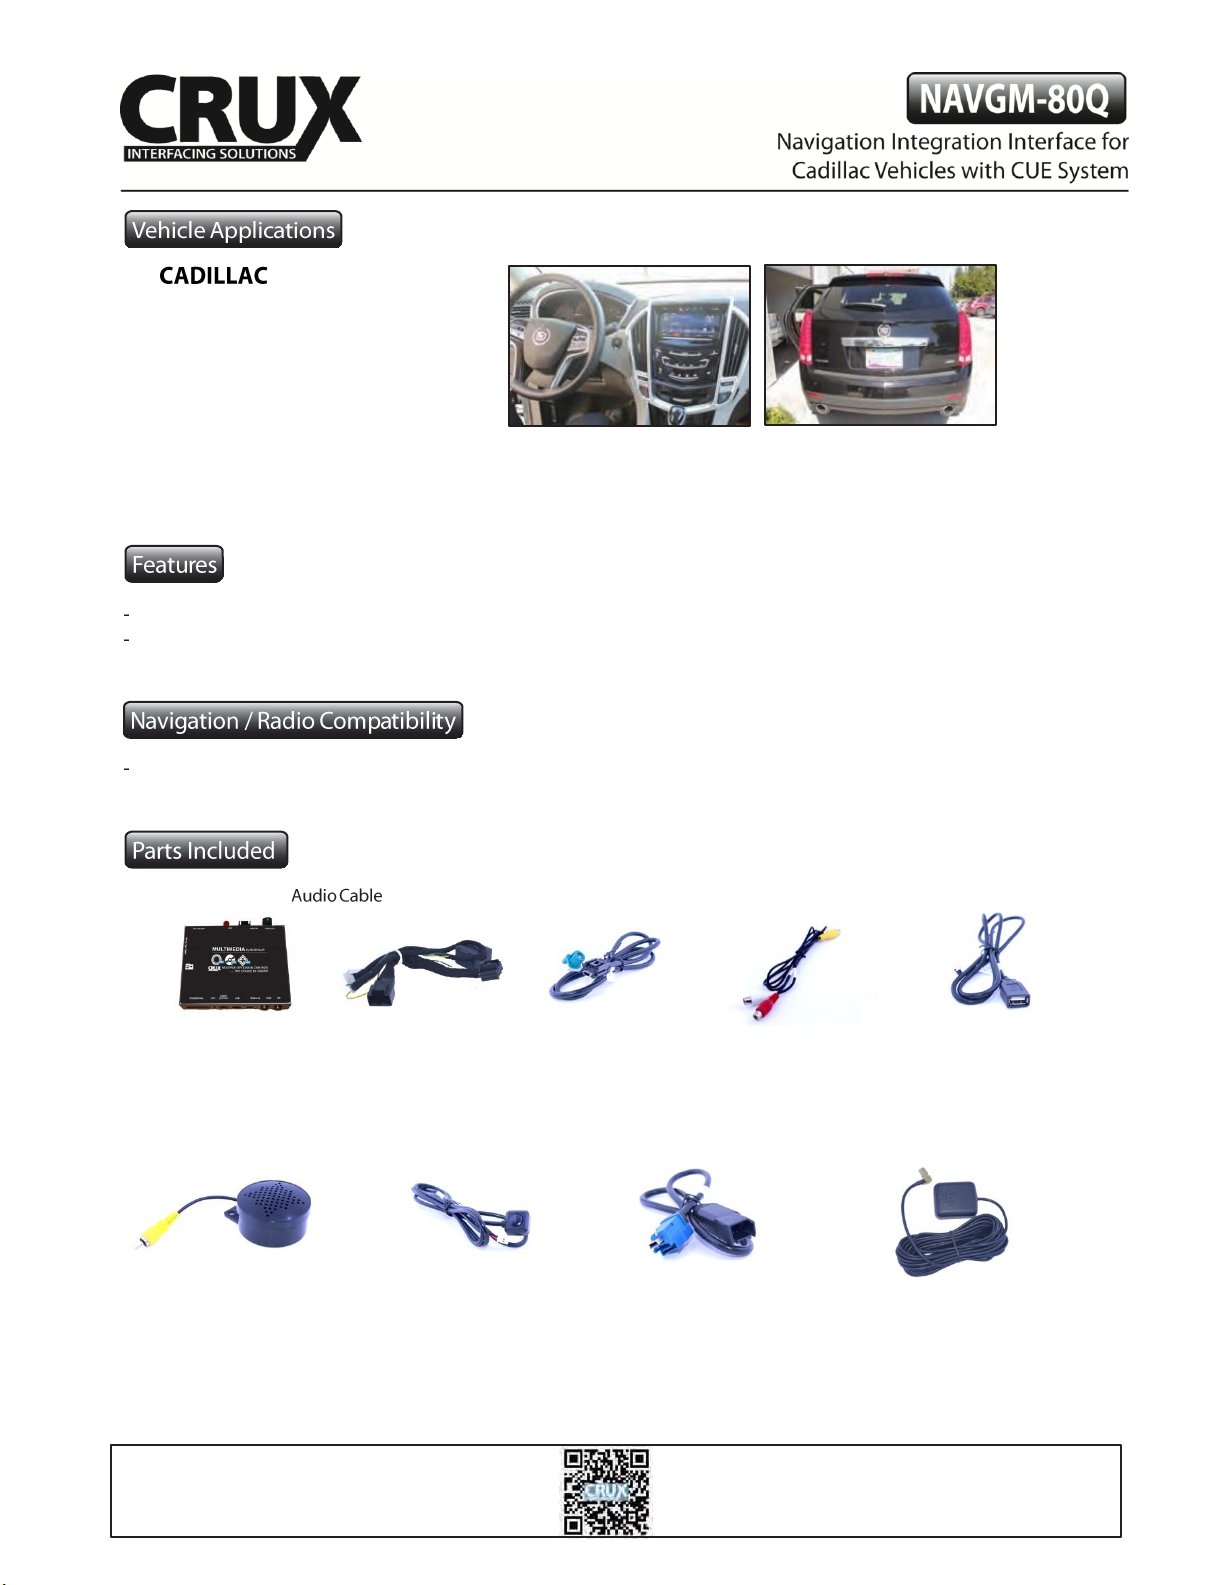
2013-2016 ATS
2014-2016 CTS Coupe
2014-2016 CTS/CTS V
2015 Escalade
2013-2015 XTS
2013-2015 SRX
Plug and Play connectors make installation simple and easy.
Utilizes the latest mapping version of iGo Primo.
GM CUE Infotainment Systems
Interface
Module
LVDS Cable
Audio
Harness
Vehicle
Harness
USB Extension
Cable
Speaker
Push Button
Switch
USB Mini B
Extension Cable
GPS
Antenna
1
rev.122716
Page 2
Crux Interfacing Solutions
6860 Canby Avenue, Suite 116,
Reseda, CA 91335
www.cruxinterfacing.com
tel. #: (818) 609-9299
fax #: (818) 996-8188
2 / 5
rev.122716
Page 3

Crux Interfacing Solutions
6860 Canby Avenue, Suite 116,
Reseda, CA 91335
www.cruxinterfacing.com
tel. #: (818) 609-9299
fax #: (818) 996-8188
BEFORE YOU START:
- Set the parking brake before working on the vehicle.
- Disconnect the negative side of the battery to avoid short circuits during installation.
- Check that you have all the necessary parts listed on the “Parts Included” section.
- Verify that you have a secure location to mount the Multimedia / Navigation Interface box and
harness staying clear of any major components or HVAC system.
1. Remove panels to gain access
to the screws.
2. Pull out console side panels. 3. Remove bezel trim by pulling upward.
4. Remove black bezel by first
pulling out then up. Bezel is held by
two clips.
5. Remove the 2 screws holding the
radio bezel.
6. Pull out radio bezel. Bezel attaches
to the dashboard by these 8 points.
7. Unplug the 9-pin connector
from behind the radio bezel.
8. Remove the 4 screws holding
the radio and CD changer.
9. Unplug the radio connector, USB
and mini USB from radio.
3 / 5
rev.061815
Page 4

Crux Interfacing Solutions
6860 Canby Avenue, Suite 116,
Reseda, CA 91335
www.cruxinterfacing.com
tel. #: (818) 609-9299
fax #: (818) 996-8188
10. Plug the Male 16-pin connector to
the harness provided in this kit.
11. Plug mini USB connector from the
vehicle into the LVDS Input of the interface.
12. Plug the blue LVDS pigtail cable connector
(included in kit) to the LVDS Output jack of
the interface.
13. Plug the other end (mini USB)
of the supplied pigtail to the female
mini USB jack behind the radio.
14. Mount the GPS antenna to a
suitable location and run the cable
to the radio. Plug into the interface.
15. Plug the audio harness into the
interface and route necessary AV
cable for video input.
16. Plug speaker RCA to the RCA
audio plug found on the audio
harness. Mount the speaker in a
suitable location.
17.Plug in the micro SD card with
iGo Primo map.
18. Find a suitable location to secure
the multimedia integration interface
and test the system.
19. Check functionality of the Navigation. 20. Check functionality of video inputs. 21. Reverse the order of installation
to put back the radio and all the trim.
4 / 5
rev.122716
Page 5

Crux Interfacing Solutions
6860 Canby Avenue, Suite 116,
Reseda, CA 91335
www.cruxinterfacing.com
tel. #: (818) 609-9299
fax #: (818) 996-8188
DIP
Down (ON)
Up (OFF)
1
RGBS ON
RGBS OFF
2
AV1 ON
AV1 OFF
3
AV2 ON
AV2 OFF
4
After-market Camera ON
After-market Camera OFF
5
800*480
480*234
6
Not Used
7
Not Used
8
Always ON (Down)
1. Press the HOME button for 2 to 3 seconds to toggle between sources.
Source Rotation:
Radio – RGBS - AV1 - AV2 - Radio
Radio not Supported
Cadillac XTS – Mfg Date 06/16
5 / 5
rev.122716
 Loading...