

Crucial CT120BX500SSD1, CT240BX500SSD1, CT480BX500SSD1 User manual
HOW TO INSTALL A CRUCIAL®
SSD IN YOUR COMPUTER
Installing a Crucial SSD is easy and makes your computer significantly faster!
PART 1: PREPARE
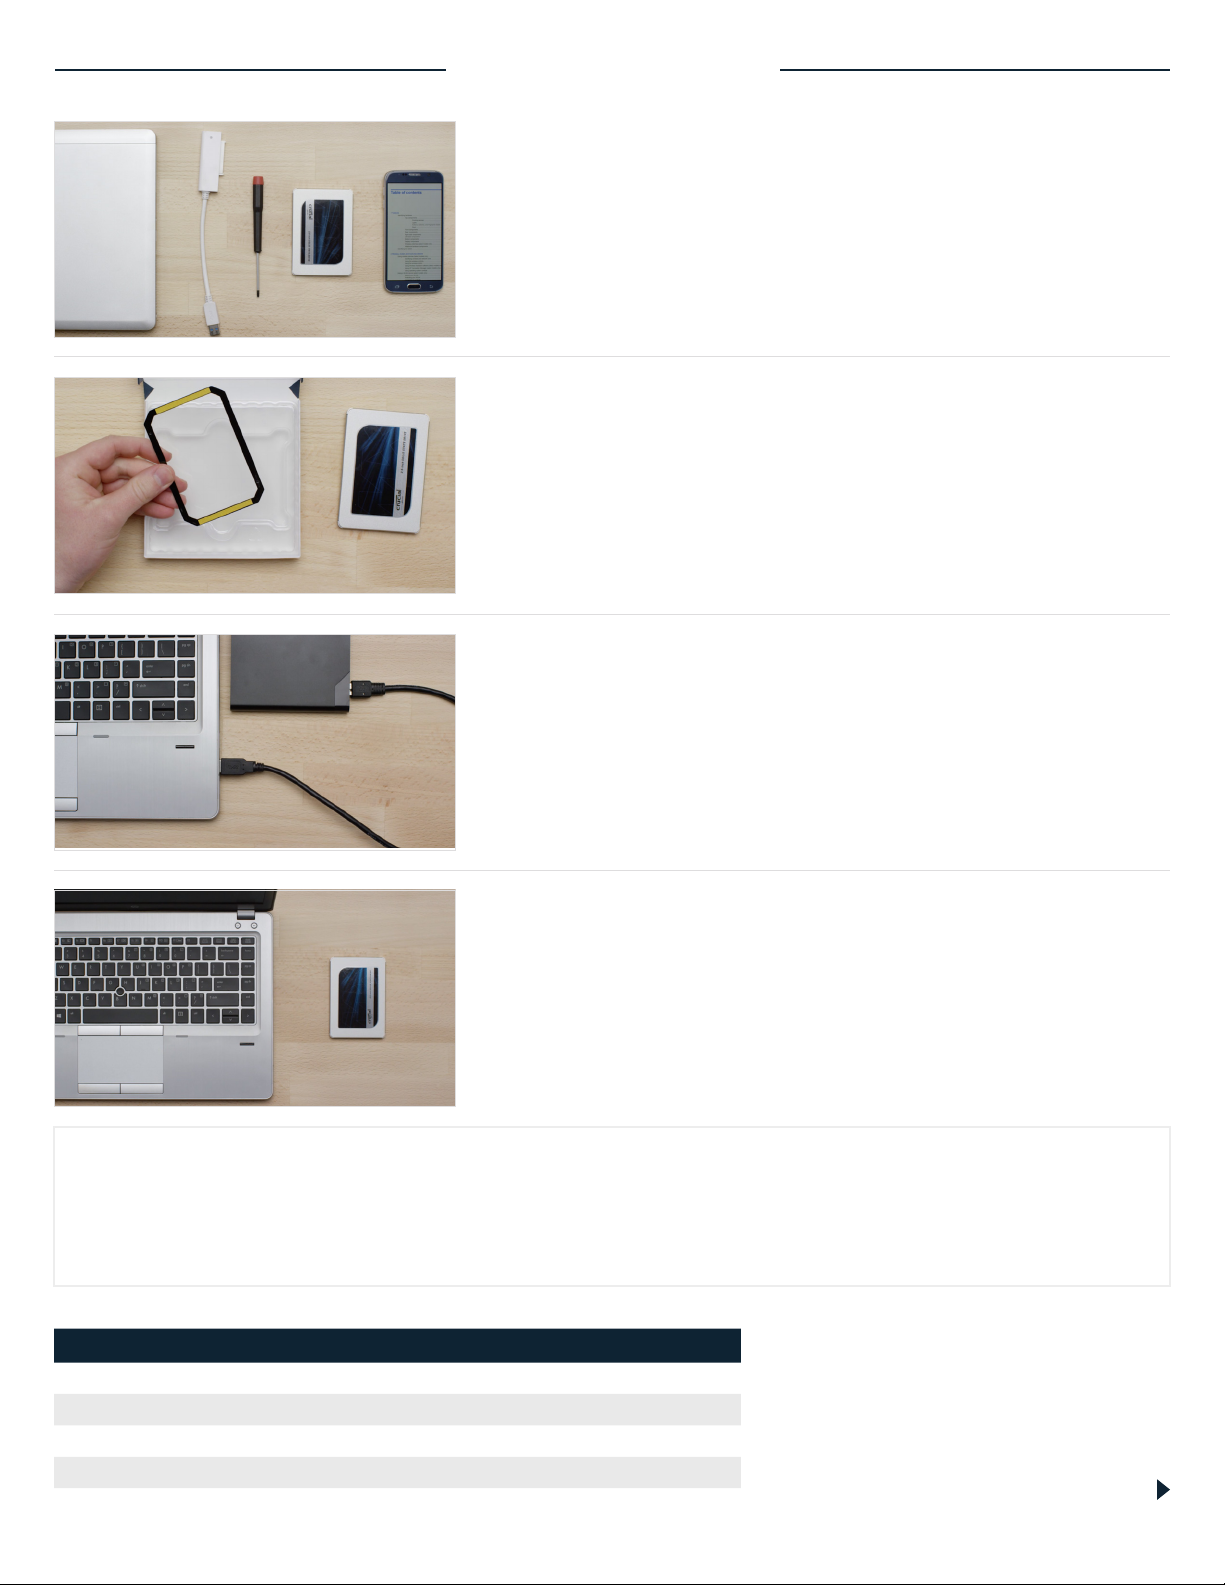
1. Gather supplies
You will need your system. A screwdriver. A Crucial SSD. A SATAto-USB cable. And your system’s owner’s manual. If you don’t have
a SATA-to-USB cable, you can get one in the Crucial SSD Install Kit,
which is sold separately.
2. Set the spacer aside
As you take your SSD out of its box, you’ll see this – it’s called a
spacer, but not all SSD models come with one. Set this aside for
now. It won’t come into play until later in the process, and based on
your system, you may not even need it.
3. Back up important files
Before starting the actual installation, take a few moments to save
any important files on your computer to an external storage drive
or a USB drive.
4. Go slowly and deliberately
The information you need is all here. Your system will likely look
dierent than the ones shown, but the process is the same. Read
each step thoroughly and consult our Helpful Tips for more info.
HELPFUL TIP
For Mac installations, follow our Mac-specific steps at www.crucial.com/mac-ssd-install since the process
is significantly dierent and not all Mac systems are upgradeable.
Amount of data on old hard drive Time it may take to copy to new SSD
Less than 256GB 20-30 minutes
256-512GB 30-60 minutes
512GB-1TB 60-90 minutes
More than 1TB 90+ minutes
DID YOU KNOW...?
The longest part of the SSD install process
is copying everything from your old drive to
your new SSD. Before you start, get a sense
of how long this’ll take by referring to our
chart on the left.
Page 2
PART 2: COPY
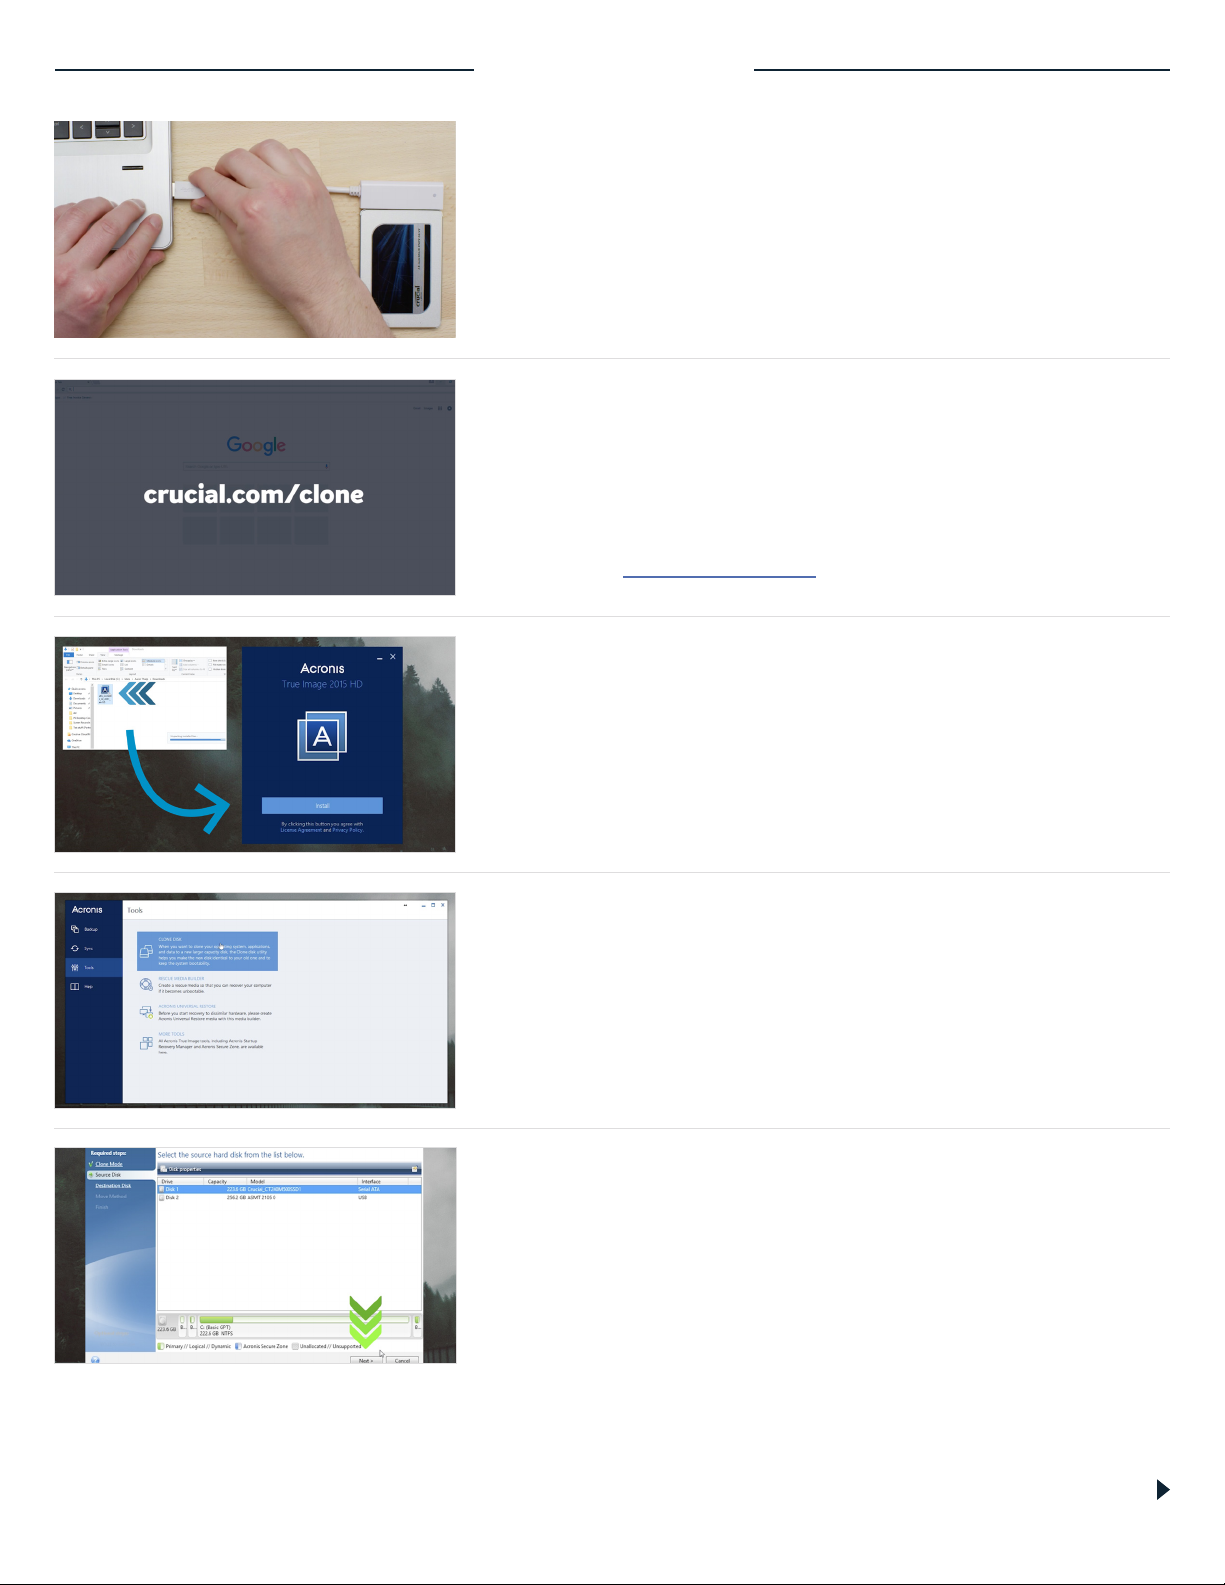
1. Connect the SSD to your system
Get started by using the SATA-to-USB cable to connect the SSD
to your computer. When handling your SSD, don’t touch its gold
connector pins with your fingers.
2. Download the software that copies your
old drive to your new SSD
Now it’s time to download the software that copies your old
storage drive to your new SSD. On the computer your SSD
is connected to, go to the website shown on the screen to
download it. Crucial.com/clone
3. Install the software you downloaded
Install this software by opening the file you just downloaded and
accepting all the prompts. A screen will pop up where you’ll need to
click Install. Once the installation is complete, start Acronis.
4. Prepare to copy or “clone” your data
You’ll now see several options in the software. Select the Clone
Disk option. You’ll then be asked to select a clone mode. If you’ve
never done this before, we recommend the Automatic method,
then click the Next button.
5. Select source and destination drives (disks)
Acronis will now ask you to select your “source” drive, which is your
existing drive. Select it by clicking on it, then click Next. Now select
your “destination” disk – your new SSD. Since your SSD is currently
plugged into a USB port, the interface column will say “USB” and
that’s how you know which drive to select for your destination disk.
Select it, then click Next. On the following screen, click Proceed to
start copying your data.
Page 3
 Loading...