

Page 1
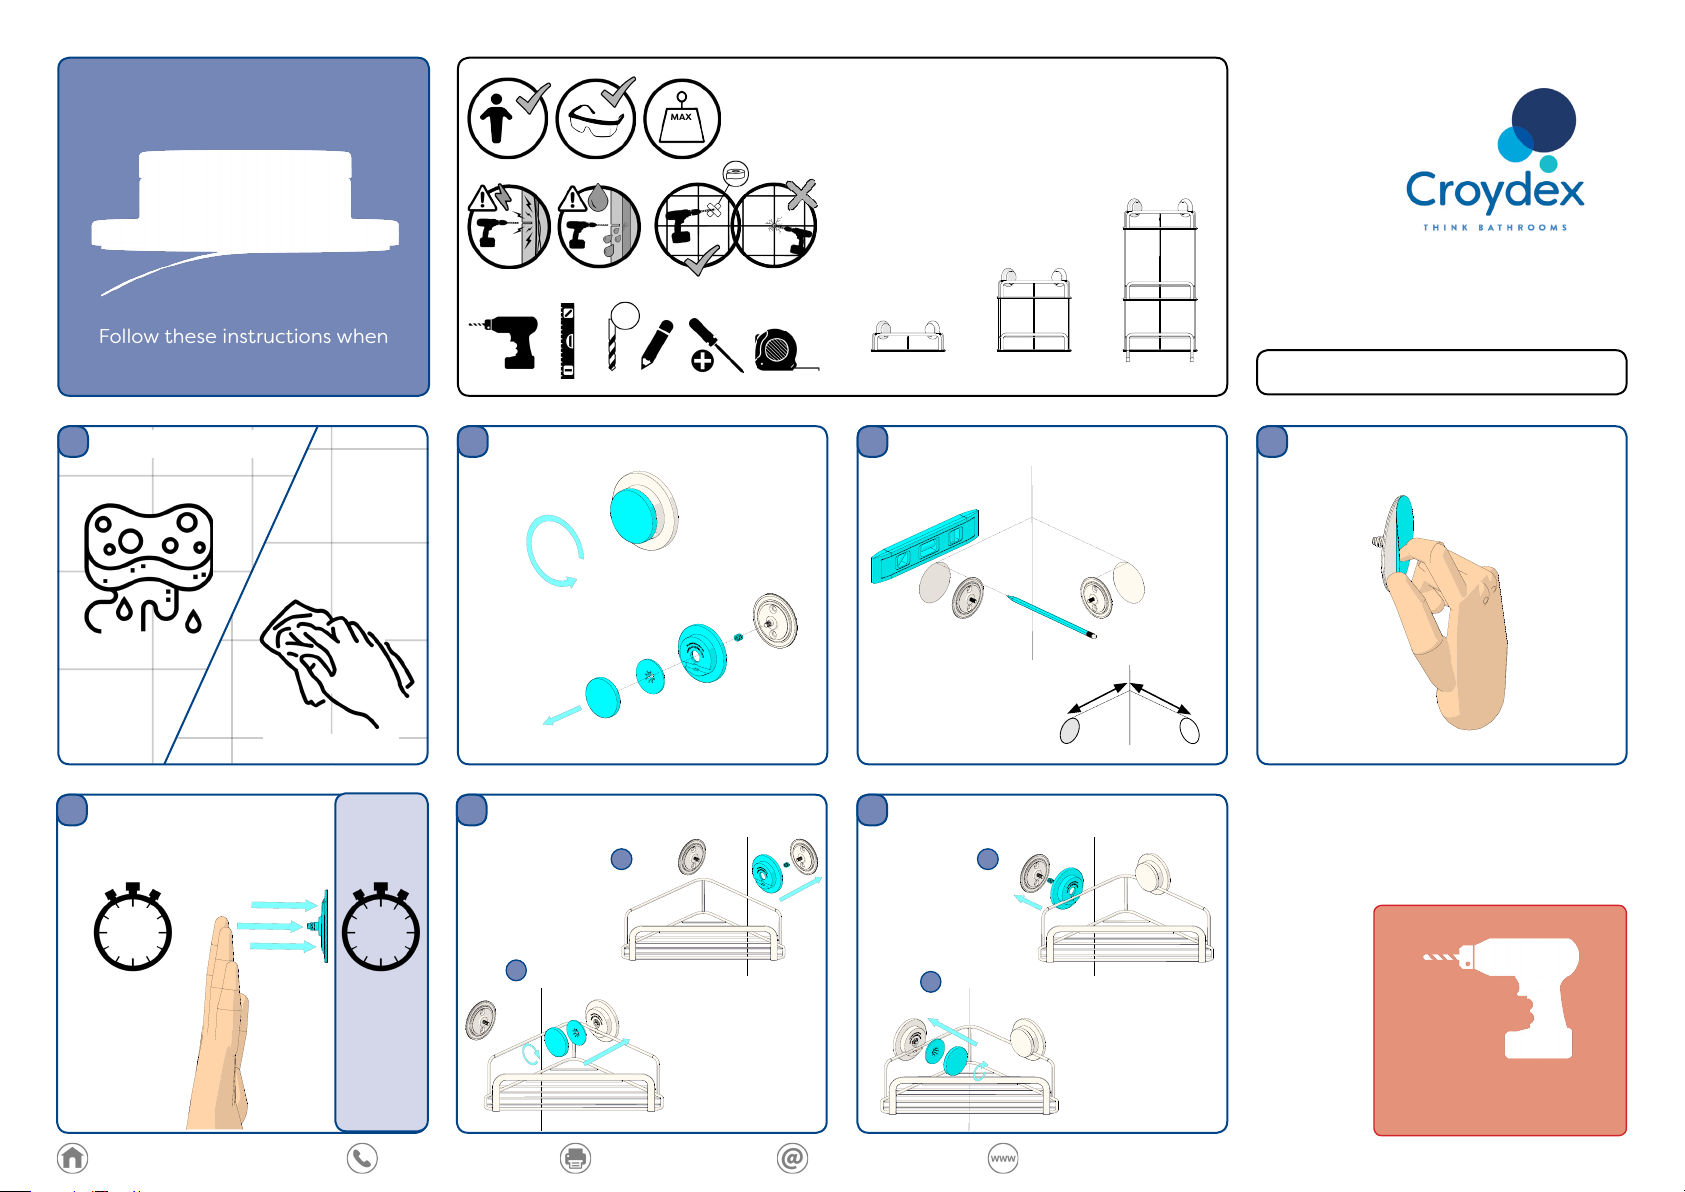
Follow these instructions when
using the adhesive fixing method.
Warning
MAX
x1
2.5kg
6mm
The adhesive is suitable for use on most flat finished
surfaces, such as gloss paint, tiles, polished stone,
laminates and textured surfaces. DO NOT USE ON
DECORATIVE WALL PAPER FINISHES. The adhesive is NOT
suitable for unfinished materials such as brick, block-work,
wood, emulsion paint, loose, flaky surfaces or surfaces
contaminated with grease, wax or dust.
QM295941 QM290741 QM290841
PLEASE TURN OVER FOR MORE
SAFETY AND CARE INSTRUCTIONS.
Clean chosen area with
1
warm soapy water
Dry area thoroughly
with a clean towel
Press & Hold for 30 seconds.
5 6
LEAVE FOR 24 HOURS BEFORE USE.
30s
24h
Unscrew the cap and disassemble the bracket.
2
Reassemble one of the brackets with the basket
attached. Make sure to tighten the caps firmly.
DO NOT OVER TIGHTEN.
A A
B
Using a pencil mark around the intended
3 4
positions of the brackets. Ensure they are level.
120mm
Recommended Centres
Reassemble the other bracket with the basket
7
attached. Make sure to tighten the caps firmly.
DO NOT OVER TIGHTEN.
120mm
B
Expose the adhesive by peeling away the red
protective film.
Croydex, Central Way, Andover,
Hampshire, SP10 5AW, UK
+44 (0) 1264 365881
+44 (0) 1264 356437
www.croydex.com
For drilling instructions
please turn over.
snl 013 r01
Page 2
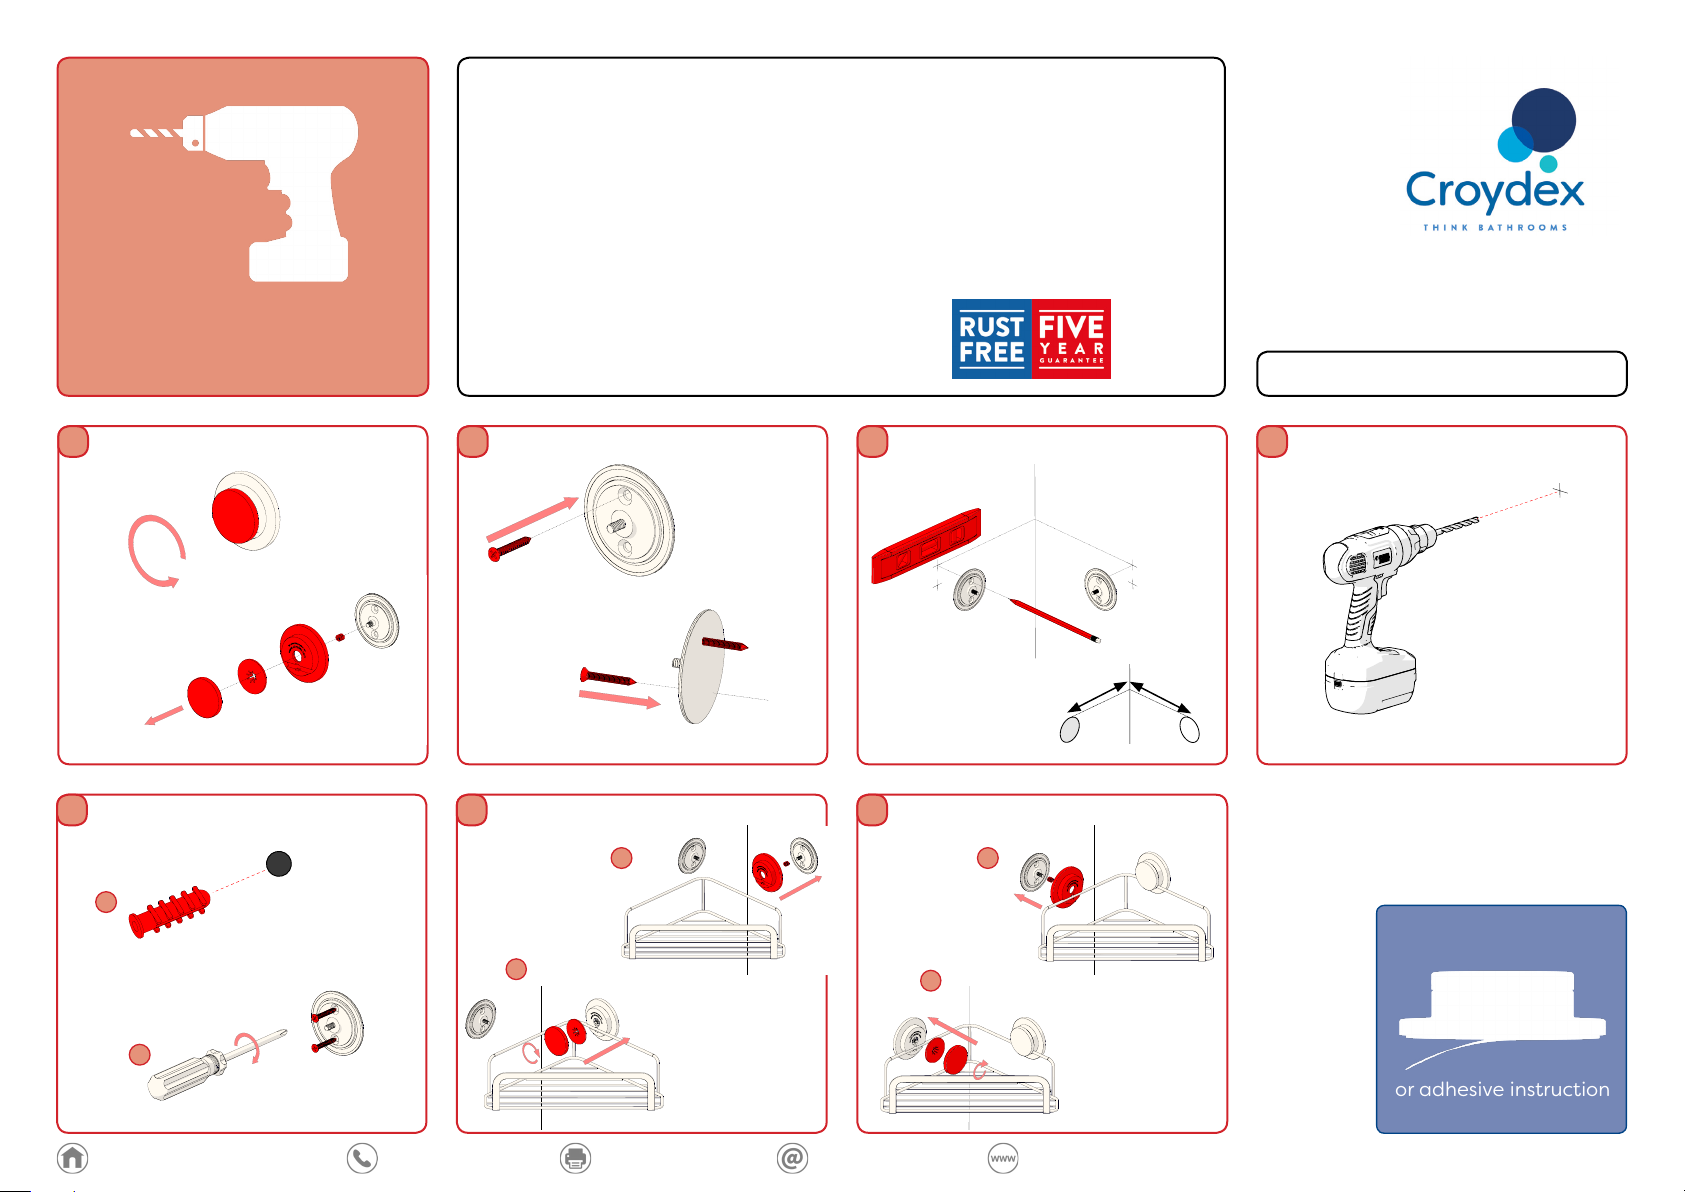
Follow these instructions when
drilling new holes.
Safety & Care
1. Always take care when using power tools, especially
if there is any water in the working area.
2. When drilling into a tiled surface do not use a
hammer drill.
3. Always use a drill bit that is suitable for the surface
that is being drilled.
4. The wall plugs supplied are for use on solid walls
only. For cavity walls or plasterboard use specialist
fixings that are suitable for the type of wall
construction.
5. To retain the best quality finish, clean product
regularly with a soft damp cloth.
6. Do not use abrasive or chemical cleaners, as these
may damage the product.
7. Redecoration may be required on some painted
surfaces after removal.
8. The maximum safe working load is 2.5kg
distributed evenly. DO NOT OVERLOAD.
9. Do not use tile cleaning chemicals on or around this
product as they may aect adhesion.
5 Year Anti-corrosion Guarantee
This product is guaranteed against corrosion for 5
years. Please retain a copy of your receipt which must
be presented should a guarantee claim be necessary.
This guarantee covers corrosion under normal usage,
when the product is installed, used and cleaned in
accordance with these instructions. This guarantee
does not cover corrosion resulting from damage to
the protective coating due to the use of abrasive
sponges or pads, abrasive cleaners, strong chemical
cleaners or metal polish. In the unlikely event that
corrosion should occur during the guarantee period
we will replace the product.
PLEASE TURN OVER FOR MORE
PRE-INSTALLATION INSTRUCTIONS.
Unscrew the cap and disassemble the bracket.
1
Insert the wall plugs into the holes and then
5 6 7
screw the back plates to the wall.
Using the screw, pierce through the plastic and
2
the adhesive tape.
Reassemble one of the brackets with the basket
attached. Make sure to tighten the caps firmly.
DO NOT OVER TIGHTEN.
A A
A
B
Using a level, mark the holes for the intended
3 4
positions of the brackets.
120mm
Recommended Centres
Reassemble the other bracket with the basket
attached. Make sure to tighten the caps firmly.
DO NOT OVER TIGHTEN.
120mm
B
Using a 6mm drill bit, drill the holes marked.
B
Croydex, Central Way, Andover,
Hampshire, SP10 5AW, UK
+44 (0) 1264 365881
+44 (0) 1264 356437
www.croydex.com
For adhesive instructions
please turn over.
snl 013 r01
 Loading...