

Crown CR-48, ROADSTER SERIES Owner's Manual

Owner’s Manual
Model No.: DN-4DS

TABLE OF CONTENTS
1. Main technique data … … …… … … … …… ………………4
2. Operation
2.1 Operation layout … … … … … … … … … … …………….5
2.2 Dashboard … … … … … … … … … … … … … … ……...6
2.3 Switch… …… … … … … … … … … … … … … …………7
2.4 Pedal … … … … … … … … … … … … … … … … ………9
2.5 Charging … … … … … … … … … … … … … … … …….10
2.6 Cigarette lighter … … … … … …… … … ………………10
3.
User information
3.1 Driver qualification… … … … … … ………………………..11
3.2 User notes… … … … … … … … … … … … ………………10
3.3 Driving road condition …… … …… … … ………………….11
4. Driver information … … … …… … … … … ………………..11
5 Operation criterions
5.1 Operation procedure…… … … … … … … … …………….12
5.2 Safety drive … … …… … … … … … … … … …………….12
5.3 Driving on slope…… … … … … … … … …………………..13
5.4 Parking notes … … … … … … …… … ………………..…13
6. Before initial use
6.1New vehicle Inspection…… … ………………………………..14
6.2 Run-in period regulations…… … … … ……….……………..14
7. Maintenance
7.1 Maintenance guide… … … …… … … … … ………………..16
1

7.2 Battery Maintenance…… … … … … … …………… …..16
7.3Charging for the battery group… … … … … … … … …18
7.4 Brake system maintenance… …… ……………………….22
7.5 Steering system maintenance… ………………. ………….23
7.6 motor maintenance….. ….. ….. ….. ….. ….. ….. ….. ….. .23
7.7Lubrication maintenance … … ……………………………23
7.8 Maintenance items for User … … … … … … … … … …24
8 Troubleshooting … … … … … ……………………………...26
9 After-sale services……. …… … ……………………………..29
10 Monthly maintenance records…… ……………………..….29
2

1.
Main technique data
DN-4D
Item Data
Dimension(L×W×H)
3140*1235*1300(mm)
Passengers 4
Front/rear tread 940/990
wheelbase 2220(mm)
Weight include battery
500kg)
Total weight and capacity 750(kg)
Turing Radius <3.5m
Ground Clearance 150mm
max speed 28km/h
Climbing capacity ≤30%
Brake Distance ≤5m
motor 48V3KW
battery group 48V170AH
charger 48V18A
range after one full charging 80KM
charging time 8-10H
3
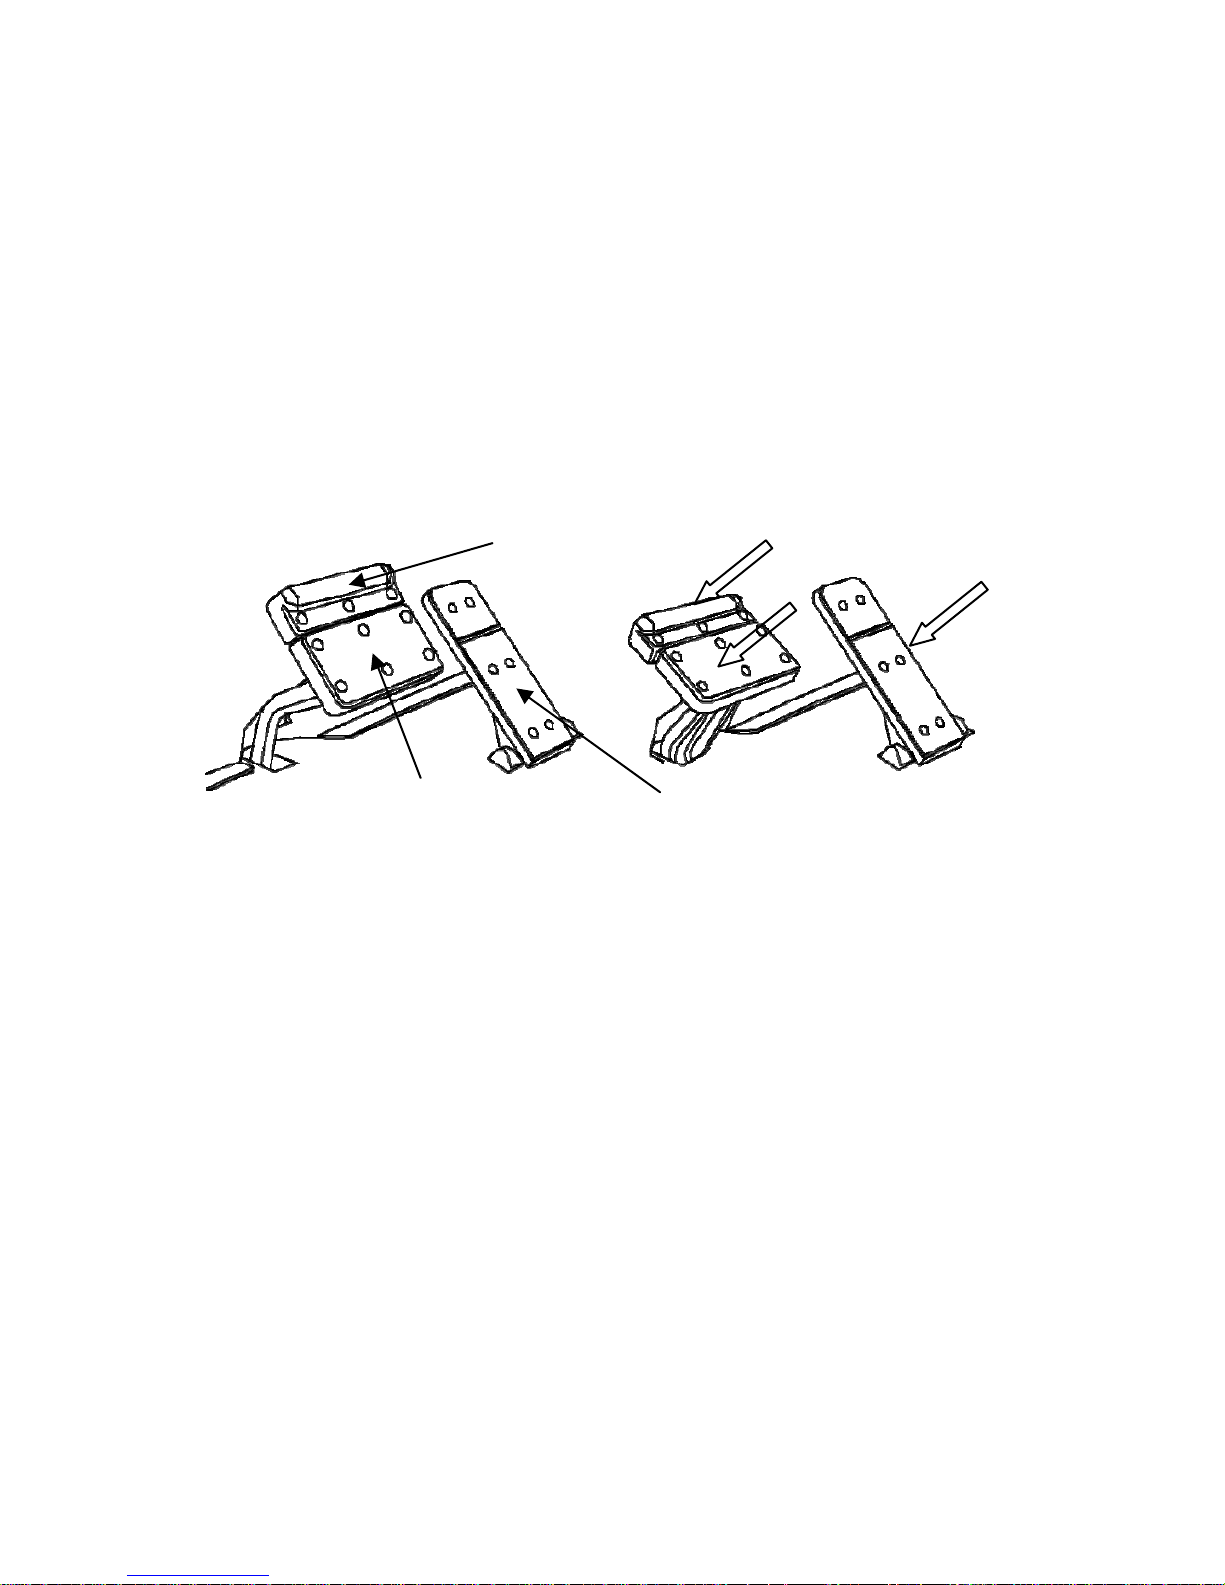
2. Operation system
2.1 Operation layout
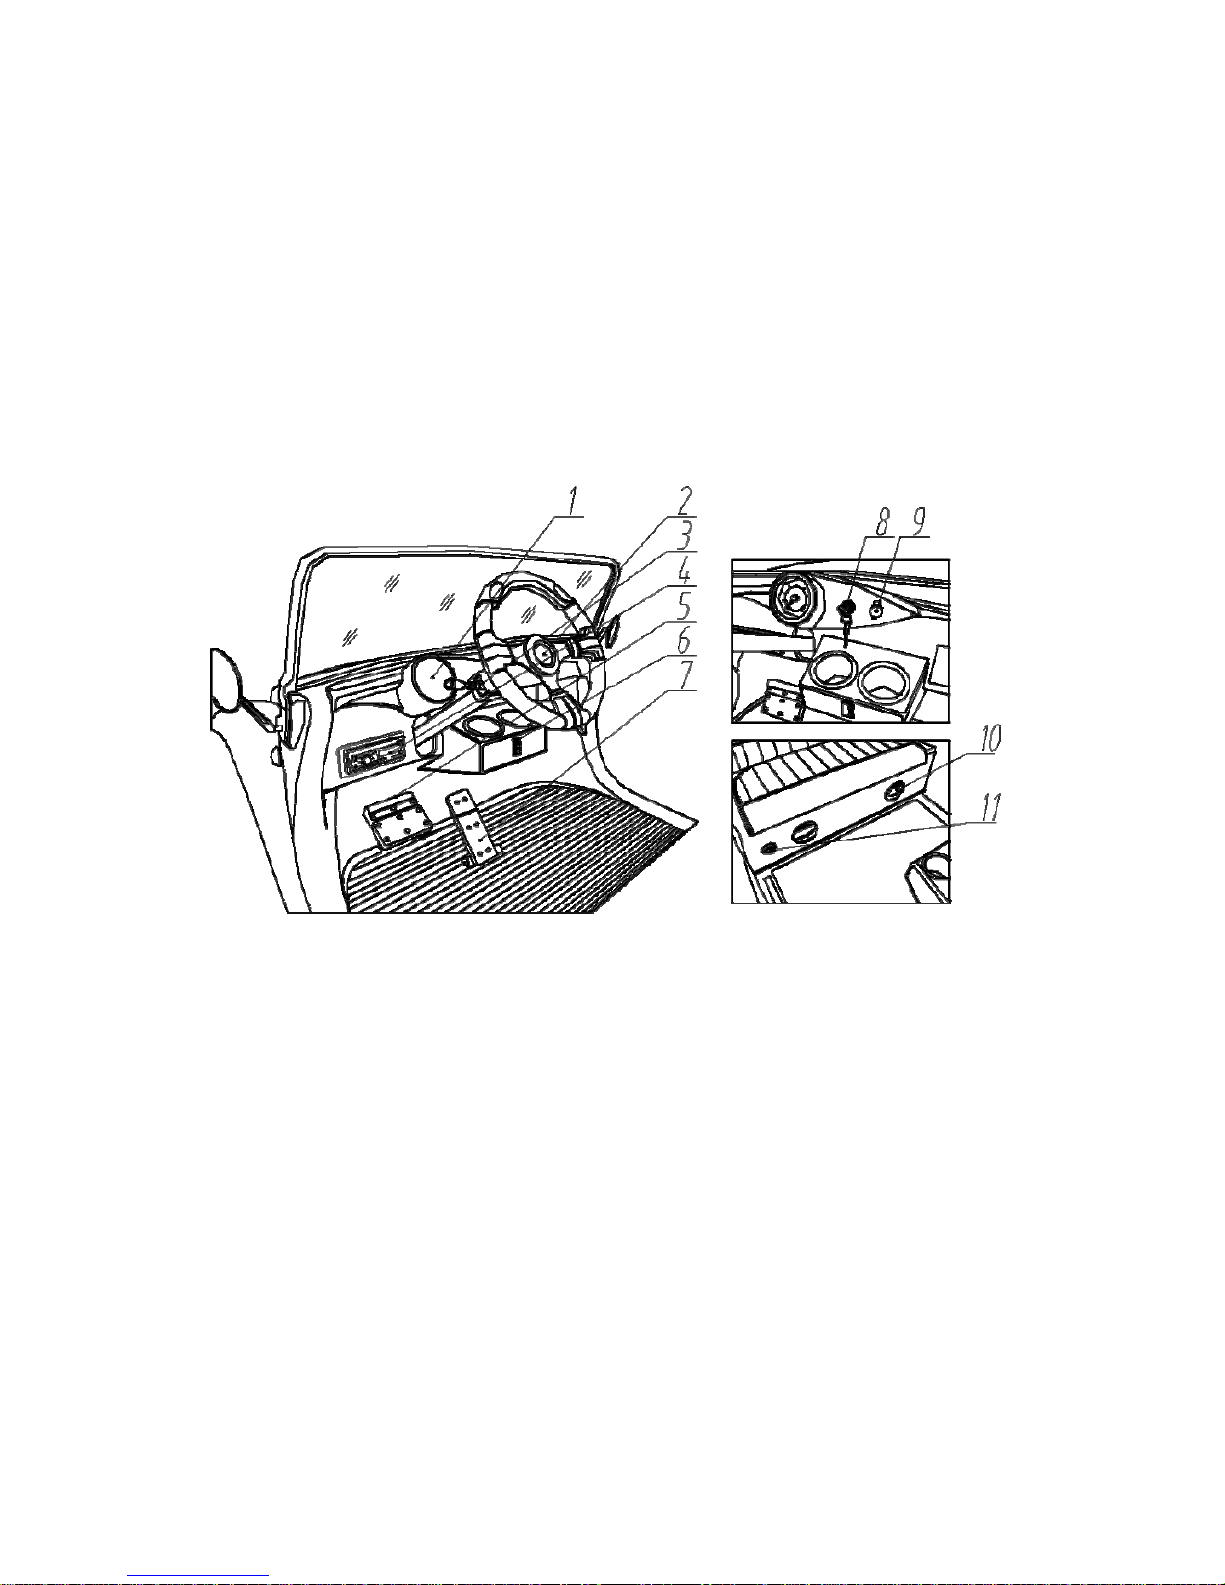
DN-4D
1. Dashboard 2. Steering wheel
3. Combination switches 4. CD player
5. Brake pedal 6. Forward/backward switch
7. Accelerator pedal 8. Key switch
9. Cigarette lighter 10. Speaker
11. Charger socket
4
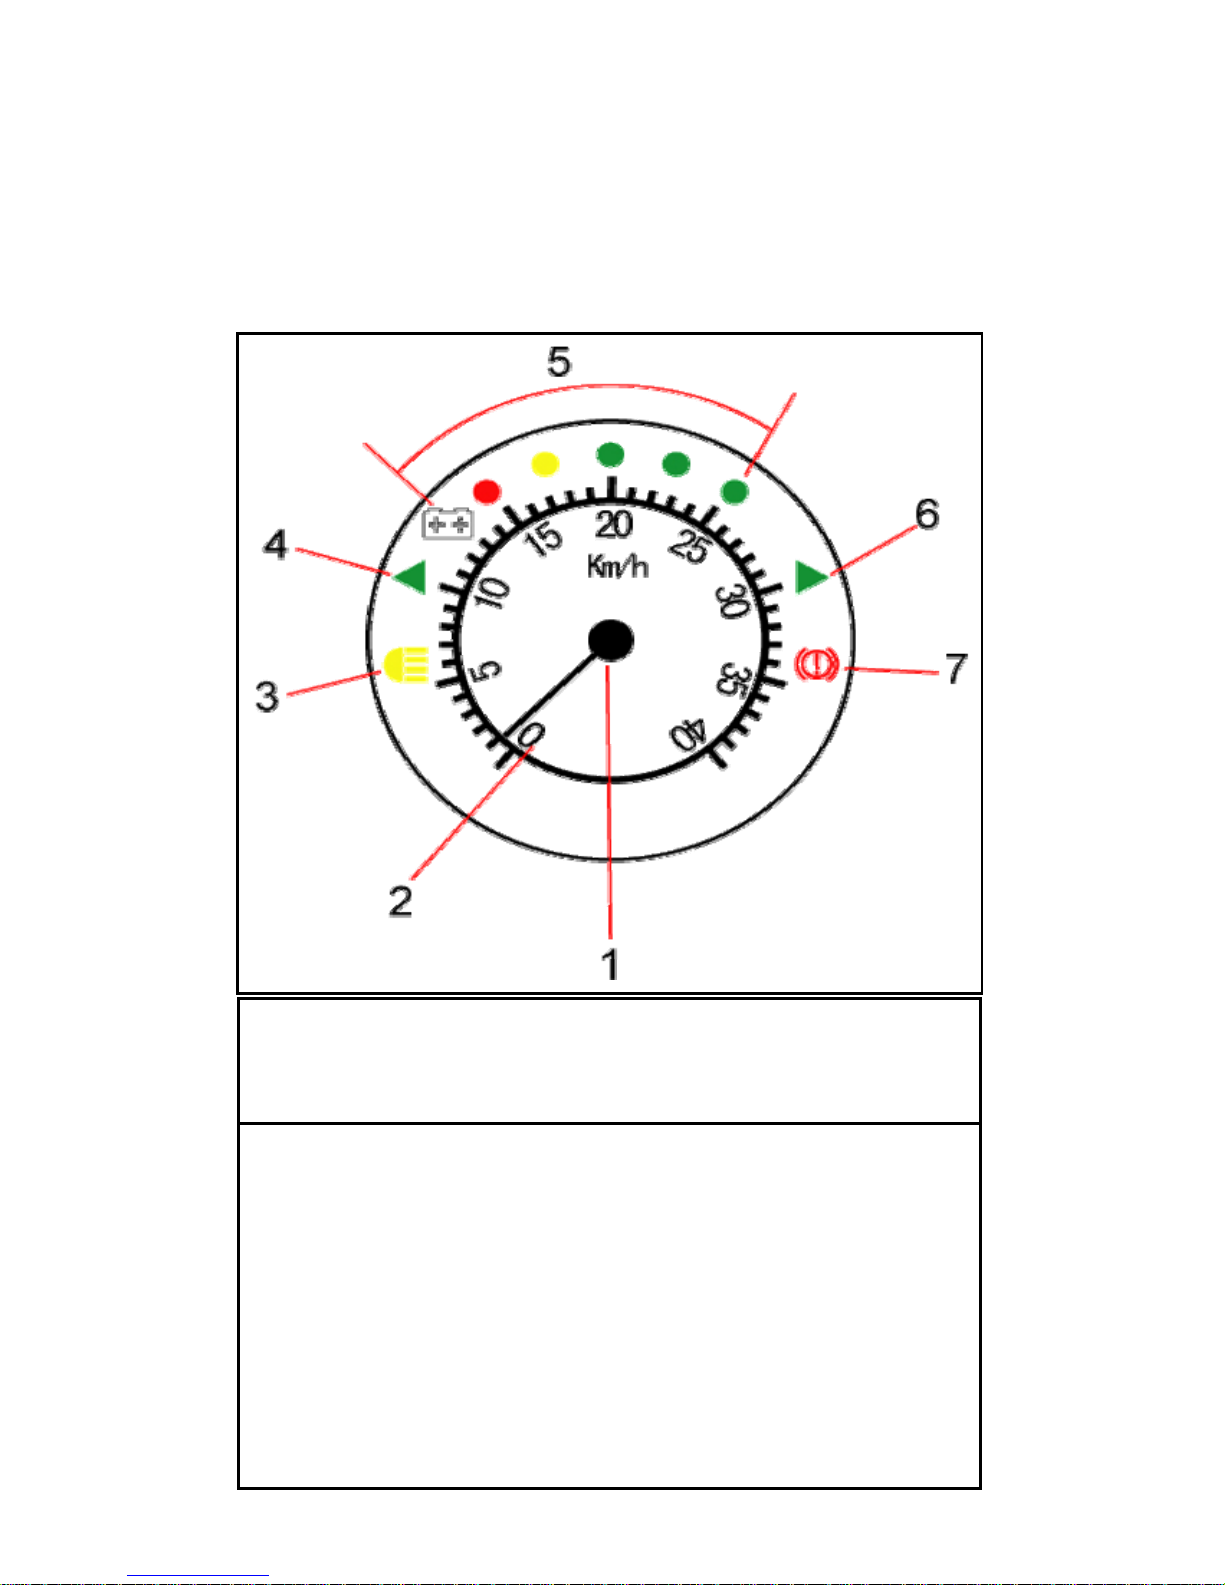
2.2 Dashboard
Notes:
① Battery low voltage alarm light----Red, When the voltage
of battery is low, the indicator light on
② Turning light---Green, When the ignition switch is ON,
the green indicator will light on when twist the turning
switch.
③ High beam ---Yellow. The indicator will light on when use
high beam.
1. Speed finger 2. speed level 3. front light 4. Left turning
5. Power display 6. Right turning 7. Brake trouble
5
2.3 Switch
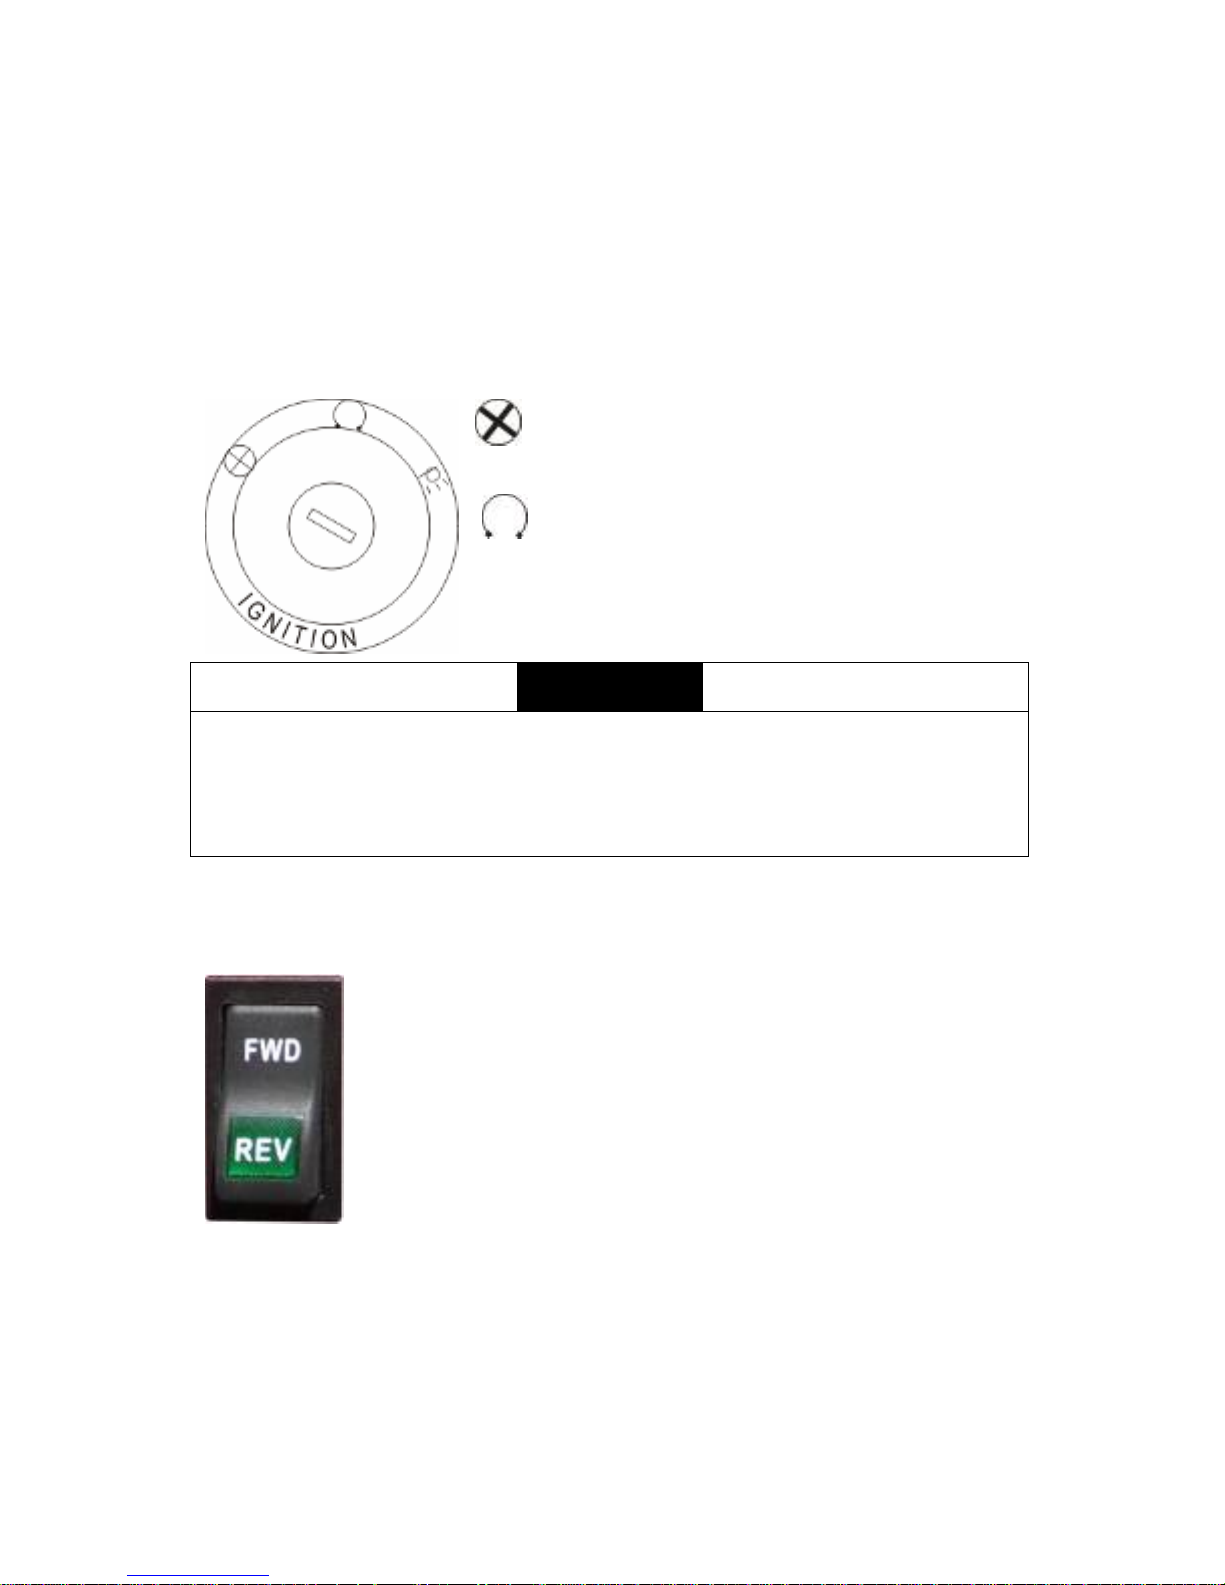
2.3.1 Key switch
: it is the normal parking position, only at
this position you can take out the key。
AC :All the power of your car is connected
when you turn the key to this position.
!WARNING !
● Do not take out the key when the vehicle is running.
● Do not leave the key alone, especially to children to avoid any
accident.
2.3.2 Forward/ Backward switch
It has three positions, the vehicle goes forward when
press down FWD, and go backward when press down
REW, keep unmoved when it’s on neutral position
6
!WARNING !
● Strictly prohibit shifting forward and backward
directly when the vehicle is running, or it will damage
the transmission system badly.
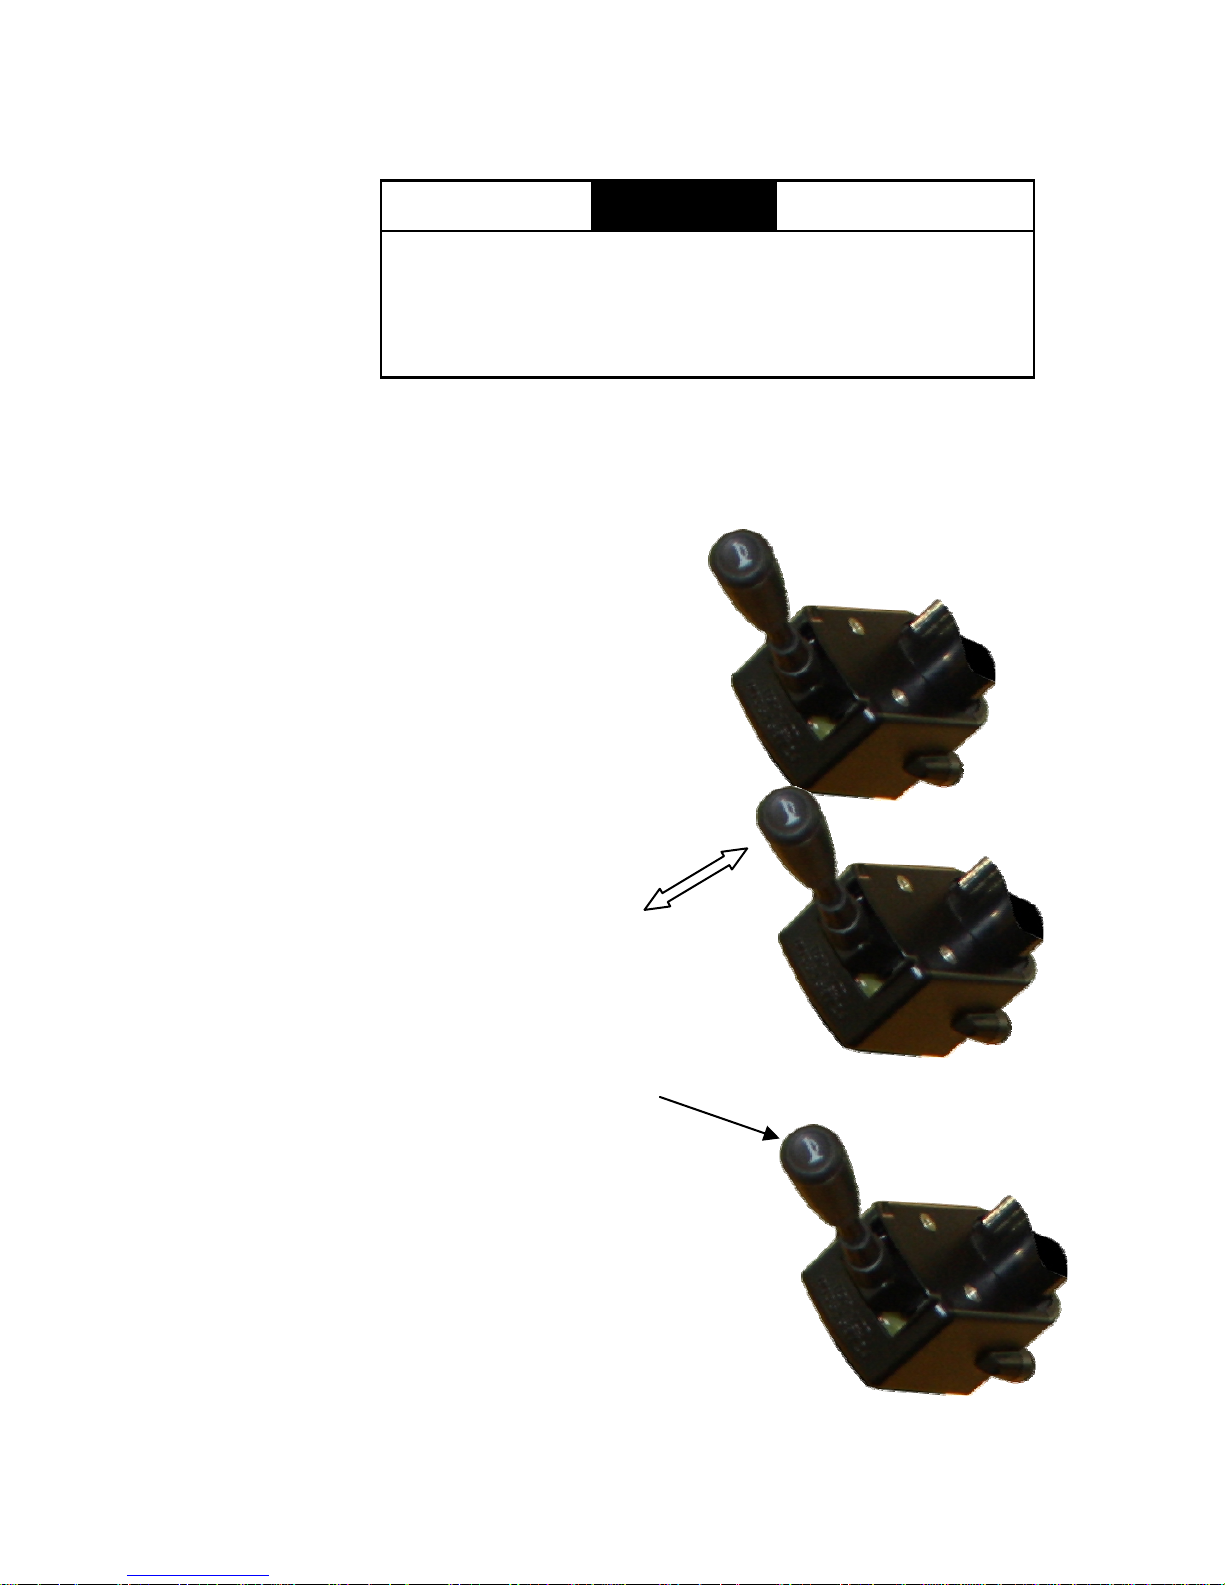
2.3.3 Turning switch
Push the operation bar forward, right
Signal light will be on; draw it back
, the left signal light will be on.
2.3.4 Headlight switch
Pull up the operation bar, the headlight
and rear light work and go out
when push down operation bar
2.3.5 Horn switch
Press down the horn button along with the
Controller level direction to start the horn.
7
2.4 Pedal
Parking pedal
Brake pedal Accelerator pedal
2.4.1 Parking
Parking pedal:The parking pedal will hitch the limited plate when press
the parking pedal, which makes parking function in operation. Release the
parking when press the accelerator pedal.
2.4.2 Barking
brake pedal :Depress the brake pedal and make it goes into effect.
2.4.3 Accelerator pedal
Accelerator pedal: press the pedal and make different speed by different
obliquity and force. Stop when release the pedal.
8
WARNING
●Before you leaving the cart please keep the Forward/ Backward
switch on neutral position, at the time make parking effective. The
Forward/ Backward switch should be on neutral position when
release the parking.
● Before run the parking should be released, or may seriously damage
the brake system and related parts.
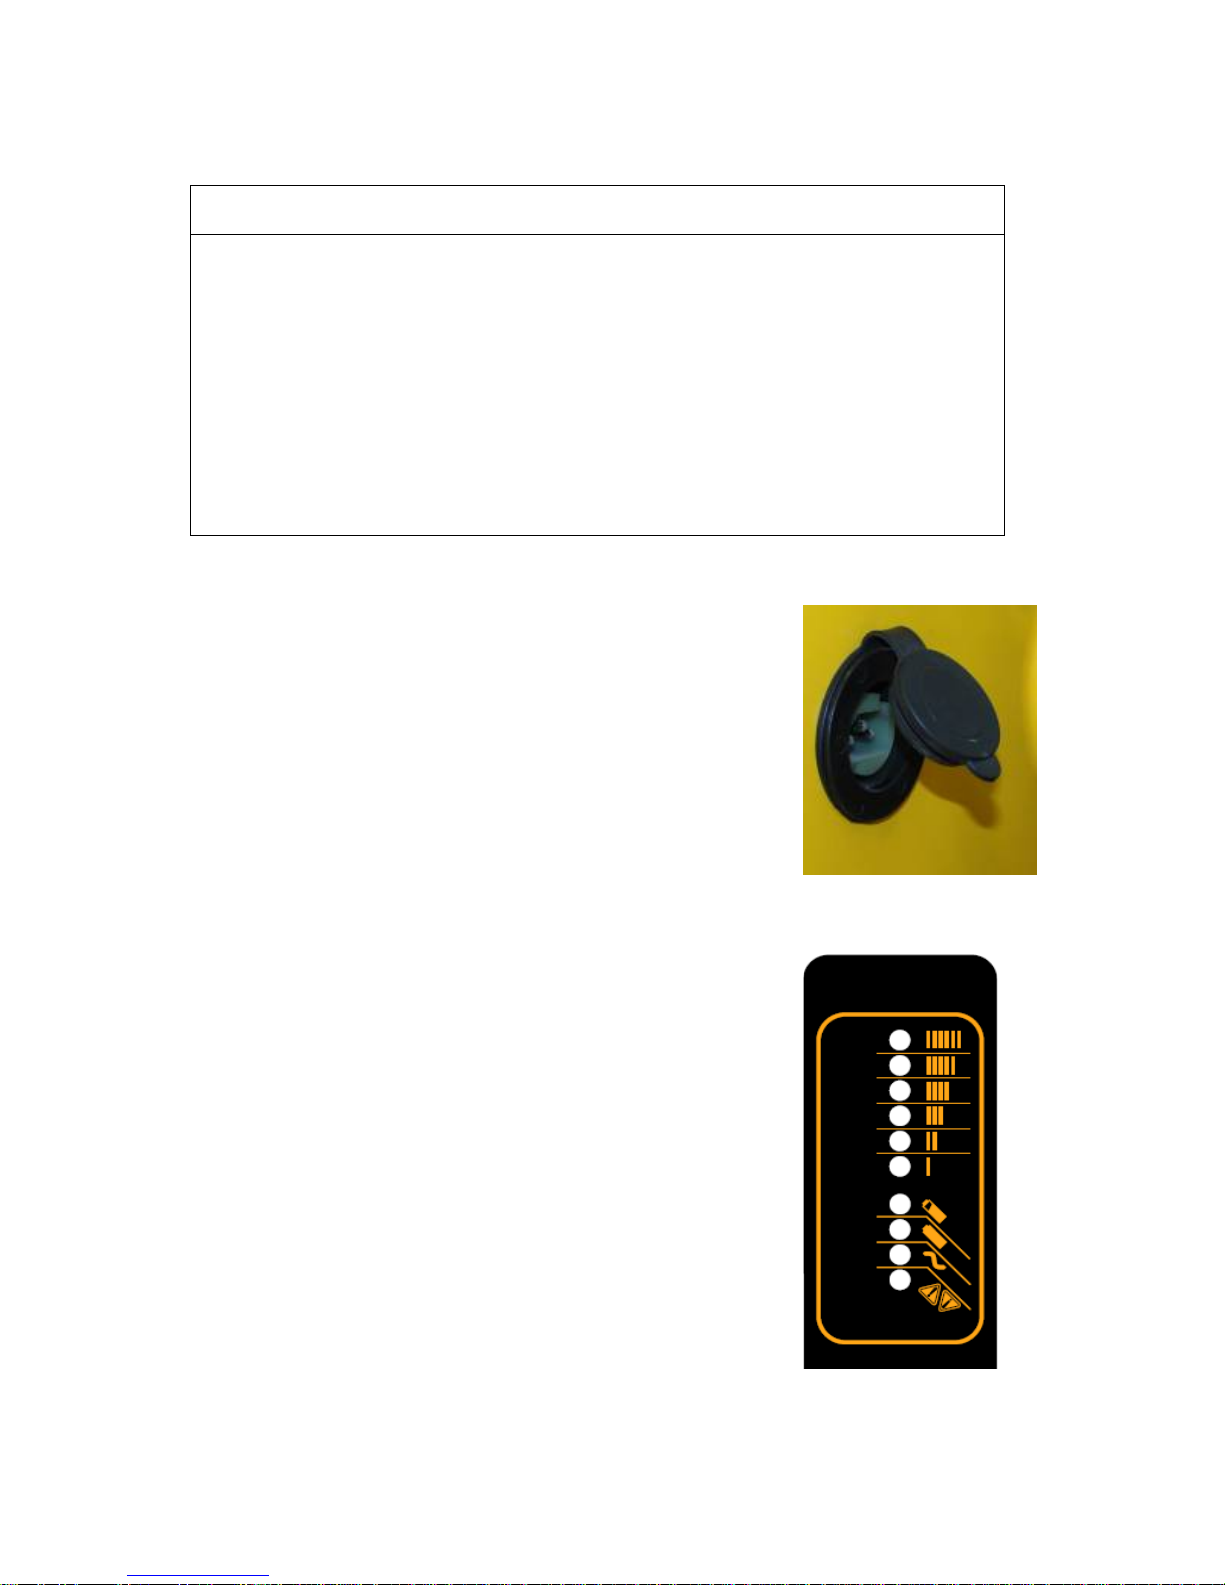
2.5 charging
2.5.1 Charger Socket
Plug one terminal of charger into charger
Socket (see picture), and plug the other terminal
into main power (110V-220V) when need to
recharge the batteries.
2.5.2 Charger
When connect the charger and main power and
vehicles, the charging begin. The user can find
display on charger as right picture. The first six
circles should different power circle status. The 7
th
circle show the power capacity is 80% (amber
indicator keep on),the 8th should circle the power
capacity is 100% (green indicator keep on), at this
time, the charging finished. The 9
th
circle show the
input status of AC power (amber indicator keep
9
 Loading...