

Page 1
Technical Installation Guide
Page 2
SycloneTM Amalgam Separator
Technical Installation Guide
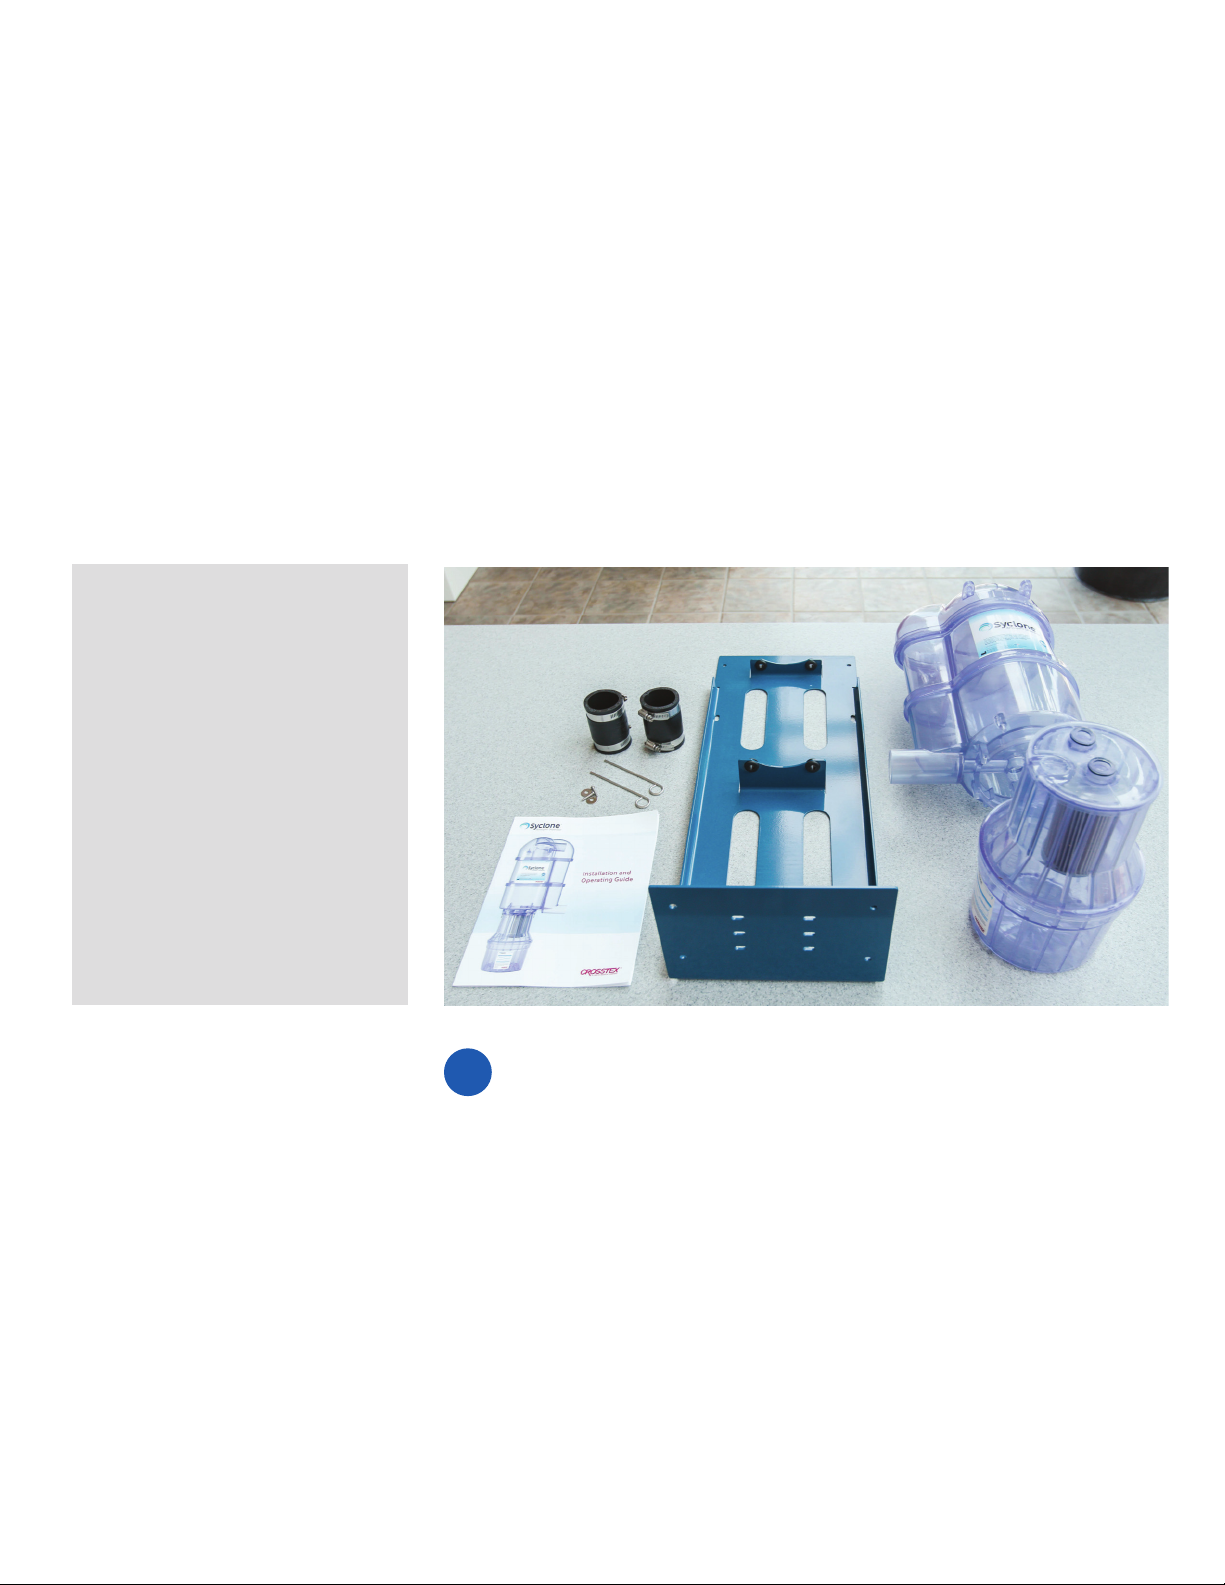
It is recommended to keep
these tools within arm’s reach
during the installation:
• Stud nder
• Level
• Heavy-duty wall anchors
• Screws
• Drill
• Phillips screwdriver
• Slotted screwdriver
• Measuring tape
• Pipe cutter
• Adapters and additional pipe
(as necessary)
• All items from the Syclone
Amalgam Separator box
Before installation, ensure that the vacuum is turned o .
!
Page 3
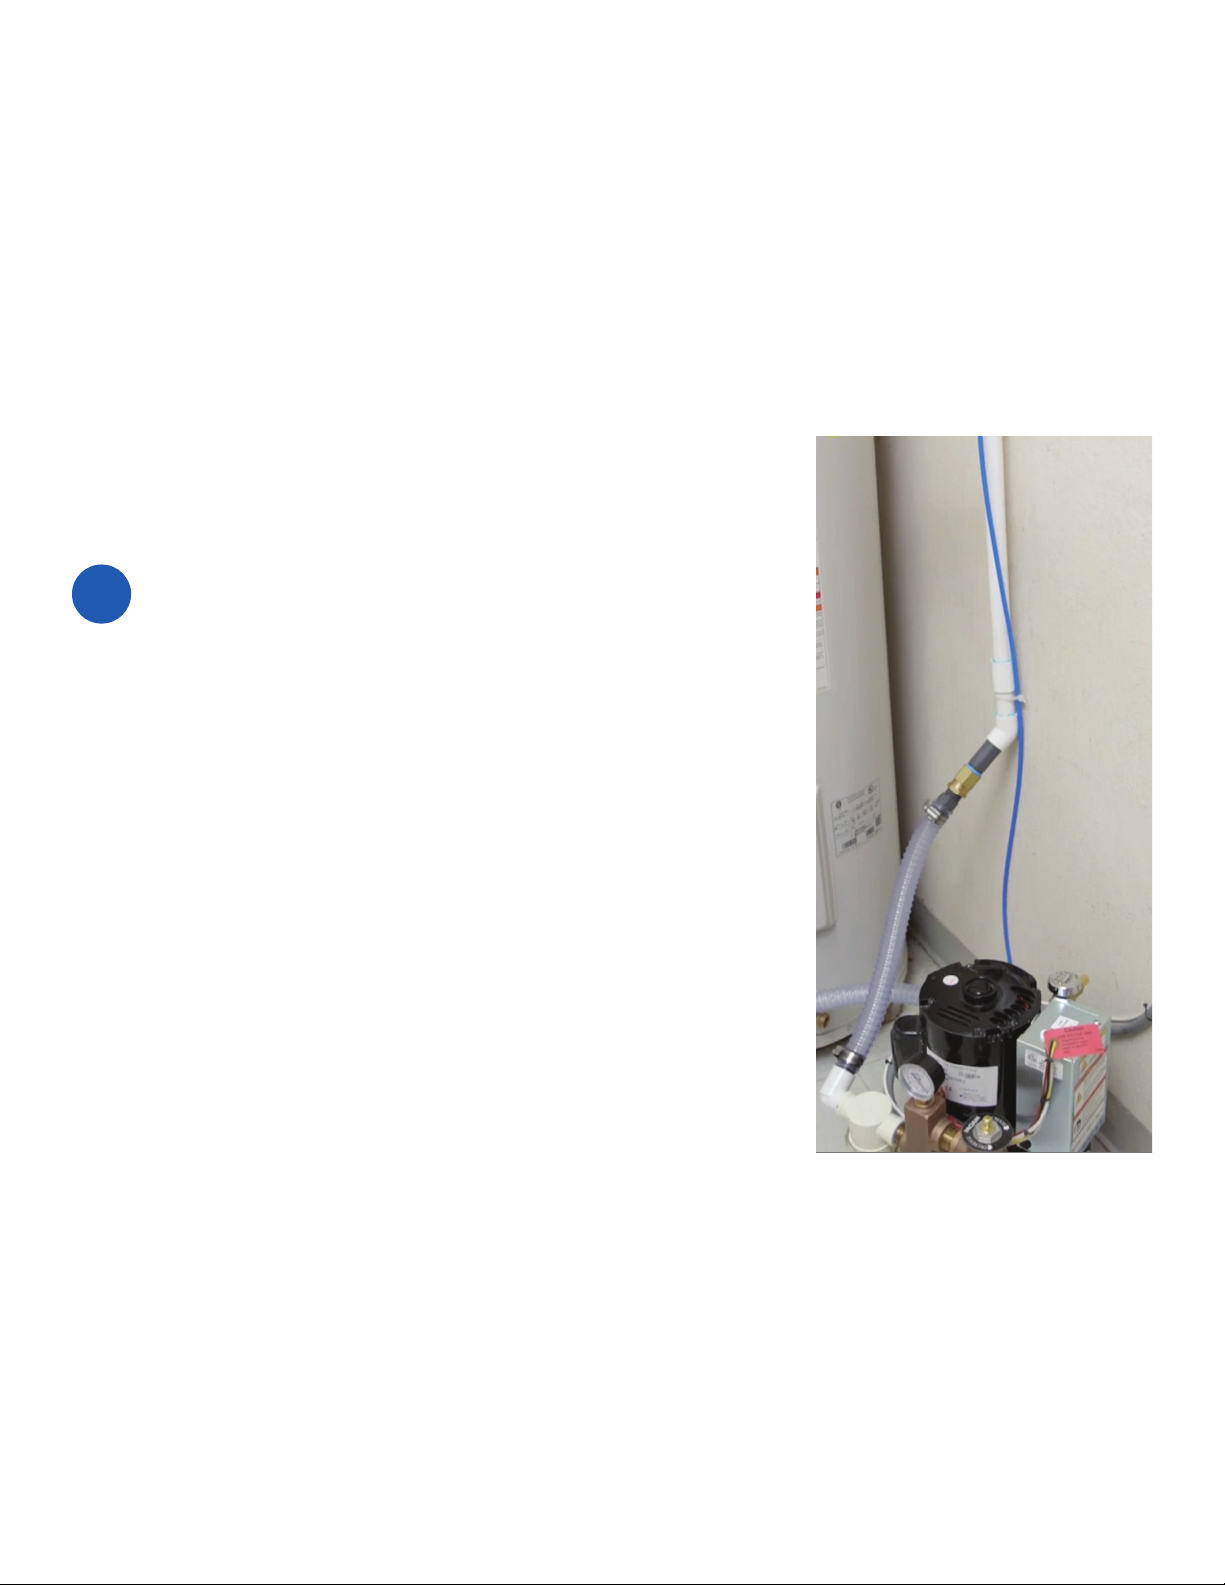
Find an appropriate location for the Syclone™
1
Amalgam Separator
• Generally installed close to the vacuum pump
• The Syclone Amalgam Separator outlet should be at least 4-6 inches
higher than the vacuum inlet
Page 4
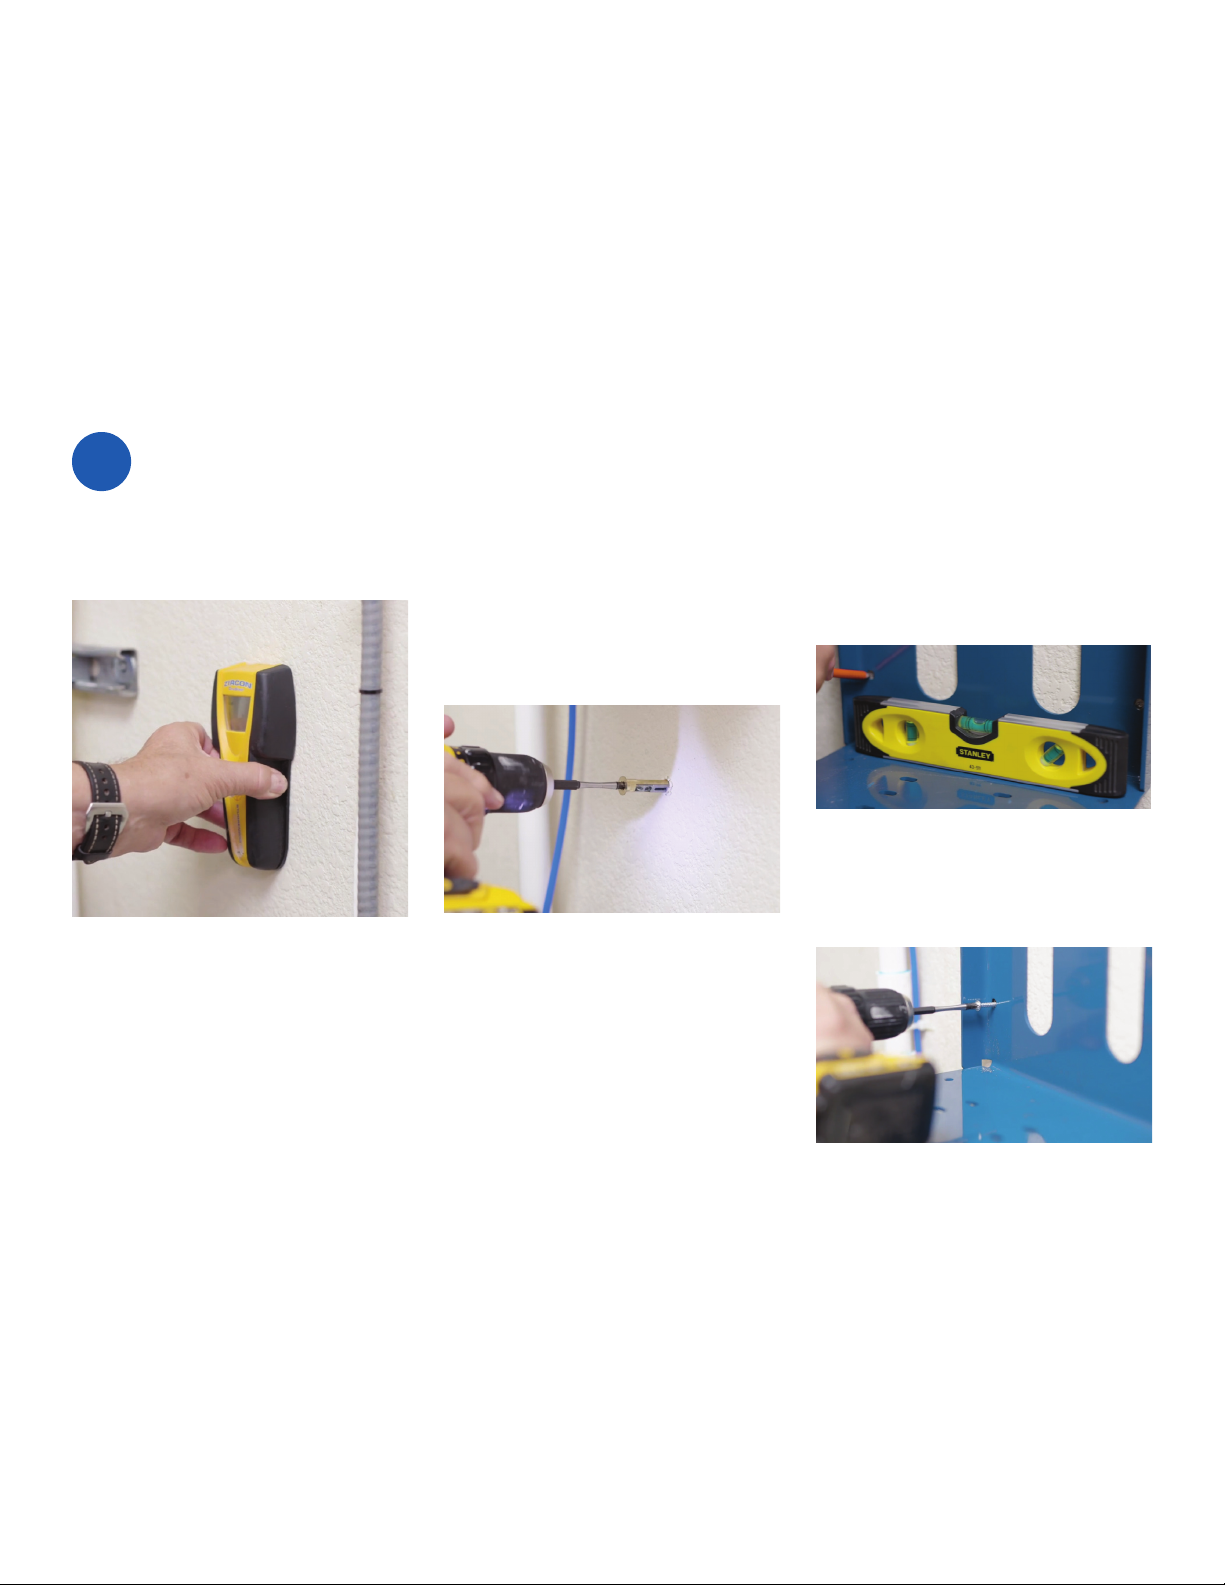
Secure the mounting bracket
2
• Check for studs and mark one of the
top corners
• Check for studs and mark one of the
top corners
• If a stud is not available, wall anchors,
plastic stando s, or similar ttings
should be used
NOTE: Do not mount directly into drywall
• Attach the top corner of the mounting
bracket
• Use level to con rm alignment
• Mark the rest of the pilot holes
• Drill pilot holes, install wall anchors if
necessary and use appropriate screws
to secure the mounting bracket
Page 5
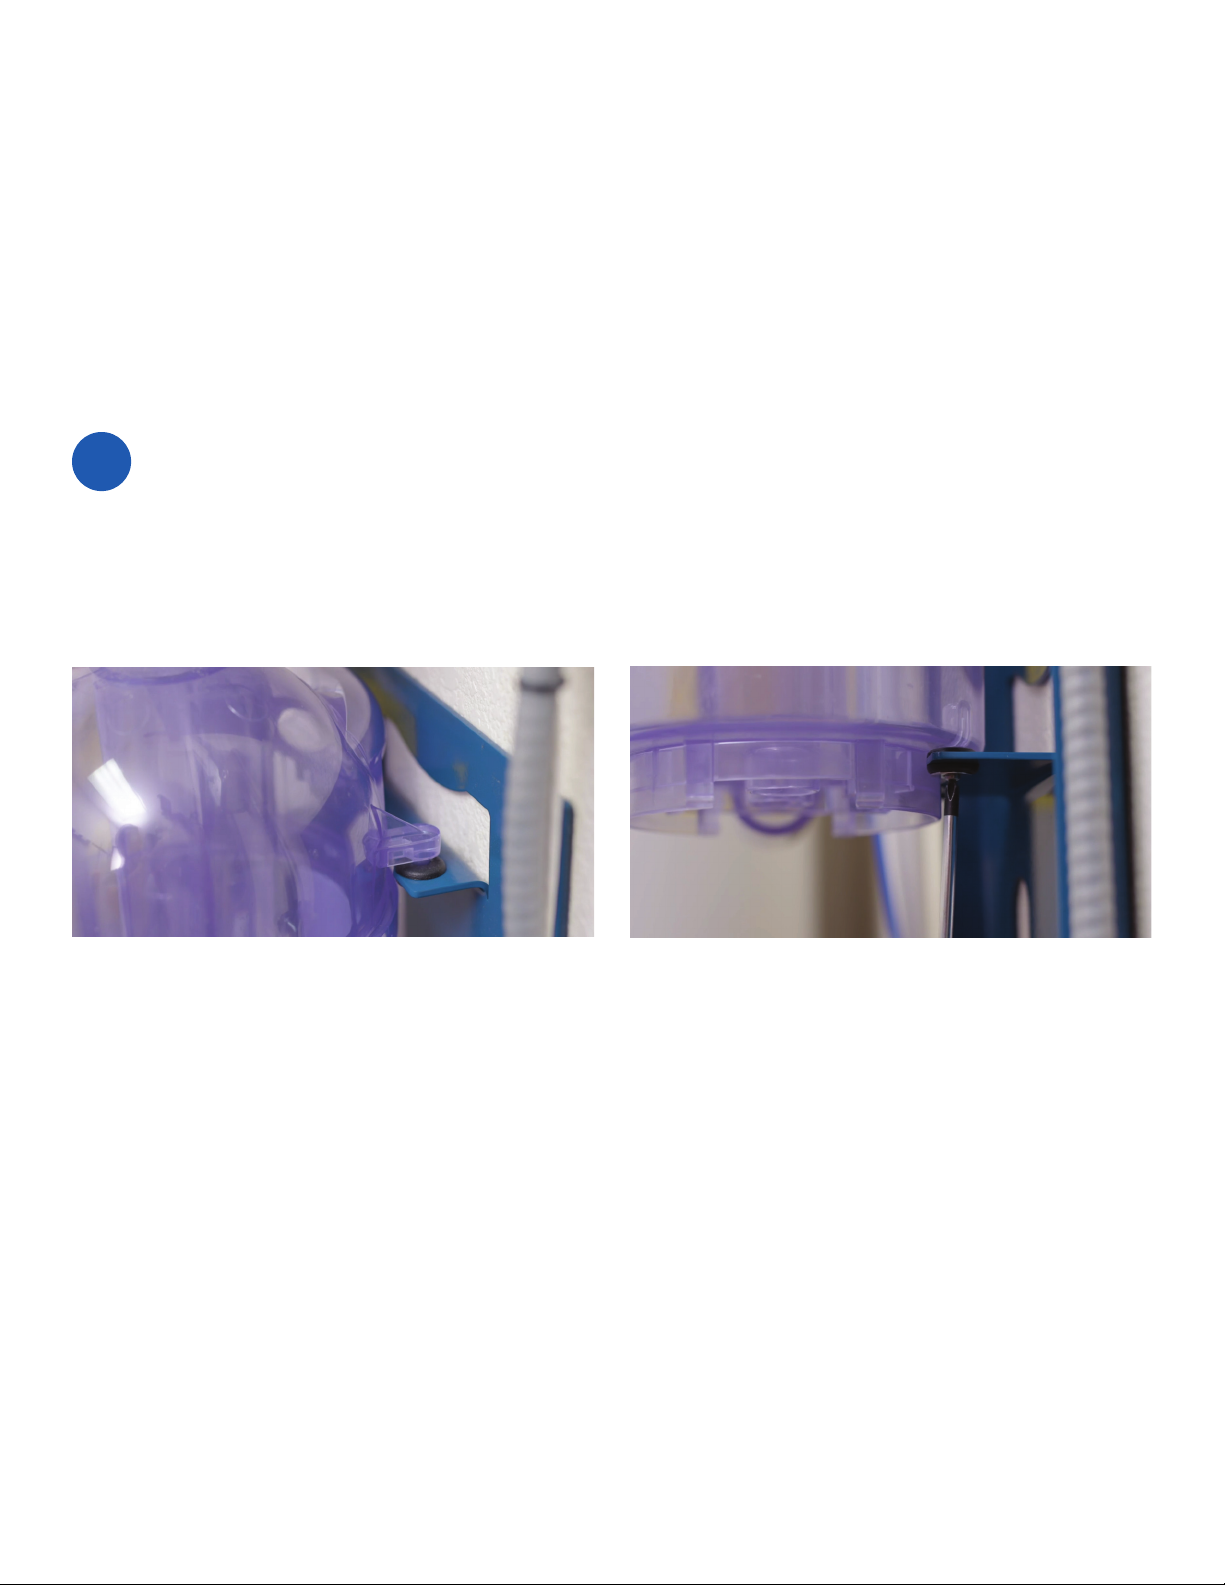
Attach the top chamber
3
• Choose either left- or right-facing installation based on layout
• Seat the prongs of the top chamber into the corresponding
slots on the mounting bracket
• Ensure that all the top and bottom ttings are fully seated
• Use a Phillips-head screwdriver to tighten the screws and
washers provided for the bottom prongs of the top chamber
until snug
Page 6
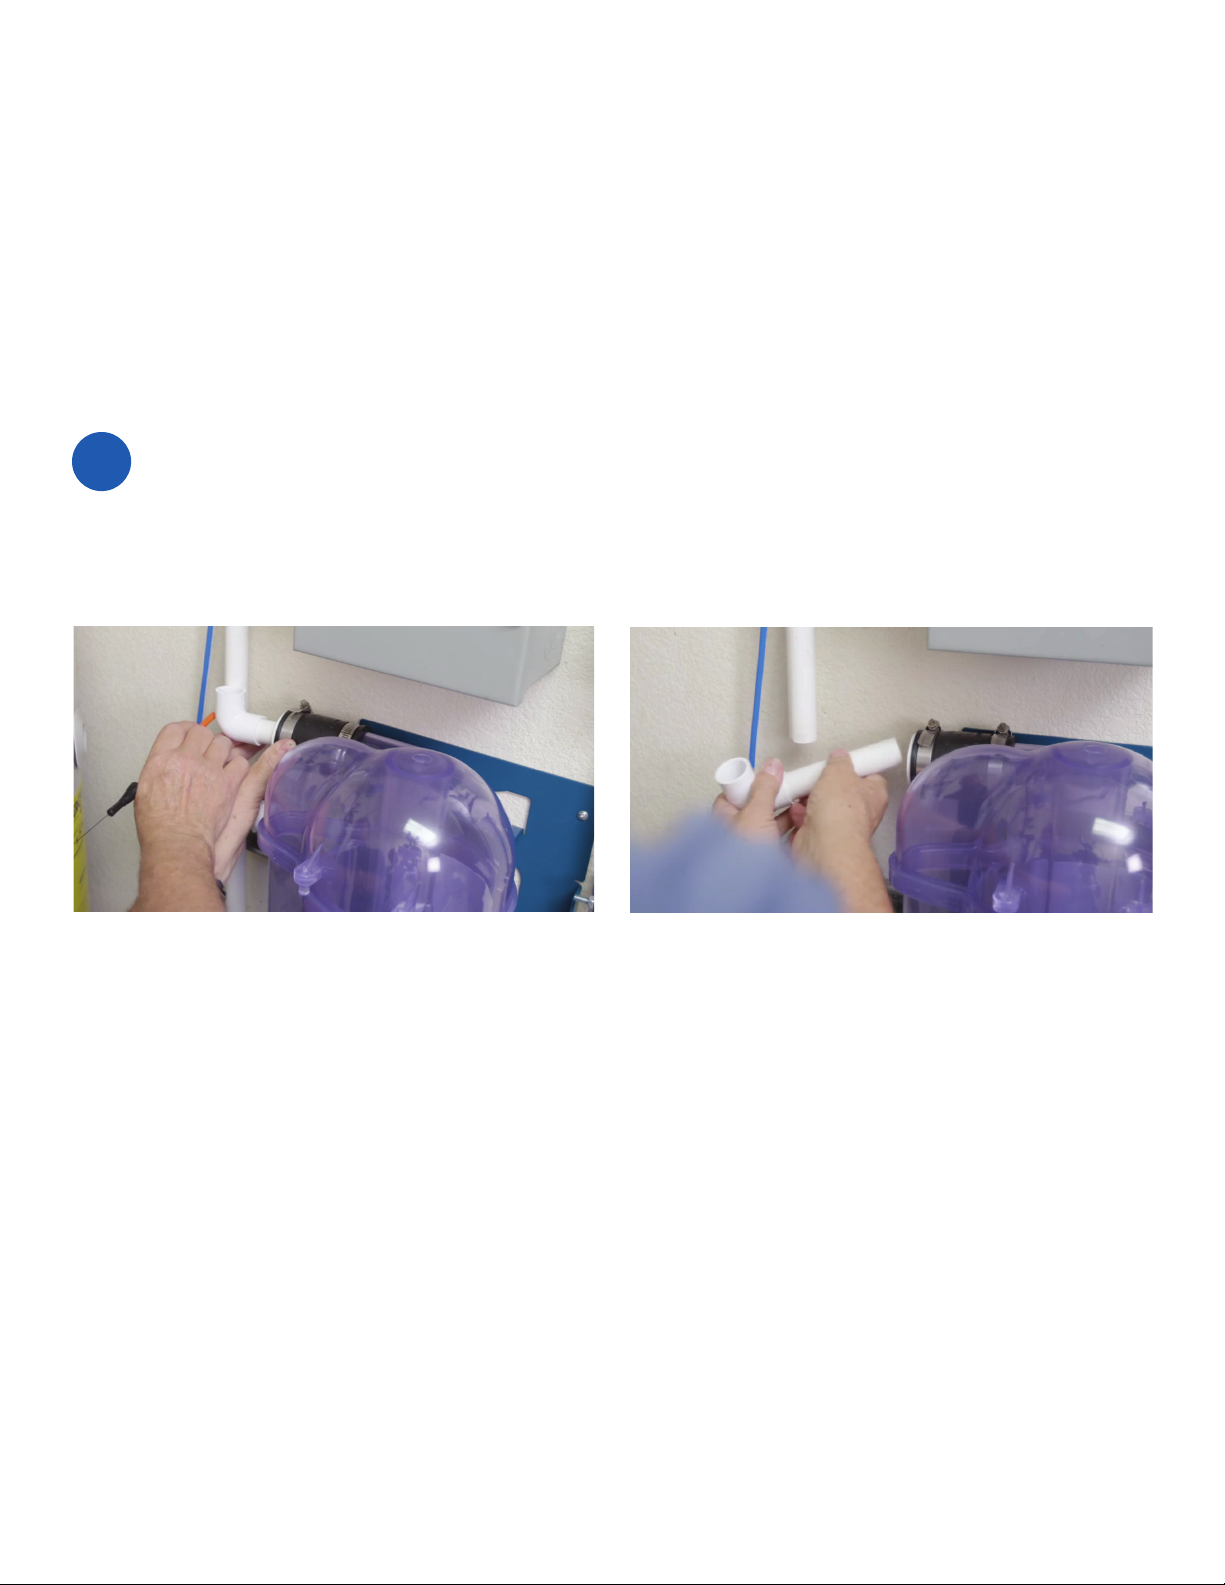
Attach the top chamber to pipes
4
• The outlet from the operatories should be installed to the top
inlet of the Syclone™ Amalgam Separator
• Measure the piping and cut
• Use one of the two couplings provided along with adapters and
additional pipe as necessary
Page 7
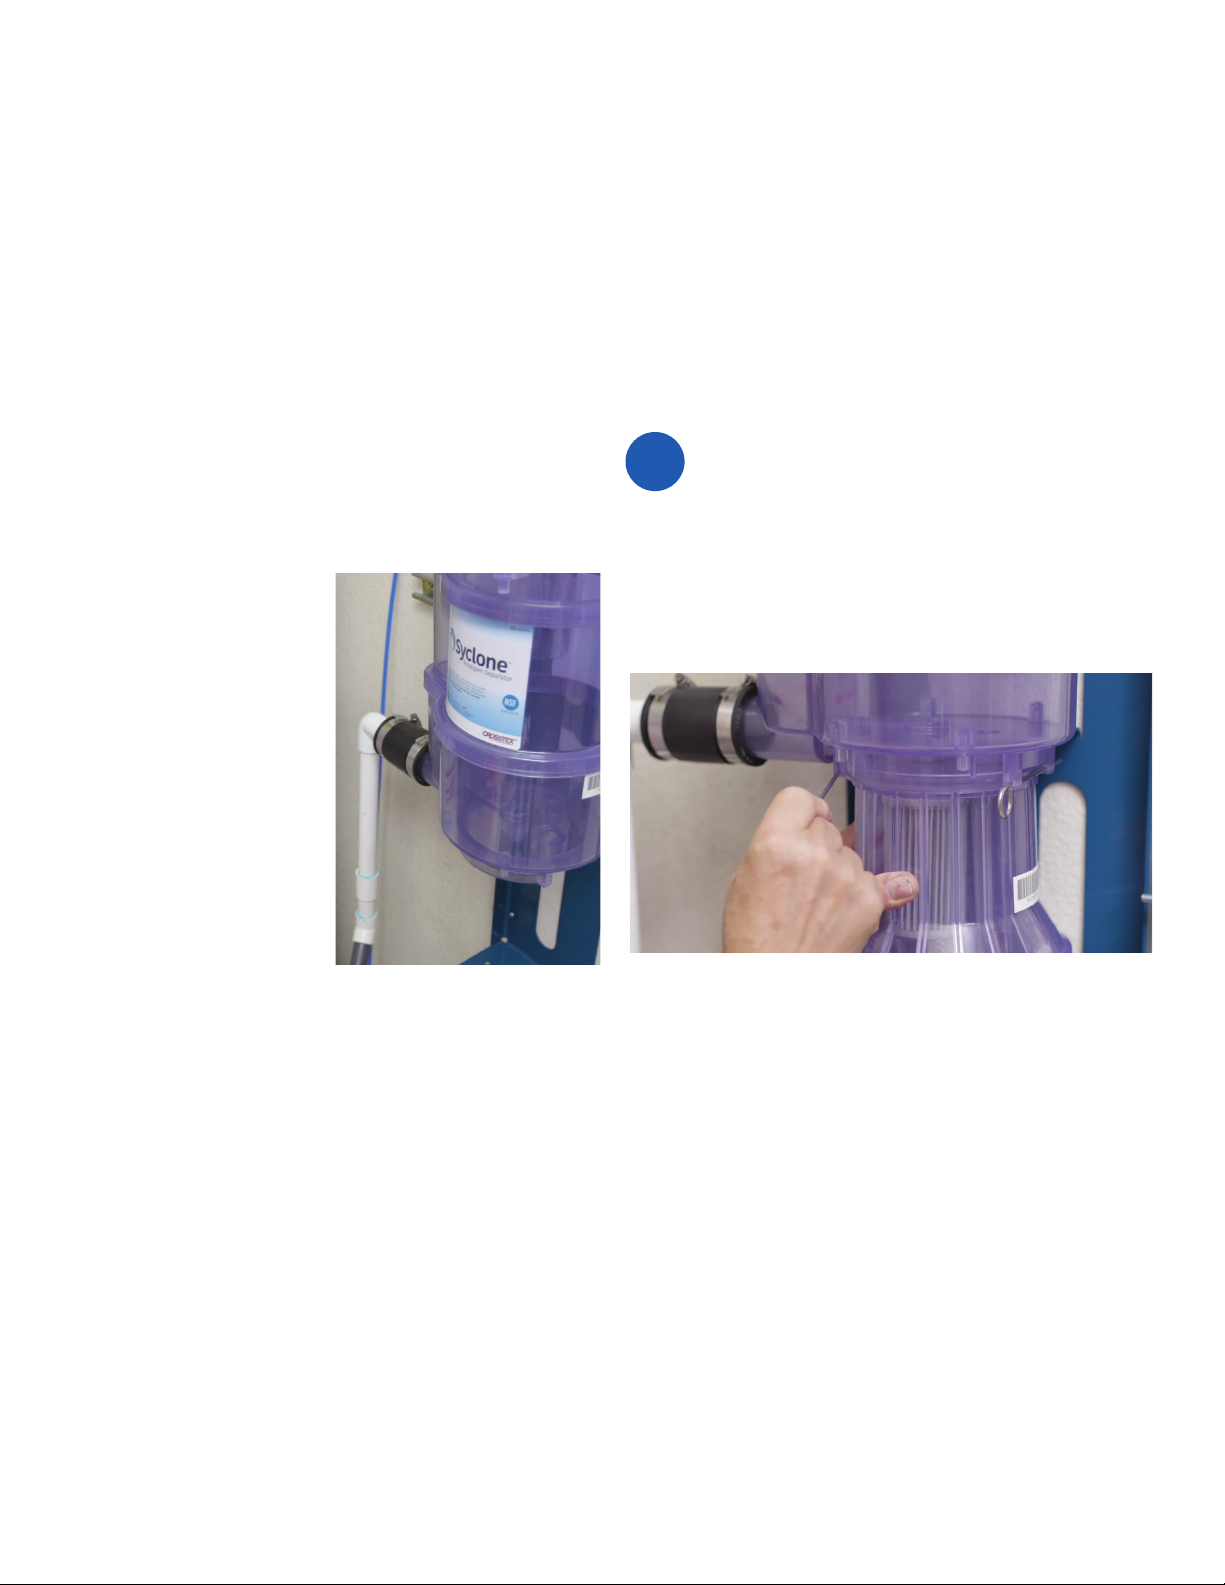
Install the canister
5
• Connect to the vacuum via the system outlet on the bottom using
the other coupling provided
• Install adapters and additional
pipe as necessary
• Be sure to tighten all
connections to prevent leaking
NOTE: Depending on the
con guration of the pipes,
you may need to get PVC
adaptors to connect the
plumbing to the system
(not provided with Syclone™
Amalgam Separator)
• Align the canister to the top chamber and push up
• Secure the canister using the retaining pins provided
Page 8
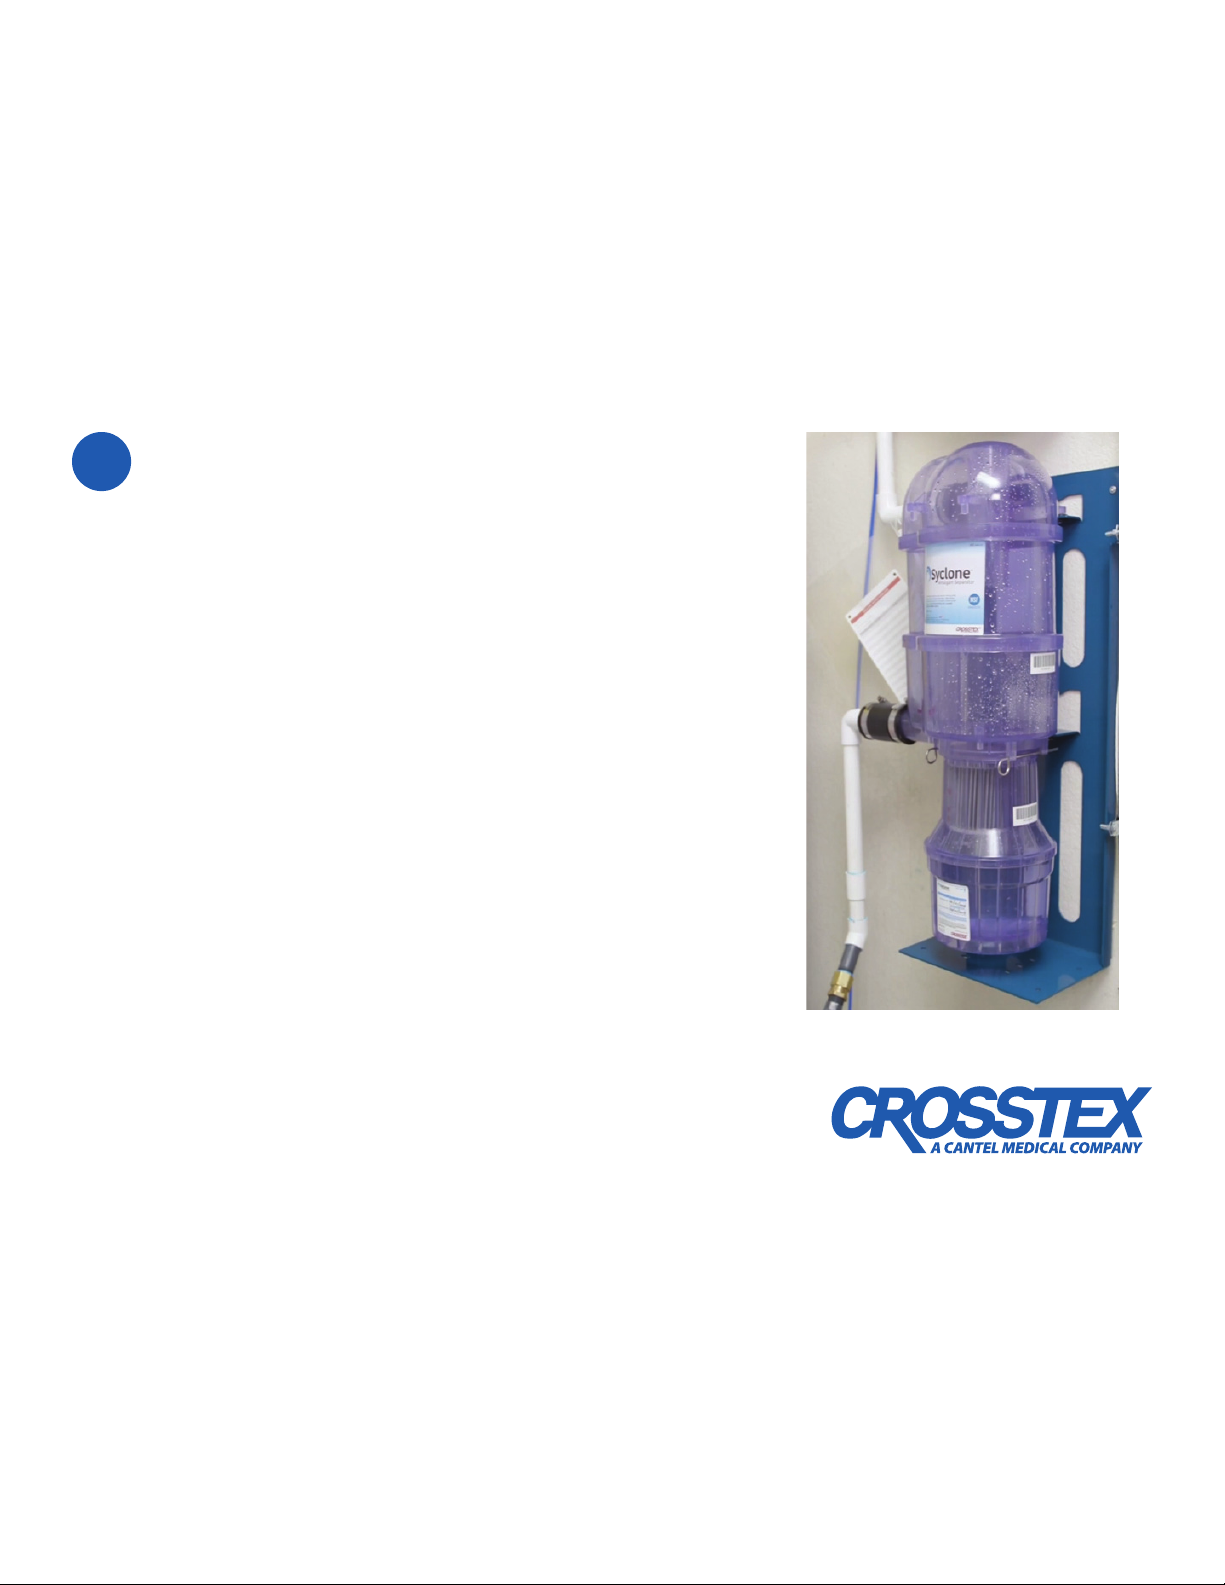
Final checks
6
• Turn on the vacuum and run water through the system and check
for leaks
• Write the installation date as well as the maximum change date of
12 months on the canister label
• Attach the visual inspection log from the installation guide
• The unit is now ready for use
Additional information: Crosstex.com/Syclone
All product names are trademarks of Crosstex International Inc., a Cantel Medical
Company, its a liates or related companies, unless otherwise noted. Patent pending.
© 2018 Crosstex International, Inc. 1018 DLIT00488-Rev B
crosstex.com | 888-276-7783
 Loading...