

Page 1
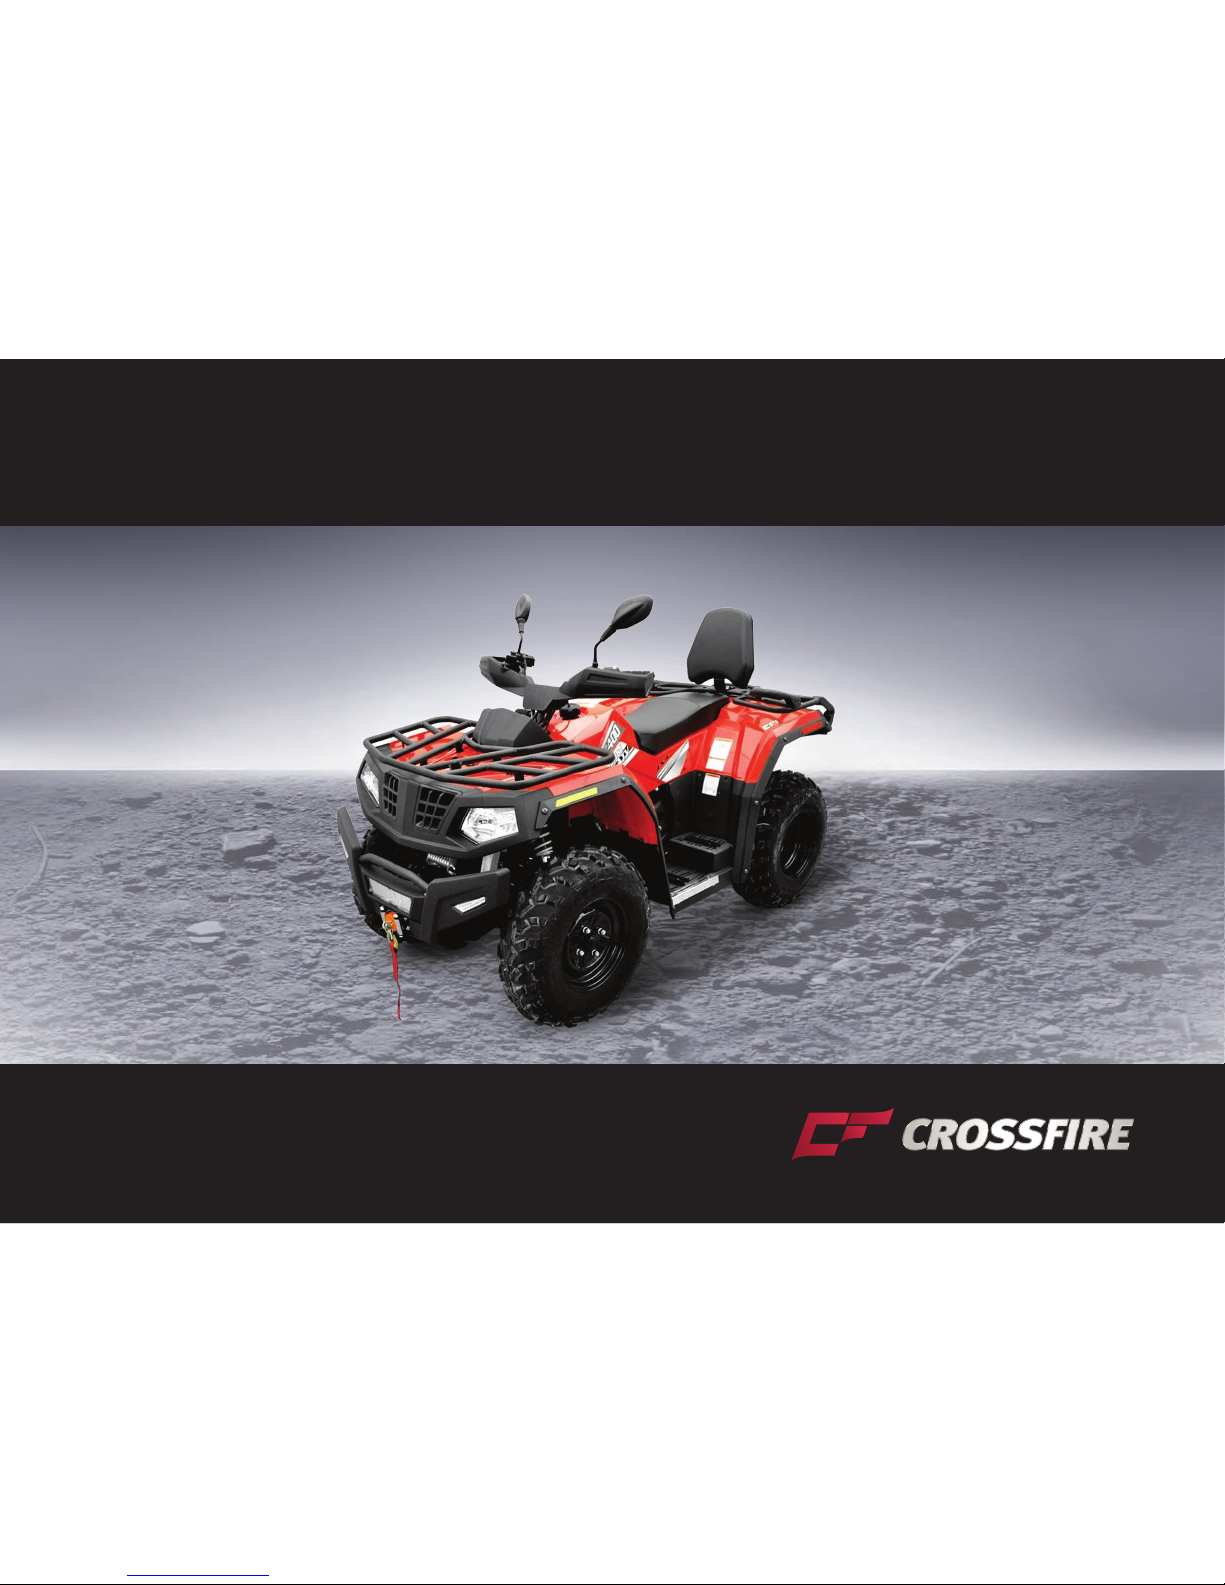
X400 ATV USER MANUAL
Page 2
Owner's Manual
Page 3

Owner's Manual
INTRODUCTION
Congratulations on your purchase of the HS400ATV-8. This Owner’s / Operator’s manual will
provide you information regarding safe operation, operational instructions , maintenance and care.
Fully understanding this manual and following all of the instructions herein will provide the
knowledge needed to have a safe and enjoyable ATV operation.
For questions regarding this UTV, please call (972) 446-0760.
IMPORTANT SAFETY MESSAGES
● READ THIS MANUAL CAREFULLY AND COMPLETELY BEFORE OPERATING YOUR ATV. MAKE
SURE YOU UNDERSTAND ALL INSTRUCTIONS.
● PAY CLOSE ATTENTION TO THE WARNING AND CAUTION LABELS ON THE ATV.
● NEVER OPERATE THE ATV WITHOUT PROPER TRAINING OR INSTRUCTION.
● THIS ATV, AND ANY OTHER ATV OVER 90 cc, SHOULD NOT BE RIDDEN BY ANYONE UNDER 16
YEARS OF AGE.
Page 4
Owner's Manual
IMPORTANT MANUAL INFORMATION
FAILURE TO FOLLOW THE WARNINGS CONTAINED IN THIS MANUAL CAN RESULT IN SERIOUS
INJURY OR DEATH.
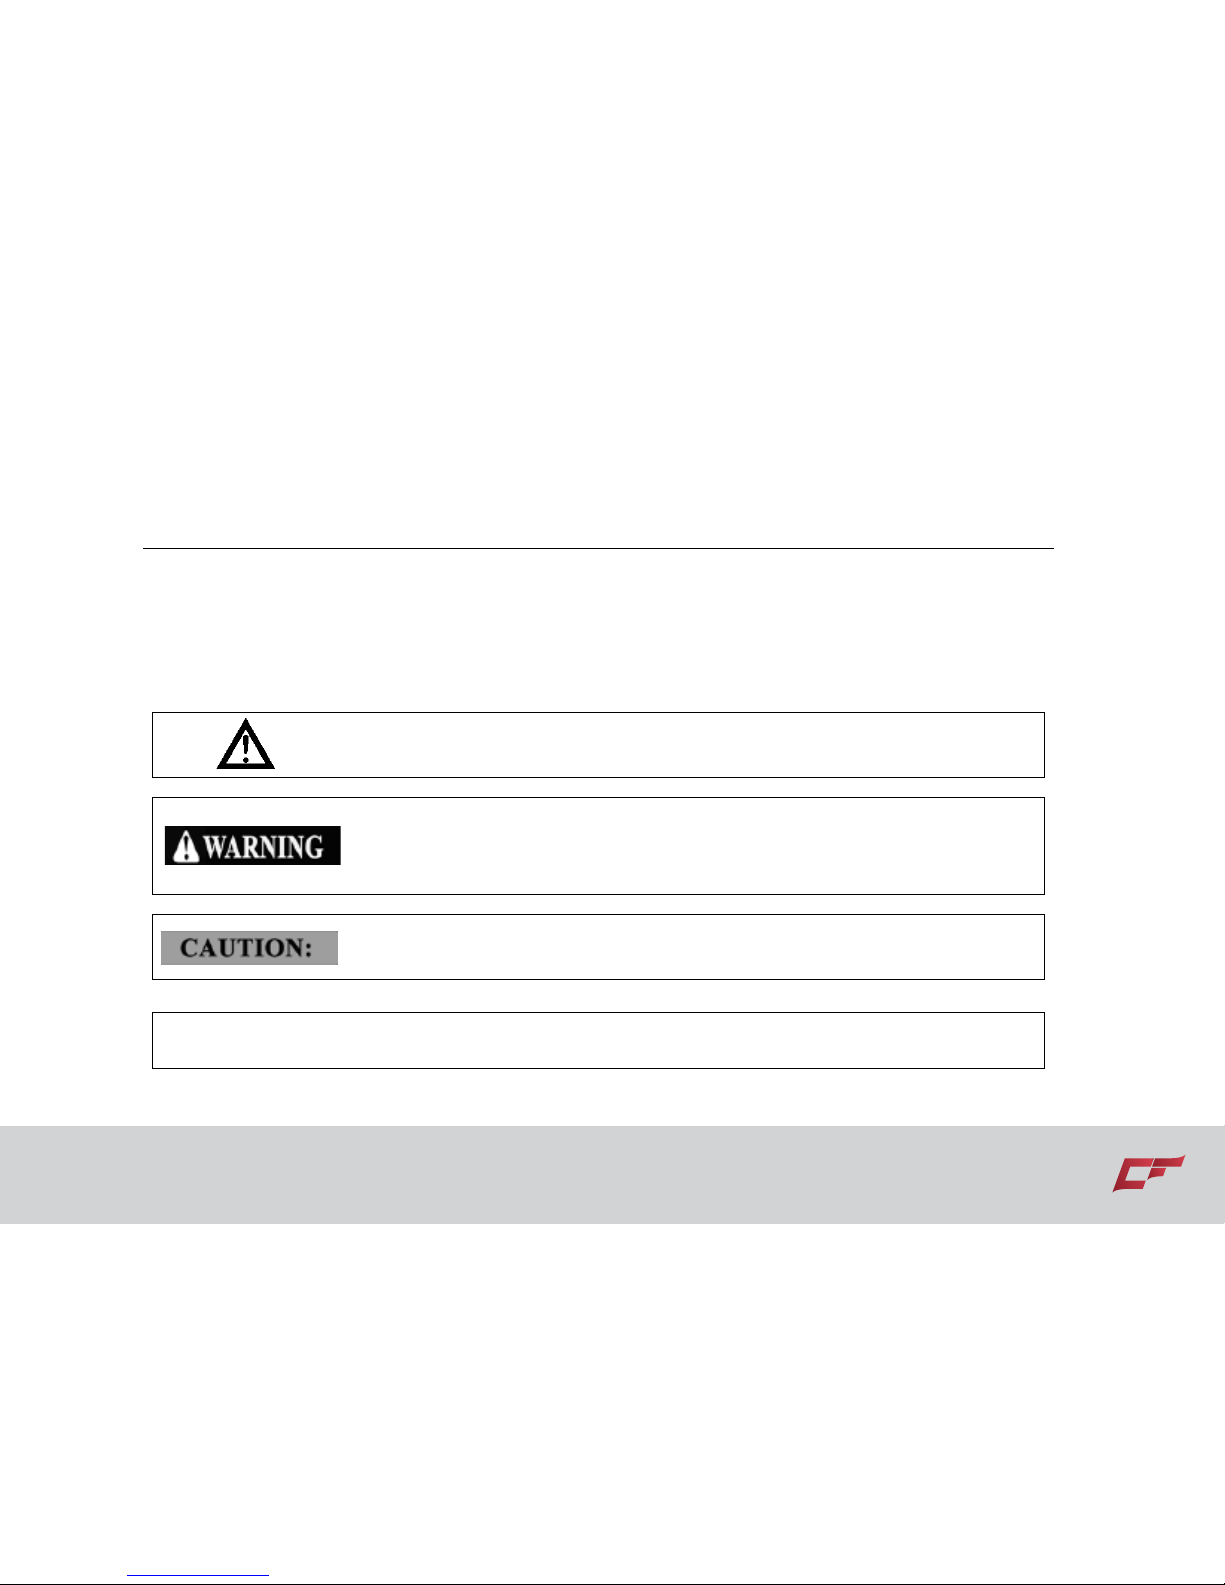
Particularly important information is distinguished in this manual using the
following notations:
The Safety Alert Symbol means ATTENTION!
YOUR SAFETY IS INVOLVED!
Failure to follow WARNING instructions could result in severe injury or
death to the machine operator, a bystander or a person inspecting or
repairing the machine.
A CAUTION indicates special precautions that must be taken to avoid
damage to the machine.
A NOTE provides key information to make procedures easier or clearer.
NOTE:
Page 5

Owner's Manual
IMPORTANT NOTICE
The turning speed of this ATV should not exceed 25km/h.
This ATV is designed and manufactured OFF-ROAD use only. It is illegal and unsafe to operate
this ATV on any public street, road or highway.
This ATV complies with all applicable OFF-ROAD noise level and spark arrester laws and
regulations in effect at the time of manufacture.
Please check your local riding laws and regulations before operating this ATV.
When the temperature is below –20℃(-4°F), please park the ATV in the place where the
temperature is higher than –20℃(-4°F). After the ATV has warmed up, the ATV can be started.
Please check P6-3 on the warming up process.
When the temperature is higher than 38℃(100°F), and when you park the ATV after it runs at a
high speed, please turn off flameout switch firstly, while make the radiator fan still work for at
least 3 minutes, then turn off the power switch to save the battery.
As long as the ATV key switch is on, the oil pump of the EFI system is in working status, which
will consume the storage of the battery. When the battery is short of electricity, the electric start
system would not work. So, if you want to stop ATV working for a long time, please always
keep the key switch off.
Page 6
Owner's Manual
Location of the Warning and
Specification Labels 1-1
Safety Information 2-1
Description and Vehicle
Identification 3-1
Vehicle Identification Number 3-2
EC signs 3-3
Model Label 3-3
Control Functions 4-1
Ignition Switch 4-1
Indicator and Warning Lights 4-2
Speedometer Unit 4-3
Clock Mode 4-4
Fault Code indicator 4-6
Fuel level indicator 4-6
Left Handlebar Switches 4-7
Throttle Lever 4-12
Speed Limiter 4-14
Foot brake pedal – all wheel
brakes 4-14
Parking brake – Park position
lever 4-15
Gear shift lever 4-16
Fuel Tank Cap 4-16
Seat 4-17
Front & Rear Carrier 4-17
DC Socket 4-20
Steering Lock 4-22
Pre Operation Checks 5-1
Brake System 5-3
Fuel 5-4
Engine Oil 5-6
Differential Gear Oil 5-7
Coolant 5-7
Throttle Lever 5-9
Fittings and Fasteners 5-9
Lights 5-9
Switches 5-9
Idling 5-9
Ignition and Emergency Switches
5-9
1
2
3
4
5
Page 7
Owner's Manual
Tires 5-10
How to Measure Tire Pressure 5-11
Tire Wear Limit 5-12
Operation 6-1
Starting a cold engine 6-1
Starting a Warm Engine 6-2
Warming the engine 6-2
Engine shut down 6-2
Drive Select Lever Operation
and Reverse Driving 6-3
Neutral to Reverse Low 6-4
Braking
Parking brake
Parking on a slope
Vehicle brake in
Engine break-in
After break-in
Braking system break-in
Modifications
Loading
6-5
6-6
6-7
6-8
6-8
6-9
6-9
6-10
6-10
Your Vehicle 7-1
Driving Your Vehicle 7-1
Ride with care and good Judgment 7-1
Apparel
7-4
Speed Limiter 7-7
Loading and Accessories 7-8
During Operation 7-9
Modifications 7-11
Exhaust System 7-11
Be Careful Where You Ride
7-12
Turning Your ATV 7-18
Climbing Uphill 7-21
Riding Downhill 7-26
Crossing A Slope 7-28
Crossing Through Shallow Water
7-29
Riding Over Rough Terrain 7-32
Sliding and Skidding 7-33
Periodic Maintenance and
Adjustment 8-1
Periodic Maintenance and
Adjustment 8-1
6
7
8
Page 8

Owner's Manual
Periodic Maintenance Chart for
the Emission Control System 8-2
General Maintenance and
Lubrication Chart 8-3
EFI System 8-5
Engine Oil and Oil Filter 8-8
Final Gear Oil 8-12
Differential Gear Oil 8-14
Cooling System 8-16
Coolant Replacement 8-17
Axle Boots 8-19
Spark Plug Inspection 8-20
Air Filter Element Cleaning 8-22
Spark Arrester Cleaning 8-25
V-belt Cooling Duct Check Hose 8-26
V-belt Case Drain Plug 8-26
Valve Clearance Adjustment 8-27
Throttle Lever Adjustment 8-27
Front/Rear Brake Pad Inspection 8-28
Brake Fluid Replacement 8-29
Front Brake Lever Free Play 8-30
Adjusting the Parking Brake Lever
8-31
Adjusting the Brake Pedal 8-31
Inspecting / Lubricating Cables 8-32
Lubricating the Brake Lever and
Brake Pedal 8-32
Rear Knuckle Upper and Lower
Pivot Lubrication 8-33
Wheel Removal 8-34
Wheel Installation 8-34
Battery 8-35
Battery Maintenance 8-36
Fuse Replacemen
t
8-37
Replacing
A
Headlight Bulb 8-38
Replacing a tailligh
t
8-39
A
TV common fault inspection
and solution charts 8-40
Cleaning and Storage
9-1
Cleaning 91
Storage 9-2
Specifications 10-1
9
10
Page 9

Owner's Manual
Fault codes for the Electronic
Fuel Injection System 11-1
USA EPA Emissions Limited
Warranty 12-1
11
12
Page 10
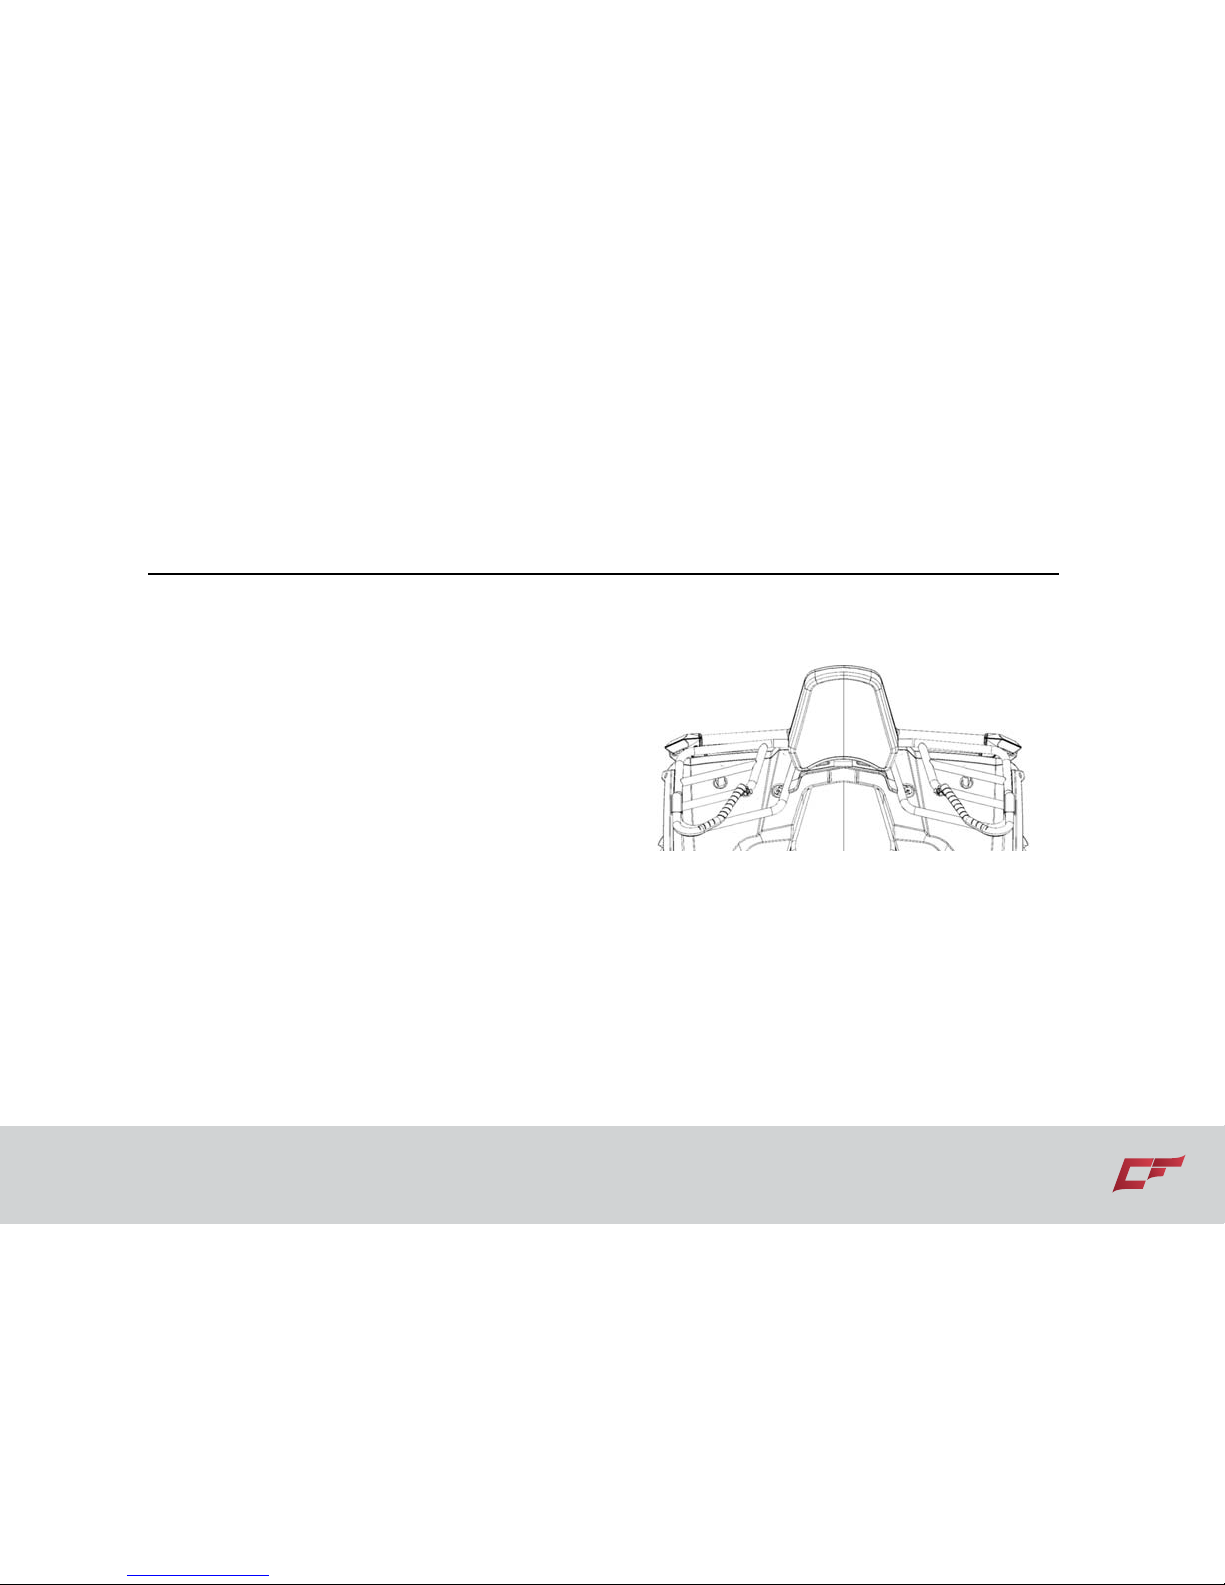
Location of the Warning and Safety Labels 1-1
LOCATION OF THE WARNING AND SPECIFICATION LABELS
Page 11

1-2 Location of the Warning and Safety Labels
Read and understand all of the labels on
your machine. They contain important
information for safe and proper operation of
your ATV.
Never remove any labels from your ATV. If a
label becomes difficult to read or comes off, a
replacement label is available from your
dealer.
1.
Page 12

Location of the Warning and Safety Labels 1-3
2.
3.
4.
5.
Page 13
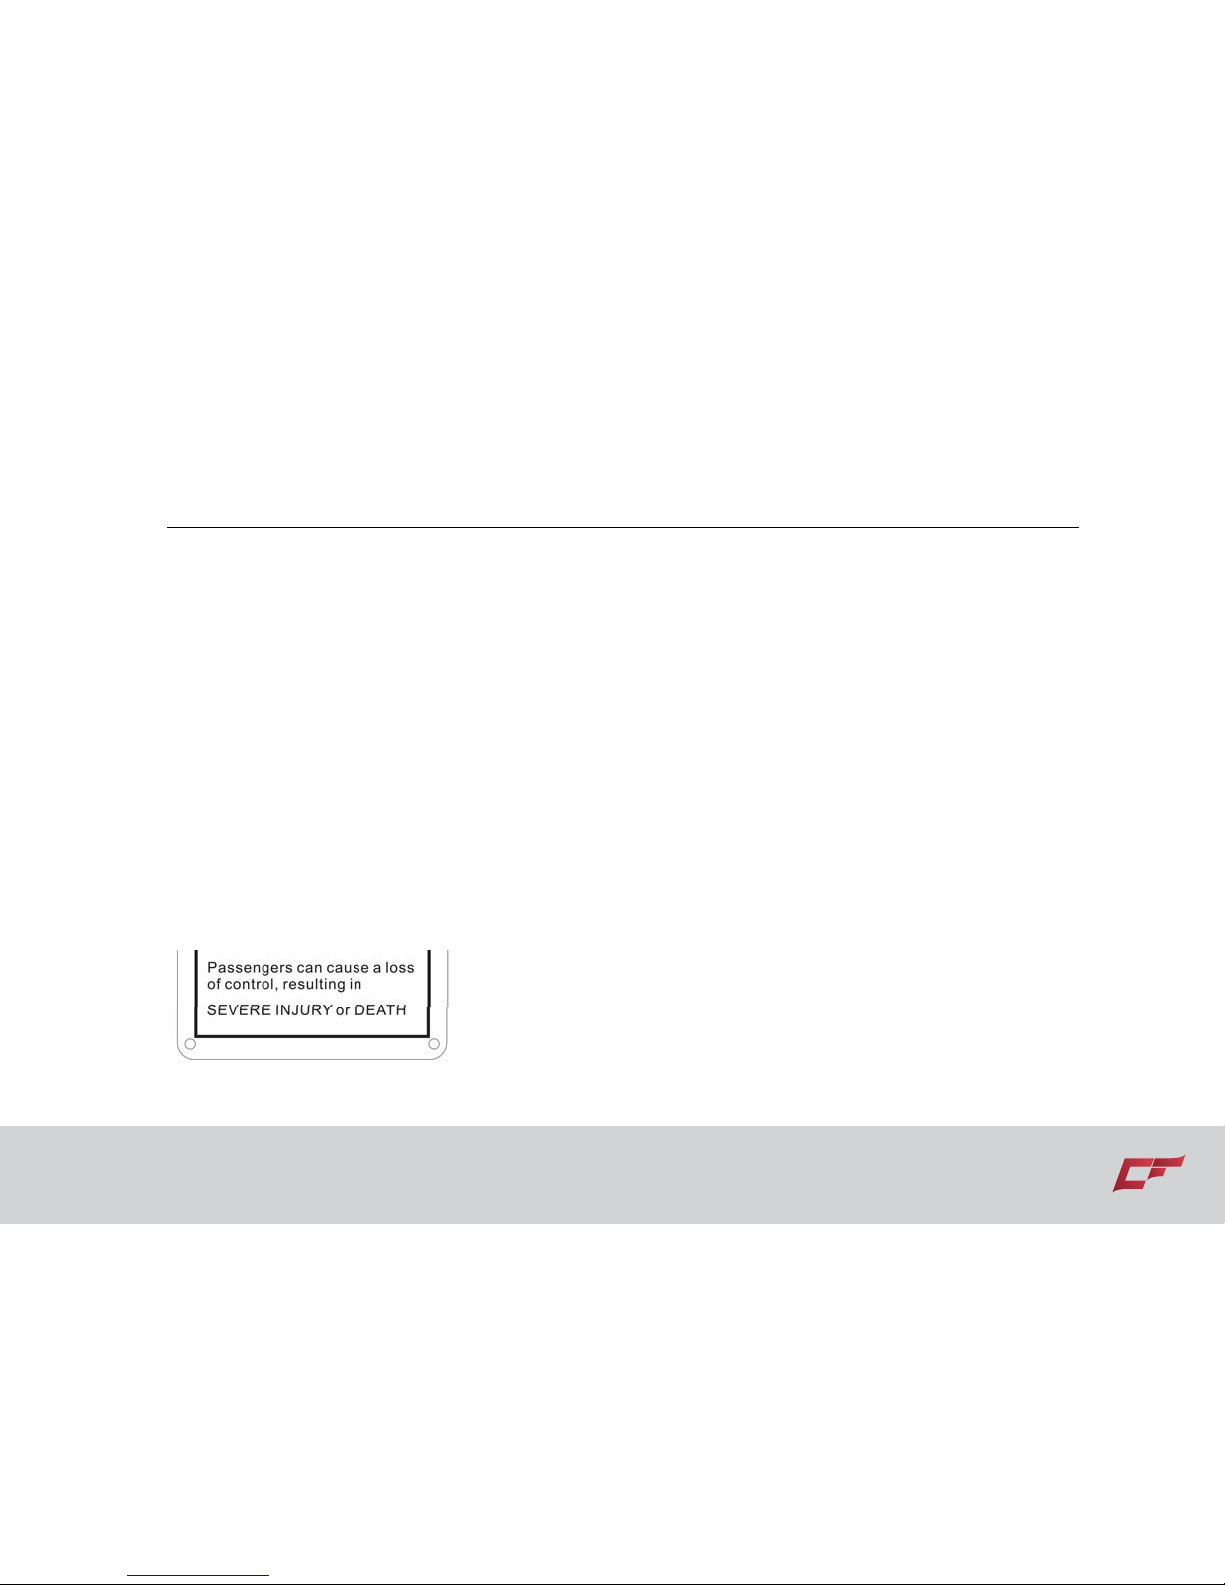
1-4 Location of the Warning and Safety Labels
6.
7.
8.
9.
Page 14
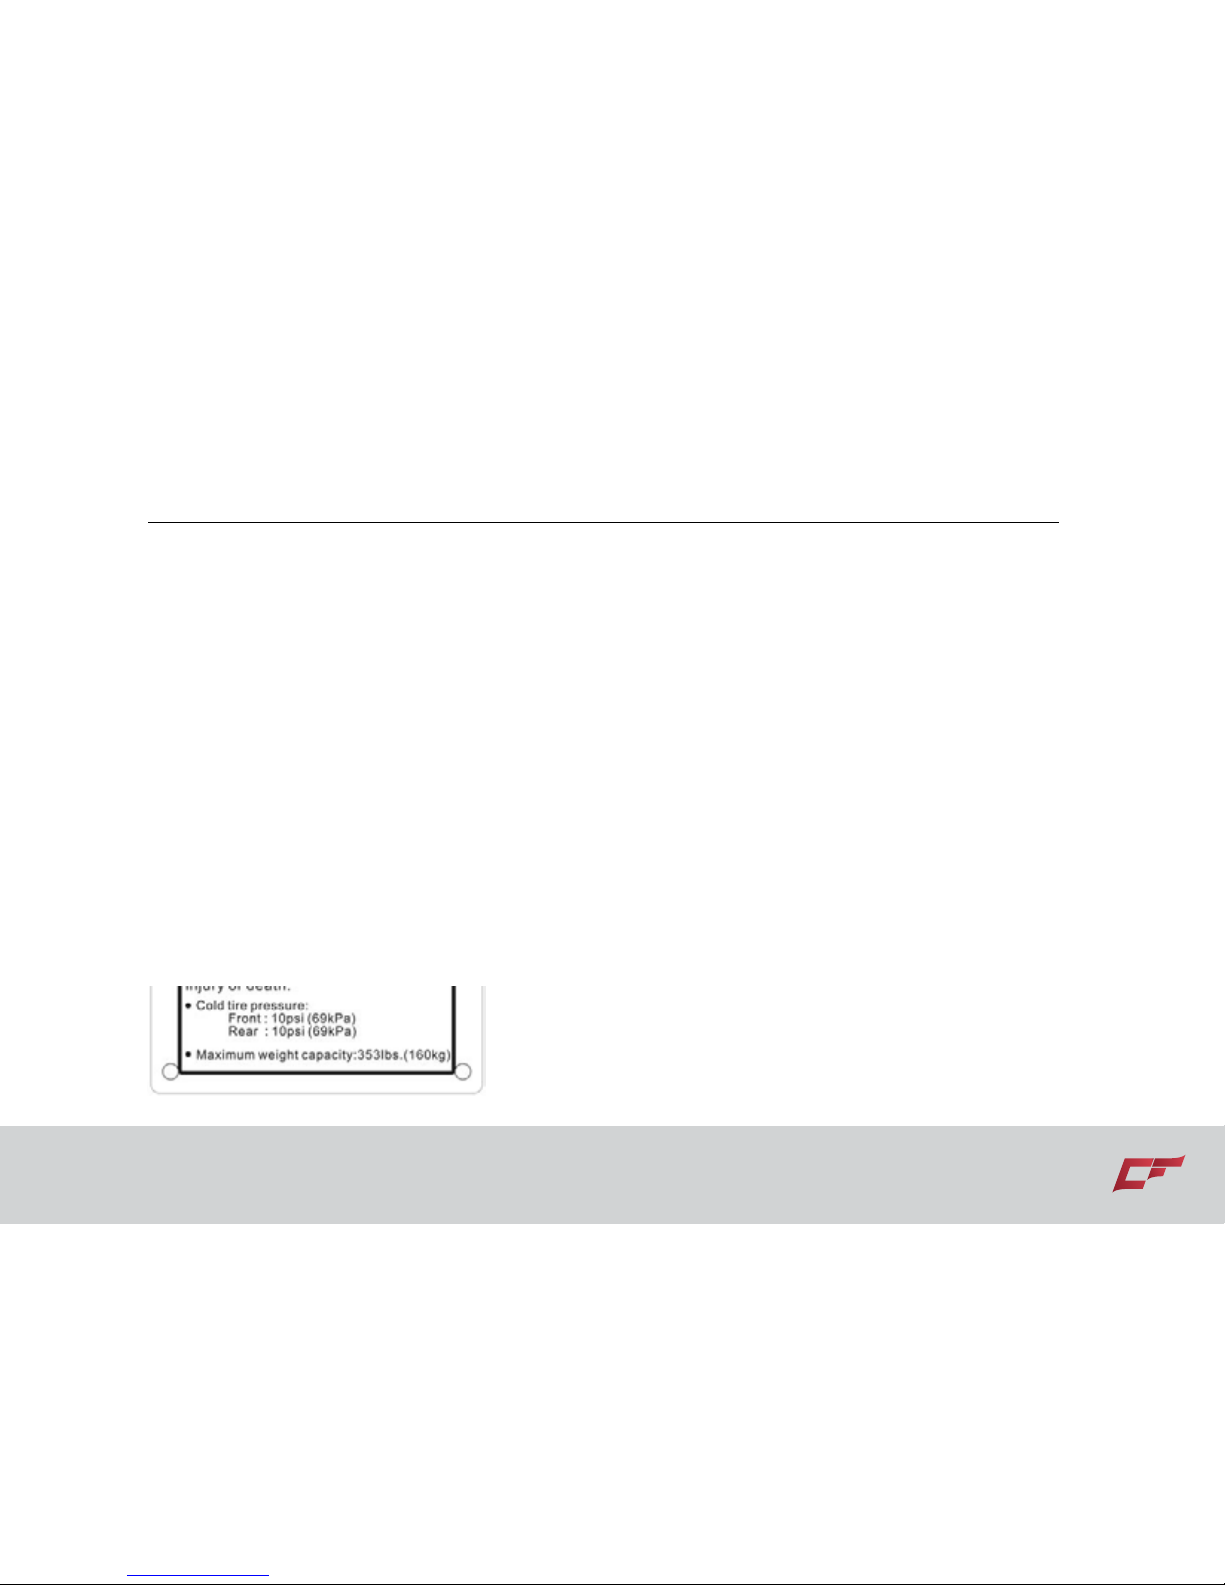
Location of the Warning and Safety Labels 1-5
10.
11.
12.
13.
Page 15
2-1 Safety Information
This ATV is a special vehicle, which is different from other vehicles such as motorcycles and
cars. A collision or rollover can occur quickly, even during routine maneuvers such as turning
and riding on hills or over obstacles if you fail to take proper precautions.
SEVERE INJURY OR DEATH can result if you do not follow these instructions:
Read this manual and all labels carefully and follow the operating procedures described.
Never operate an ATV without proper training or instruction. Take a Training Course.
Beginners should receive training from a certified instructor.
Always follow the age recommendation:
A child under 16 years old should never operate an ATV with an engine size greater than
90cc.
Never allow a child under age 16 to operate an ATV without adult supervision, and never
allow continued use of an ATV by a child if he or she does not have the abilities to operate
it safely.
Never carry more than one passenger on an ATV unless it is designed for two people.
Never operate an ATV without wearing an approved motorcycle helmet that fits properly.
You should also wear eye protection (goggles or face shield), gloves, boots, long-sleeved
SAFETY INFORMATION
Page 16

Safety Information 2-2
shirt or jacket, and long pants.
Never use alcohol or drugs before or while operating an ATV.
Never operate it at a high speed for your skills. Always operate it at a speed that is proper
for the terrain, visibility and operating conditions, and your experience.
Never attempt wheelies, jumps, or other stunts.
Always inspect your ATV each time when you use it to make sure it is in safe operating
condition. Always follow the inspection and maintenance procedures and schedules
described in this manual.
Always keep both hands on the handlebars and both feet on the footboards of the ATV
during operation.
Always go slowly and be extra careful when operating on unfamiliar terrain. Always be alert
to terrain conditions changing when operating an ATV.
Never operate on excessively rough, slippery or loose terrain until you have learned and
practiced the skills necessary to control the ATV on such terrain. Always be especially
cautious on these kinds of terrain.
Always follow proper procedures for turning as described in this manual. Practice turning
at low speeds before attempting to turn at faster speeds. Do not turn at excessive speed.
Never operate the ATV on hills too steep. Don’t operate an ATV beyond your capabilities.
Practice on shallow inclines before attempting larger steeper hills.
Page 17

2-3 Safety Information
Always follow proper procedures for climbing hills as described in this manual. Check the
terrain carefully before climbing any hill. Never climb those hills with excessively slippery or
loose terrain. Keeping your weight forward, never open the throttle suddenly. Never go
over the top of a hill at a high speed.
Always follow proper procedures for going down hills and braking on hills as described in
this manual. Check the terrain carefully before you start to go down any hill. Keeping your
weight forward, never go down a hill at a high speed. Avoid going down a hill with a slope
that could cause the vehicle roll down. Brake carefully when necessary, for braking may
cause the ATV to roll down while going down the hill.
Always follow proper procedures for crossing the hill as described in this manual.
Avoid hills with excessively slippery or loose terrain. Keeping your weight forward, never
attempt to turn around the ATV on any hill until you have mastered the turning technique
described in this manual. Avoid crossing the steep hill.
Always use proper procedures if you stall or roll backwards when climbing a hill. To avoid
stalling, use the proper gear range and maintain a steady speed when climbing a hill. If you
stall or roll backwards, follow the special procedures for braking described in this manual.
Always check obstacles before operating in a new area. Never attempt to operate over
large obstacles, such as large rocks or fallen trees. Always follow proper procedures when
operating over obstacles as described in this manual.
Page 18

Safety Information 2-4
Always be careful when skidding or sliding. Learn to control the vehicle in skidding or
sliding by practicing at low speeds and on level, smooth terrain. On extremely slippery
surfaces, go slowly and be very cautious in order to reduce the chance of out of control.
NEVER ride your ATV on an icy road.
Never operate an ATV in fast flowing water or in water deeper than that recommended in
this manual. Remember that wet brakes will reduce brake performance. Test your brakes
after leaving water. If necessary, apply them several times to let friction dry the linings.
Always be sure there are no obstacles or people behind you when you operate in reverse.
Go slowly while the vehicle in reverse.
Always use the tires with the specified size and type indicating in this manual.
Always maintain proper tire pressure as described in this manual.
Never modify an ATV through improper installation or accessories.
Never exceed the stated load limit for an ATV. Cargo should be properly securely attached.
Reduce speed and follow instructions in this manual for carrying cargo or pulling a trailer.
Allow longer distances for stopping when braking.
Page 19
2-5 Safety Information
WARNING
Improper handling of gasoline may cause fire
and you could be burned.
Remember: Always turn off the engine when
refueling. Do not refuel right after the engine
has been stopped which is still very hot.
Do not spill gasoline on the engine or exhaust
pipe/muffler when refueling.
No smoking while refueling.
Never refuel in the vicinity of sparks, open
flames, or other sources of ignition such as
the pilot lights of water heaters and clothes
dryers.
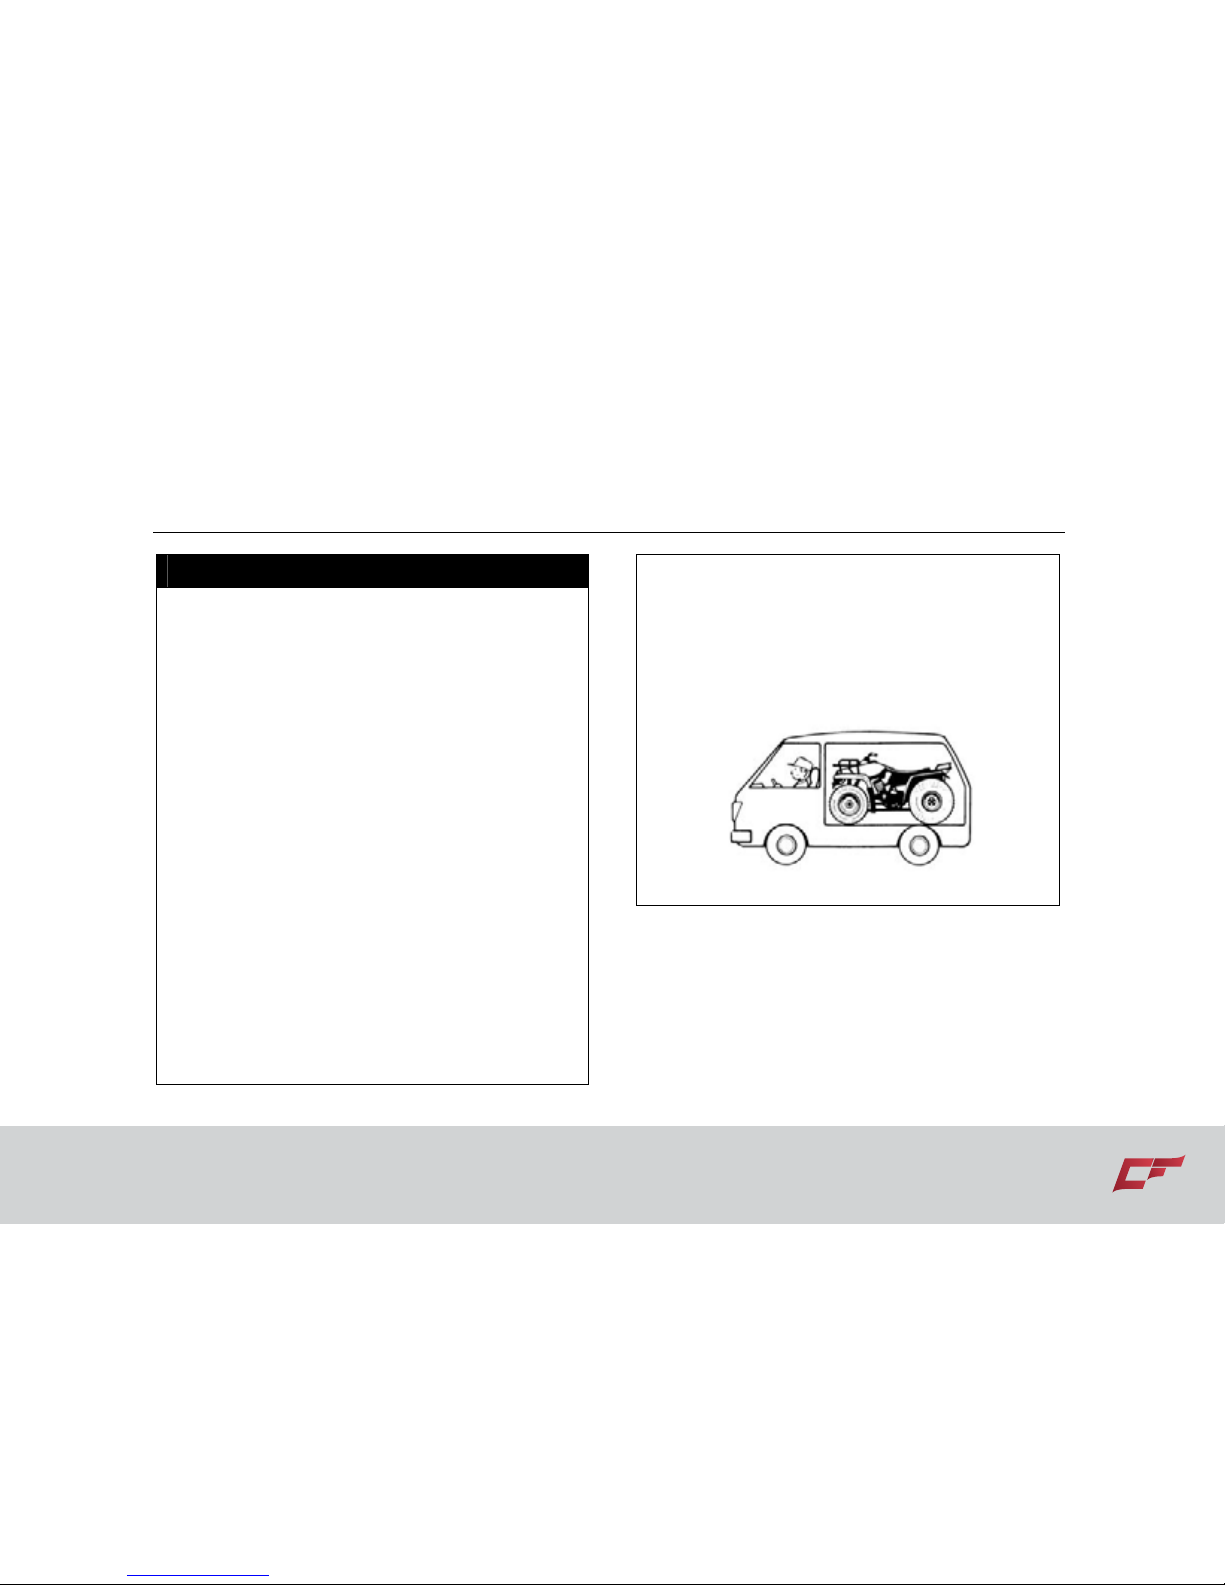
When transporting the ATV in another vehicle,
be sure it is in an upright position. Otherwise,
fuel may leak out of the fuel tank.
Gasoline is poisonous and can cause injuries.
If you swallow gasoline or inhale gasoline
fumes, or get gasoline in your eyes, see your
doctor immediately. If gasoline spills on your
skin, wash with soap and water. If gasoline
spills on your clothing, change your clothes.
Page 20
Safety Information 2-6
WARNING
POTENTIAL HAZARD
Starting or running the engine in a closed area.
WHAT CAN HAPPEN
Exhaust fumes are poisonous and may cause
loss of consciousness and death within a short
time.
HOW TO AVOID THE HAZARD
Always operate your ATV in an area with good
ventilation.
Page 21

3-1 Description and Vehicle Identification
DESCRIPTION AND MACHINE IDENTIFICATION
Page 22

Description and Vehicle Identification 3-2
Page 23
3-3 Description and Vehicle Identification
NOTE:
The ATV you have purchased may differ
slightly from those shown in the figures of
this manual.
Identification number records
Record the vehicle identification number,
engine identification number and model
label information in the spaces provided for
assistance when ordering spare parts from
a dealer or for reference in case the
vehicle is stolen.
1.VEHICLE IDENTIFICATION NUMBER:
2. VEHICLE IDENTIFICATION NUMBER:
3. MODEL LABEL INFORMATION:
○
●
Vehicle identification number
The vehicle identification number is
stamped into the frame.
Page 24
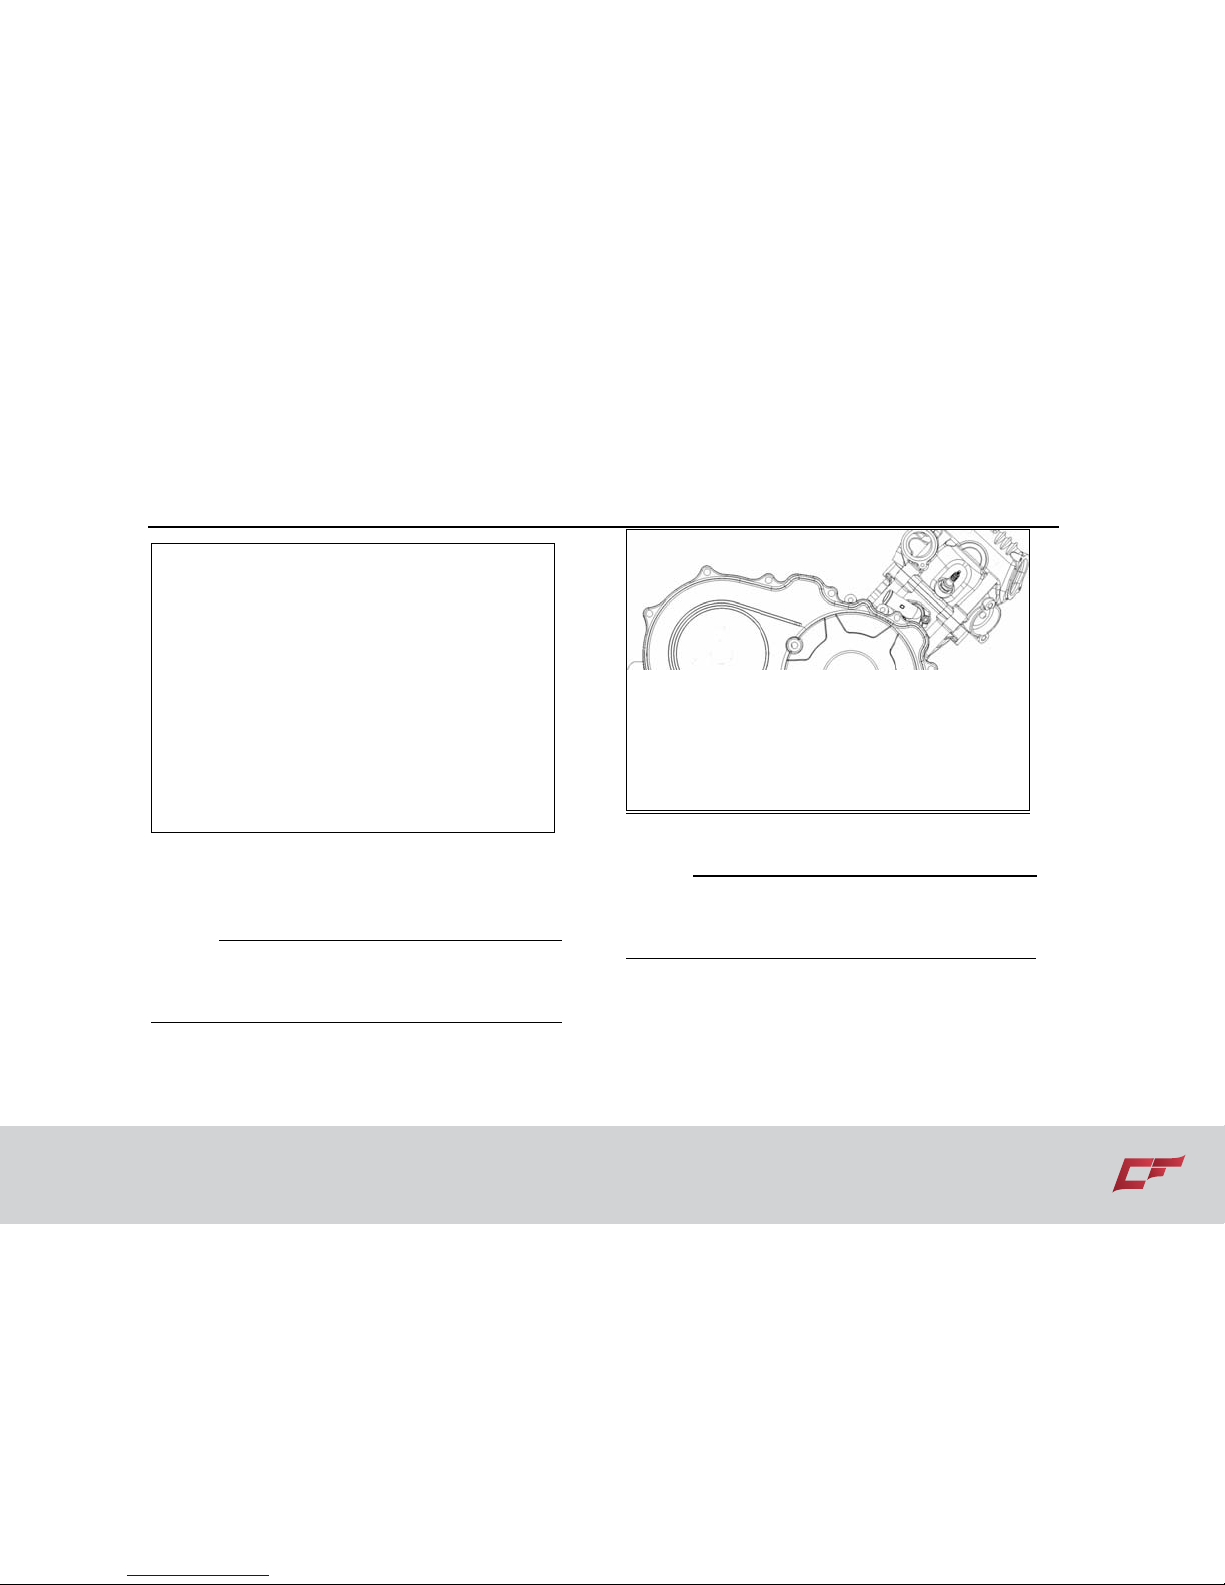
Description and Vehicle Identification 3-4
[1]. Vehicle identification number
NOTE:
The vehicle identification number is used
to identify your machine.
Engine identification number
[1]. Engine identification number
NOTE:
The engine identification number also is
used to identify your machine.
Model label
The model label is affixed at the location
shown in the illustration. Record the
Page 25
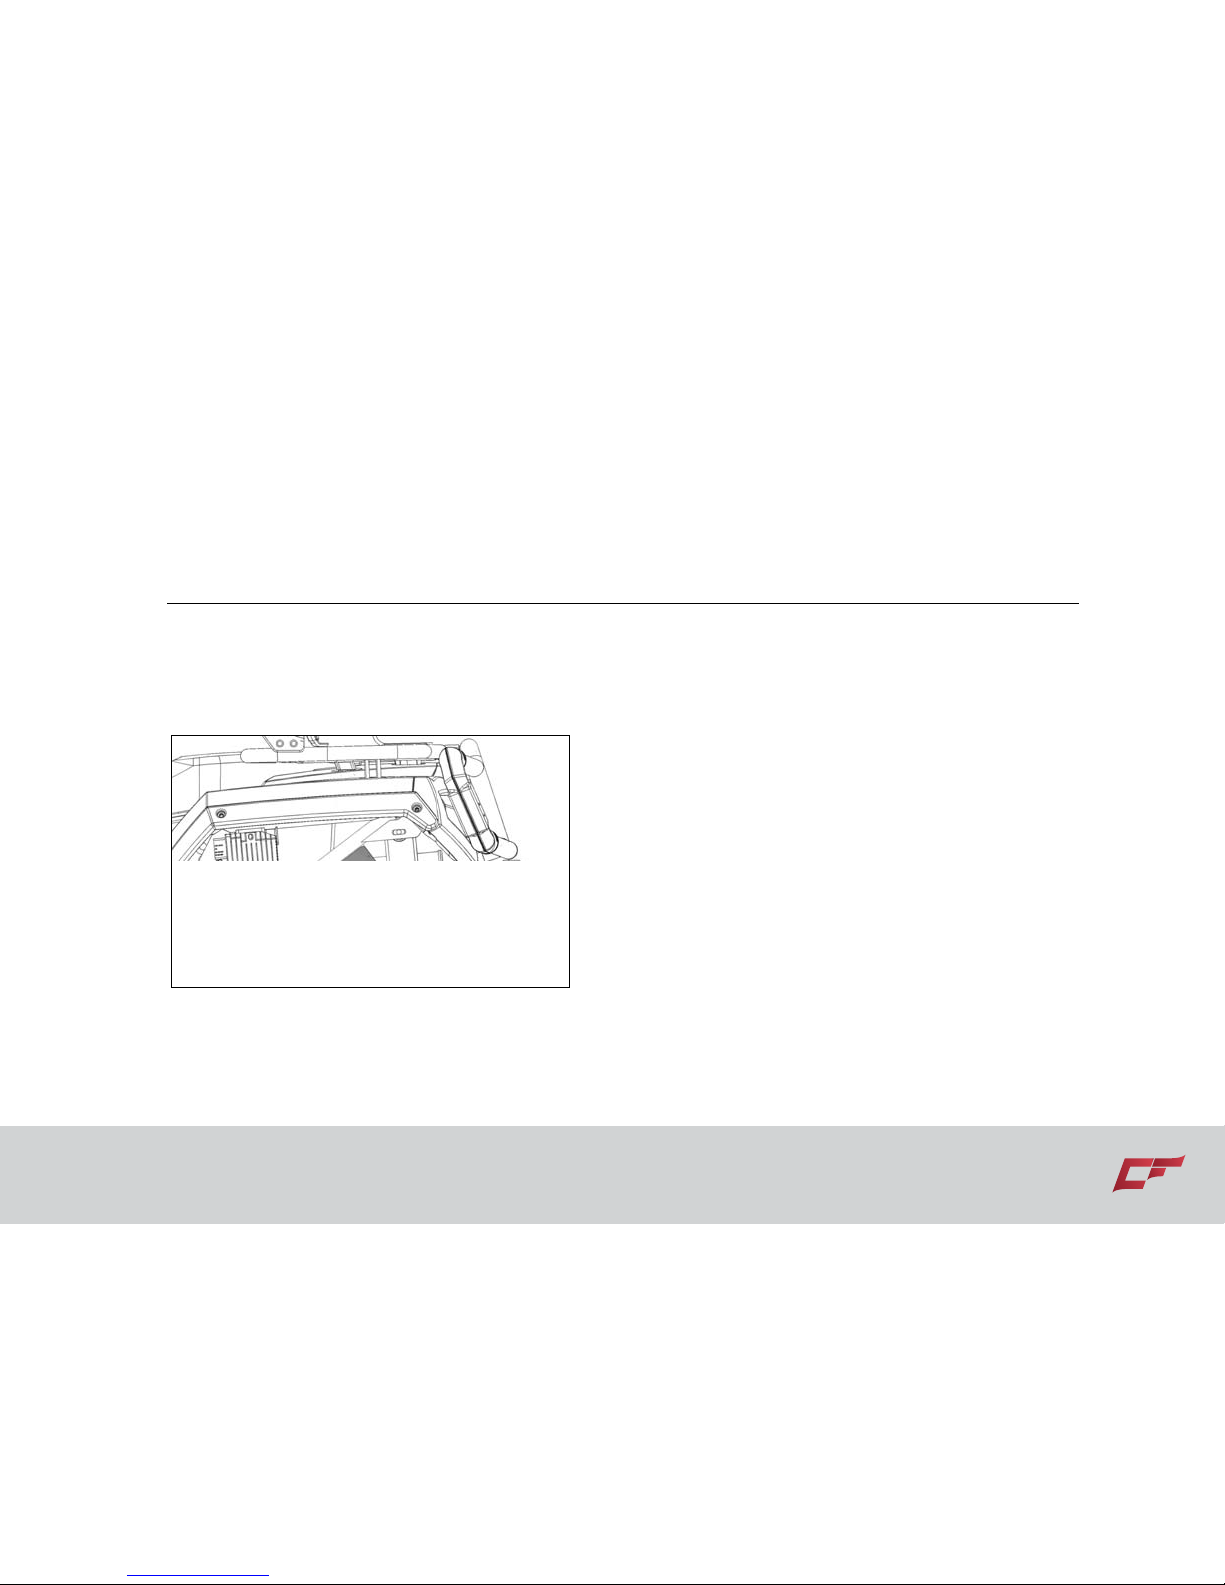
3-5 Description and Vehicle Identification
information on this label in the space
provided. This information will be needed
to order replacement parts from your
dealer.
[1]. Model label
Page 26

Control Functions 4-1
CONTROL FUNCTIONS
Ignition switch
Switch functions in respective positions are as
follows:
[1] Ignition switch
[2] “OFF”
[3] “ON”
ON:
The engine can be started only in this position
and the headlights and taillights can be turned
on when the light switch is on.
OFF:
All electrical circuits are switched off. The key
can be removed in this position.
Page 27
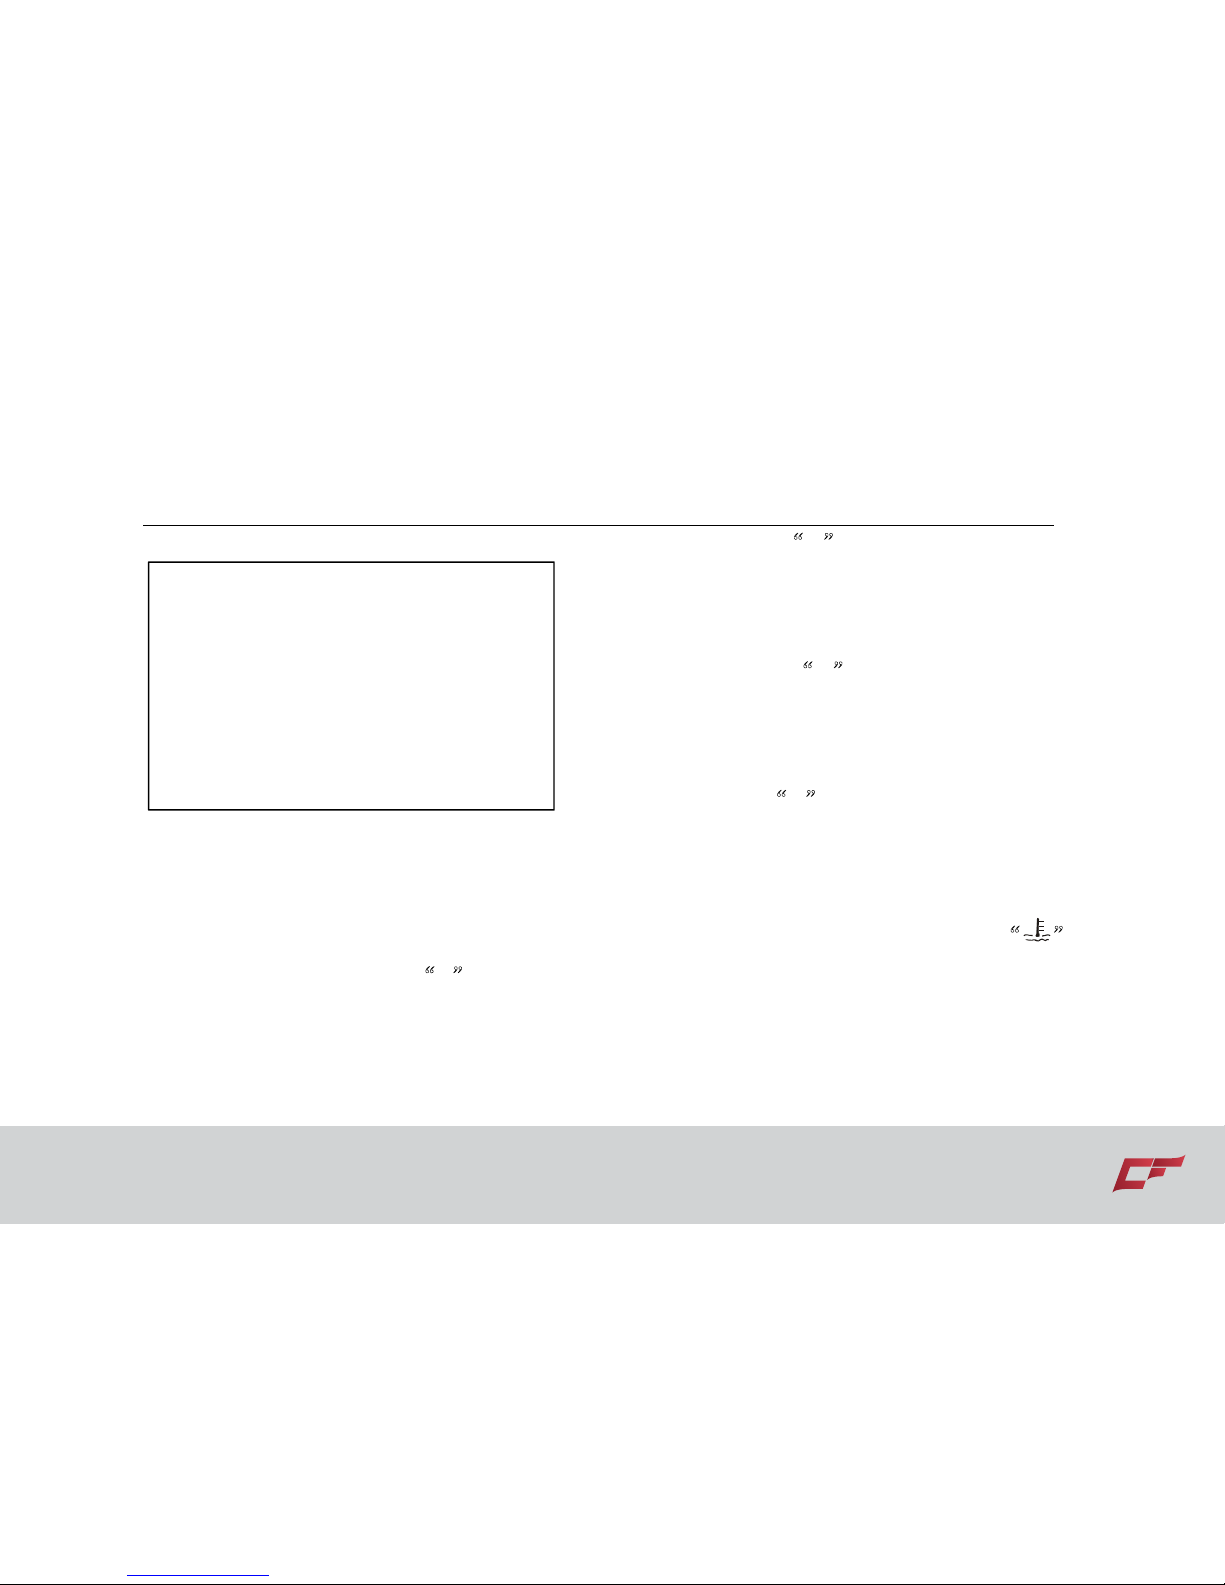
4-2 Control Functions
Indicator and Warning Lights
1. Position Light
2. High beam indicator
3. Park position indicator “P”
4. Neutral indicator “N”
5. Gear display
6. Emergency flashers indicator
7. Coolant temperature gauge
Low-gear range indicator “F”
This indicator light comes on when the drive
select lever is in the “F” position.
Neutral indicator“
N”
This indicator comes on when the drive
select lever is in the “N” position.
Reverse indicator“
R”
This indicator comes on when the drive
select lever is in the “R”position.
Park indicator “
P”
This indicator light comes on when the
mechanical parking brake is applied.
Coolant temperature warning indicator“
”
When the coolant temperature reaches a
specified level, this light comes on indicating
the coolant temperature is too hot. If the light
comes on during operation, stop the engine
as soon as it is safe to do so and allow the
engine to cool down for about 15 minutes.
Page 28
Control Functions 4-3
CAUTION:
The engine may overheat if the ATV is
overloaded. If this happens, reduce the
load to specification.
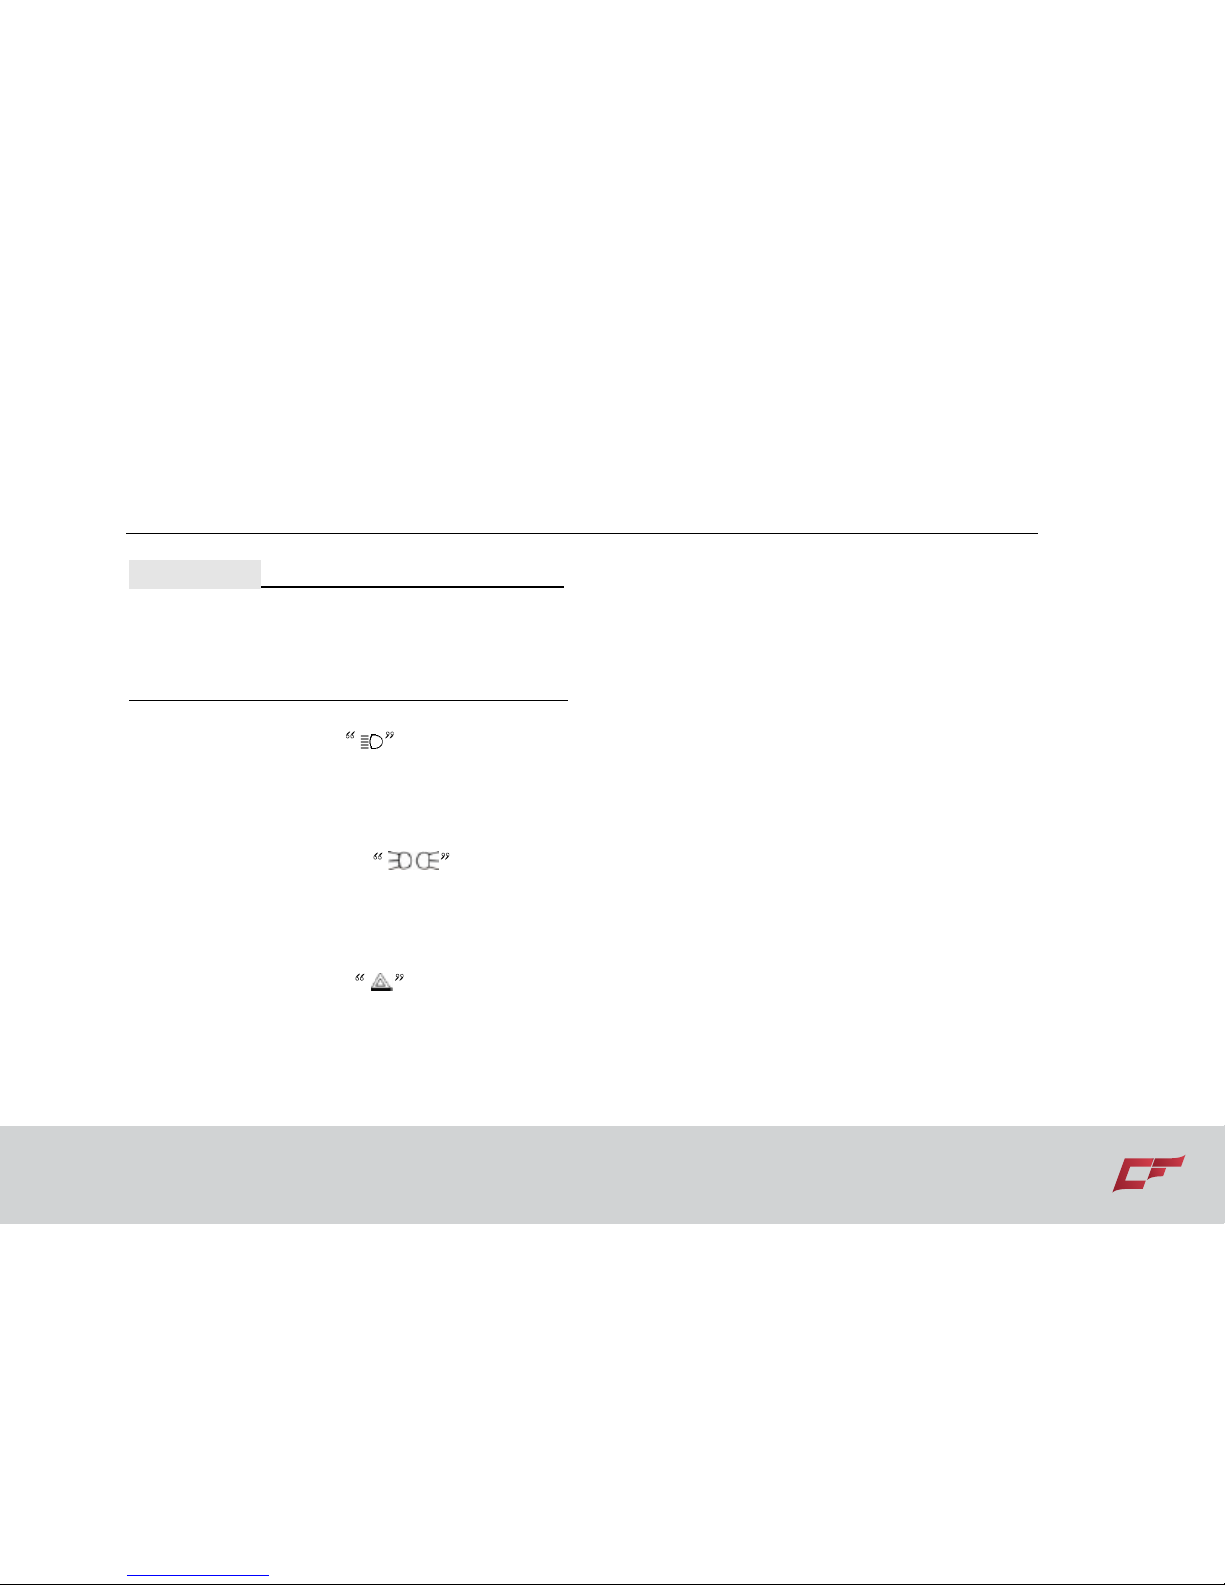
Headlight indicator “ ”
When the headlights are on, this indicator will
light.
Position light indicator“
”
When the headlight is on, this indicator will
light.
Emergency flashers “
”
When the emergency flasher is on, this
indicator will light.
Speedometer Unit
1. RPM indicator
2. Odometer/trip meter/Eng. hours & Clock adjustment
3. Left turn signal light
4. Speed indicator
5. Right turn signal light
6. Miles per hour/Kilometers per hour selector button
7. 2WD / 4WD indicator light
8. Differential Lock indicator light
Speedometer unit functions:
a speedometer (which shows the speed)
Page 29

4-4 Control Functions
an odometer (which shows the total
distance covered)
a trip meter (which can be cleared and
then show any new distances traveled)
an RPM indicator (which shows the
revolutions per minute of the engine)
a clock
an EFI fault code indicator (which shows
the fault code diagnosed by EFI )
Odometer and trip meter modes
On the display panel there are two large
buttons, one located on the left side and one
on the right side. Quickly toggle the button on
the left side can switch the display from the
odometer to the trip meter, and then to the
hours meter; then it starts the cycle over.
The odometer displays the total distance
traveled by the ATV. The trip meter can
record distances up to 999.9 miles for specific
trips. To reset the trip meter, press the left
button to switch to small mileage (Trip), then
press the right button for a long time to reset.
The trip meter can also be used to estimate
the distance that can be traveled with a full
tank of fuel. This information will enable you to
judge the fuel consumption.
To switch the miles to kilometers on the
display, press the right side button.
Clock time adjustment
Press the left button and hold for three
seconds and the clock goes into the hour ‘set’
mode.
Page 30
Control Functions 4-5
1. Press the right button to set the hour.
2. Press the left button again and the clock
goes into the minute ‘set’ mode.
3. Press the right button to set the minutes.
4. Press the left button again and the clock
will exit the ‘set’ mode.
Four-wheel drive indicator “ ”/ “ ”
There are two 4WD indicators on the display
panel. The left 4WD indicator has a blinking
circle on the front axle when the grey and
yellow 4WD selector buttons are pressed in
indicating the “4WD” function has been
activated. This position also indicates that the
4WD is NOT locked. This allows the wheels
on the left and right sides to rotate at different
speeds to accommodate turning.
Differential gear lock indicator “DIFF-LOCK
”
The right 4WD symbol will show an ‘X’ over
the center of the front axle when the lever is
moved to the right and the yellow differential
gear lock button is set to the " " out position,
which means the differential is not operational
and is locked. When riding an ATV on muddy
and slippery roads or when climbing a steep
hill, make sure the 4WD lock indicator is on.
When riding on a flat road at a comparatively
high speed, adjust the settings to
“2WD/UNLOCK” and there are no symbols in
either of the 4WD indicators.
Riding an ATV while the differential is
functioning and is NOT locked, may improve
Page 31
4-6 Control Functions
the stability and safety of the ATV operation.
CAUTION:
When the selector is set to 4WD “DIFF.
LOCK”, the right 4WD symbol front axle will
have an ‘X’ in the middle. When riding on
smooth flat surfaces you should unlock the
differential and press in the yellow and the
gray buttons to the 2WD unlocked position.
There should be no symbols showing in
either the left or right 4WD indicators.
CAUTION:
If the display indicators flash or the
speedometer does not show the speed while
the ATV is in motion, consult a dealer to check
the speed sensor and circuits.
Fault code indicator
When the EFI encounters faults, the ECU will
send the fault code to the instrument display,
and it will flash on the clock.
If there are more than one fault code, they will
be shown in rolling sequence. When fault
codes are present, press the clock button to
check time. Then after five seconds, the fault
code returns again. Only when the fault is
fixed, the time could show automatically.
The description for the fault codes are shown
in Chapter 11 of this manual.
Fuel level indicator
The fuel level display will indicate the fuel
volume. When the fuel is getting low the fuel
pump indicator will flash.
Page 32
Control Functions 4-7
[1]. Fuel level indicator in lower position
[2]. Fuel level indicator in higher position
Left handlebar switches
1. Light switch “ / / OFF / ”
2. Starter button “”
3. Turning signal switch
4. Engine stop button “ / ”
5. Horn button
6. Emergency flashers button
Light switch “ / / OFF/ ”
Toggle switch “” to turn on the low
beams.
Page 33
4-8 Control Functions
Toggle switch “” to turn on the high
beams.
Toggle switch “OFF” to turn off all the lights.
Toggle switch “ ” to turn on the parking
lights and the taillights.
NOTE:
Do not use the headlights with the engine off
for more than fifteen minutes. Otherwise the
battery may run out and the vehicle cannot
start. If this happens, remove the battery and
recharge it.
Ignition switch “ ”
The starter motor cranks the engine when this
button is pushed.
NOTE:
See starting instructions prior to starting the
engine. (See P6-1—6-2)
Turn signal switch
Moving the turn signal switch left or right, the
turn signal light will be on with a buzzer
sound.
Engine emergency stop switch
“ / ”
Make sure that the engine emergency stop
switch is set to “” before starting the
engine. The engine stop switch controls
ignition and can be used at all times to stop
the engine, especially in an emergency. The
engine will not start or run when the
emergency stop switch is set to “”.
Page 34

Control Functions 4-9
Horn button
Press this button, horn activates.
Emergency flasher button
Press this button, the four turn signal lights
will flash continuously with a buzzer sound.
2WD/4WD operation
This ATV is equipped with two-wheel and four
wheel drive switch "2WD/4WD". Select the
appropriate drive according to different
terrains and conditions.
Differential
This ATV is equipped with a front differential
that can be locked, which allows the ATV to
perform better on muddy surfaces.
This ATV is equipped with a“4WD/LOCK”
switch to lock the differential according to
terrains and conditions.
“2WD/4WD”
switch
1. “2WD”/ “4 WD” lever switch
2. “2WD/ “ selector button
Page 35
4-10 Control Functions
“4WD/ LOCK”switch
1. “4WD/ “LOCK” button
2. “2WD”/’4WD” lever switch
CAUTION:
When ATV is in operation, DO NOT press the
2WD/4WD buttons. This may break the rear
axle gears.
Two-wheel drive (”2WD”): Power is sup-
plied to the rear wheels only.
Four-wheel drive (“4WD’): Power is
supplied to the rear and front wheels.
Four–wheel drive with the differential gear
locked (“4WD-LOCK”): Power is supplied
to the rear and front wheels when the
differential gear is locked. Unlike the 4WD
mode, all wheels turn at the same speed
regardless of traction.
WARNING
POTENTIAL HAZARD
Changing from 2WD to 4WD or from 4WD to
4WD LOCK, while the ATV is moving.
WHAT CAN HAPPEN
It may cause the ATV to become hard to
handle. The operator could lose control.
HOW TO AVOID THE HAZARD
Always completely stop the ATV before
changing from 2WD to 4WD or from 4WD to
4WD-LOCK.
Page 36

Control Functions 4-11
2WD/4WD selection
1. Selection lever switch
2. 2WD/4WD” selector button
From 2WD to 4WD:
To change from 2WD to 4WD ,stop the vehicle,
and then set the switch to “4WD”.When the
vehicle is in 4WD, the 4WD indicator will
come on in the multi-function meter unit
display .
From 4WD to 2WD
To change from 4WD to 2WD .stop the
vehicle ,be sure the select lever is set to
position , and then set the switch to
“2WD”.
Switch “4WD”/”LOCK”
To lock the differential gear in 4WD, stop the
vehicle, make sure the On-Command
four-wheel-drive switch is set to “4WD”, move
the select lever to position , and then set the
switch to “LOCK”. When the differential gear
is locked, the differential gear lock indicator
light will come on along with the differential
gear lock indicator in the multifunction meter
unit display .To release the differential gear
lock , stop the vehicle and set the switch to
“4WD”.
Page 37
4-12 Control Functions
WARNING
POTENTIAL HAZARD
When driving too fast with DIFF.LOCK on.
WHAT CAN HAPPEN
Four wheels will rotate at the same speed. It is
extremely difficult to turn. It is easier to lose
control of the ATV.
HOW TO AVOID THE HAZARD
Slow down the ATV to a safe speed when
driving with the DIFF.LOCK on.
Note:
When the switch is set to “LOCK”, the
differential gear lock indicator and
indicator light will flash until the differential
gear is locked.
When the indicator and indicator light are
flashing, turning the steering wheel back
and forth will help the differential gear lock
to engage.
Riding before the differential gear lock
is properly engaged (e.g., when the
indicator and indicator light are
flashing) will cause the engine speed
to be limited until engagement is
complete.
Throttle lever
While the engine is running, press the throttle
lever to increase the speed. Changing the
speed of the ATV by varying the throttle
position. Since the throttle is spring-loaded,
the ATV will decelerate and the engine will
return to idle when your hand is taken off the
throttle lever.
Page 38
Control Functions 4-13
1. Throttle lever
WARNING
POTENTIAL HAZARD
Malfunction of the throttle.
WHAT CAN HAPPEN
The throttle could be hard to operate, making
the ATV difficult to speed up or slow down
when needed, which could cause an accident.
HOW TO AVOID THE HAZARD
Check the throttle lever before starting the
engine. If it does not work smoothly, check it.
Solve the problem before riding the ATV.
Consult a dealer if you can’t solve the
problem by yourself.
Page 39
4-14 Control Functions
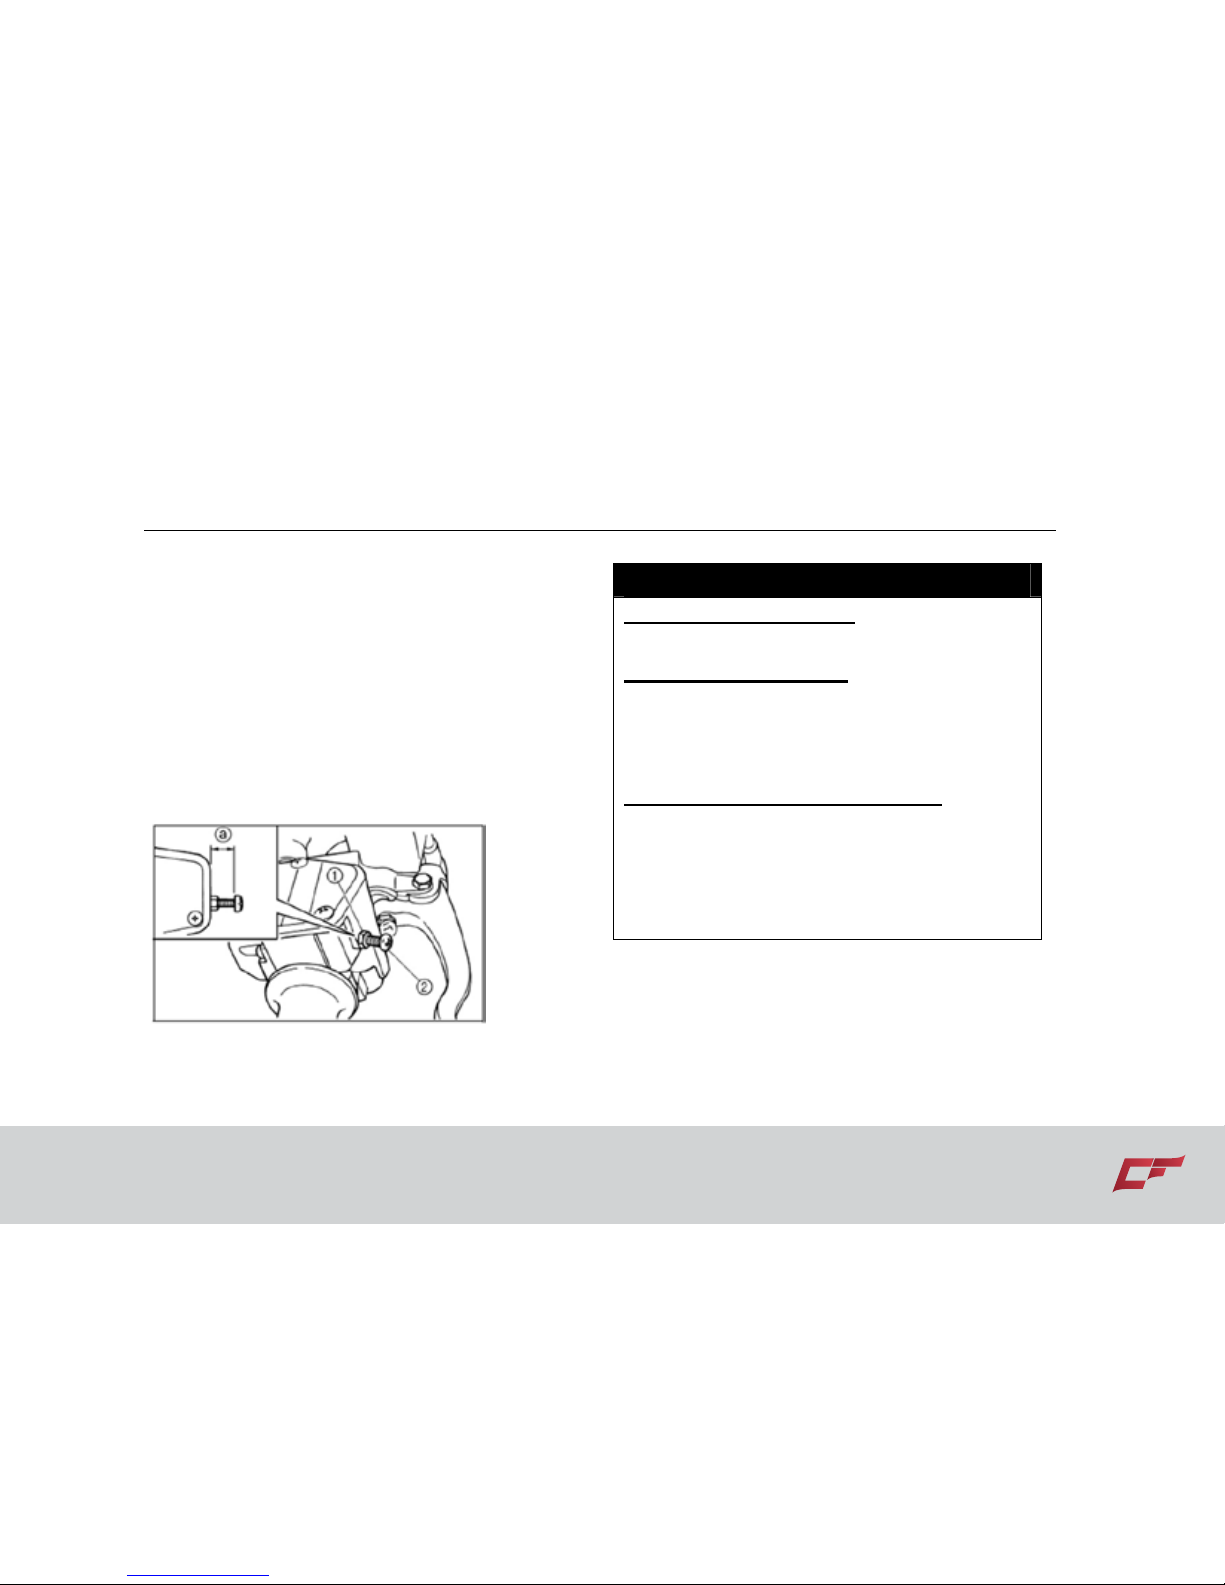
Speed limiter
The speed limiter keeps the throttle from fully
opening even when the throttle lever is
pushed to the maximum. Turn the adjusting
screw to limit the maximum engine power
available and decrease the maximum speed
of the ATV.
When finish the speed adjustment, you must
tighten the locknut.
1. Locknut 2. Adjusting screw
a. No more than 12 mm
WARNING
POTENTIAL HAZARD
Improper adjustment of the speed limiter
WHAT CAN HAPPEN
The throttle cable could get damaged.
The ATV may go out of control. The operator
may have an accident and/or be injured.
HOW TO AVOID THE HAZARD
Do not turn the adjusting screw out more than
12 mm (0.47 in). Always make sure that the
throttle lever free play is adjusted to 3-5 mm
(0.12-0.20 in).
Foot brake pedal – all wheel brakes
The foot pedal is located on the right side of
the ATV just above the floor pan. Pushing
Page 40
Control Functions 4-15
down the pedal will stop the ATV. This brake
pedal controls the entire brake system. It
applies brakes to all the wheels.
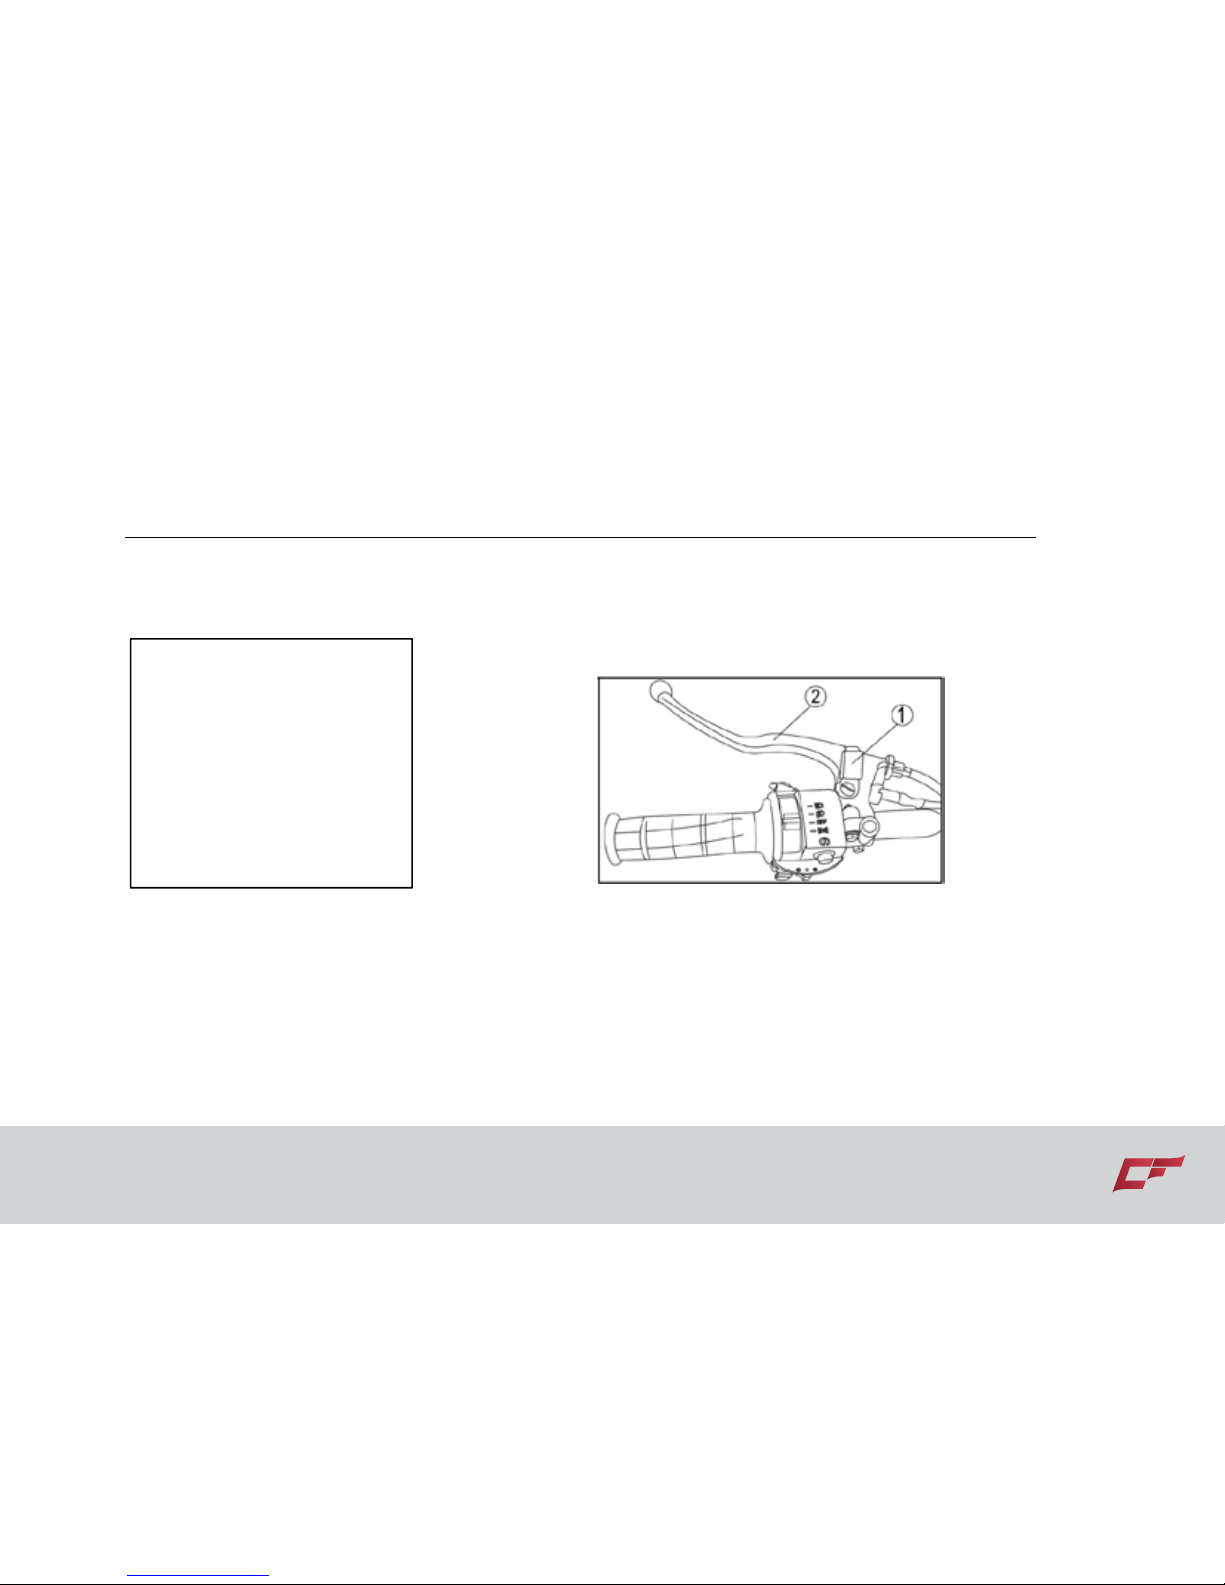
1. Foot brake pedal
Parking brake – Park position lever
The parking brake lever is located on the left
handlebar. Holding the lever thoroughly tight
will stop the ATV. Holding the lever down can
maintain the ATV brake in the on position,
which will also activate the park position
indicator on the display. If necessary, the
brake can be used as emergency brake.
1. Parking latch (if equipped) 2. Parking handlebar
Page 41

4-16 Control Functions
Gear shift lever
The gear shift lever is used to shift your ATV
into the forward(F),neutral (N) and the reverse
(R) positions. (See P6-3,—P6-5)
[1] Drive select lever
Fuel tank cap
The fuel tank cap is located on the middle
side of the ATV. Remove the fuel tank cap by
turning it counterclockwise.
[1].fuel tank cap
Page 42

Control Functions 4-17
SEAT
1. To remove the seat, pull the seat lock lever
upward and pull up the seat at the rear.
[1]. Seat [2]. Seat lock buckle
CAUTION:
To install the seat, insert the projections on
the front of the seat into the seat holders and
push down on the rear of the seat.
Make sure that the seat fits securely.
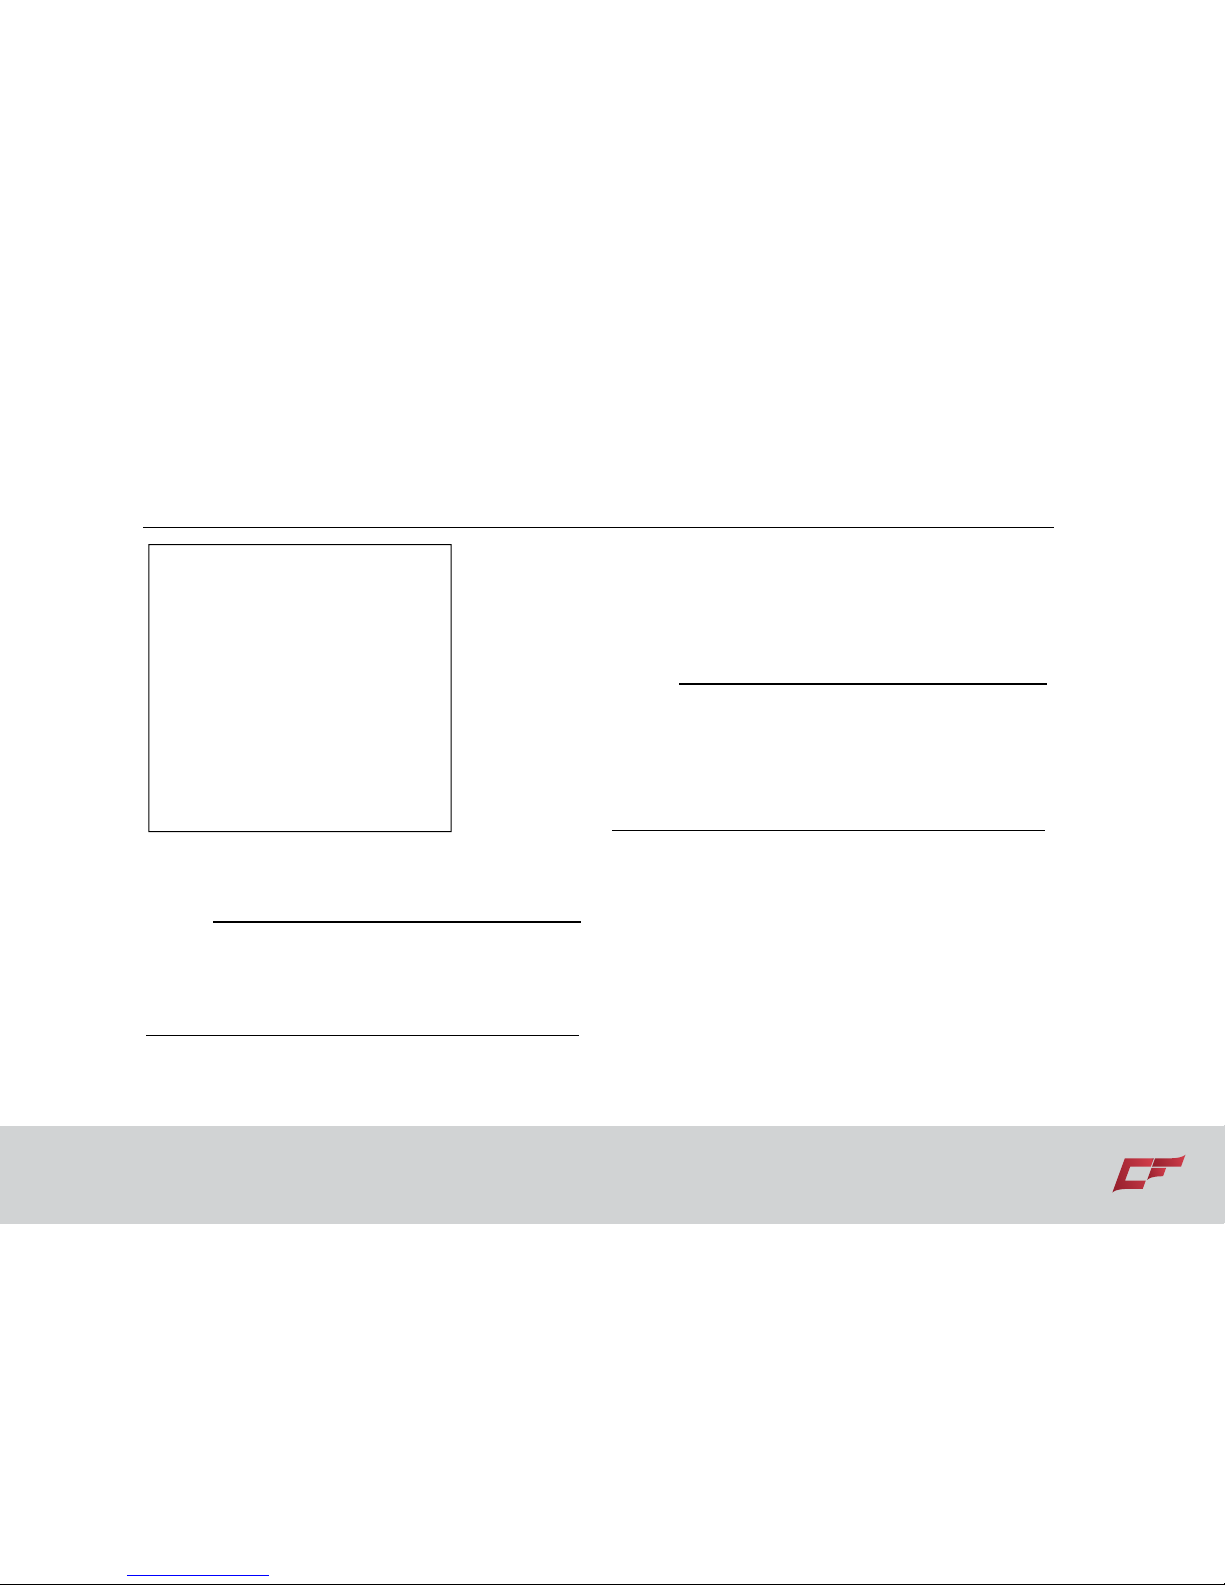
Front & Rear Carrier
Maximum load limit of front carrier: 20kg
Maximum load limit of rear carrier: 35kg
[1]. Front Carrier
Page 43
4-18 Control Functions
[1]. Rear Carrier
NOTE:
Goods must be tied securely and placed in
the middle of the luggage carrier. Otherwise,
the ATV may be out of balance, and effect
the driver's control of the ATV.
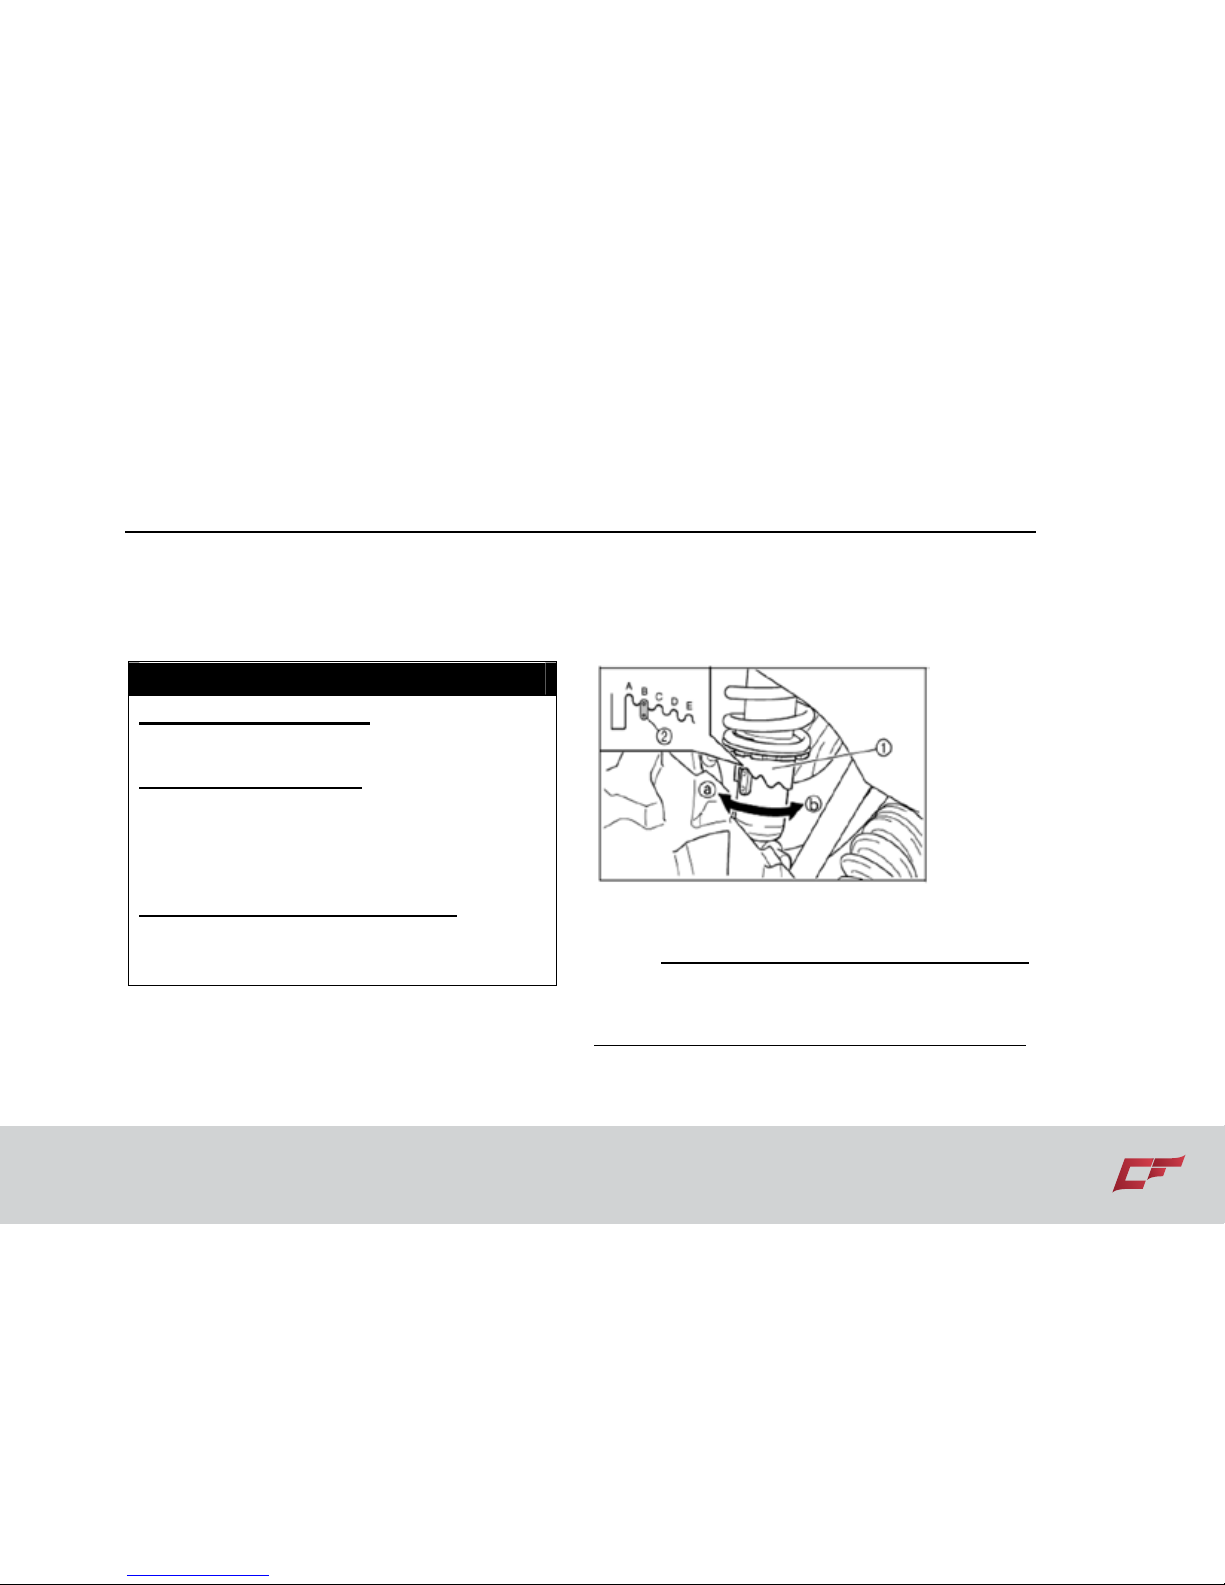
Front/rear shock absorber adjustment
The spring preload can be adjusted to match
the rider’s weight and riding conditions.
NOTE:
When adjusting the rear shock absorbers, the
rear wheels may need to be removed. (See
pages 8-35—8-37 for removal and installation
procedures.)
Spring Adjustment Principles:
When there is only a driver riding on a flat
road, adjust the shock absorber to be a little
softer.
Driving at higher speeds or on flat roads,
adjust the shock absorber to be a little stiffer.
For off-road, adjust the shock absorber to be
Page 44
Control Functions 4-19
fairly stiff.
At full load, adjust the shock absorber to be
the stiffest it could go.
WARNING
POTENTIAL HAZARD
Improper shock absorber adjustment.
WHAT CAN HAPPEN
Uneven adjustment can cause poor handling
and loss of stability, which could lead to an
accident.
HOW TO AVOID THE HAZARD
Always adjust the shock absorbers on the left
and right side to the same setting.
Adjust the spring as follows:
To increase the spring preload, turn the
adjusting ring counter-clockwise (direction a).
To decrease the spring preload turn the
adjusting ring clockwise (direction b).
1. Spring preload adjusting ring 2. Position indicator
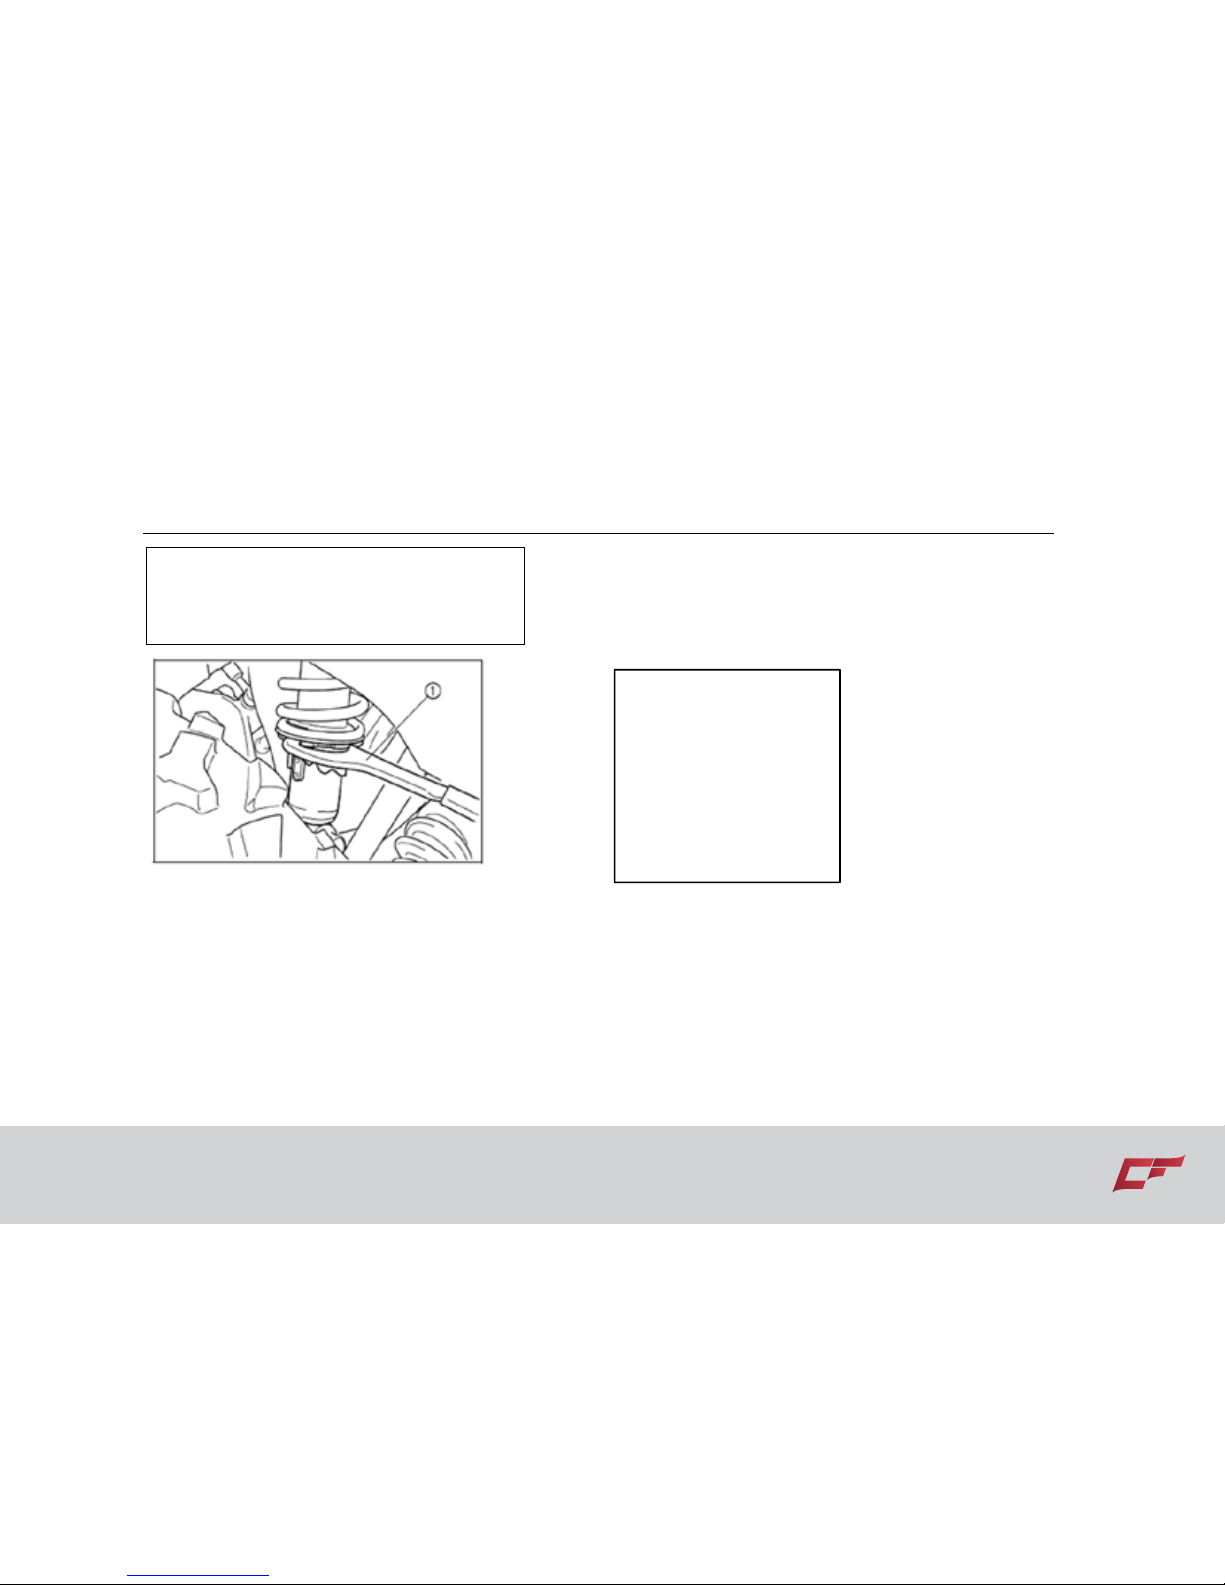
NOTE:
A special wrench can be obtained at a dealer
to make these adjustments.
Page 45
4-20 Control Functions
B- Standard position
A- Minimum (soft)
E- Maximum (hard)
1. Special wrench
DC socket
The DC socket is located at the front right side
of the ATV aside the ignition switch.
The DC socket can be used for work lights,
radios, etc.
The DC socket can provide 8.5A/12V DC
current for approximately 1 hour.
The DC socket should only be used when the
engine is running.
[1]. DC socket
How to use the DC socket
1. Set the light switch to “OFF” turning off all
the lights.
2. Start the engine, (See pages 6-1—6-2.)
Page 46
Control Functions 4-21
3. Open the DC socket cap, and then insert
the accessory power plug into the jack.
4. When the DC socket is not being used,
cover it with the cap.
[1]. DC socket
Maximum rated capacity for the DC
socket
DC 12V, 120W(10A)
CAUTION:
Do not use accessories requiring move
than the above maximum capacity. This
may overload the circuit and cause fuses
to blow.
If accessories are used without the
engine running or with the headlights
turned on, the battery will lose its charge
and starting the engine may become
difficult.
Do not use an automotive cigarette
lighter or other accessories with a plug
that gets hot because the socket may be
damaged.
Page 47

4-22 Control Functions
Steering Lock
This vehicle is equipped with steering lock,
which can guard against theft while parking.
[1]. Steering lock [2]. Steering stem
Page 48
Pre Operation Check List 5-1
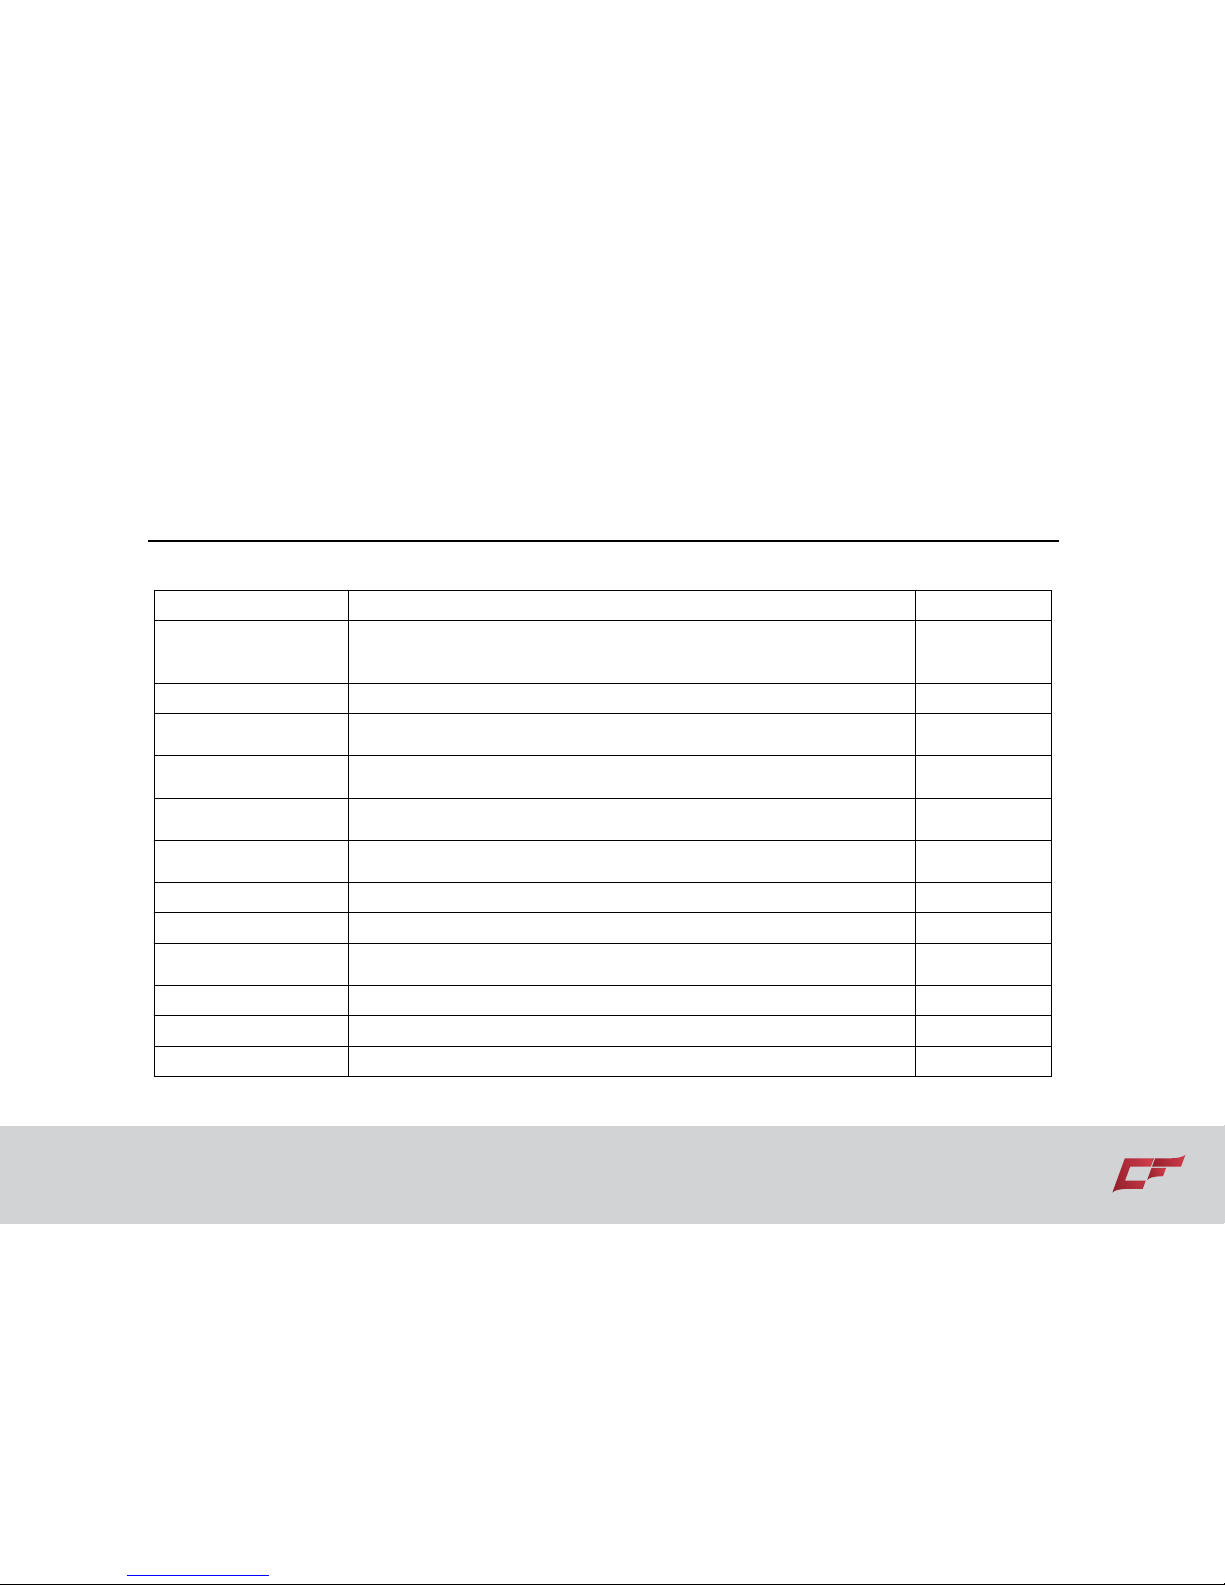
Before using this ATV, check the following points:
ITEM ROUTINE PAGE
Brakes
● Check the operation, free play, fluid levels and look for any fluid leaks.
● Add DOT 4 brake fluid if necessary.
● Check to see if the disc brake rotor and the brake pads are worn beyond limits.
P5-3, P5-4
P8-28
Parking Brake ● Check to see if the parking brake functions normally. P6-6-P6-7
Fuel
● Check the fuel level.
● Fill with fuel if necessary.
P5-4-P5-5
Engine oil
● Check the oil level.
● Fill with oil if necessary.
P5-6
Coolant reservoir
● Check the coolant level in the reservoir.
● Fill with coolant if necessary.
P5-7-P5-8
Front & Rear Differential
● Check for any leaks.
● Check the oil level, fill with oil if necessary.
P5-7
Throttle ● Check the throttle cable operation and free play. P4-13
Wheels and tires ● Check the tire pressure, wear and look for any damage. P5-10-P5-12
Idle
● Check to see if the idle speed is normal.
● Take it to a dealer for adjustment if necessary.
P5-9
Ignition Switch ● Ensure that the ignition switch turns off the engine. P5-9
Fittings and fasteners ● Check all fittings and fasteners. P5-9
Lights and switches ● Check for the proper operation of the switches and that the light all work. P5-9
Page 49
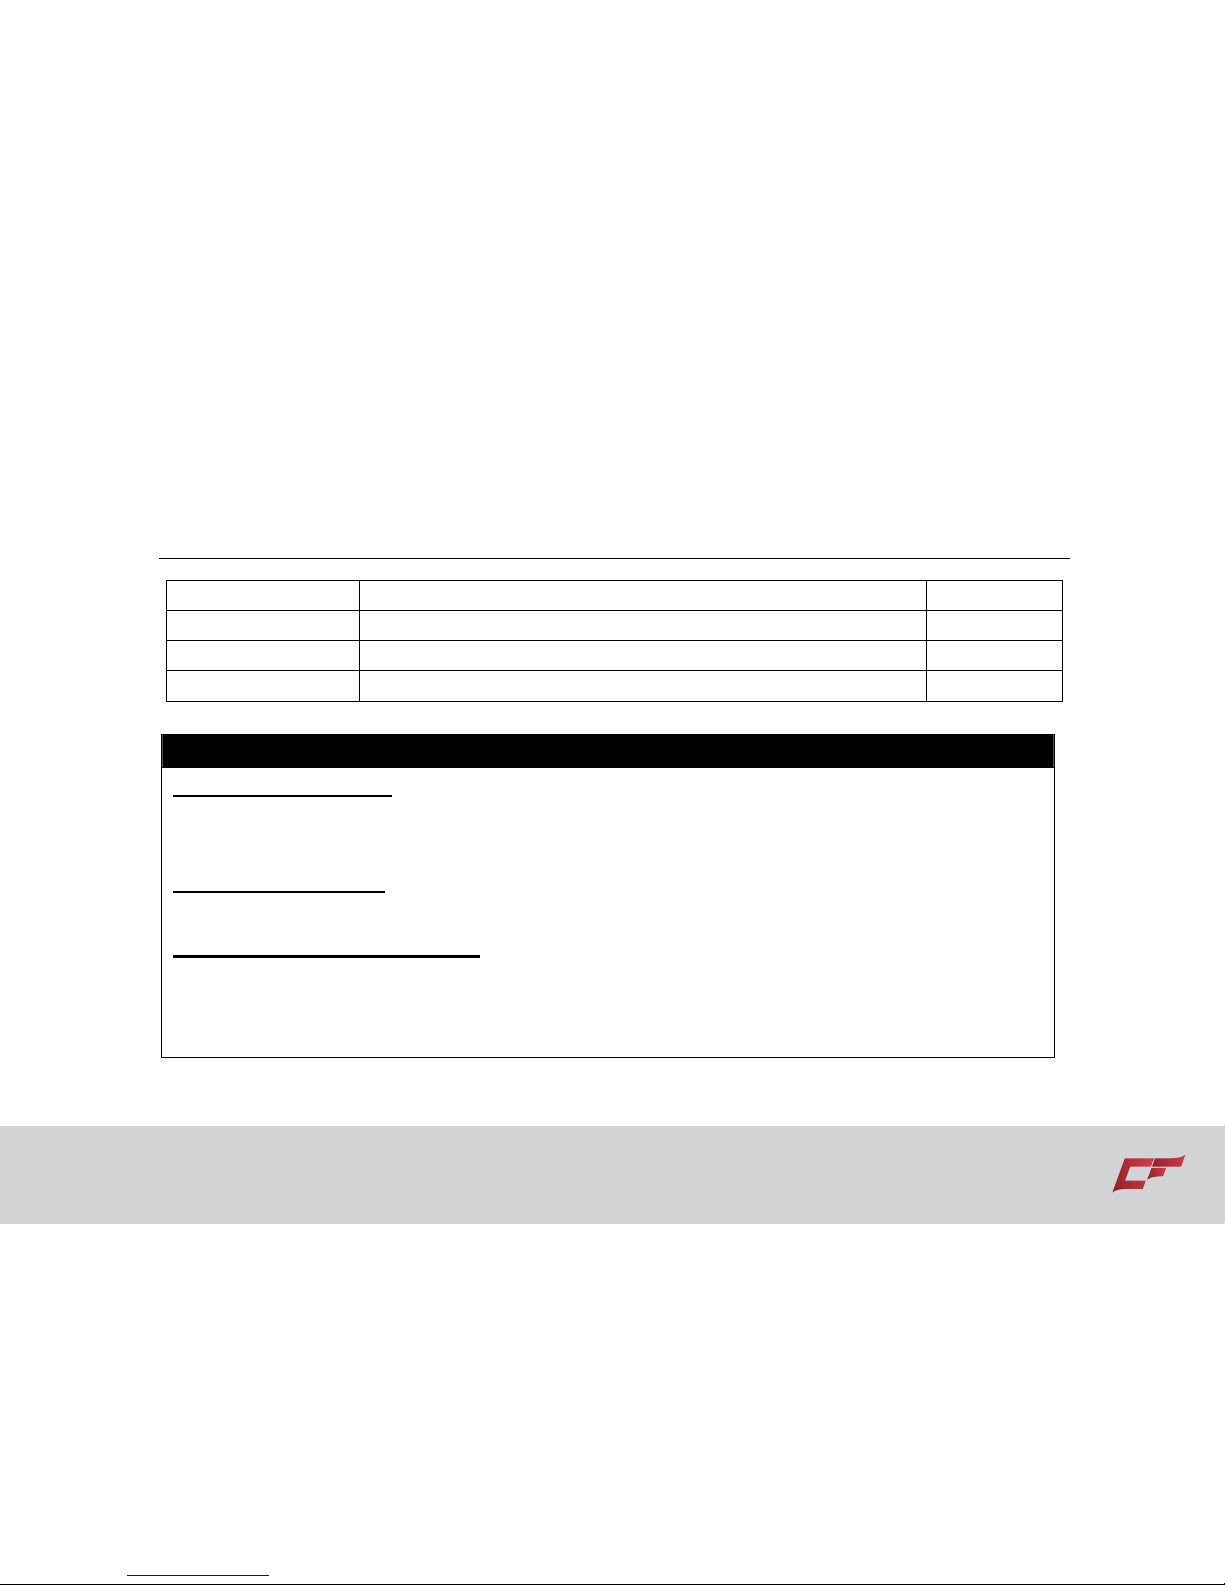
5-2 Pre Operation Check List
Axle boots ● Check each boot for tears or leaks. P8-19
Instrument Panel ● Check and be sure all the instrument indicators are working properly. P4-3
Warning Lights ● Check and be sure all the warning lights function normally on the panel. P4-2
EFI System ● Check for any fault codes on the panel; repair the EFI system if necessary. P8-5
WARNING
POTENTIAL HAZARD
Failure to inspect the ATV before operating.
Failure to properly maintain the ATV.
WHAT CAN HAPPEN
This increases the possibility of an accident or equipment damage.
HOW TO AVOID THE HAZARD
Always inspect your ATV each time you use it to make sure the ATV is in safe operating condition.
Always follow the inspection and maintenance procedures and schedules described in this
Owner’s Manual.
Page 50

Pre Operation Check List 5-3
Brake System
Brake levers and brake pedal
Check whether there is free travel in the front
brake lever, if not, adjust it.
Check whether there is free travel in the
brake pedal, if not, adjust it. (See pages
P8-31.)
Check the brake pedal height. If the pedal
height is incorrect, have a dealer adjust it.
Check the operation of the brake levers and
pedal. They should move smoothly and there
should be a firm feeling when the brakes are
applied. If they catch or feel spongy have a
dealer inspect the brake system.
Brake Pads
Check the brake pads for wear or damage
and check they are within limits. (See pages
P8-31)
Disc Brake Rotor
Check the disc brake rotors, which should be
within limits. (See pages P8-42-P8-43)
Brake fluid level
Check the brake fluid level. Add fluid if
necessary. (See page P8-32-P33.)
Recommended brake fluid: DOT 4
Brake fluid leaks
Check to see if any brake fluid is leaking out
of the lines, connections or brake fluid
reservoirs. Apply the brakes firmly for one
minute. If the lever moves slowly inward,
there may be a leak in the brake system. If
there are any leaks, the brake system should
be inspected by a dealer.
Page 51
5-4 Pre Operation Check List
Brake operation
Test the brakes at slow speeds after starting
and make sure they are working properly. If
the brakes are not good, inspect the brake
pads and rotors for wear.
WARNING
POTENTIAL HAZARD
Riding with improperly operating brakes.
WHAT CAN HAPPEN
You could lose brake ability, which could lead
to an accident.
HOW TO AVOID THE HAZARD
Always check the brakes at the start of each
ride. Do not ride the ATV if you find any
problems with the brakes. If a problem cannot
be corrected by the adjustment procedures
provided in this manual, have a dealer check
for the cause.
Fuel
Make sure there is sufficient gasoline in the
tank.
Recommended fuel:
UNLEADED GASOLINE ONLY
Fuel tank capacity:
Total: 10 L (2.2 lmp gal, 2.64 US gal)
CAUTION:
Use unleaded gasoline only. The use of
leaded gasoline will cause severe damage to
internal engine parts, such as the valves and
piston rings, as well as to the exhaust
system.
Page 52
Pre Operation Check List 5-5
Your engine has been designed to use
regular unleaded gasoline with a pump
octane number ([R+M]/2) of 86 or higher, or
research octane number of 91 or higher. If
knocking or pinging occurs, use a different
brand of gasoline or premium unleaded fuel.
Unleaded fuel will give the spark plug longer
lifetime and reduce maintenance cost.
Gasohol
This ATV is equipped with an EFI system,
which ensures this ATV can attain the EPA
and EEC standards. The EFI parameters are
set based on the use of standard unleaded
gasoline. Mixing gasohol or gasoline with oil
could reduce engine performance and
emissions will be worse.
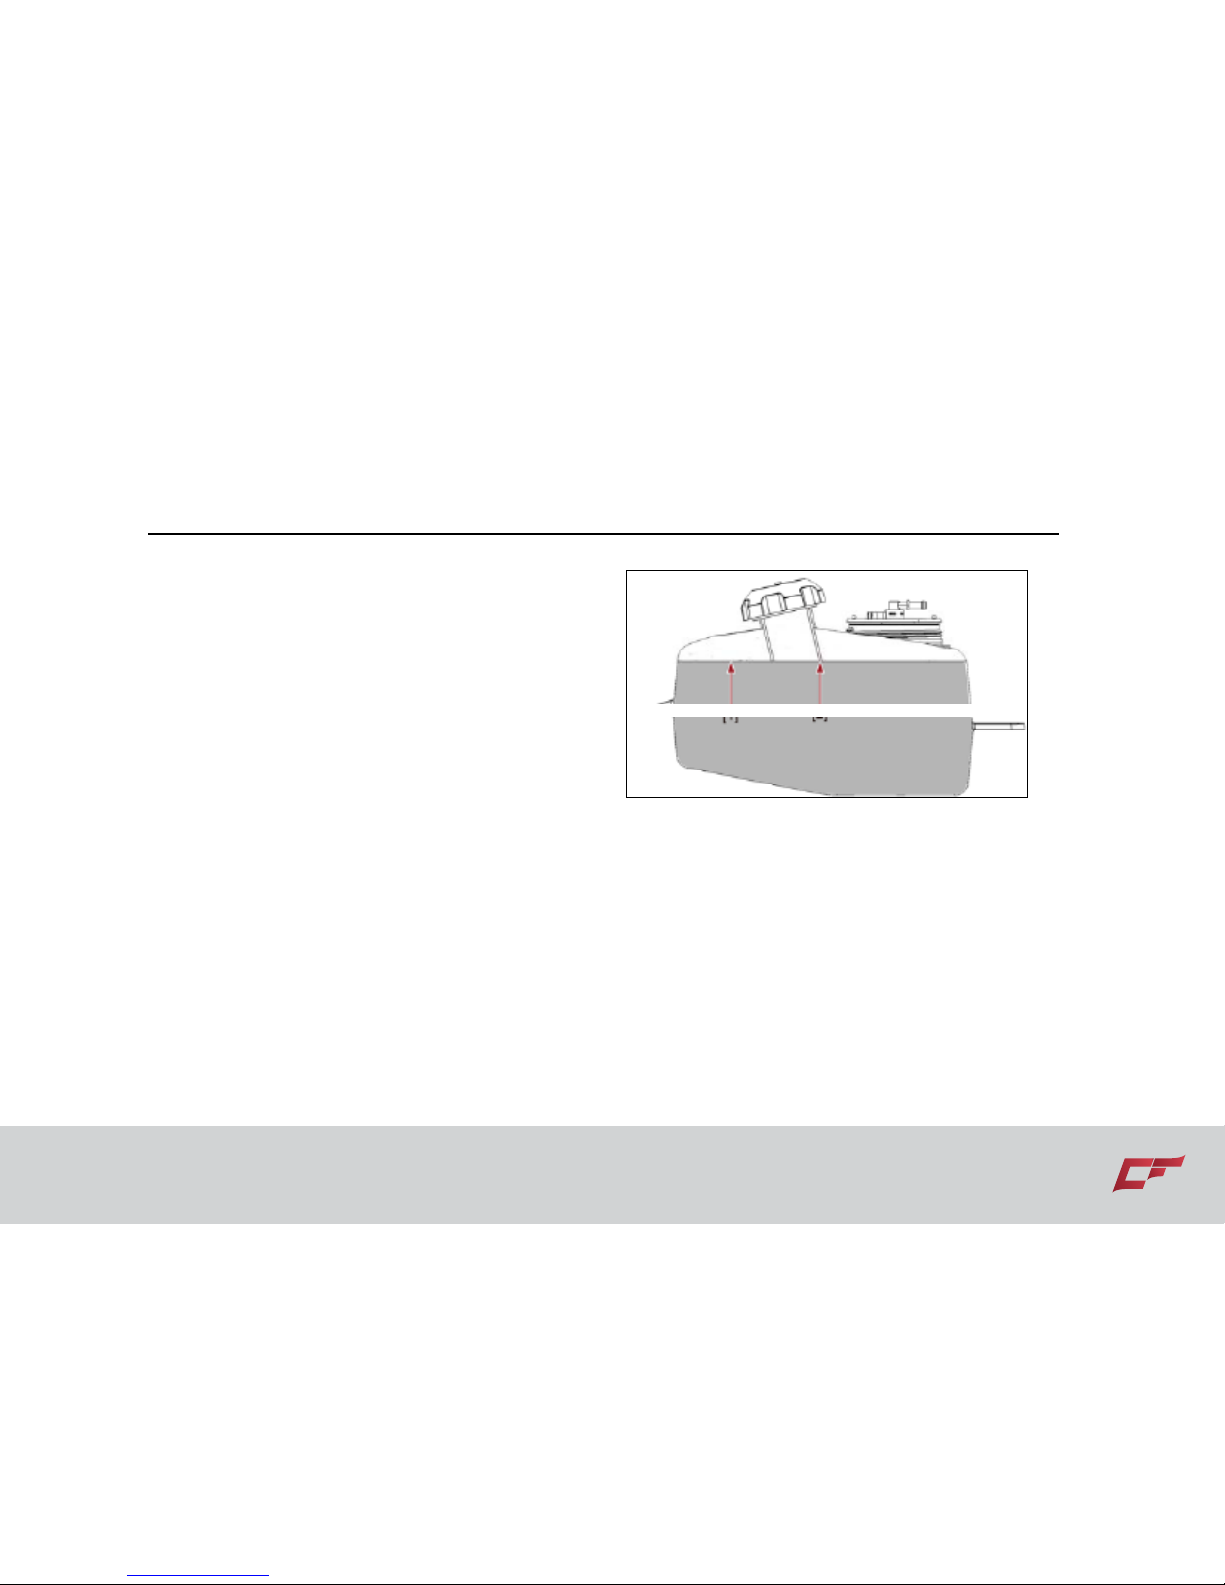
[1]. Fuel level [2]. Fuel tank filler tube
Page 53
5-6 Pre Operation Check List
WARNING
POTENTIAL HAZARD
Improper care when refueling.
WHAT CAN HAPPEN
Fuel can spill, which can cause a fire and
severe injury.
Fuel expands when it heats up. If the fuel tank
is overfilled, fuel could be forced out due to
heat from the engine or the sun.
HOW TO AVOID THE HAZARD
Do not overfill the fuel tank. Be careful not to
spill fuel, especially on the engine or exhaust
pipe. Wipe up any spilled fuel immediately. Be
sure the fuel tank cap is closed securely.
Do not refuel right after the engine has been
running and it is still very hot.
Engine oil
Make sure the engine oil is at the specified
level. Add oil as necessary. (See page 8-8—
8-13.)
CAUTION:
In order to prevent clutch slip (since the
engine oil also lubricates the clutch), do
not mix any chemical additives. Do not
use oils with a diesel specification of
“CD” or oils of a higher quality than
specified. In addition, do not use oils
labeled “ENERGY CONSERVING II” or
higher.
Make sure that no foreign material enters
the crankcase when checking oil levels.
Page 54
Pre Operation Check List 5-7
Recommended engine oil type and
quantity:
See page 10-2
Differential gear oil
Make sure that the differential gear oil is at
the specified level. Add oil as necessary.
(See pages 8-14.)
Recommended oil:
SAE 90 API GL-5 Hypoid gear oil
NOTE:
GL-5 is a quality and additive rating, GL-6
rated hypoid gear oils may also be used.
Coolant
Use the specialized antifreeze engine
coolant.
Check the coolant level in the coolant
reservoir when the engine is cold. (The
coolant level will vary with engine
temperature.) The coolant level is suitable if it
is between the minimum and maximum level
marks on the coolant reservoir. If the coolant
level is at or below the minimum level mark,
add distilled water to bring the level up to
maximum level mark. Change the coolant
every two years. (See pages 8-17—8-20.)
Page 55
5-8 Pre Operation Check List
CAUTION:
Hard water or salt water is harmful to the
engine. You may use soft water if you can not
get distilled water. However, find antifreeze
coolant and replace the soft water as soon as
possible. Make sure to discharge all the soft
water, while adding antifreeze coolant.
Coolant reservoir capacity
(up to the maximum level mark):
0.627 L (0.555 Imp qt, 0.663 US qt)
WARNING
POTENTIAL HAZARD
Removing the radiator cap while the engine
and radiator are still hot.
WHAT CAN HAPPEN
You could be burned by hot fluid and steam
blown out under pressure.
HOW TO AVOID THE HAZARD
Wait for the engine to cool before removing
the radiator cap. Always use a thick rag over
the cap. Allow any remaining pressure to
escape before completely removing the cap.
Page 56

Pre Operation Check List 5-9
Throttle lever
Check to see that the throttle lever operates
correctly. It must open smoothly and go back
to the idle status when released. Have a
dealer repair as necessary for proper
operation.
Fittings and fasteners
Always check the tightness of chassis fittings
and fasteners before riding. Take the ATV to
a dealer or refer to the Service Manual for
correct tightening torque specifications.
Lights
Check the headlights and tail/brake lights to
make sure they are in working condition.
Repair as necessary for proper operation.
Switches
Check the operation of all switches. Have a
dealer repair as necessary for proper
operation.
Idling
High idle speed may cause engine damage.
A damage throttle cable or an ECU failure
may result in high idle speed.
As this ATV has an EFI system, idle speed
adjustment must be done via a special
computer, which can modify the ECU
program. Check with a dealer if necessary.
NOTE:
The EFI system ECU takes about 1 minute
for self diagnostics every time, when the
ignition is turned on. Check idle speed after 1
minute.
Ignition and Emergency Switches:
Ensure that the ignition and emergency
switch can both turn off the engine.
Page 57
5-10 Pre Operation Check List
Tire
WARNING
POTENTIAL HAZARD
Operating this ATV with improper tires, or
with improper or uneven tire pressure.
WHAT CAN HAPPEN
Use of improper tires on this ATV, or operation
of this ATV with improper or un-even tire
pressure, may cause loss of control,
increasing your risk of accident.
1. The tires listed below have been approved.
Type Size
Front
25×8-12
6PR
Rear
25×10-12
6PR
2.The tires should be inflated to the
recommended pressure:
Recommended tire pressures
Front 69 kPa (0.70kgf/cm
2
, 10 psi)
Rear 69 kPa (0.70kgf/cm
2
, 10 psi)
Check and adjust the tire pressures when the
tires are cold.
Tire pressures must be equal on both sides.
3. Tire pressure below the minimum specified
could cause the tire dropping off from the rim
under severe riding conditions.
The following are minimums:
Front 62 kPa (0.62 kgf/cm
2
, 9 psi)
Rear 62 kPa (0.62 kgf/cm
2
, 9 psi)
4. Use no more than the following pressures
when seating the tire beads.
Front 250 kPa (2.5 kgf/cm
2
, 36 psi)
Rear 250 kPa (2.5 kgf/cm
2
, 36 psi)
Page 58
Pre Operation Check List 5-11
Higher pressures may cause the tire to burst.
Inflate the tires very slowly and carefully.
Rapid inflation could cause the tire to burst.
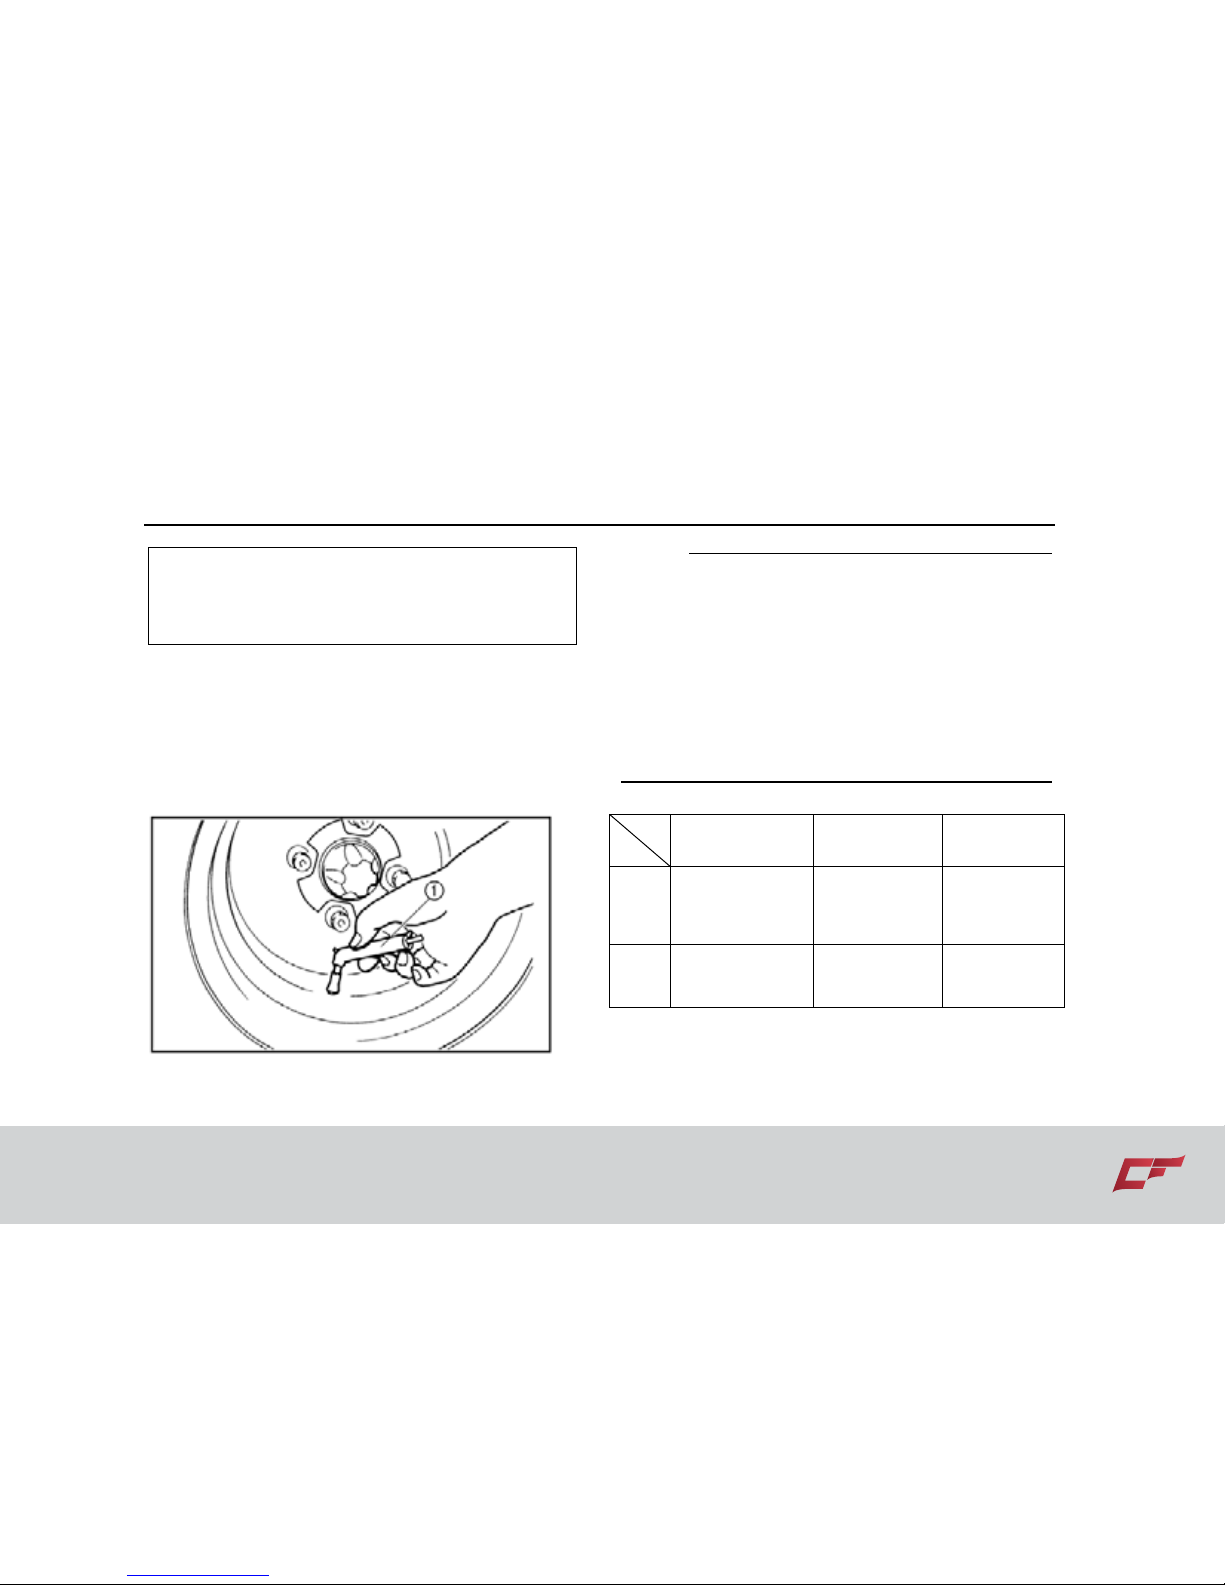
How to measure tire pressure
Use the low-pressure tire gauge, which can
be found in the ATV tool kit package.
1. Low-pressure tire gauge
NOTE:
The low-pressure tire gauge is included as a
standard equipment. Make two
measurements of the tire pressure and use
the second reading. Dust or dirt in the gauge
could cause the first reading to be incorrect.
Set pressure with the tire cold.
Set tire pressures to the following
specifications:
Recommended
pressure
Minimum Maximum
Front
69 kpa
(0.70kpf/cm2,
10 psi)
62 kpa
(0.63kpf/cm2,
9 psi)
76 kpa
(0.76kgf/cm2,
11 ps i )
Rear
69 kpa
(0.70kpf/cm2,
10 psi)
62 kpa
(0.63kpf/cm2,
9 psi)
76 kpa
(0.76kgf/cm2,
11 ps i )
Page 59
5-12 Pre Operation Check List
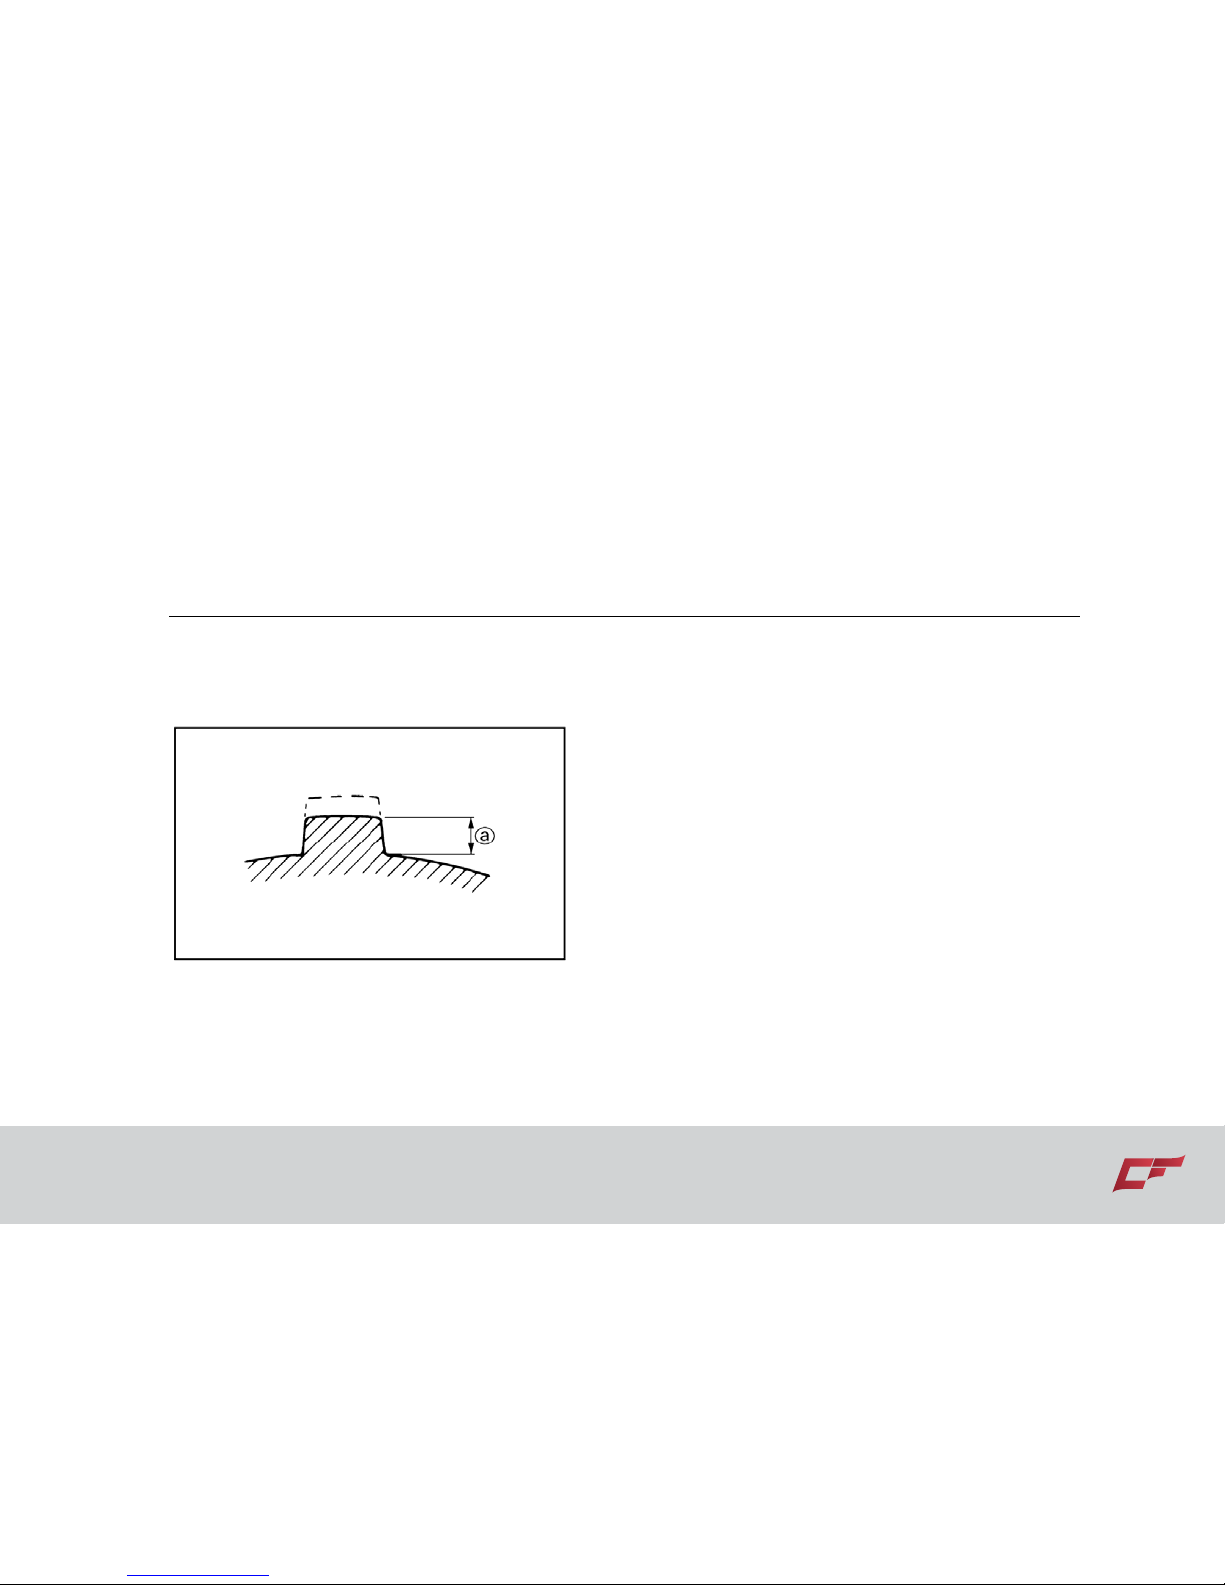
Tire wear limit
When the tire tread height decreases to 3
mm (0.12 in) due to wear, replace the tire.
a. Tire wear limit
Page 60
Operation 6-1
WARNING
POTENTIAL HAZARD
Operating an ATV without being familiar with
all controls.
WHAT CAN HAPPEN
Loss of control, which could cause an
accident or injury.
HOW TO AVOID THE HAZARD
Read the Owner’s Manual carefully. If there is
a control or function you do not understand,
ask your dealer.
Starting a cold engine
WARNING
POTENTIAL HAZARD
Freezing control cables in cold weather.
WHAT CAN HAPPEN
You could be unable to control the ATV, which
could lead to an accident or collision.
HOW TO AVOID THE HAZARD
When riding in cold weather, always make
sure all control cables work smoothly before
you begin riding.
Starting Procedure:
1. Apply the foot brake pedal.
2. Turn the ignition switch to “ON”.
3. Place the gear shift to “N”position.
4. Turn the engine stop switch to “
”.
Page 61

6-2 Operation
5. Press the “Start” button, then the engine
starts.
NOTE:
When the gear shift is in the Neutral (N)
position, see if the “N” indicator on the
display is on. If not, check circuits on the
ATV.
CAUTION:
Read the “Engine break-in” section prior
to operating the engine for the first time.
Starting a warm engine
To start a warm engine, refer to the
“Starting a cold engine” section. The
throttle should be opened slightly.
Warming the engine
To achieve the maximum service life of
engine, always warm up the engine before
starting .
Never accelerate hard with a cold engine!
To make sure the engine is warm, start with
one third throttle for the first 3km drive; or
let the engine warm for 3 minutes at 2000
rpm.
Engine shut down
Press the emergency shut off button in,
then the engine will shut down.
Or turn the ignition key to “OFF”, which will
turn off the engine as well.
NOTE
When you turn off the ignition switch there
is a three minute run time for the fan to
continue to cool and prevent the coolant
Page 62
Operation 6-3
from boiling. Then the fan automatically
shuts off.
Drive Select Lever Operation and
Reverse Driving
CAUTION:
Before shifting, you must stop the ATV,
release the throttle lever, otherwise the
transmission may be damaged.
Shifting:
Neutral to High and High to Low
1. Bring the ATV to a complete stop and
release the throttle lever to let the engine
idle at 1400 rpm.
2. Once the engine idle is below 1400 rpm,
apply the brakes, shift the gear in place
with the left button pressed in.
3. Apply the throttle lever gradually.
NOTE:
Make sure that the gear shift lever is
completely placed into position.
[1].Drive Select Lever
Page 63
6-4 Operation
Neutral to Reverse
NOTE:
The gear shift lever cannot be shifted
between any of the gears without first
pressing in the button on the left side of the
gear shift handle.
1. Bring the ATV to a complete stop and
release the throttle lever to let the
engine idle at 1400 rpm.
2. Once the engine idle is below 1400 rpm,
apply the brakes, shift the gear in place
with the left button pressed in.
3. Shift from neutral to reverse or
backtrack by moving the gear shift lever
into place.
[1].Drive Select Lever
NOTE:
When in reverse, the reverse indicator on
the display panel should be on. If the light
does not come on, have a dealer inspect
the electrical circuits.
Due to the synchronizing mechanism in the
engine, the indicator may not come on until
the ATV starts moving
Page 64
Operation 6-5
4. Check the behind for people or
obstacles, and then release the brake
pedal.
5. Apply the throttle lever gradually and
keep checking the behind while backing.
WARNING
POTENTIAL HAZARD
Improperly operating in reverse.
WHAT CAN HAPPEN
You could hit an obstacle or person behind
you, resulting in serious injury.
HOW TO AVOID THE HAZARD
When you shift into reverse, make sure there
are no obstacles or people behind you. When
it is safe to proceed, go slowly.
BRAKING
An ATV performs differently according to the
load and the road conditions. When
braking,
pay special attention to the following
points:
1. Leave enough distance for braking.
2. Longer braking distance is needed when
an ATV is operated at a higher speed.
3. Longer braking distance is needed when
the ATV carries heavier loads.
4. Longer braking distance is needed when
driving an ATV on wet roads.
5. Riding an ATV on wet roads at high
speeds, and applying the brakes
abruptly may cause the ATV to go out of
control. So slow down and be cautious
when riding an ATV on wet roads.
Page 65
6-6 Operation
6. Remember that wet brakes will reduce
brake performance. Operate your ATV at
safe speeds and apply the brakes
repeatedly to let friction dry the linings.
Only when the brake performance
returns to normal can the ATV be driven
as usual.
WARNING
POTENTIAL HAZARD
The brakes get wet.
WHAT CAN HAPPEN
The ATV may go out of control because of the
wet brakes. An accidents may occur.
HOW TO AVOID THE HAZARD
1. Check the braking performance. If the
braking function does not return to normal,
the ATV should not be operated.
2. If the brake performance degrades, you
should slow down your ATV and apply the
brakes repeatedly to dry them. Only after the
braking performance returns to normal
should the ATV be driven.
Parking brake
● Stop the ATV using the brake pedal。
● Shut off the ignition switch.
● Operate left brake lever to engage the
parking brake and use the latch to
keep the left lever applied to maintain
the brake status.
Page 66
Operation 6-7
Parking on a slope
WARNING
POTENTIAL HAZARD
Parking on a hill or other incline.
WHAT CAN HAPPEN
The ATV could roll out of control, increasing
the chance of an accident.
HOW TO AVOID THE HAZARD
Avoid parking on hills or other inclines.
If you have to park on an incline, place the
machine transversely across the incline,
apply the parking brake, and block the front
and rear wheels with rocks or other objects.
Do not park the ATV at all on hills that are so
steep you could not walk up them easily.
1. Bring the ATV to a stop by applying the
brakes.
2. Shift the brave select lever into “N”
position.
3. Then turn the ignition switch off.
4. Operate the left brake lever to apply the
brake and use the latch to keep the left
lever applied.
5. Put rocks or wedge-shaped pieces of
wood under the downhill side of the tires
to ensure that the ATV will not slide on
the hillside unexpectedly.
Page 67

6-8 Operation
Vehicle break-in
The brake-in period for your new ATV
vehicle is the first 25 hours of operation, or
the time it takes to use the first three full
tanks of gasoline.
Within the break-in period, be cautious
when riding your ATV. Careful treatment of
the ATV components will result in more
efficient performance and longer life.
CAUTION:
For the first three hours, if you run your
engine at full throttle, the engine may
overheat, which could ruin the oil seals and
other operational components. Never run
your engine at full throttle for the first three
hours.
Only use the types of oil recommended in
this manual. Other types of oil may harm
the engine.
Engine break-in
There is never a more important period in
the life of your ATV than the period
Page 68

Operation 6-9
between zero and 25 hours.
Always read and follow the below
instruction. Since the engine is brand new,
you must not put an excessive load on it for
the first several hours of operation.
During the first 25 hours, various parts in
the engine wear and polish themselves to
the correct operating tolerances.
During this period, full throttle operation or
any condition which might result in
excessive engine heating must be avoided.
Each full throttle acceleration should be
followed with an enough rest of the engine
at lower rpm, so the engine can rid itself of
the temporary heat. If any abnormality is
noticed during this period, consult a dealer.
0-10 hours:
Avoid continuous operation above half
throttle. Allow a cooling down period of five
to ten minutes after each operation. Vary
the ATV speed from time to time. Do not
operate it at one throttle position.
10-25 hours:
Avoid prolonged operation above 3/4
throttle. Rev the ATV freely but do not use
full throttle at any time.
After break-in:
The vehicle can now be operated normally.
Braking system break-in
Applying the brakes 50 times with varying
pedal force. Each of the 50 times brakes
should be applied frequently during the
Page 69

6-10 Operation
operation. The brake system will perform
best after the break-in period.
Aggressive or overly forceful braking when
the brake system is new could harm the
brake pads and rotors.
Modifications
Improper installation of accessories or
modifications on this ATV may result in an
accident. If you plan to modify the vehicle
or drive the ATV with modifications, please
remember the following:
● Never modify this ATV using improper
installations or accessories. All parts and
accessories must be genuine or
equivalent components designed for this
ATV, which should be installed and used
following the instructions. If you have
questions, consult a ATV dealer.
Loading
Cargo or trailer can change the stability
and handling of an ATV. You must use
common sense and good judgment when
carrying cargo or towing a trailer.
Remember the following:
● Never exceed the stated load capacity
for the ATV
MAXIMUM LOADING LIMIT
●Vehicle loading limit (total weight of cargo,
rider, accessories and tongue weight):
230kg (507 lbs)
●Front carrier: 20 kg (44 lbs)
●Rear carrier: 35 kg (70 lbs)
●Trailer hitch:
Pulling load (total weight of trailer and
cargo): 550kgf (1,212 lbf)
Tongue weight (vertical weight on trailer
hitch point):30 kgf (66 lbf)
● Load cargo on the front/rear carriers
closing to the vehicle center gravity.
Page 70
Operation 6-11
Center the cargo from side to side.
● Tie down cargo securely to the carriers.
Make sure that the cargo in the trailer
cannot move around.
● Make sure that the load does not
interfere with the operation or your
driving sight.
● Always ride more slowly than usual with
a load. The more weight you carry, the
slower you should drive. Do not use the
‘H’ range lever whenever you are
carrying heavy loads or towing a trailer.
● Allow more braking distance. A heavier
vehicle takes longer drive to stop.
● Always turn at very slow speeds.
● Avoid hills and rough terrain. Loading
could affect the stability and operation of
the ATV.
WARNING
POTENTIAL HAZARD
Overloading this ATV or carrying or towing
cargo improperly.
WHAT CAN HAPPEN
Will cause changes in vehicle handling which
could lead to an accident.
HOW TO AVOID THE HAZARD
Never exceed the stated load capacity for this
ATV.
Cargo should be properly distributed and
securely attached.
Reduce speed when carrying cargo or when
pulling a trailer. Allow greater distances for
braking.
Always follow the instructions in your
Owner’s Manual for carrying cargo or pulling
a trailer.
Page 71

7-1 Your Vehicle
DRIVING YOUR VEHICLE
This ATV is mainly for utility use, but may
also be used for recreation. This section,
“Riding Your ATV” provides general ATV
riding instructions for recreational riding. The
skills and techniques described in this
section, however, are appropriate for all
types of riding. Only a qualified driver should
operate this ATV. All operators, including
experienced ATV drivers or passengers,
should carefully read and fully understand
this Users Manual, and operate strictly as the
manual states in order to achieve the best
performance and avoid accidents.
Riding an ATV can be very enjoyable.
However, always pay close attention to the
safe operation on pages 2-1—2-6, the begin
warning and caution labels on the ATV.
RIDE WITH CARE AND GOOD
JUDGEMENT
Get training if you are inexperienced.
Beginners should get training from a certified
instructor.
Become familiar with this ATV at slow speeds
first, even if you are an experienced operator.
Do not attempt to operate at maximum
performance until you are totally familiar with
the machine’s handling and performance
characteristics.
Page 72
Your Vehicle 7-2
WARNING
POTENTIAL HAZARD
Operating this ATV without proper instruction.
WHAT CAN HAPPEN
The risk of an accident is greatly increased if
the operator does not know how to operate
the ATV properly in different situations and on
different types of terrain.
Riding your ATV requires skills acquired
through practice over a period of time.
Take the time to learn the basic techniques
well before attempting more difficult
maneuvers.
Not recommended for children under 16
years of age.
WARNING
POTENTIAL HAZARD
Failure to follow the age recommendations for
this ATV.
WHAT CAN HAPPEN
Use by children of ATVs that are not
recommended for their age can lead to severe
injury or death of the child.
HOW TO AVOID THE HAZARD
A child under 16 should never operate an ATV
with engine size greater than 90cc.
Page 73
7-3 Your Vehicle
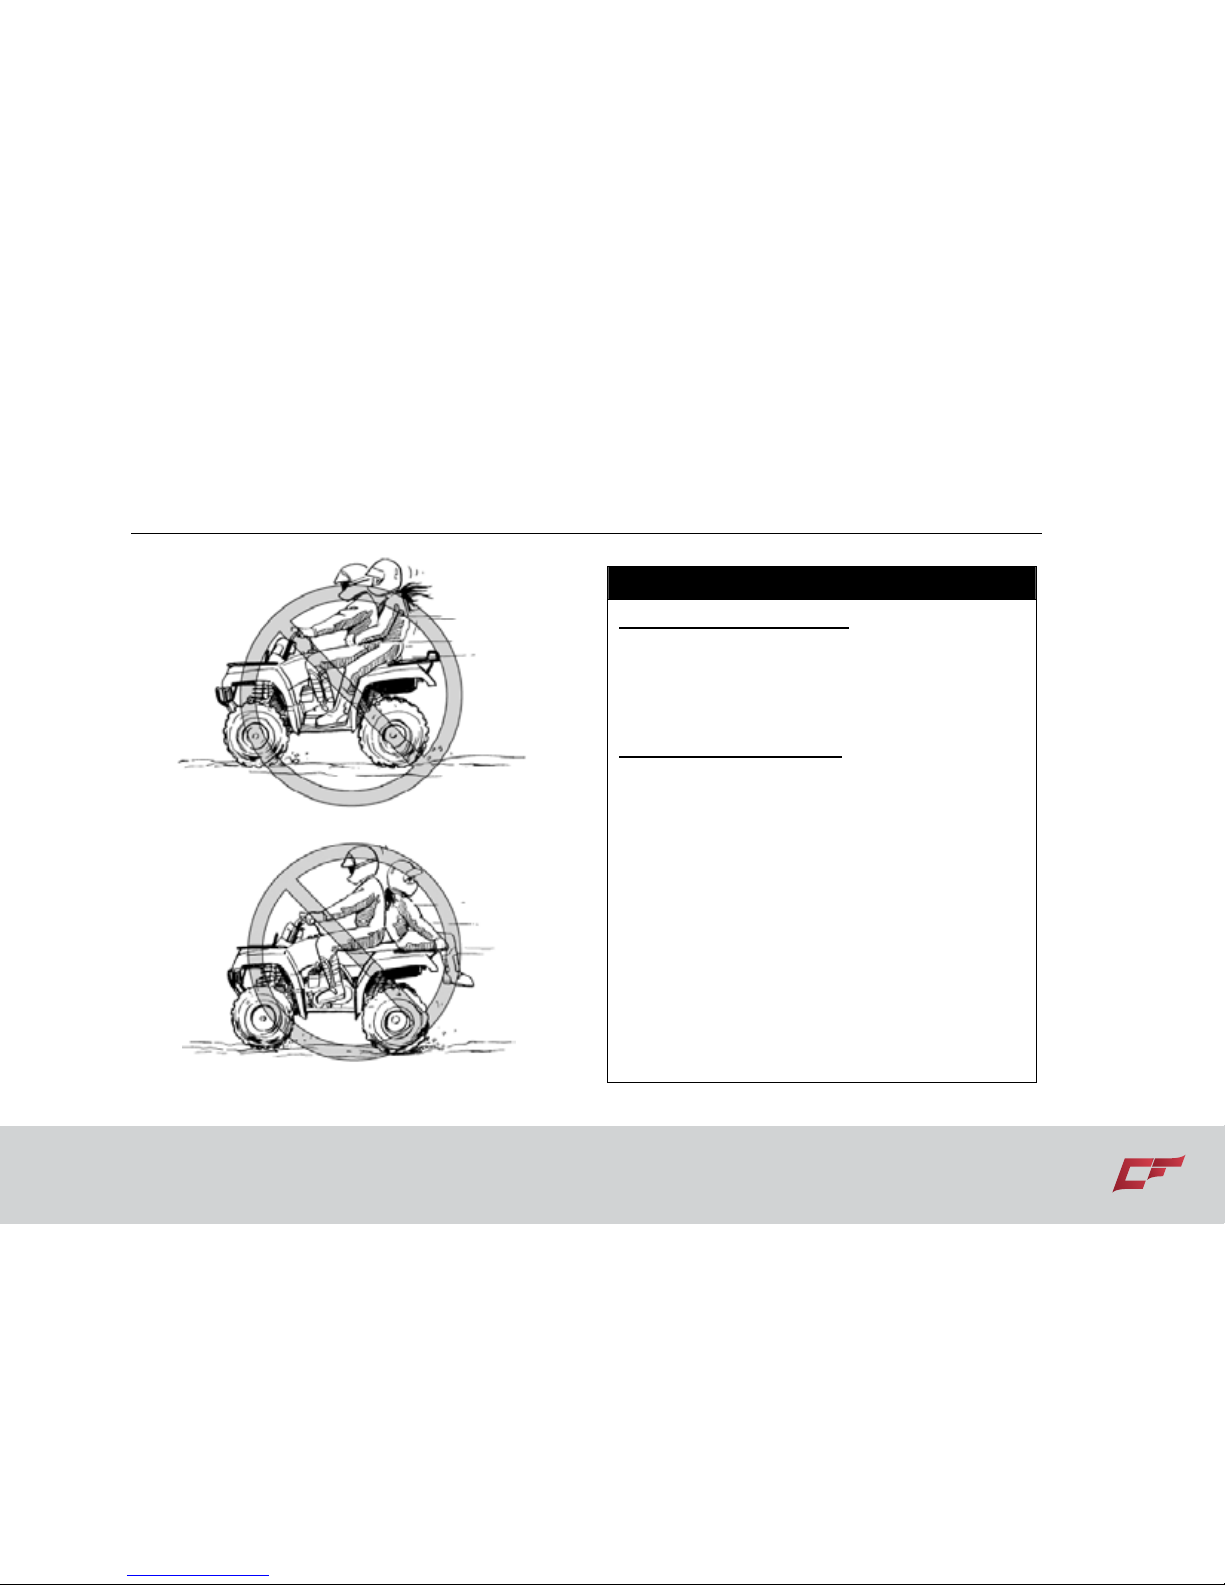
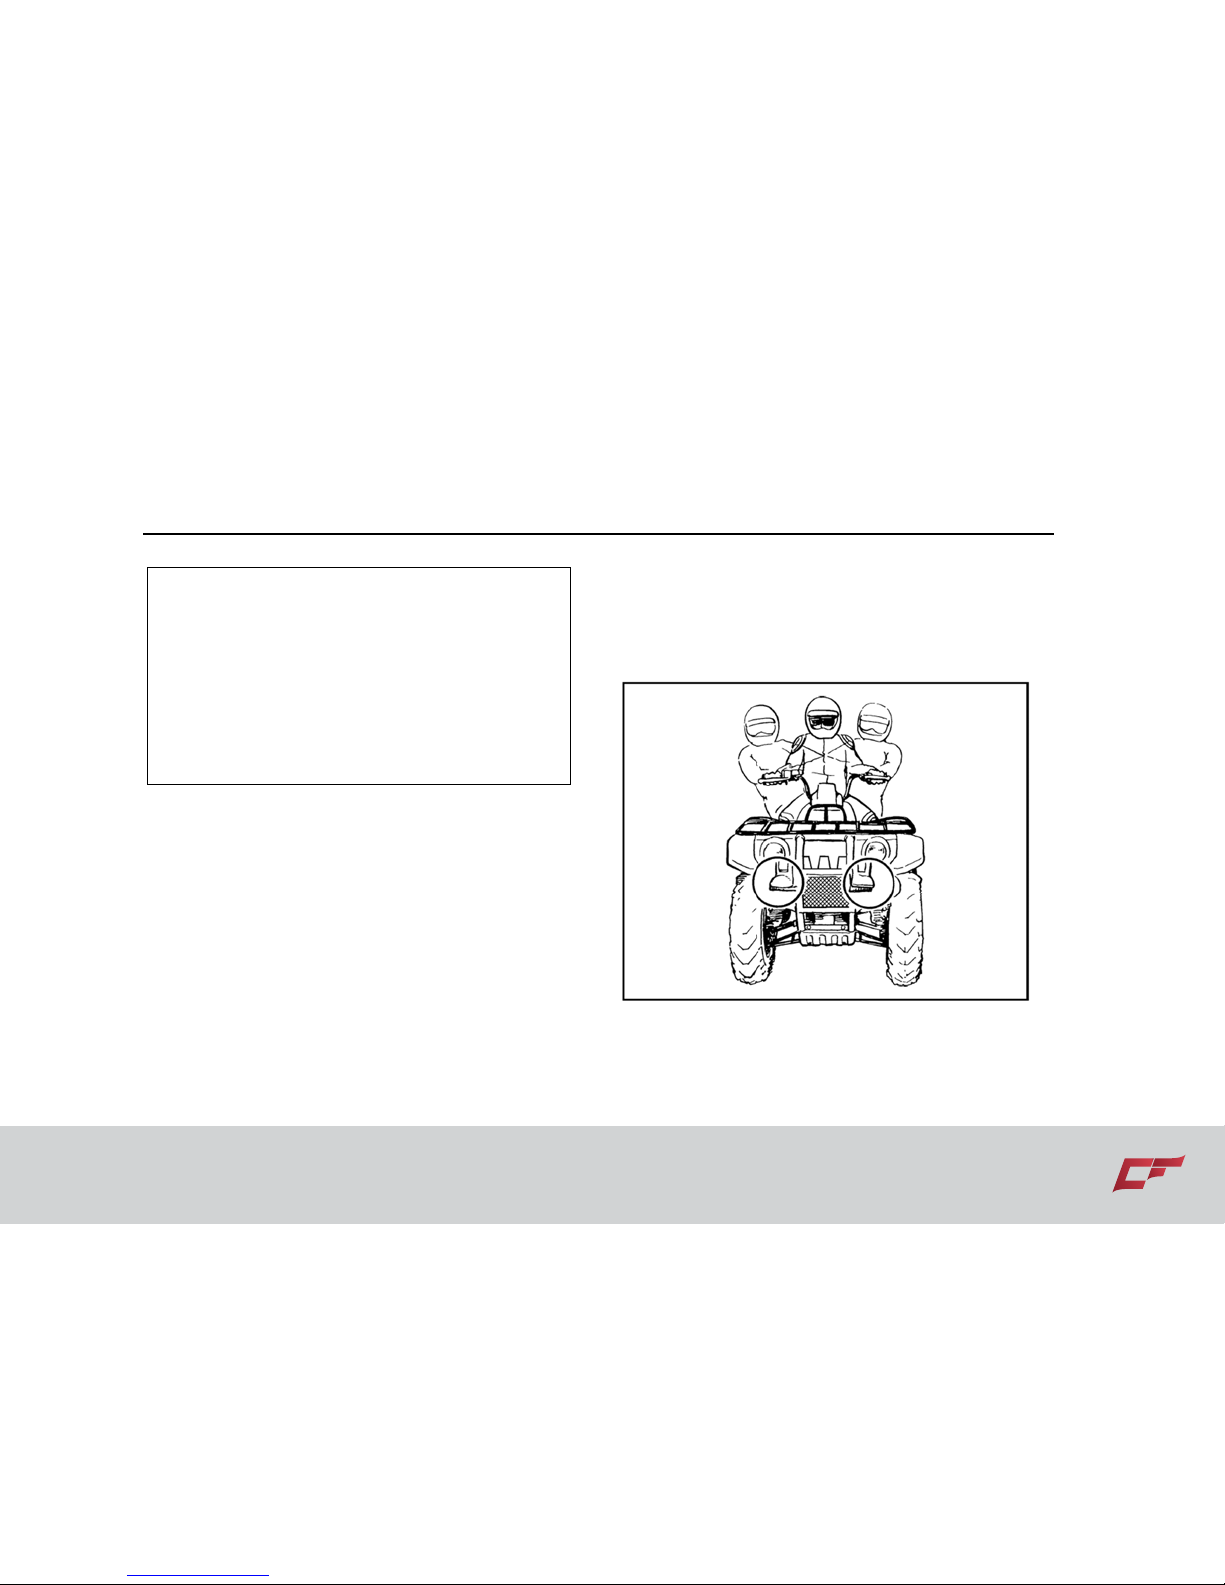
This ATV is designed to carry operator
and cargo only - passengers prohibited.
WARNING
POTENTIAL HAZARD
Carrying a passenger on this ATV.
WHAT CAN HAPPEN
Greatly reduces your ability to balance and
control this ATV. Could cause an accident,
resulting in harm to you and/or your
passenger.
HOW TO AVOID THE HAZARD
Never carry a passenger. The long seat is to
allow the operator to shift position as needed
during operation. It is not for carrying
passengers.
Page 74
Your Vehicle 7-4
Apparel
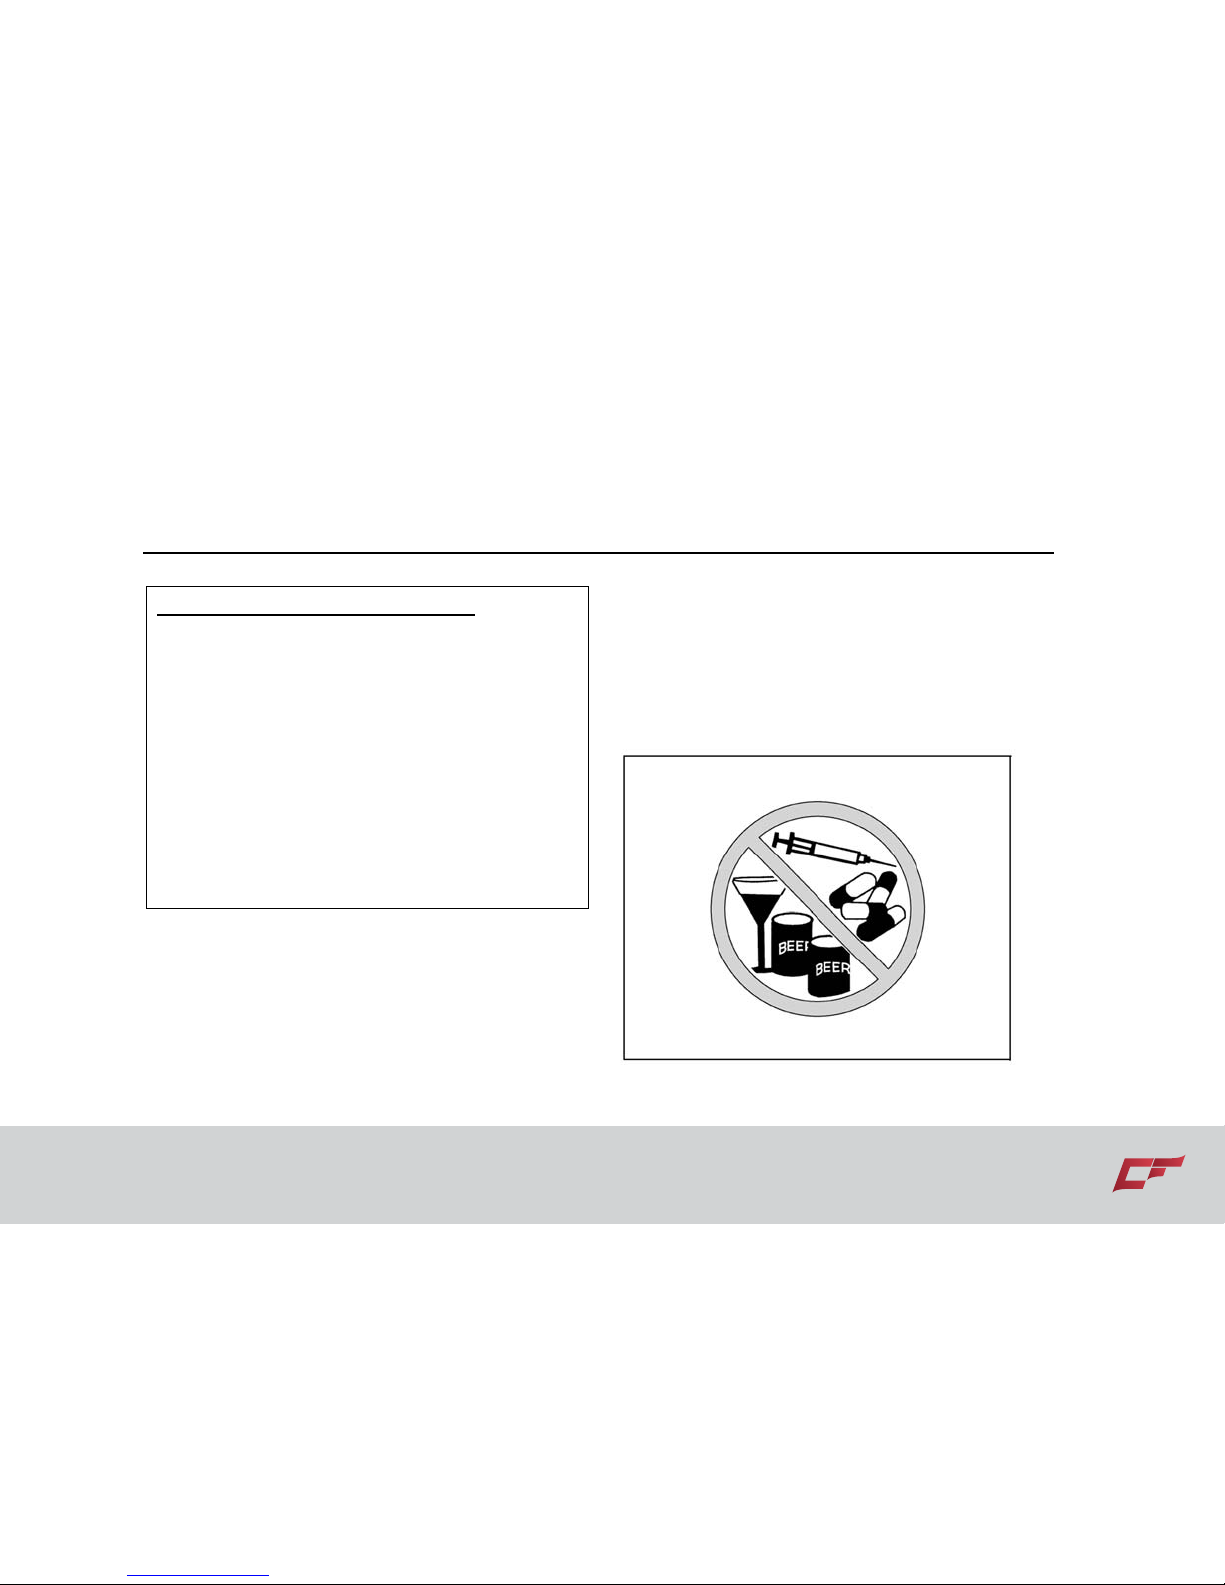
WARNING
POTENTIAL HAZARD
Operating this ATV without wearing an
approved motorcycle helmet, eye protection
and protective clothing.
WHAT CAN HAPPEN
Operating without an approved motorcycle
helmet increases your chances of a severe
head injury or death in the event of an
accident.
Operating without eye protection can result in
an accident and increases your chances of a
severe injury in the event of an accident.
Operating without protective clothing
increases your chances of severe injury in the
event of an accident.
Page 75
7-5 Your Vehicle
HOW TO AVOID THE HAZARD
Always wear an approved motorcycle helmet
that fits properly.
You should also wear:
eye protection
(goggles or face shield)
gloves
boots
long-sleeved shirt or jacket
long pants
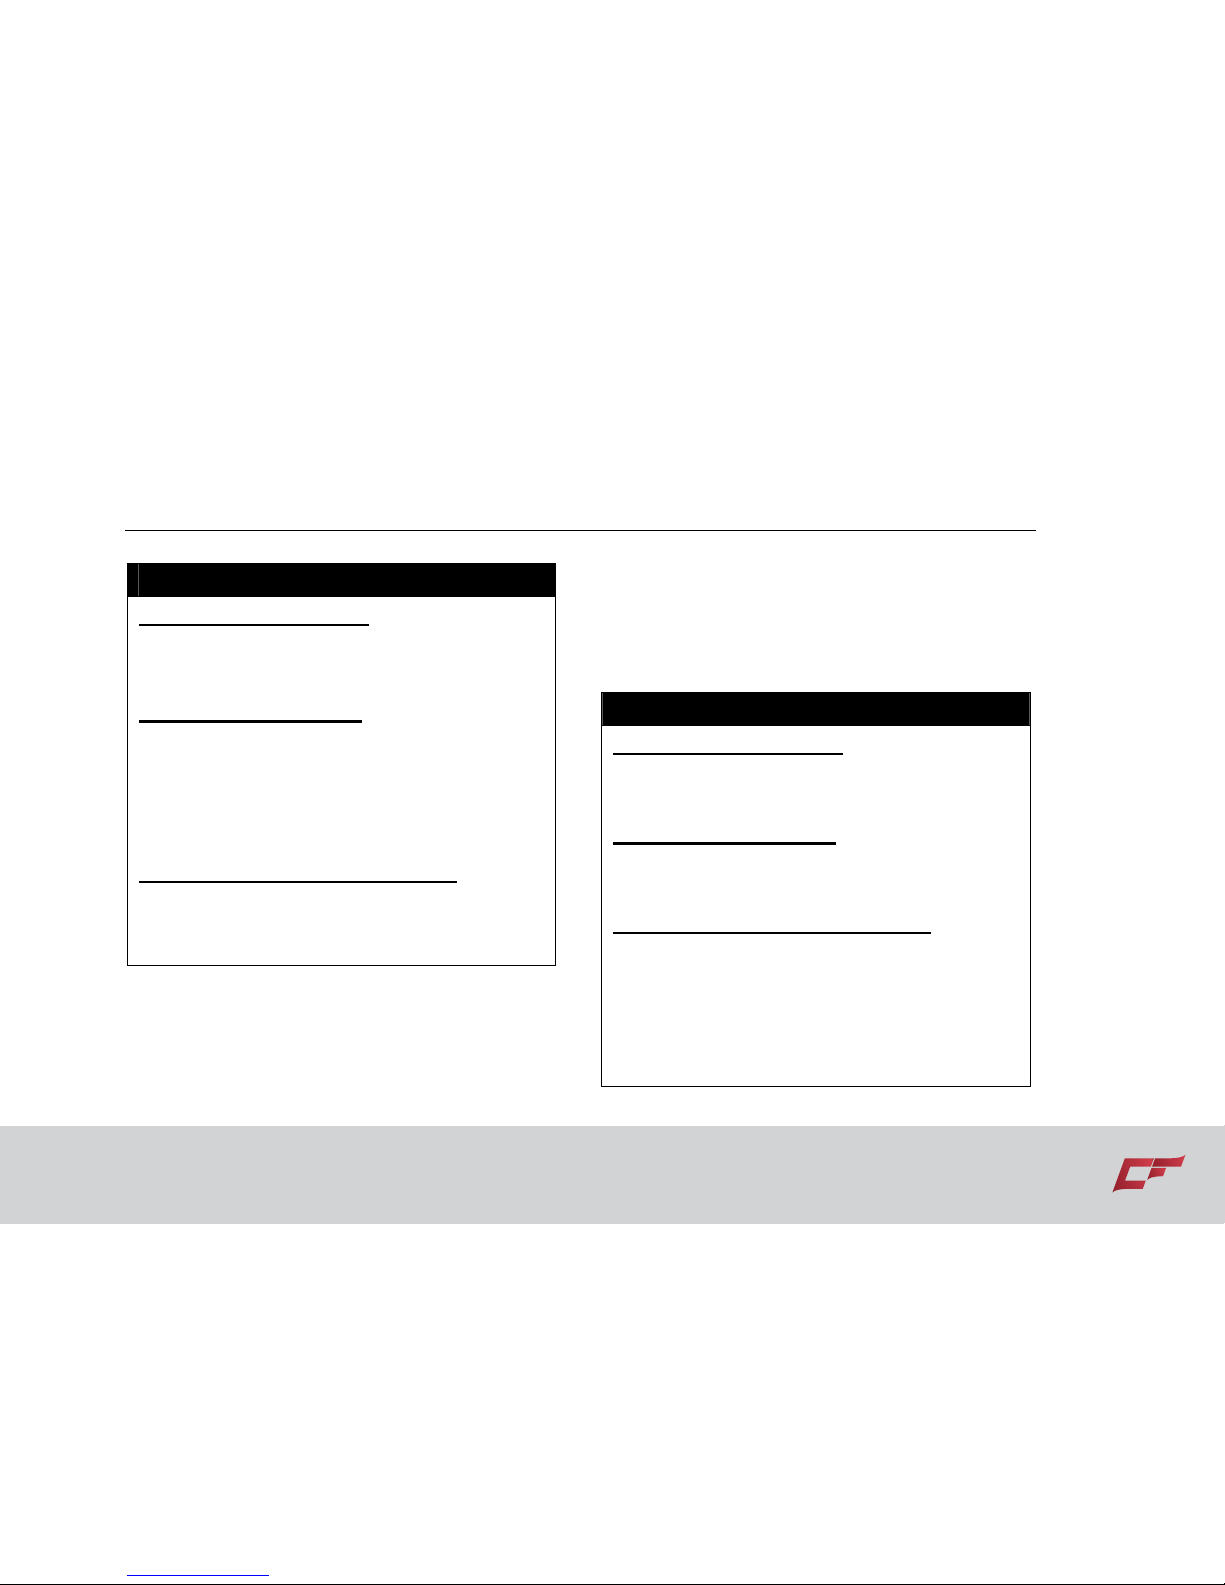
Never operate an ATV after drinking or
using drugs.
The alcohol or drugs could make the
operator lose balance and control of the
vehicle.
Page 76
Your Vehicle 7-6
WARNING
POTENTIAL HAZARD
Operating this ATV after consuming alcohol or
drugs.
WHAT CAN HAPPEN
Could seriously affect your judgment.
Could cause you to react more slowly.
Could affect your balance and perception.
Could result in an accident.
HOW TO AVOID THE HAZARD
Never consume alcohol or drugs before or
while driving this ATV.
Pre-operation checks
To better prevent troubles, it is important to
know condition of the vehicle well. Always
check the items listed on page 5-1 before
starting.
WARNING
POTENTIAL HAZARD
Failure to inspect the ATV before operating.
Failure to properly maintain the ATV.
WHAT CAN HAPPEN
Increases the possibility of an accident or
equipment damage.
HOW TO AVOID THE HAZARD
Always inspect your ATV each time you use it
to make sure the ATV is in safe operating
condition. Always follow the inspection and
maintenance procedures and schedules
described in the Owner’s Manual.
Page 77
7-7 Your Vehicle
WARNING
POTENTIAL HAZARD
Operating this ATV at speeds too fast for your
skills or the conditions.
WHAT CAN HAPPEN
Increases your chances of losing control of
the ATV, which can result in an accident.
HOW TO AVOID THE HAZARD
Always go at a speed that is proper for the
terrain, visibility and operating conditions,
and your experience.
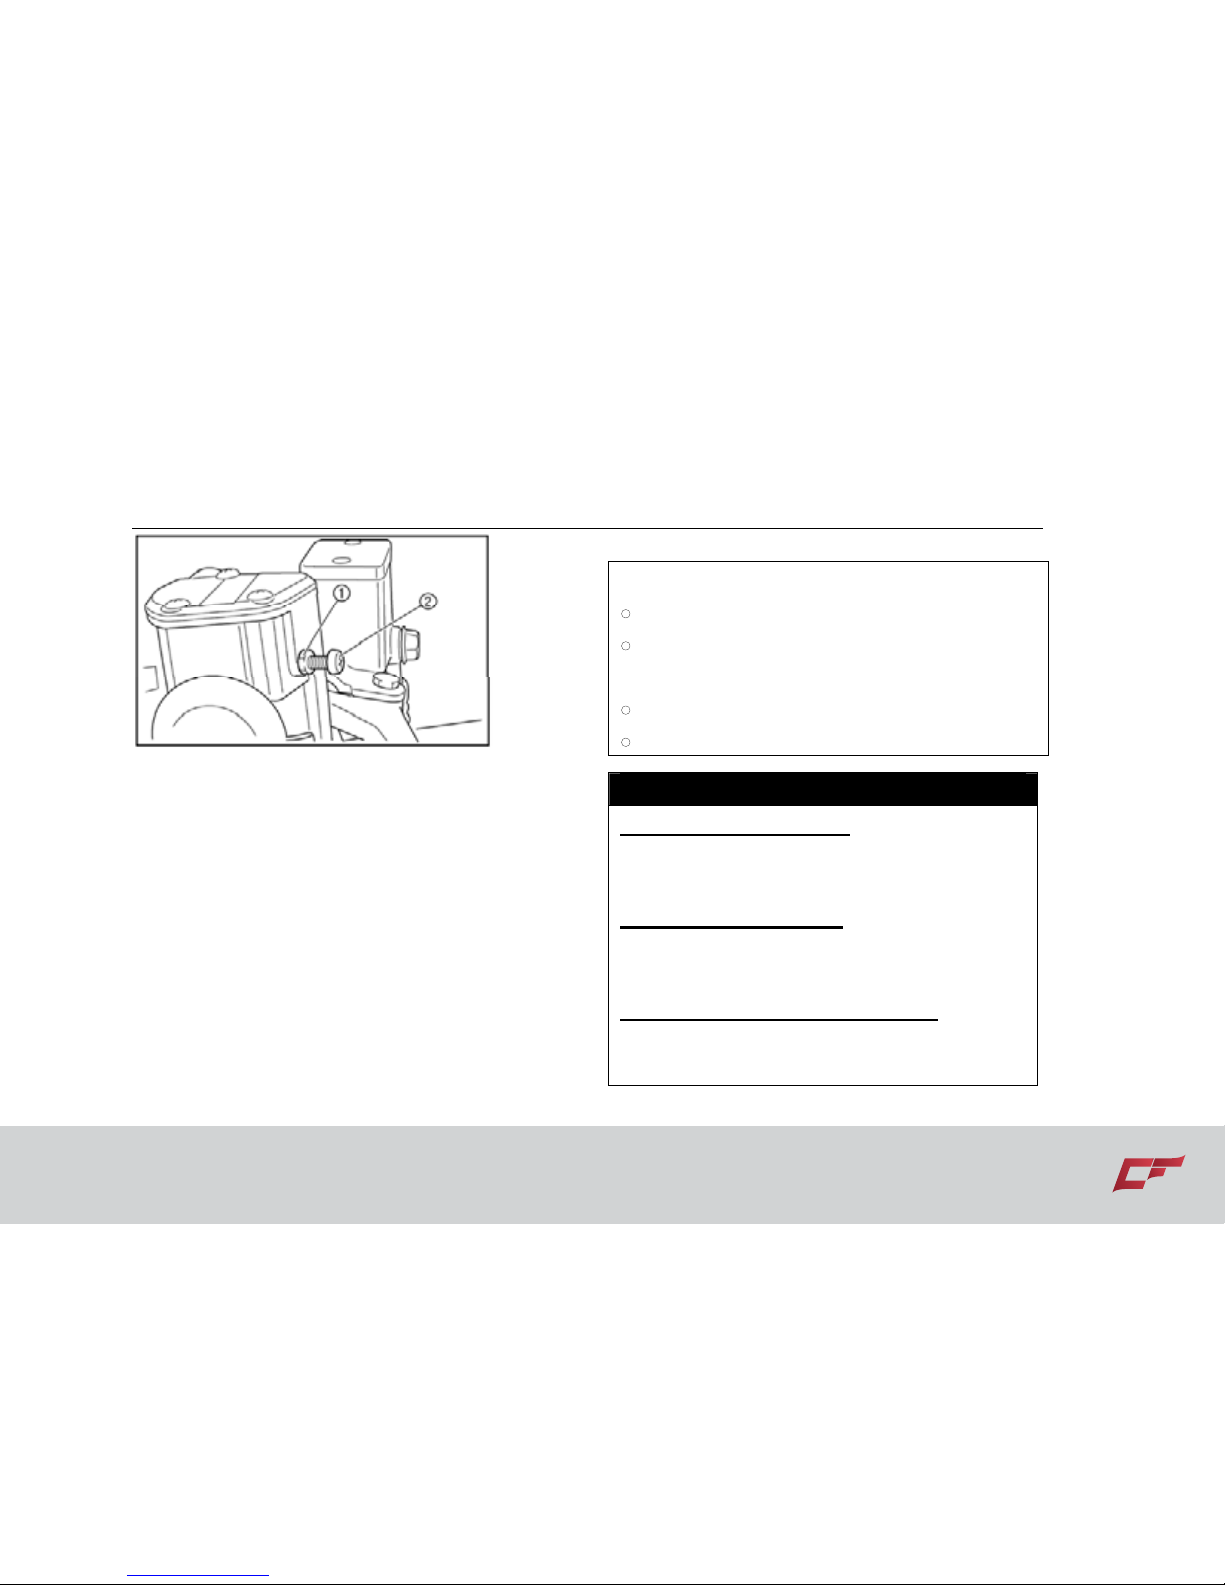
Speed limiter
For riders less experienced with this model,
this model is equipped with a speed limiter in
the throttle lever housing. The speed limiter
keeps the throttle from fully opening, even
when the throttle lever is pushed to the
maximum. Screwing in the adjuster limits the
maximum engine power available and
decreases the maximum speed of the ATV.
Turning the screw in decreases top speed
and turning it out increases top speed.
Page 78
Your Vehicle 7-8
1. Locknut 2.Adjusting screw
Loading and accessories
Pay close attention to the operation when
riding your ATV with additional loads, such as
accessories or cargo. The ATV’s handling
and stability may be adversely affected.
Always reduce the speed when carrying
additional loads.
MAXIMUM LOADING LIMIT
●Vehicle loading limit: 160kg (353lb)
● Total weight of cargo, rider and
accessories, and trailer hitch vertical load.
●Front carrier: 20 kg (44 lb)
●Rear carrier: 35 kg (77 lb)
WARNING
POTENTIAL HAZARD
Overloading this ATV or carrying or towing
cargo improperly.
WHAT CAN HAPPEN
Could cause changes in vehicle handling
which could lead to an accident.
HOW TO AVOID THE HAZARD
Never exceed the stated load capacity for this
ATV.
Page 79
7-9 Your Vehicle
Cargo should be properly distributed and
securely attached.
Reduce speed when carrying cargo or pulling
a trailer. Allow greater distance for braking.
Always follow the instructions in your
Owner’s Manual for carrying cargo or pulling
a trailer.
During operation
Always keep your feet on the footboards
during operation. Otherwise your feet may
contact the rear wheels.
Page 80
Your Vehicle 7-10
WARNING
POTENTIAL HAZARD
Removing hands from handlebars or feet from
footboards during operation.
WHAT CAN HAPPEN
Removing even one hand or foot can re-duce
your ability to control the ATV or could cause
you to lose your balance and fall off of the
ATV. If you remove a foot from a footboard,
your foot or leg may come into contact with
the rear wheels, which could injure you or
cause an accident.
HOW TO AVOID THE HAZARD
Always keep both hands on the handlebars
and both feet on the footboards of your ATV
during operation.
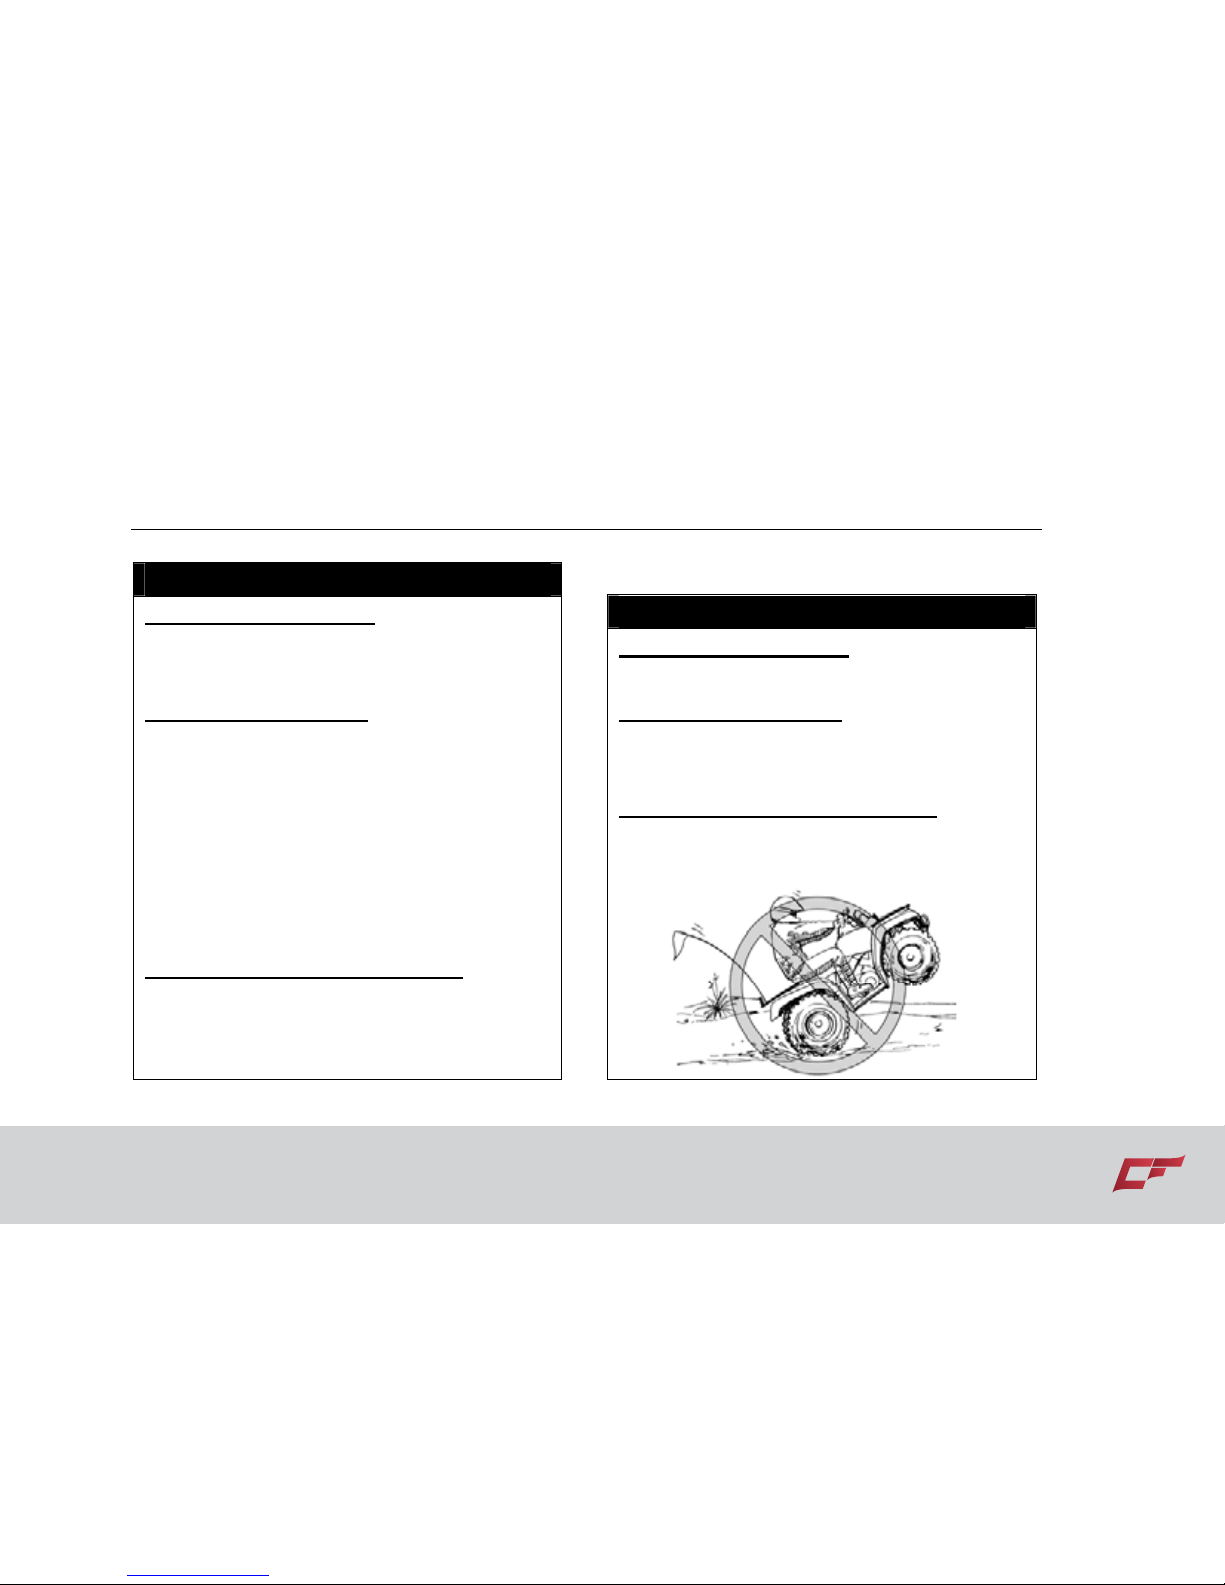
Avoid wheelies and jumping. You may lose
control of the ATV or overturn.
WARNING
POTENTIAL HAZARD
Attempting wheelies, jumps, and other stunts.
WHAT CAN HAPPEN
Increases the chance of an accident,
including an overturn.
HOW TO AVOID THE HAZARD
Never attempt stunts, such as wheelies or
jumps. Don’t try to show off.
Page 81
7-11 Your Vehicle
Modifications
WARNING
POTENTIAL HAZARD
Operating this ATV with improper
modifications.
WHAT CAN HAPPEN
Improper installation of accessories or
modification of this vehicle may cause
changes in handling which in some situations
could lead to an accident.
HOW TO AVOID THE HAZARD
Never modify this ATV through improper
installation or use of accessories. All parts
and accessories added to this vehicle should
be genuine or equivalent components
designed for use on this ATV and should be
installed and used according to instructions.
If you have questions, consult an authorized
ATV dealer.
Exhaust system
The exhaust system on the ATV is very hot
during and following operation. To prevent
burns, avoid touching the exhaust system.
Park the ATV in a place where pedestrians or
children are not likely to touch it.
WARNING
POTENTIAL HAZARD
Hot exhaust system.
WHAT CAN HAPPEN
Dry grass or brush or other combustible
material accumulated around the engine area
could catch fire.
Someone touching the exhaust system during
or after operation could be burned.
Page 82
Your Vehicle 7-12
HOW TO AVOID THE HAZARD
Do not operate, idle, or park the ATV in dry
grass or other dry ground cover.
Keep the engine area free of dry grass, brush,
or other combustible material.
Do not touch the hot exhaust system.
Do not park the ATV in a place where others
might be likely to touch it.
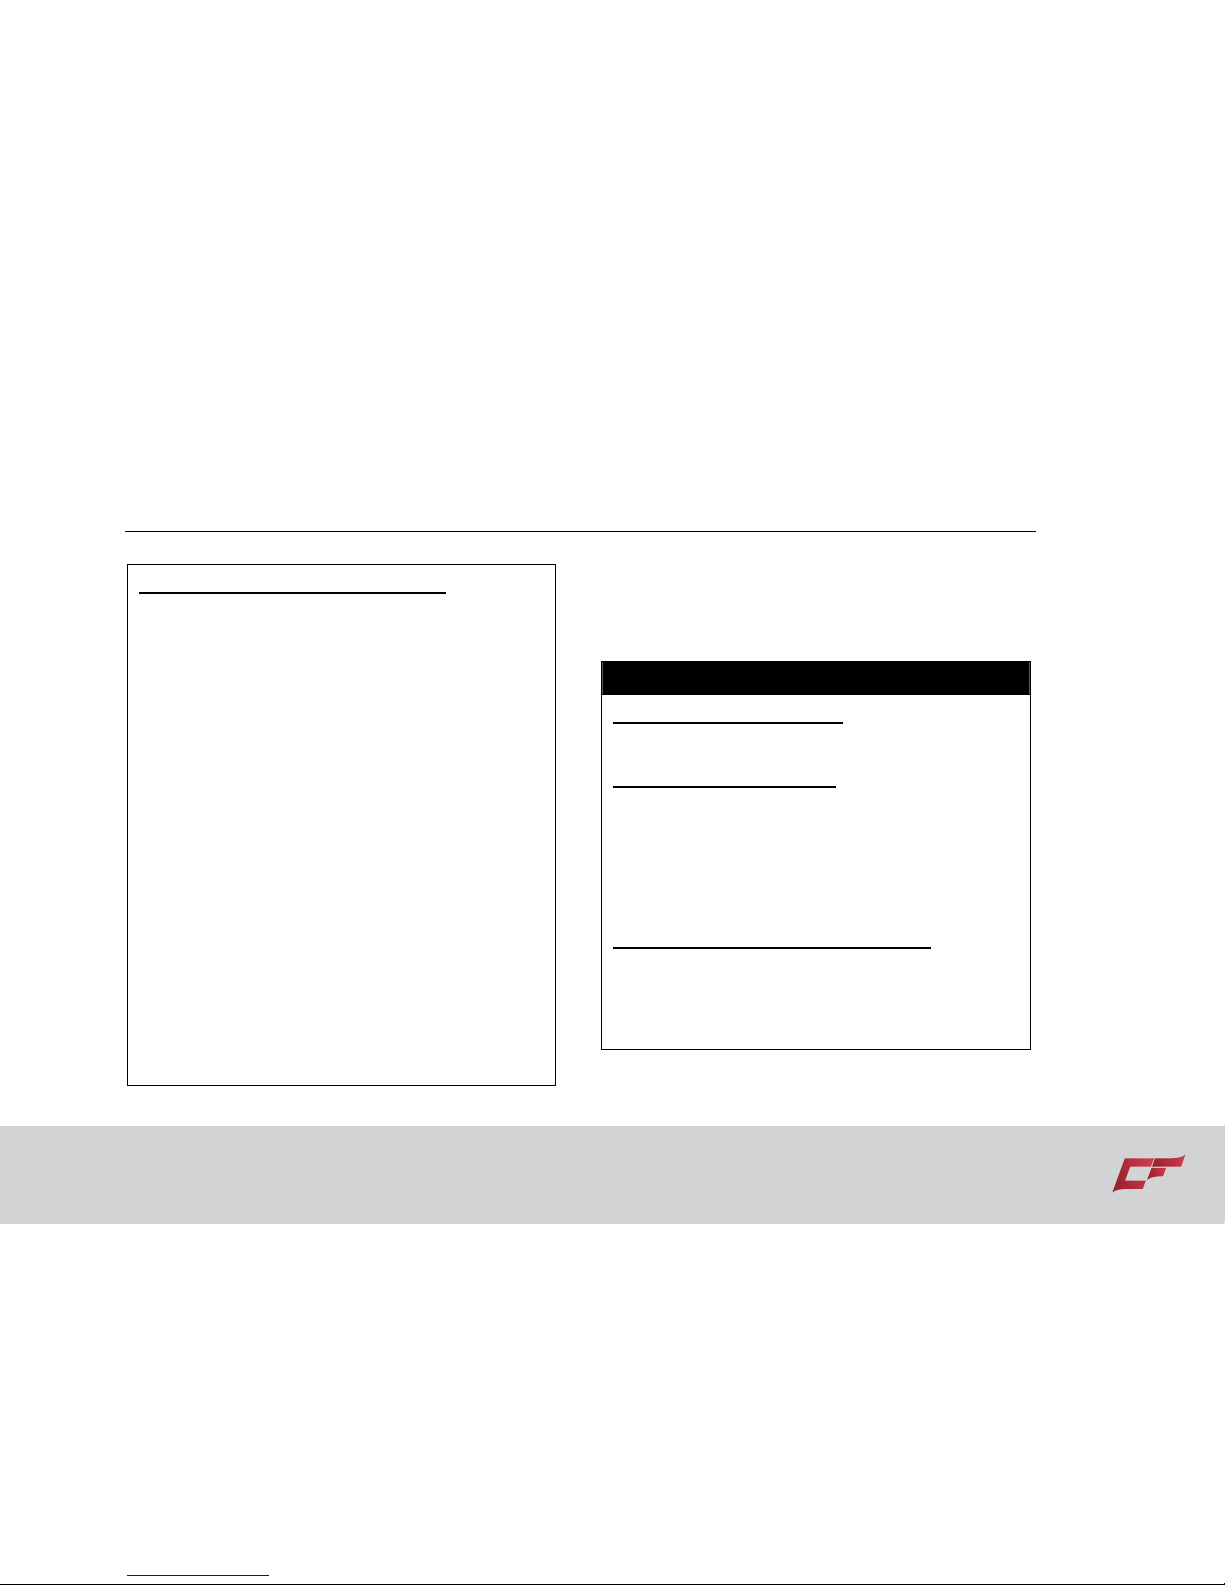
BE CAREFUL WHERE YOU RIDE
This ATV is designed for off-road use only.
Riding on paved surfaces can cause loss of
control.
WARNING
POTENTIAL HAZARD
Operating this ATV on paved surfaces.
WHAT CAN HAPPEN
ATVs are designed for off-road use only.
Paved surfaces may seriously affect handling
and control of the ATV, and may cause the
vehicle to go out of control.
HOW TO AVOID THE HAZARD
Always avoid paved surfaces, including
sidewalks, driveways, parking lots and
streets.
Page 83
7-13 Your Vehicle
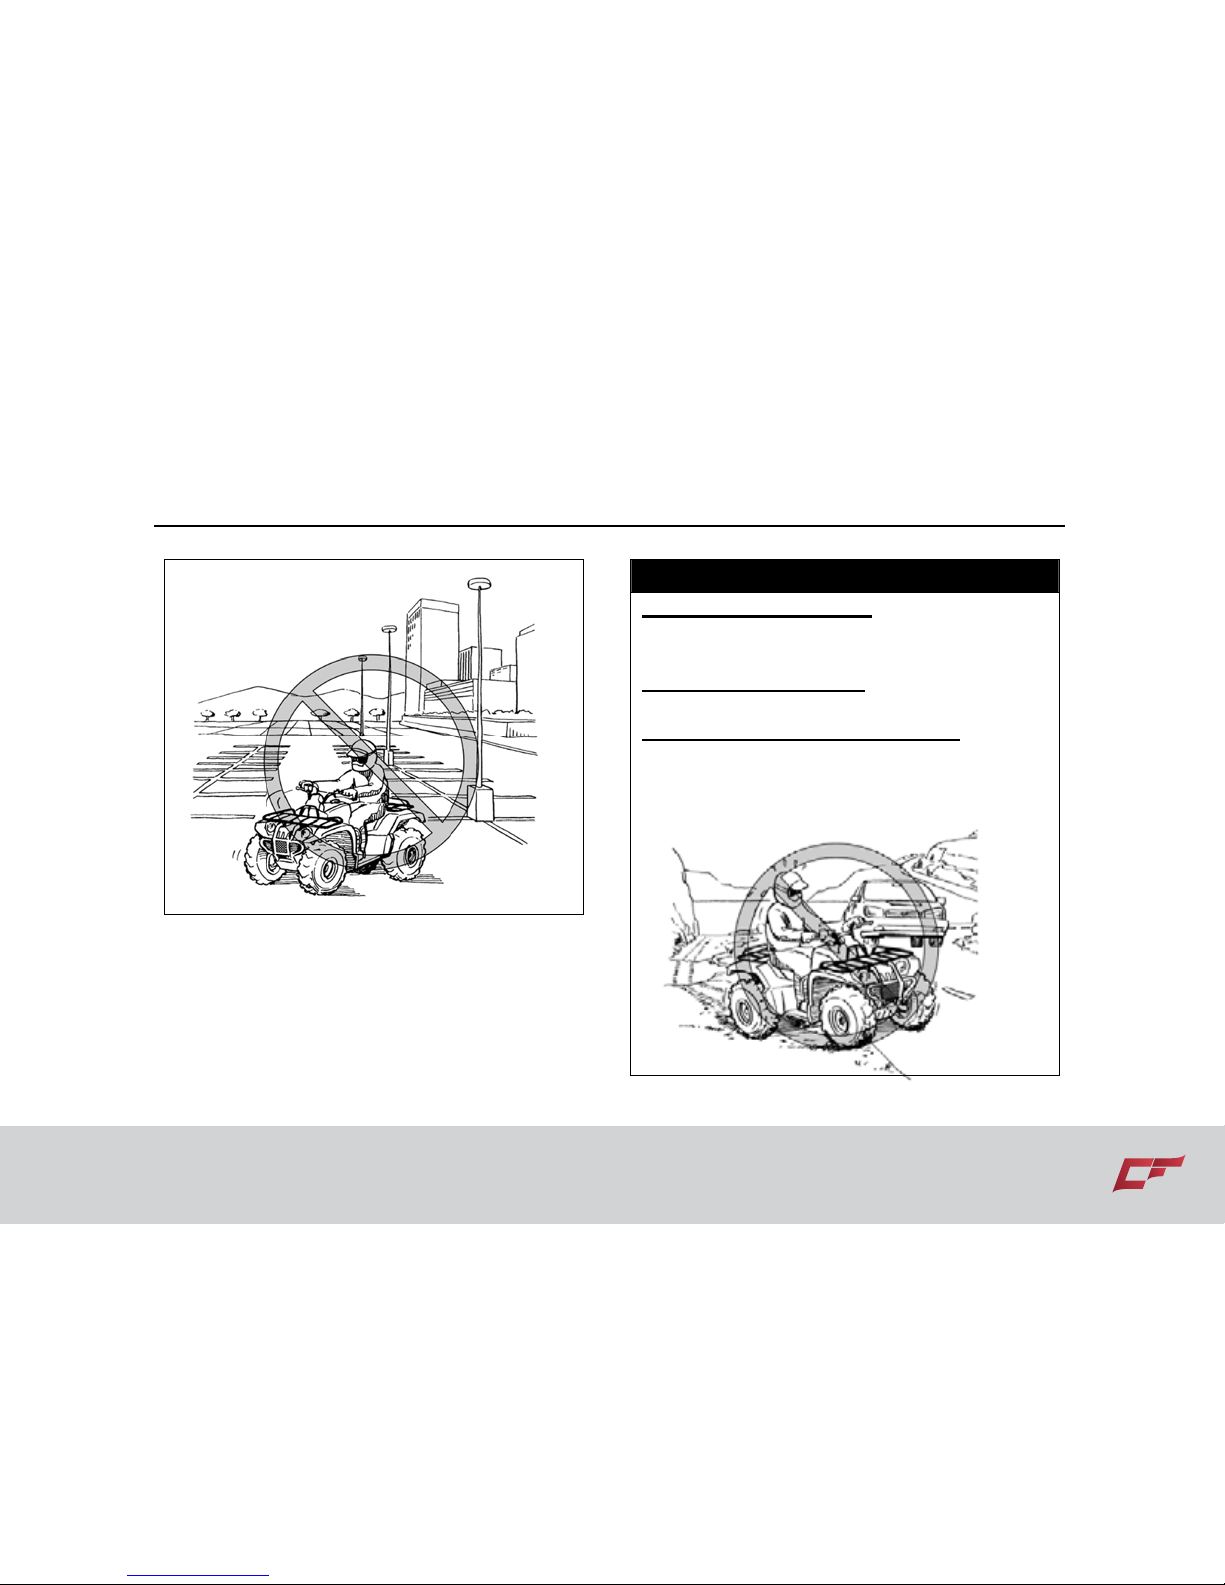
Do not ride on any public road, street, or
highway.
Riding on public roads can result in collisions
with other vehicles.
WARNING
POTENTIAL HAZARD
Operating this ATV on public streets, roads or
highways.
WHAT CAN HAPPEN
You can collide with another vehicle.
HOW TO AVOID THE HAZARD
Never operate this ATV on any public street,
road or highway, even dirt or gravel one. In
many states it is illegal to operate ATVs on
public streets, roads and highways.
Page 84
Your Vehicle 7-14
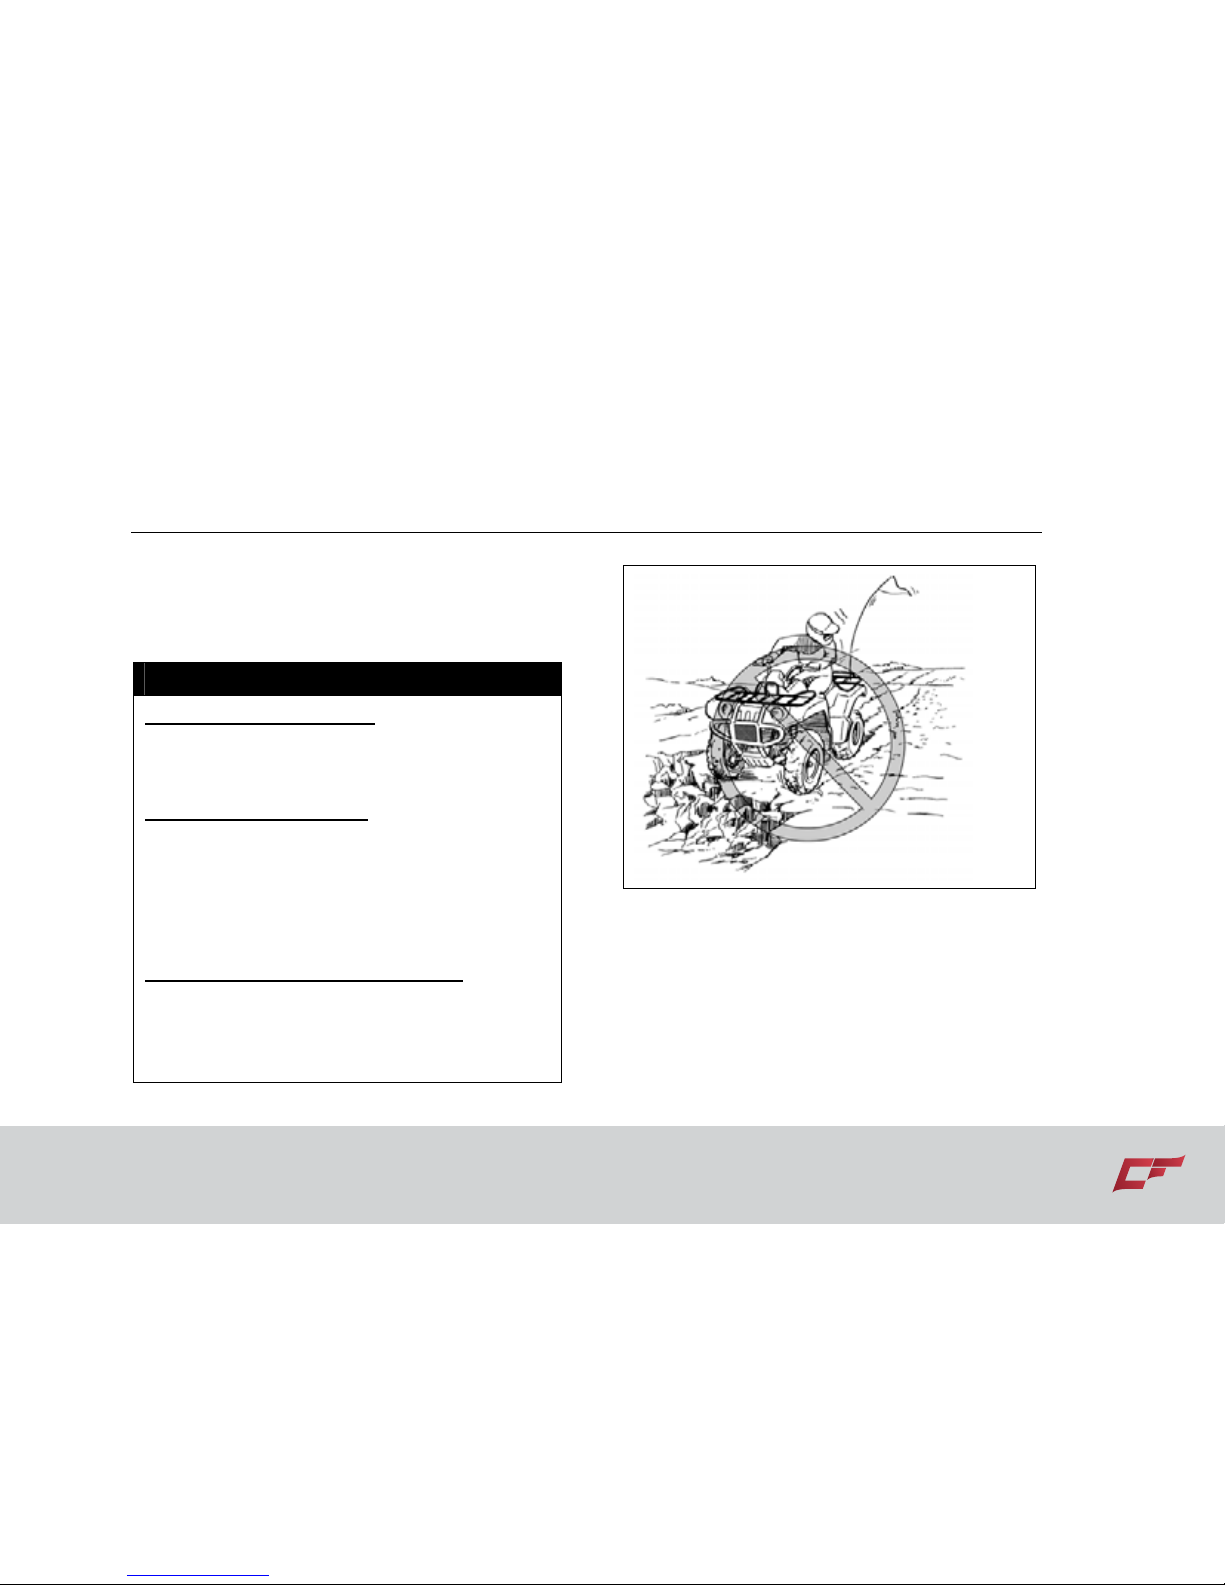
Know the terrain where you ride. Ride cautiously
in unfamiliar areas. Stay alert for holes, rocks, or
roots in the terrain, and other hidden hazards
which may cause the ATV to upset.
WARNING
POTENTIAL HAZARD
Failure to use extra care when operating this
ATV on unfamiliar terrain.
WHAT CAN HAPPEN
You can come upon hidden rocks, bumps, or
holes, without enough time to react. Could
result in the ATV overturning or going out of
control.
HOW TO AVOID THE HAZARD
Go slowly and be extra careful when operating
on unfamiliar terrain. Always be alert to changing
terrain conditions when operating the ATV.
Page 85
7-15 Your Vehicle
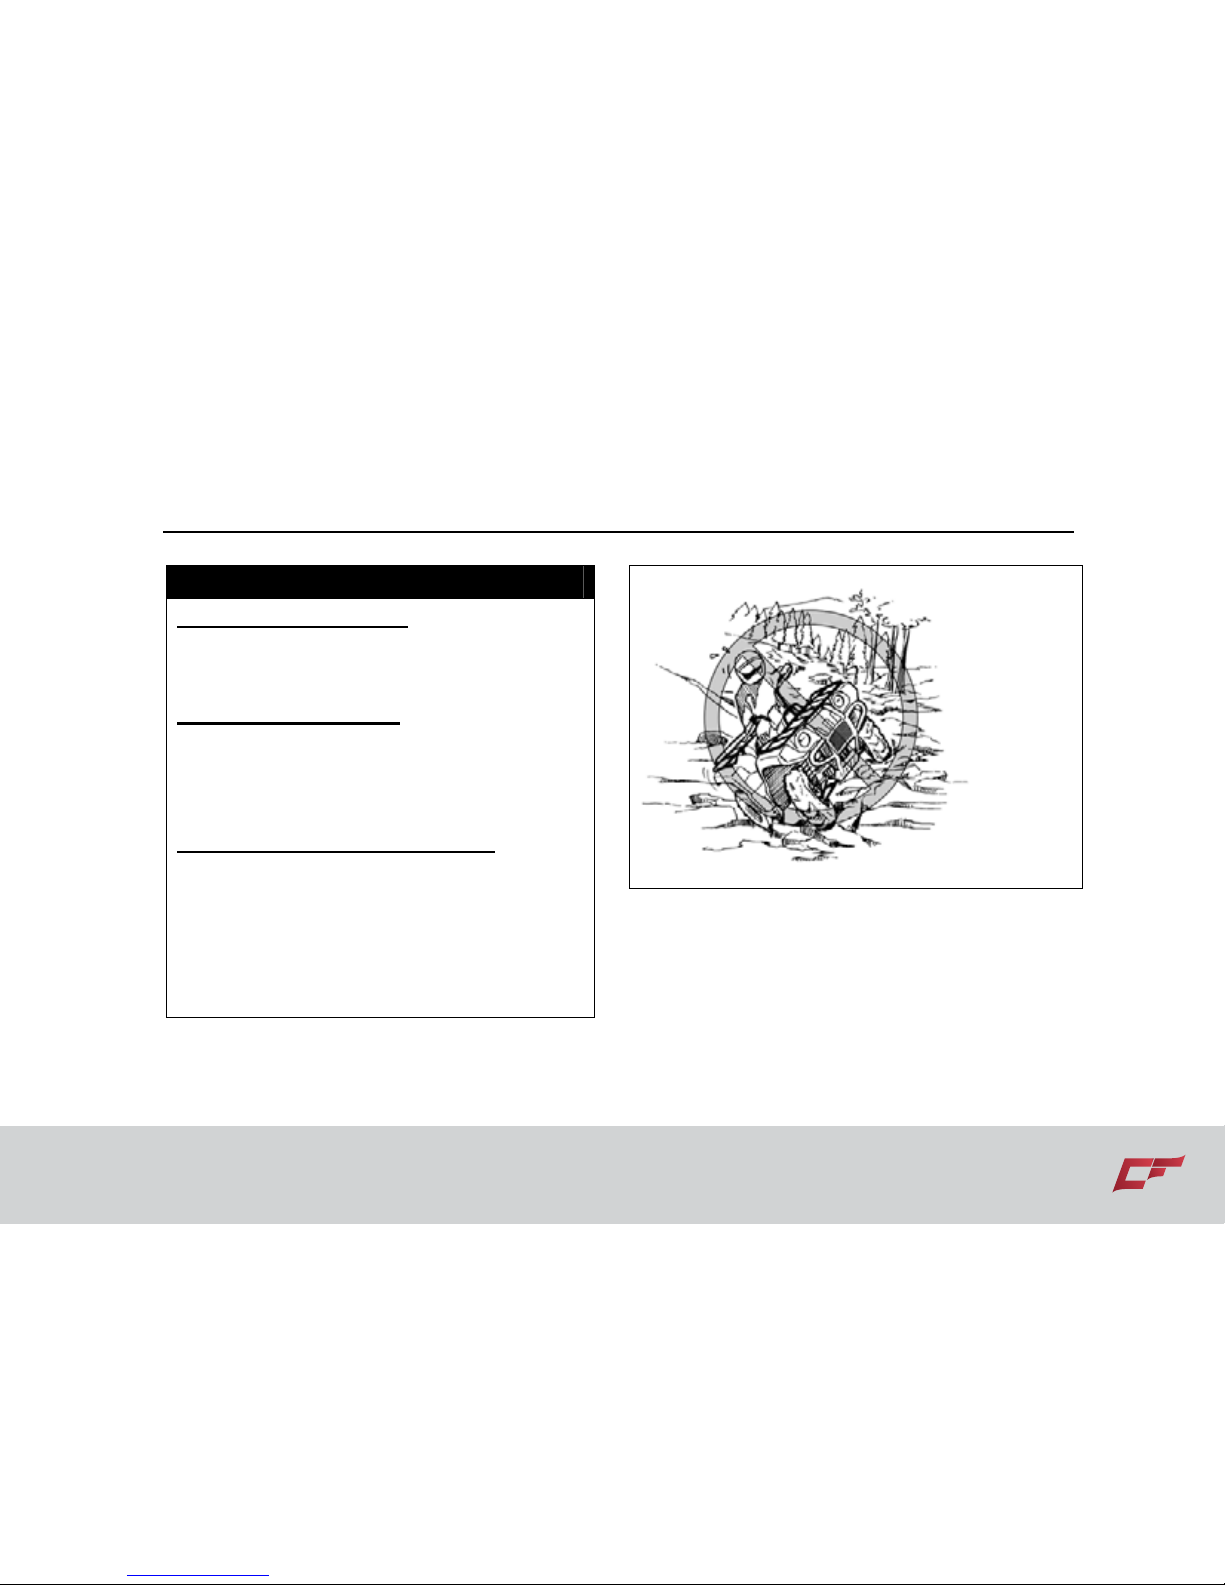
WARNING
POTENTIAL HAZARD
Failure to use extra care when operating on
excessively rough, slippery or loose terrain.
WHAT CAN HAPPEN
Could cause loss of traction or vehicle
control, which could result in an accident,
including an overturn.
HOW TO AVOID THE HAZARD
Do not operate on excessively rough, slippery
or loose terrain until you have learned and
practiced the skills necessary to control the
ATV on such terrain. Always be especially
cautious on these kinds of terrain.
Page 86
Your Vehicle 7-16
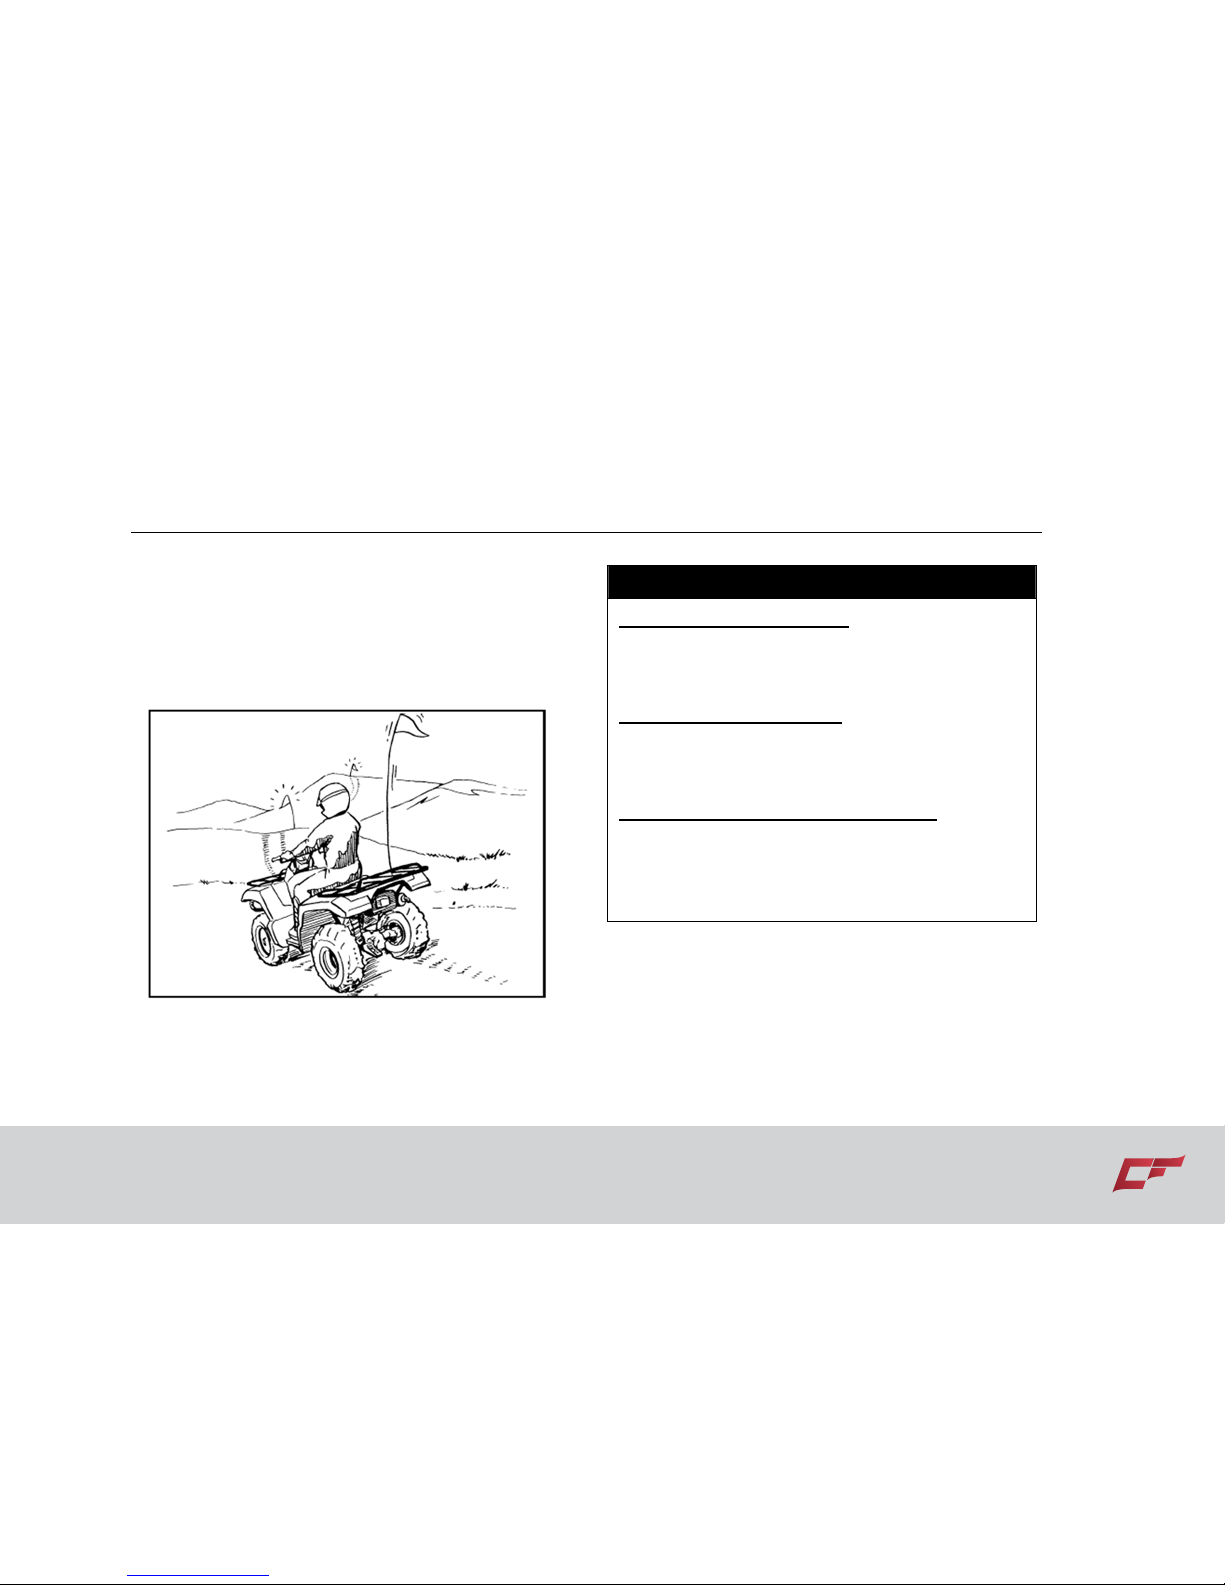
When riding in an area where you might not
easily be seen, such as desert terrain, mount
a caution flag on the ATV. DO NOT use the
flag pole bracket as a trailer hitch.
WARNING
POTENTIAL HAZARD
Operating in areas where you might not be
seen by other off-road vehicles.
WHAT CAN HAPPEN
You could be in a collision. You could be
injured.
HOW TO AVOID THE HAZARD
Always mount a caution flag on the ATV to
make you more visible. Watch carefully for
other vehicles.
Page 87
7-17 Your Vehicle
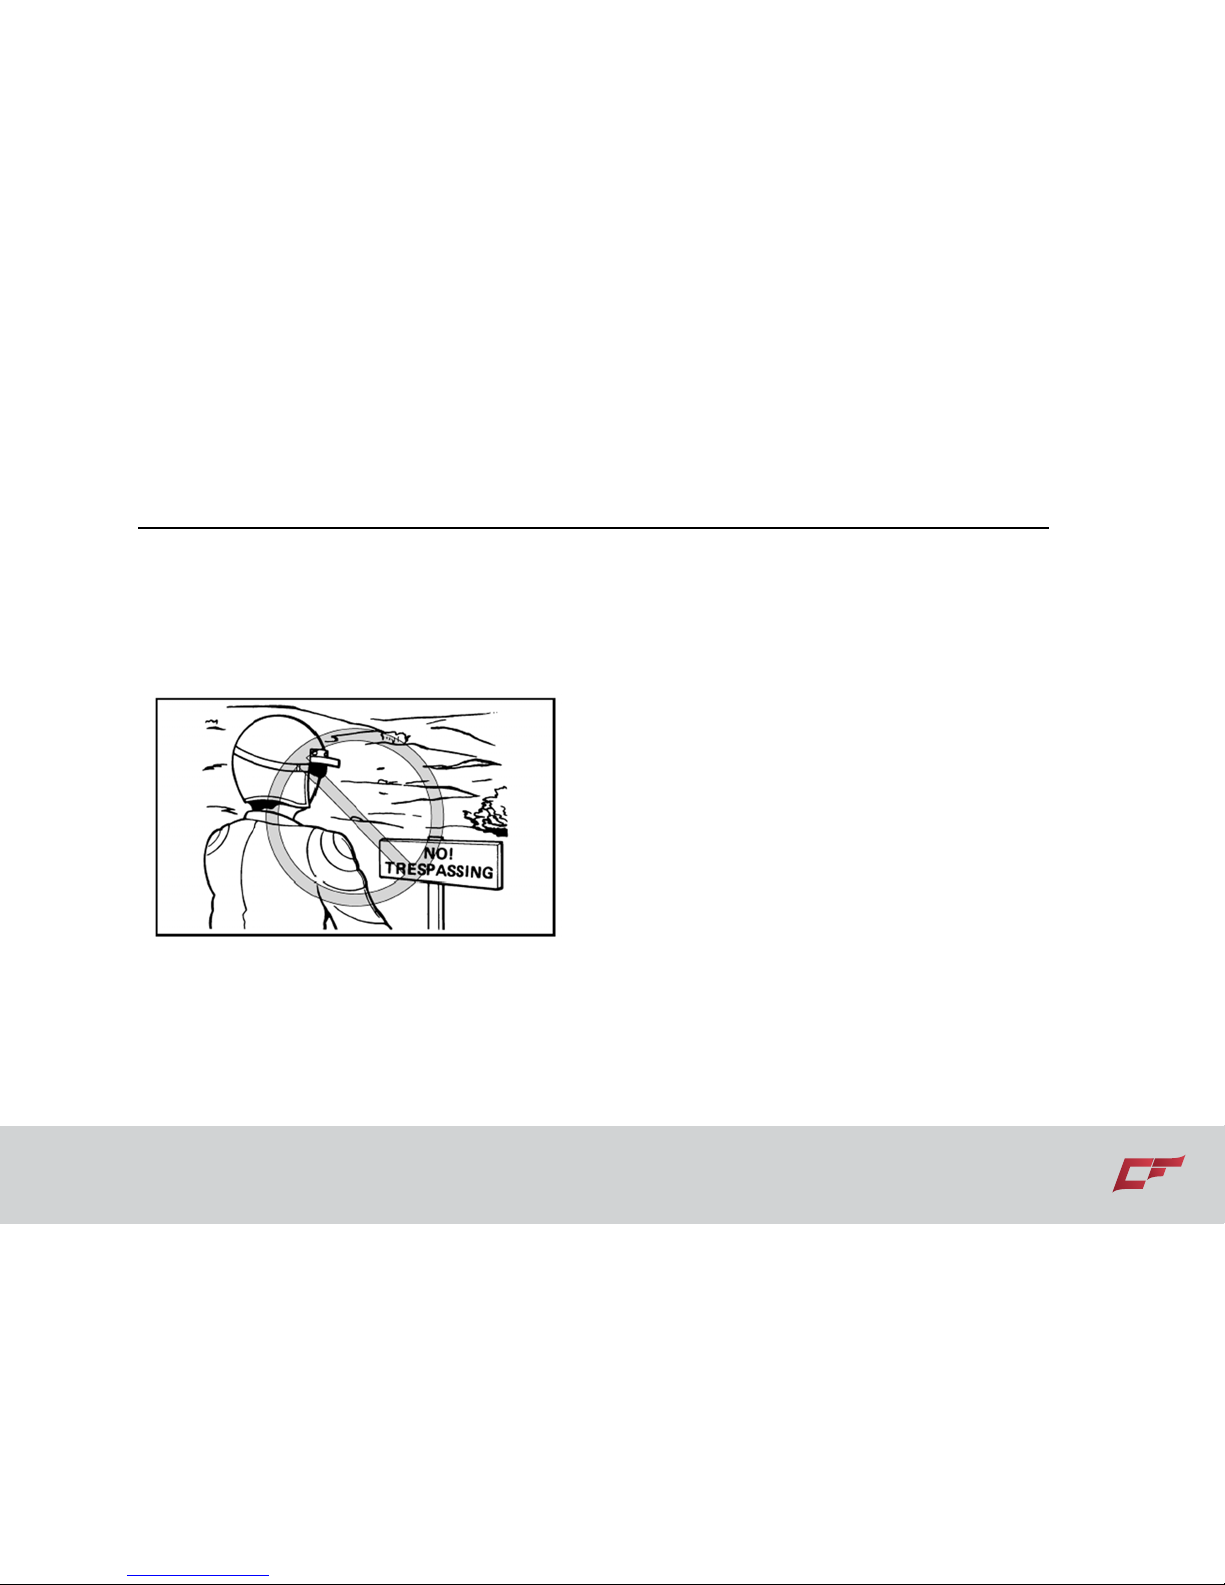
Do not ride in areas posted “ no
trespassing”.
Do not ride on private property without
getting permission.
Select a large, flat area off-road to become
familiar with your ATV. Make sure that this
area is free of obstacles and other riders. You
should practice control of the throttle, brakes,
shifting procedures, and turning techniques
in this area before trying more difficult terrain.
Always avoid riding on paved surfaces: the
ATV is designed for off-road use only, and
handling maneuvers are more difficult to
perform on pavement.
Remember that the engine and exhaust pipe
will be hot when riding and afterwards; do not
allow skin or clothing to come in contact with
these components.
With the engine idling, return the starter
(choke) to the closed position, shift the drive
select lever into the forward position, and
Page 88

Your Vehicle 7-18
then release the parking brake. Apply the
throttle slowly and smoothly. The centrifugal
clutch will engage and you will start to
accelerate. If the throttle is app lied too
abruptly, the front wheels may lift off the
ground resulting in a loss of directional
control. Avoid higher speeds until you are
thoroughly familiar with the operation of your
ATV.
When slowing down or stopping, release the
throttle and apply the brakes smoothly and
evenly.
Improper use of the brakes can cause the
tires to lose traction, reducing control and
increasing the possibility of an accident.
TURNING YOUR ATV
To achieve maximum traction while riding
off-road in 2WD or 4WD, the two rear wheels
turn together at the same speed.
Furthermore, when riding in 4WD-LOCK
the front wheels also turn together at the
same speed. Therefore, unless the wheel on
the inside of the turn is allowed to slip or lose
some traction, the ATV will resist turning. A
special turning technique must be used to
allow the ATV to make turns quickly and
easily. It is essential that this skill be learned
first at low speed.
Page 89
7-19 Your Vehicle
WARNING
POTENTIAL HAZARD
Turning improperly.
WHAT CAN HAPPEN
ATV could go out of control, causing a
collision or overturn.
HOW TO AVOID THE HAZARD
Always follow proper procedures for turning
as described in this Owner’s Manual.
Practice turning at low speeds before
attempting to turn at faster speeds. Do not
turn at speeds too fast for your skills or the
conditions.
Operate at a slow speed and allow extra time
and distance for maneuvers when in
4WD-LOCK.
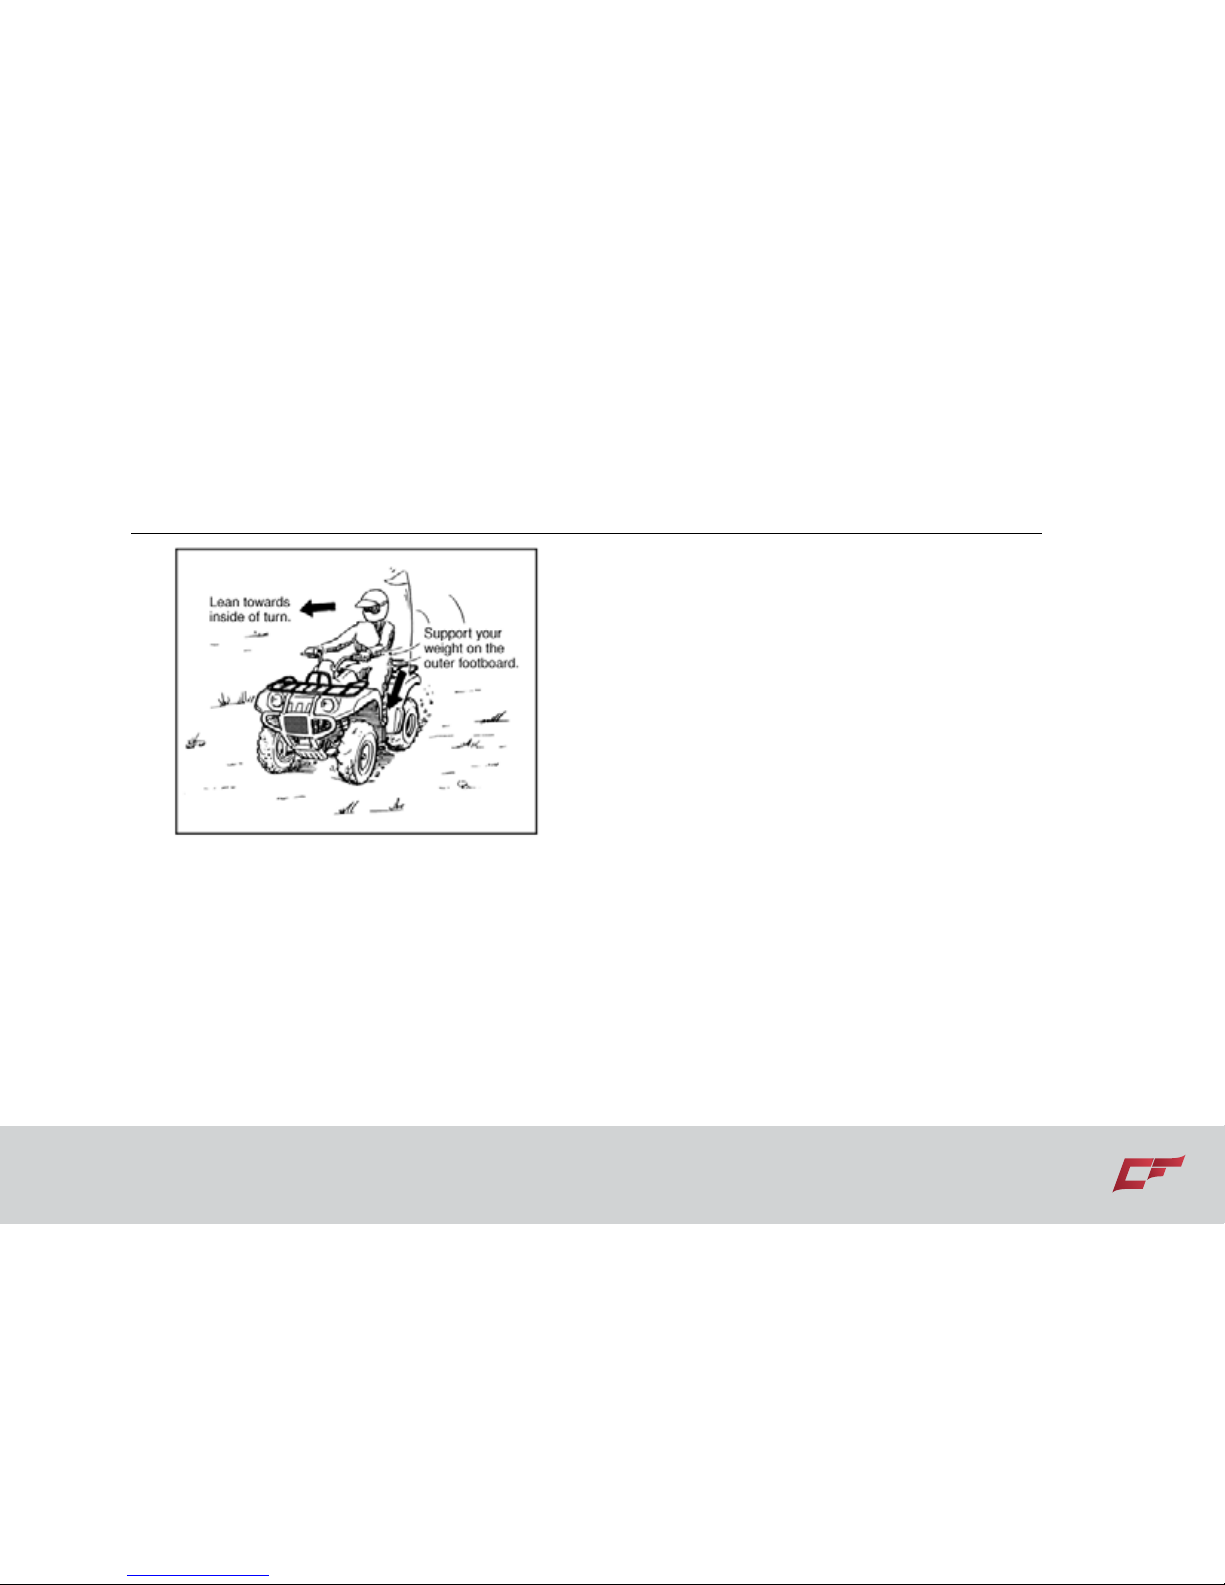
As you approach a curve, slow down and
begin to turn the handlebars in the desired
direction. As you do so, put your weight on
the footboard to the outside of the turn
(opposite your desired direction) and lean
your upper body into the turn. Use the throttle
to maintain an even speed through the turn.
This maneuver will let the wheel on the inside
of the turn slip slightly, allowing the ATV to
make the turn properly.
Page 90
Your Vehicle 7-20
This procedure should be practiced at slow
speed many times in a large off-road area
with no obstacles. If an incorrect technique is
used, your ATV may continue to go straight.
If the ATV doesn’t turn, come to a stop and
then practice the procedure again. If the
riding surface is slippery or loose, it may help
to position more of your weight over the front
wheels by moving forward on the seat.
Once you have learned this technique you
should be able to perform it at higher speeds
or in tighter curves.
Improper riding procedures such as abrupt
throttle changes, excessive braking, incorrect
body movements, or too much speed for the
sharpness of the turn may cause the ATV to
tip. If the ATV begins to tip over to the outside
while negotiating a turn, lean more to the
inside. It may also be necessary to gradually
let off on the throttle and steer to the outside
of the turn to avoid tipping over. Remember:
Avoid higher speeds until you are thoroughly
familiar with the operation of your ATV.
Page 91
7-21 Your Vehicle
CLIMBING UPHILL
Use proper riding techniques to avoid vehicle
overturns on hills. Be sure that you can
maneuver your ATV well on flat ground
before attempting any incline and then
practice riding first on gentle slopes. Try
more difficult climbs only after you have
developed your skill. In all cases avoid
inclines with slippery or loose surfaces, or
obstacles that might cause you to lose
control.
WARNING
POTENTIAL HAZARD
Operating on excessively steep hills.
WHAT CAN HAPPEN
The vehicle can overturn more easily on
extremely steep hills than on level surfaces or
small hills.
HOW TO AVOID THE HAZARD
Never operate the ATV on hills too steep for
the ATV or for your abilities. Practice on
smaller hills before attempting large hills.
It is important when climbing a hill to make
sure that your weight is transferred forward
on the ATV. This can be accomplished by
leaning forward and, on steeper inclines,
Page 92
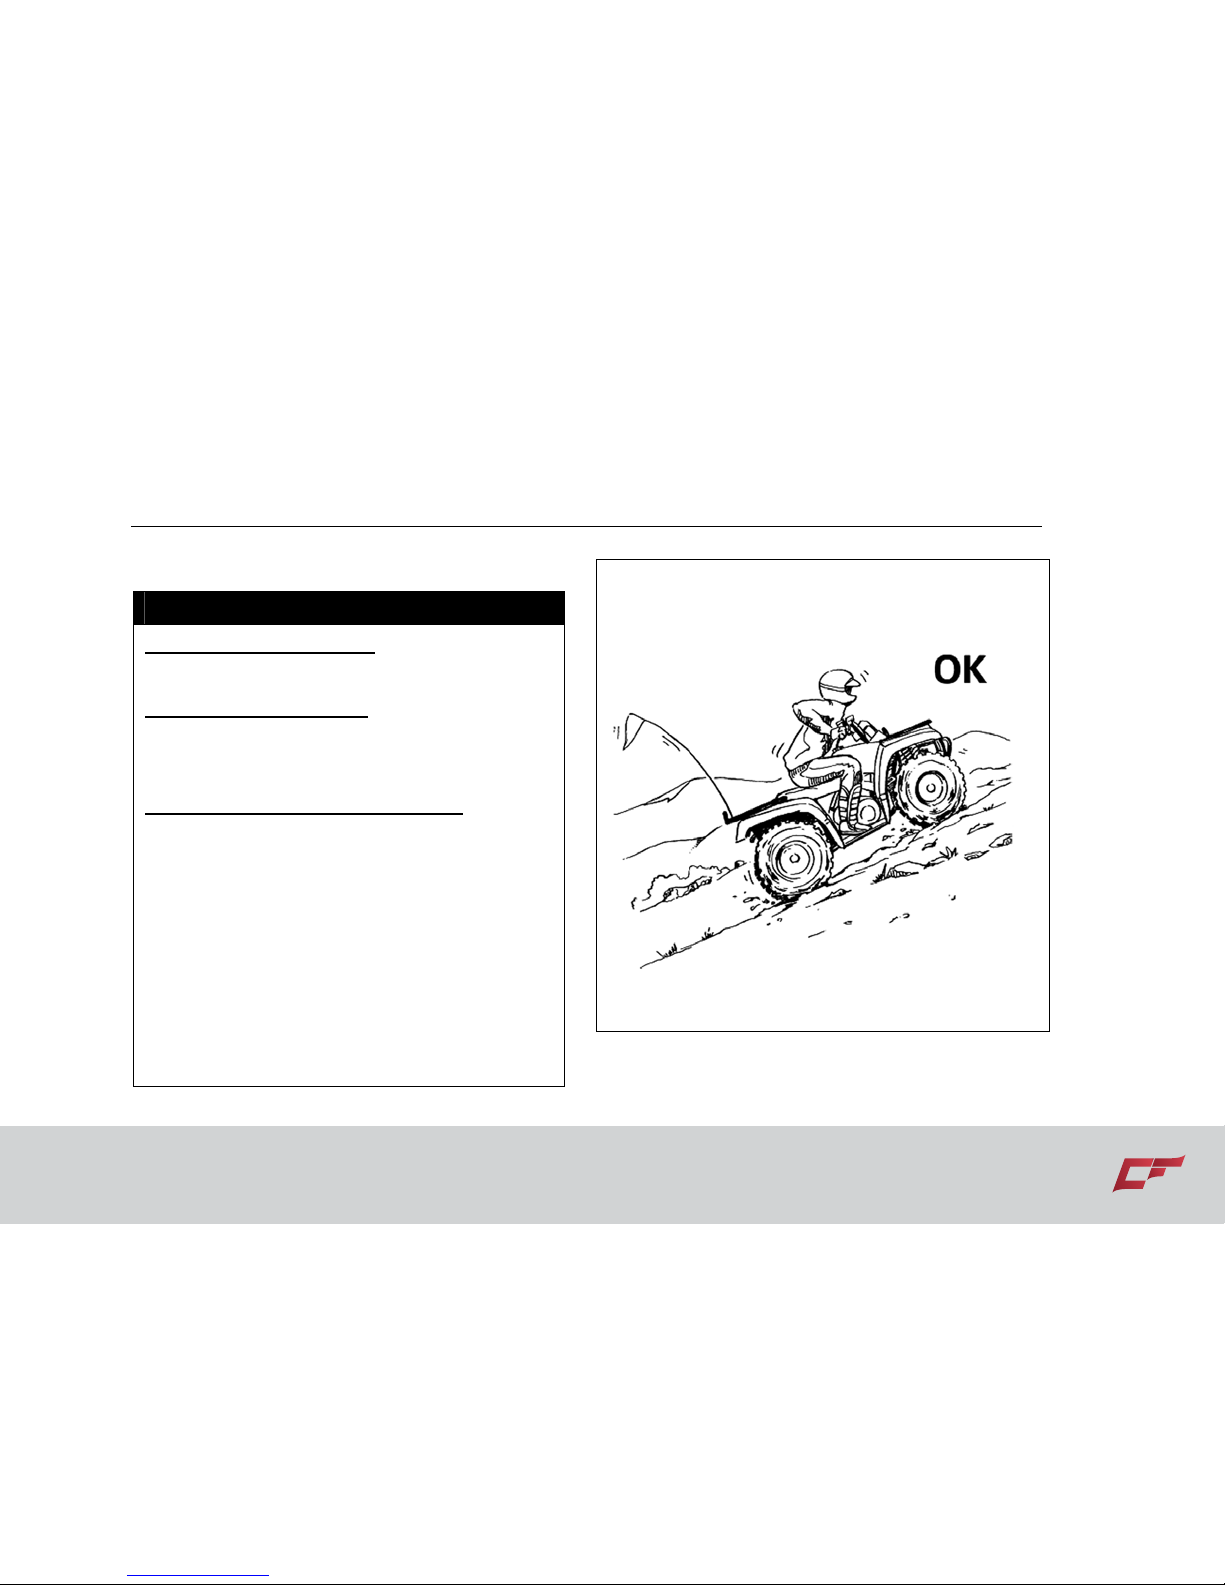
Your Vehicle 7-22
standing on the footboards and leaning
forward over the handlebars.
WARNING
POTENTIAL HAZARD
Climbing hills improperly.
WHAT CAN HAPPEN
Could cause loss of control or cause the ATV
to overturn.
HOW TO AVOID THE HAZARD
Always follow proper procedures for climbing
hills as described in this Owner’s Manual.
Always check the terrain carefully before you
start up any hill.
Never climb hills with excessively slippery or
loose surfaces.
Shift your weight forward.
Never open the throttle suddenly.
The ATV could flip over backwards.
Never go over the top of any hill at high speed.
An obstacle, a sharp drop, or another vehicle or
person could be on the other side of the hill.
Page 93
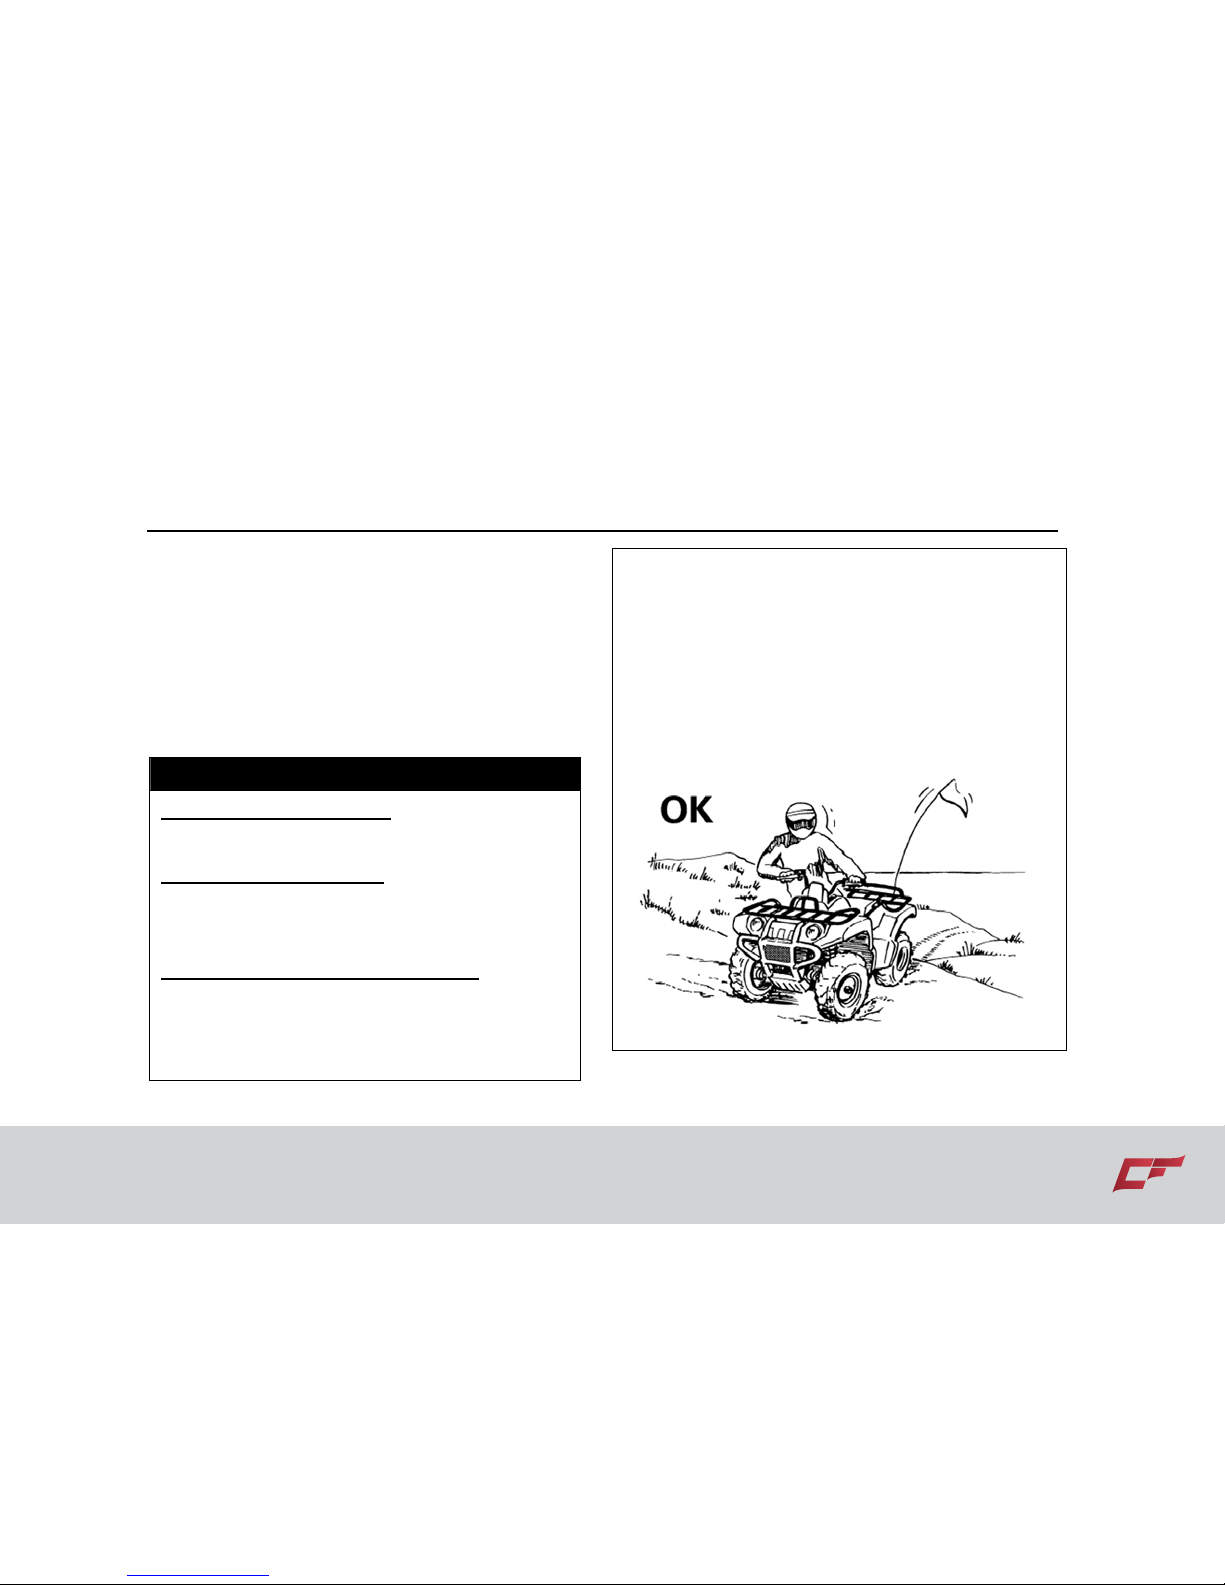
7-23 Your Vehicle
If you are climbing a hill and you find that you
have not properly judged your ability to make
it to the top, you should turn the ATV around
while you still have forward motion (provided
you have the room to do so) and go down the
hill.
WARNING
POTENTIAL HAZARD
Improperly crossing hills or turning on hills.
WHAT CAN HAPPEN
Could cause loss of control or cause the ATV
to overturn.
HOW TO AVOID THE HAZARD
Never attempt to turn the ATV around on any
hill until you have mastered the turning
technique as described in the Owner’s Manual
on level ground. Be very careful when turning on
any hill. Avoid crossing the side of a steep hill if
possible.
When crossing the side of a hill:
Always follow proper procedures as described in
the Owner’s Manual.
Avoid hills with excessively slippery or loose
surfaces.
Shift your weight to the uphill side of the ATV.
Page 94

Your Vehicle 7-24
If your ATV has stalled or stopped and you
believe you can continue up the hill, restart
carefully to make sure you do not lift the front
wheels which could cause you to lose control.
If you are unable to continue up the hill,
dismount the ATV on the uphill side.
Physically turn the ATV around and then
descend the hill.
If you start to roll backwards, DO NOT
applies either brake abruptly. If you are in
2WD, apply only the front brake. When this
ATV is in 4WD or 4WD-LOCK, all wheels
(front and rear) are interconnected by the
drive train. This means that applying either
the front brake or the rear brake will brake all
wheels. When descending hills, using either
brake lever or the brake pedal will brake the
wheels on the downhill side. Avoid sudden
application of either the front or rear brake
because the wheels on the uphill side could
come off the ground. The ATV could easily tip
over backwards. Apply both the front and
rear brakes gradually, or dismount the ATV
immediately on the uphill side.
Page 95
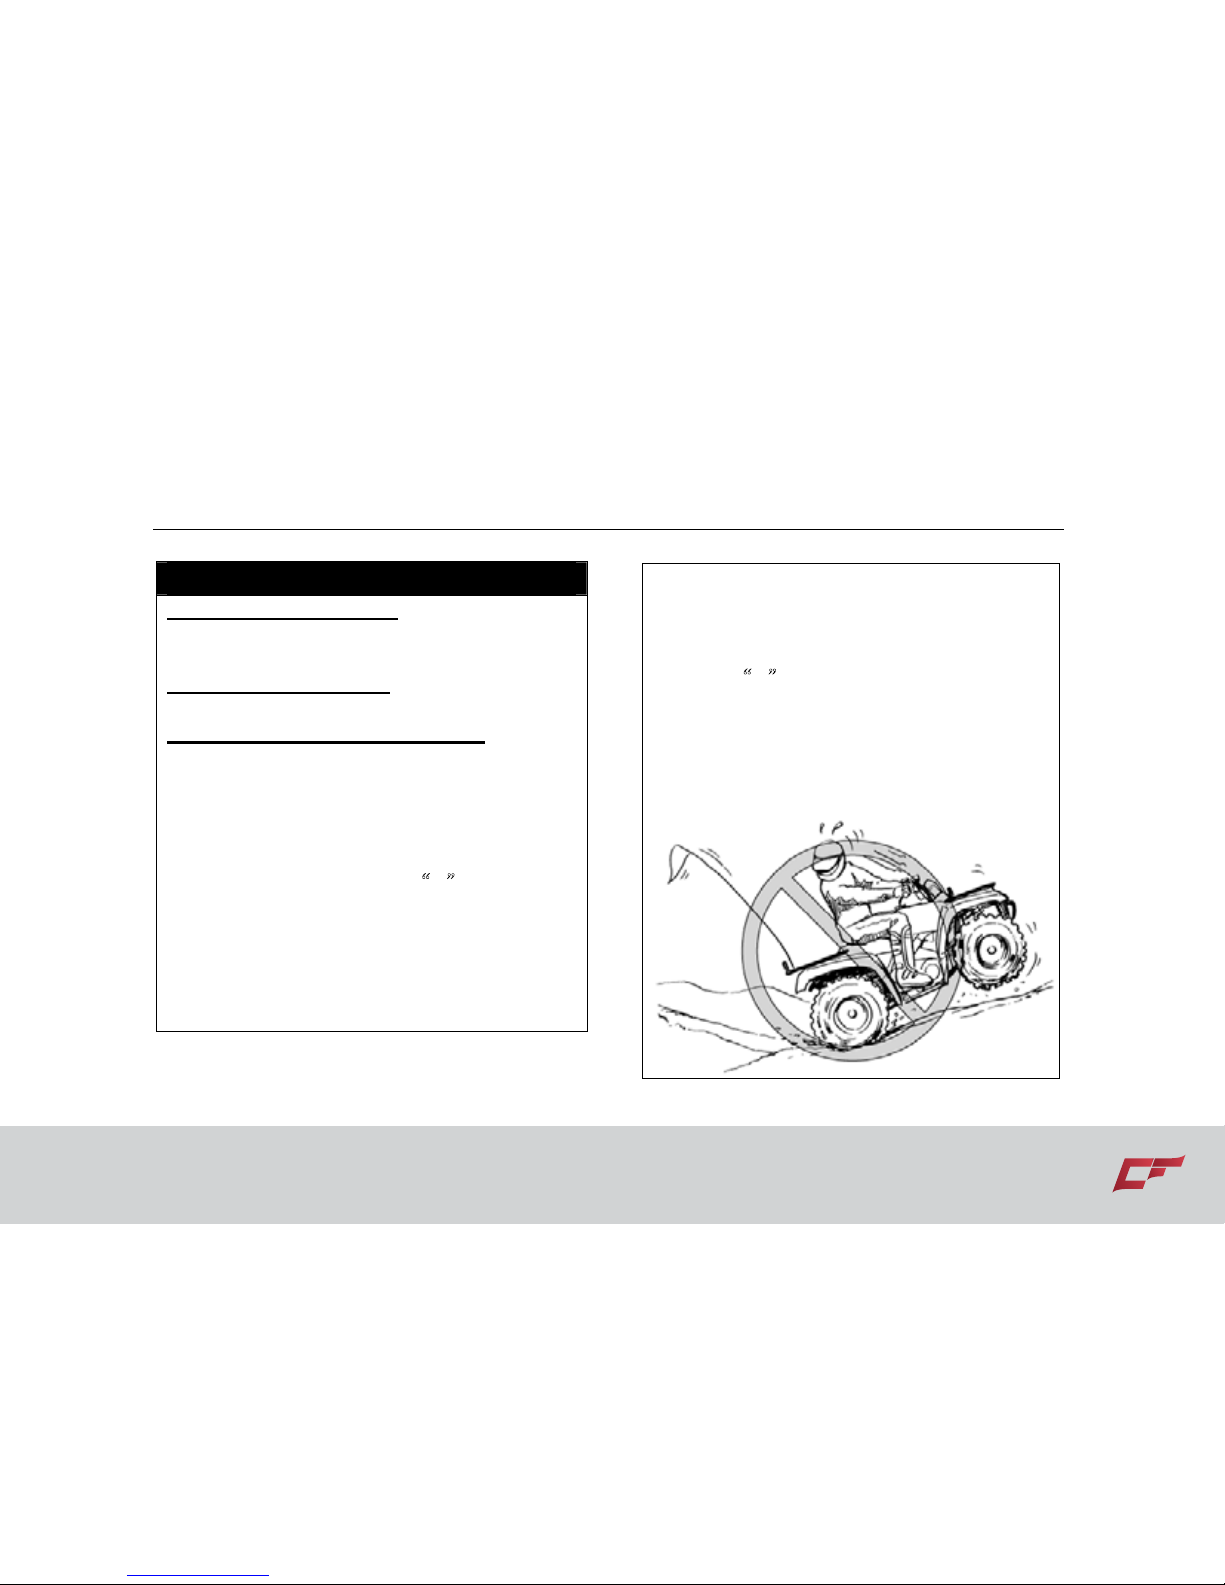
7-25 Your Vehicle
WARNING
POTENTIAL HAZARD
Stalling, rolling backwards or improperly
dismounting while climbing a hill.
WHAT CAN HAPPEN
Could result in ATV overturning.
HOW TO AVOID THE HAZARD
Use proper gear and maintain steady speed
when climbing a hill.
If you lose all forward speed:
Keep weight uphill.
Apply the brakes.
Shift to the parking position “
P” after you are
stopped.
If you begin rolling backwards:
Keep weight uphill.
2WD: Never apply the rear brake while rolling
backwards. Apply the front brake.
4WD or 4WD-LOCK: Apply both front and
rear brakes gradually.
When fully stopped, shift to the parking
position “
P”.
Dismount on uphill side or to a side if
pointed straight uphill. Turn the ATV around
and remount, following the procedure
described in the Owner’s Manual.
Page 96

Your Vehicle 7-26
RIDING DOWNHILL
When riding your ATV downhill, shift your
weight as far to the rear and uphill side of the
ATV as possible. Move back on the seat and
sit with your arms straight. Engine
compression will do most of the braking for
you. For maximum engine compression
braking effect, change to 4WD or
4WD-LOCK before beginning to descend the
hill. Improper braking may cause a loss of
traction. Use caution while descending a hill
with loose or slippery surfaces. Braking
ability and traction may be adversely affected
by these surfaces. Improper braking may
also cause a loss of traction.
When this ATV is in 4WD or 4WD-LOCK, all
wheels (front and rear) are interconnected by
the drive train. This means that applying
either the front brake or the rear brake will
brake all wheels. When descending hills,
using either brake lever or the brake pedal
will brake the wheels on the downhill side.
Avoid sudden application of either the front or
rear brake because the wheels on the uphill
side could come off the ground. Apply both
the front and rear brakes gradually.
Whenever possible, ride your ATV straight
downhill. Avoid sharp angles which could
allow the ATV to tip or roll over. Carefully
choose your path and ride no faster than you
will be able to react to obstacles which may
Page 97
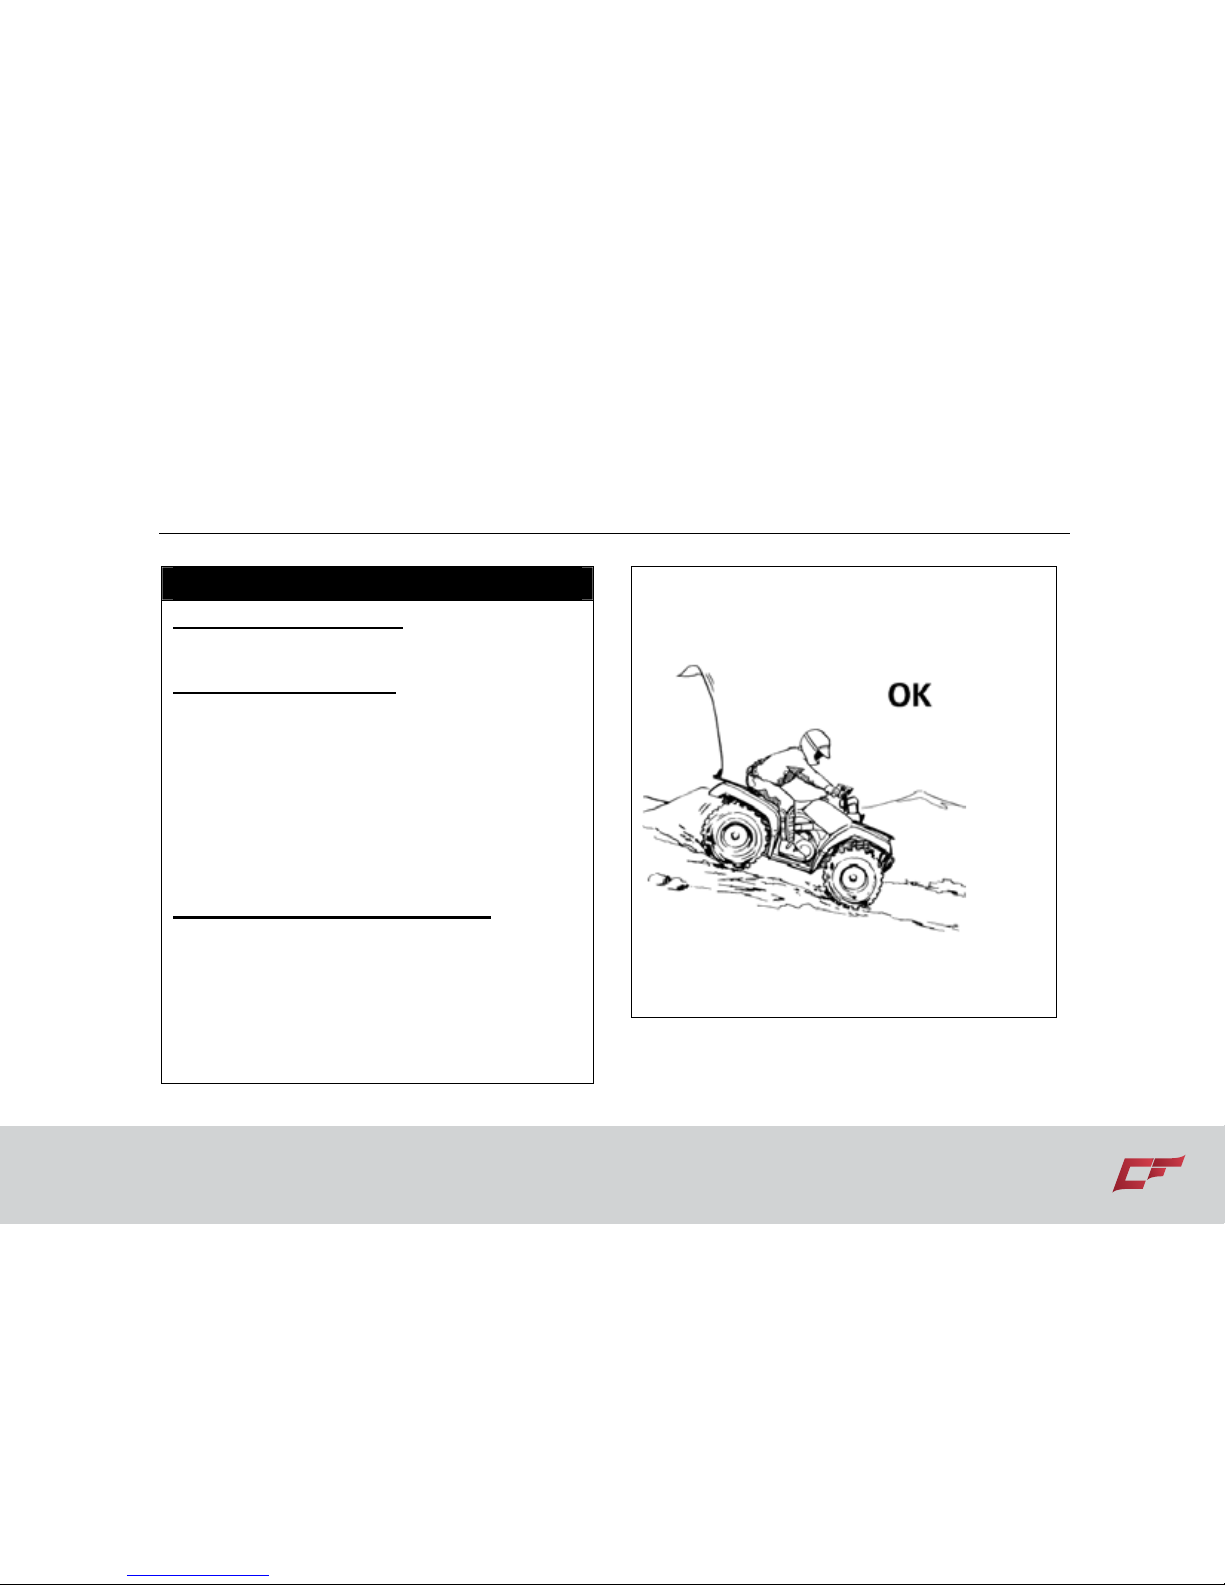
7-27 Your Vehicle
appear.
WARNING
POTENTIAL HAZARD
Going down a hill improperly.
WHAT CAN HAPPEN
Could cause loss of control or cause the ATV
to overturn.
Always follow proper procedures for go- ing
down hills as described in this Owner’s
Manual. Note: a special technique is required
when braking as you go down a hill.
HOW TO AVOID THE HAZARD
Always check the terrain carefully before you
start down any hill.
Shift your weight backward.
Never go down a hill at high speed.
Avoid going down a hill at an angle that would
cause the vehicle to lean sharply to one side.
Go straight down the hill where possible.
Page 98
Your Vehicle 7-28
CROSSING A SLOPE
Traversing a sloping surface on your ATV
requires you to properly position your weight
to maintain proper balance. Be sure that you
have learned the basic riding skills on flat
ground before attempting to cross a sloping
surface. Avoid slopes with slippery surfaces
or rough terrain that may upset your balance.
As you travel across a slope, lean your body
in the uphill direction. It may be necessary to
correct the steering when riding on loose
surfaces by pointing the front wheels slightly
uphill. When riding on slopes be sure not to
make sharp turns either up or down hill.
If your ATV does begin to tip over, gradually
steer in the downhill direction if there are no
obstacles in your path. As you regain proper
balance, gradually steer again in the
direction you wish to travel.
WARNING
POTENTIAL HAZARD
Improperly crossing hills or turning on hills.
WHAT CAN HAPPEN
Could cause loss of control or cause the
ATV to overturn.
HOW TO AVOID THE HAZARD
Never attempt to turn the ATV around on any
hill until you have mastered the turning
technique as described in the Owner’s Manual
on level ground. Be very careful when turning
on any hill.
Avoid crossing the side of a steep hill if
possible.
When crossing the side of a hill:
Page 99
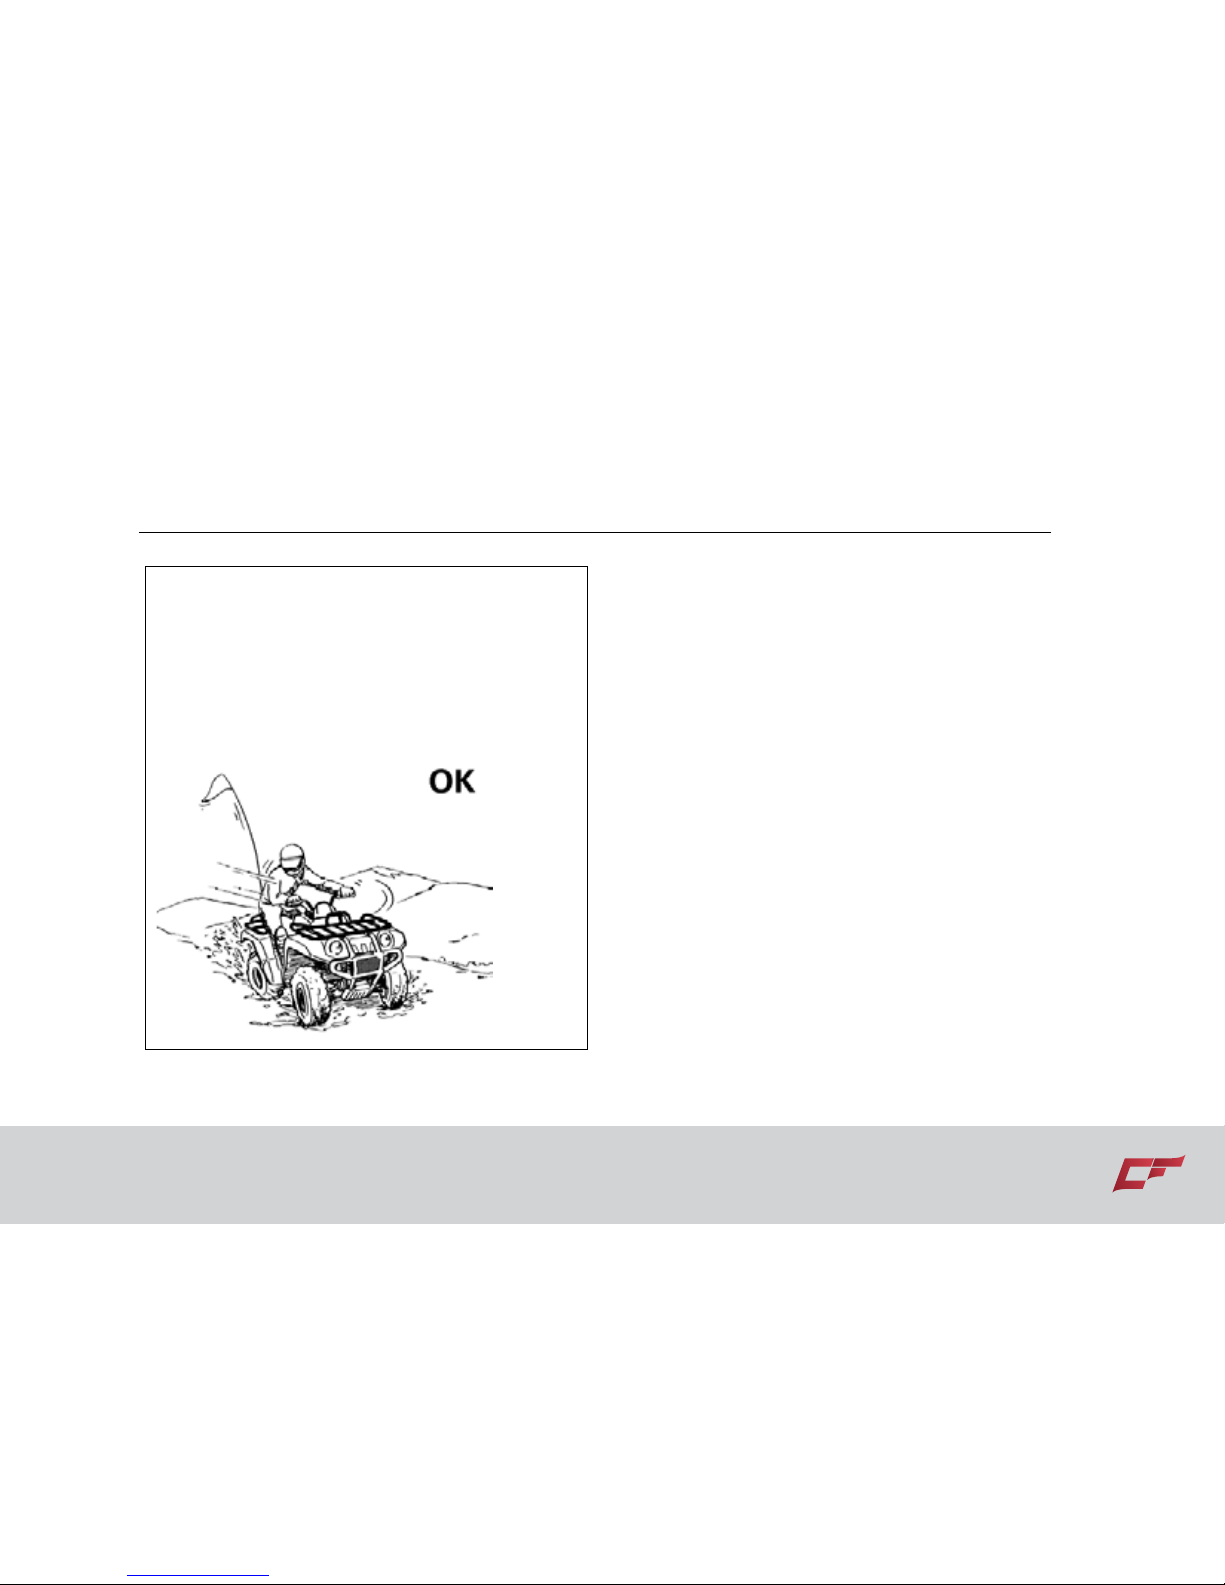
7-29 Your Vehicle
Always follow proper procedures as de- scribed
in the Owner’s Manual.
Avoid hills with excessively slippery or loose
surfaces. Shift your weight to the uphill side of
the ATV.
CROSSING THROUGH SHALLOW
WATER
The ATV can be used to cross slow moving,
shallow water of up to a maximum of 35 cm
(14 inches) in depth. Before entering the
water, choose your path carefully. Enter
where there is no sharp drop off, and avoid
rocks or other obstacles which may be
slippery or upset the ATV. Drive slowly and
carefully.
Page 100
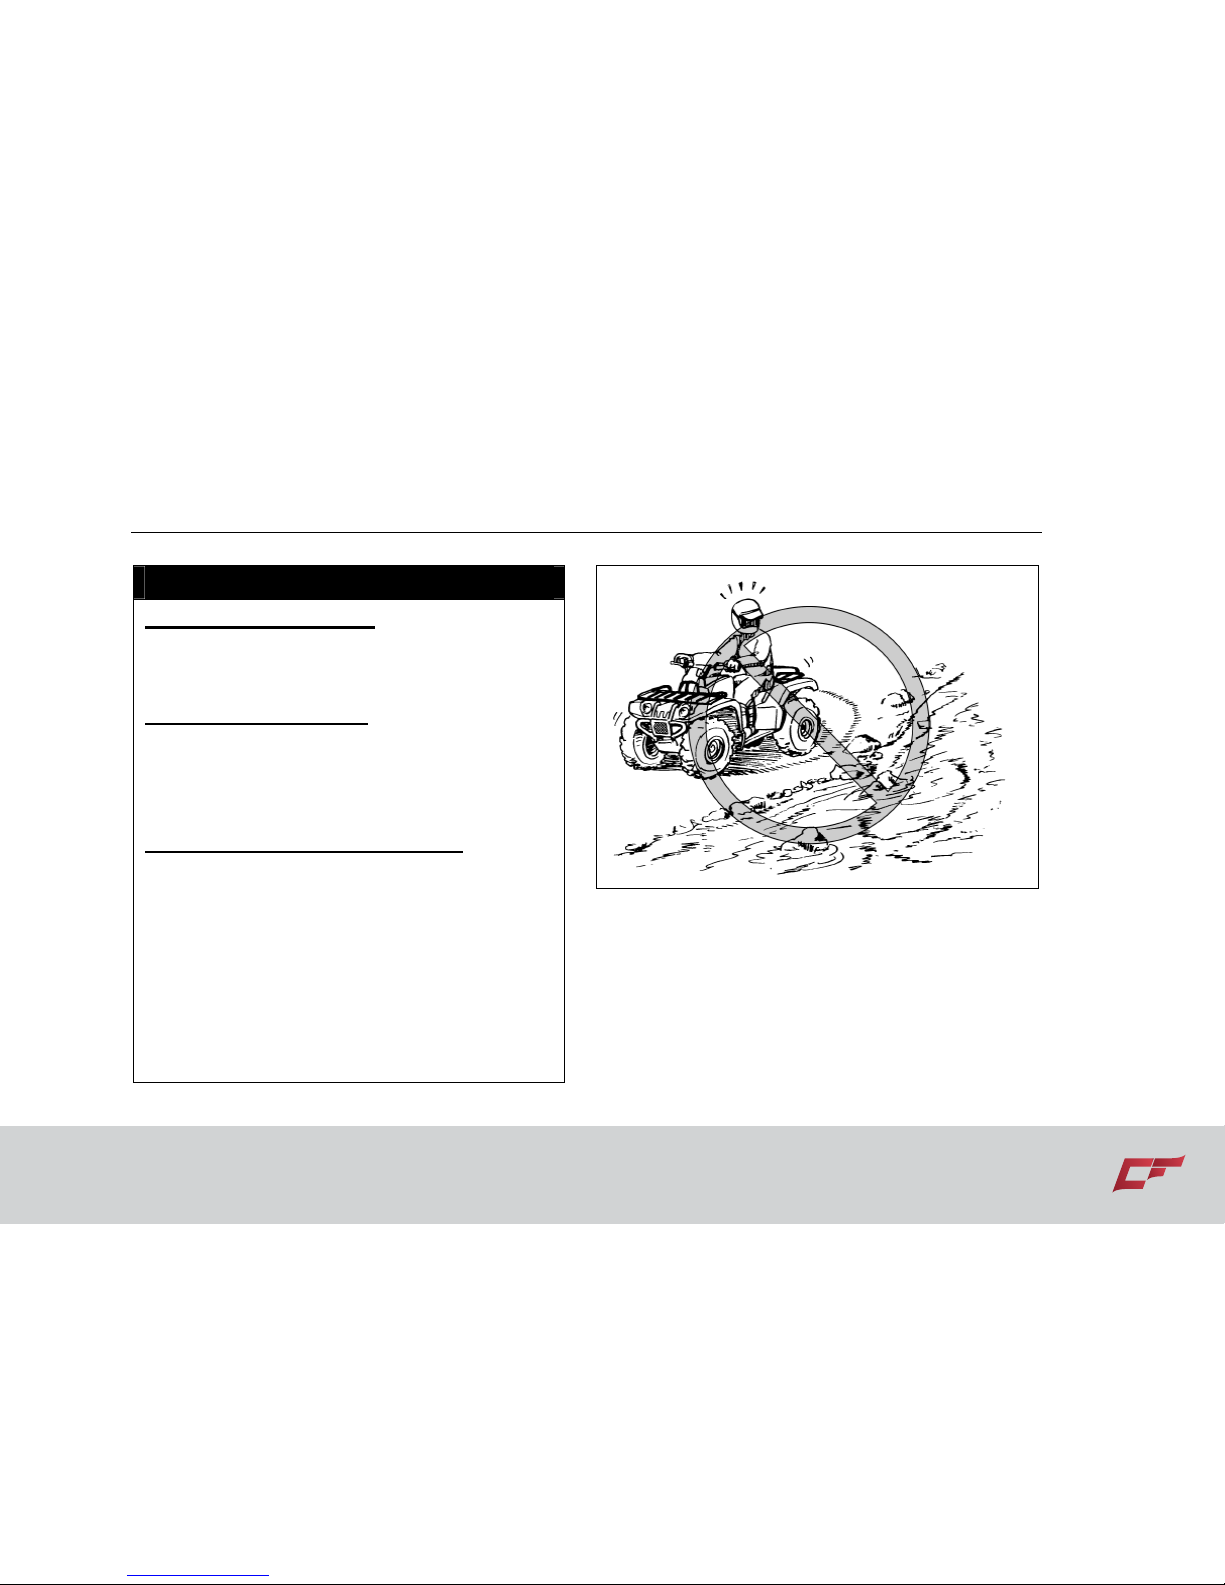
Your Vehicle 7-30
WARNING
POTENTIAL HAZARD
Operating this ATV through deep or fast
flowing water.
WHAT CAN HAPPEN
Tires may float, causing loss of traction and
loss of control, which could lead to an
accident.
HOW TO AVOID THE HAZARD
Never operate this ATV in fast flowing water or
in water deeper than that specified in your
Owner’s Manual.
Remember that wet brakes may have reduced
stopping ability. Test your brakes after leaving
water. If necessary, apply them several times
to let friction dry out the linings.
Test your brakes after leaving the water. Do
not continue to ride your ATV without
verifying that you have regained proper
braking ability.
 Loading...