

Crossbow Stargate NetBridge User Manual

Stargate NetBridge Gateway User’s Manual
Revision A, October 2007
PN: 7430-0449-01

© 2007 Crossbow Technology, Inc. All rights reserved.
Information in this document is subject to change without notice.
Crossbow, IRIS, MICA, TrueMesh and XMesh are registered trademarks of Crossbow
Technology, Inc. Other product and trade names are trademarks or registered trademarks of their
respective holders.

Stargate NetBridge Gateway User’s Manual
Table of Contents
1 Introduction.............................................................................................................................1
1.1 Stargate NetBridge Gateway Overview.........................................................................1
1.2 Package Contents...........................................................................................................1
2 Quick Start WSN Kit Users...................................................................................................2
2.1 Out-of-the-Box Demo....................................................................................................2
3 Hardware Overview...............................................................................................................7
3.1 Stargate NetBridge Gateway..........................................................................................7
4 System Configuration.............................................................................................................9
4.1 Boot Procedure .............................................................................................................. 9
4.2 Gateway Server Statistics .............................................................................................. 9
4.3 Network Topologies .................................................................................................... 11
5 Data Visualization using MoteExplorer.............................................................................12
5.1 Pre-requirements..........................................................................................................12
5.2 Login............................................................................................................................13
5.3 Map.............................................................................................................................. 14
5.4 Charts...........................................................................................................................16
5.5 Network .......................................................................................................................22
5.6 Data..............................................................................................................................26
6 Data logging and Visualization using MoteView...............................................................27
6.1 Remote Connection using MoteView..........................................................................27
6.2 MoteView at a Glance ..................................................................................................28
7 Advanced Stargate NetBridge Administration..................................................................30
7.1 Remote Stargate NetBridge Administration................................................................30
7.2 MoteExplorer Administration......................................................................................33
7.3 XServe Administration ................................................................................................33
7.4 Recovery of the XServe............................................................................................... 37
7.5 Direct connection to a PC using Crossover cable........................................................ 38
7.6 Assigning Static IP address..........................................................................................40
7.7 Commercial networks.................................................................................................. 41
7.8 Re-programming the base using UISP utility..............................................................41
8 Appendix A. Advanced XServe Configuration..................................................................42
8.1 Configuring XServe.....................................................................................................42
9 Appendix B. Accessories ......................................................................................................51
9.1 Crossbow Accessories: ................................................................................................51
Doc. # 7430-0449-01 Rev. A Page i

Stargate NetBridge Gateway User’s Manual
9.2 Other Accessories........................................................................................................51
10 Appendix C. Warranty and Support Information..........................................................52
10.1 Customer Service .....................................................................................................52
10.2 Contact Directory..................................................................................................... 52
10.3 Return Procedure...................................................................................................... 52
10.4 Warranty................................................................................................................... 53
Page ii Doc. # 7430-0449-01 Rev. A
Stargate NetBridge Gateway User’s Manual
About This Document
The following annotations have been used to provide additional information.
; NOTE
Note provides additional information about the topic.
; EXAMPLE
Examples are given throughout the manual to help the reader understand the terminology.
3 IMPORTANT
This symbol defines items that have significant meaning to the user
WARNING
The user should pay particular attention to this symbol. It means there is a chance that physical
harm could happen to either the person or the equipment.
The following paragraph heading formatting is used in this manual:
1 Heading 1
1.1 Heading 2
1.1.1 Heading 3
This document also uses different body text fonts (listed in Table 0-1) to help you distinguish
between names of files, commands to be typed, and output coming from the computer.
Table 0-1. Font types used in this document.
Font Type Usage
Courier New Normal
Courier New Bold
Times New Roman Italic
Franklin Medium Condensed
Sample code and screen output
Commands to be typed by the user
TinyOS files names, directory names
Text labels in GUIs
Doc. # 7430-0449-01 Rev. A Page iii


Stargate NetBridge Gateway User’s Manual
1 Introduction
This User’s Manual describes the features and operation of the Stargate NetBridge embedded
wireless sensor network gateway.
1.1 Stargate NetBridge Gateway Overview
Stargate NetBridge is a Linux based embedded Wireless Sensor Network (WSN) gateway based
on the Linksys NSLU2 device. It has been modified by Crossbow to specifically support the
functionality of a WSN gateway. For any questions or assistance with this product please contact
Crossbow technical support; do not contact Linksys directly as they will not be able to assist with
issue regarding this particular device.
1.2 Package Contents
The Stargate NetBridge Gateway package includes:
• 1 x Stargate NetBridge
• 1 x USB FLASH disk
• 1 x Stargate NetBridge power supply
• 1 x Stargate NetBridge vertical stand
• 1 x Ethernet cable
• 1 x CD with the software and documentation
Doc. # 7430-0449-01 Rev. A Page 1
Stargate NetBridge Gateway User’s Manual
2 Quick Start WSN Kit Users
2.1 Out-of-the-Box Demo
This section will step you through the process of setting up a simple Mote sensor network
demonstration. The four main steps are to
1. Set-up Stargate NetBridge
2. Set up BU base station and SN sensor nodes (optional)
3. Run the GatewayConfig tool to find the IP address of the Stargate NetBridge
4. Start MoteExplorer and visualize sensor data from the wireless sensor network
2.1.1 Setting-up Stargate NetBridge
To get started and set-up the Stargate NetBridge
• Remove the Stargate NetBridge gateway from its packaging. An included base can be
used for upright operation.
• The bag holding the Stargate NetBridge also contains an USB FLASH disk included in
the package. Insert this device into the bottom USB port of the Stargate NetBridge
labeled “Disk 1”. Please make sure that the side with the electrical contacts on the USB
disk mates with the contacts inside the USB connector. If the USB disk is plugged in the
wrong way the Stargate NetBridge will not boot.
• Also included are a CAT5 Ethernet cable and a snap-on inductor. For optimal noise
reduction, place the inductor close to the connector that will plug into the Stargate
NetBridge and snap it in place.
• Connect the Ethernet cable to the Stargate NetBridge Ethernet port. The other end would
typically plug into a Router or Ethernet hub/switch. If a direct connection to a PC without
a Router is desired, a special cross-over cable (not included) must be used. Refer to
Section 7.4 for further details on this type of setup.
Page 2 Doc. # 7430-0449-01 Rev. A
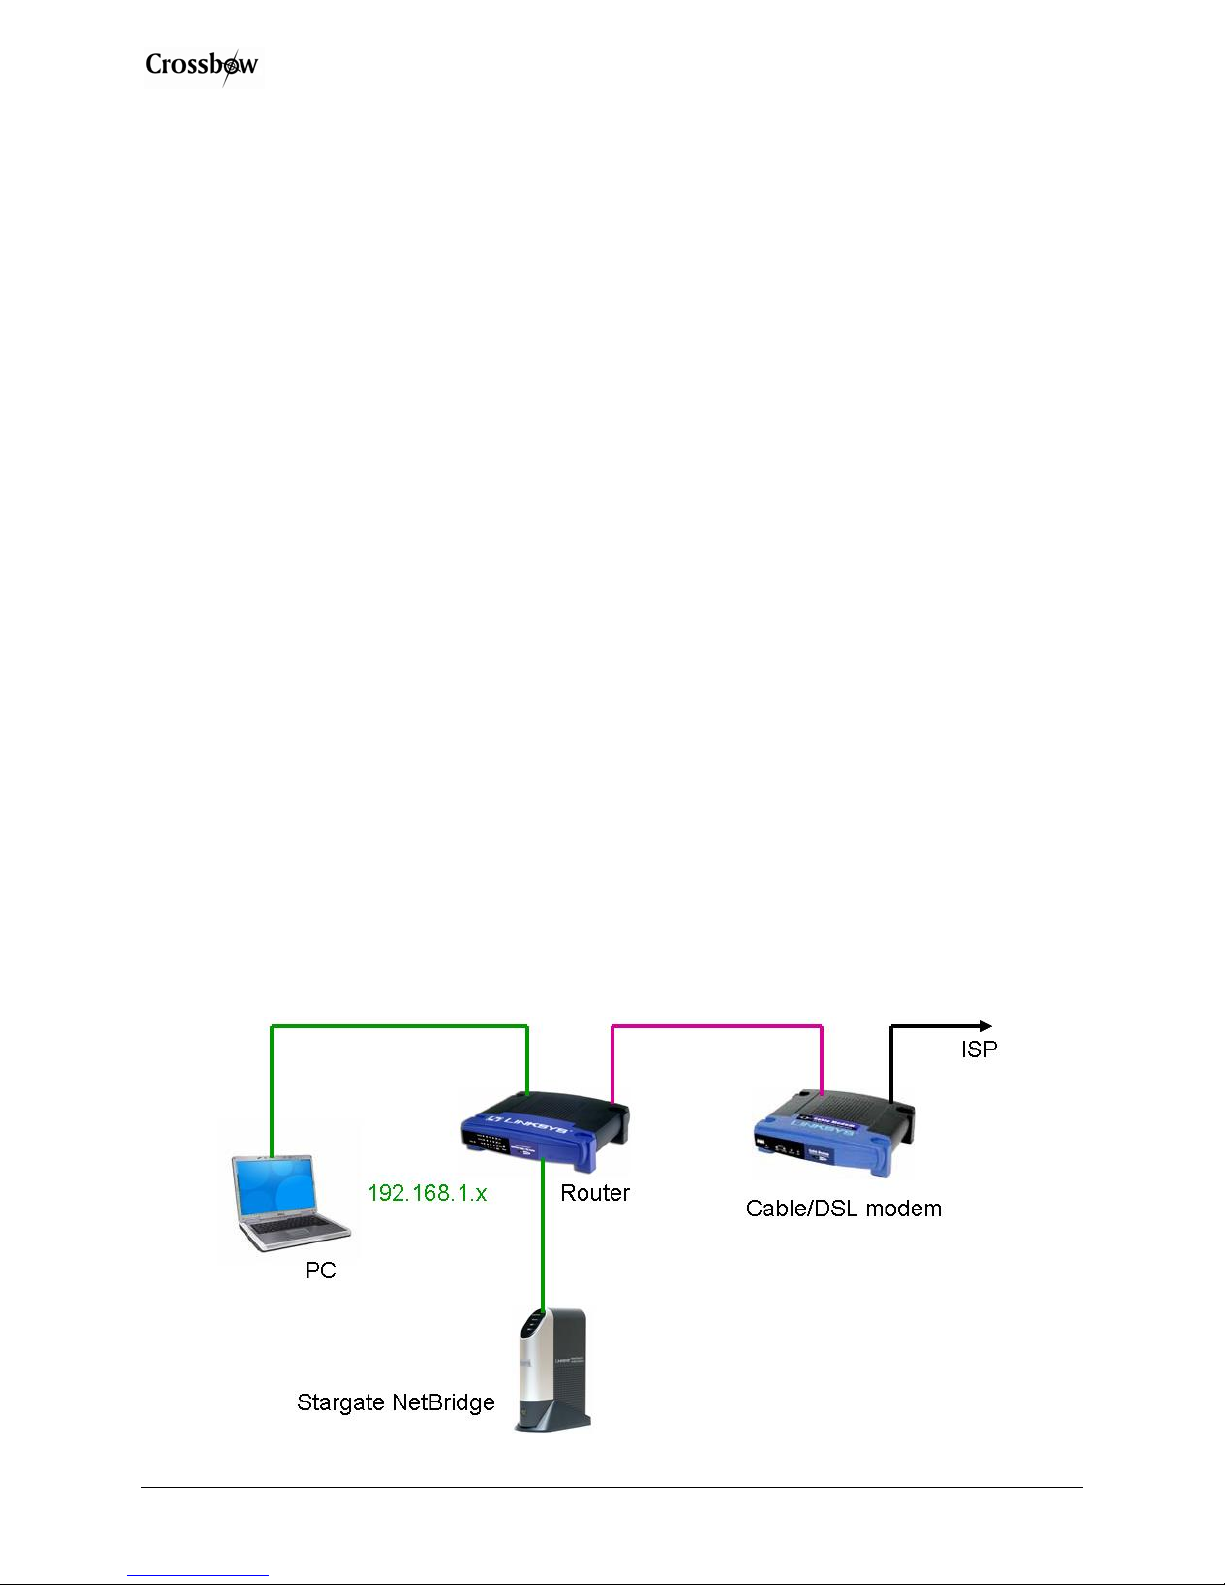
Figure 2-1. Typical network configuration

Stargate NetBridge Gateway User’s Manual
• Insert the included power adapter into a standard electrical outlet and plug the power
connector into the Stargate NetBridge. Upon application of external power, the Stargate
NetBridge will commence its boot procedure, it is not necessary to push the power button
at the front of the device.
2.1.2 Setting up the BU base station and SN sensor nodes (Optional)
• If you purchased a Sensor Network base station such as the BU900, BU2110, or BU2400
with the Stargate NetBridge plug its USB cable into the remaining USB slot on the
Stargate NetBridge labeled “Disk 2”. If you are planning to add other USB devices to the
Stargate NetBridge, the “Disk 2” port can be attached to a standard USB hub which in
turn can host additional devices. Make sure that the external USB hub is powered (active)
if the attached devices exceed the power capabilities of a passive hub. Never attach the
system FLASH disk via a hub, always plug it in directly into the “Disk 1” port.
• If you purchased the packaged SN series Sensor Nodes, they should be labeled with
Unique Node ID.
• Insert batteries into the battery holder compartment of the Sensor Nodes and turn the
power switch to the ON position.
• Spread the nodes around on your desk top or in the office area. Make sure that the sensor
nodes are resting on their bases with antenna pointing vertically upwards.
2.1.3 Run the GatewayConfig tool to find the IP address of the Stargate NetBridge
In order to connect to the Stargate NetBridge its hostname or IP address has to be known. The
GatewayConfig tool can help scan and find the IP address. Some networks will resolve the
hostname properly so knowing the NetBridge’s IP address is not required.
• The hostname is determined by the prefix sluggo- and the 5-digit serial number that can
be found on the sticker attached to the bottom of the device (e.g., SN = 00006 ->
hostname is sluggo-00006).
• Enter
http://hostname (e.g., http://sluggo-00006) into your Web browser. If the
MoteExplorer welcome screen appears you do not need to install the GatewayConfig
tool, skip to the next section.
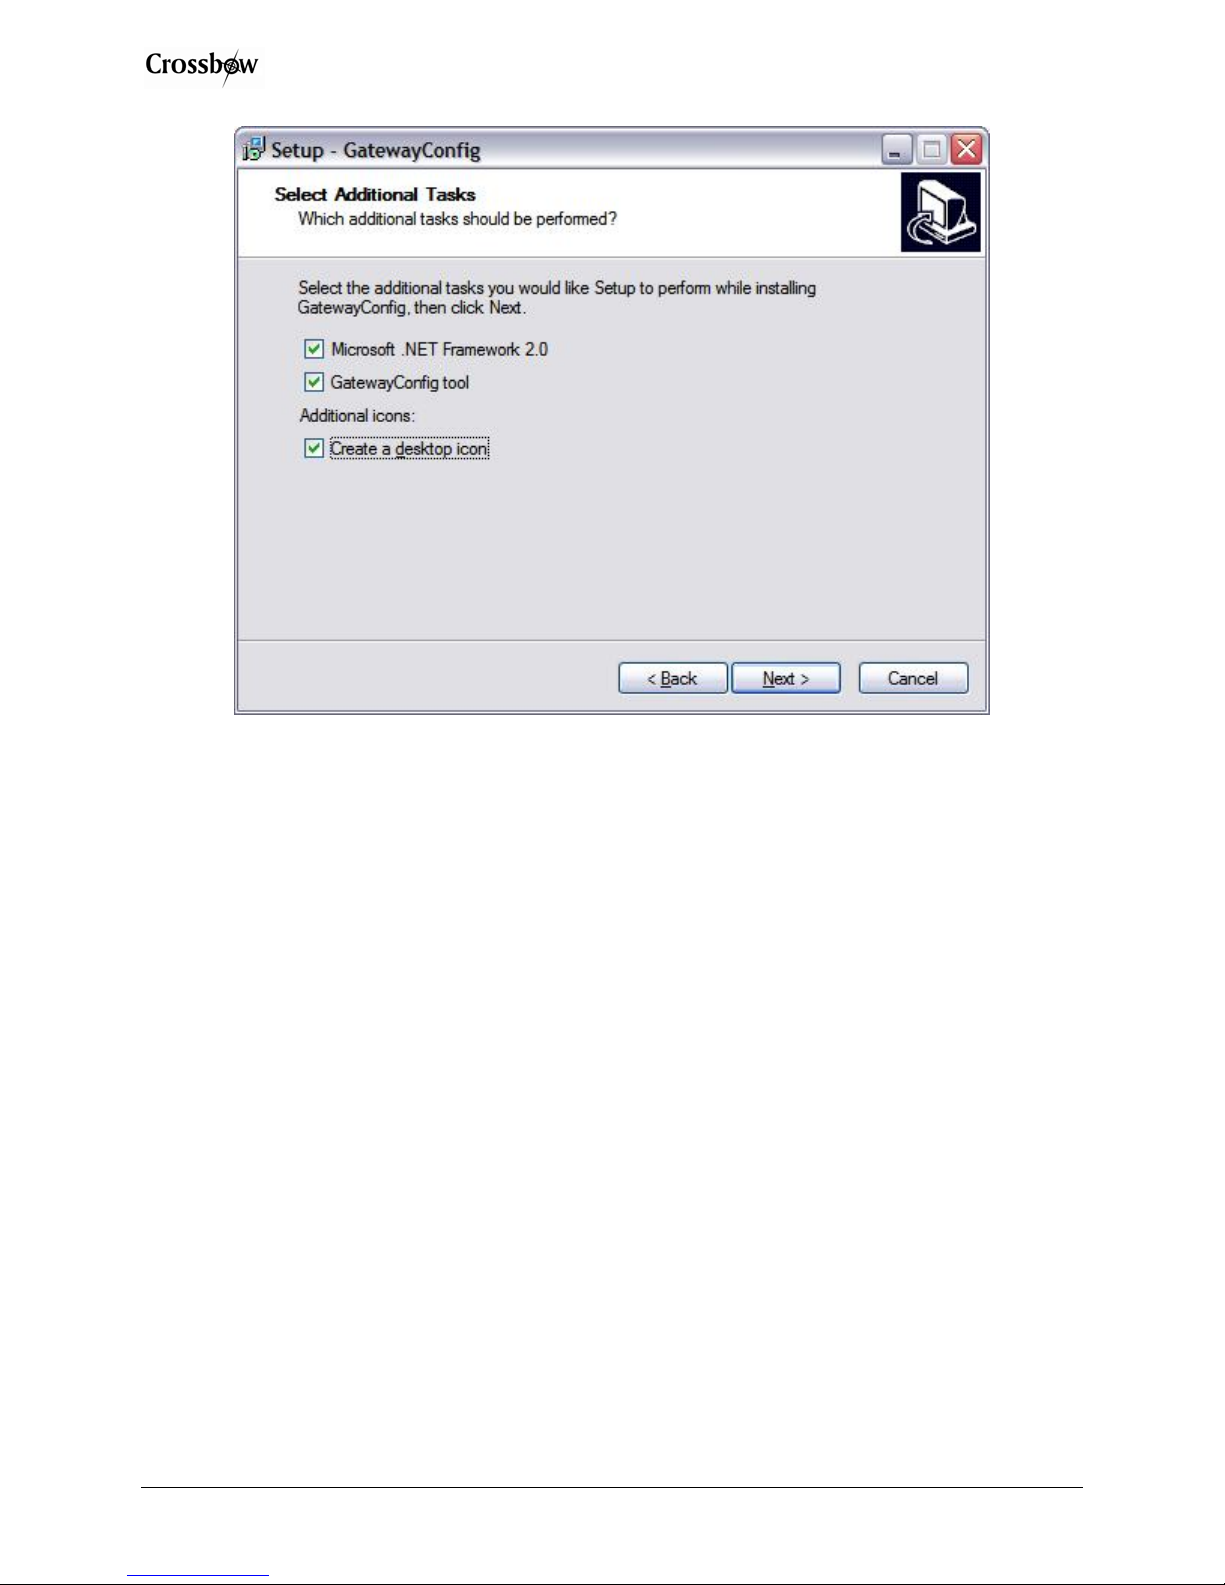
• Install GatewayConfig by double-clicking on GatewayConfigSetup_<version>.exe file
found on the CD.
• The Setup wizard would guide you through the installation process. Make sure to check
all the installation options (you would need Microsoft .NET Framework 2.0)
Doc. # 7430-0449-01 Rev. A Page 3
Stargate NetBridge Gateway User’s Manual
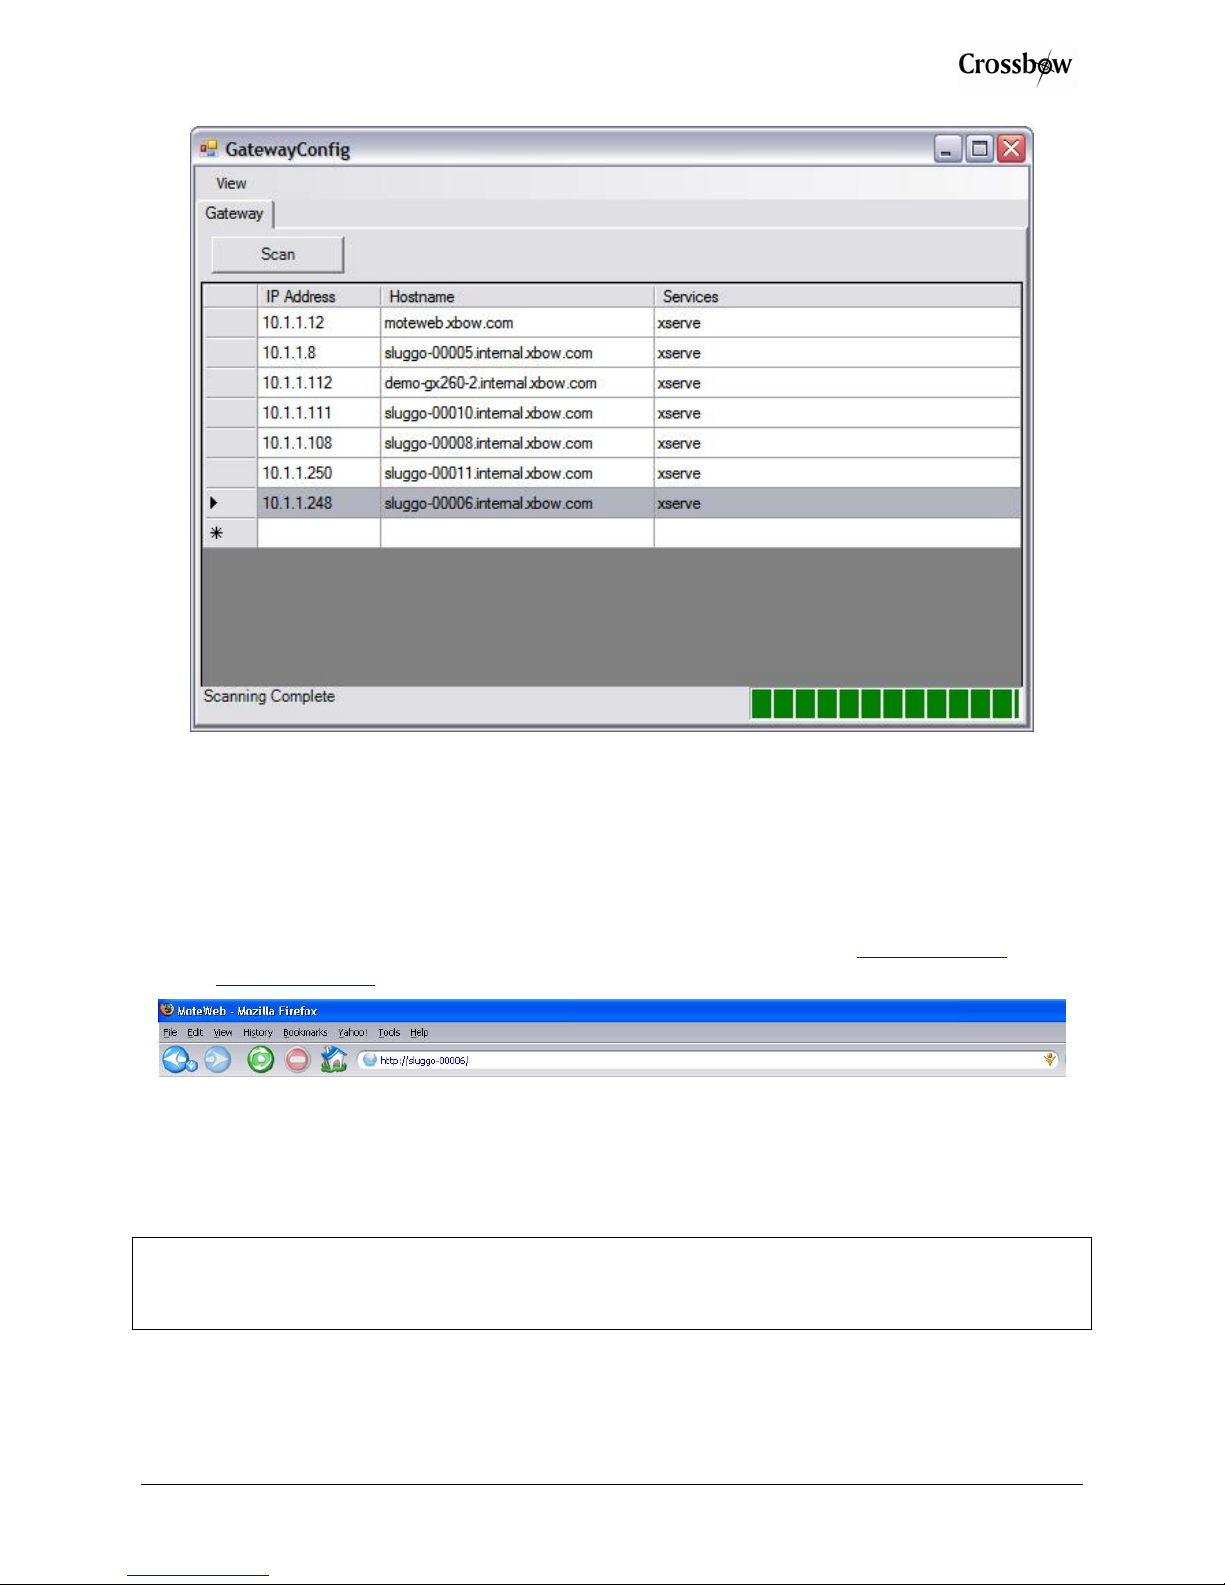
• Run GatewayConfig from Windows
• In the GatewayConfig GUI, click on
Start>Programs>Crossbow>GatewayConfig.
Scan.
• Allow sometime for the scanning to complete and the GUI would display a list the
Stargate NetBridge gateways that were found in your network.
• Make a note of the IP address assigned to your hostname. Double-clicking on this IP
address will open the MoteExplorer in a web browser.
Page 4 Doc. # 7430-0449-01 Rev. A
Stargate NetBridge Gateway User’s Manual
2.1.4 Start-up MoteExplorer
The primary interface to the Stargate NetBridge can be accessed using a Web browser on a
locally connected PC. In order to connect to the Stargate NetBridge its hostname or IP address
has to be known.
• Open a web browser (eg. Internet Explorer or Firefox)
• The following URLs will bring up the MoteExplorer login screen: http://hostname
http://ip-address
or
• MoteExplorer requires a username and password to login. Type the default values below
and click on
Login.
Username: admin
Password: crossbow
; NOTE: If you do not have Adobe’s Flash 9.x installed in your browser, you will be
prompted by your browser to install it. Follow the instructions given by your browser and then
retry the above steps.
You should see nodes appear in the node list on the left hand side of the MoteExplorer window.
MoteExplorer has four main user interface sections which you can browse and use.
• Map: Shows a Mote network map with placement and parenting information.
Doc. # 7430-0449-01 Rev. A Page 5

Stargate NetBridge Gateway User’s Manual
• Chart: Provides the ability to generate graphs of a sensor data vs. time for a set of nodes.
• Network: Displays the latest health packet readings received for each node in the
network
• Data: Displays the latest sensor readings received for each node in the network.
Figure 2-2. Screenshot of the MoteExplorer GUI
More information about MoteExplorer and its features can be found in the Chapter 5 of the
manual.
; NOTE: To turn off the power, press the power button. This allows Stargate NetBridge to
correctly shutdown the operating system and takes about 40 seconds.
Page 6 Doc. # 7430-0449-01 Rev. A
Stargate NetBridge Gateway User’s Manual
3 Hardware Overview
3.1 Stargate NetBridge Gateway
The Stargate NetBridge gateway is an embedded Sensor Network gateway device. It is based on
the Intel IXP420 XScale processor running at 266MHz. It features one wired Ethernet and two
USB 2.0 ports. The device is further equipped with 8MB of program FLASH, 32MB of RAM
and a 2GB USB 2.0 system disk.
The Stargate NetBridge runs the Debian Linux operating system. It comes preloaded with
Crossbow’s Sensor Network management and data visualization software packages,
MoteExplorer and XServe. Those programs are automatically started when a Sensor Network
base station is plugged into the secondary USB port.
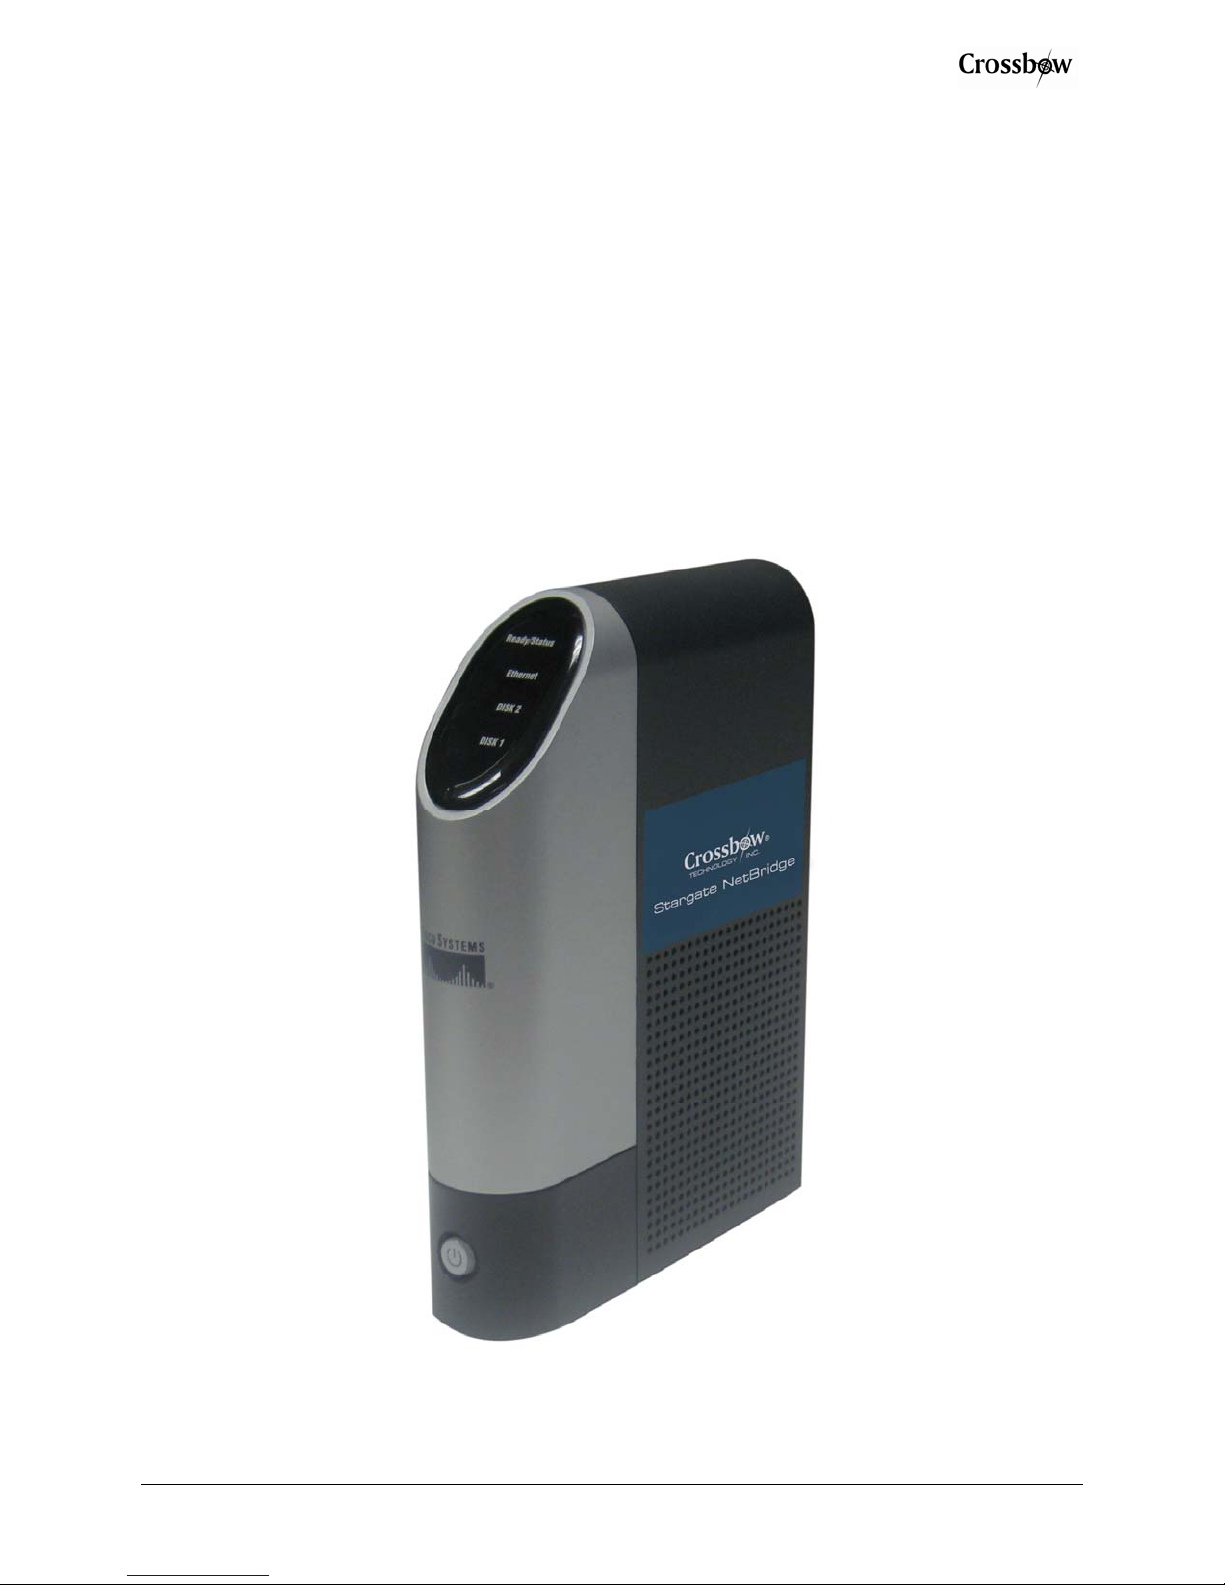
Figure 3-1. Photo of the Stargate NetBridge
Doc. # 7430-0449-01 Rev. A Page 7

Stargate NetBridge Gateway User’s Manual
3.1.1 Performance Specifications
Table 3-1. Stargate NetBridge Gateway Performance Specifications
Parameter Operating Value
CPU IXP420 @ 266MHz
Program Flash 8 MB
RAM 32 MB
USB Flash Disk 2 GB
3.1.2 Electrical Specifications
The electrical specifications for the Stargate NetBridge Gateway are provided in Table 3-2.
Table 3-2. Stargate NetBridge Gateway Electrical Specifications
Parameter Operating Value
Voltage supply 5.0 Volts
Power Consumption ~ 3 W
I/O
User Interfaces
Other features
1 x RJ45 Ethernet (IEEE 802.3, 802.3u)
2 x USB 2.0 host (USB 1.0/1.1 compatible)
4 x status LEDs
1 x power LED
1 x soft power button
1 x Reset button
1 x beeper
Automatic boot when powered
Real-time clock (battery backed-up RTC)
Watchdog timer
3.1.3 Environmental and Mechanical Specifications
The environmental and mechanical specifications for the Stargate NetBridge gateway are
provided in Table 3-3.
Table 3-3. Stargate NetBridge Gateway Environmental Specifications
Storage Temperature -100 C to +600 C
Operating Temperature 50 C to + 400 C
Page 8 Doc. # 7430-0449-01 Rev. A
Parameter Operating Value
Humidity 5% to 90 % non-condensing
Size 130 mm x 21 mm x 91 mm
Weight 160 g

Stargate NetBridge Gateway User’s Manual
4 System Configuration
4.1 Boot Procedure
The start of the boot process has the top LED named “Status” light up yellow. The LED just
below it labeled “Ethernet” will blink green at any time if a proper wired Ethernet connection is
present. After a short while, the Status LED will blink yellow and green alternately, followed by
all four LEDs blinking consecutively for a period of time. Subsequently, the bottom two LEDs
will turn off and the top LED will be yellow for a while. The boot process is complete when the
“Disk 1” LED starts lighting up and the Status LED turns blinks green and yellow. A short beep
indicates the completion of the boot procedure as well. The whole process takes about two
minutes.
After Stargate NetBridge has powered up, you should see the front indicators showing the
following status.
Table 4-1. Stargate NetBridge Gateway LED indicator
Indicator Color Status
Power Button Green System on
Ready/Status
Ethernet Flashing Green Network activity
Disk2 Solid Green XServe Running
Disk1 Green USB disk running
Green/flashing Yellow System running
Yellow then flashing Green System boot
; NOTE:
correctly shutdown the operating system and takes about 40 seconds.
4.2 Gateway Server Statistics
The gateway server statistics page provide information about the network interfaces, disk
allocation, memory usage, process list along with memory allocations. This can be accessed by
typing the following URL in a web browser.
http://<hostname>/server.html
This is useful in finding if the gateway is running out of disk space or memory.
Server Information
Hostname: sluggo-00006
Server Uptime: 14:20:02 up 20:53, 0 users, load average: 0.07, 0.08, 0.07
Current Date: Tue Sep 25 14:20:02 PDT 2007
To turn off the power, press the power button. This allows Stargate NetBridge to
or http://<ip-address>/server.html
Network Interfaces:
eth0 Link encap:Ethernet HWaddr 00:14:BF:68:8C:A1
Doc. # 7430-0449-01 Rev. A Page 9

inet addr:10.1.1.248 Bcast:10.1.1.255 Mask:255.255.255.0
inet6 addr: fe80::214:bfff:fe68:8ca1/64 Scope:Link
UP BROADCAST RUNNING MULTICAST MTU:1500 Metric:1
RX packets:459986 errors:0 dropped:0 overruns:0 frame:0
TX packets:2527 errors:0 dropped:0 overruns:0 carrier:0
collisions:0 txqueuelen:100
RX bytes:32502391 (30.9 MiB) TX bytes:1142335 (1.0 MiB)
lo Link encap:Local Loopback
inet addr:127.0.0.1 Mask:255.0.0.0
inet6 addr: ::1/128 Scope:Host
UP LOOPBACK RUNNING MTU:16436 Metric:1
RX packets:8 errors:0 dropped:0 overruns:0 frame:0
TX packets:8 errors:0 dropped:0 overruns:0 carrier:0
collisions:0 txqueuelen:0
RX bytes:560 (560.0 b) TX bytes:560 (560.0 b)
Total Disk Allocation:
Filesystem Size Used Avail Use% Mounted on
/dev/sda1 2.0G 446M 1.5G 24% /
tmpfs 16M 0 16M 0% /lib/init/rw
udev 11M 33k 11M 1% /dev
tmpfs 16M 0 16M 0% /dev/shm
Total Memory Allocation:
total used free shared buffers cached
Mem: 30707712 29478912 1228800 0 5242880 6508544
Swap: 132849664 4775936 128073728
Total: 163557376 34254848 129302528
Virtual Memory Statistics:
procs -----------memory---------- ---swap-- -----io---- -system-- ----cpu--- r b swpd free buff cache si so bi bo in cs us sy id wa
1 0 4664 1192 5120 6356 0 0 1 11 175 21 1 1 96 2
Per-process Memory Allocation:
PID USER COMMAND START %MEM %CPU
1 root init Sep24 1.9 0.0
2 root ksoftirqd/0 Sep24 0.0 0.0
3 root events/0 Sep24 0.0 0.0
……..
Stargate NetBridge Gateway User’s Manual
Page 10 Doc. # 7430-0449-01 Rev. A

Stargate NetBridge Gateway User’s Manual
……..
……..
Current Process List:
PID COMMAND
1 init [2]
2 [ksoftirqd/0]
3 [events/0]
……..
……..
……..
XServe/MoteExplorer Information
XServe Processes:
XServe System Files:
total 8236
drwxr-xr-x 2 user user 4096 Sep 25 14:19 .
drwxrwxr-x 14 user user 4096 Aug 31 15:12 ..
-rwxr--r-- 1 user user 32 Aug 31 13:56 basejoinmap.xtbl
-rwxr--r-- 1 user user 12 Aug 31 13:56 joinmap.xtbl
-rwxr--r-- 1 user user 28 Aug 31 13:56 joinreject.xtbl
-rwxr--r-- 1 user user 8399872 Sep 25 14:19 xserve_sqlite.db
4.3 Network Topologies
For this user guide we will assume that the network to which the Stargate NetBridge is connected
consists of a class C IP network (e.g., of the type 192.168.x.x). It is further assumed that this
network consists of a NAT router with DHCP server capability, a WAN port connected to the
Internet and LAN ports hosting the Stargate NetBridge and at least one local PC.
There are a number of different possible network configurations the Stargate NetBridge can be
connected to. Further examples are briefly discussed in the Appendix. Note that the Stargate
NetBridge should never be directly connected to the Internet without using a NAT router or
firewall. This poses a serious security risk as the Stargate NetBridge is not equipped with
firewall protection to prevent unauthorized access.
The Stargate NetBridge is factory configured for DHCP (dynamic IP address). If a static IP
address is desired it will need to be reconfigured using the procedure described in the Section
7.6.
Doc. # 7430-0449-01 Rev. A Page 11
Stargate NetBridge Gateway User’s Manual
5 Data Visualization using MoteExplorer
This section describes the features of the MoteExplorer web interface included with the Stargate
NetBridge.
MoteExplorer is a web-based sensor network visualization application. The MoteExplorer
application supports Crossbow’s sensor and data acquisition boards (Table 1-1). For other legacy
boards, users should use MoteView to log and visualize data as explained in Chapter 6.
Table 5-1. MTS/MDA boards supported by MoteExplorer and their compatible Mote platforms
Sensor and Data Acquisition Boards
MTS300/310
MTS300/310
MTS400
MTS420
MDA100
MDA300
MDA320
Mote Platforms
IRIS MICAz MICA2
3 3 3
3 3 3
3 3 3
3 3 3
3 3 3
3 3 3
3 3 3
5.1 Pre-requirements
5.1.1 System Requirements
• PC connected to the Internet.
• Web browser, e.g. Microsoft’s Internet Explorer or Mozilla’s Firefox
• Adobe’s Flash Player 9.x. To install Flash Player 9.x visit Adobe’s web site:
http://www.macromedia.com/software/flash/about/
o
If you are unsure whether Flash 9.x is already installed on your PC, continue with the login steps.
If Flash 9.x is not installed, your web browser will prompt you to install Flash 9.x and will lead
you through the steps to do so.
5.1.2 MoteExplorer URL
MoteExplorer is a web-based application and can be accessed through a PC’s web browser. To
access the application users will need the MoteExplorer URL address. Users can use either the
hostname of their Stargate NetBridge written on a sticker attached to one side of the device or an
IP Address. For users on a corporate or university network, the hostname should be enough to
allow users to find the application through the browser. Most home routers do not support the
means to use the hostname on the side of the box. In those cases users will need to use the IP
address of the Stargate NetBridge device.
Page 12 Doc. # 7430-0449-01 Rev. A
Stargate NetBridge Gateway User’s Manual
The IP address of the Stargate NetBridge can be found either using the GatewayConfig tool (see
GatewayConfig section) or can be found manually through your routers DHCP client table. To
look up the IP address using your routers DHCP table, please refer to your routers manual.
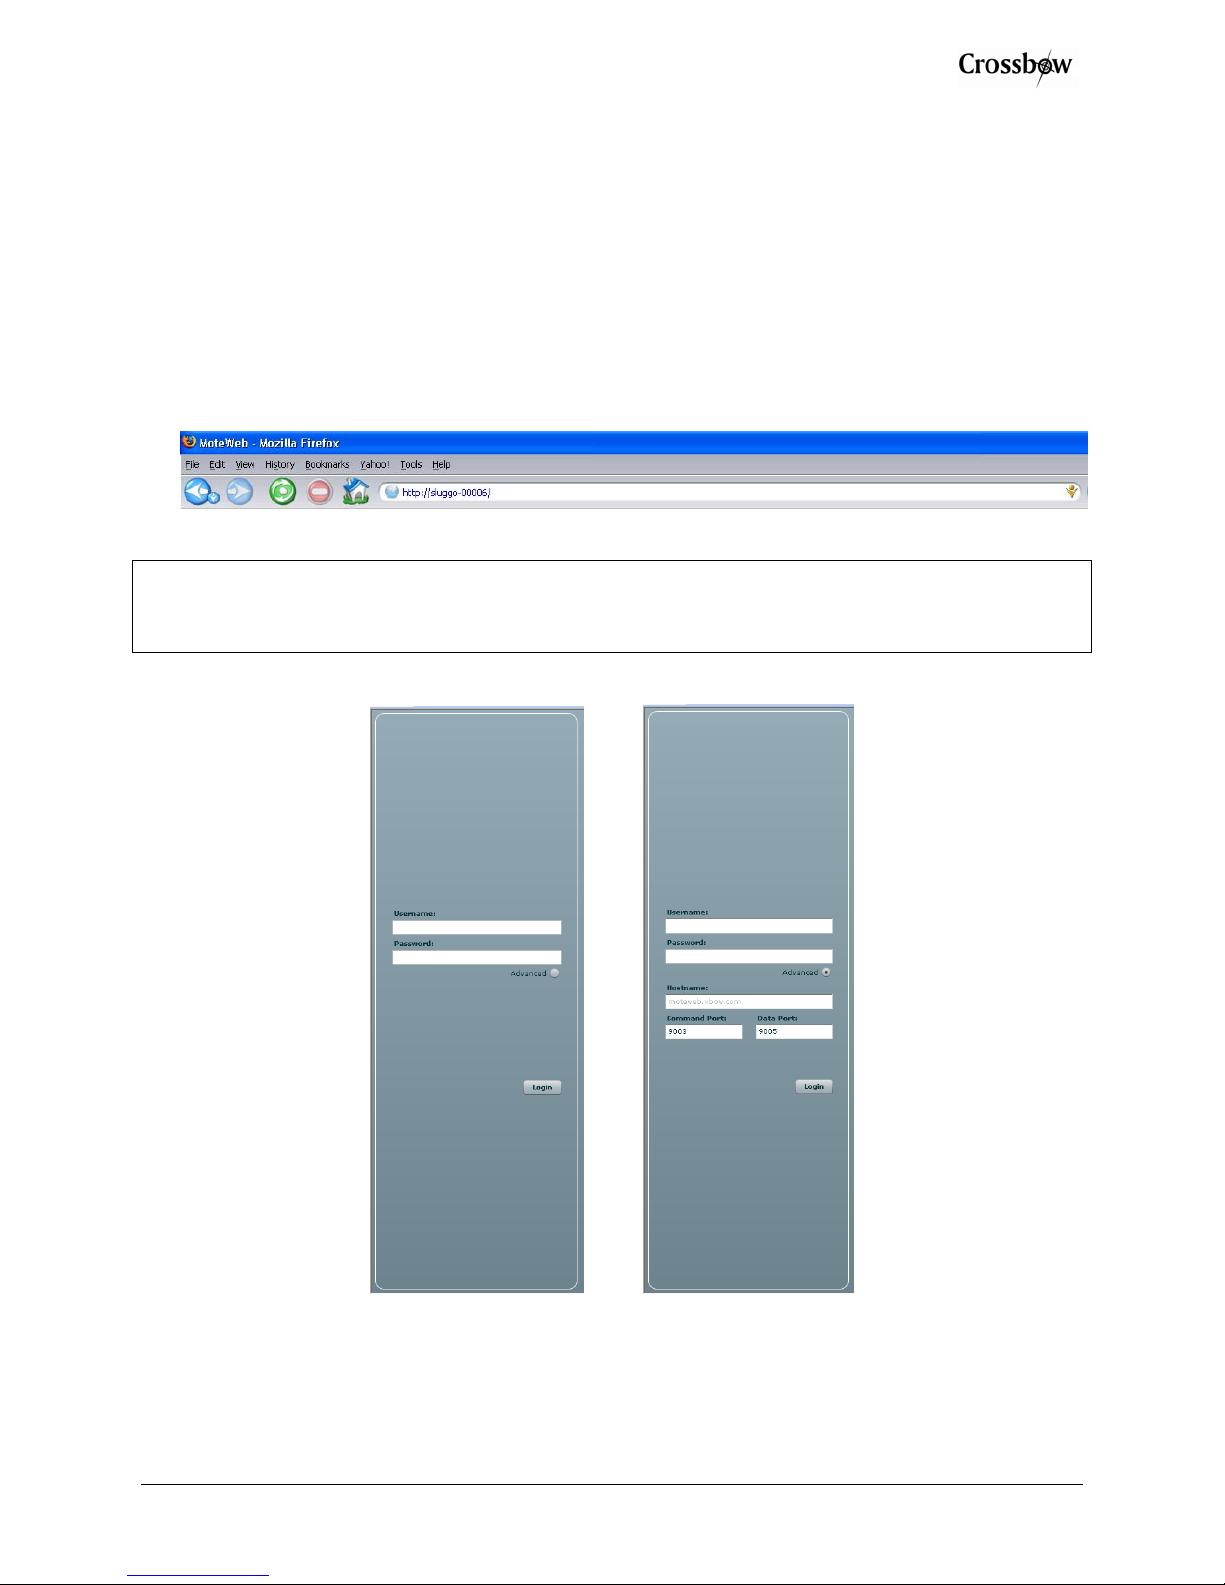
5.2 Login
Login to MoteExplorer:
1. Open a web browser on your PC.
2. In the URL field type http://<your gateway name>. The name of your Stargate
NetBridge can be found on a sticker attached to the side of your gateway.
; NOTE: If you’re using a home network router or can’t login with using the name on the
sticker, use the GatewayConfig tool on your installation CD to find the IP address of your
Stargate NetBridge.
MoteExplorer requires a username and password to login. The default values are:
Username: admin
Password: crossbow
Doc. # 7430-0449-01 Rev. A Page 13
 Loading...