

Page 1
Crosley Radio Products are warranted against defects in material and
workmanship for a period of 90 days beginning from the date of sale to the
original purchaser.
Should the unit fail under normal usage during the 90 day warranty period, a
request for RETURN AUTHORIZATION (R.A.) must be made by the original
customer before returning the unit. Call Crosley Radio customer service for
Return Authorization at (502) 583-4246 from 9 AM to 5 PM (EST) Monday to
Friday.
Upon receiving the RETURN AUTHORIZATION number from the Customer
Service Department, properly pack your unit in its original packaging. Include
any adapters, parts, & accessories which were originally provided with the
product, along with a check or money order for $19.95 made out to Crosley
Radio to cover the handling and return postage. Display the R.A. # on the
outside of the carton and ship PREPAID via standard UPS or its equivalent.
ATTN: RETURNS DEP'T
2001 PRODUCTION DRIVE
BAY 2 & 3
LOUISVILLE, KY 40299
CROSLEY RADIO assumes no responsibility for units sent without prior Return Authorization.
The purchasers bill of sale is the only proof of warranty entitlement and must accompany the unit.
The warranty does not cover damage due to acts of nature, accident, misuse, abuse, negligence, commercial
use or modification of, or to any part of the product. This warranty does not cover damage due to improper
operation or maintenance, connection to improper voltage supply, or attempted repair by anyone other than
a facility authorized by Crosley Radio to service the product. This warranty does not cover products sold
AS IS or consumables (such as fuses or batteries). This warranty is valid only in the United States.
This warranty gives the purchaser specified legal rights in addition to any rights which may vary from state
to state.
In accordance with the "Moss-Magnuson Warranty Act" of July 10, 1975, this is termed a "limited warranty"
which in no way compromises Crosley Radio high standards of Quality and Workmanship.
WARRANTY
ST 73
Instruction Manual
910-259100-001
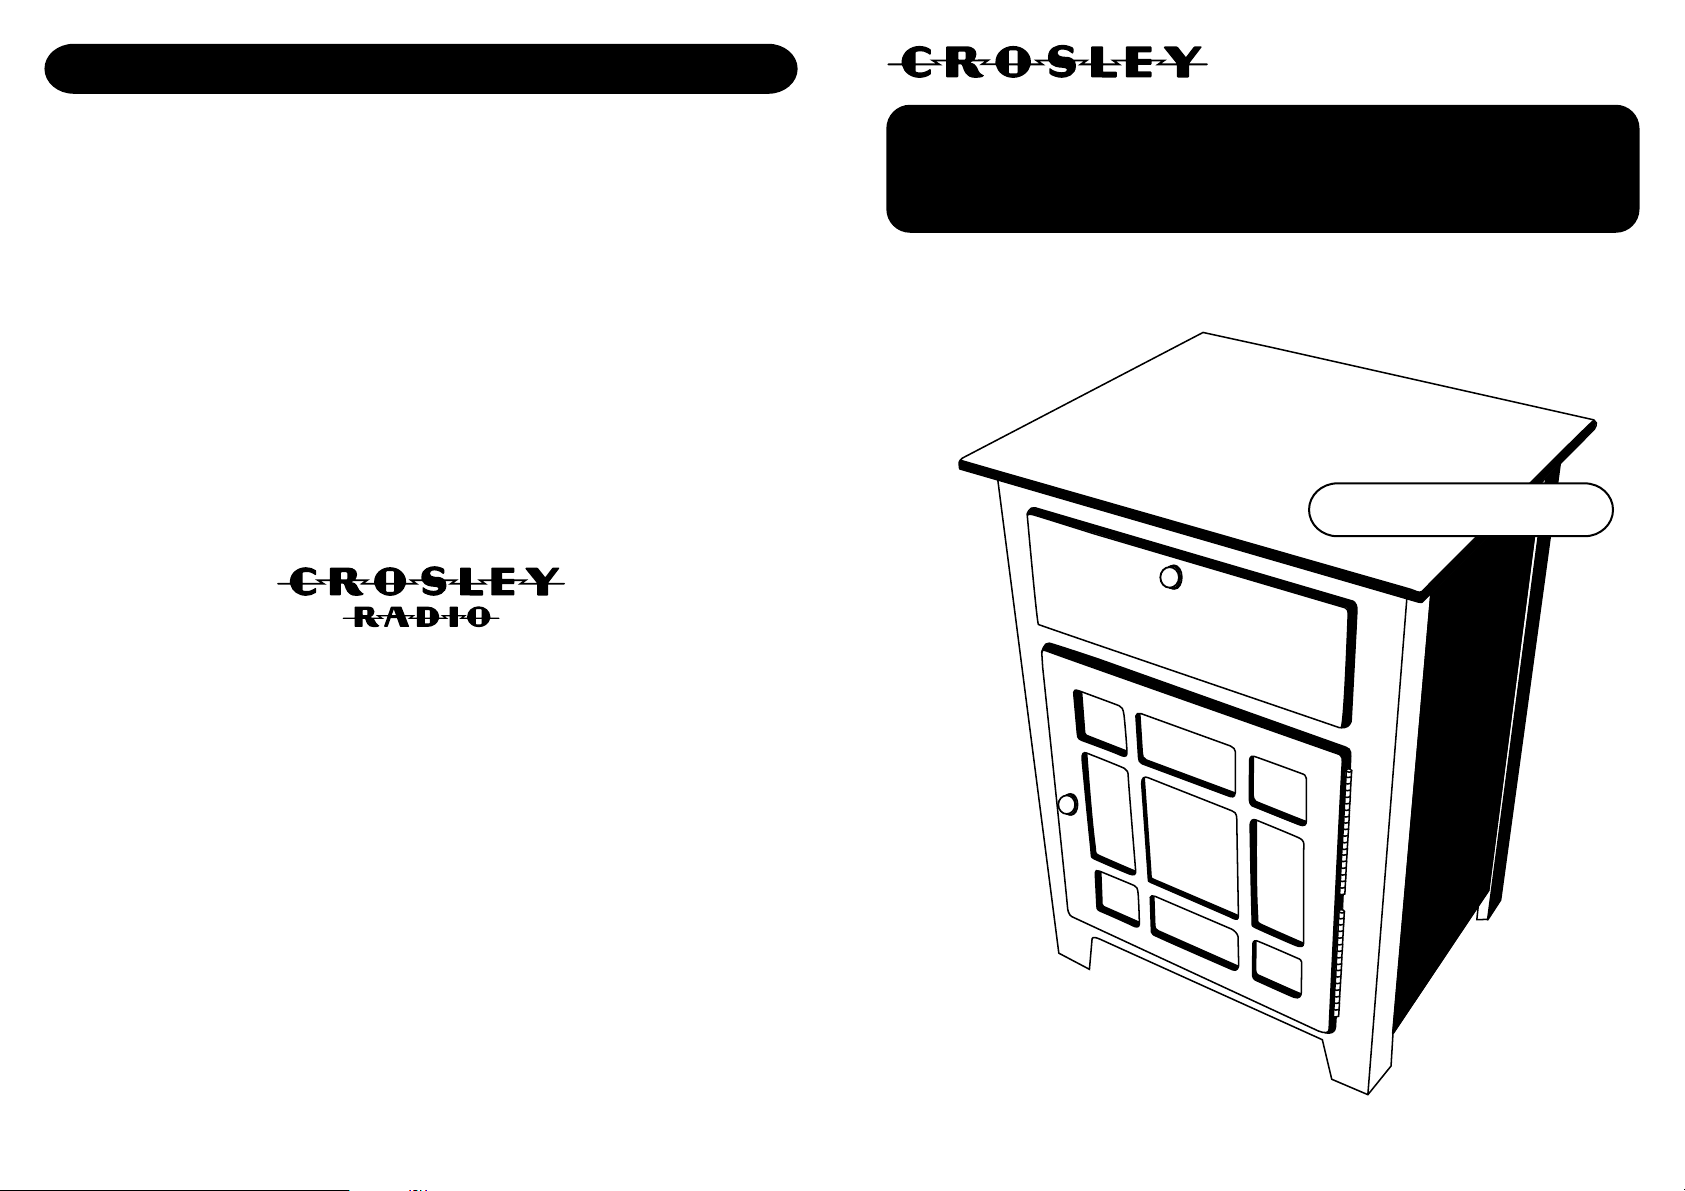
Richmond Entertainment Center Cabinet
Page 2

Assembly Instruction Assembly Instruction
C
B
Diagram A
Diagram B
Diagram G
Diagram H
Top Panel
Front & Back Panel
Finished Stand Assembly
DO NOT OVERTIGHTEN
Open the top door to access the
Cam Locks for the Top Panel.
A
1
1
1
1
1
1
3
4
3
1
1
1
1
1
1
1
4
5 2
5
5
5
5
5
5
5
5
5
2
2
2
2
Page 3

PART
DESCRIPTION
PARTS LIST
QTY
B
E
D
C
A
BACK PANEL
SIDE PANEL
MIDDLE PANEL
FRONT PANEL
TOP PANEL
1PCS
2PCS
2PCS
1PCS
1PCS
PART
DESCRIPTION
QTY
01
CAM BOLTS 12PCS
02
CAM LOCKS 12PCS
03
BRASS KNOB 2PCS
04
SCREW 2PCS
05
WOOD DOWEL 12PCS
Getting Started Full Assembly Diagram
Tools Required
Assembly Instructions
#2 Phillips head screwdriver
1.
Screw 4 Cam Bolts (01) into the outer bolt holes of the Top Panel (A). See Diagram A.
2. Insert 4 Wood Dowels (05) into the inner holes of the Top Panel (A). See Diagram A.
3.
Screw 4 Cam Bolts (01) into the outer bolt holes of the Front Panel (B) and the Back Panel (C).
4. Insert 4 Wood Dowels (05) into the inner holes of the Front Panel (B) and the Back Panel (C)
5.
Attach the Middle Panels (D) to the Front Panel (B). The Cam Locks should be facing towards the
bottom of the stand. Using a #2 Phillips head screwdriver, turn the Cam Locks clockwise until they are
tight. See Diagram D.
6. Attach the Back Panel (C). Turn the Cam Locks clockwise until they are tight. See Diagram D.
7. Slide the Side Panels (E) into the slots between the Front Panel (B) and the Back Panel (C) from the
top of the stand. See Diagram E.
8. Attach the Top Wooden Board (A) to the top of Wooden Front Panel (B) and Wooden Back Panel (C).
Turn the Cam Locks clockwise until tight. See Diagram G.
9. Install the Brass Knobs (03) onto the Door and the Drawer Front using the supplied Machine Screw (04).
See Diagrams B & G.
D
C
B
D
A
E
E
4
3
3
4
1 6
Page 4

Assembly Instruction Assembly Instruction
E
E
Diagram EDiagram C
Diagram D
Diagram F
Push Down
Push Down
D
C
B
D
Side Panels
Top Panel
Middle Panel
A
1
1
1
1
D
D
2
2
2
2
2
2
2
3 4
Note: Make sure the Cam Locks (02) are facing
towards the bottom of the stand
5
5
5
5
 Loading...