

Page 1

ARCTIC AIR
COMMERCIAL
REFRIGERATO R/FREEZER
TABLE OF CONTENTS
Product Registration ........................................... 2
Important Safety Instructions ............................. 2
Electrical Information .......................................... 2-3
Caster Installation and Setup ............................. 3-4
Appliance Start-Up .............................................. 4
Features ............................................................... 5-6
Routine Maintenance .......................................... 6
Reversing Door .................................................... 6-7
Energy Conservation Measures ......................... 7
Avoid Service Checklist ...................................... 8-9
Wiring Diagram .................................................... 10
If You Need Service ............................................. 11
Warranty ............................................................... 12
P/N: 297282601 (April, 2009))
Page 2
Product Registration
The information contained within this owner's guide
wilt instruct you on how to properly operate and care
for your product. Please read through the information
contained in your literature pack to learn more about
your new appliance. The serial plate is located on the
left wall of unit.
Record your Model and Serial Numbers
Record the model number and serial number of this
appliance in the space provided below.
Model No.:
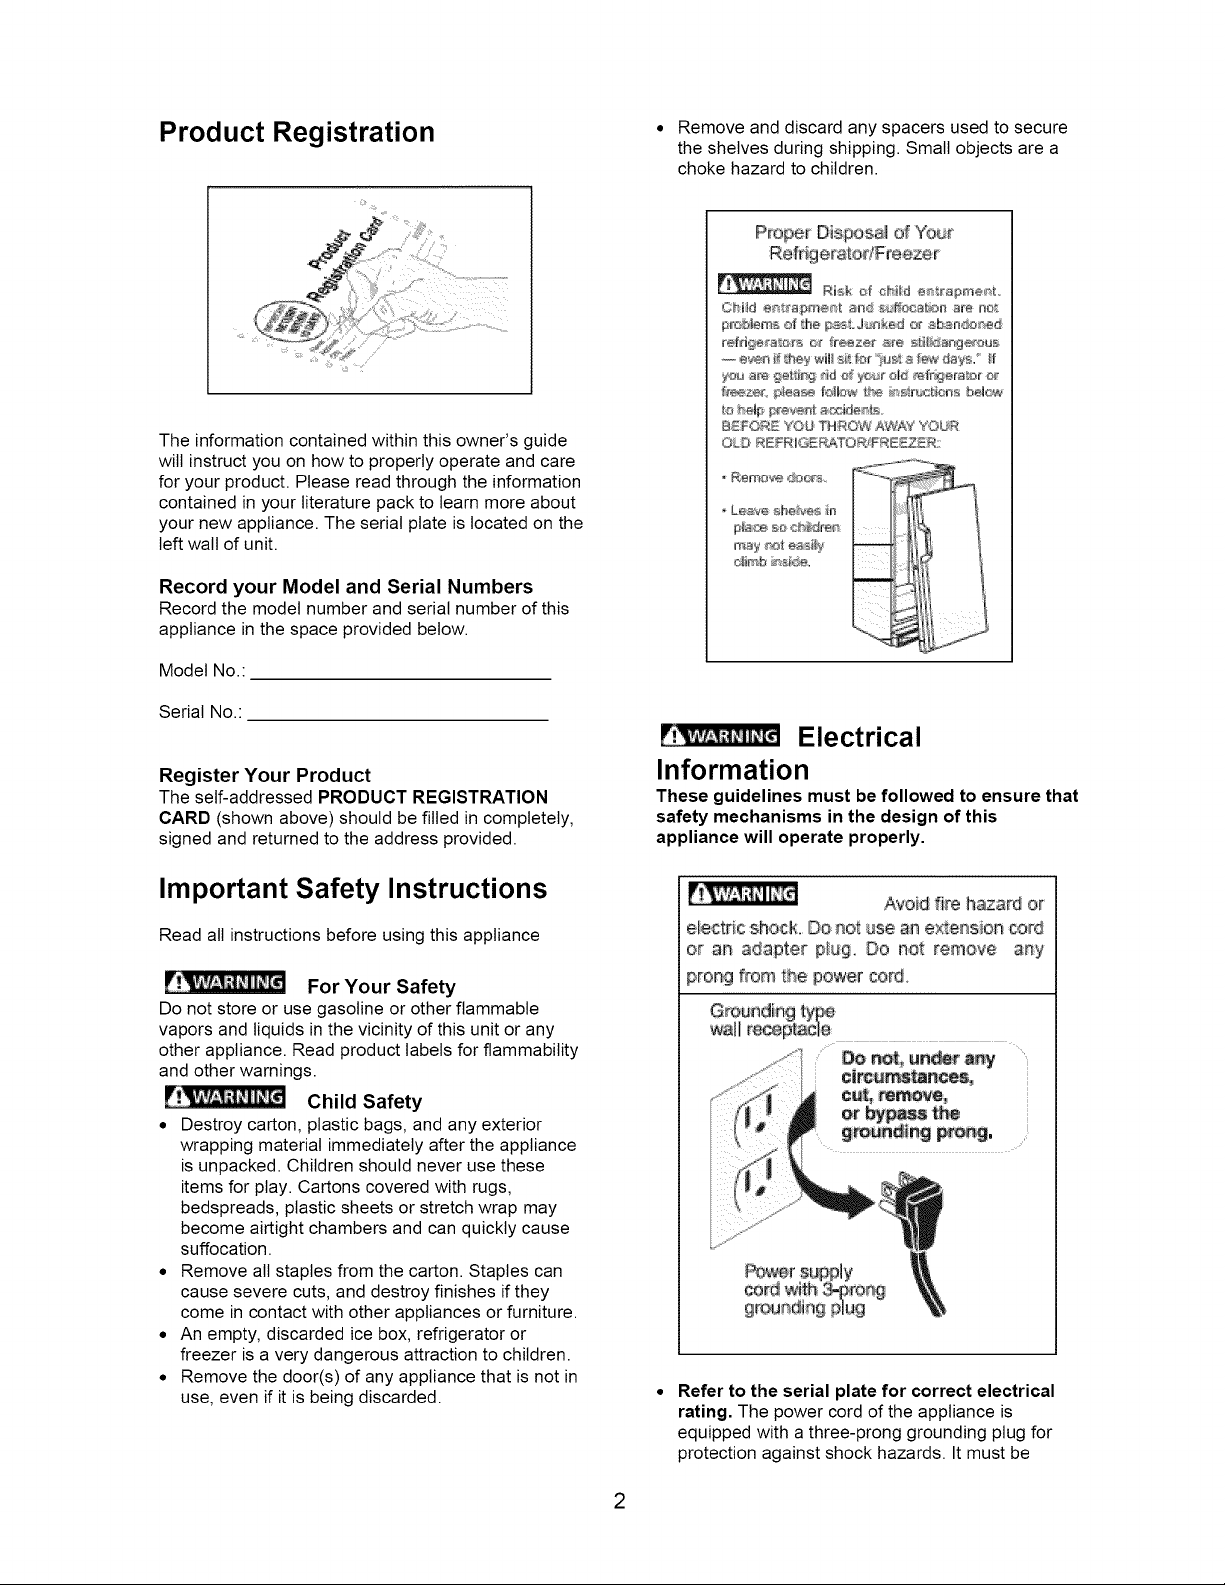
• Remove and discard any spacers used to secure
the shelves during shipping. Small objects are a
choke hazard to children.
Proper Disposal of 'Y'ou_
Cbid e¢,b'apme4t an _c_a_n are i've
to help Fra,/enl8¢_zide_Ls.
OLD REFRIGE _ORJFRE_R
'l' i/ /
i
Serial No.:
Register Your Product
The self-addressed PRODUCT REGISTRATION
CARD (shown above) should befilled in completely,
signed and returned to the address provided.
Important Safety Instructions
Read all instructions before using this appliance
For Your Safety
Do not store or use gasoline or other flammable
vapors and liquids in the vicinity of this unit or any
other appliance. Read product labels for flammability
and other warnings.
Child Safety
• Destroy carton, plastic bags, and any exterior
wrapping material immediately after the appliance
is unpacked. Children should never use these
items for play. Cartons covered with rugs,
bedspreads, plastic sheets or stretch wrap may
become airtight chambers and can quickly cause
suffocation.
• Remove all staples from the carton. Staples can
cause severe cuts, and destroy finishes if they
come in contact with other appliances or furniture.
• An empty, discarded ice box, refrigerator or
freezer is a very dangerous attraction to children.
• Remove the door(s) of any appliance that is not in
use, even if it is being discarded.
Electrical
Information
These guidelines must be followed to ensure that
safety mechanisms in the design of this
appliance will operate properly.
Avoid fi_ehazard or
ebct:r csho_k. Do not:_asean ex!:ens_oncord
o_ an adapte_ p_g. Do not remove any
prong from the power co_:d.
Refer to the serial plate for correct electrical
rating. The power cord of the appliance is
equipped with a three-prong grounding plug for
protection against shock hazards. It must be
2
Page 3

plugged directly into its own properly grounded
three-prong receptacle, protected with a 15 amp
time delay fuse or circuit breaker. The receptacle
must be installed in accordance with the local
codes and ordinances. Consult a qualified
electrician. Receptacles with Ground Fault Circuit
Interrupters (GFCI) are NOT RECOMMENDED.
DO NOT USE AN EXTENSION CORD OR AN
ADAPTER PLUG.
• If the voltage varies by 10 percent or more,
appliance performance may be affected.
Operating the appliance with insufficient power
can damage the motor. Such damage is not
covered under the warranty. If you suspect your
voltage is high or low, consult your power
company for testing.
• To prevent the appliance from being turned off
accidentally, do not plug the unit into an outlet
controlled by a walt switch or pull cord.
• DO NOT pinch, knot, or bend the power cord in any
manner.
Other Precautions
• NEVER unplug the appliance by pulling on the
power cord. Always grip the plug firmly and pull
straight out from the receptacle.
• To avoid electrical shock, unplug the appliance
before cleaning.
5/16", 3/8_and 9/I6" Adjustable Wrench Phillips _
Socketo_Open End o_'PH÷_s Screwdriver
Wrench
UNCRATING AND SET-UP
• Remove carton and all loose parts from inside of
the unit.
• Remove the rear access cover, place it and the
screws in a safe place for reassembly later
• Using an assistant, carefully tip the unit onto its
back and rest on blocks to avoid damaging the
condensate drain hose and the plastic raceway
that covers the evaporator tubing on the back of
the cabinet.
• Using a 3/8" socket wrench remove four screws
holding the wood skid to the bottom of the unit.
Discard the wood skid and screws. See Figure 1.
• Remove and discard the two front brackets with
leg leveler using a 5/16" socket wrench. See
Figure 1.
NOTE: Turning the control to "OFF" turns off the
compressor but does not disconnect power to other
electrical components.
CASTER INSTALLATION AND SET-
UP
Inspect the underside of the cabinet and packaging
for damage such as a fork truck can cause. If hidden
damage is found after uncrating, immediately call the
delivery carrier and request an inspection. Retain all
packaging and crating materials until the inspection
is complete.
PARTS AND ACCESSORIES
Check to make sure that you have received the box
containing all of the components listed below.
A Carriage Bolt (4} D Fixed Caster (2}
B LockNut(4) E Hex Screw (10)
C Swive_Caster (2)
A
TOOLS NEEDED
You wilt need the following tools to assemble and
install the casters to the unit.
E
Front Bracket
& Leg Leveler
F_gure 1
FRONT FIXED CASTER
INSTALLATION
• Locate and align fixed caster (with brake lever
facing front of unit - see Figure 3) over the same
mounting holes from front brackets in Figure 1
using six hex screws (3 for each caster). Secure
the screws snug using a 3/8" open end wrench.
Repeat the same procedure for opposite corner.
DO NOT OVERTIGHTEN.
REAR SWIVEL CASTER
INSTALLATION
3
Page 4
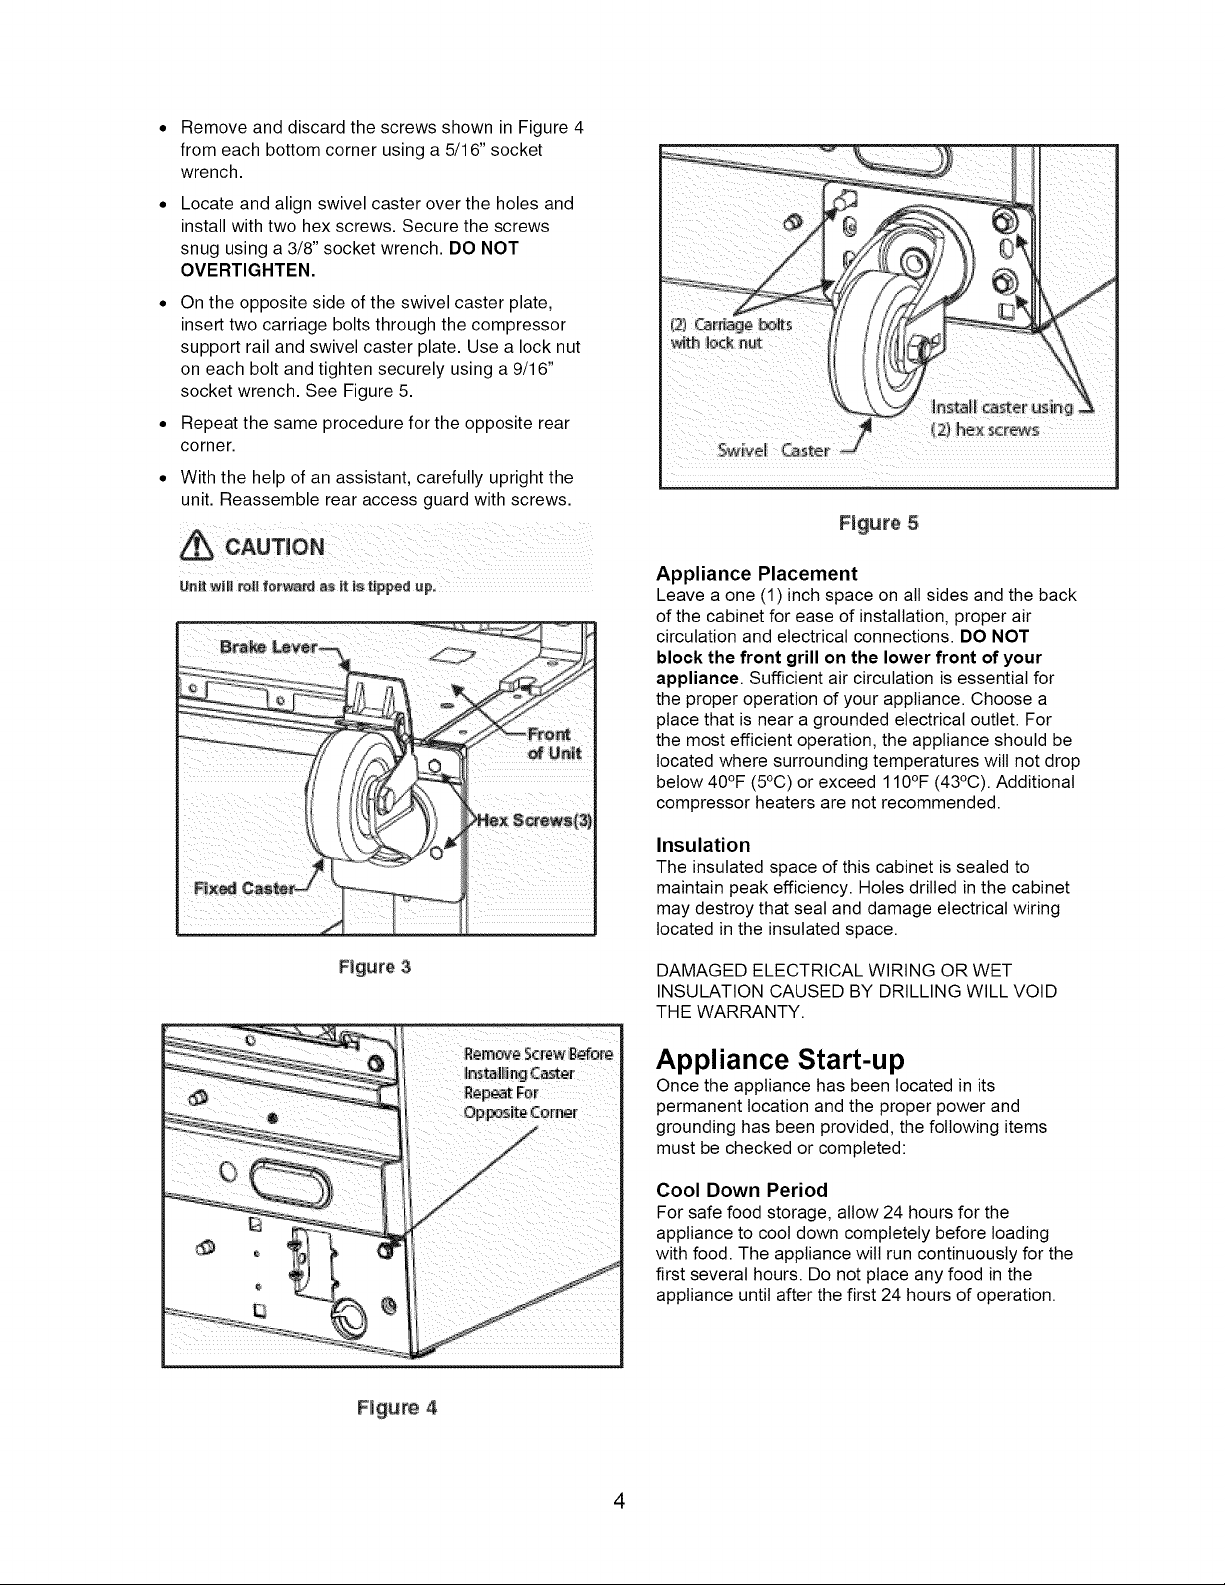
Remove and discard the screws shown in Figure 4
from each bottom corner using a 5/16" socket
wrench.
Locate and align swivel caster over the holes and
install with two hex screws. Secure the screws
snug using a 3/8" socket wrench. DO NOT
OVERTIGHTEN.
On the opposite side of the swivel caster plate,
insert two carriage bolts through the compressor
support rail and swivel caster plate. Use a lock nut
on each bolt and tighten securely using a 9/16"
socket wrench. See Figure 5.
Repeat the same procedure for the opposite rear
corner.
With the help of an assistant, carefully upright the
unit. Reassemble rear access guard with screws.
Figure 5
Unit wHi _l! f_twa_ _s it Isttpped up,
Figure 3
Appliance Placement
Leave a one (1) inch space on all sides and the back
of the cabinet for ease of installation, proper air
circulation and electrical connections. DO NOT
block the front grill on the lower front of your
appliance. Sufficient air circulation is essential for
the proper operation of your appliance. Choose a
place that is near a grounded electrical outlet. For
the most efficient operation, the appliance should be
located where surrounding temperatures wilt not drop
below 40°F (5°C) or exceed 110°F (43°C). Additional
compressor heaters are not recommended.
Insulation
The insulated space of this cabinet is sealed to
maintain peak efficiency. Holes drilled in the cabinet
may destroy that seal and damage electrical wiring
located in the insulated space.
DAMAGED ELECTRICAL WIRING OR WET
INSULATION CAUSED BY DRILLING WILL VOID
THE WARRANTY.
Appliance Start-up
Once the appliance has been located in its
permanent location and the proper power and
grounding has been provided, the following items
must be checked or completed:
Figure 4
Cool Down Period
For safe food storage, allow 24 hours for the
appliance to cool down completely before loading
with food. The appliance wilt run continuously for the
first several hours. Do not place any food in the
appliance until after the first 24 hours of operation.
4
Page 5

Thermostat Setting
The appliance is shipped from the factory with the
thermostat set at about the mid-point of the operating
range. Adjustments colder or warmer can be made
after the appliance has been running for at least 8
hours. Allow at least 8 hours for temperature
stabilization before re-adjusting the thermostat.
Defrost Setting
The appliance is designed to defrost automatically
every 12 hours. To set the time of defrost wait until
the desired time to defrost. With the notch on the
timer knob aligned with the line on the bracket (Fig.
A), turn the defrost timer knob clockwise slowly. The
timer wilt click several times, then once loudly, at
which point the defrost cycle begins. The timer knob
wilt advance through the defrost cycle, than click
loudly at the end of the cycle. The appliance wilt
defrost automatically every 12 hours after the first
defrost cycle.
For example, to set the appliance to defrost at 10:00
a.m., turn the timer knob clockwise at 10:00 a.m.
until the timer clicks loudly. The appliance wilt defrost
daily at 10:00 a.m. and again 12 hours later at 10:00
p.m. Note: The product interior temperature will rise
during the defrost cycle every 12 hours.
• Heavy duty removable stainless steel shelf
support
The appliance is provided with 4 shelves. One goes
on the floor of the cabinet and the other 3 are placed
in the metal side supports wherever they are needed.
The shallow shelf goes in the upper position.
Casters
The appliance comes with 4 casters; 2 with locks for
front of unit and 2 without locks for the back of the
unit. The casters allow the appliance to be moved
with ease, and then locked into place upon final
destination (Refer to page 3 for instructions.)
Fig. A (Rear of unit)
Features
• Heavy duty epoxy powder coated adjustable
shelves.
• NSF certified top mounted evaporator
• 2-1/2" urethane foam cabinet insulation
• Torsion spring door closer
• Heavy duty fixed and swivel casters
• 17 watt fluorescent tamp
• Removable stainless steel drain cover
• Adjustable temperature control
• NSF certified interior
• Stainless steel toe plate
• Heavy duty commercially rated electrical harness
Reversible Door Lock
The appliance comes with an outer cabinet mounted
door lock and two keys. The lock can be mounted on
either side of the appliance depending on which side
the door swings open. A door mounted lock has
been provided for added security. (Refer to page 7
for instructions.
5
Page 6

Adjustable Temperature Control
The adjustable thermostat control islocated on the
top left panel inside the unit.
Interior Thermometer
The appliance comes with a thermometer to show
the internal temperatures. The thermometer isto be
hung from the top adjustable shelf on the right hand
side.
Cleaning the Exterior
Wipe the textured cabinet exterior occasionally with a
cloth dampened in mild detergent and water. Rinse
and wipe dry with a soft cloth. Wipe the stainless
steel door plate and toe grill with Magic Clean
Stainless Steel Cleaner or some other stainless steel
cleaner. Do not use razor blades or other sharp
instruments that can scratch the appliance surface
when removing adhesive labels. Any glue left from
the tape can be removed with a mixture of warm
water and mild detergent or touch the residue with
the sticky side of tape already removed. DO NOT
REMOVE THE SERIAL PLATE.
Condensate Pan
The condensate pan is in a fixed position and must
not be removed from under the cabinet. If the pan is
removed, condensate will drop onto the floor.
Reversing Door
This appliance features a door that can provide
either left hand or right hand opening. It comes from
the factory with right hand position.
Follow these steps to reverse the opening:
1. With the appliance in a standing upright position,
open the door and remove the toe plate (2
screws in the upper corners).
Interior Light
The appliance is equipped with a 40 watt bulb that
lights up when the door is opened. If bulb goes bad
replace with bulb of same type and wattage. This is a
special bulb with shatterproof coating. Use an NSF
certified bulb of the same type and wattage (can be
ordered from your Artic Air Service Center at 1-800-
490-9574, P/N 2163600900).
Routine Maintenance
Cleaning the Interior
Be sure to turn the temperature control to "OFF" and
unplug the electrical cord. Wash the inside surface of
the storage area with warm water and baking soda
solution (about one tablespoon of baking soda per
quart of warm water). Rinse thoroughly with clean,
warm water and wipe dry. The procedure can also be
used for cleaning the door gasket. Wipe the stainless
steel cover plates with Magic Clean Stainless Steel
Cleaner (can be ordered from your Artic Air Service
Center at 1-800-490-9574, P/N 218490900) or some
other stainless steel cleaner.
To_Pla{_ Boa-
2. Slightly loosen the two hex spacers that the toe
plate screws were screwed into.
3. Holding door securely closed; remove 2 hex
head screws from the top hinge.
4. Lift appliance door off of bottom hinge and set
aside in a safe place so it does not fall.
(2) Hex Head
crews
Top Hinge
Cabinet
6
Page 7

5,
Remove top screws from bottom hinge. Remove
top screw from opposite side of appliance.
6. Slide bottom hinge onto hex spacer and attach
top screw to cabinet. Retighten both hex
spacers.
7. Remove top hinge assembly from the door and
reverse the position making sure the pegs are
properly seated in the peg holes.
10. Install plugs in each of the hinge holes on
opposite side on the cabinet.
11. Re-install toe plate with two (2) screws.
Door Lock
Note: The lock strike should angle out and away from
the cabinet.
1. Install the lock strike on the lock side of the
cabinet using the three (3) tamper resistant
screws. Install the three remaining buttons in the
holes on the opposite side of the cabinet.
2. Install the lock guard in the side of the door
cabinet by installing the two screws into the
corresponding screw holes.
3,
The tamper resistant screws cannot
be removed after the lock strike is secured to the
cabinet.
8. Rotate the door 180 ° and re-install on bottom
hinge. Hold door in closed position.
9. Rotate the top hinge to align the mounting holes.
Re-position the hinge to the cabinet and door,
secure with (2) hex head screws.
(2) Hex Head
Screws
Top Hinge
Peg
Energy Conservation Measures
The appliance is designed for efficiency with heavy
foam insulation. However, there are things that the
user can do to maintain the appliance in operating
condition.
1. Do not operate the appliance any colder than
necessary to maintain safe, product storage
temperatures.
2. Make sure the appliance is located to prevent
direct exposure to sunlight, air ducts, etc.
3. Keep the door closed except for normal use.
Inspect the door often to see that it self-closes
and the gaskets are in good condition.
4. Do not overstock the product in the cabinet
because it wilt block the normal air flow.
5. Have at least annual inspections by a qualified
service company to see that the refrigerant
charge is correct.
6. This appliance operates more efficiently in a
cooler ambient than in a hot ambient. Try to
maintain an ambient below 80°F (27°C) and
65% RH (Relative Humidity) for maximum
efficiency.
7
Page 8

Avoid Service Checki ist
Bdore calling for service _evtew t_is list _ may save yo_4both time and e×pertse, TMs fist
t toludes cornmo_ occurrences t'_a_are nee 8he _es_R o_ defeclve workmanst ip or' maierJals in
OOCU R:RENCE SOLUTION
AP LIANCE DOES NOT RUN
app_e_'_ set_s_ s w_e_n.
A_@lienc_ dee_ _:_sy'be ..digHly o#e See Os £i'eru,.e eel. im"__Dee_ _ob_rt_5 '
A4>pliisnce 9as};e,_ is d_<:t were, e_',@_& _r #_otly II_,I. Clese s' chaise gas ®t.
LeeRs m b_ do#_ sea_ _b ca_._eesp#Bseoe toR,s _w_9_r n e,rder to msm_sin d_ss_ed
empers u_e.
O_# iie kept olse_s t_ le_sQe_ is epe{sad tee I_eqlue_dll;y+Warm ar seers dqe
e,ppl>_s#ee e_,e<? ires lhe <Ses__e 6pened. Ope_ Is÷ dee_4"_eee olee.
Large sine _#4sef,_e[m er o Iced may ha_e been s_reo _ece¢l% Wa,s_ntt he
_ppb_nee I_a_ b_d a eha_,ee e eedh i_ sele_7_e [em_Pa u_e.
_.Appliance Bee tees ly bee_ discenl_e, eted 1Ors F_e3d _t t¢_e. App} a_ee _eqake
24 ho_re Io coel down .c_mple_e y
AN_opli_nee <:ab[_tii__,am_ s theb:_uch_A_?plta_se _ c@e_a,l_+,9 nerr_is;II2,rem<_'in9
,r=
8
Page 9

OCCURRENCE SOLUTI,ON
SOUND AND _OISE
Lc££Je_ _@md le'_.e_se_he_sever
a_:_4ia r_ _ss_s.
_Eqp_@ss.@- COfl'IeS 8D
Pqoph'_@c7 _xs_£i,aa sound
Scend wi!l level ed et isapS_ar as a_pt_n_=e _£,_@n_es as-n_.
Thi__sn_al
B_,_btmg o_9uFglm_ sa_.rid,
_i_e wa_er L,_JinG
W#/TER/MO_S TURE,'FRO ST
INSIDE A#@L/ANC_
Mais_¢e _@'mBOqi¢_:St4_e
W#iTER%_OISTURE_FRO ST
OU'TSID£ APPUA_4CE
Mois_we i'_3,_s on outside 6:f
appliance
ODOR IN APPLIANCE
DOOR PROBLEMS
Re@g_ra_nt {u_ _:_oo_,/ app,,ShOe is @rcu_q# thr@>ghe4 t the _ys[en-_. Thb_ is
_k_a_ maven o_"_es£ Apf_lia_se r_££s on l£_e_ear when it _s ns@_S sS/£jh_%Be
A_@_ance is [_su@in£4me wail Ra4eve_ _he mpp_anee c¢ move app£snce sltg_y.
We.s_r _s hes an_ h(_r_d, which ncre£_as il3te_<al ta,_.eol__to_t b;_ld,-_@. This _s
Oc£_r is sIiyhtiy epe_. _ Occurrence £_cb,_q "Dca_' Pr_/em& _
mois_ sir #ore ou:d_d . See Ocexfre_s4_e _c_ic,l's D.o6rF_bJ_ms.
• rssedor _,_ds to be cleaned. C_÷an i_e_dor _{_ sponge wa553 '4,s£eL and b_km_
* _eod_ _4:_hstrops9 od6¢s ._ n the _mo{4ian<_oOe,,÷t @_efood UgHy.
L_IP S NOT ON
* _Io_st isel'teve_s 0_" _ak.
9
Page 10

Refr_ge+r_:r E_¢tdcai
'Wiring Diagrams
EC?9
• _,,,] _ _ ..................
_h U_h_
Ught
C_c_or
+L++++n+_U+'_++_++th+w +;+_,+_++ +etume+ +++:+
++++,++,+++:+at++:+++++:++++++'+d+_:,+++++l_+mourn+,
I0
Page 11

if You Need Service...
Avoid Unnecessary Cost and inconveniene÷
M_ke a f_w ,_im_/e ei_ekS b@8_®ca_4i__g/or_'v,,s®. Corr_rr,s_ oxJ:_ r®nc®sa_d hei _/uLo_ _ car' be @u_'_d
h h e "Avond Serv _c_ 8 heck_i¢l '__cud ®di_ hi_ _,e ¢ 9uid_
11
Page 12

ARCTIC AIR COMMERCIAL REFRIGERATO REEZER
Th_4;war÷a.n_:yp_os4_des:
A, _A_TS _A!R!RANT'_
ARCTIC _R will, a_ i_Sc_iori_ repai_ ot tep4aoe aay pa_(s_, 1hal _r÷ _@Undde_ec_i_#÷du@_g _he warrarm_, _,siCd. h
a rt, ARCTIC AR _srtar_J: _ha_the o:_rs_r÷sSOr ShaJJb_ _ee _bsm de'_ecis _@ran addRior_l I;s_r (4) y÷a_s
h@_¢ysd _'tN @_ita_;¢Jrs o_ In@ wa ran_y period Or _@ra oral pe@sd @__ive {5} y_ars. WaFacsty ceplacers,epi #arls
mUsl be arranged by c.al/!r_g the Customer Se_i_e Cen,_er a/: l-S3@-490@B74 { n _be U{'filed S_ale¢ an_ P_e_/o
_lco an_ 1_868..,29,1@9I 1 { In Canada }.
B, WA_A:A_TY
the war_anSy :pe_o(L Warranty I_@orm_si be a (£ by c_!ti_# #;e C_:stoms÷r Se_,/ice Ce_t_¢ a_ 1800o490_9574
{ ir_tb.,eU:ni_ed SB_e_s and P.i_ert_aR;_s_} and 1_886o294 @g_I ( ih Cana_ga ',L
C, S_ECIAL MOBILE USE: WARRA_N!TY
ARCTIC A;_Rw_rra_t_ ._very is@wte_dgera_er _n_ _reeze¢ o ed by a c_nce Sior_air® o¢ 'vertdor i_ a _railer,
mo{a_z,_.J vehicl÷ _s a_ vary;isg [_caHOi18 _o_a pe&sd d One (1 ye@r fs# l_--_epart(S} ai'_d r_J[se!:y{ 9COdJays _(;_a_c_r
_o reg®i_ or _p_ac÷ a_ A:rc_iCA_r'S Opsios, _:h÷warranty pat{s)., h additio_ ARCTIC AI_ wa_ran_S _h_'__be
com#_es,_a_ ®hal b_ _ree #am _}_÷cts _ot a _o_a_p_ricd _ _lv÷ ( 5 } y÷a.rs. 7hi_ war'ra_sty _¢_ti_/be®flec_lve _,_,_hlh_
÷ar/i÷_ d eilher: 1} 1he da_e ot odgir_al put#hose or 21 Ii_ee_ (15 } moths a_ter _h®man_._lac_urer_SSh_pda_@.u_
me proS_cL AfW abor t_ _mov÷ or 6_pose c,_make _h,eretn_eralor or freezer avaiiable _or ®erqc® i,_d_r _h_s
wa ra,n_y®ha_/be a_ iXe _o_se£se_@ens®.
#, CONDITIONS
Ser_i<::e bc_Ssr Ibis wa._ra_tly r_ ss_ be perf£srm_ by a p,re_erre8 s÷rvkx÷ cempa_sy _:_ii_ge_ by HseCssloi"ner
S®r,_c_ C®n_er a_ t 88b>.493@s_a ,_n _h÷ Urdt÷d S_si_s aa_ P_÷tto Rice )an_ _8@3_294o9@ 1 ( ic_Casada.
The user m_._s_give the prefected service ny proml:_: r_ice and access o the pr_/_d_..C_whert S®r_e ;S
needed
_= UMITATIONS ANO _XCLUSIV_ WARRANTY
Nu ma:{ _,eaF @r_dtear a_}{$g_ad_ual del÷_i_,_a£ion S exc_ ilrom _siS warranly T}iS pa_s and abo_ '_a<_an_y iS
_he sole arid e_clUSiVe warrartly _em8@_ offered by ARCTIC A_R. ALL OTHSR _'ARRAN"T[_S, EITHER EXPRESS
OR MPLI_D, _lS tqG UF;DER _,W OR ITY OR CU _; THE TRADE D_CLU©ING BUT NOT
L M:_TED TO WARRANTIES OR: M_R LFY OR _I_N_SS _©R A PAR_CU_£ PURPOSS ARE
_XCUJDED° N EZITH_R ARCTIC A_R NOR _TS S_RVICIN G AGENT SHOULD B_ L_AB E: _OR ANY
D_CDEf4TAL OR _QUENT!AL LOSS OR D S @NCLUD/NG BUT tdOT LI_#_IZr£OTO FOG9 OR
PRODUCT LOSS_ P_RSONAL ;NJURY ,O_ PROPERTY DAMAGE) WHET_RER BASED ON CONTRA_T OR
TORT {I_CL.UD_NG [_EGUG_NCE A#_D S_R_CT L AB L!lY) AR SING OIJ T ©!F TRE EQUIPMENT OR
S_RVICE PROVIDED H_REUND_R TNIS WARRANTY DOES NOT A_PLY ARCTIC AR P S SOLO
O_JTS DS THE UNITED STATES QA, OR PUERTO RICO. _ _SWARRANTY ODES NO7 COVER:
FREIGHT DAMAGE
_SS
_' NON-FACTORY APPROVED REVISIONS OR _D©_ICAT_ONS
12
 Loading...