

Page 1
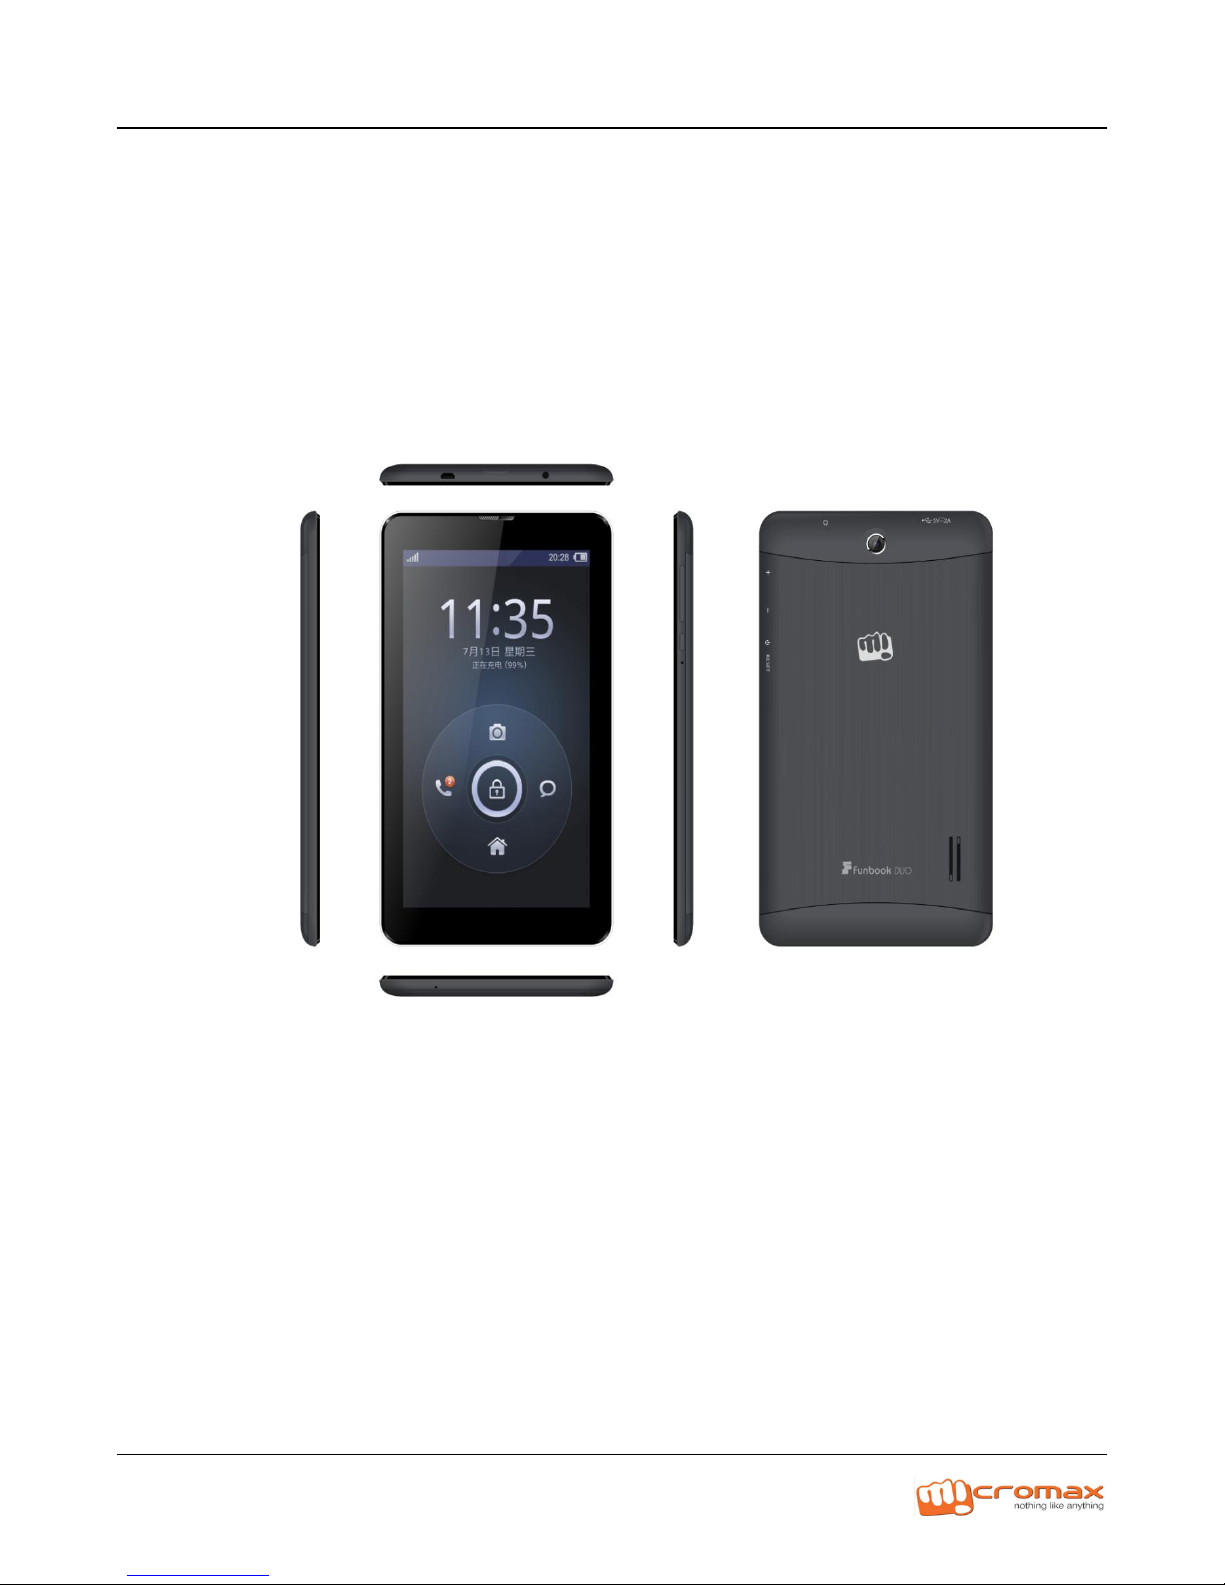
P310 L2 Service Manual
Page 2

P310 L2 Service Manual
Product introduce
Model :P310
Product size:188.4*108.3*10mm
Platform:MTK8317 ,Quad 1.0GHz
Memory:4GB+1GB (Nand&sdram+RAM)
System:Android 4.1.2
Frequency band: Dual-SIM WCDMA 900/2100MHz,GSM 900/1800 MHZ
Battery:2800mAh
Charger: Travel charger
USB cable: MICRO 5PIN
Earphone:3.5jack
LCD&TP: resolution: 1024*600,Capacitance TP
Camera:2.0M+0.3M
Support:FM, GPS,BT4.0,WIFI
Support:G-sensor
Page 3
P310 L2 Service Manual
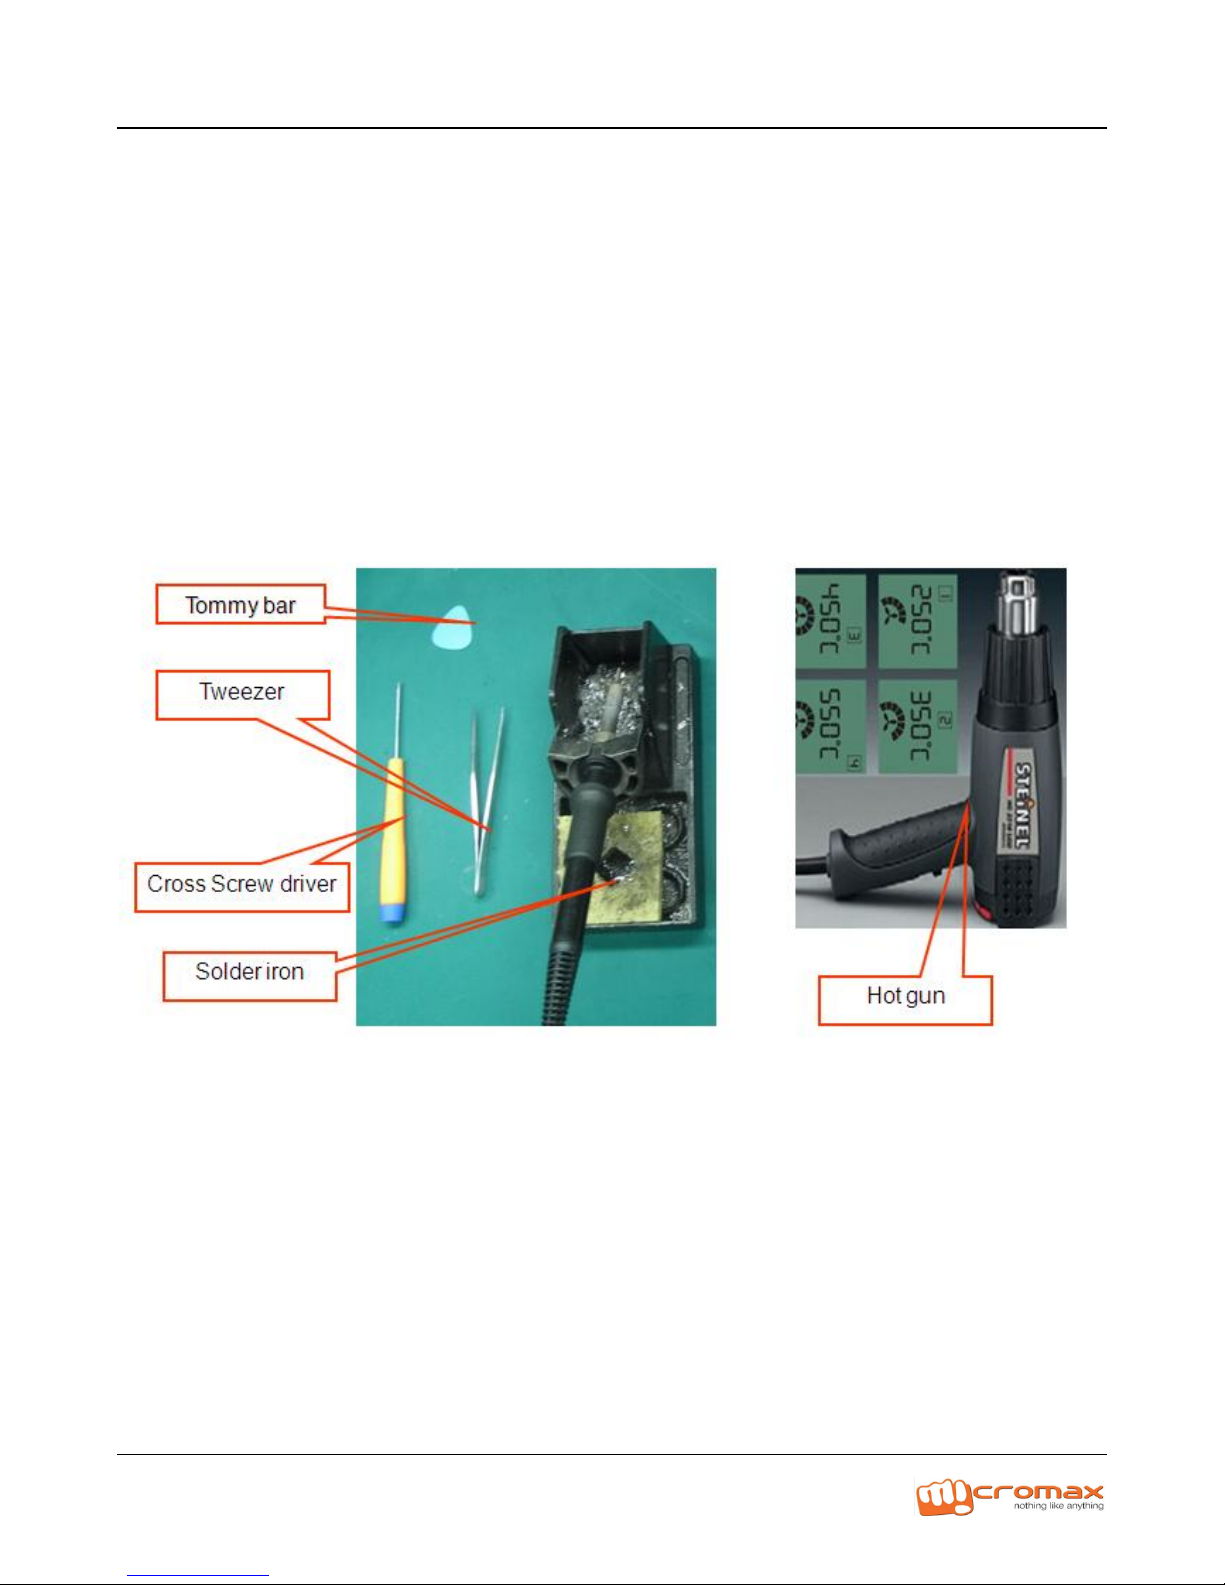
1. Tools list
I. Tweezer Cross
II. Screw driver
III. Solder
IV. Tommy bar
V. Hot gun
Page 4
P310 L2 Service Manual
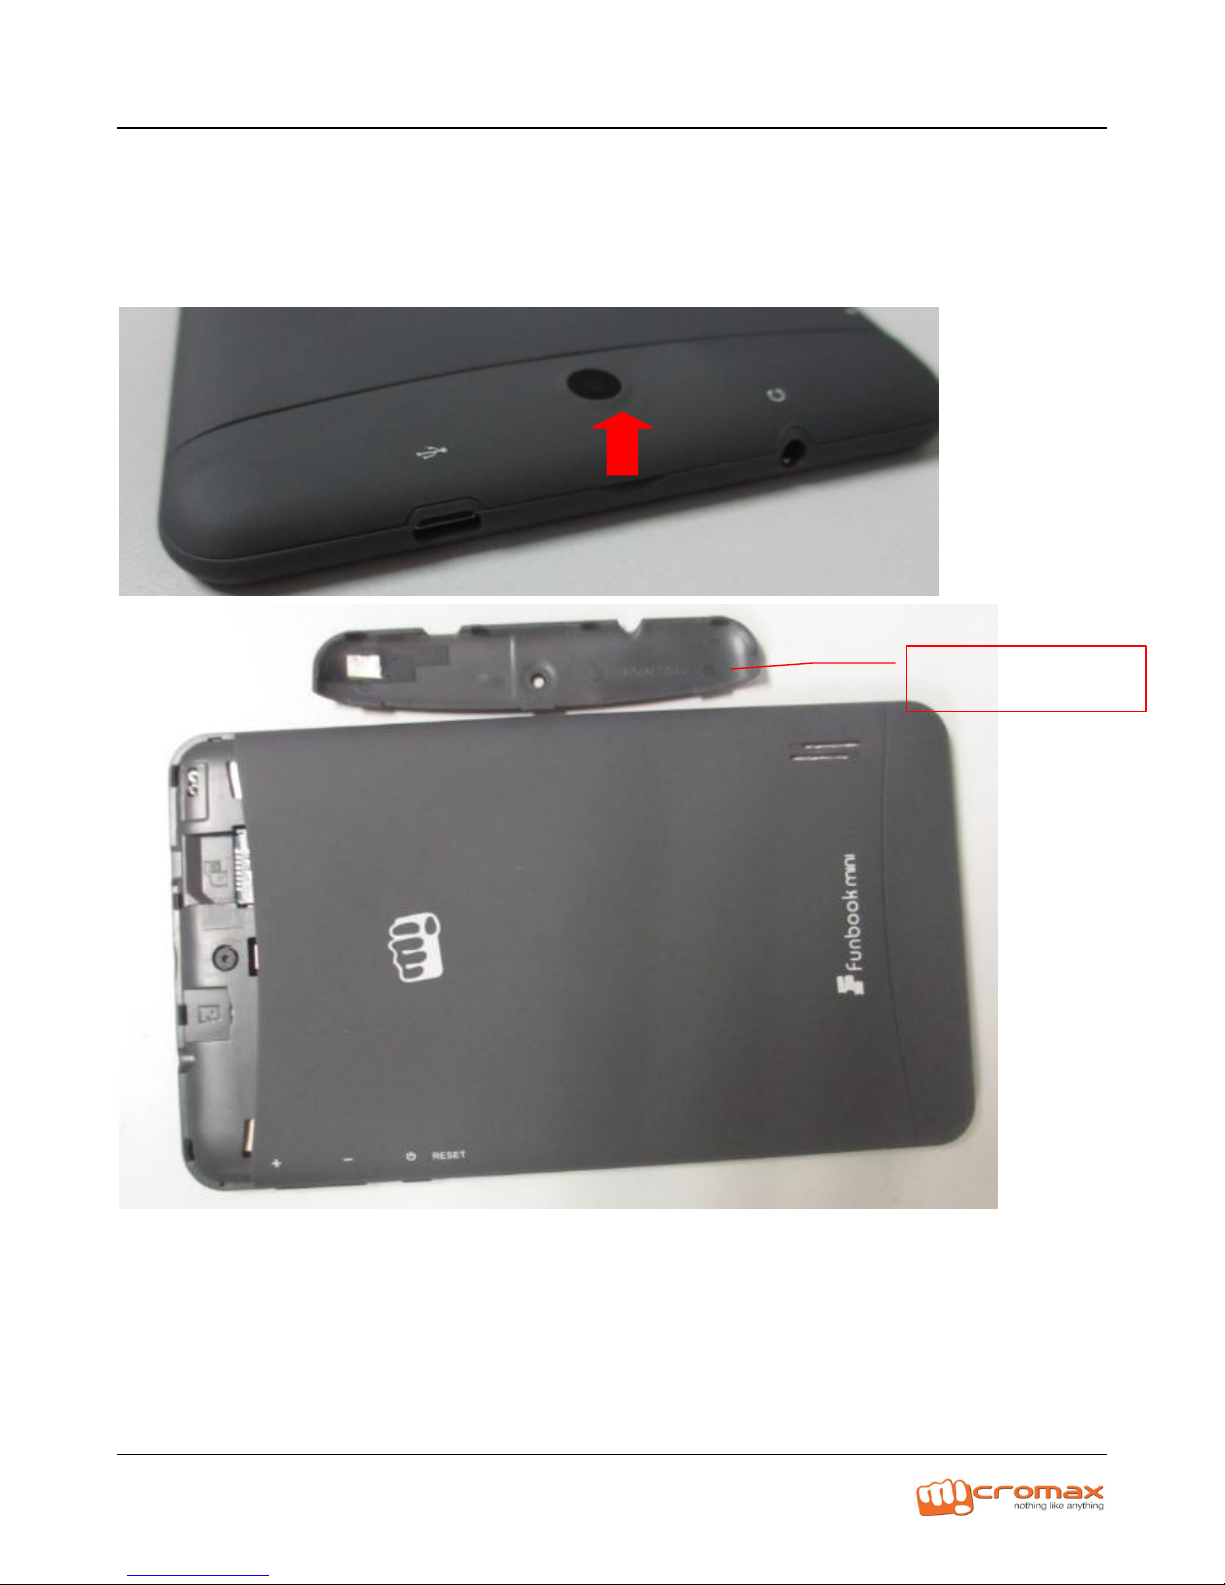
2. Cover Plate disassembly
Open the cover plate,as the Fig. 1
FIG.1
COVER PLATE
Page 5
P310 L2 Service Manual
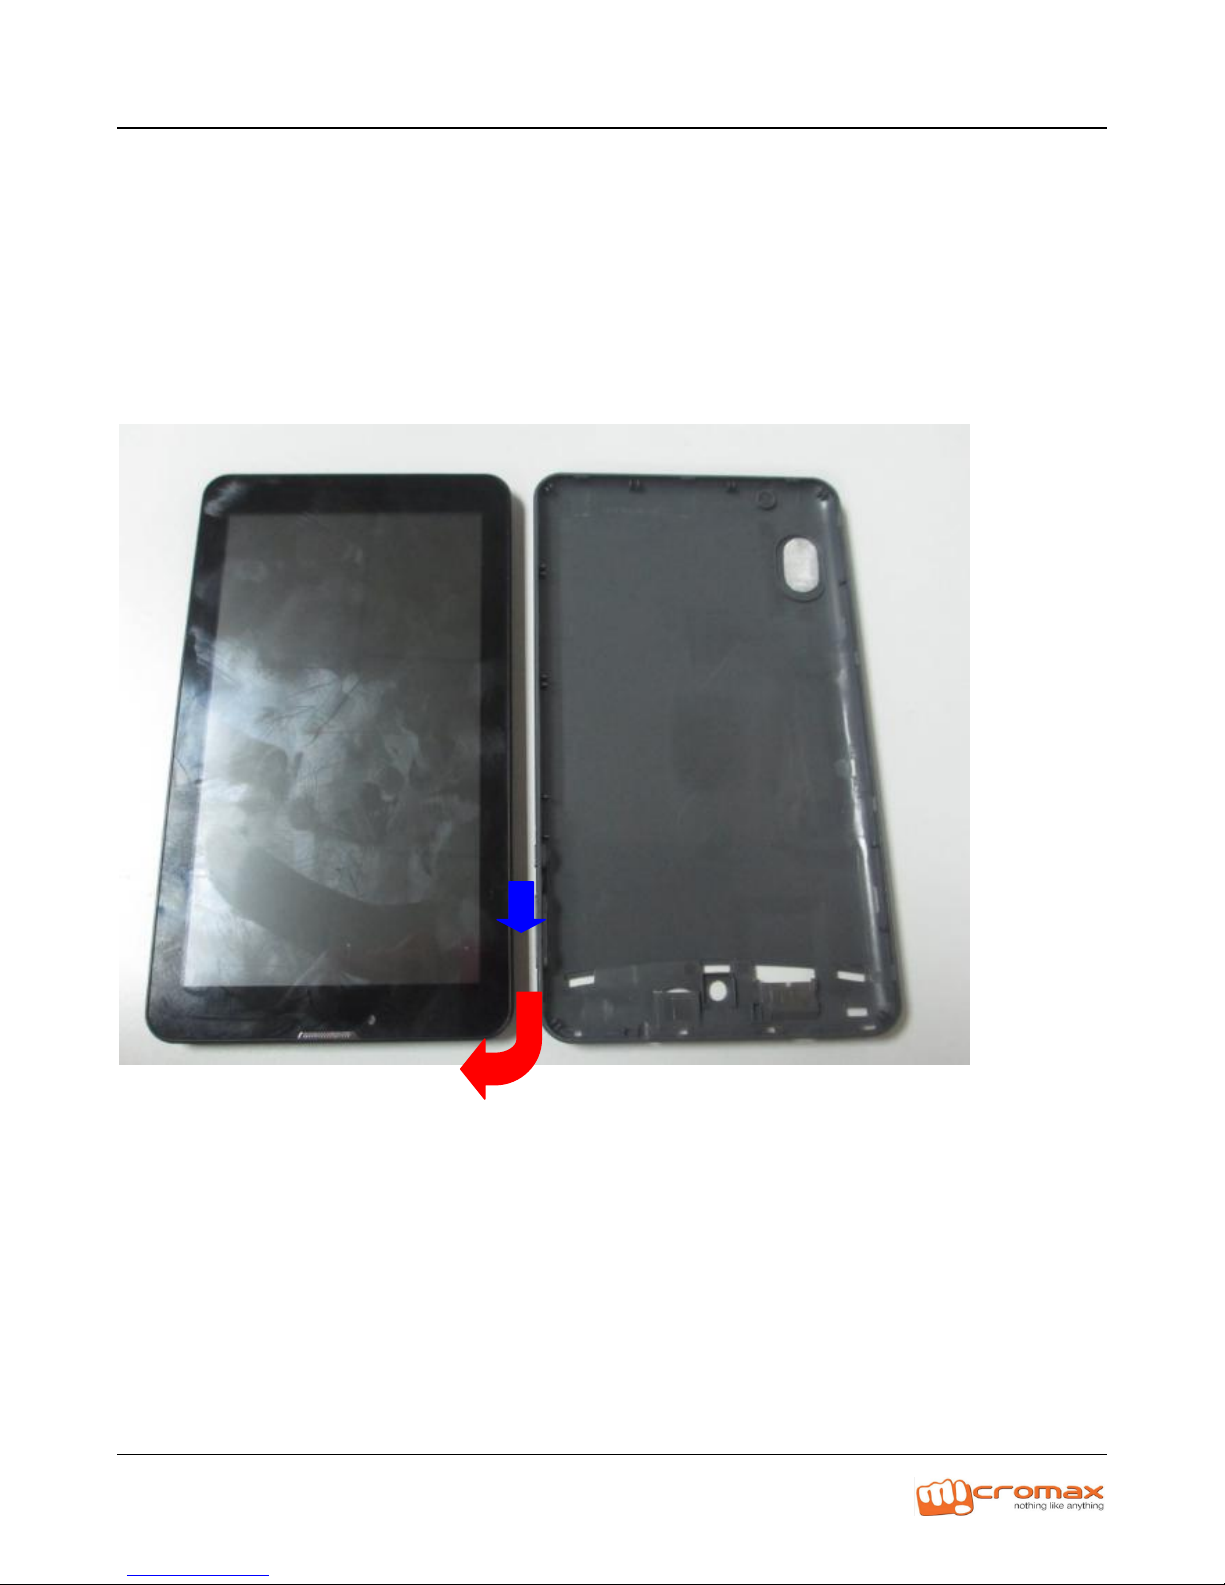
3. Back case disassembly
Insert tommy bar into the gap between middle frame and back case, then
slide it slowly along the gap, as the Fig.2
FIG.2
Page 6
P310 L2 Service Manual
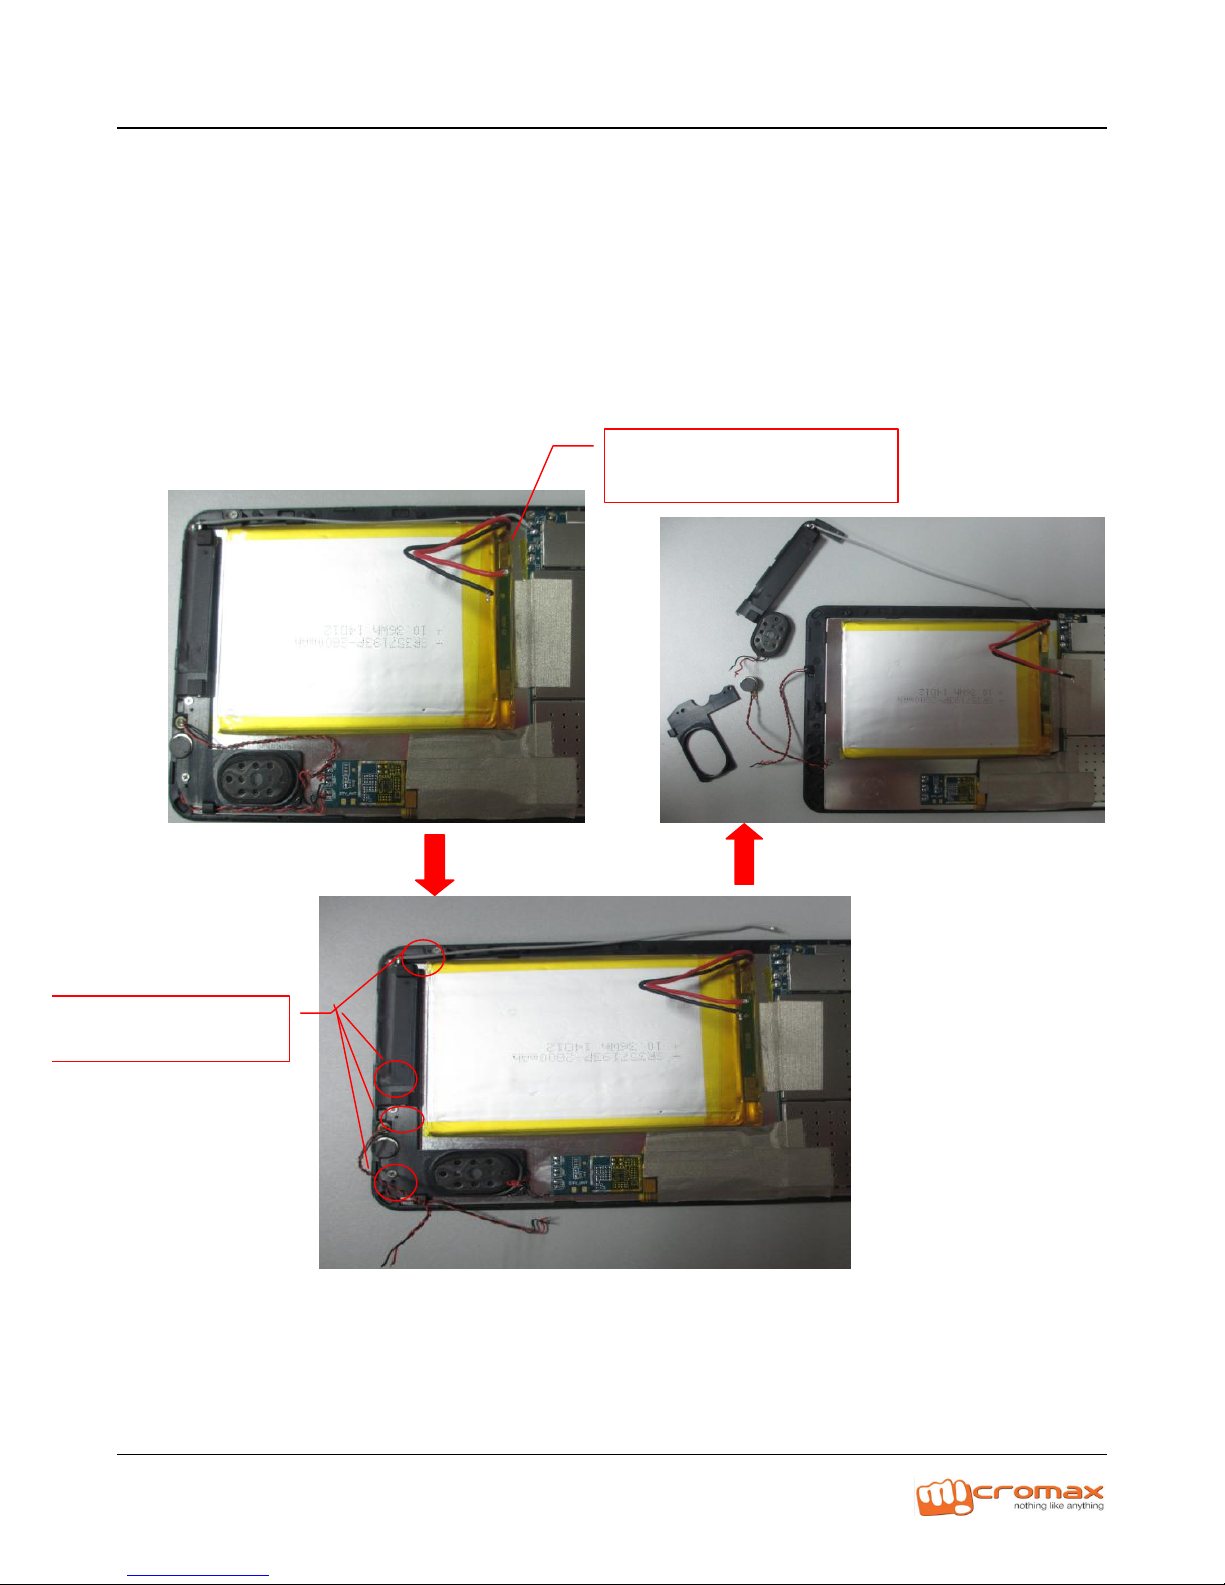
4. Disassemble battery&speaker&mic&motor
First, remove battery with soldering iron. Then remove the four screws as
shown in the fig.3 to disassemble speaker holder and antenna holder.
FIG.3
FIRST REMOVE
FOUR SCREWS
Page 7
P310 L2 Service Manual
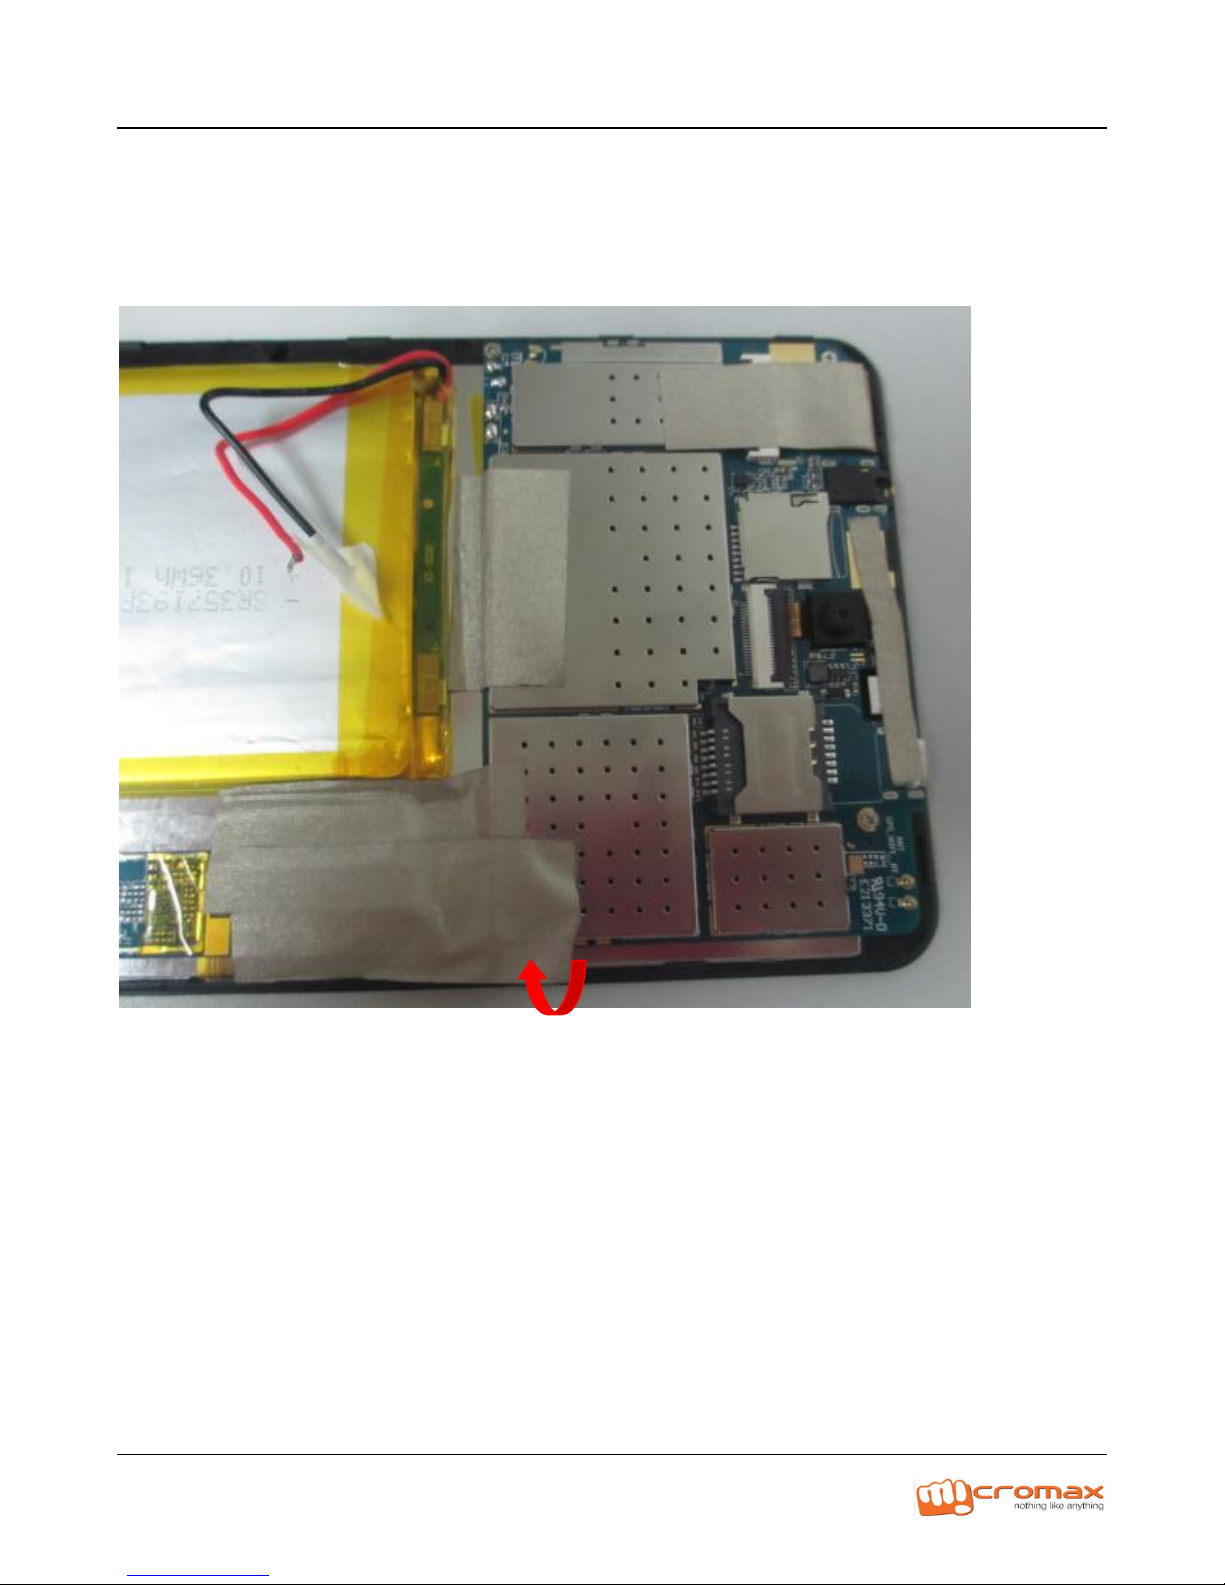
5. Tear off conduction tape and high temp tape,as the Fig.4
FIG.4
Page 8
P310 L2 Service Manual
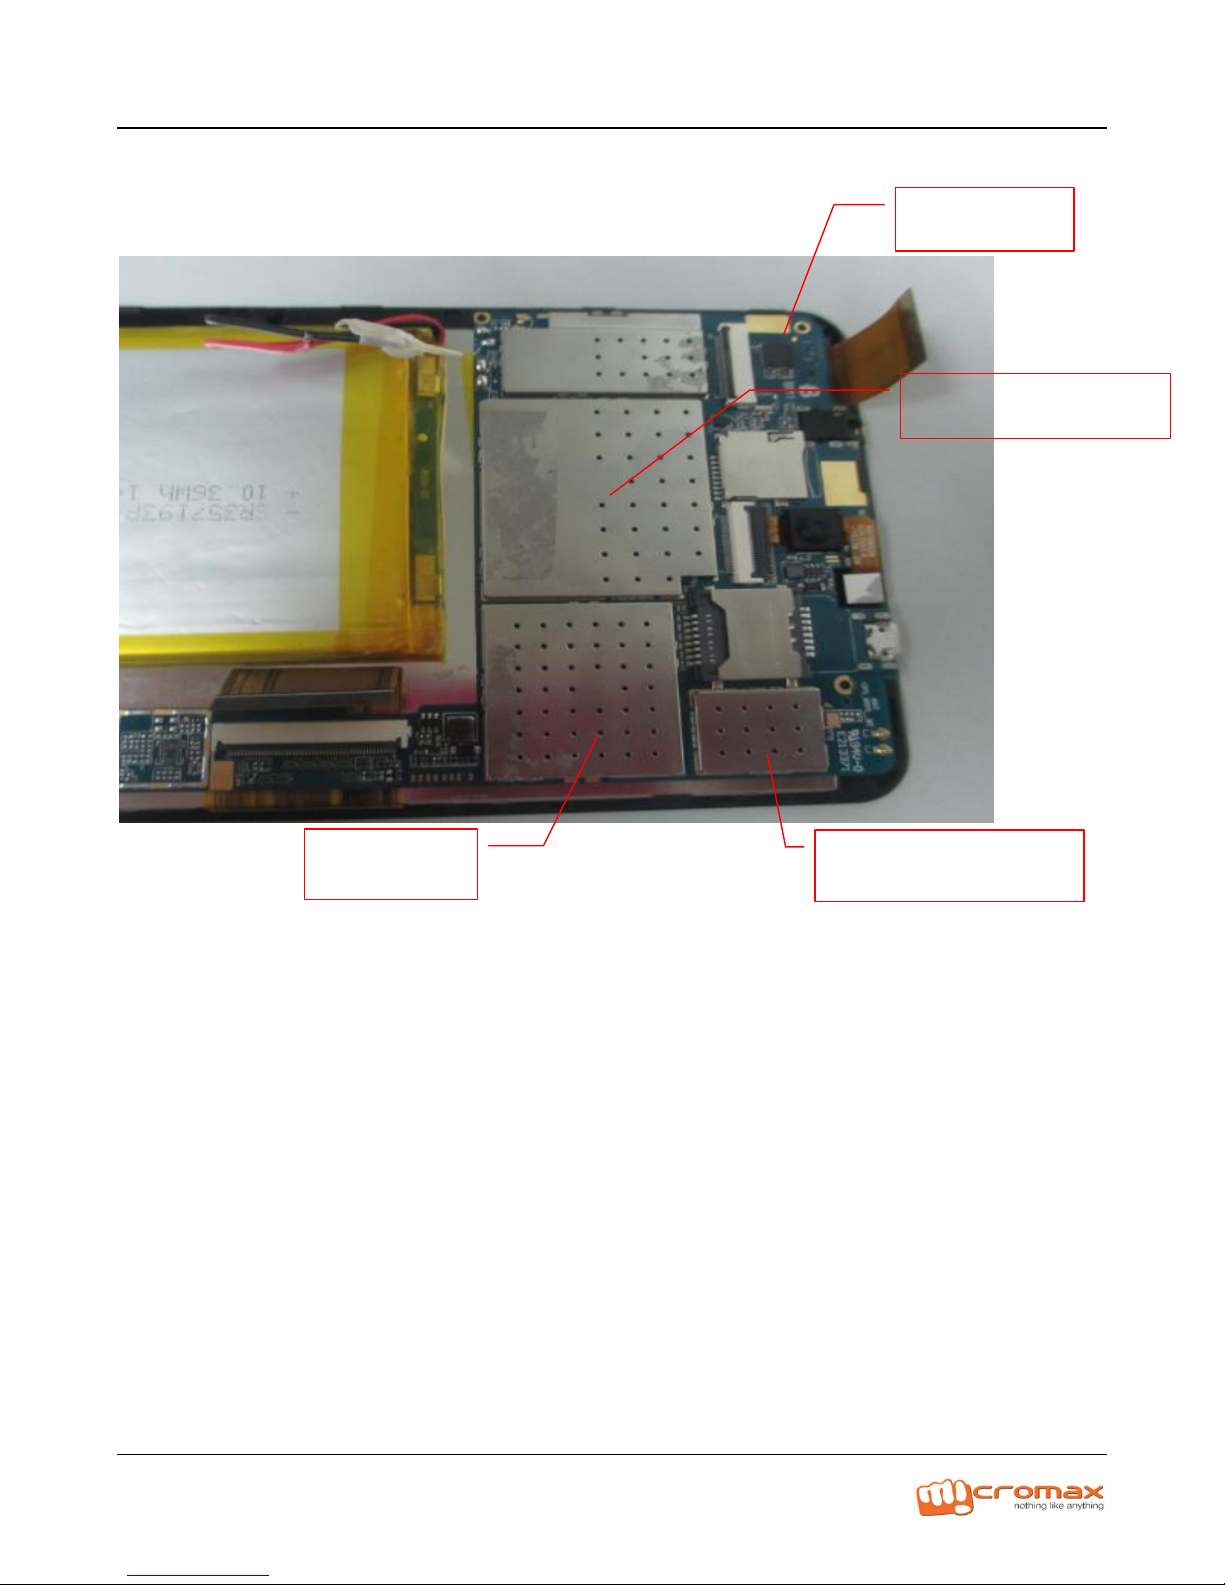
6. The main components distribution,as the fig.5
FIG.5
TOUCH IC
CPU/DDR/PMU
FLASH
WIFI+BT MODEL
Page 9
P310 L2 Service Manual
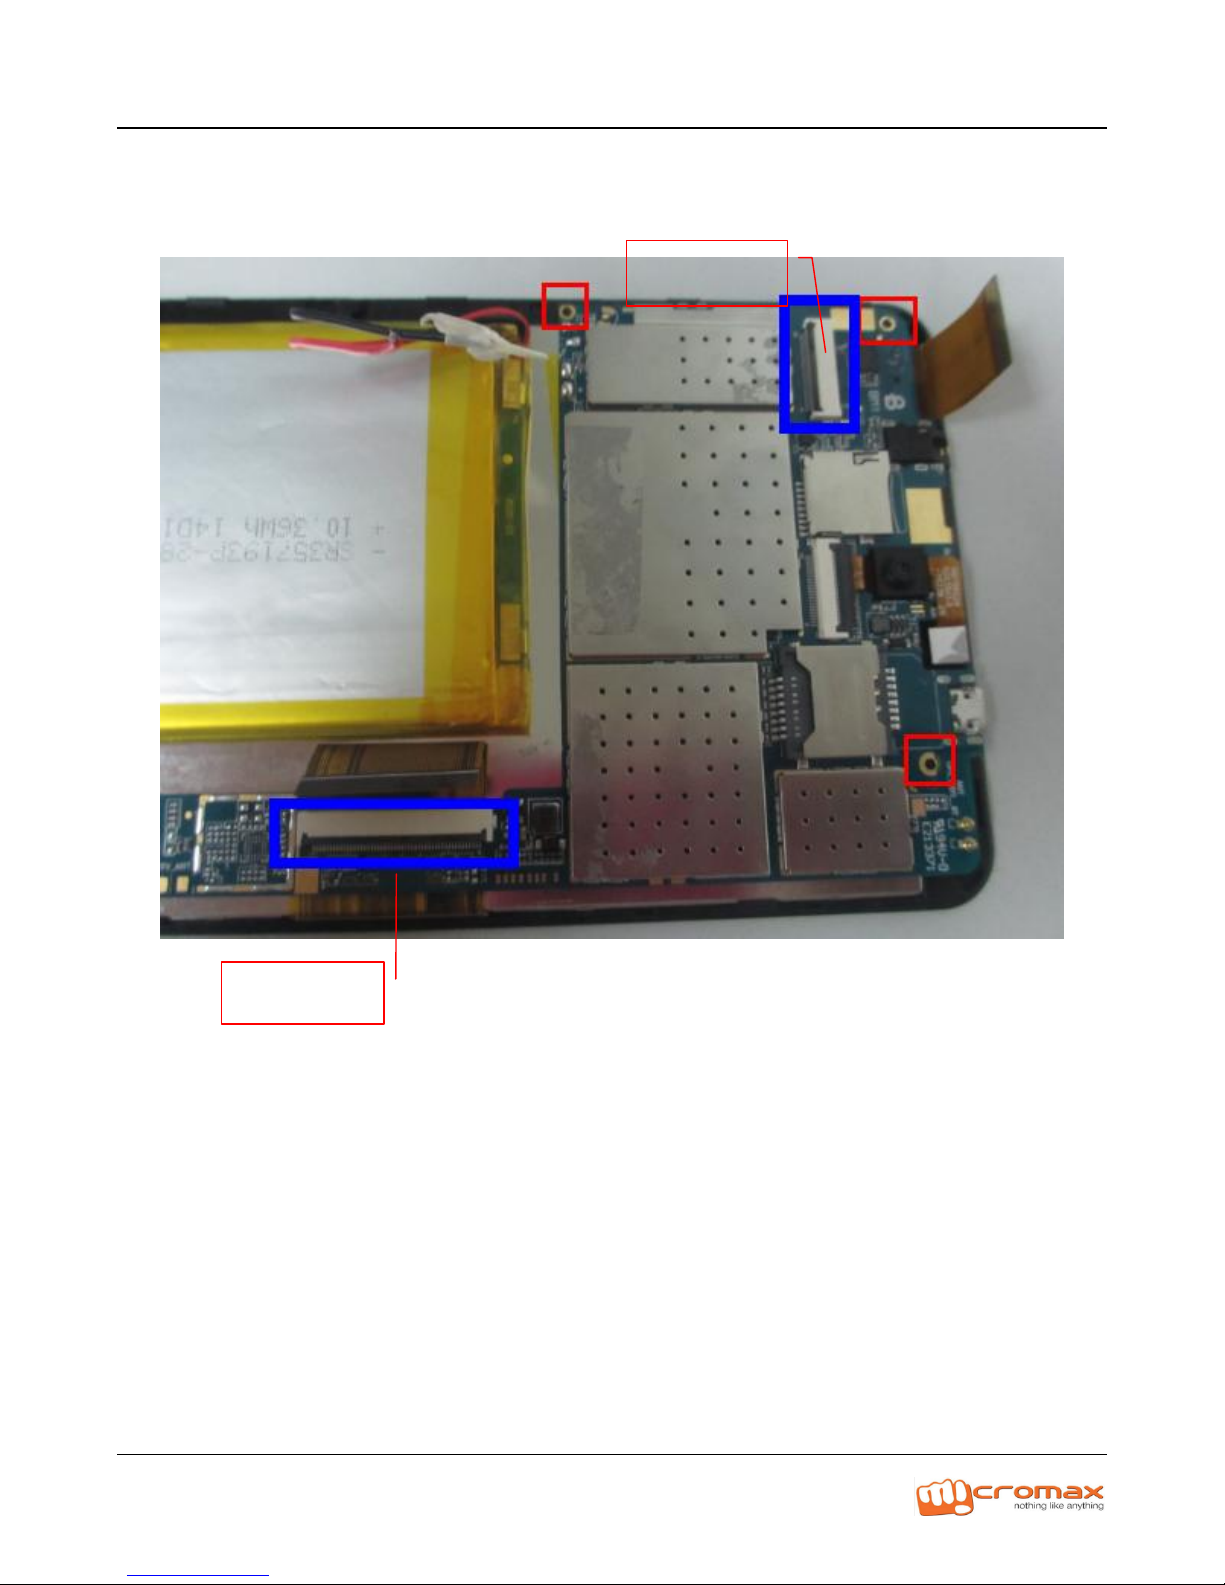
7. Remove the three screws and open the LCD con. & TP con.,as the fig.6
FIG.6
TF CON
LCD CON
Page 10
P310 L2 Service Manual
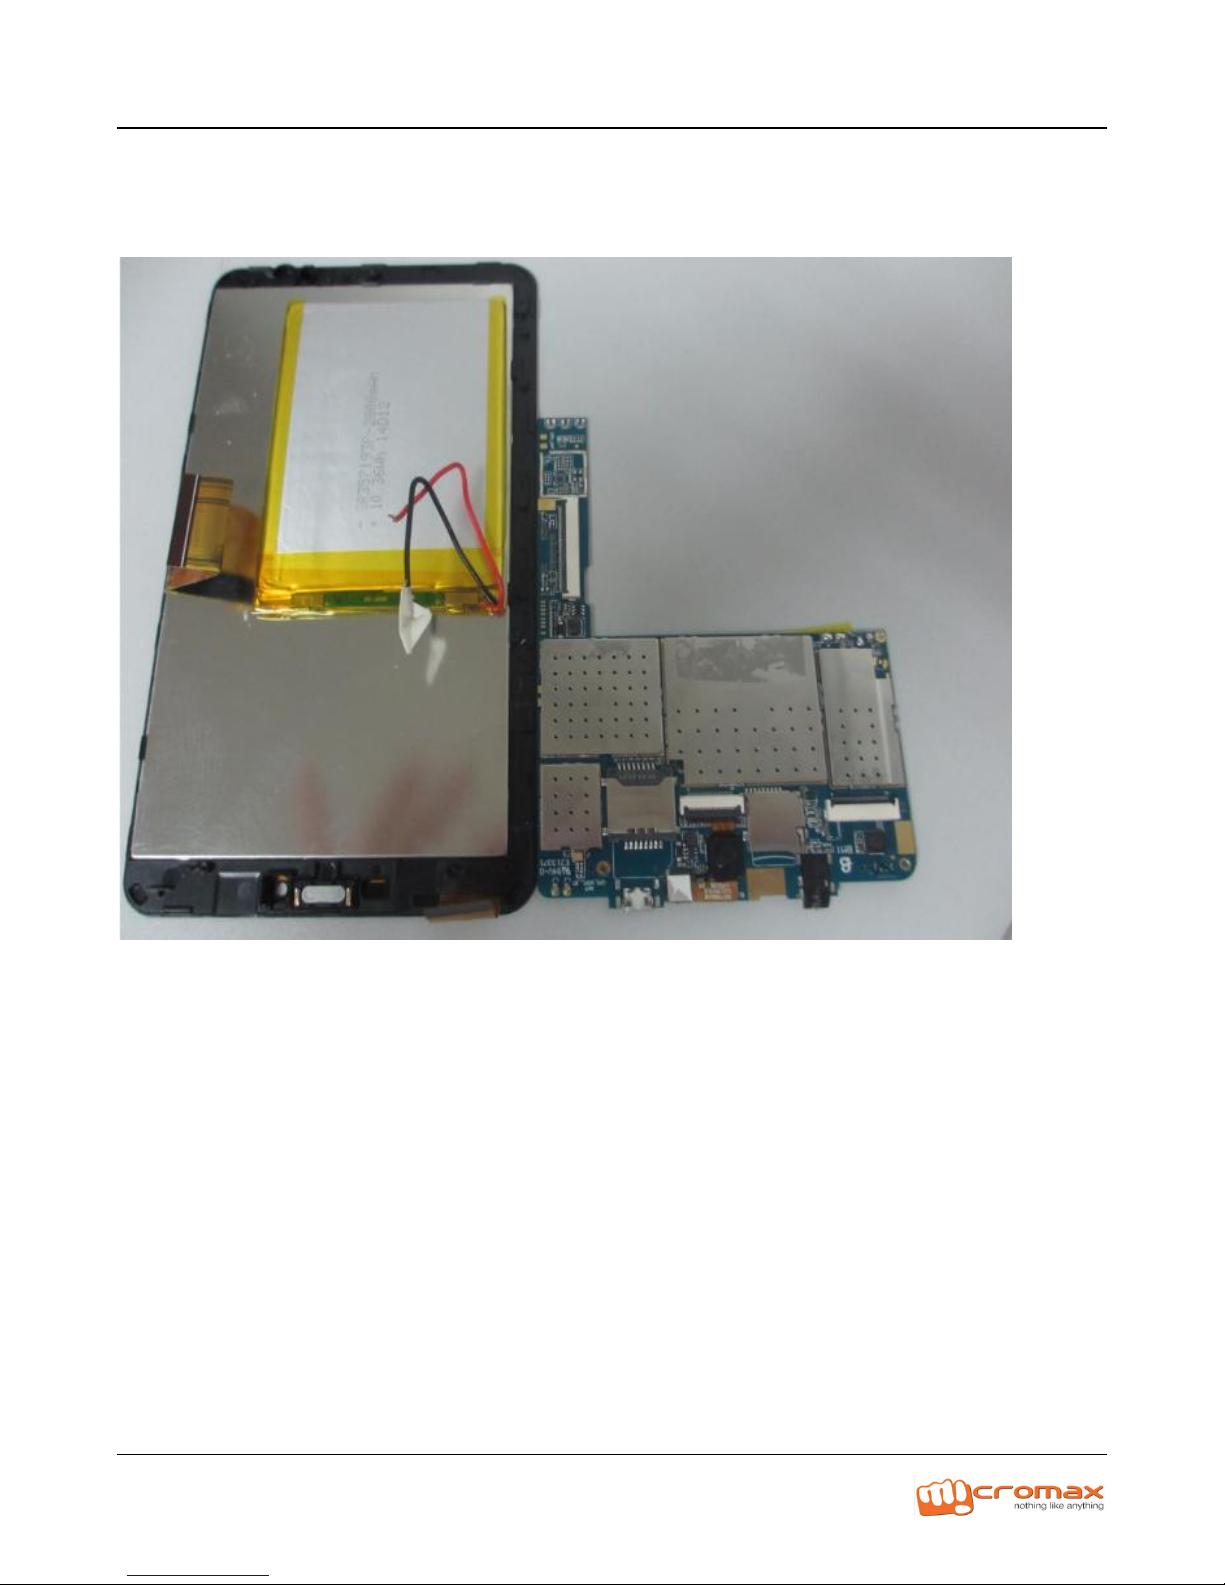
8. Remove main board from case,as the FIG.7
FIG.7
Page 11
P310 L2 Service Manual
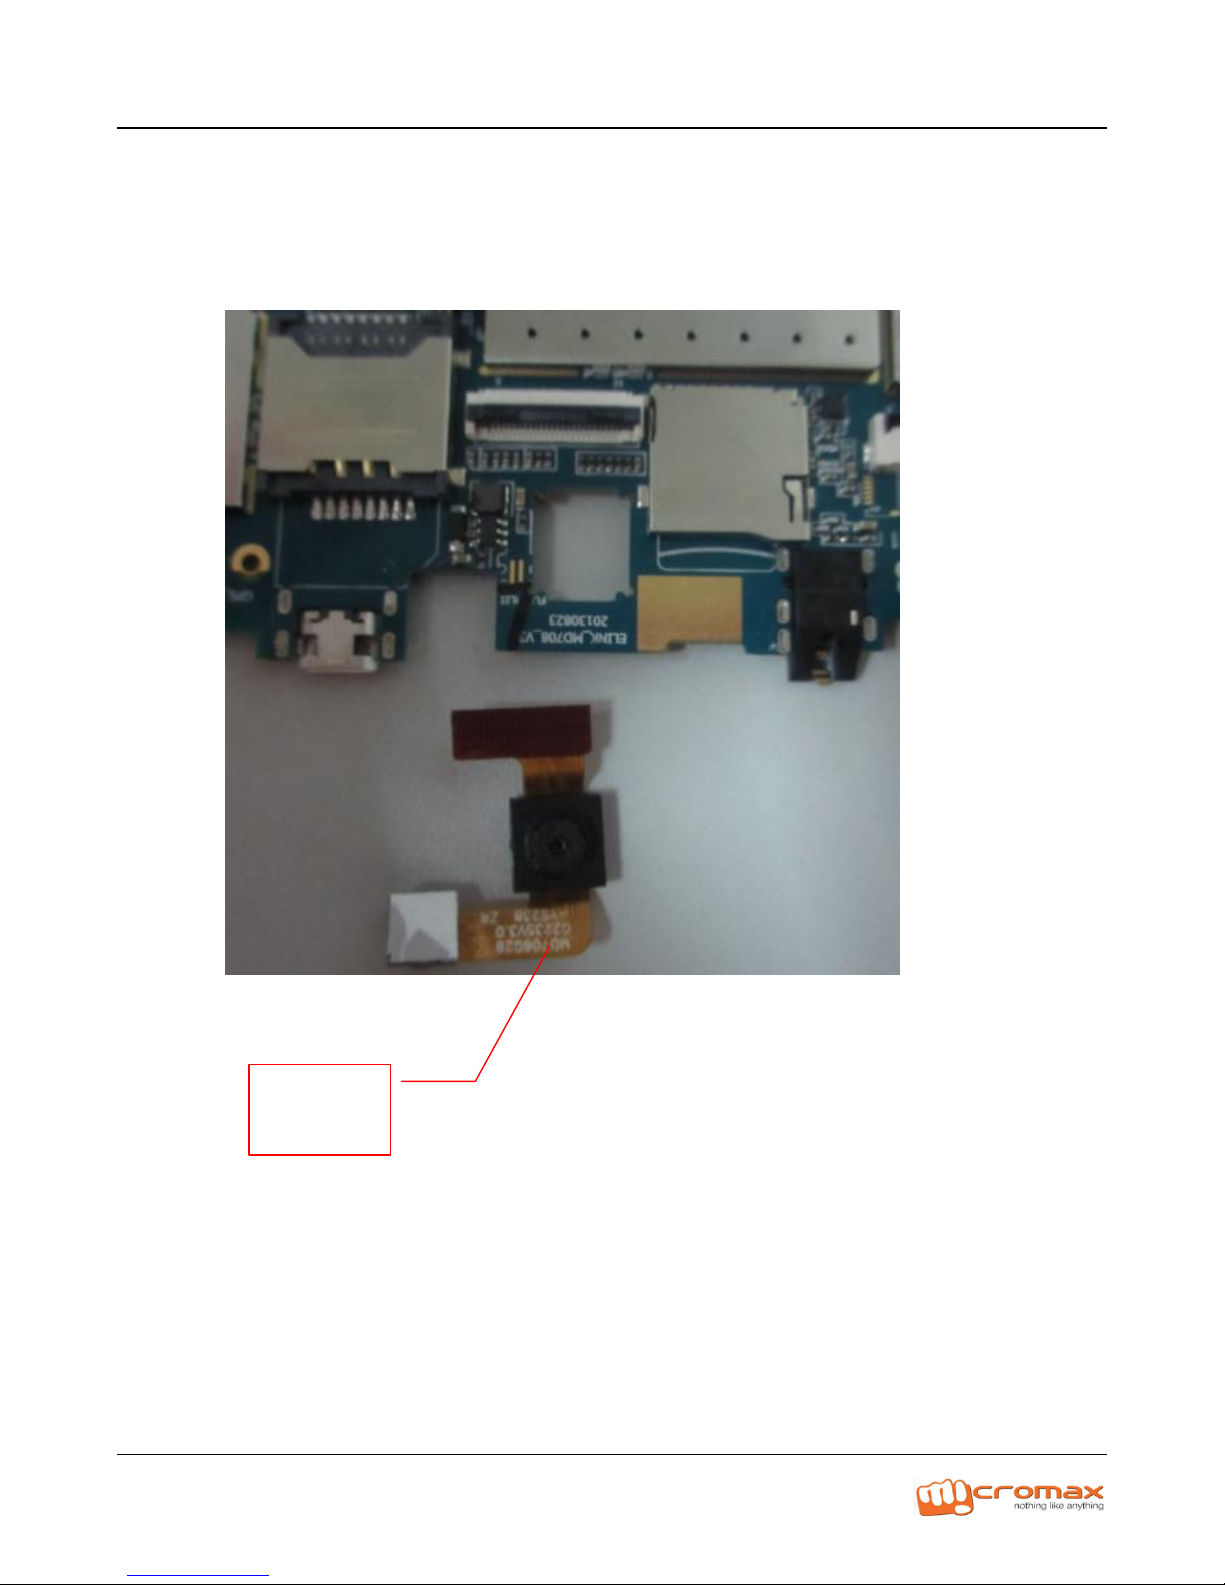
9. Remove camera ,as the FIG.8
FIG.8
CAM
Page 12
P310 L2 Service Manual
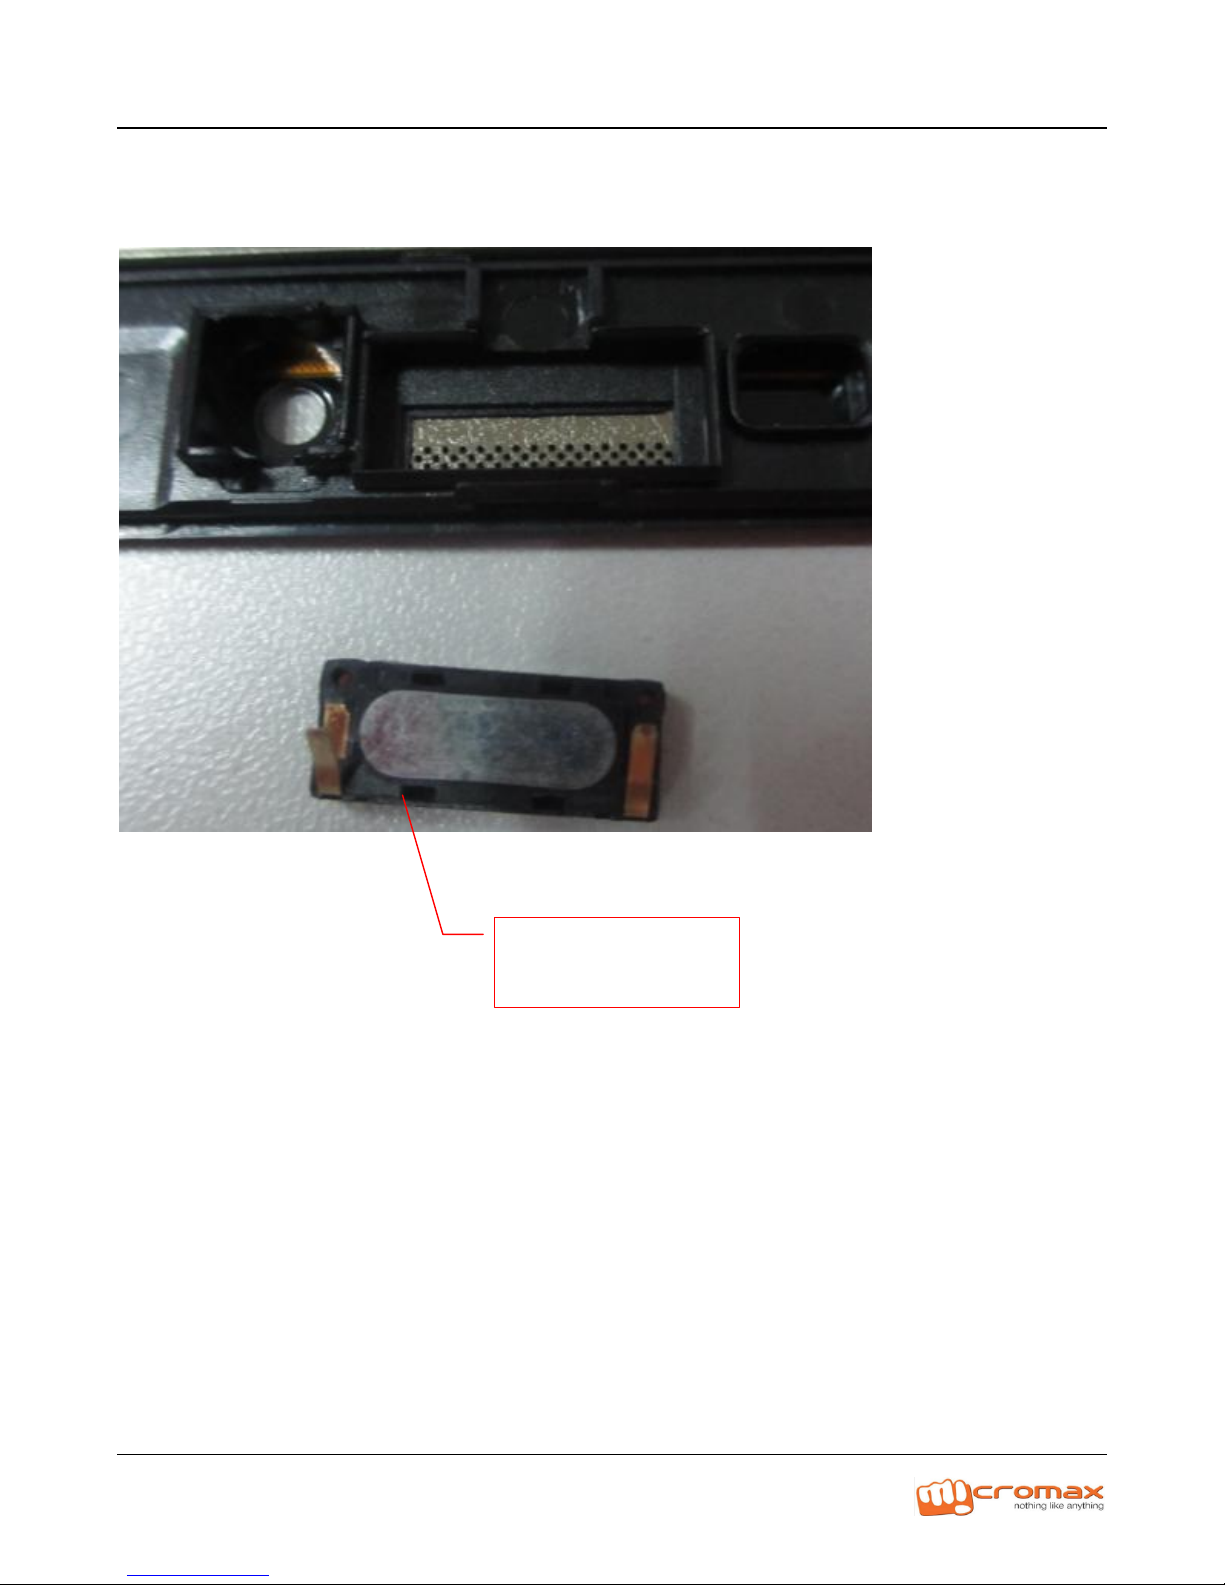
10.Receiver disassembling, as the fig.9
FIG.9
RECEIVER
Page 13
P310 L2 Service Manual
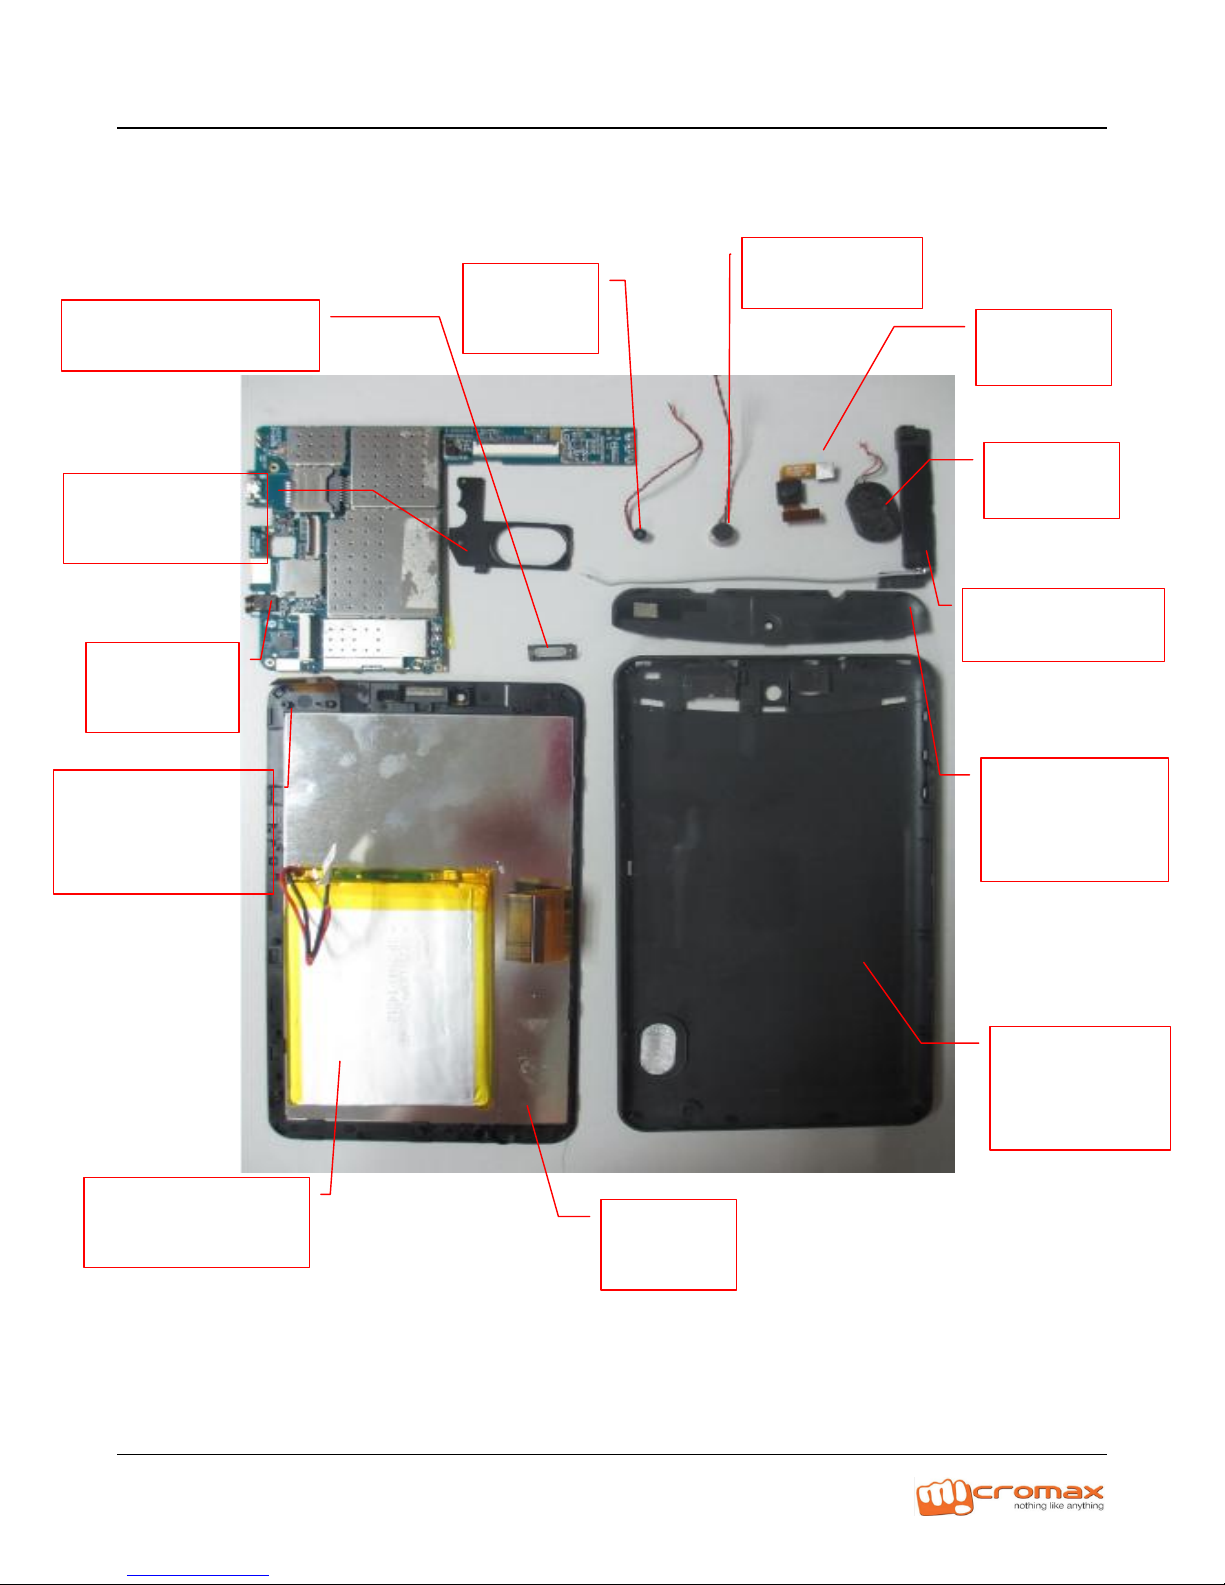
11. Exploded view
MIC
MOTOR
CAM
SPK
RECEIVER
PCBA
COVER
PLATE
HOLDER
HOLDER
BACK
CASE
MIDDLE
FRAME
BATTERY
LCD
Page 14
P310 L2 Service Manual
L1 & L2 Repairing guide
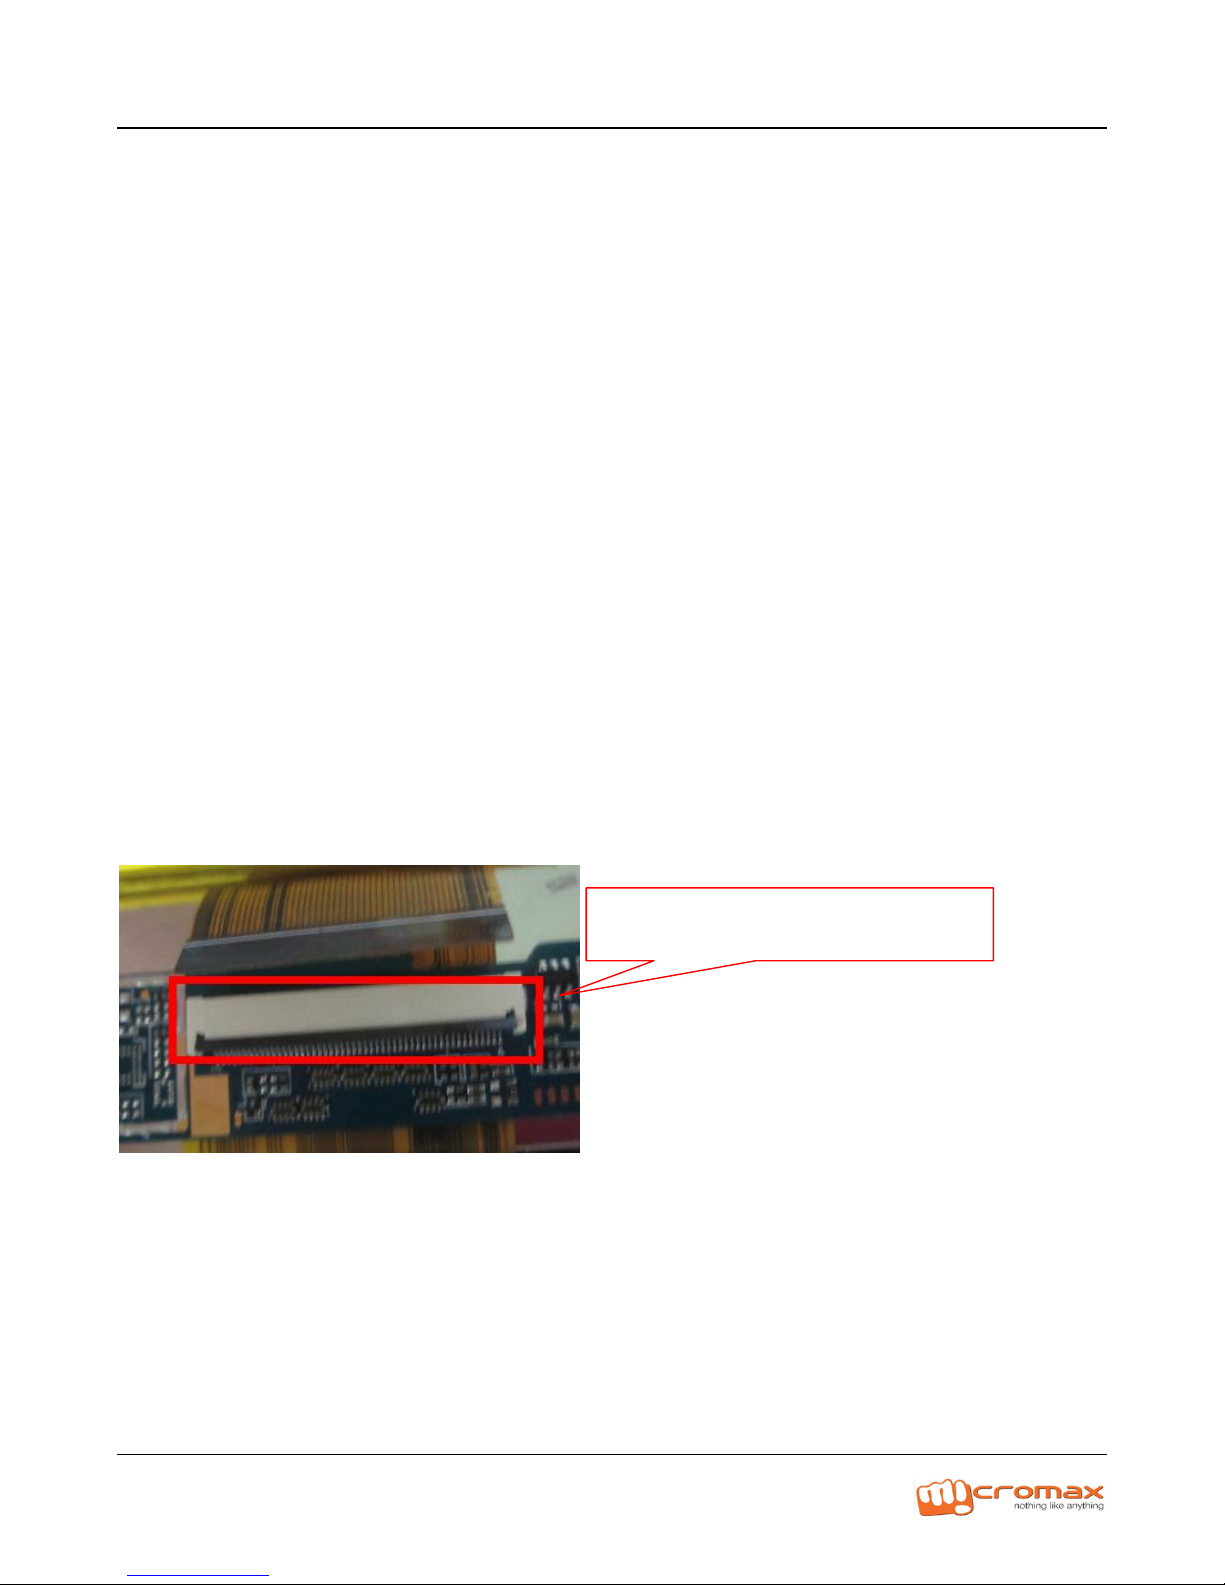
1. LCD
Check the SW is correct, otherwise to upgrade the SW;
Check the LCD is ok, otherwise change a new LCD;
Ifthe LCD loose, re-assemble the LCD and test;
Checking the LCD connector is ok, otherwise re-solder it or change a new
one;
Check the circuit around the LCD connector.
LCD CONNECTOR
Page 15
P310 L2 Service Manual
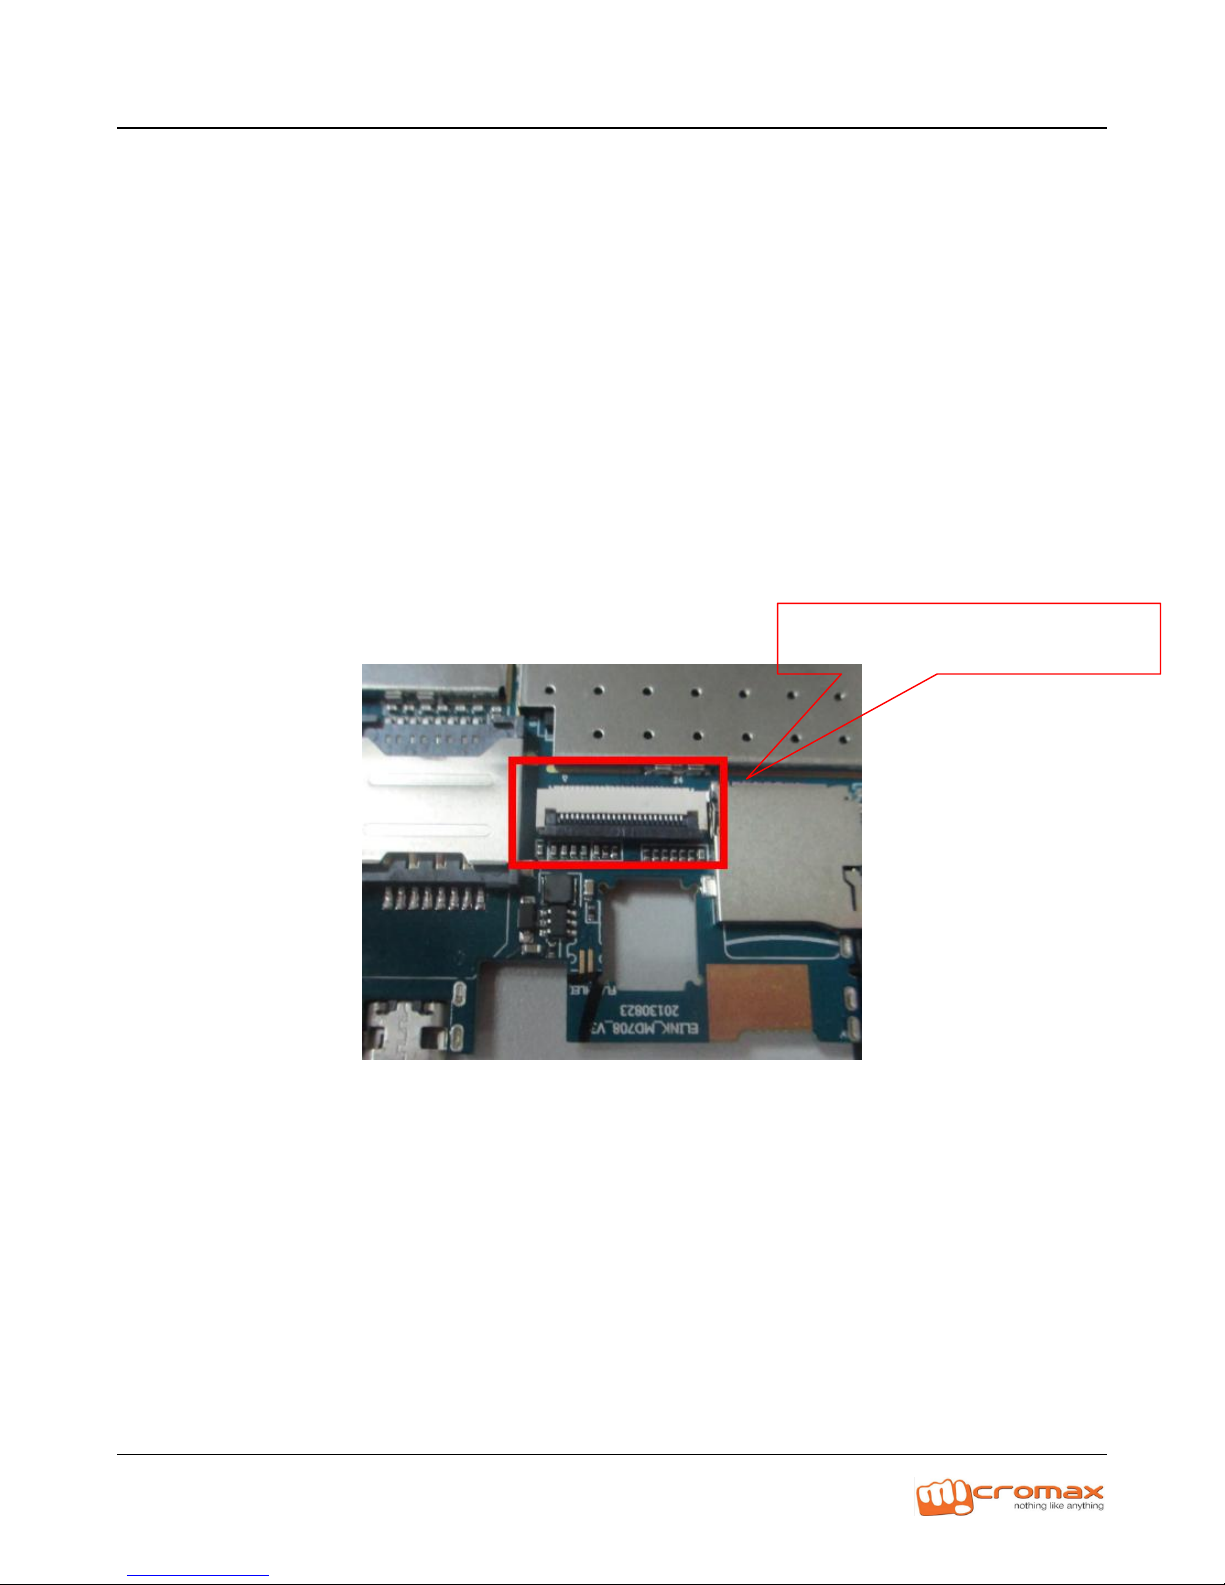
2. Camera
Check the camera assemble correctly, otherwise re-assemble the camera
and test;
Cross test with a good camera, and check the camera is ok;
Check the camera connector is ok as shown in the below picture,
otherwise re-solder or change a new one;
Check the circuit around the camera connector.
CAM CONNECTOR
Page 16
P310 L2 Service Manual
3. Touch Pannel
Check the SW is correct, otherwise to upgrade the SW;
Check the FPC of TP is correct, otherwise re-assemble it;
Cross test with a good TP;
Check the TP connector is correct, otherwise re-solder or change a new
one;
Check the circuit around the TP connector.
Page 17
P310 L2 Service Manual
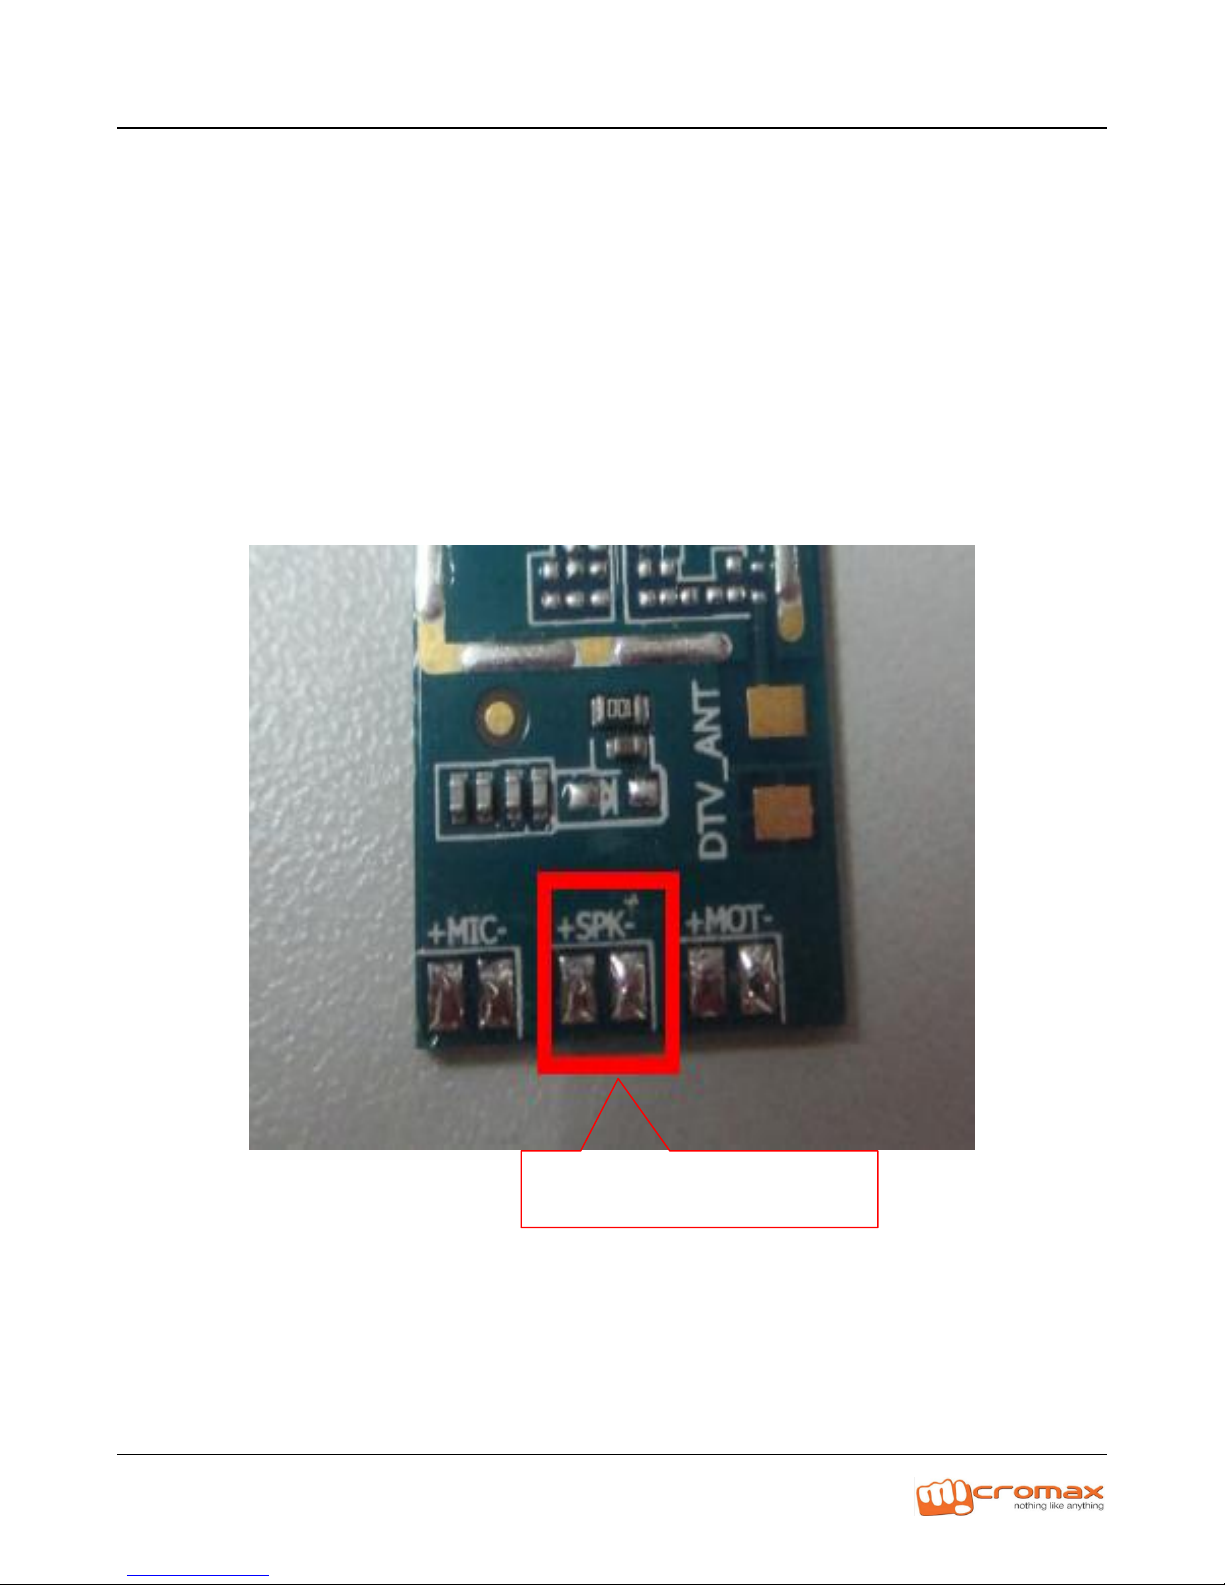
4. Ringer
Check the shrapnel of speaker is ok;
Check the resistance of speaker is ok, otherwise to change a new one;
Check the FPC is ok;
Check SPK-FPC connector with sub-board is ok.
SPEAKER
Page 18
P310 L2 Service Manual
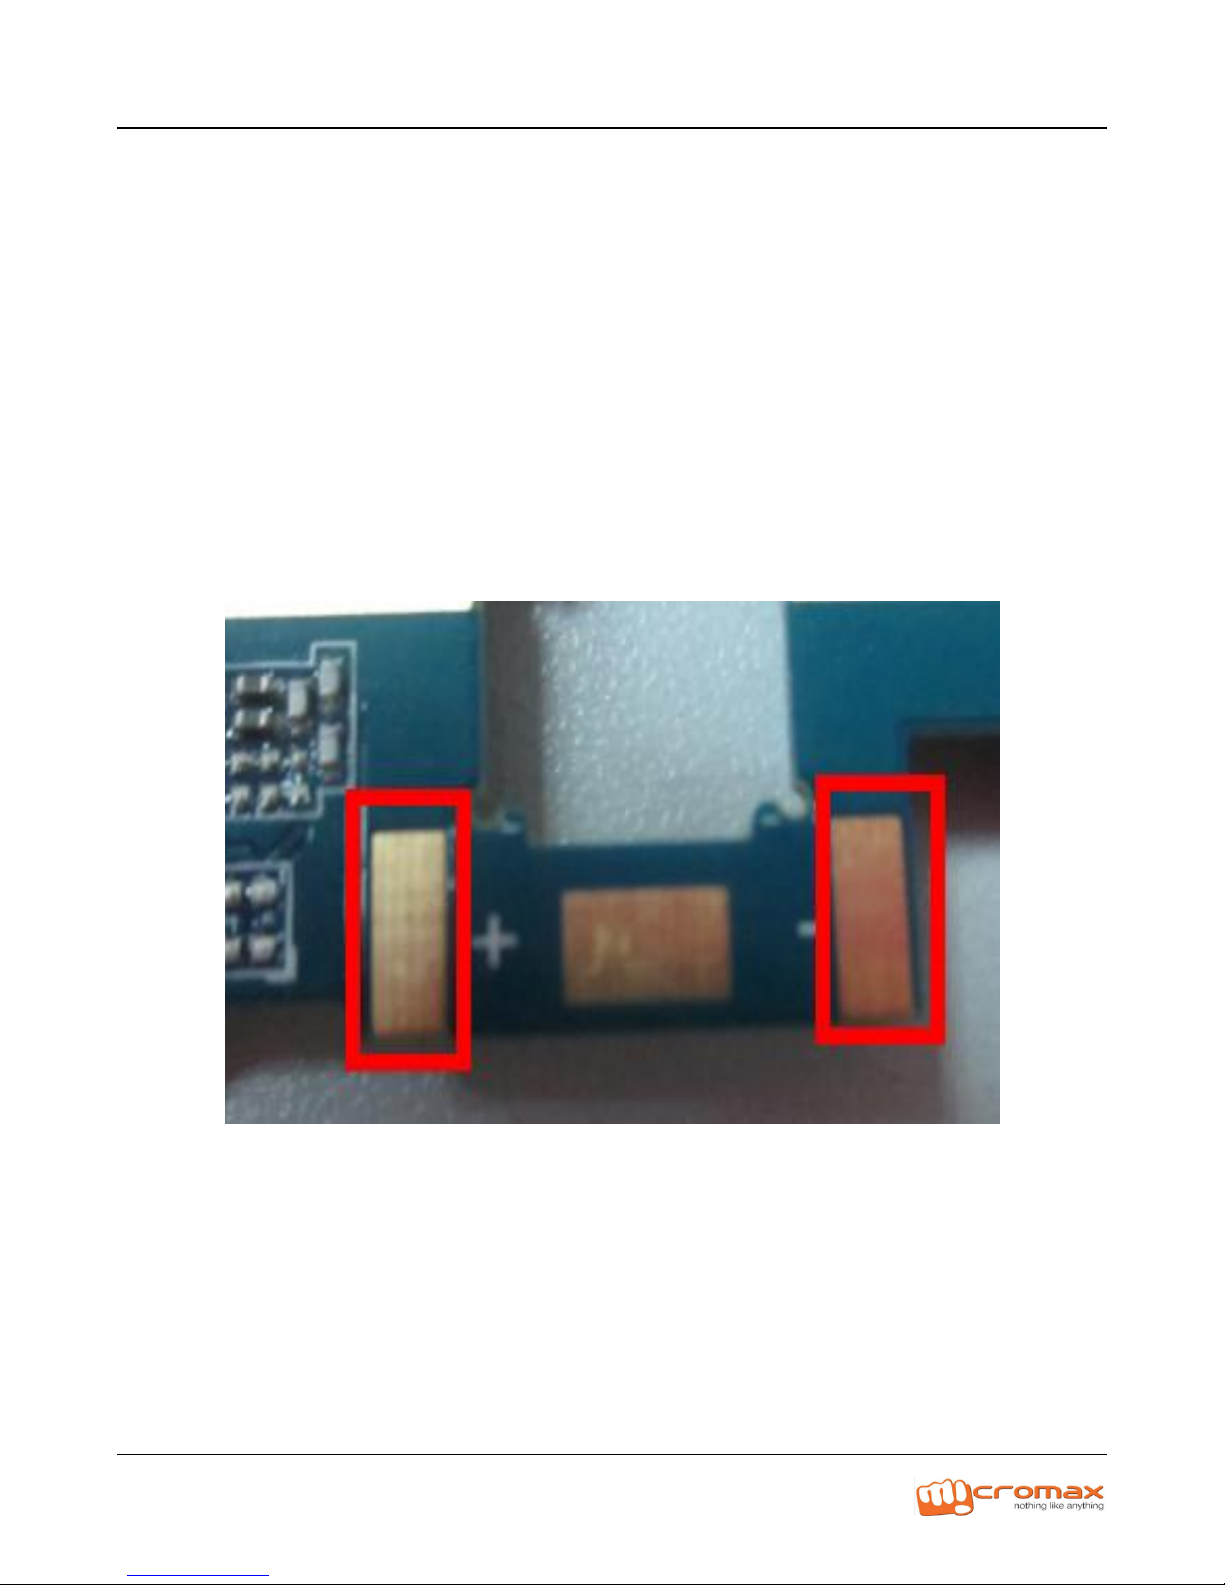
5. Receiver
Check the shrapnel of receiver is ok;
Check the resistance of receiver is ok, otherwise change a new one;
Check the connector point on the main board is ok, as shown in the below
picture;
Check the receiver circuit is ok.
Page 19
P310 L2 Service Manual
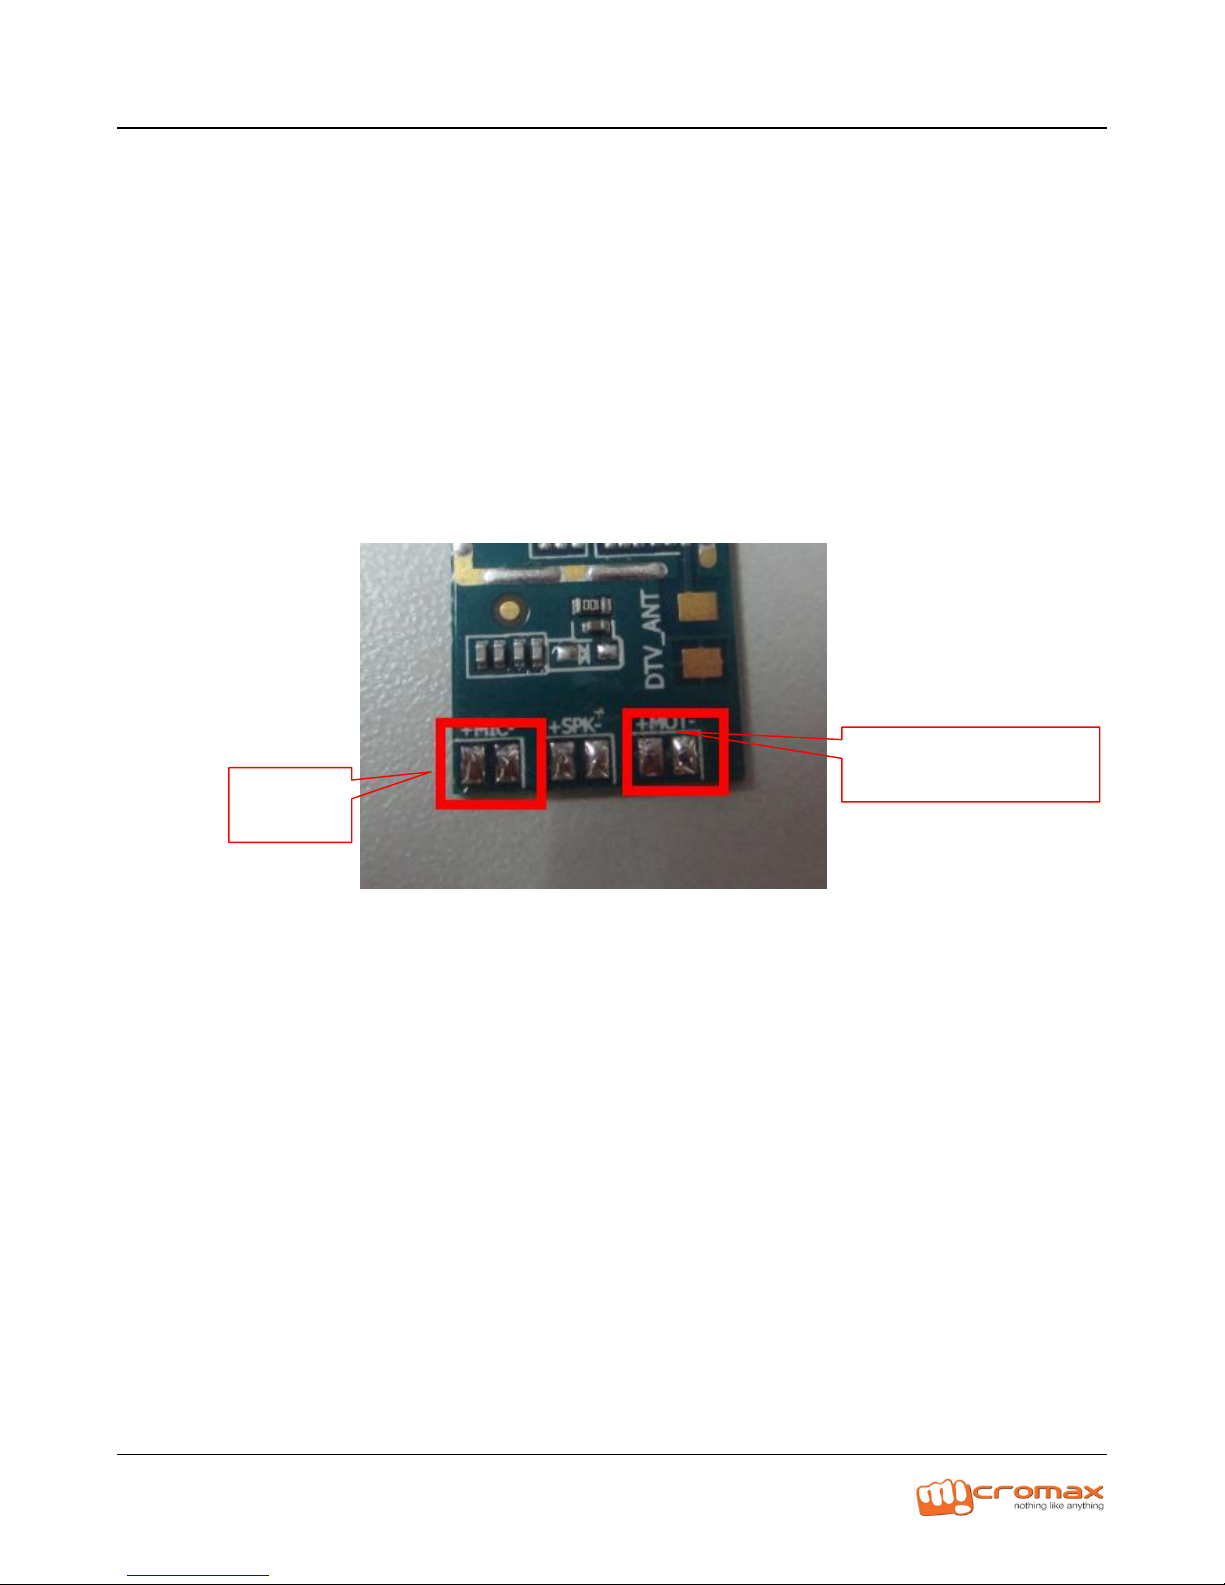
6. MIC and Vibrator
Check the MIC and Vibrator is cold soldering, otherwise re-solder it;
Change the MIC and Vibrator;
Check the circuit of MIC and Vibrator;
Check the FPC is connect correctly.
MIC
VIBRATOR
Page 20
P310 L2 Service Manual
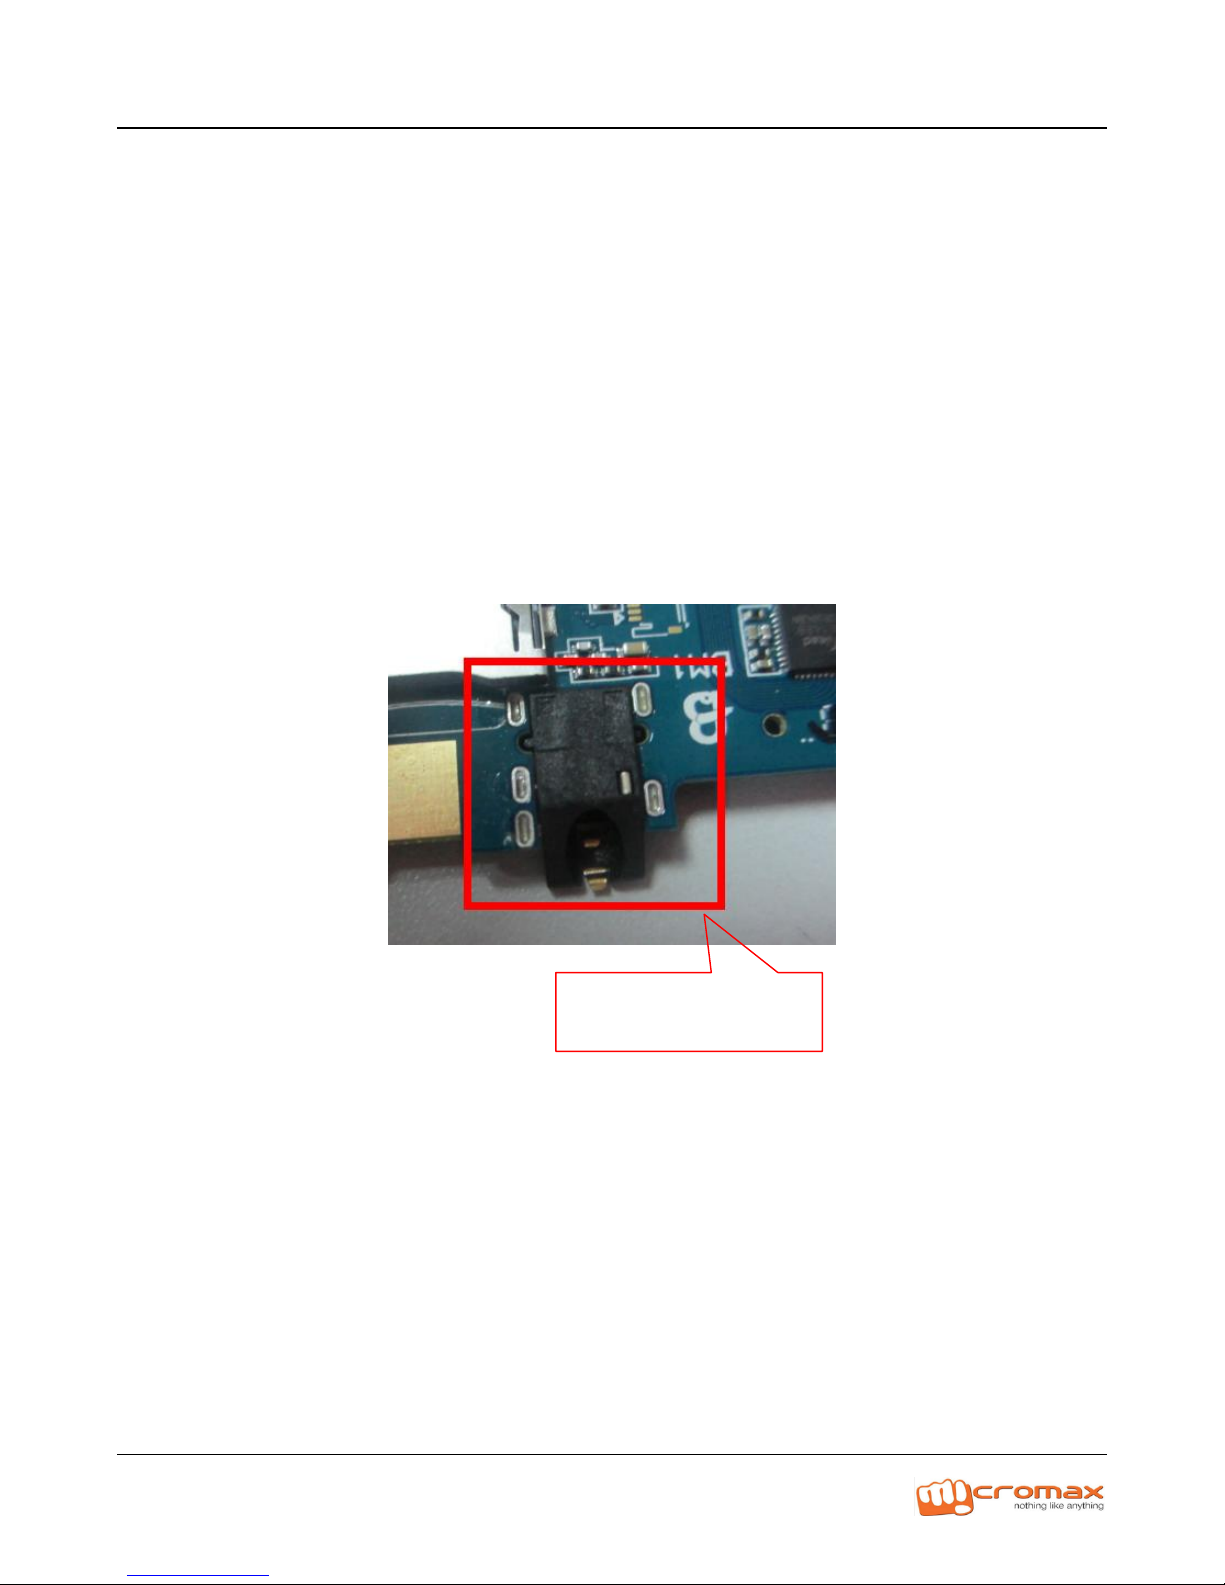
7. Earphone
Check the shrapnel of earphone is ok;
Check the connector point on the main board is ok, as shown in the below
picture;
Change earphone connector;
Check the circuit of earphone is OK.
EARPHONE
Page 21
P310 L2 Service Manual
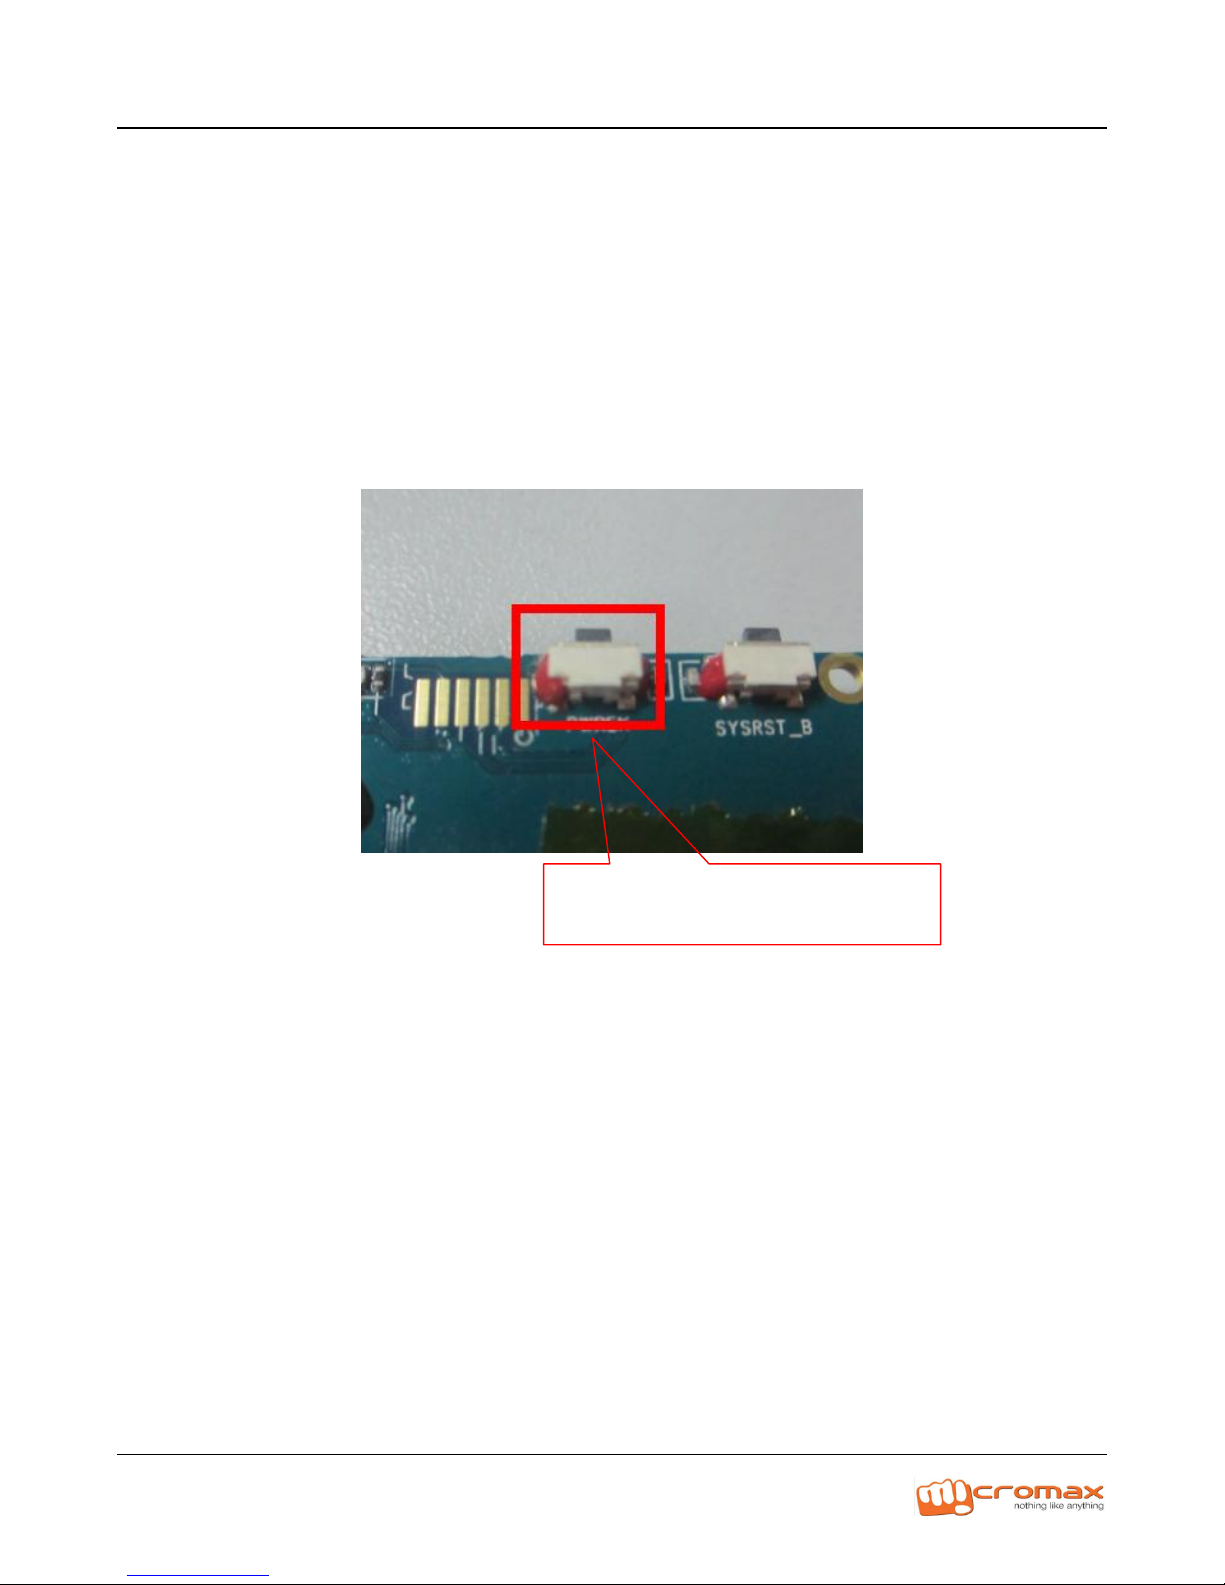
8. No Power On / Dead
Check the voltage of battery is 3.8-4.2V and connect correctly;
Upgrade the SW;
Check power on key and the circuit around it.
POWER BUTTON
Page 22
P310 L2 Service Manual
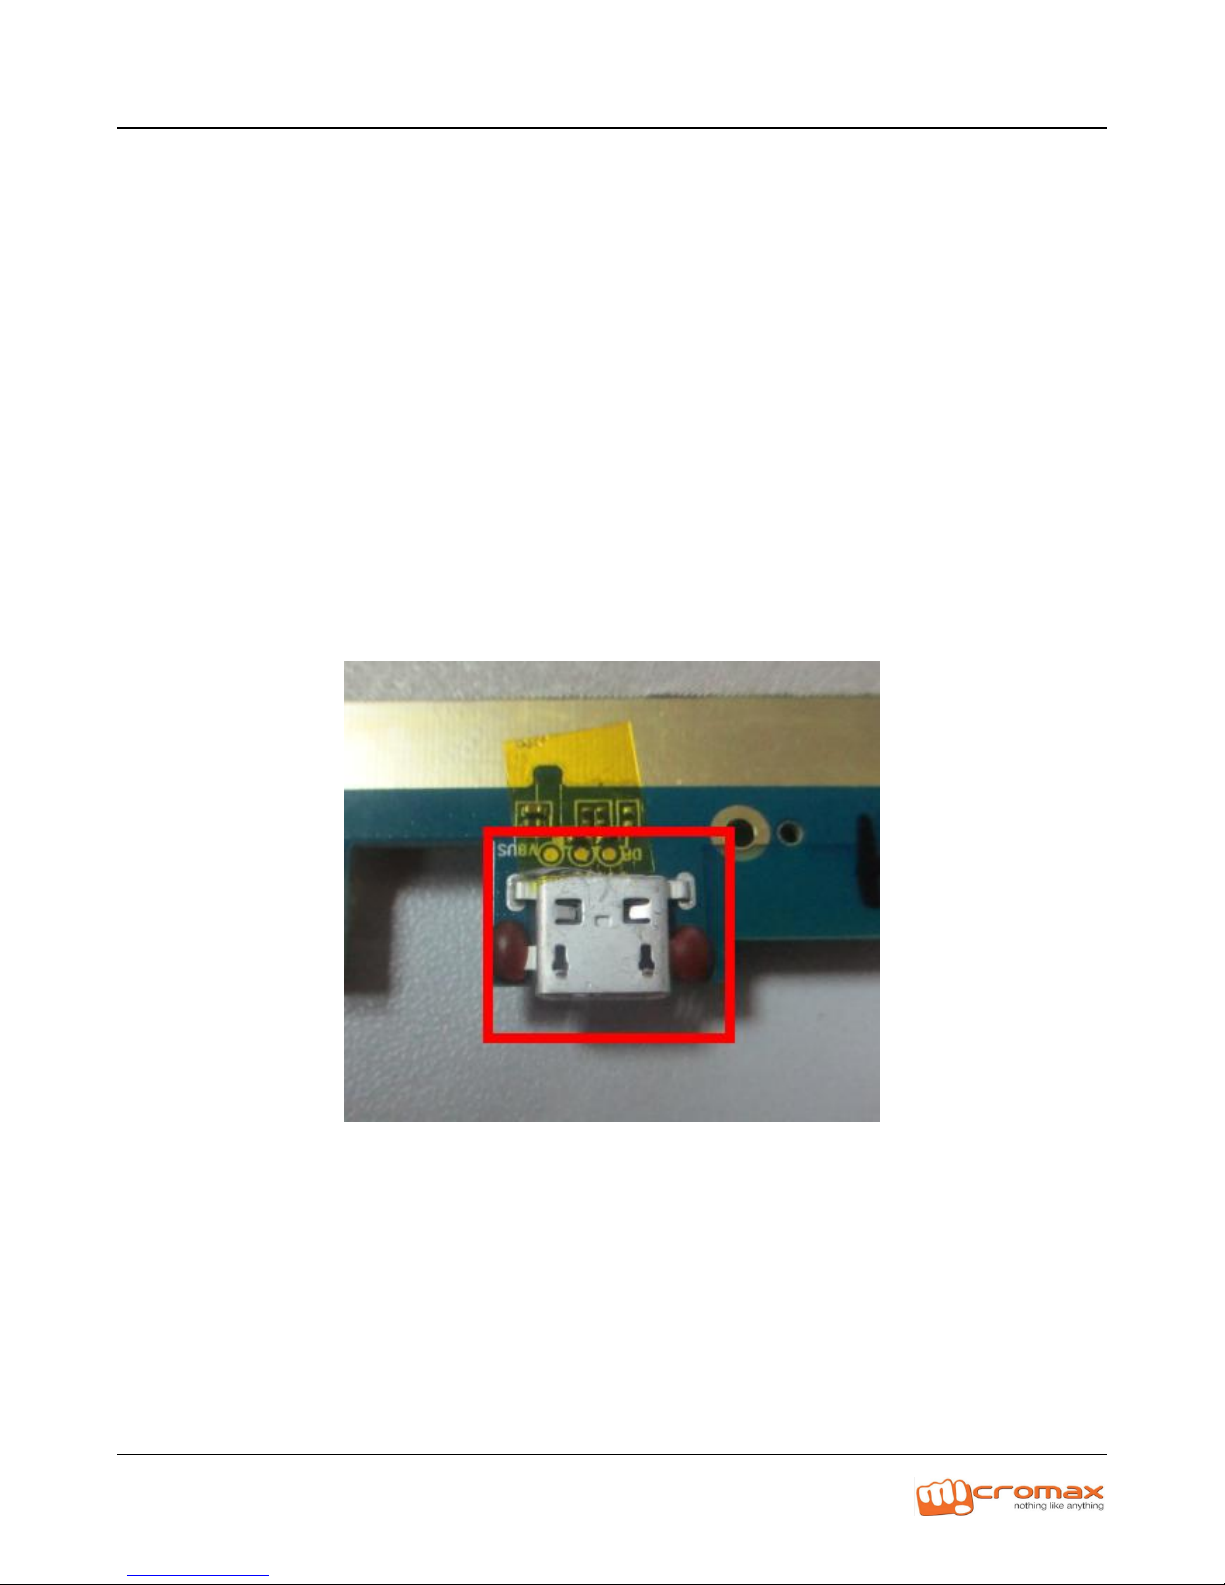
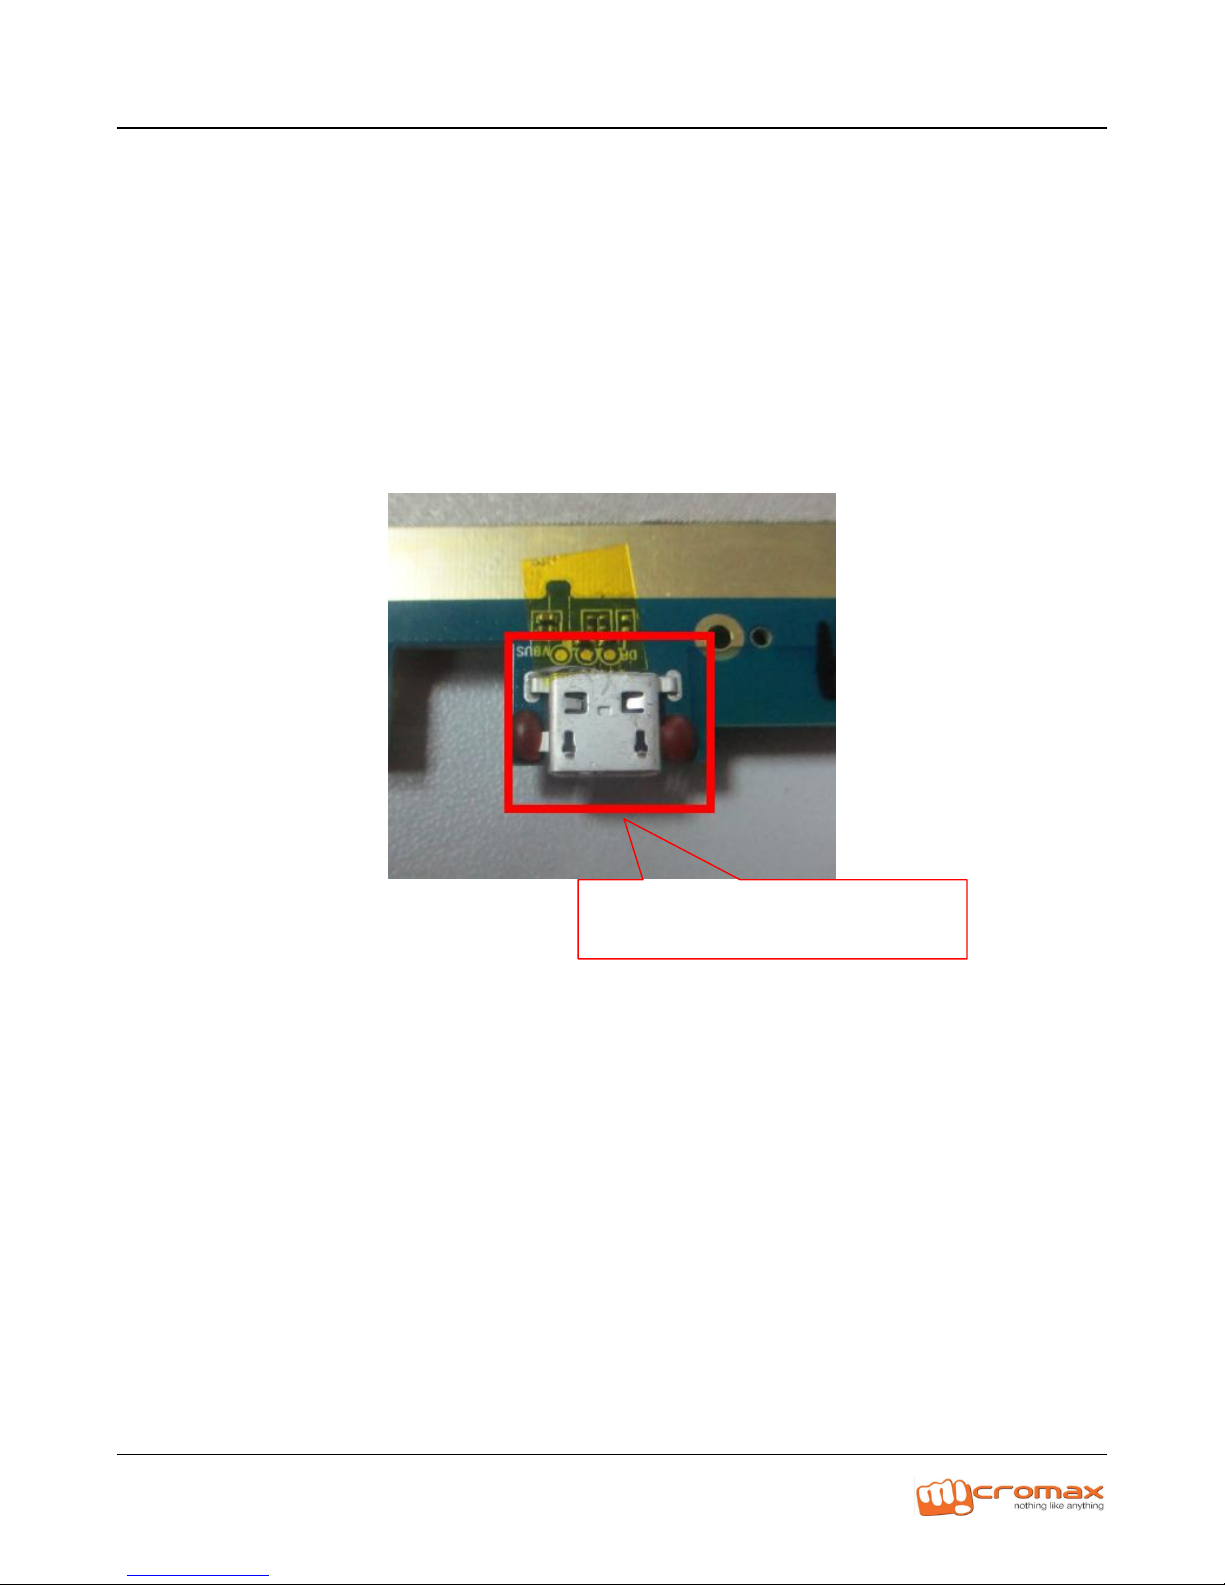
9. No Charging
Checkthe voltage of battery is over 3.4V;
Check the charger and USB cable is ok;
Check the USB connector and circuit is ok.
USB CONNECTOR
Page 23
P310 L2 Service Manual
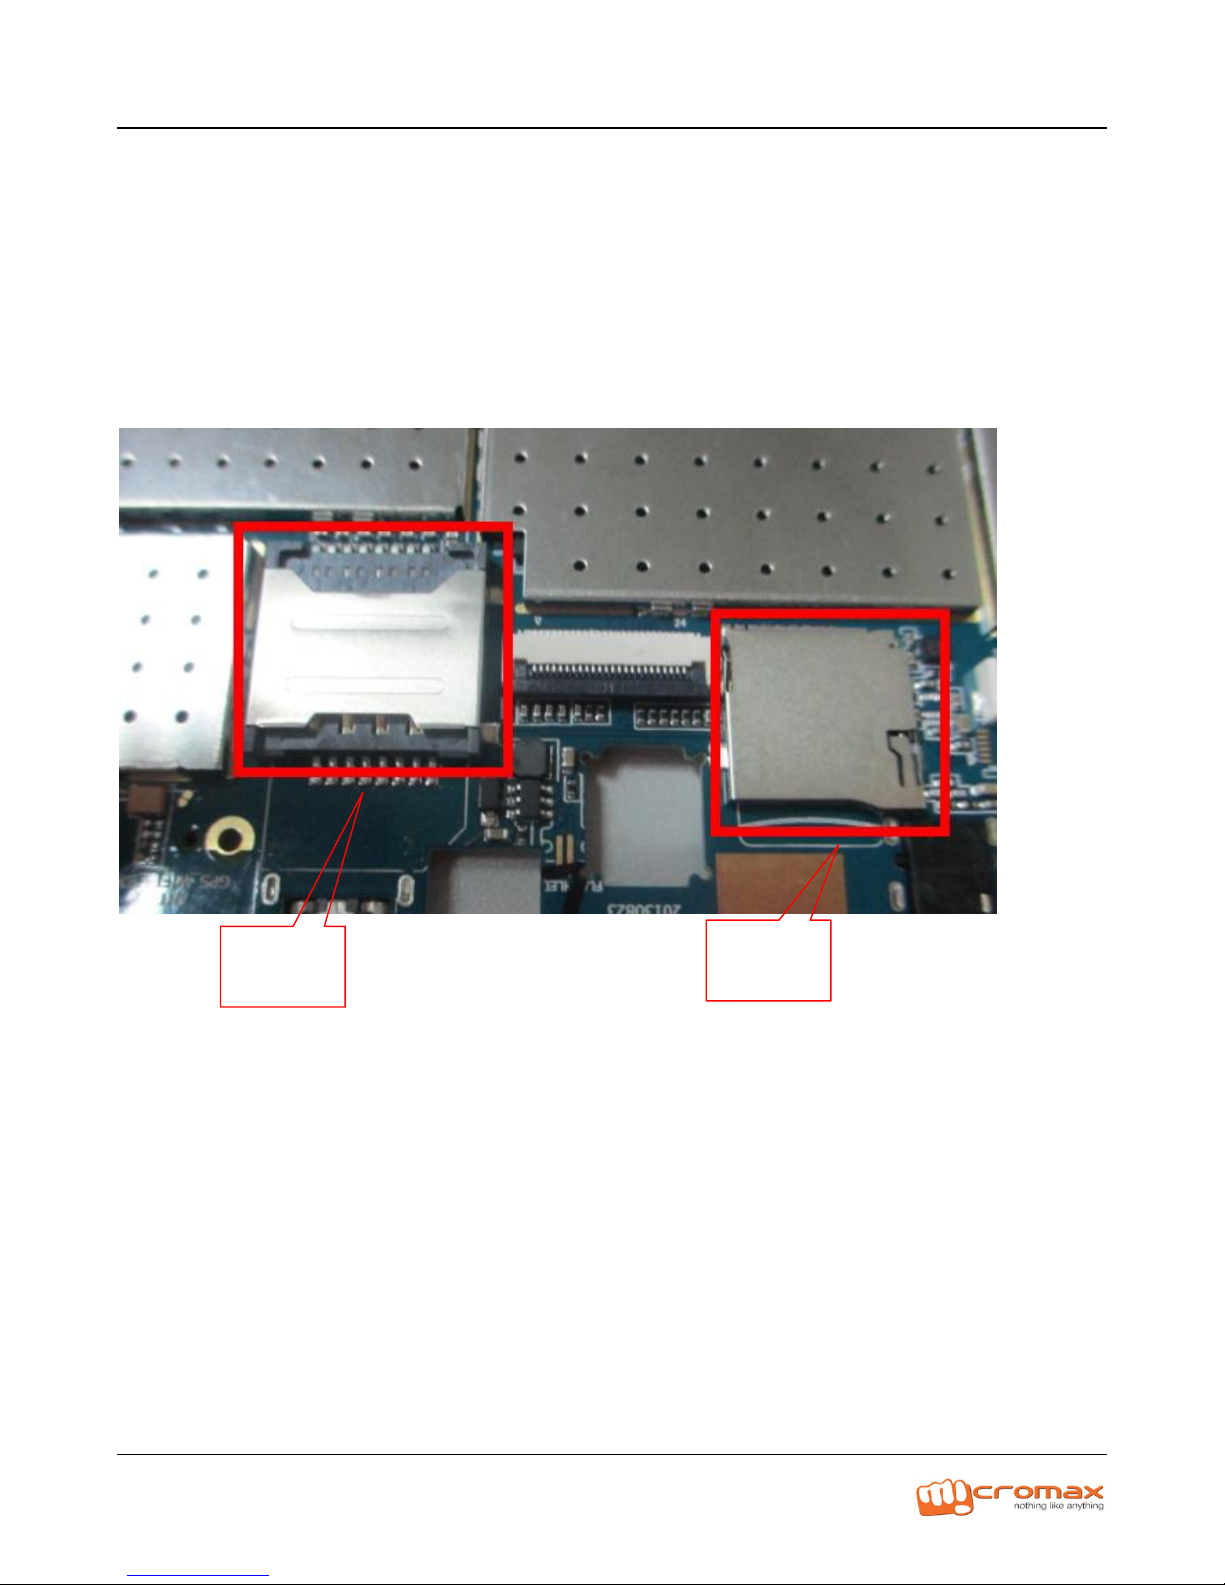
10. No SIM card and no memory card
Check the connector of T –card and SIM card;
Change the connector of T –card and SIM card;
Thanks
For any questions or suggestions please email to [email protected]
SIM
TF
 Loading...