

CrimeStopper SV-6400 Installation Manual
Page 1 of 8
SV-6400 ClipCam
SAFETY PRECAUTIONS
z Make sure to read the “Installation Manual” for safety precautions before
installing unit or accessories.
z Please make sure the vehicle is well parked in a safe place. Make sure that the
engine and the power are switched off.
z Avoid installation outdoors during rain or thunder storms.
z The instructions presented in this manual are based on the passenger seat at the
right of the driver’s seat. In an opposite situation, change the directions
accordingly.
z Objects on the monitor are closer than they appear.
z This ClipCam camera is not a safety device. Safe driving is the driver’s
responsibility in all circumstances.
NOTICE-DISCLAIMER
Under no circumstances shall the manufacturer or distributor of the ClipCam be held liable for
consequential or incidental damages sustained in connection with the use of the ClipCam rear vision
system. The ClipCam is designed as a safety enhancement device and is in no way intended as a
replacement for rear-view mirrors, side-view mirrors o r physically checking the surroundings when
backing a vehicle. Always check surroundings for safety when backing. Objects on the monitor are closer
than they appear. For the best fit, modificatio n of the vehicle license may or may not be necessary. It is the
sole responsibility of the vehicle owner to check and verify any and all state or federal motor vehicle codes
with regard to modifications of vehicle license plates.
Compilation and Publication Notice
Under the supervision of PEC, this manual has been compiled and published, covering the latest description
and specification. The contents of this manual and the specifications of this product are subject to change
without notice. PEC reserves the right to make changes without notice in the specification and material
contained herein and shall not be responsible for any damages (including consequential) caused b y reliance
on the materials presented, including but not limited to typographical and other errors relating to the
publication.
Page 2 of 8
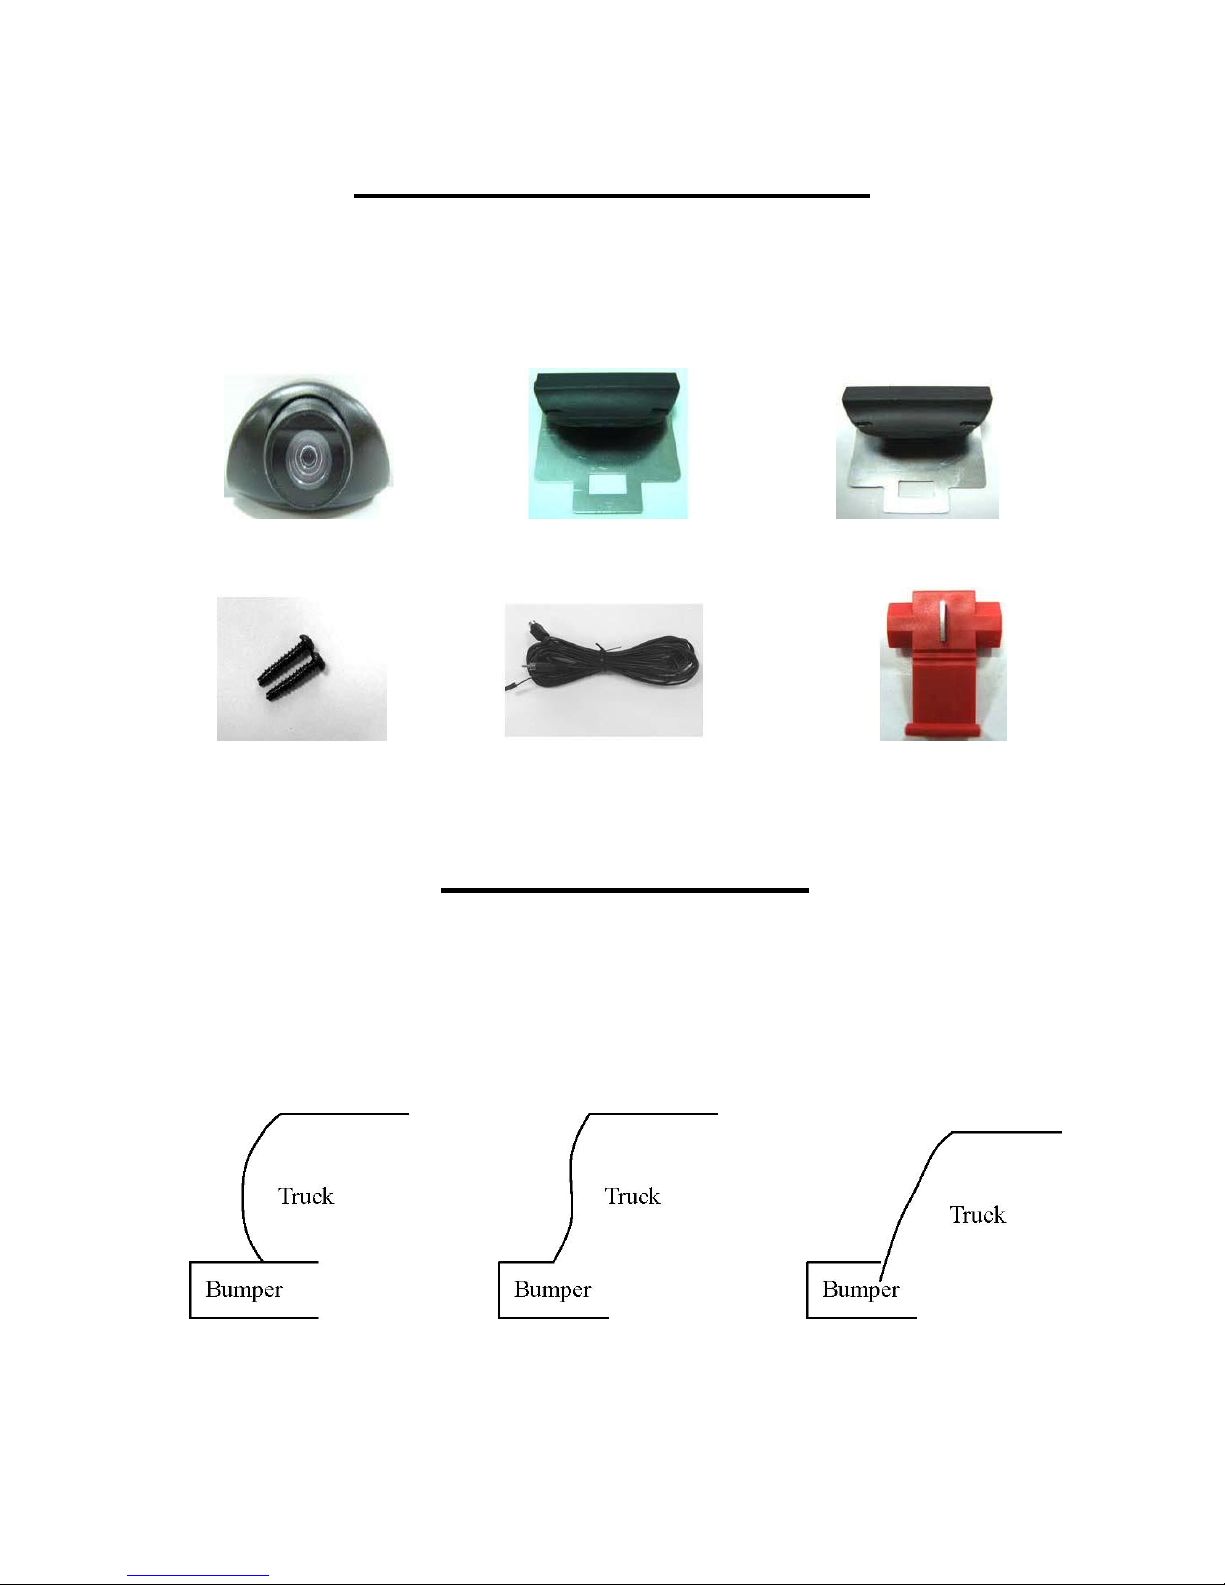
PACKAGE CONTENTS
Check your package for the listed contents. If you do not find all of the
listed items, contact the supplier from whom you purchased the camera
before installing the unit and accessories.
(1) Clip Cam (1) Camera Clip (small) (1) Camera Clip (large)
(2) Screws (1) 20’ cable (10) Cable Carpet Clips
?
INSTALLATION
Before installing the unit and accessories, read this manual in its entirety. The
ClipCam is designed to work on most vehicles. However, there are some vehicles that
we suggest you not use the ClipCam on due to difficulty in installation or improper
viewing angles. Please refer to the following three diagrams of trunk lip profiles.
Outer Curved Trunk Lip Inner Curved Trunk Lip Trunk Lip Below Bumper

Page 3 of 8
Step 1: Testing th e Camera (Bench Testing)
1. Prepare two sets of DC 11-13V batteries for running a bench test to
make sure the camera functions are working properly (before you
actually install the camera into your vehicle).
2. Refer to the wiring diagram (4.1-3) the camera and the monitor each
have to have their own power source, DO NOT connect with the same
battery.
3. When connecting the 20’ cable, make sure all connectors have been
solidly connected.
4. Turn on the monitor and you should see a clear, color picture display.
5. If you do not see a picture or the picture quality is not satisfactory,
please turn off the monitor and double check all the connectors to make
sure they are securely connected.
6. Turn on the monitor again. If you are still unable to see the picture or
the picture quality has not improved, contact your supplier for
assistance.
Step 2: Checking the Power Source
1. The camera can only operate by connecting a power source of DC 11-
13V / 70mA type.
2. Check your vehicle and make sure you have the correct power source for
the camera.
3. In most cases, the camera power line is connected with the reverse light
power source.
Step 3: ClipCam Installation
1. Your package includes camera clips in two sizes. Use the size that
matches with the thickness of the vehicle’s rear trunk lip. The small size
clip ranges 1/4” (6 mm) and the larger size ranges from 1/4”(6 mm ) up
to ½” (12 mm ) thickness.
 Loading...