

Crimestopper SV-5120.IR.II Installation Manual

INSTALLATION INSTRUCTION
SV-5110 License bar color camera
SV-5120 IR.II License bar color camera with IR
SecurView series License plate bar waterproof back-up cameras are designed to be installed on any
vehicle using the existing license plate mounting holes. It is easy to install with no drilling required,
requiring minimal installation time.
This uniquely designed product can be of use for any passenger car, SUV and Van, also can be of use
for large trucks, school bus, bus or RV and boats as well. Furthermore, it not only can be installed on
the license plate, but also other locations of the vehicle, such as on the sides of cargo trailers, above
the hatch or inside and outside motor home’s.
The SV-5110 type is designed for any passenger car, SUV, Van, pickup truck or trailer.
The SV-5120 IR.II is the same as above but includes night vision feature.
SPECIFICATION:
Image Device: OmniVision CameraChipTM
TV System: NTSC full color
Operating Voltage: 12 V DC
Image: Mirror image or non mirror image (optional)
Video Output: 1.0Vp-p, 750Ohm
Resolution: 380 TV Lines
Illumination: 2Lux/F1.2, 0Lux with Night-vision
Current Consumption: Max. 60mA/ 200mA for Night-vision
Lens: f=2.8mm/f=2.0
View Angle: 130 degrees
Water Resistance: IP68
TECHNICAL SUPPORT: (800) 998-6880
INSTALLATION TIPS:
IMPORTANT!!
Read this instruction sheet completely and your monitors instructions before beginning the
installation.
Note: Most License plates do not require modification. However, please look over camera
mounting and placement options prior to making modifications to vehicle.
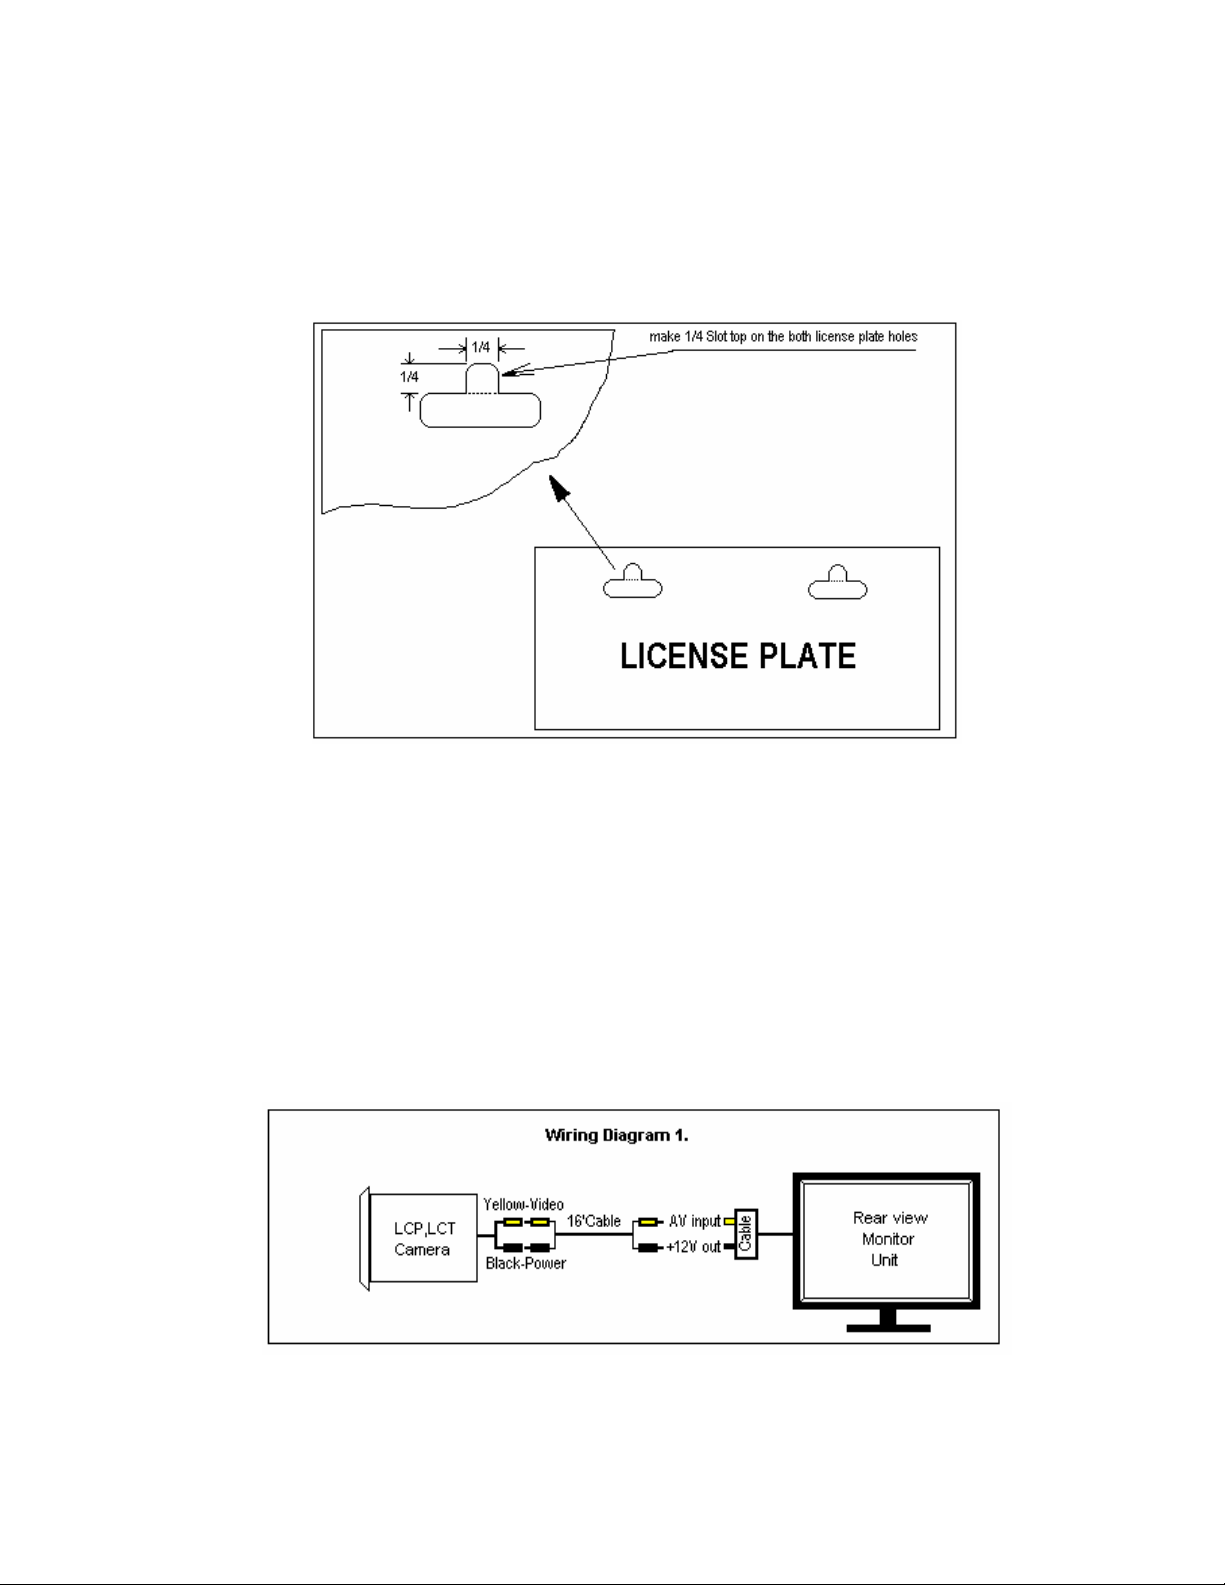
Step 1. Remove license plate, if necessary cut or file a ¼ slot above the license plate mounting holes
as shown below.
Step 2. Install the License plate bar camera over the face on the top edge of the license plate; make
sure the screws are secure. DO NOT OVER TIGHTEN!! Over tightening may damage the camera
mounting hole locations.
Step 3. Wire connections:
Camera’s Yellow socket is connected to video input on monitor unit; Black socket is for the power
connected to DC 12V.
A. Connect the yellow (RCA) socket to video monitor input connection, and the black socket to the
video monitor power output connector, if the Rear view monitor unit has auto reverse camera
power on feature. (See Wiring Diagram1.)
 Loading...