

CrimeStopper SP-102 Owner's Manual

CONGRATULATIONS on your choice of a CrimeStopper Remote Security System. This booklet contains all the
necessary information for using, and maintaining your security system. If any questions should arise, contact
your installation facility or check out the Knowledge Base at www.crimestopper.com.
ONE-WAY
DELUXE
SECURITY
SYSTEM
OWNER’S MANUAL1230-60033-01-A

2
INTRODUCTION
FCC Compliant
This device complies with Part 15 of the FCC Rules. Operation is subject to the following two conditions: (1) This device may not cause
harmful interference, and (2) this device must accept any interference received, including interference that may cause undesired
operation.
CAUTION: Changes or modications not expressly approved by TESSONICS Inc. Could void the user’s authority to operate this device.
NOTE: This equipment has been tested and found to comply with the limits for a Class A digital device, pursuant to Part 15 of the FCC
Rules. These limits are designed to provide reasonable protection against harmful interference when the equipment is operated in a
commercial environment. This equipment generates, uses, and can radiate radio frequency energy and, if not installed and used in
accordance with the instruction manual, may cause harmful interference to radio communications. Operation of this equipment in a
residential area is likely to cause harmful interference in which case the user will be required to correct the interference at his own
expense.
TABLE OF CONTENTS
Introduction 2
Remote Pairing and Battery Replacement 3
System Command and Valet Mode 4-5
Carjack Modes 6
Alarm Triggers and Shock Sensor 7
French 9-13
Spanish 14-18
Warranty 20
3
REMOTE PAIRING/ BATTERY REPLACEMENT
Pairing a Remote to the System
NOTE: Once you enter programming mode it will erase all of the other remotes paired to the
system, therefore we recommend having all remotes for the system ready to pair prior to
entering pairing mode. The SP-102 can pair up to 4 remotes. The Override/Programming button
can usually be found at the bottom of the dash near the OBD II port or near the driver’s side fuse
panel. If you need help locating this button please contact the installation facility that installed
your security system.
1. Turn the ignition to the ON position
2. Press the Override/Program button 4 times. You will know you are in pairing mode once
the system “chirps” the siren and ashes the parking lights 4 times.
3. Once in pairing mode, press Button #1 or the LOCK/ARM button of the rst remote you
want to learn. You will know that the remote has paired when the parking lights ash twice
indicating that the system is ready for the next remote. Now press Button #1 or LOCK/
ARM button of the next remote. The parking lights will ash 3 times indicating the system
is ready for the next remote. Continue this until you have added all of the remotes you wish
to add to control the system or up to 4 remotes.
4. After you have programmed all of your remotes, exit programming by turning the ignition
to OFF position.
Replacing the Battery
To replace the battery in the remotes you will need to remove the 4 screws on the back of the remote. Once all of the screws are
removed you can separate the remote. Now slide out the (3) CR-2016 batteries from the back of the circuit board. Stack the new
batteries on top of each other with the plus sign facing up and slide them into the holder on the circuit board. Place the remote pieces
back together and reinsert the screws holding the case together. Be careful to not over tighten the screws as it could strip out and not
hold the case together.
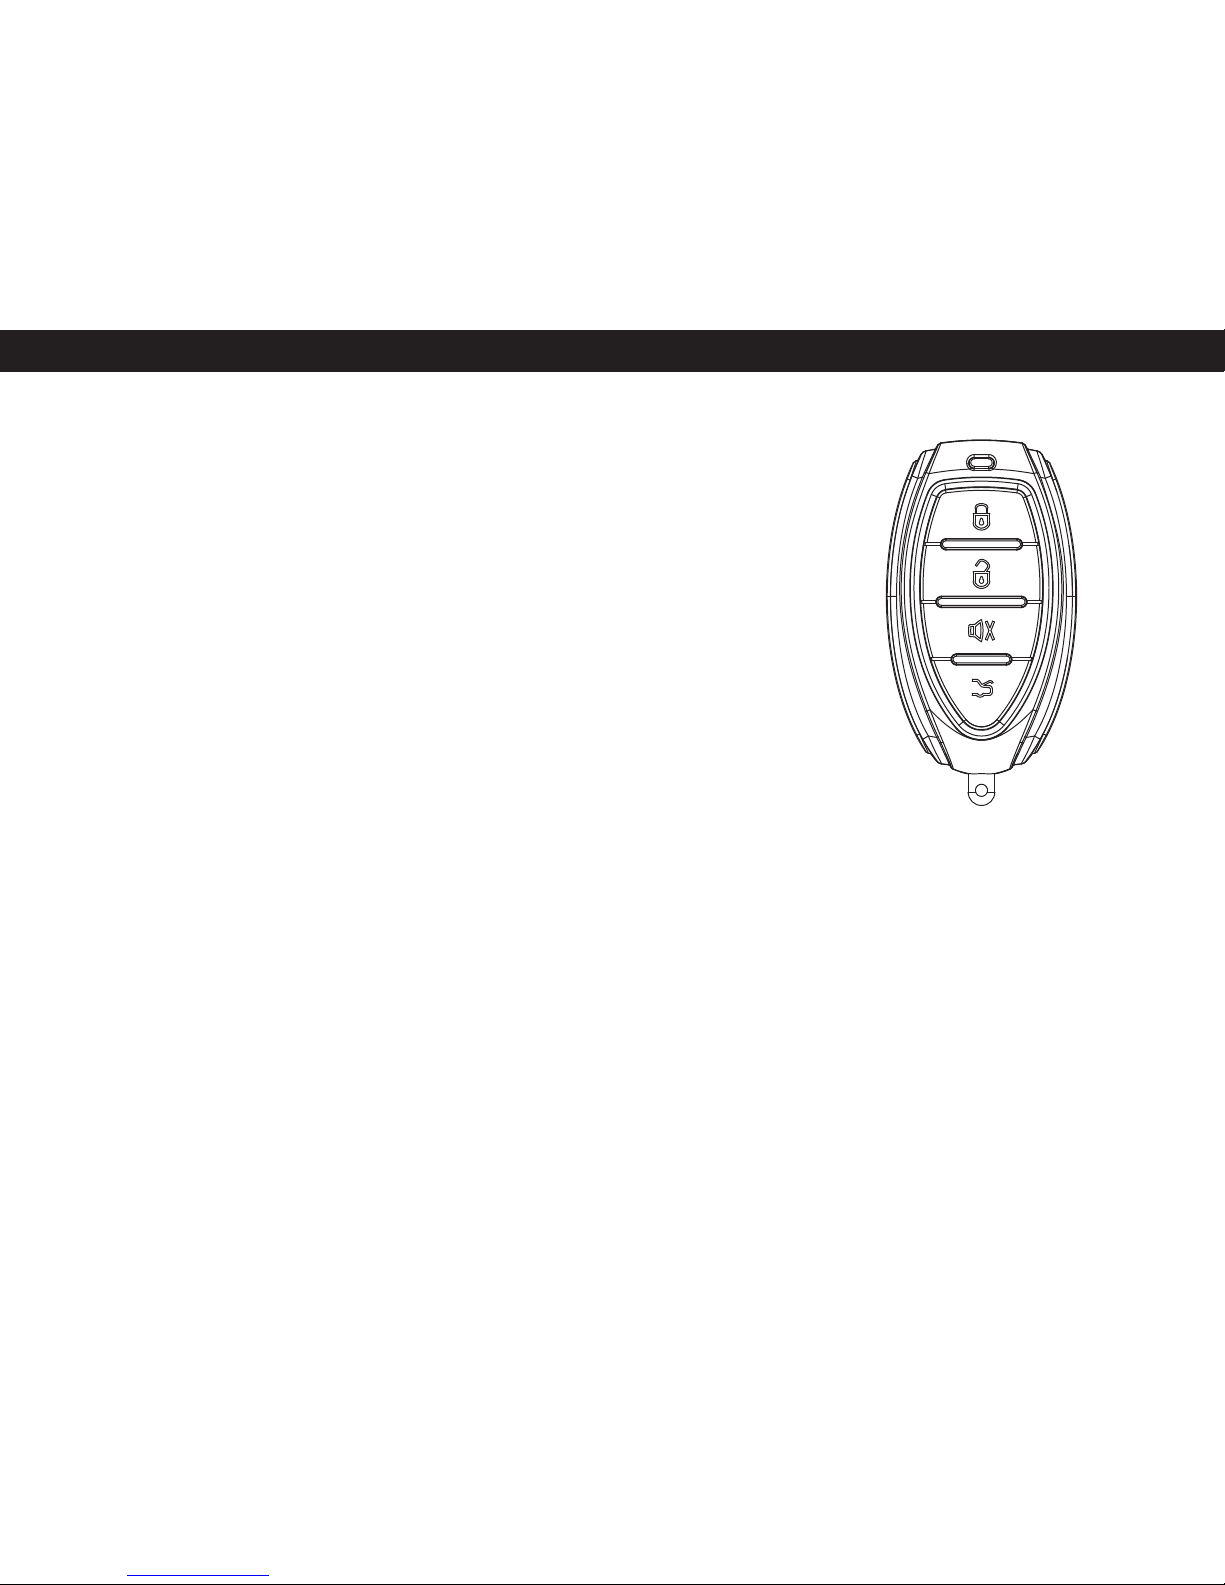
SP-102 4 BUTTON REMOTE
LOCK
UNLOCK
SILENT
TRUNK
RELEASE

4
SYSTEM COMMANDS
LOCK/ARM (Active Arming) - To arm the security system and lock the doors, press Button #1 (LOCK) on the remote. You will hear
a single chirp from the system and the parking lights will ash once. The system will arm, the doors will lock and the starter will be
disabled if these optional features have been installed. After the short 5-30 second delay to allow the vehicle and electronics to settle,
the system will be completely armed. The alarm status LED in the vehicle will begin ashing.
UNLOCK/DISARM (Active Disarm) - To disarm the security system and unlock the doors, press button 2 (UNLOCK) on the remote. You
will hear 2 chirps from the system and the parking lights will ash twice. The LED will stop ashing. The doors will unlock if the vehicle’s
power locks are connected to the system.
Silent Arming - To silently arm the alarm, press Button #3 (SILENT) on the remote, the parking lights will ash one time and the system
will arm.
Silent Disarm - With the system already armed using SILENT ARM, press Button #3 (SILENT) and the system will disarm and ash the
parking lights twice.
Passive Arming - If programmed, Passive (automatic) Arming will occur 40 seconds after the ignition is turned OFF and the last door
has been closed. The LED will begin to ash rapidly while counting down. If a door, trunk, hood is reopened, the system will wait for the
door, trunk, and hood to close before arming. The unit will ash the parking lights once.
Active Re-Arming - The active re-arming feature allows the system to re-arm itself 40 seconds after being disarmed with the remote if
a door has not yet been opened. This is handy if the vehicle is accidentally disarmed (via the remote in your pocket) without you knowing
it. This feature can be turned ON or OFF in the programming.
Emergency Disarm/System Override - If you have lost the remote or it has stopped working for any reason and the vehicle is armed,
you will need to perform an Emergency Override to disarm the alarm. To do this, you will need to unlock the vehicle with the key in the
door. This will activate the alarm, the siren will sound and the parking lights will ash. Insert the key into the ignition and turn it to the
ON position. After the ignition is ON, press and hold the Override/Programming button for 4-5 seconds or until the alarm stops. This
will disarm the alarm.

5
SYSTEM COMMANDS
Ignition Controlled Door Locks - If this feature is enabled in the programming, the doors will automatically lock when the ignition is
turned ON and will unlock when the ignition is turned OFF. This feature can be turned ON or OFF in the programming.
Trunk Release - To release the trunk (if this options is applicable and installed), press Button #4 (TRUNK) on the remote for at least
4 seconds. If “disarm with trunk release” has been disabled, the trunk WILL open without activating the alarm when using the remote
only, but the system will remain armed.
Alarm Triggering - If there is an intrusion into the vehicle or a hard impact to the body, the alarm will sound and ash the parking
lights for 45 seconds. After 45 seconds the siren and the ashing parking lights will stop; the alarm will remain armed and continue to
monitor the vehicle. If an intruder left the door open, the unit will cycle a second time of 45 seconds and then continue to monitor the
remaining un-tampered zones of the vehicle.
Panic/Vehicle Finder - To sound the alarm with the remote, press and hold Button #1 (LOCK) for at least 3 seconds or until the siren
sounds. To shut off the remote panic, press Button #1 (LOCK) and the alarm will reset.
Valet Operation – This will disable the alarm system while still allowing the keyless entry portion to still work (if applicable).
Entering Valet Mode – Turn the ignition to the ON position. Press and hold the Override/Program button for 4-5 seconds until the alarm
LED turns ON solid and the system chirps the siren once.
Exiting Valet Mode – Turn the ignition to the ON position. Press and hold the Override/Program button for 4-5 seconds until the alarm
LED turns OFF and the system chirps the siren twice.
VALET MODE

6
CARJACK MODES
NOTE: This feature will need to be enabled through the programming of the system. Consult the installation manual or installation facility
that installed your system.
Active Carjack - This feature provides Active Carjack protection and MUST be enabled before use through the alarm programming. To
activate, with the ignition ON, press Button #2 (UNLOCK). The parking lights will ash twice to conrm Carjack countdown has begun.
After 90 seconds the unit will begin the Carjack cycle consisting of pre-warning chirps for 20 seconds then turning into a full system
alarm activation with the siren and parking lights ashing for 5 minutes. To reset the Active Carjack, turn the ignition to the ON position
and press Button #2 (UNLOCK) again.
Passive Carjack - This feature provides Passive Carjack protection and MUST be enabled before use through the alarm programming.
To activate, the ignition has to be ON and a door must be opened. The parking lights will ash twice to conrm Carjack countdown has
begun. After 90 seconds the unit will begin the Carjack cycle consisting of pre-warning chirps for 20 seconds then turning into a full
system alarm activation with the siren and parking lights ashing for 5 minutes. To reset the Passive Carjack protection, turn the
ignition ON with the doors CLOSED, then press the Override/Program button 3 times.
Full-time Carjack - Full-time Carjack mode should only be used in extreme conditions. This feature provides Full-time Carjack protection
and MUST be enabled before use through the alarm programming. Every time the ignition is turned ON or a door is opened, the Carjack
countdown will be initiated. The parking lights will ash twice to conrm the Carjack countdown has begun. After 90 seconds, the unit
will begin the Carjack cycle consisting of pre-warning chirps for 20 seconds and then turning into a full system alarm activation with the
siren and parking lights ashing for 5 minutes. You MUST reset the unit every time the ignition is turned ON or a door is opened. To reset
the Full-time Carjack feature, the ignition must be ON and the doors must be closed, then press the Override/Program button 3 times.
NOTE: Before you are able to enter Valet mode, program any option or remotes, you MUST reset the unit every time the ignition is turned
ON or a door is opened when full-time Carjack mode is active. It is always active each time the ignition is turned ON and/or a door is
opened with the ignition ON.
 Loading...