

Page 1
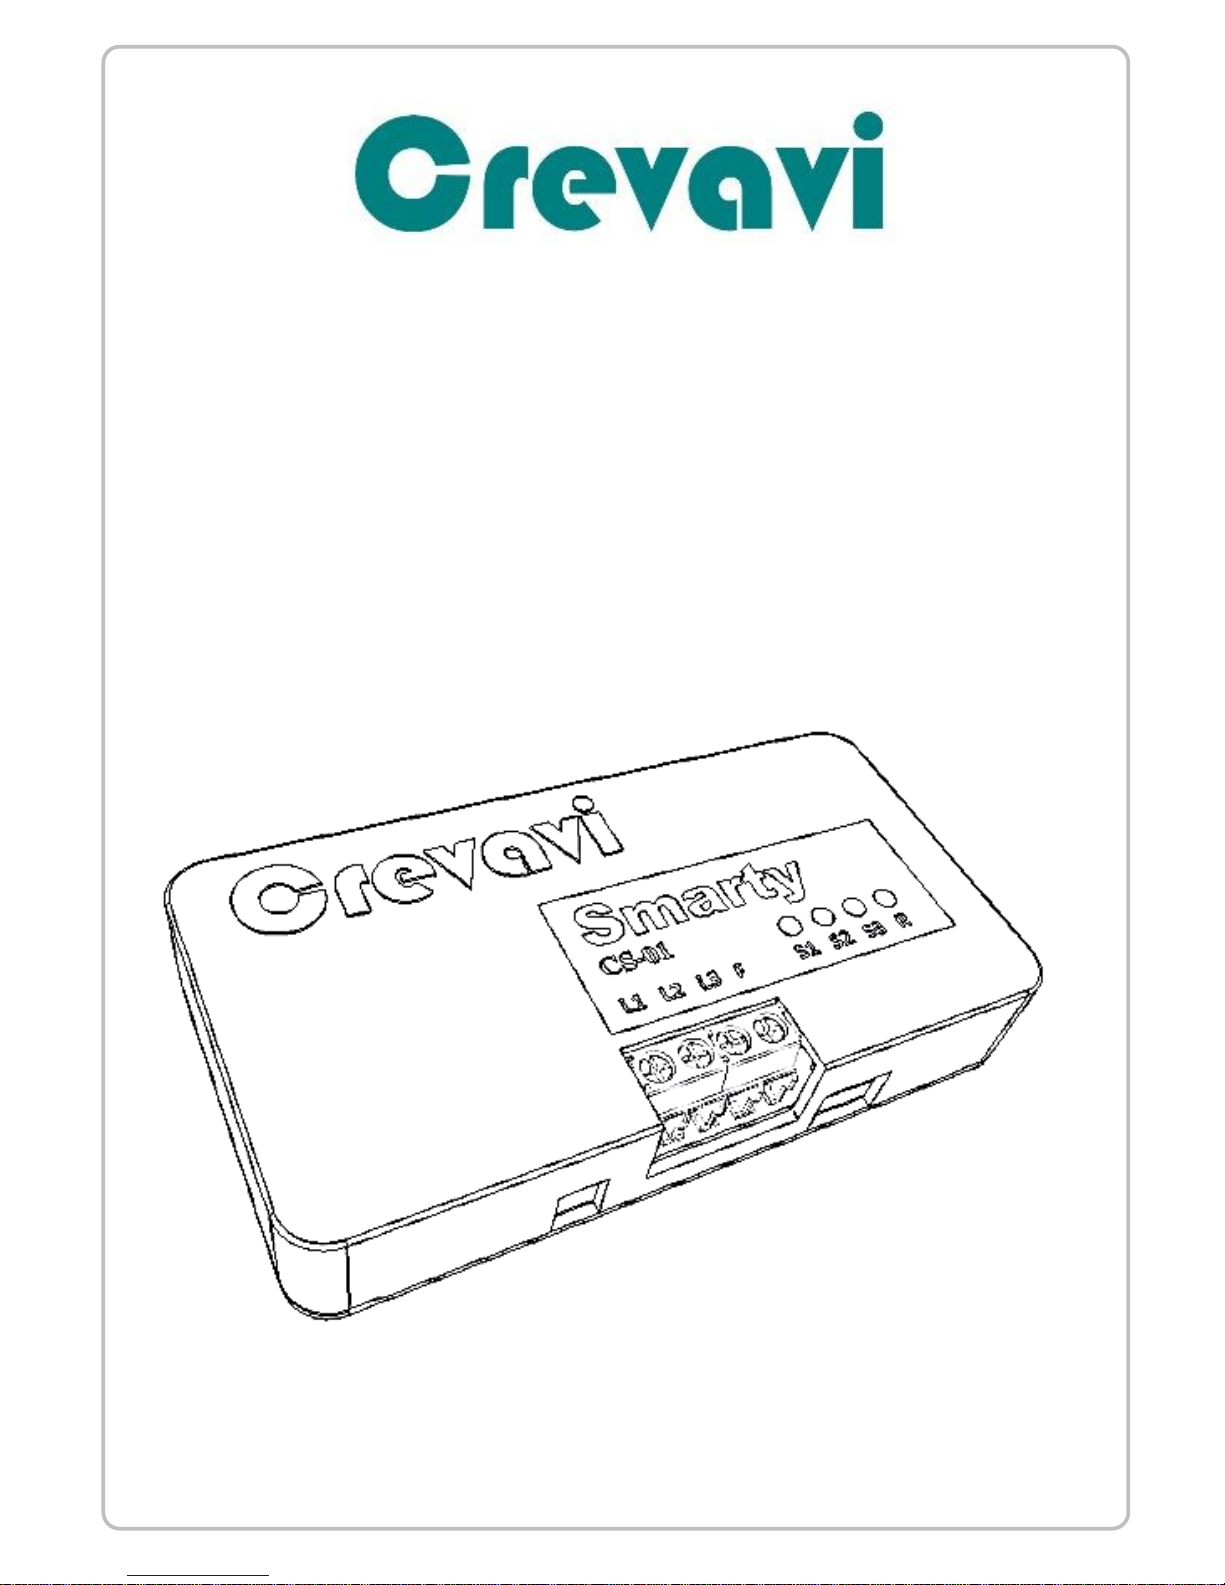
Smarty
Quick Reference Guide
Version: 1.2
Page 2
Page 2 of 16
1. Introduction ..................................................................... 3
2. Product Functionality ....................................................... 3
3. Warning ........................................................................... 5
4. Wiring .............................................................................. 6
5. Smarty App .................................................................... 12
5.1. Configuration: ................................................................ 12
5.2. Operation ....................................................................... 15
Download Smarty App
Page 3

Page 3 of 16
1. Introduction
Crevavi Smarty – A smart switch to provide automation to
any and every house lighting applications. It can retrofit
into any of the existing switchboards and you can use your
smart phone to operate light or fan switches.
There are 2 parts in Smarty solution…
❖ Smarty box fits inside most traditional switch boxes, and
attach to existing wiring.
❖ Smarty app is to control the lights/fans that are
connected to the smarty box.
2. Product Functionality
❖ Smarty-Box
▪ Connects to switches, lights and fans (Connection
explained in section 3)
▪ Takes input from mobile app, and switches on/off
the lights/fans, it also can regulate speed of fan on
the dedicated regulator port
▪ It reads the physical switch status, and controls
light/fans based on that input too. All switches
connected to smarty, becomes 2-way switch.
Page 4

Page 4 of 16
❖ Smarty App
▪ Home
• User can create “groups”, like Bedroom, Hall,
Kitchen, etc. Where multiple devices could be
connected to one/more which boards
• Once smarty is configured (process explained in
section 4.1), it shows the group on home screen
• Touch on a group connects to the smarty-boxes
(within proximity) configured for that group, and
app shows a control panel with switches
connected
▪ Control Light/Fan
• Each connected switch shows their individual
status on screen
• On click, it changes the output state of the
switch, and once change is successful, updates
the status on screen
▪ Manage
• Each smart-boxes need to be paired with the
app, and switches can be configured with a userfriendly interface
• Icons and names for each group and switch are
configurable
Page 5

Page 5 of 16
• Switches can be scheduled for ON/OFF at a
scheduled time, 3 schedules per switch can be
configured.
3. Warning
o Any work with AC mains must be done by trained
professional
o Main switch must be switched off before performing
any wiring
o Internal parts of the device conduct high voltage AC /
DC current. Under No circumstances user should open
the device housing
o Electrocution can cause Fatal injuries
Page 6
Page 6 of 16
4. Wiring
Smarty box fits inside most traditional switch boxes, and
attach to existing wiring. There are three types of wires to
be connected
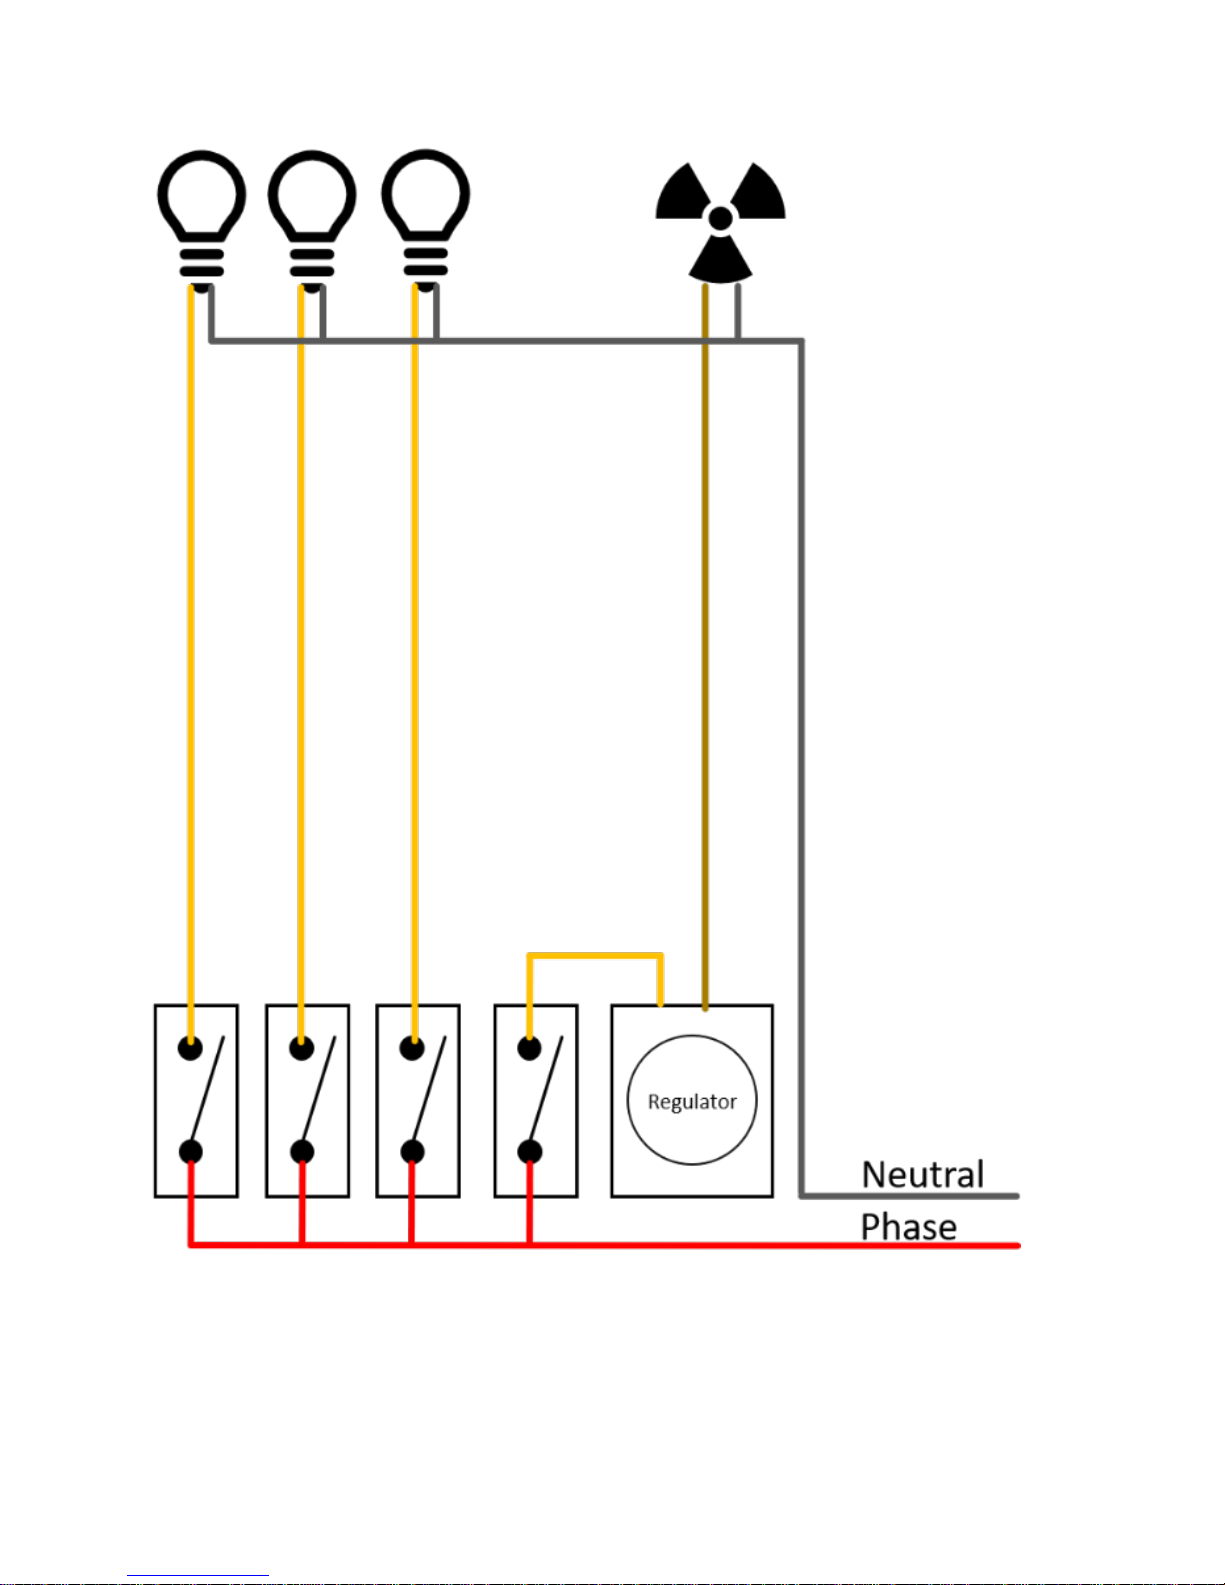
o Light/Fan outputs – on an existing switch-board
light/fan wires are connected to switches, remove them
from switch, and connect them to output terminal of
smarty.
o Switch Inputs – Connect those switches to the input
wires
o Line and Neutral – power supply to the smarty box
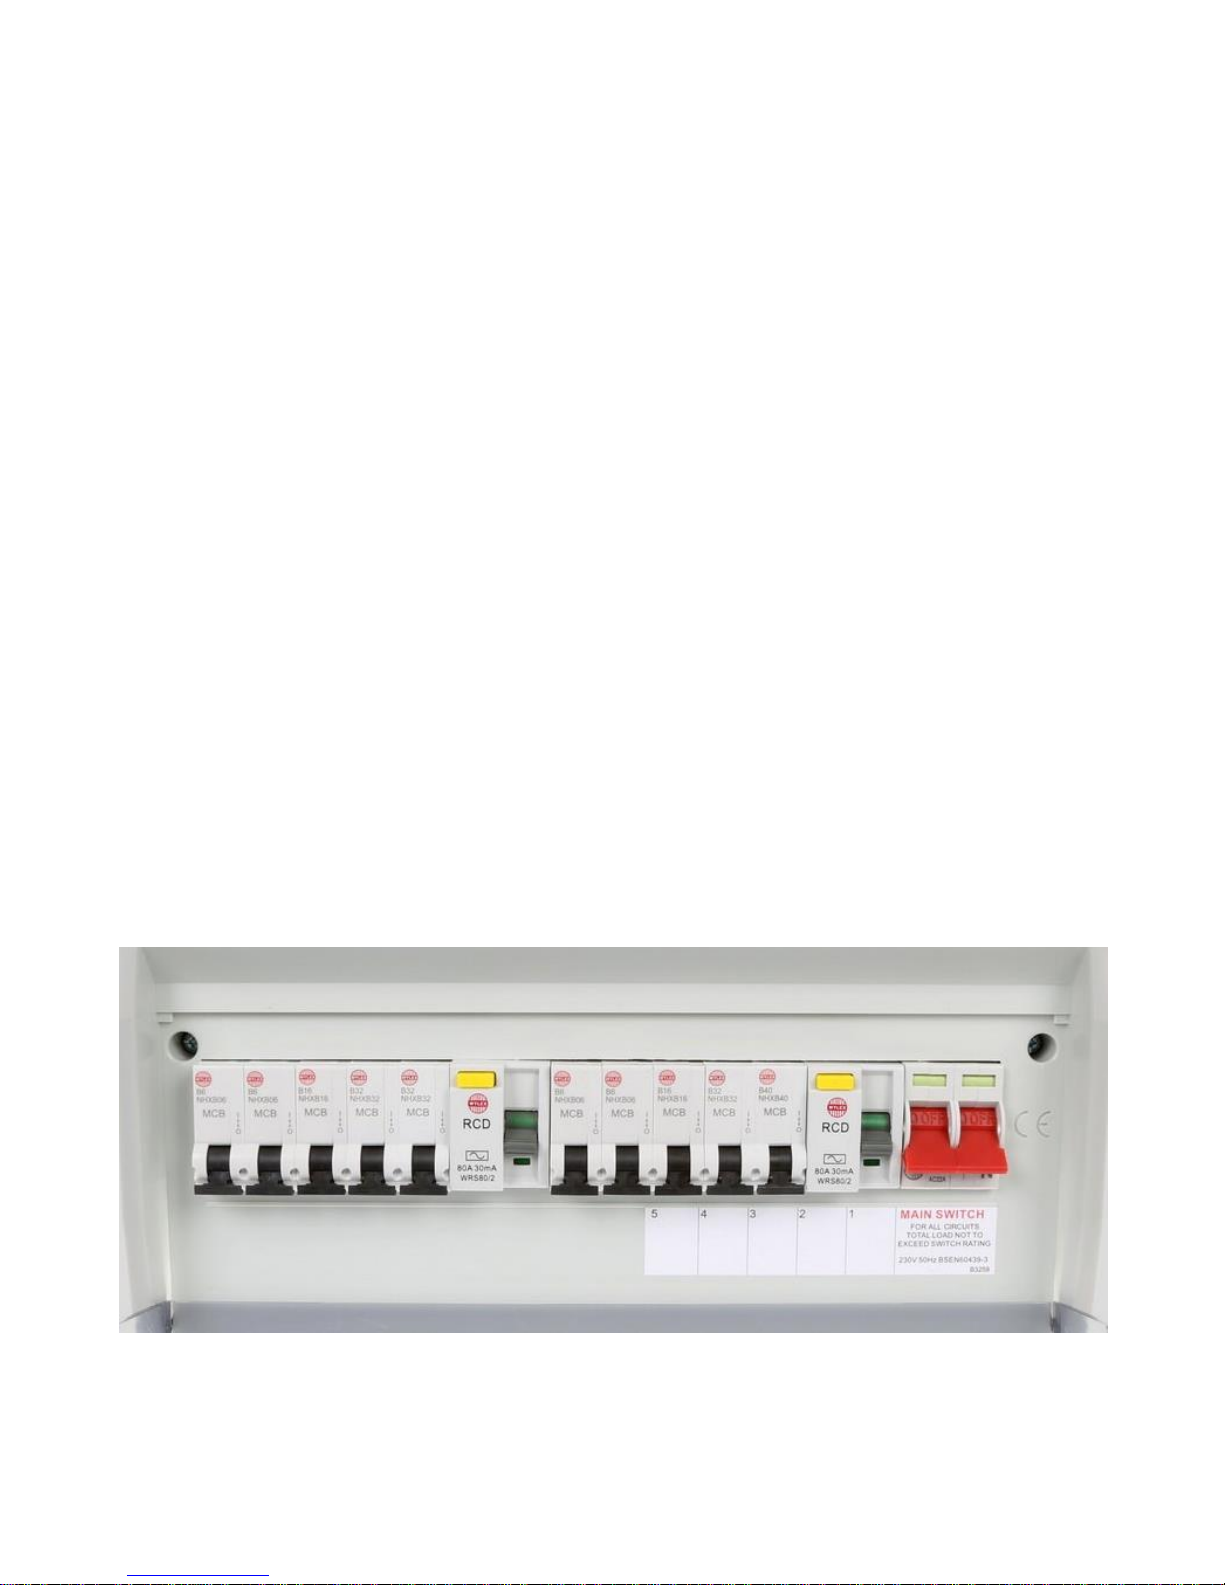
Step-1: Switch off Mains, and make sure there is to power on
the Mains Line and Neutral
Step 1
Page 7
Page 7 of 16
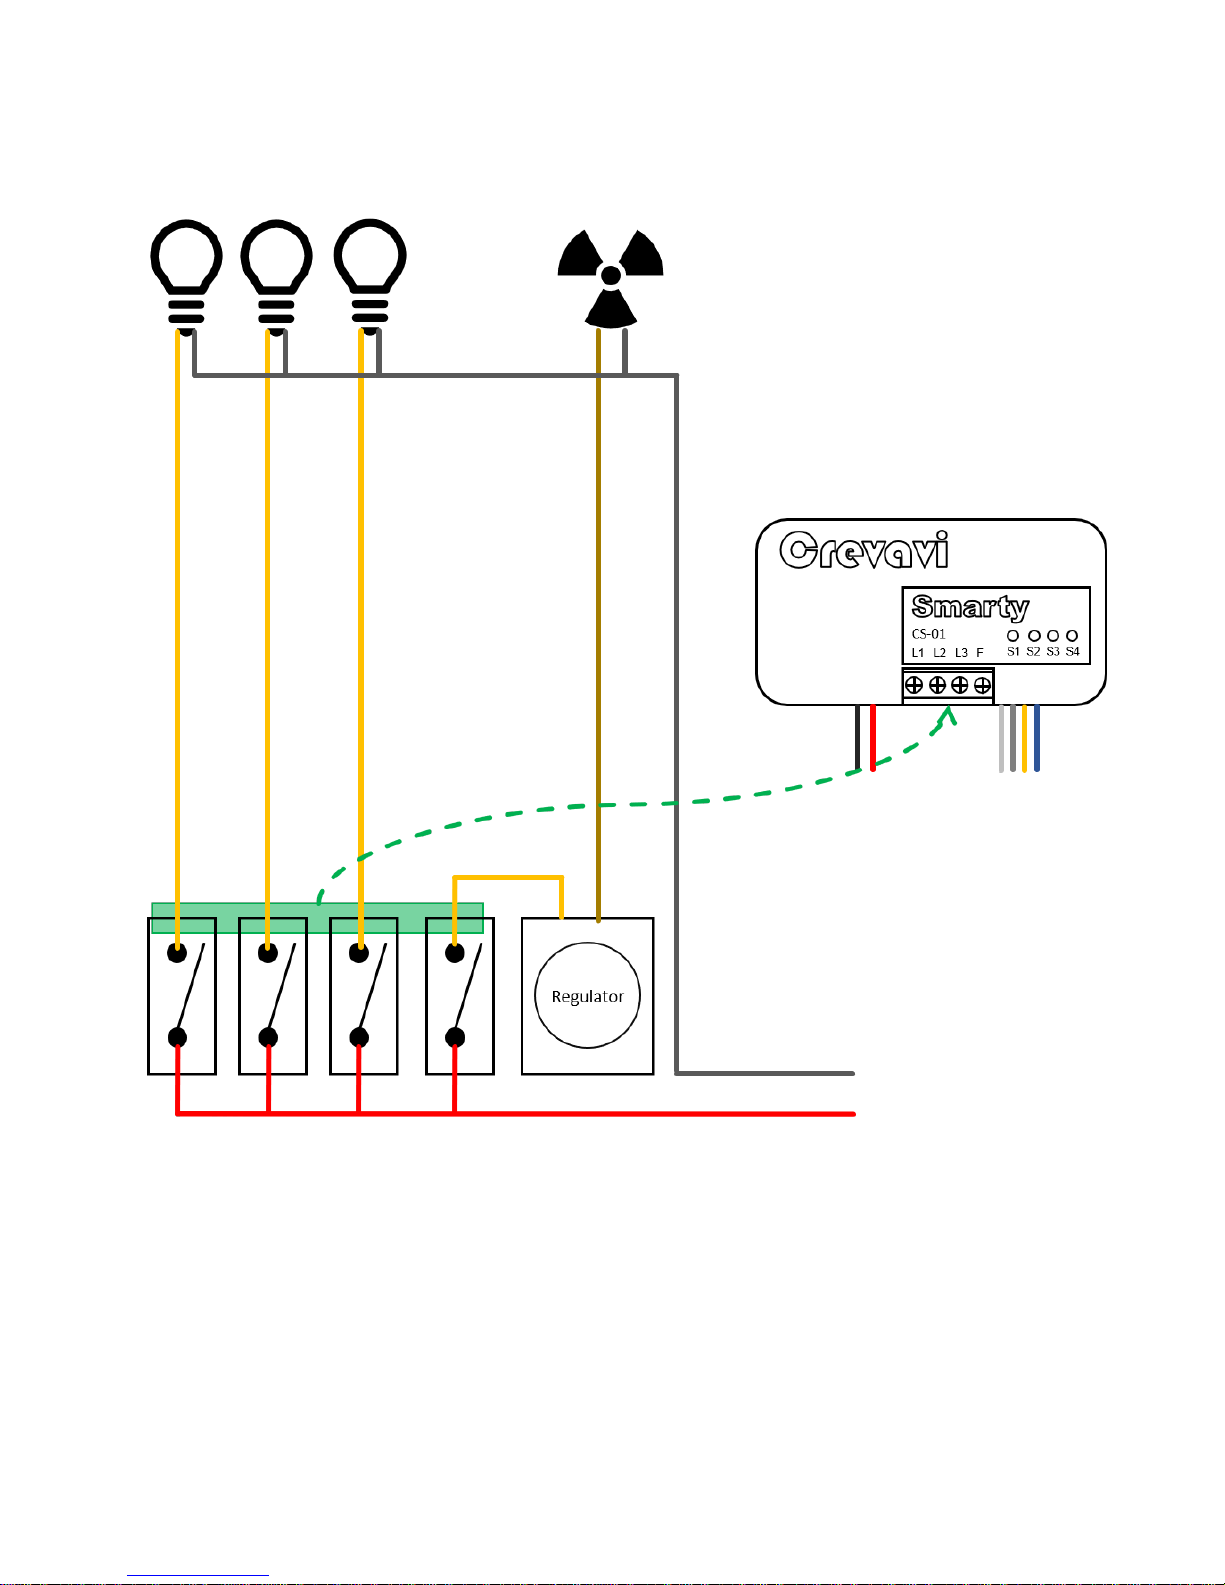
Step-2: Open the switch board, and note the connections
Step 2
Page 8
Page 8 of 16
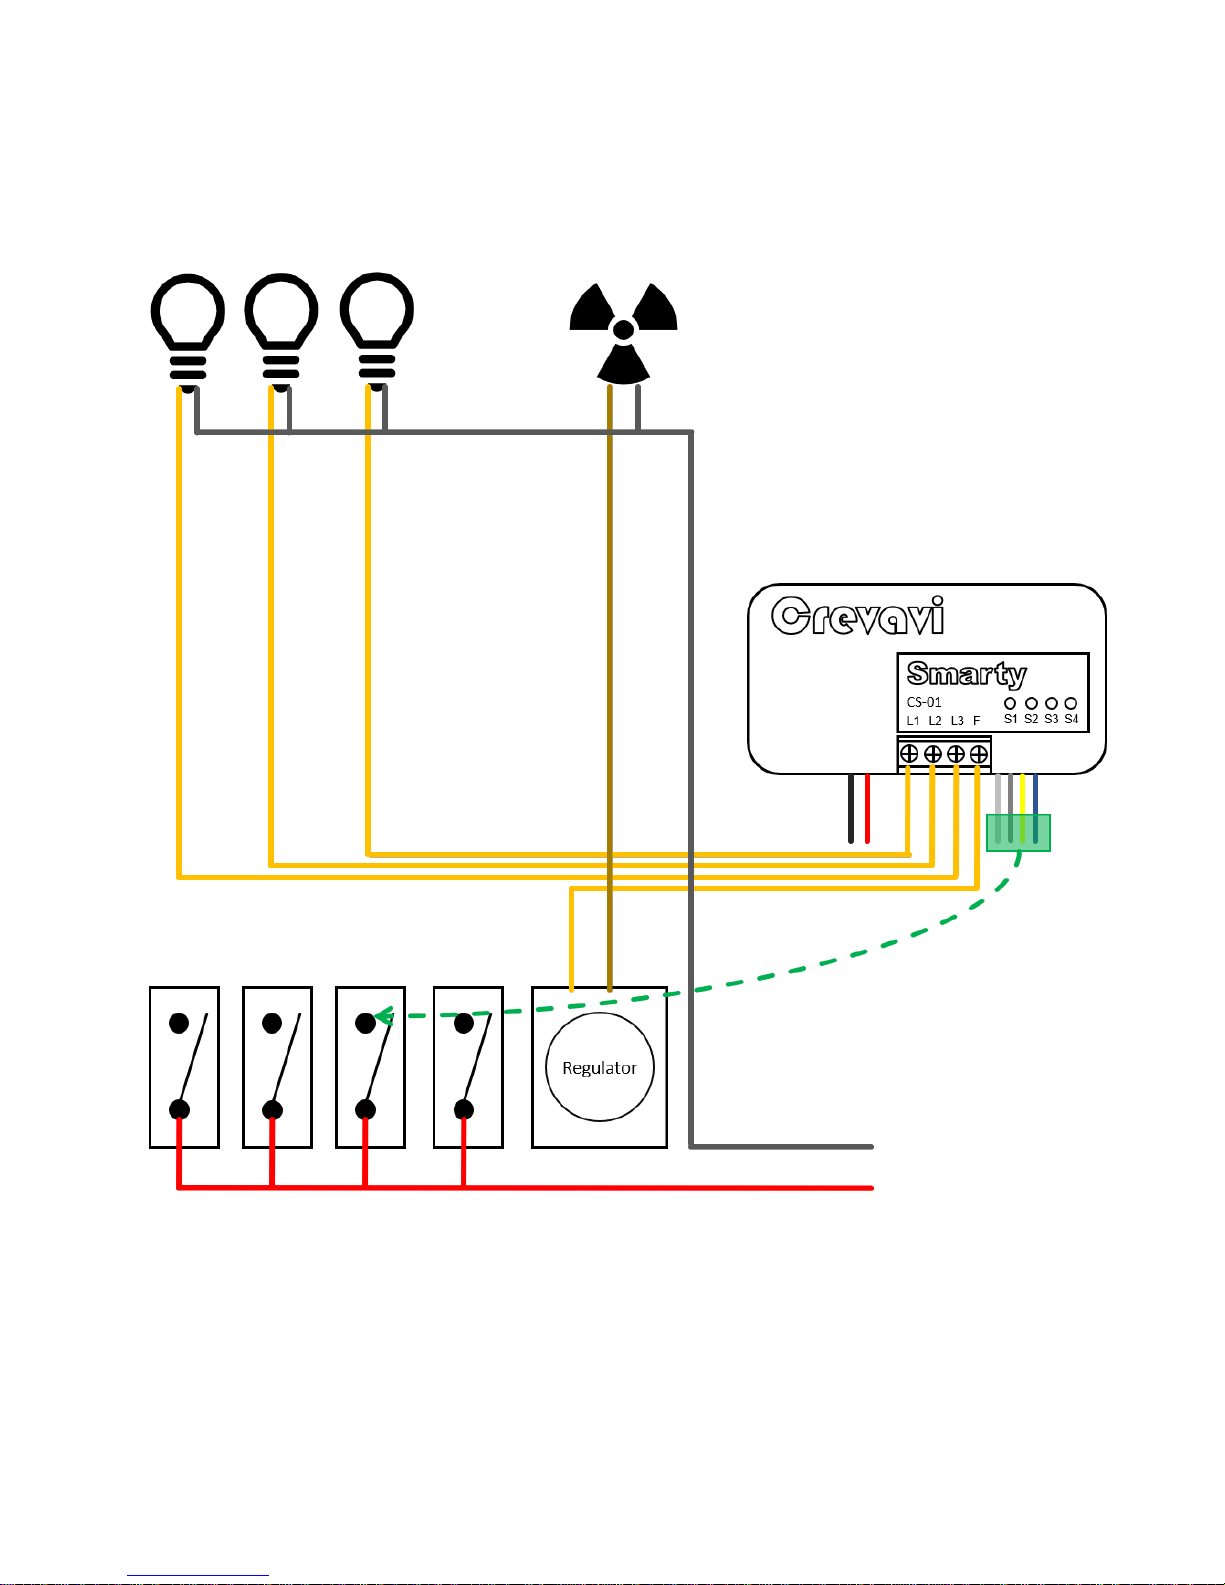
Step-3: Remove the light/fan wires from switch
Step 3
Page 9
Page 9 of 16
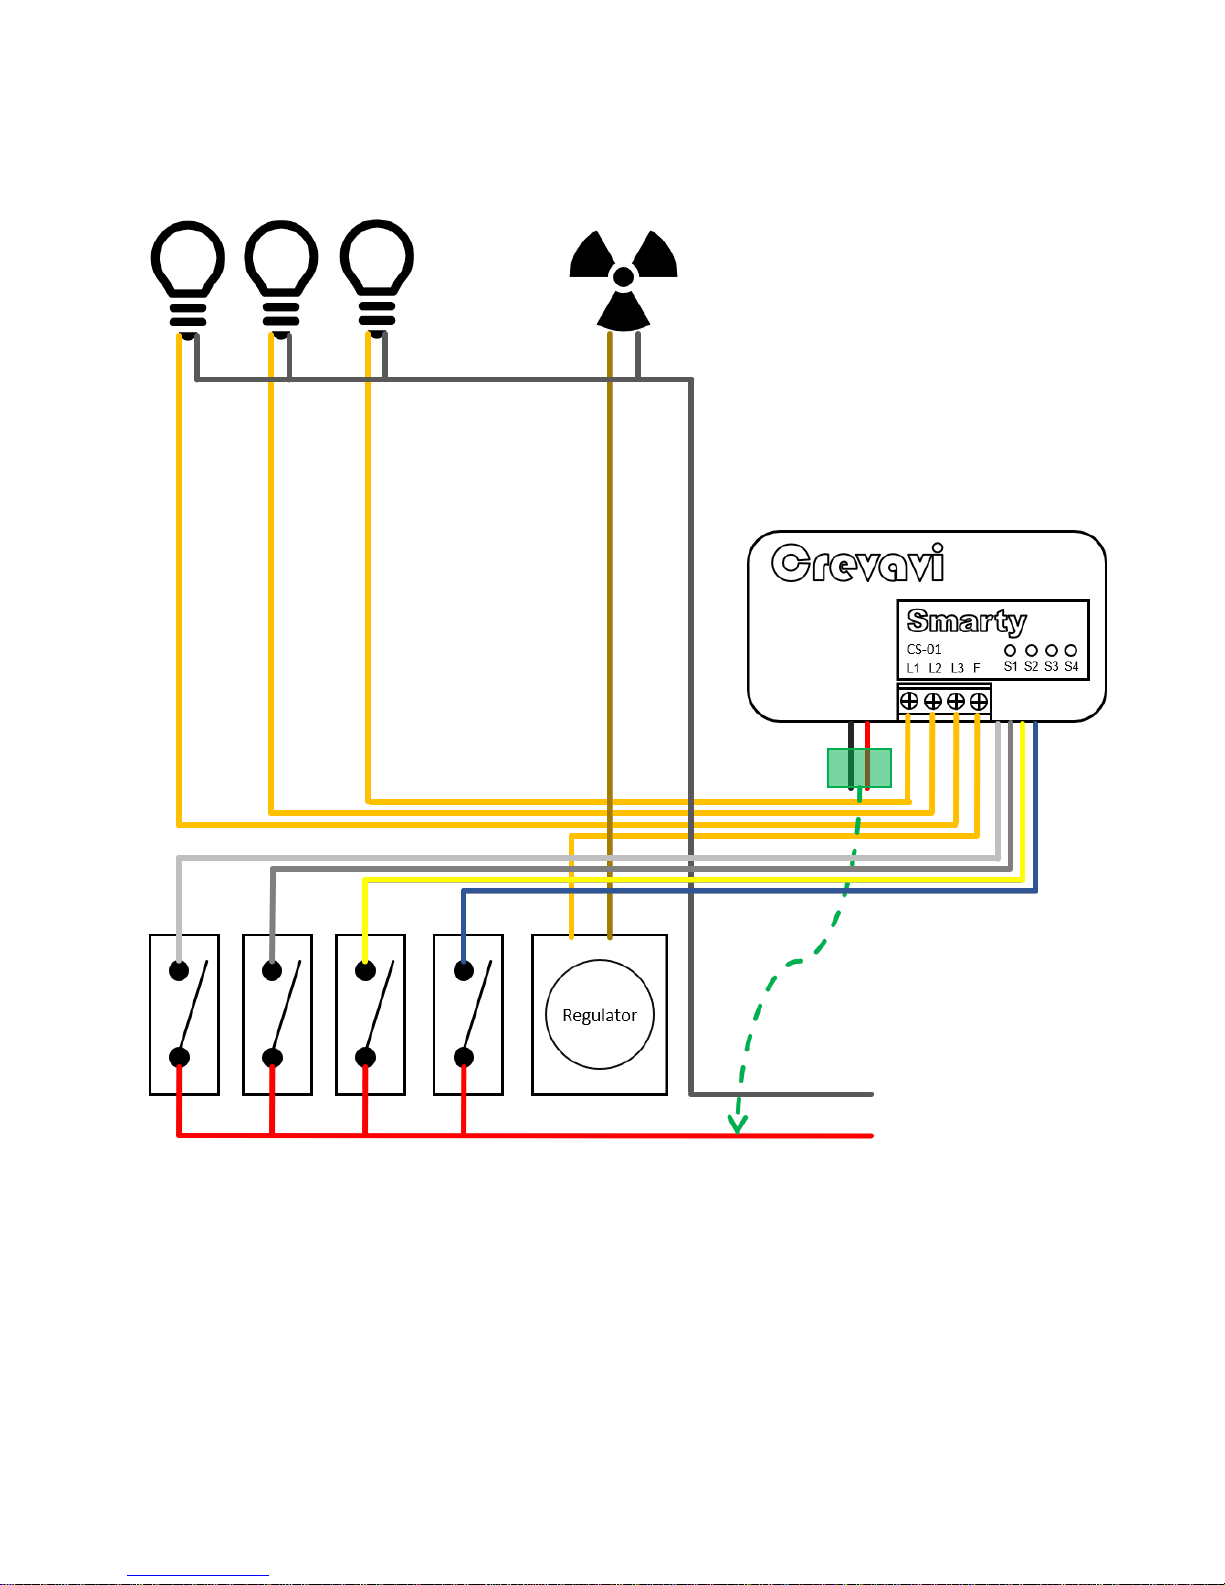
Step-4: Connect these disconnected wires to smarty L1, L2, L3,
and R terminals
Step 4
Page 10
Page 10 of 16
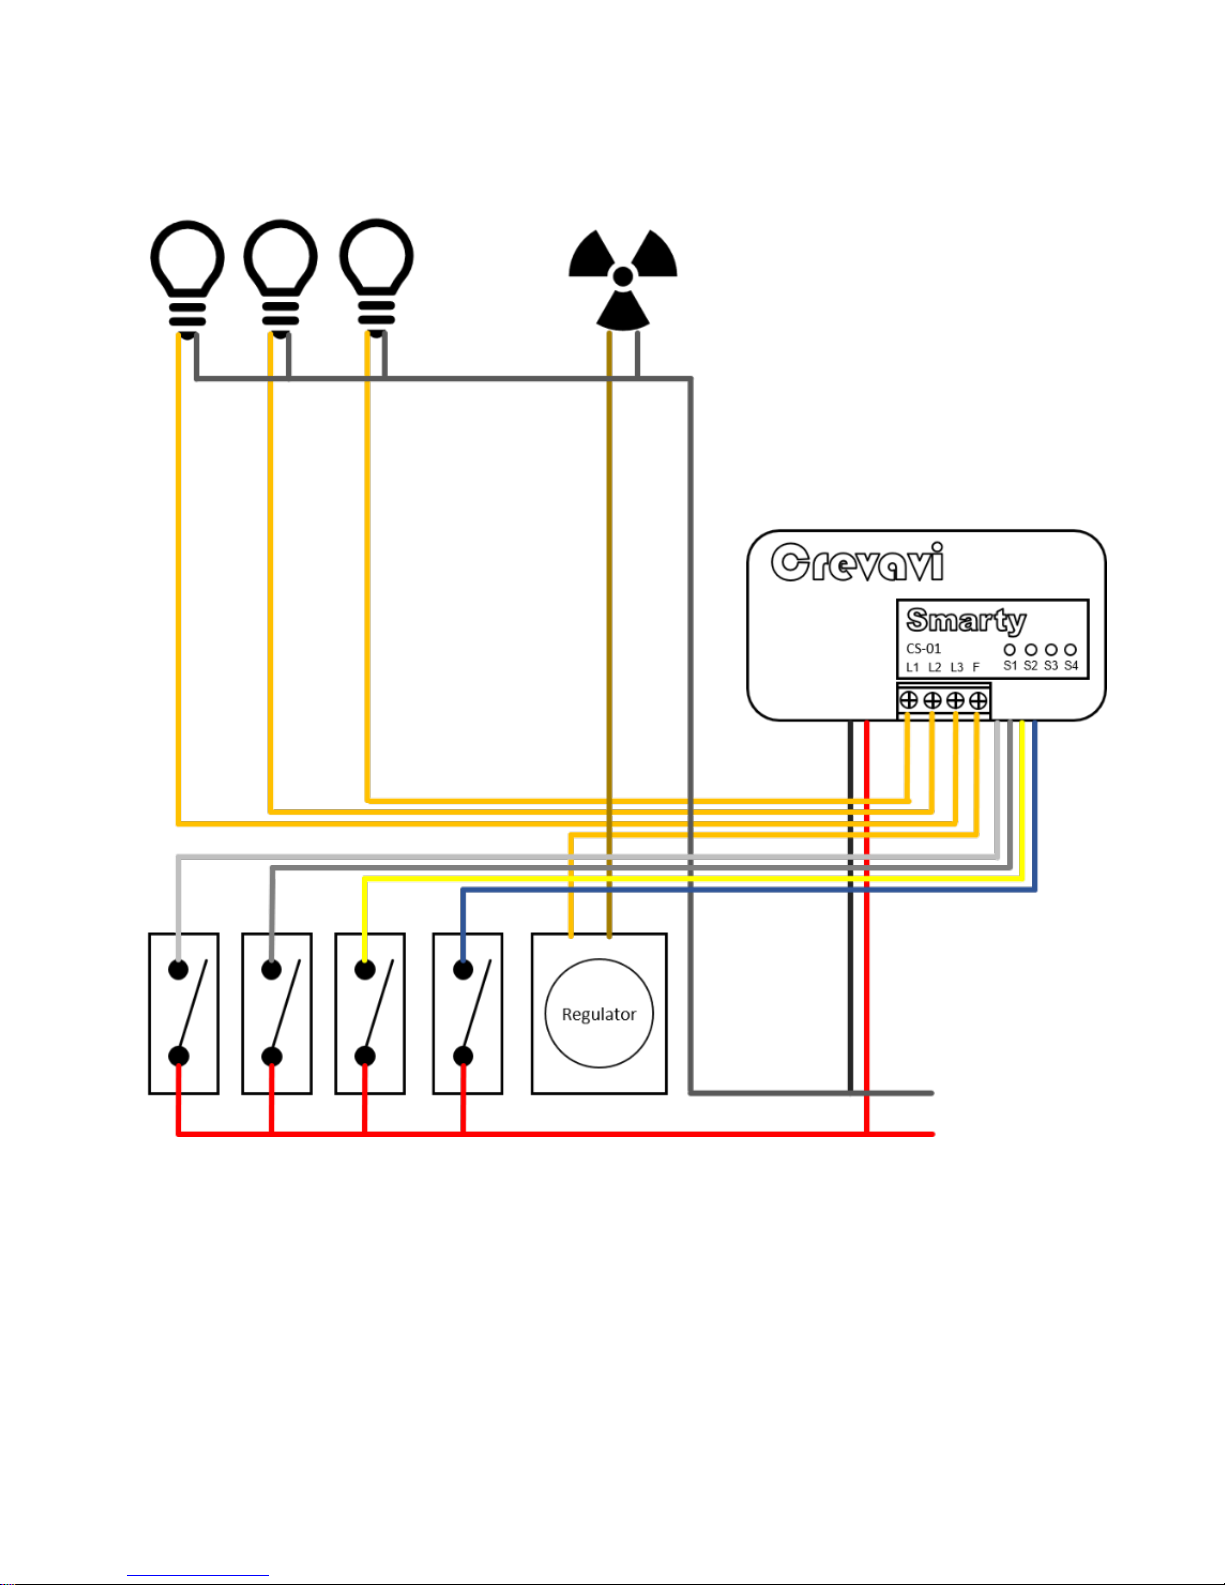
Step-5: Connect the switches to input S1, S2, S3, and F wire
Step 5
Page 11
Page 11 of 16
Step-6: Connect Phase and Neutral
Step 6
Finish: Make sure there are no open wires. Close the switch
box, and Switch on Mains
Page 12
Page 12 of 16
5. Smarty App
Download and install the Smarty
app from google play – search for
“Crevavi Smarty”, or scan the QR
code on front page to directly get
the google play link for the app.
Install and Open the App
5.1. Configuration:
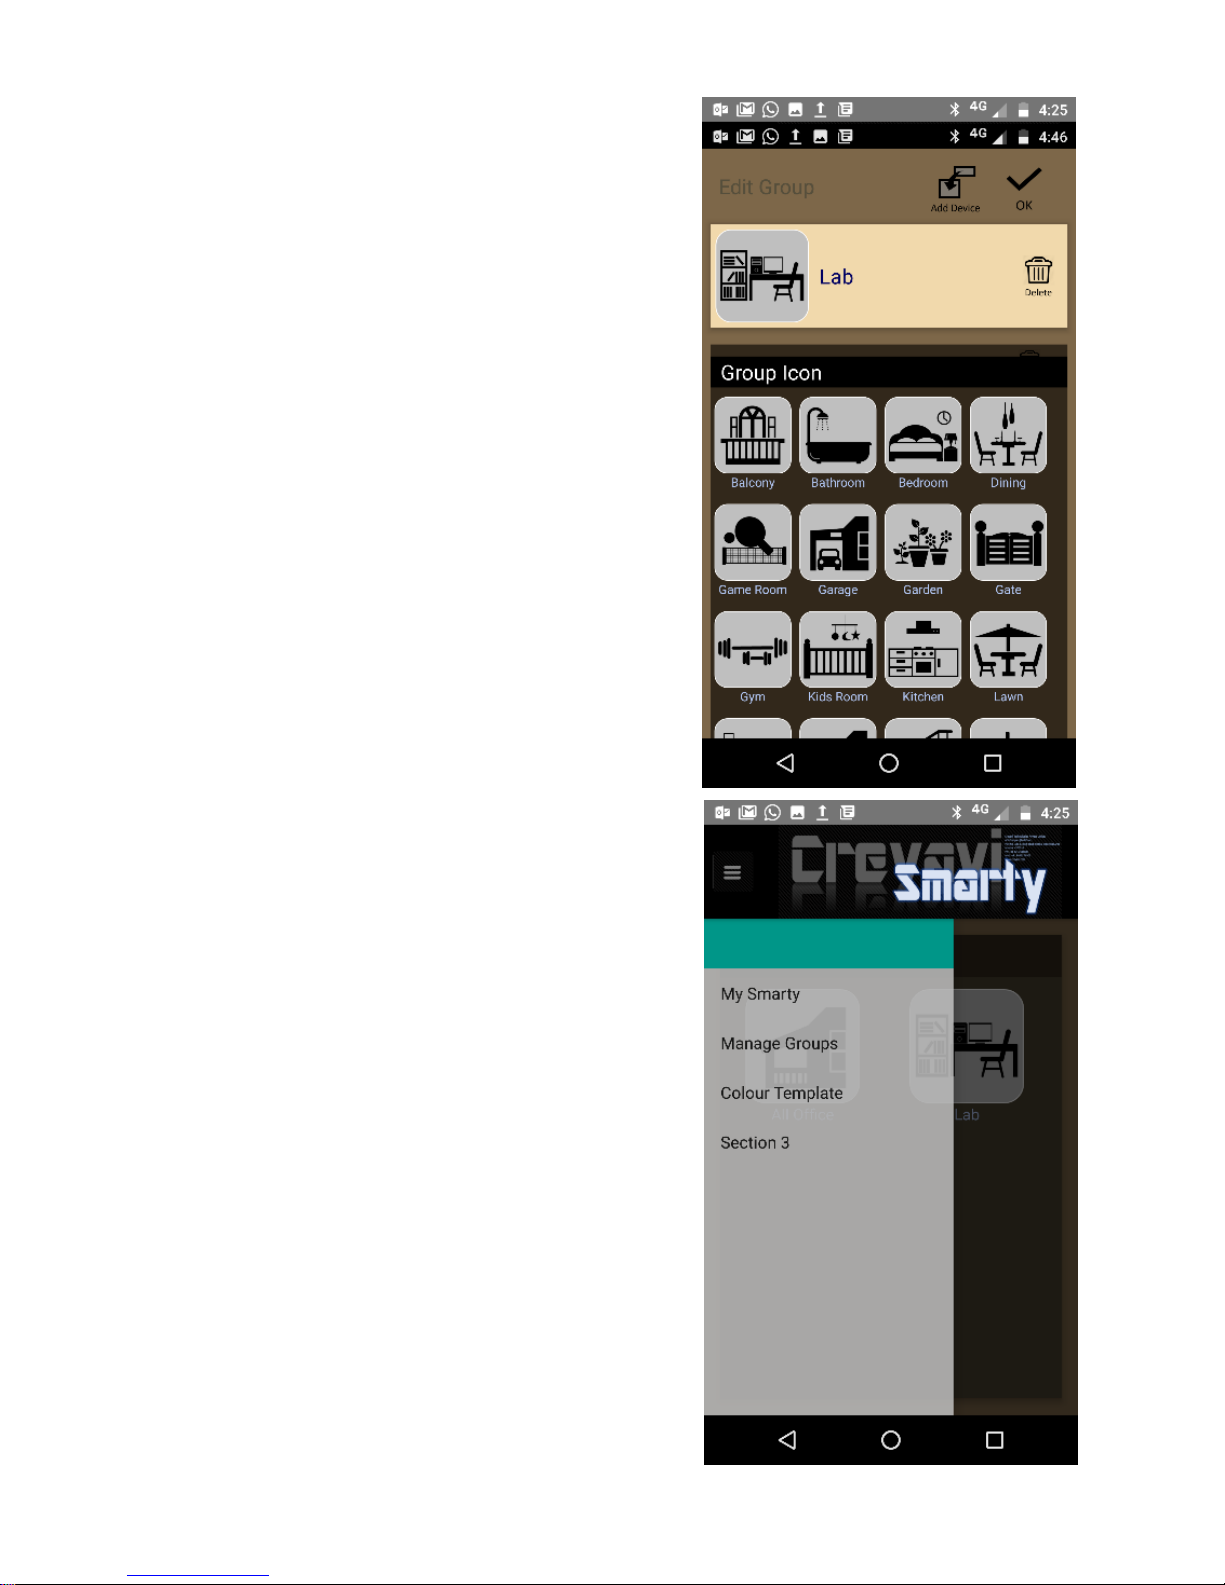
For first time usage, the smartybox(s) need to be paired with the
app:
✓ Step-1: Open Menu -> Manage
Groups
✓ Step-2: Press on “New Group”
icon on right top corner of screen
✓ Step-3: You may press on the
new group icon and name to
modify it. Select a suitable icon
for your group and name it.
Page 13
Page 13 of 16
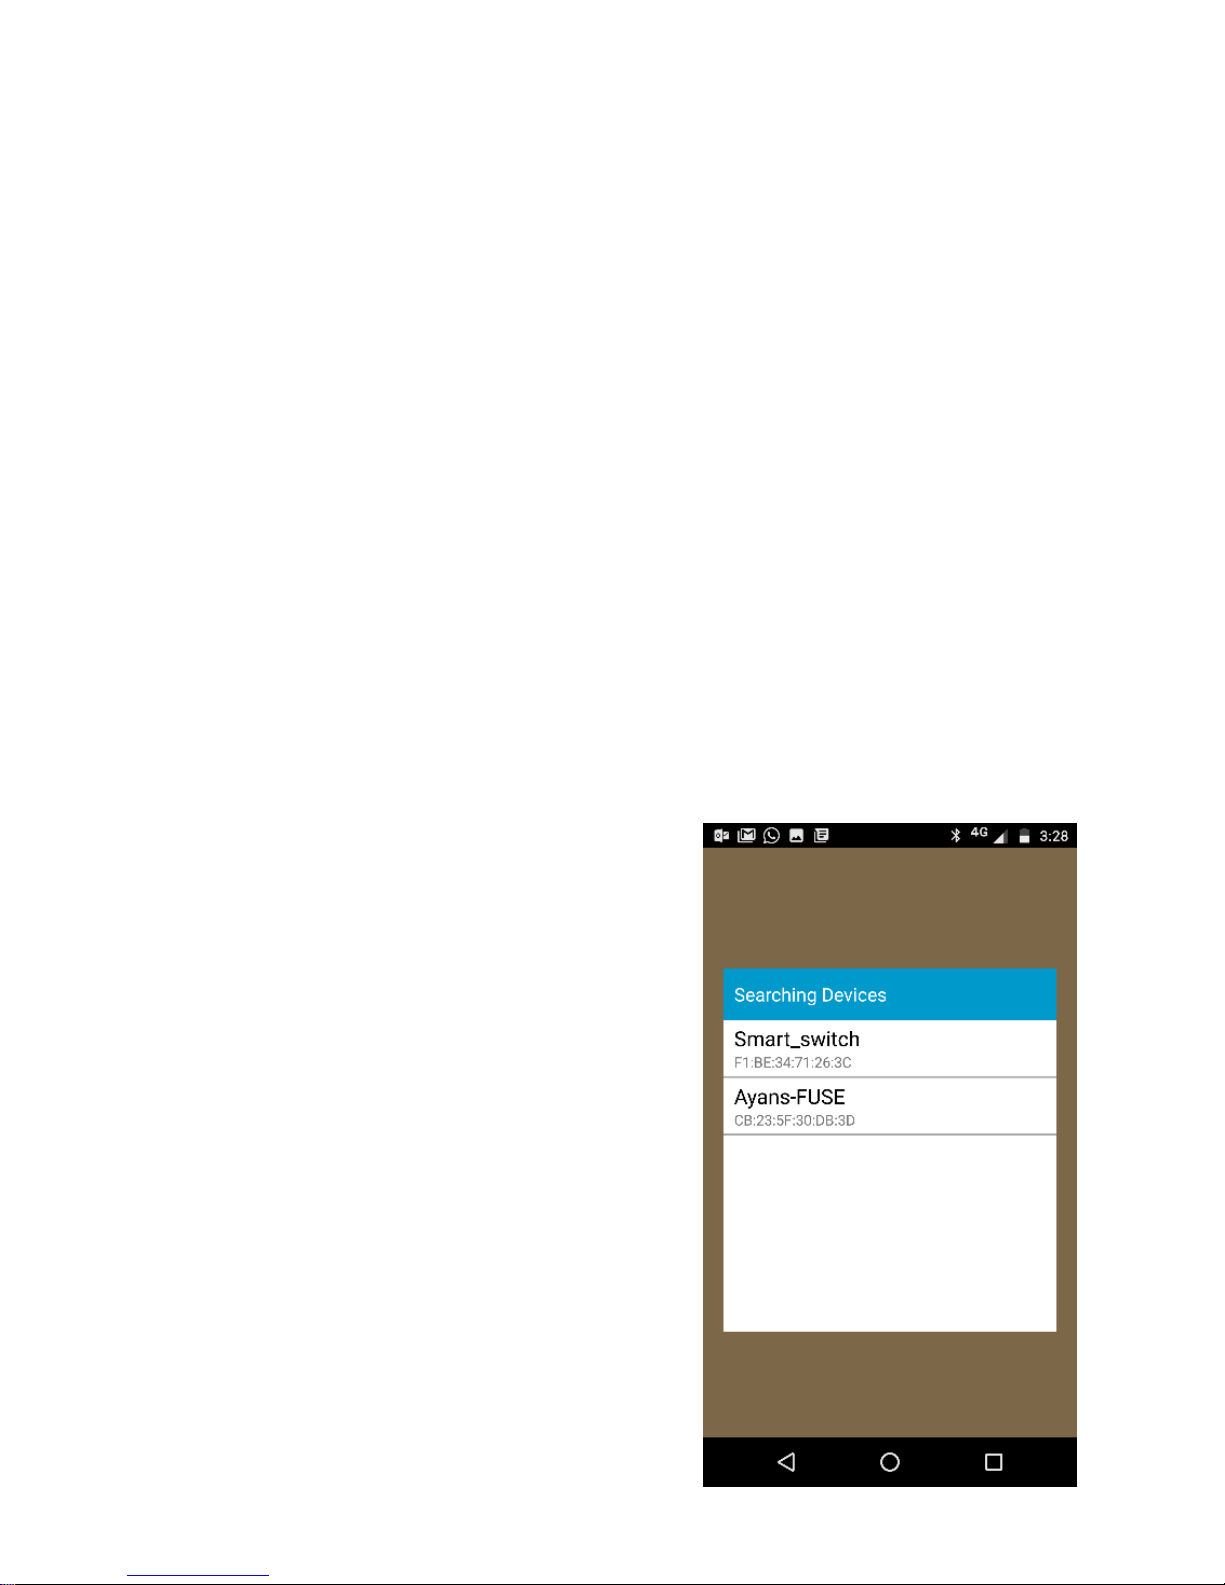
✓ Step-4: Press on “Add Device” icon on top of screen to pair
a Smarty box. This process with scan for available smarty
boxes and connect automatically to the one which is
within 1ft proximity. You may touch the screen for manual
configuration. In case of manual configuration, the screen
will show the devices in the proximity, and list the device
IDs.
o Find your device ID on back of Smarty / packaging.
Select the one you are willing to Pair.
o For pairing process to complete you need to be within
1ft of the Smarty-box.
o Once pairing and syncing is over, the screen will display
switches available on the
device
o You may add multiple devices
in the same group (up-to 6 per
group)
o Press OK at top-right corner to
save the configuration
Page 14
Page 14 of 16
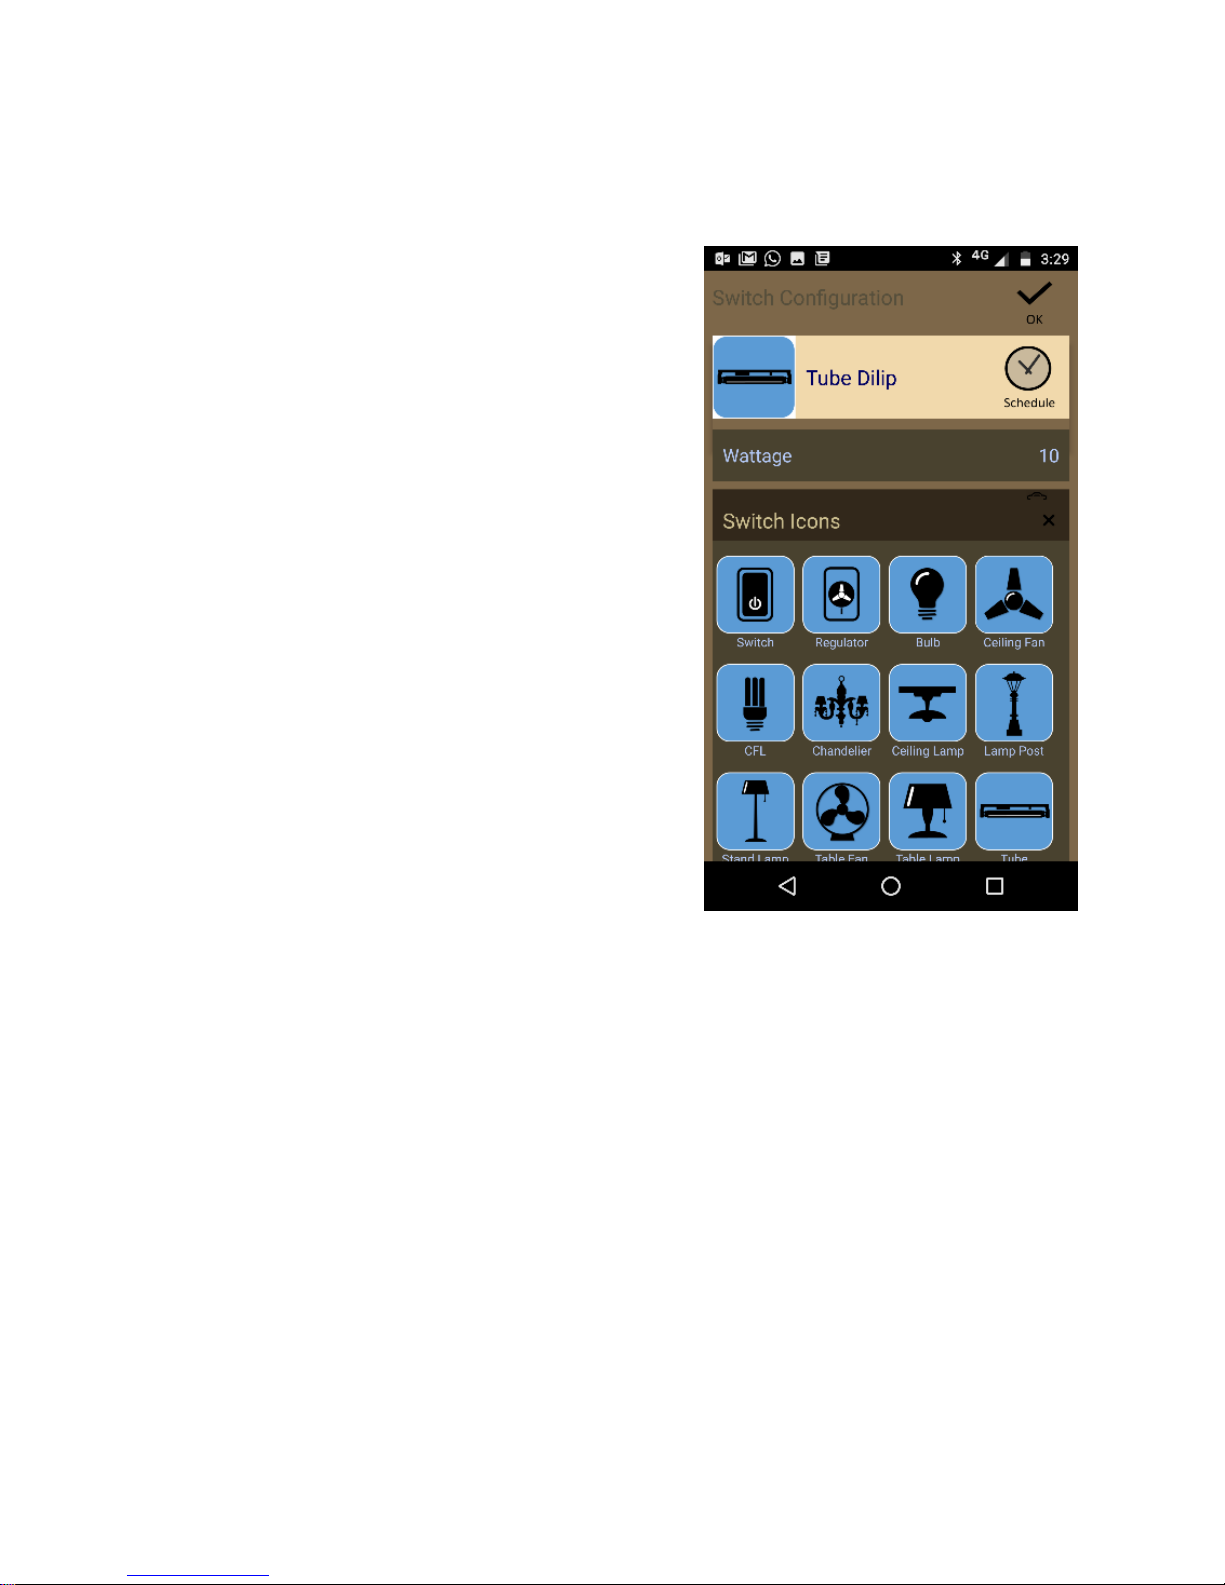
✓ Step-5: You may press on each of the switches icon and
name to modify it. Select a suitable icon for each your
switch, and name them.
✓ Step-6: Schedule for each switch
can be configured here by
pressing the schedule button on
right side of switch name.
o You can set an On-time in Manual mode, and On-time
and Off-time both in Auto mode
o In manual mode the switch goes ON at scheduled time,
and doesn’t go off automatically
o In Auto mode, it goes ON at scheduled On-time, and
automatically goes OFF at the scheduled Off-time.
Note: Smarty is capable of monitoring utilization of each
light/fan connected to it. It is recommended to enter the
Page 15
Page 15 of 16
wattage of the light connected to individual switches by
pressing on the wattage field. This will provide more
accurate utilization data.
5.2. Operation
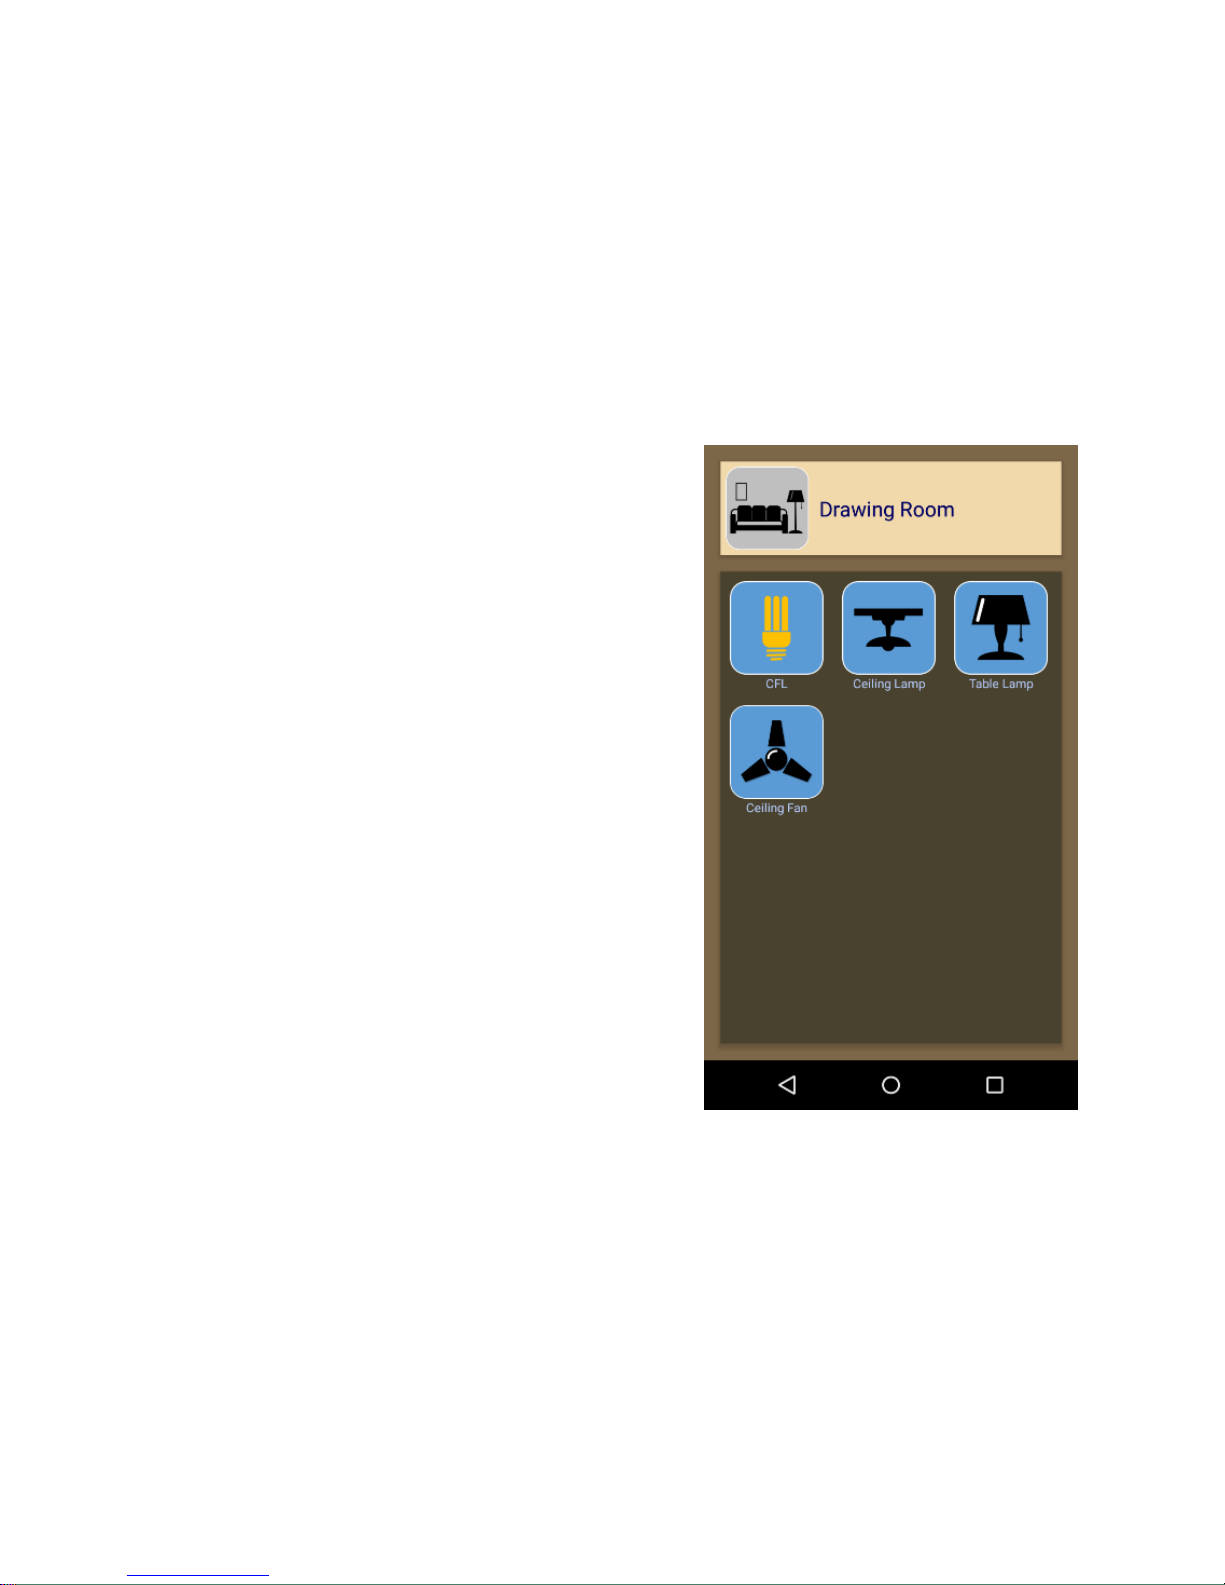
✓ Smart app shows the groups configured on home screen
✓ Touch on a group to connects to
the smarty-boxes (within
proximity) configured for that
group, and app shows a control
panel with switches connected
✓ Each connected switch shows
their individual status on control
panel screen
✓ On click, it changes the output
state of the switch, and once
change is successful, updates the
status on screen
Page 16

Page 16 of 16
For support, please contact us
Visit: www.crevavi.com/smarty
Call us: +91 821 2518805
Mail us: [email protected]
 Loading...