

Page 1
DVPHD-CUSTOM-GB
High Definition Digital Video Annotator
The Guidebar
1
The DVPHD-CUSTOM-GB with Guidebar™ technology offers a slick and powerful
presentation solution, providing separate outputs for a presenter’s touchpanel and up to
three audience displays. All outputs display the same full resolution HD image, while only
the presenter sees the Guidebar containing touchscreen controls for AV, lighting,
annotation and any other desired functions. Guidebar technology works by allowing the
use of displays with different resolutions, allocating the “extra” pixels on the higher
resolution display for the Guidebar. For instance, using an audience display with 1920 x
1080 pixels and a presenter’s touchpanel with 1920 x 1200 pixels provides an area 120
pixels high across the top or bottom of the presenter’s screen for the Guidebar. Just like
any Crestron® touchpanel, the Guidebar is completely customizable for any appearance
or functionality.
quickstart guide
For advanced setup information and operational details, refer to the latest version of the
DVPHD-CUSTOM-GB Operations Guide (Doc. 6883), which is available from the
Crestron Web site (www.crestron.com/manuals).
The VisionTools® Pro-e (VT Pro-e) project and the internal firmware of the
DVPHD-CUSTOM-GB work together to provide the Guidebar functionality by referencing
the selected display resolution (or page size) in the DVPHD-CUSTOM-GB against the
selected resolution and clip position in the VT Pro-e project. This allow the display to be
divided into two areas: one for the presenter and one for the presentation, as shown in
the illustration below. The presenter’s display shows both the presentation and the
Guidebar, allowing the presenter to control the display source, content and size and to
make annotations while the audience sees only the presentation and the presenter’s
changes.
2
Setup
The DVPHD-CUSTOM-GB is shipped with the VT Pro-e project and SIMPL™ Windows program, contained in a .zip archive,
installed on the Complact Flash card (in the \CF0\USER directory). The VT-Pro-e project is already installed. The SIMPL
program must be loaded into the control system.
In order for these to work, you must have either an Ethernet or a Cresnet® connection between the DVPHD-CUSTOM-GB and
the control system. For an Ethernet connection, use Crestron Toolbox™ to create an IP table entry (at IP ID 05) for the control
system in the DVPHD-CUSTOM-GB. For a Cresnet connection, first “comment out” Ethernet and remove the “comment” from
Cresnet in the program. Then, recompile the program. For Cresnet, be sure to change the Cresnet ID to match the program
(Net ID 03) and remove the IP table entry if any is present.
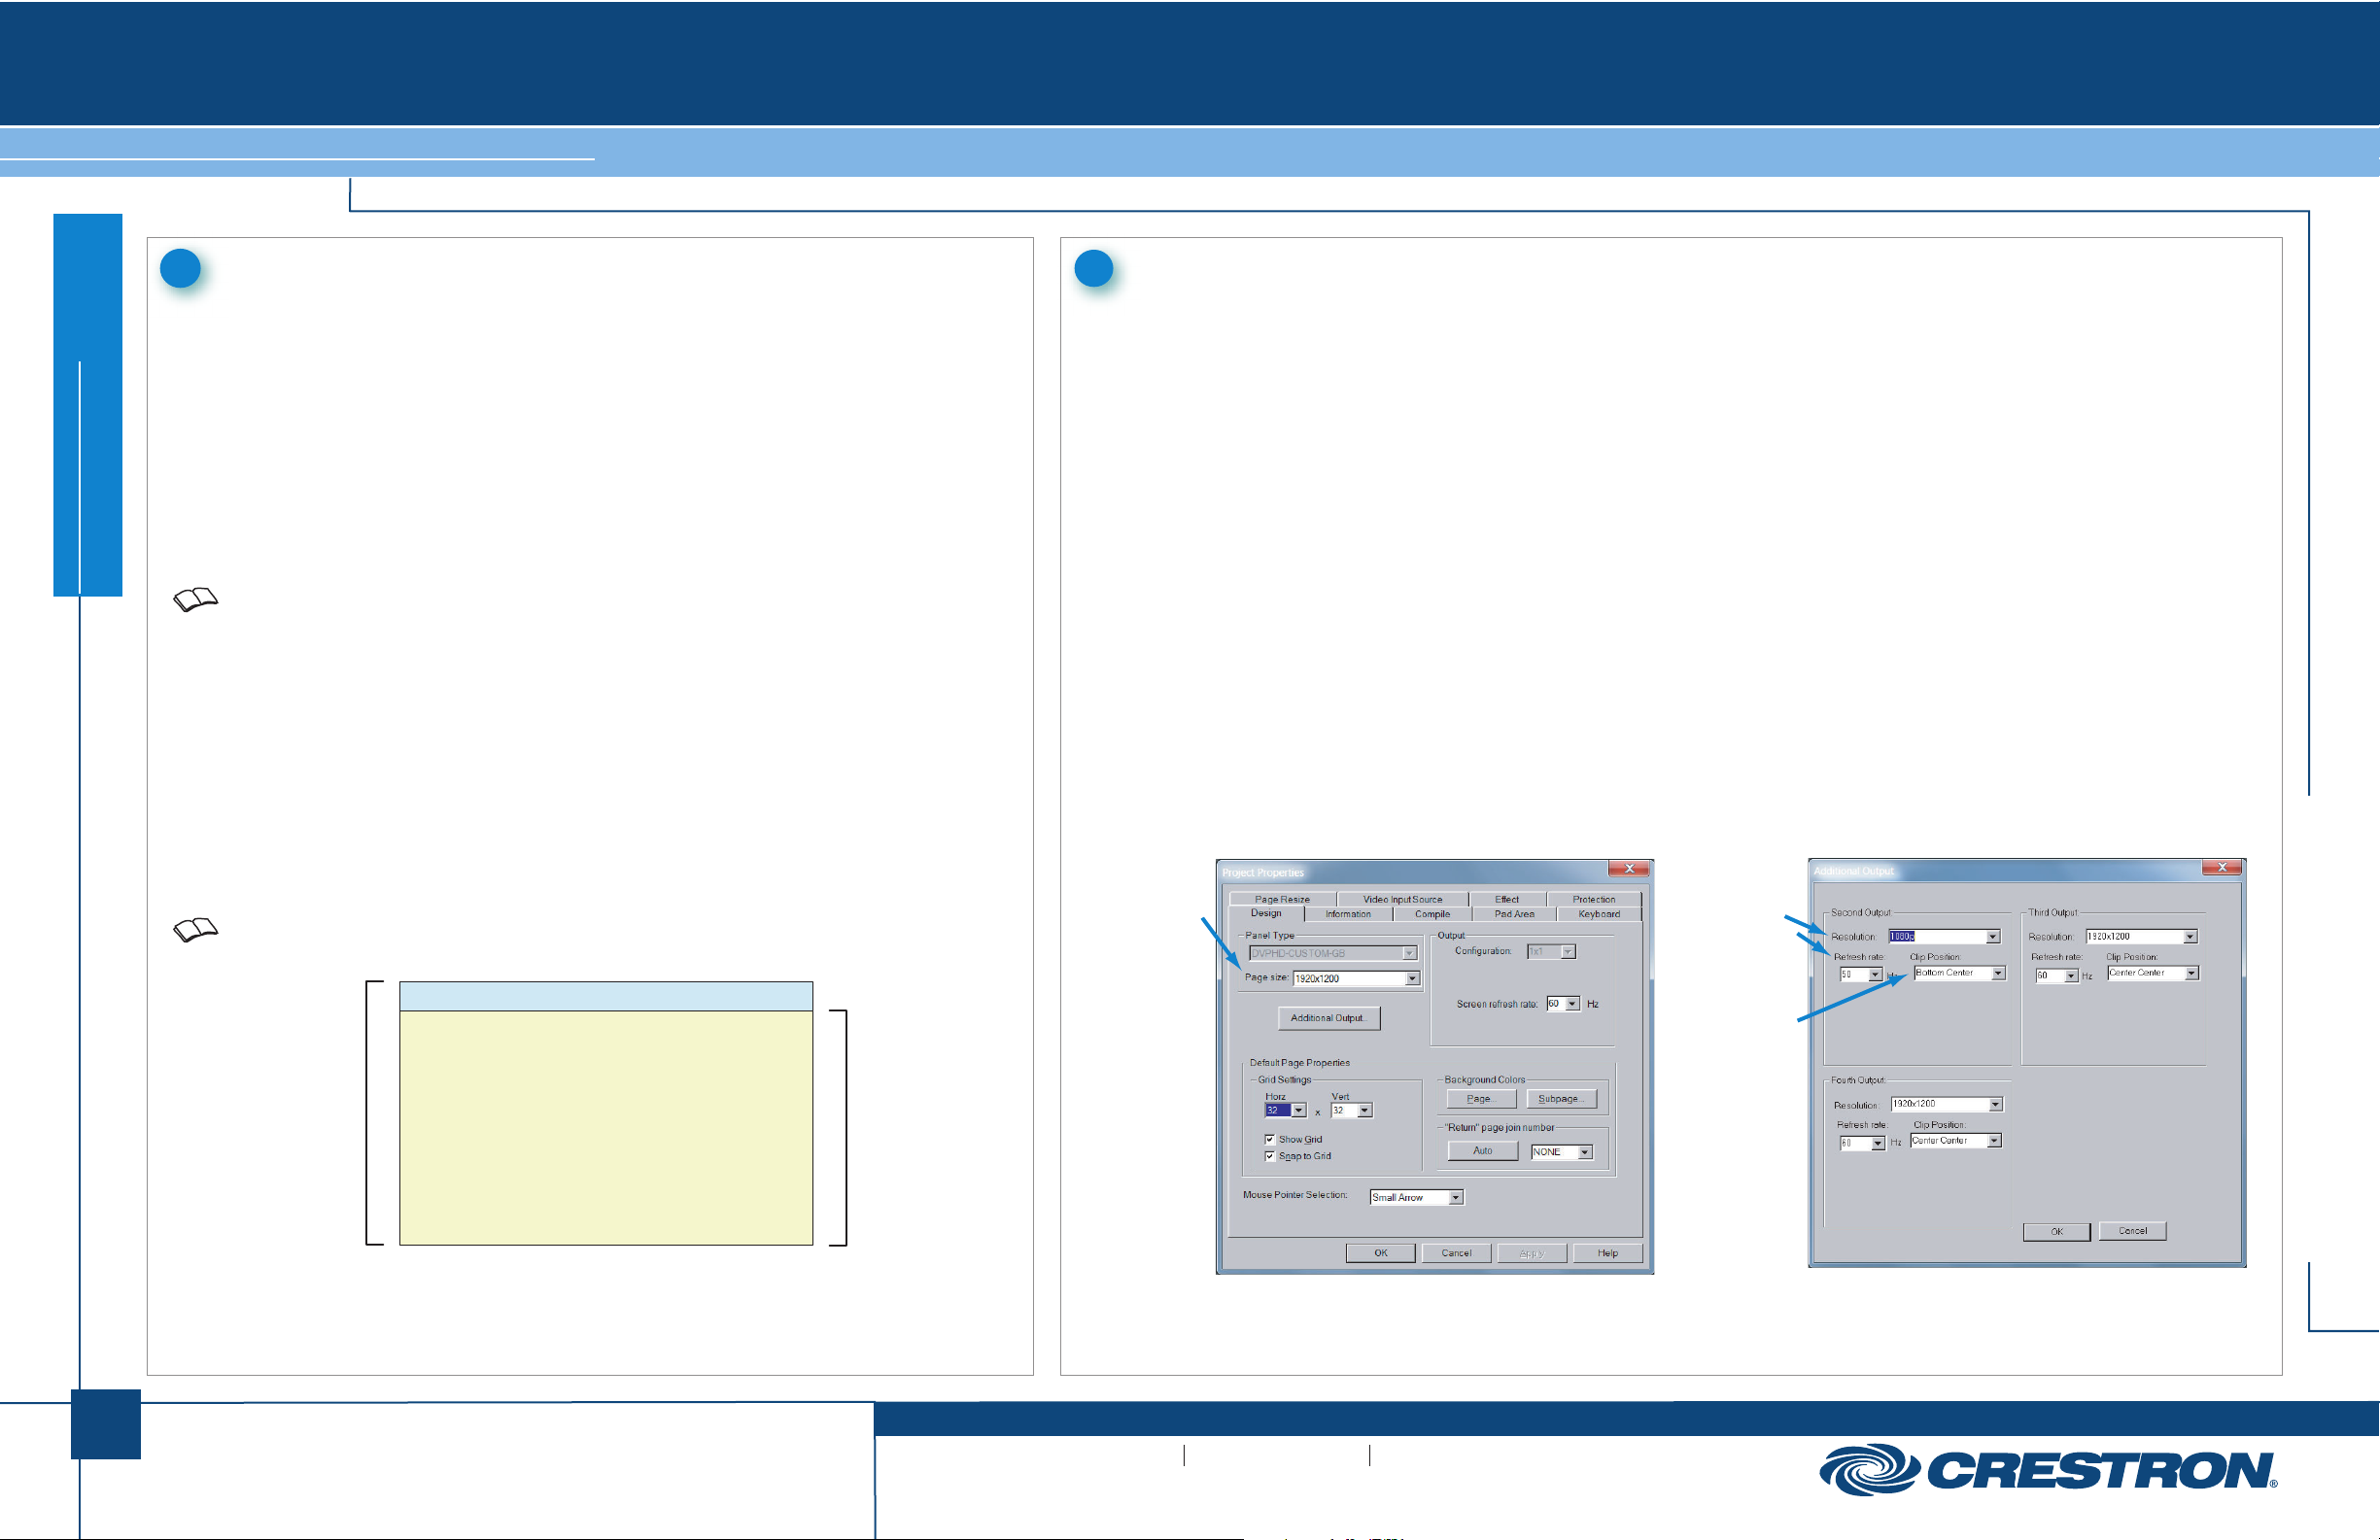
The Design tab in the “Project Properties” window in VT Pro-e (shown in the illustration below) can be used to match the
program to the particular displays in use and to customize the position of the Guidebar.
1. In the Panel Type section, use the Page size dropdown to match the resolution of the presenter’s screen.
2. Click Additional Output to open the “Additional Output” window. In the Second Output section, use the Resolution and
Refresh rate dropdowns to match the resolution and refresh rate of the audience’s screen. Use the Clip Position dropdown
to select the part of the presenter’s screen the audience will see (i.e. the presenter’s screen minus the Guidebar).
The third and fourth output can be used in the same way as the second output, for additional audience screens or other
purposes.
DVPHD-
For information on creating a VT Pro-e project, refer to the VT Pro-e help file.
Guidebar
Presenter’s view
Set to same resolution
as the project, in this
example, 1920 x 1200.
Presenter sees Guidebar
along with presentation.
Output 1
Presentation
For details, refer to the latest version of the
DVPHD-CUSTOM-GB Operations Guide, Doc. 6883.
QUICKSTART DOC. 6902B (2025501) 09.10
Output 2
Audience’s view
Set to same resolution
as the audience’s
display, in this
example, 1080p.
Using Clip Position
setting, as illustrated
on the right,
output 2 has “clipped”
the video, in this
example, from the
bottom center of the
presenter’s screen.
This is seen on the
audience’s display.
www.crestron.com
©2010 Specifications subject to
change without notice.
Set Page size to
match resolution
of presenter’s
screen.
888.273.7876 201.767.3400
All brand names, product names, and trademarks
are the property of their respective owners.
Set Resolution
and Refresh rate
to match those
of audience’s
screen.
Set Clip Position
to select the part
of the presenter’s
screen the
audience will see.
CUSTO
M-GB
 Loading...