

Page 1
CEN-BDP-CX7000ES
400-Disc Blu-ray/DVD Changer
Introduction
1
The CEN-BDP-CX7000ES provides organized storage and playback of 400 discs including Blu-ray Disc™, DVD, and CD
media. As an option for the ADMS, or as part of any complete home entertainment system, the CEN-BDP-CX7000ES
allows for seamless control integration and delivers high-end HD video and audio performance.
The CEN-BDP-CX7000ES can also be used as part of any Prodigy® or Crestron® system with fully integrated control and
metadata available through a touchpanel, handheld remote, or on-screen display. When operated in this manner, the
changer allows searching, sorting, and navigation of the disc library by title, genre, cast and more, with metadata downloaded from the Gracenote™ online service, all from the changer’s on-screen-display.
2
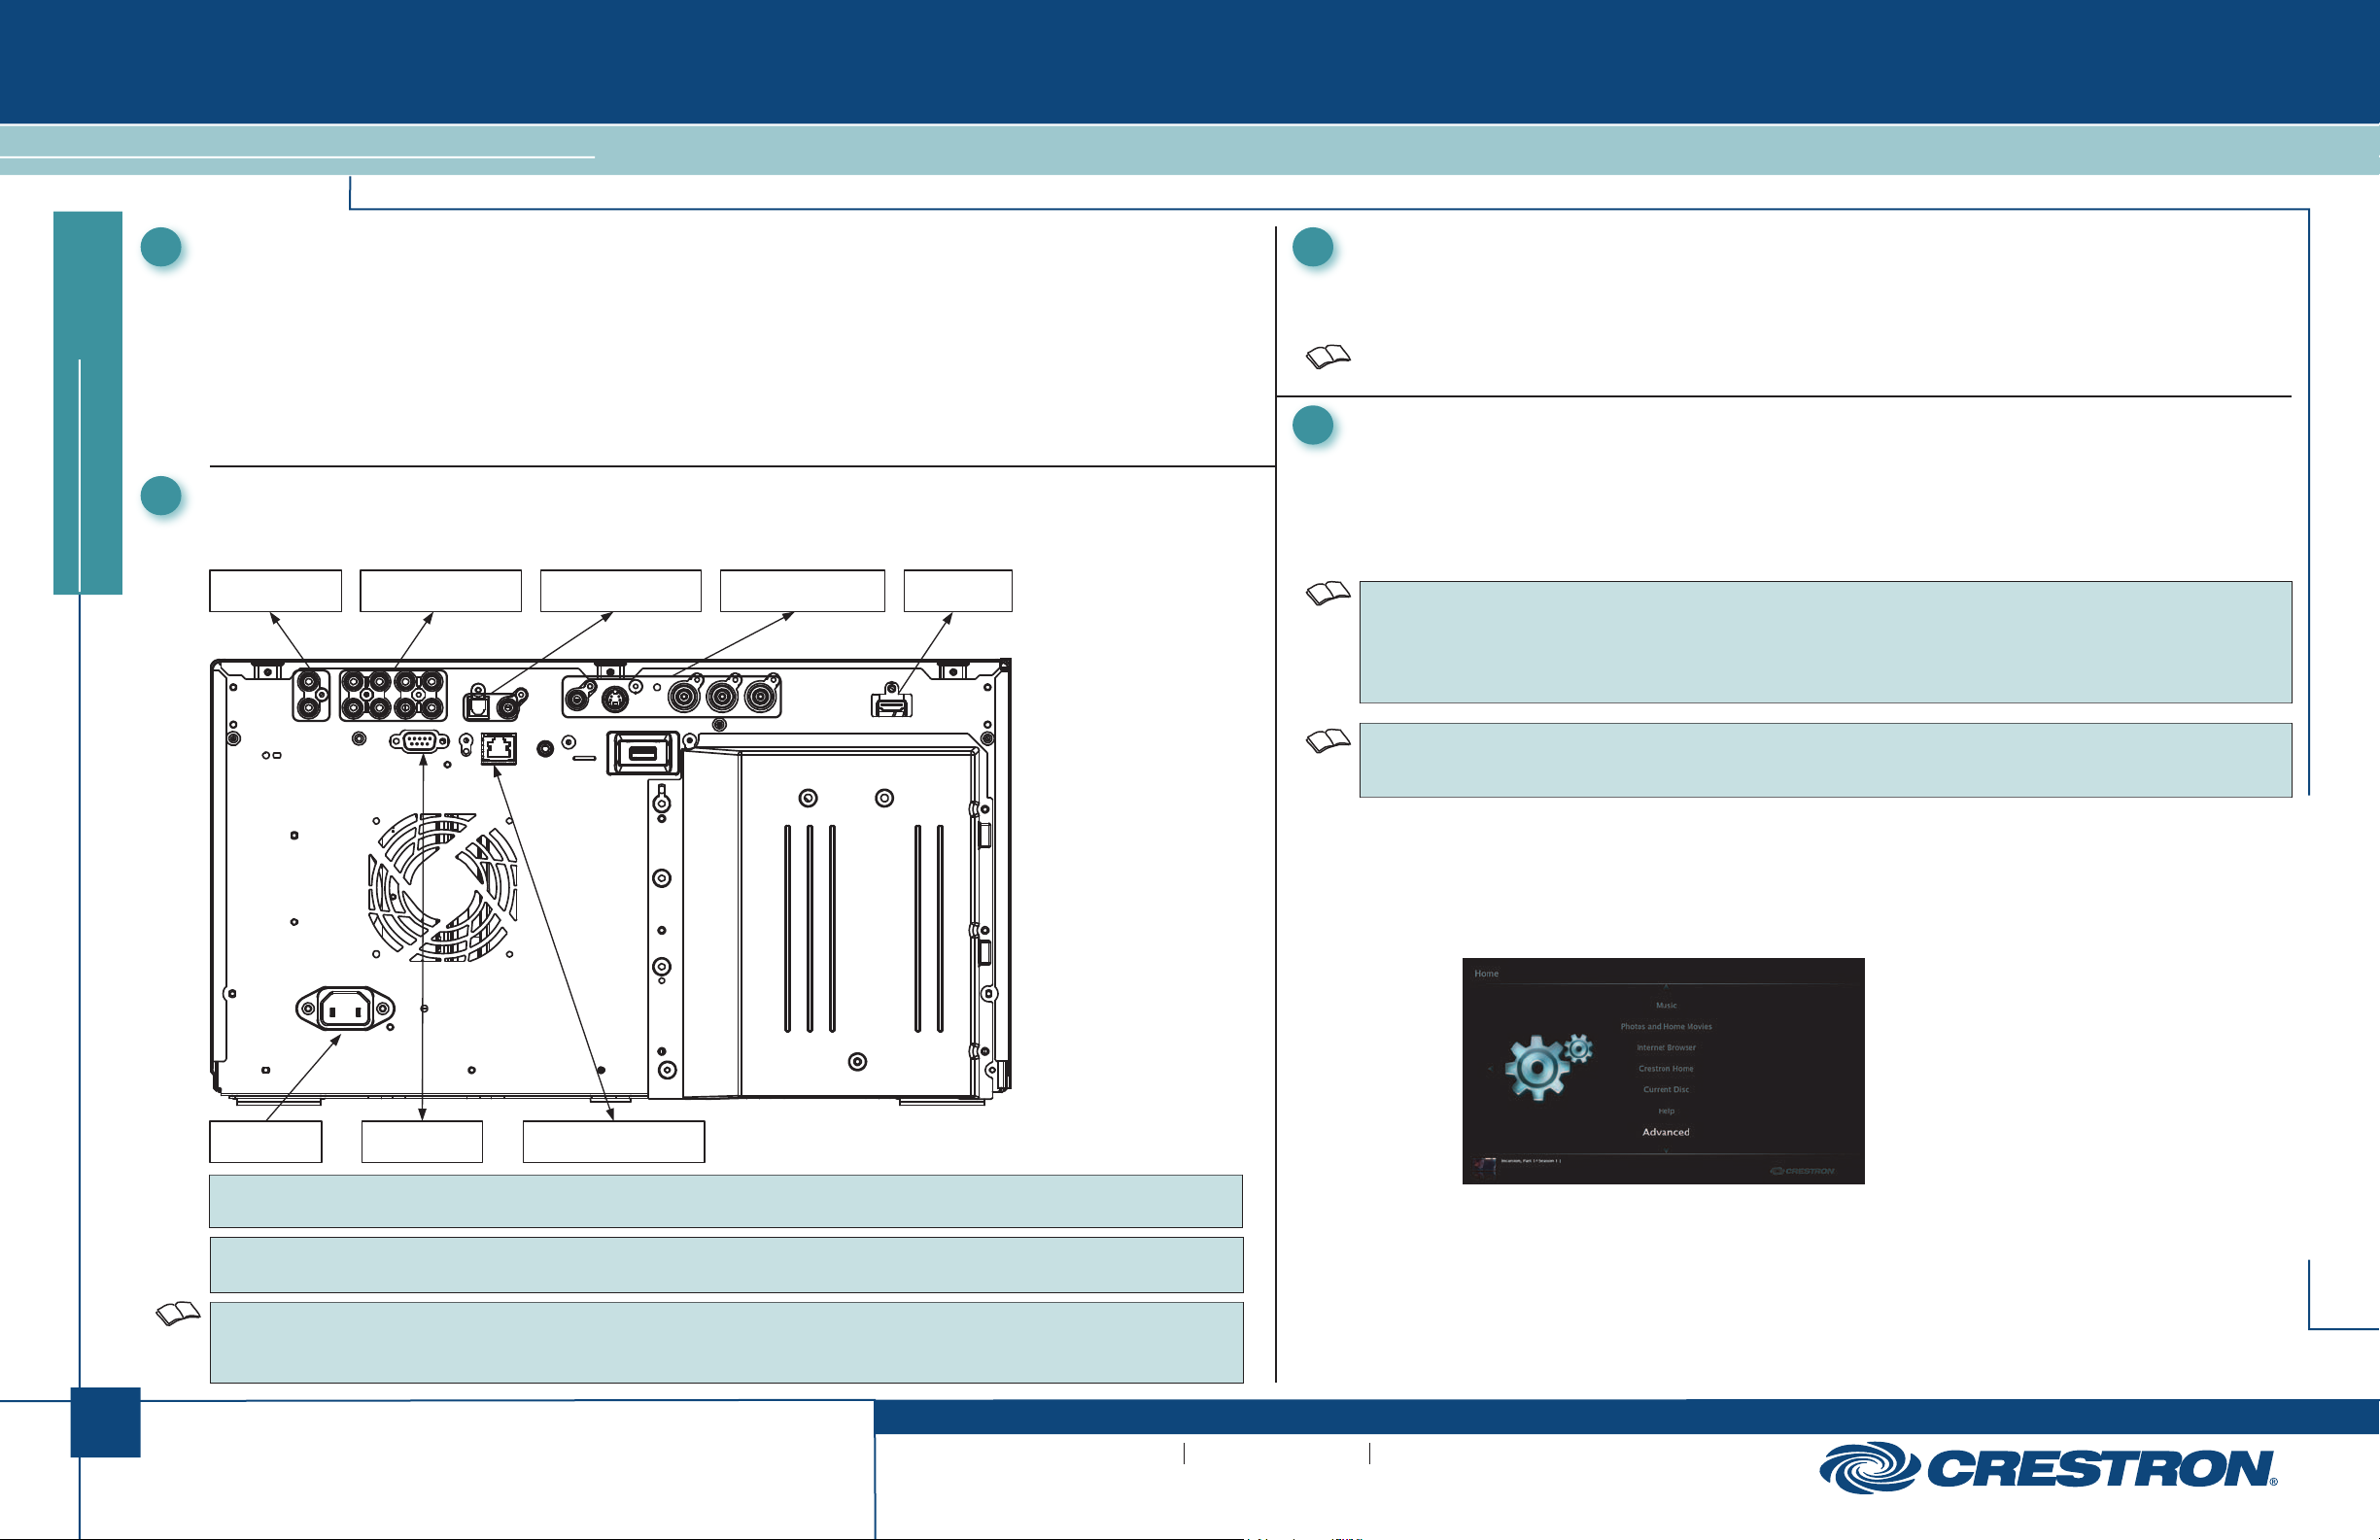
Hardware Hookup
Make the necessary connections as called out in the illustration that follows this paragraph. Apply power after all
connections have been made.
quickstart guide
AUDIO OUT:
To Stereo
Audio Receiver
MULTI CHANNEL OUTPUT:
To Multi-Channel
Audio Receiver
DIGITAL OUT:
To Digital Audio Receiver
VIDEO OUT and
COMPONENT VIDEO OUT:
To Video Display(s)
HDMI OUT:
To HDMI Receiver
or Switcher
3
4
Download Firmware
To work with the ADMS, the CEN-BDP-CX7000ES must have firmware version v15.2.018 or higher which is
available when the CEN-BDP-CX7000ES is connected to the Internet.
To get the latest compatible firmware, refer to the “Network Update” section of the Operating Instructions
that are included with the CEN-BDP-CX7000ES.
Configure the ADMS
This section contains instructions for integrating the CEN-BDP-CX7000ES with an ADMS.
If the CEN-BDP-CX7000ES is to be integrated with another device or system, SIMPL™ Windows,
SystemBuilder™, or Prodigy Composer (along with Crestron Database version 23.010 (or later)), must be
used. For details refer to the programming software’s help file.
NOTE: This section assumes that the ADMS is already installed, operational, and installed on the same
subnet as the CEN-BDP-CX7000ES and HD-MD8X1/HD-MD8X2. For more information, refer to the latest
version of the ADMS Operations Guide (Doc. 6854) which can be downloaded from the Crestron Web site
(www.crestron.com/manuals). The HDMI output of the ADMS must be connected to an input on the
HD-MD8X1 or HD-MD8X2.
NOTE: The HD-MD8X1/HD-MD8X2 should have a static IP address. For information on setting the IP
address on an HD-MD8X1 or HD-MD8X2, refer to the latest version of the HD-MD8X1/2 Operations Guide
(Doc. 6714) which can be downloaded from the Crestron Web site.
The ADMS must be configured to work with the CEN-BDP-CX7000ES and HD-MD8X1/HD-MD8X2. To
configure the ADMS:
CEN-BDP-CX7000ES
1
~AC IN:
From Line Voltage
RS232C:
To Control System
LAN(100):
10/100 Base-T Ethernet to LAN
NOTE: The HDMI OUT port must be used when used in conjunction with an ADMS and HD-MD8X1 or HD-MD8X2.
When connected with other systems and/or devices, the other audio-video outputs can be used as well.
NOTE: The LAN(100) port must be used when used in conjunction with an ADMS. When connected with other devices
or systems, the RS232C or LAN(100) port can be used.
NOTE: The CEN-BDP-CX7000ES is configured from the factory to obtain an IP address using DHCP. For instructions
on specifying a static IP address, refer to the “Network Update” section of the Operating Instructions that are included
with the CEN-BDP-CX7000ES.
For operating instructions, refer to the Operating Instructions
that are included with the CEN-BDP-CX7000ES.
QUICKSTART DOC. 7103A (2029049) 10.10
www.crestron.com
©2010 Specifications subject to
change without notice.
888.273.7876 201.767.3400
1. Open the SETUP MENU.
a. Using the keyboard connected to the ADMS, press the down arrow () to move the cursor
down until Advanced is highlighted.
(Continued on following page.)
All brand names, product names, and trademarks
are the property of their respective owners.
Page 2

CEN-BDP-CX7000ES
400-Disc Blu-ray Changer
4
Configure the ADMS (continued)
b. Press Enter on the keyboard. The Advanced section will be displayed.
c. Press the down arrow () to move the cursor down until Advanced Configuration is
highlighted.
quickstart guide
d. Press Enter. The Advanced Configuration login will be displayed.
e. Enter the password dealeradmin and press Enter. The SETUP MENU will be displayed.
4
Configure the ADMS (continued)
3. Use the mouse to click Media Changers. The “Media Changers” window will be displayed.
4. Use the mouse to click Configure Sony Changers. The “Configure Sony Changers” window will be displayed.
CEN-BDP-CX7000ES
2
2. Use the mouse to click Library. The “Library Configure” window will be displayed.
(Continued on following column.)
For operating instructions, refer to the Operating Instructions
that are included with the CEN-BDP-CX7000ES.
QUICKSTART DOC. 7103A (2029049) 10.10
www.crestron.com
©2010 Specifications subject to
change without notice.
5. Use the mouse to select a video switch (HD-MD8X1 or HD-MD8X2) from the dropdown list.
6. Use the mouse to select an output (HD-MD8X2 only).
7. Assign each input on the HD-MD switcher to the ADMS and each CEN-BDP-CX7000ES on the network.
NOTE: To determine the IP address of a CEN-BDP-CX7000ES, refer to the “Network Settings” section of the
Operating Instructions that are included with the CEN-BDP-CX7000ES.
NOTE: When using multiple CEN-BDP-CX7000ES devices and trying to identify the IP address of a specific unit,
turn off all of the other units and use the mouse to click Refresh Devices.
NOTE: If a changer or switcher is not shown in the dropdown list, use the mouse to click Refresh Devices.
NOTE: If a switcher input has a device assigned to it, the device’s output must be connected to the specified
input on the switcher.
8. When all of the connected devices are assigned to an input, use the mouse to click Close and return
to the previous screen.
888.273.7876 201.767.3400
All brand names, product names, and trademarks
are the property of their respective owners.
 Loading...