

Page 1
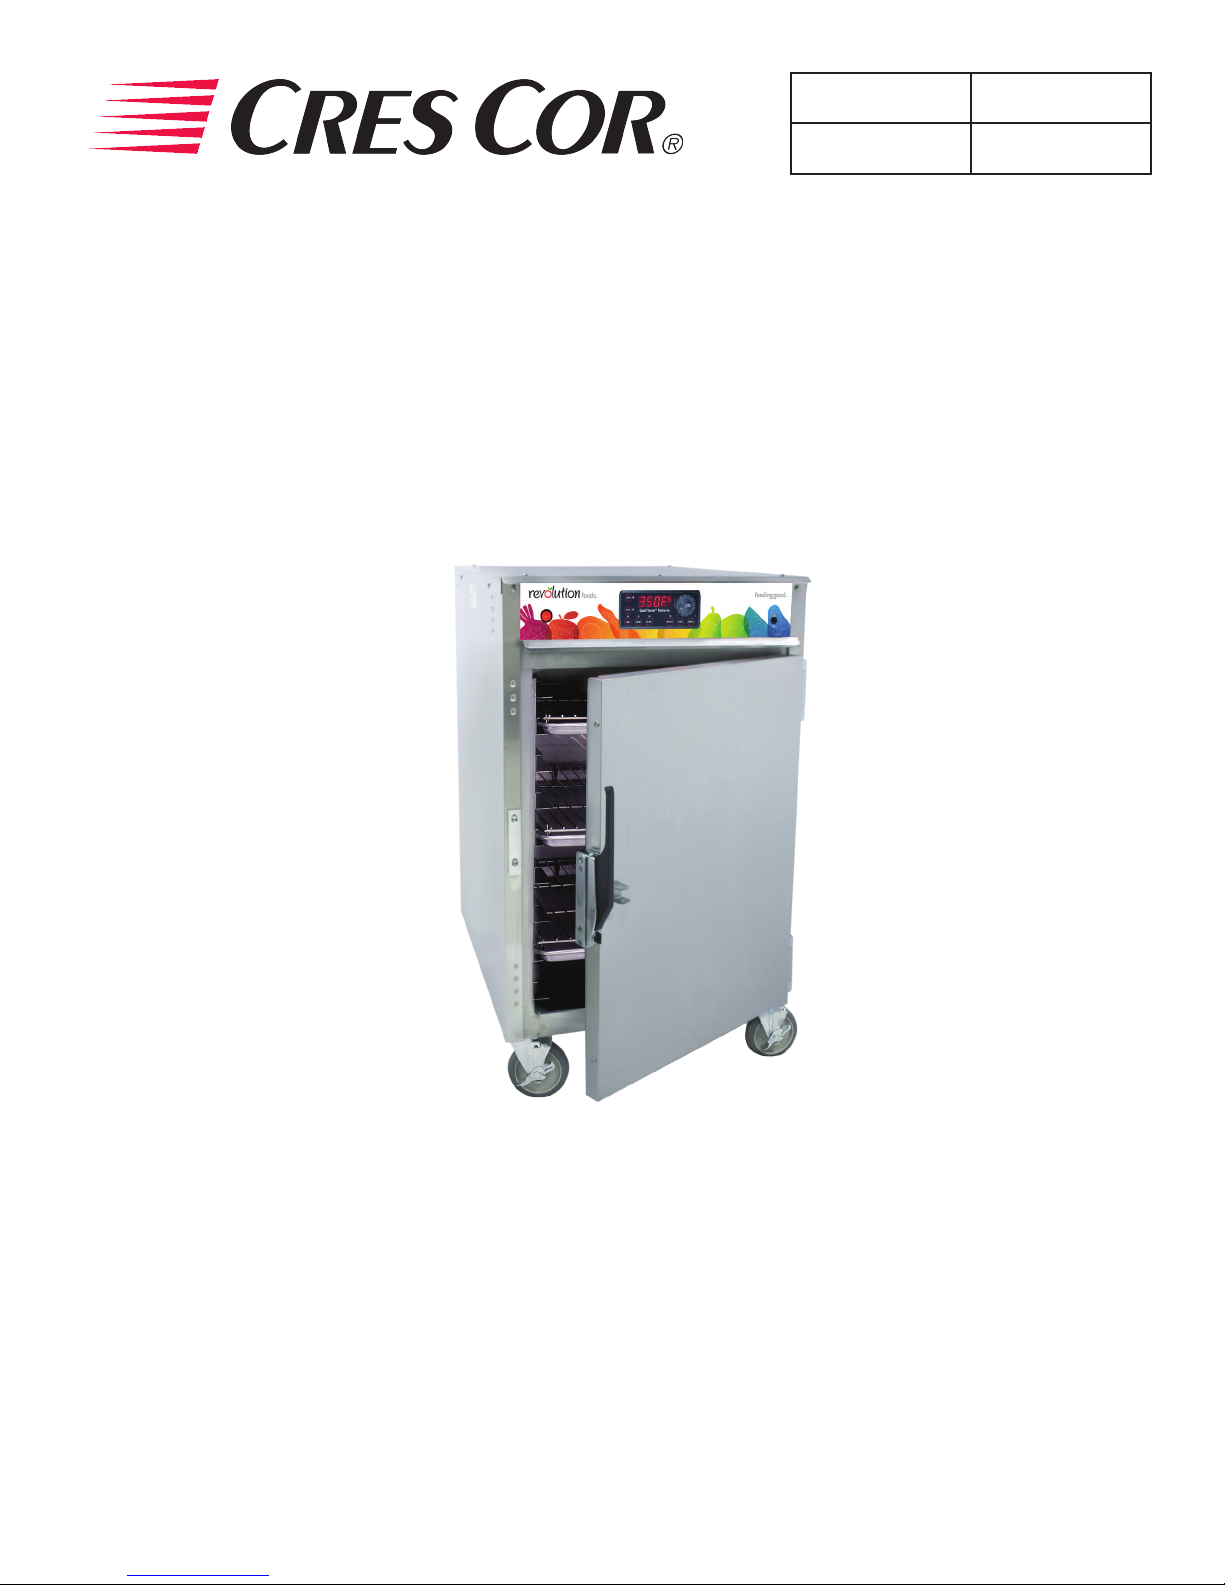
Rethermalizer
FL-CO151027
5925 Heisley Road • Mentor, OH 44060-1833
INSTALLATION, OPERATION and MAINTENANCE
MANUAL for Cres Cor 2kW RETHERMALIZER
Rev. 1 (1/16)
Page 1 of 12
Call Toll-free: 877-CRES COR (273-7267) • Fax: 800-822-0393 • www.crescor.com
REVOLUTION FOODS
MODEL CO151027
Page 2
Rethermalizer
FL-CO151027
Rev. 1 (1/16)
Page 2 of 12
5925 Heisley Road • Mentor, OH 44060-1833
TABLE OF CONTENTS
SUBJECT PAGE
INSTALLATION INSTRUCTIONS .............................................3
OPERATING INSTRUCTIONS
First Time Operation ....................................................4
Using Pre-Set Recipes .................................................4,5
How to Use Control for Retherm & Holding .................................5
Cooking With Food Probes ...............................................6
MAINTENANCE INSTRUCTIONS
How to Clean the Unit ................................................7,8
Trouble Shooting Guide ...............................................8, 9
Cabinet Replacement Parts ..............................................10
Hot Unit Replacement Parts .............................................11
Wiring Diagram For 120 Volt, 1 Phase ....................................12
SERVICE POLICY and AGENCY LIST ....................................FL-1400
WARNING
RISK OF FIRE OR ELECTRIC SHOCK
WARNING: TO REDUCE THE RISK OF FIRE OR ELECTRIC SHOCK,
DO NOT REMOVE COVER (OR BACK)
NO USER-SERVICEABLE PARTS INSIDE
DO NOT OPEN
Call Toll-free: 877-CRES COR (273-7267) • Fax: 800-822-0393 • www.crescor.com
REPAIR SHOULD BE DONE BY AUTHORIZED SERVICE
PERSONNEL ONLY
Page 3
Rethermalizer
FL-CO151027
5925 Heisley Road • Mentor, OH 44060-1833
INSTALLATION INSTRUCTIONS
VENTING YOUR CABINET:
1. This cabinet passes the EPA 202 test and complies
with section 59 of UL710B for emission of greaseladen air.
2. According to UL, this cabinet does not need to be
placed under a ventilation hood.
3. Installation must conform with local codes. The
authority having jurisdiction of enforcement of
the codes will have the responsibility for making
interpretations of the rules.
Rev. 1 (1/16)
Page 3 of 12
HOW TO INSTALL CABINETS:
1. Remove all packing material from inside and outside
of cabinet.
2. Position cabinet on level oor; install the cabinet
interior (pan slides) if not already installed.
3. Plug power cord into proper wall receptacle.
UNIT SPECIFICATIONS: Unit uses six (6) elements (1325 watts each). Units are rated 2000 watts.
MODEL NOS.
ELECTRICAL SPECS
(AC SERVICE)
VOLTS PHASES HZ AMPS VOLTS AMPS PHASES VOLTS RECEPTACLE
ELEC. LOAD
POWER SUPPLY REQUIREMENT
ALL 3 PHASE IS 3 WIRE + GROUND
CO151027 120 1 60 16.6 120 20 1 120 5-20R
Call Toll-free: 877-CRES COR (273-7267) • Fax: 800-822-0393 • www.crescor.com
Page 4
Rethermalizer
FL-CO151027
Rev. 1 (1/16)
Page 4 of 12
5925 Heisley Road • Mentor, OH 44060-1833
OPERATING INSTRUCTIONS
FIRST-TIME OPERATION
NOTE: A new cabinet needs to “burn off” manufacturing
oils and excessive adhesive before its rst use.
Do NOT load food until this has been done!
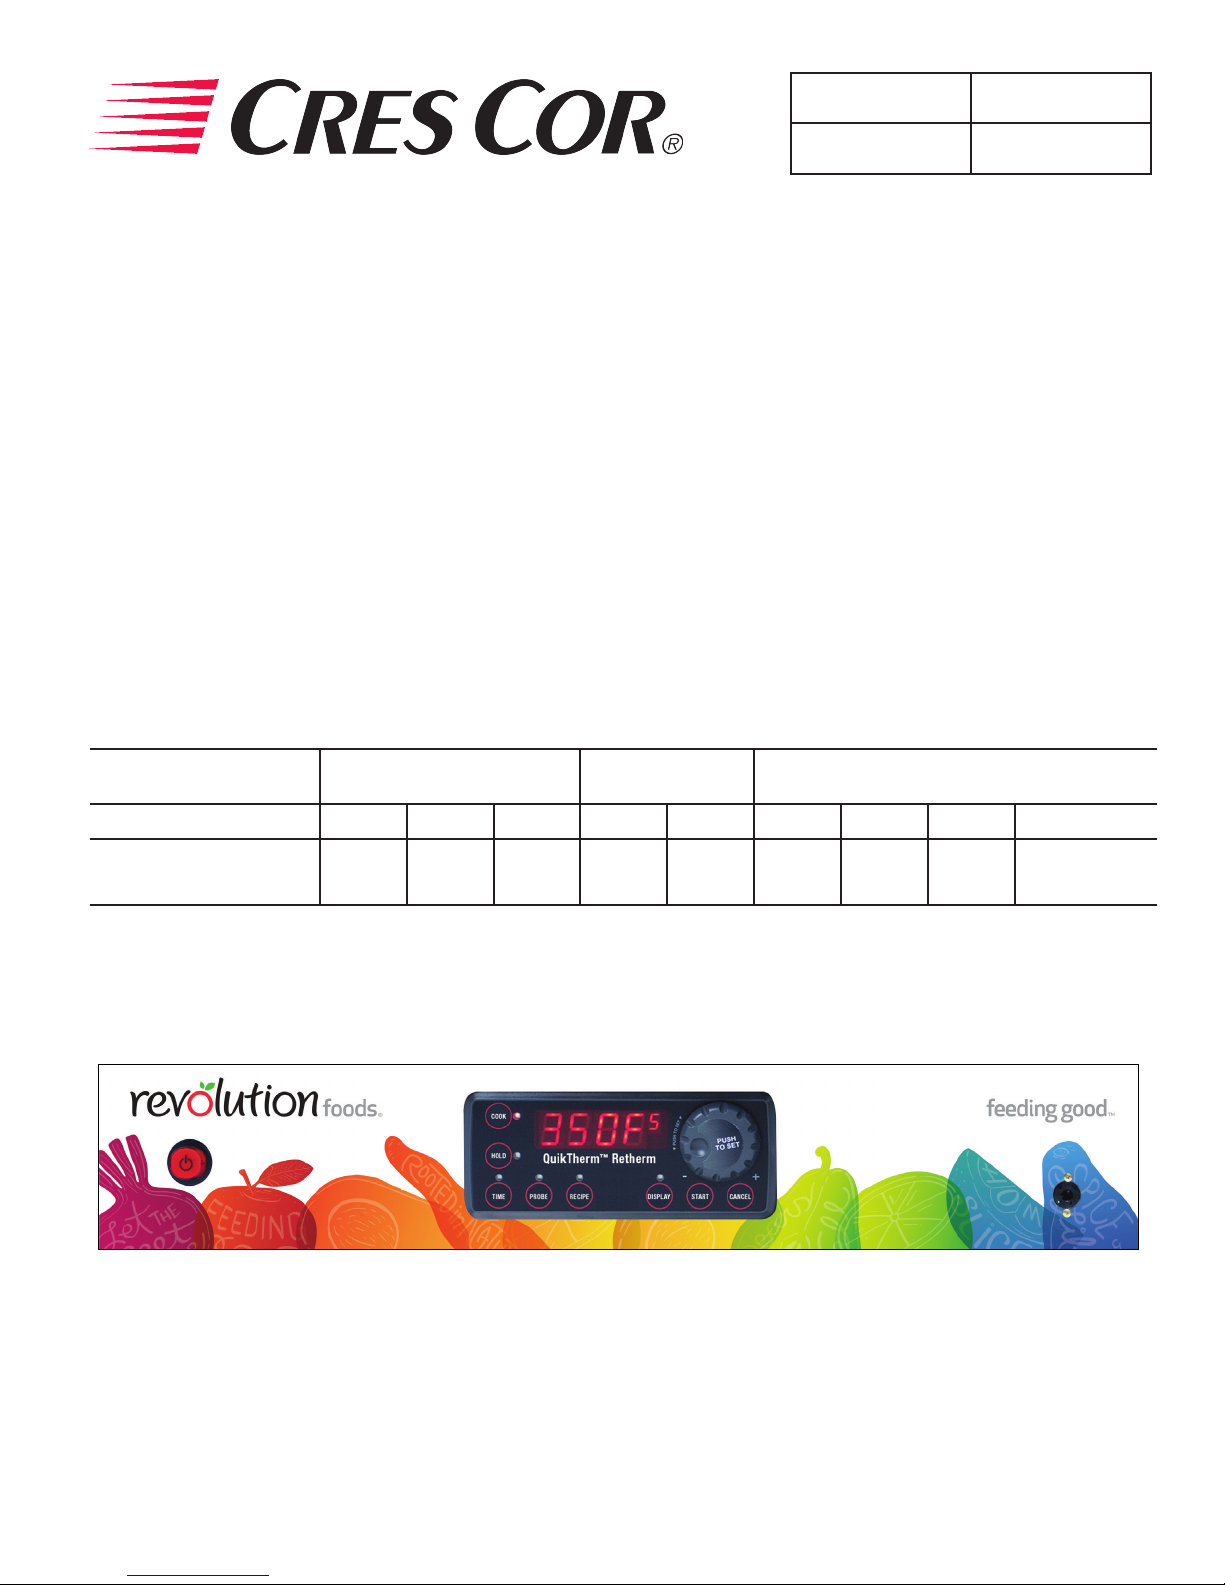
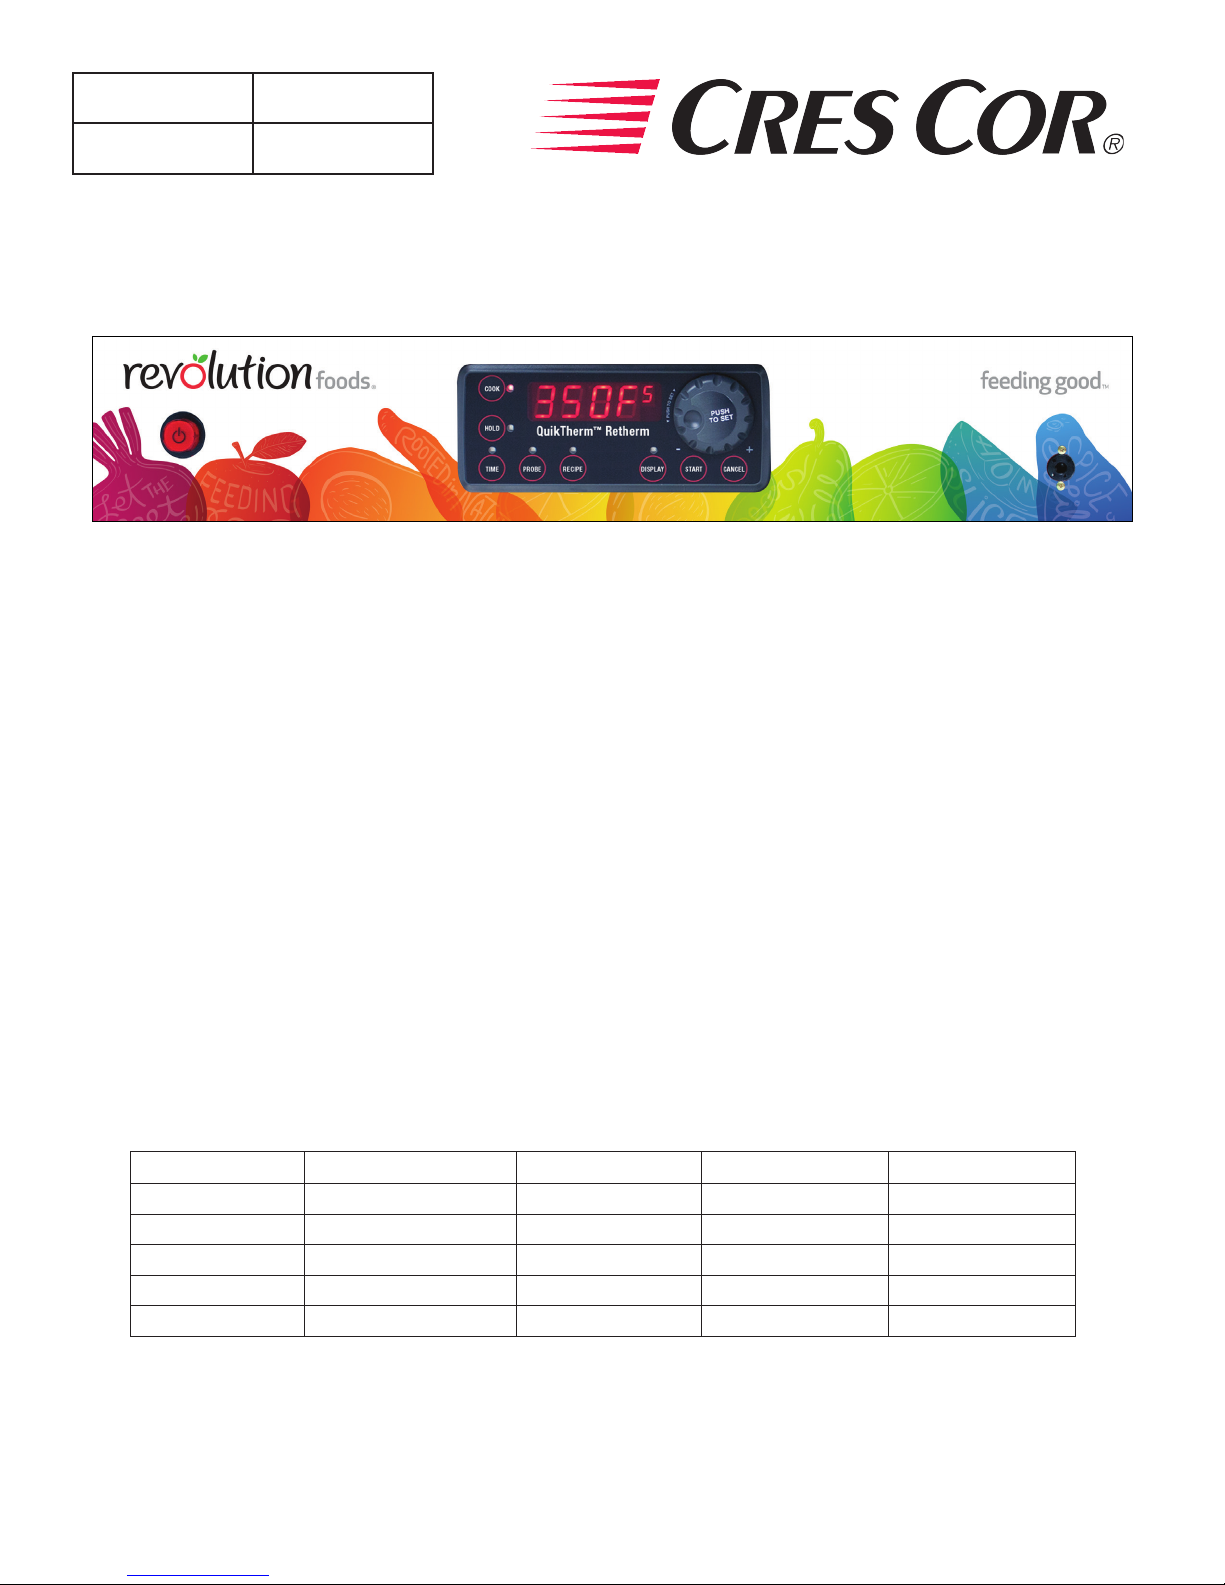
1. Push the POWER button on; the light will come on.
NOTE: The letters “LOTPR” (low temperature) will
show on the control display until it reaches 140°F
(60°C).
2. Press the COOK button.
3. Turn the SET control knob to show 350°F. Push the
SET knob to set the temperature.
4. Push the HOLD button. Turn the SET knob to 150°F
(65°C). Push the SET knob to set the temperature.
5. TIME button will light. Turn SET knob to one (1)
hour. Push the SET knob to set the time.
6. Push START button. Control will display “PREHT”,
then in approximately 15 minutes “READY”.
7. Push START button again to begin the cooking/burn
off process.
8. Turn the unit off and let cool. (Open door)
9. Wipe the inside clean with detergent and hot water.
COOKING WITH PRE-SET RECIPES:
The control can hold up to 18 saved recipes, 5 of them have been preset for different types of food product.
Recipe # Food Type
Recipe 1 Very delicate foods 225 135 20
Recipe 2 Delicate foods 250 135 25
*Recipe 3 Dense foods 270 135 35
Recipe 4 Vegetable #1 250 135 75
Recipe 5 Vegetable #2 250 135 110
Call Toll-free: 877-CRES COR (273-7267) • Fax: 800-822-0393 • www.crescor.com
Cook Temp (
°F) Hold Temp (°F)
Cook Time (min)
Page 5
Rethermalizer
FL-CO151027
5925 Heisley Road • Mentor, OH 44060-1833
OPERATING INSTRUCTIONS (continued)
COOKING WITH PRE-SET RECIPES:
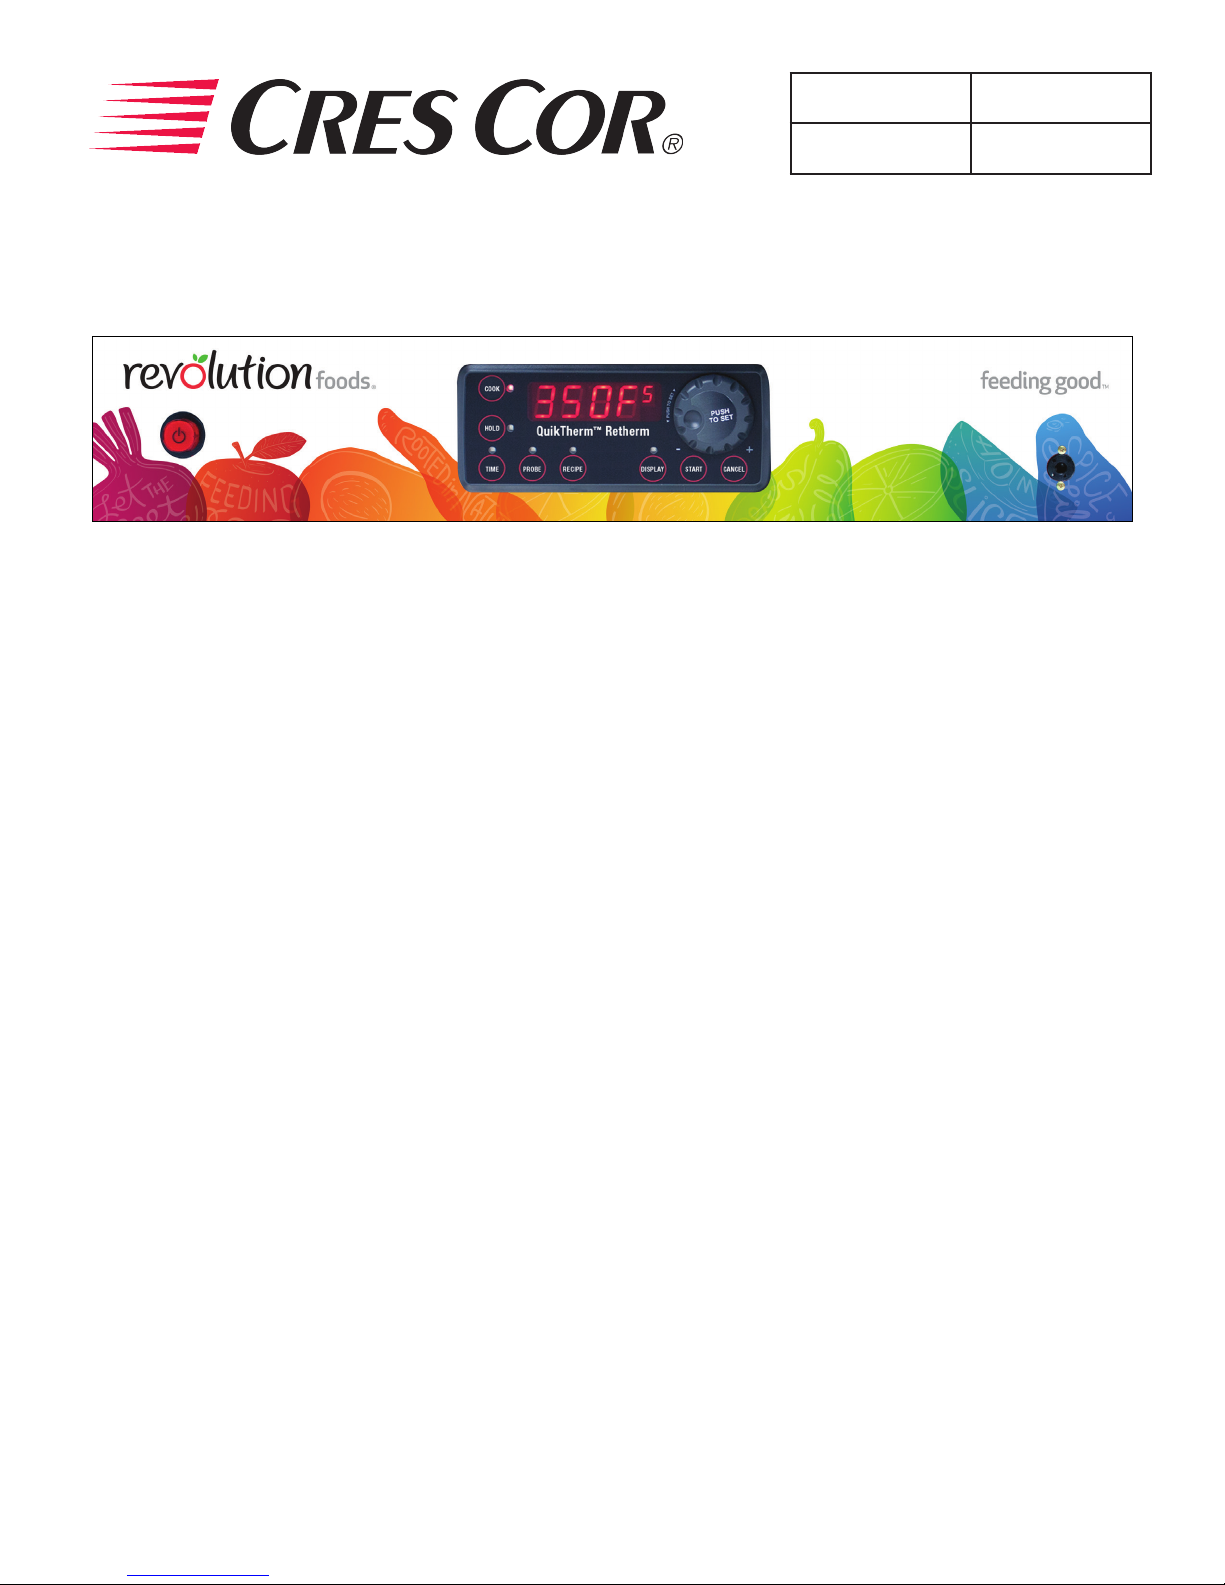
1. Push Orange Power On button. Left side of control
panel. Display will read “LOtPr” and the Retherm
unit will be in HOLD mode.
2. Push the “RECIPE” button to select Preset Recipe
process. Button will ash.
3. Turn the SET knob to select a recipe as: “rcP01” or
“rcP02” or “rcP03” or “rcP04” or “rcP05”. Push the
SET knob to select and start the preset process.
Unit will display “PrEHt”.
4. Control will next ash “PUSH StArt” and alarm
sounds. Load foods into the oven and close doors.
5. Push the “START” button to start the Retherm/Cook
process. Display will change between the set COOK
temperature and the countdown of the timer as preprogrammed.
6. When timer reaches display of “00:00”, it will change
between the set HOLD temperature and a count-up
running time. Alarm will sound. Retherm unit will
display how long foods have been on hold.
Rev. 1 (1/16)
5. Turn the set knob to the required temperature. Push the
set knob to accept the temperature setting.
6. Display will automatically move to the “TIME” button
(if no food probe is plugged into the probe jack).
7. Turn the set knob to the required time. Push the set
knob to accept the time setting.
8. Control will go to “PrEHt” and start heating to the set
COOK temperature.
9. Control will next ash “PUSH StArt” and alarm
sounds. Load foods into the oven and close door.
10. Push the “START” button to begin the Retherm/Cook
process. Display will change between the set COOK
temperature and the countdown of the timer.
11. When timer reaches display of “00:00”, it will change
between the set HOLD temperature and a count-up
running time. Alarm will sound. Unit will display how
long foods have been on hold.
Page 5 of 12
COOKING WITH TIME AND TEMPERATURE:
1. Push Orange Power On button. Left side of control
panel. Display will read “LOtPr” and the Retherm
unit will be in the HOLD mode.
2. Push “COOK” button on display panel to program a
Retherm temperature. Button will ash.
3. Turn the set knob to the required temperature. Push
the set knob to accept the temperature setting.
4. Display will move to the “HOLD” button. Button will
ash until programmed.
Call Toll-free: 877-CRES COR (273-7267) • Fax: 800-822-0393 • www.crescor.com
Page 6
Rethermalizer
FL-CO151027
Rev. 1 (1/16)
Page 6 of 12
5925 Heisley Road • Mentor, OH 44060-1833
OPERATING INSTRUCTIONS (continued)
COOKING WITH FOOD PROBES:
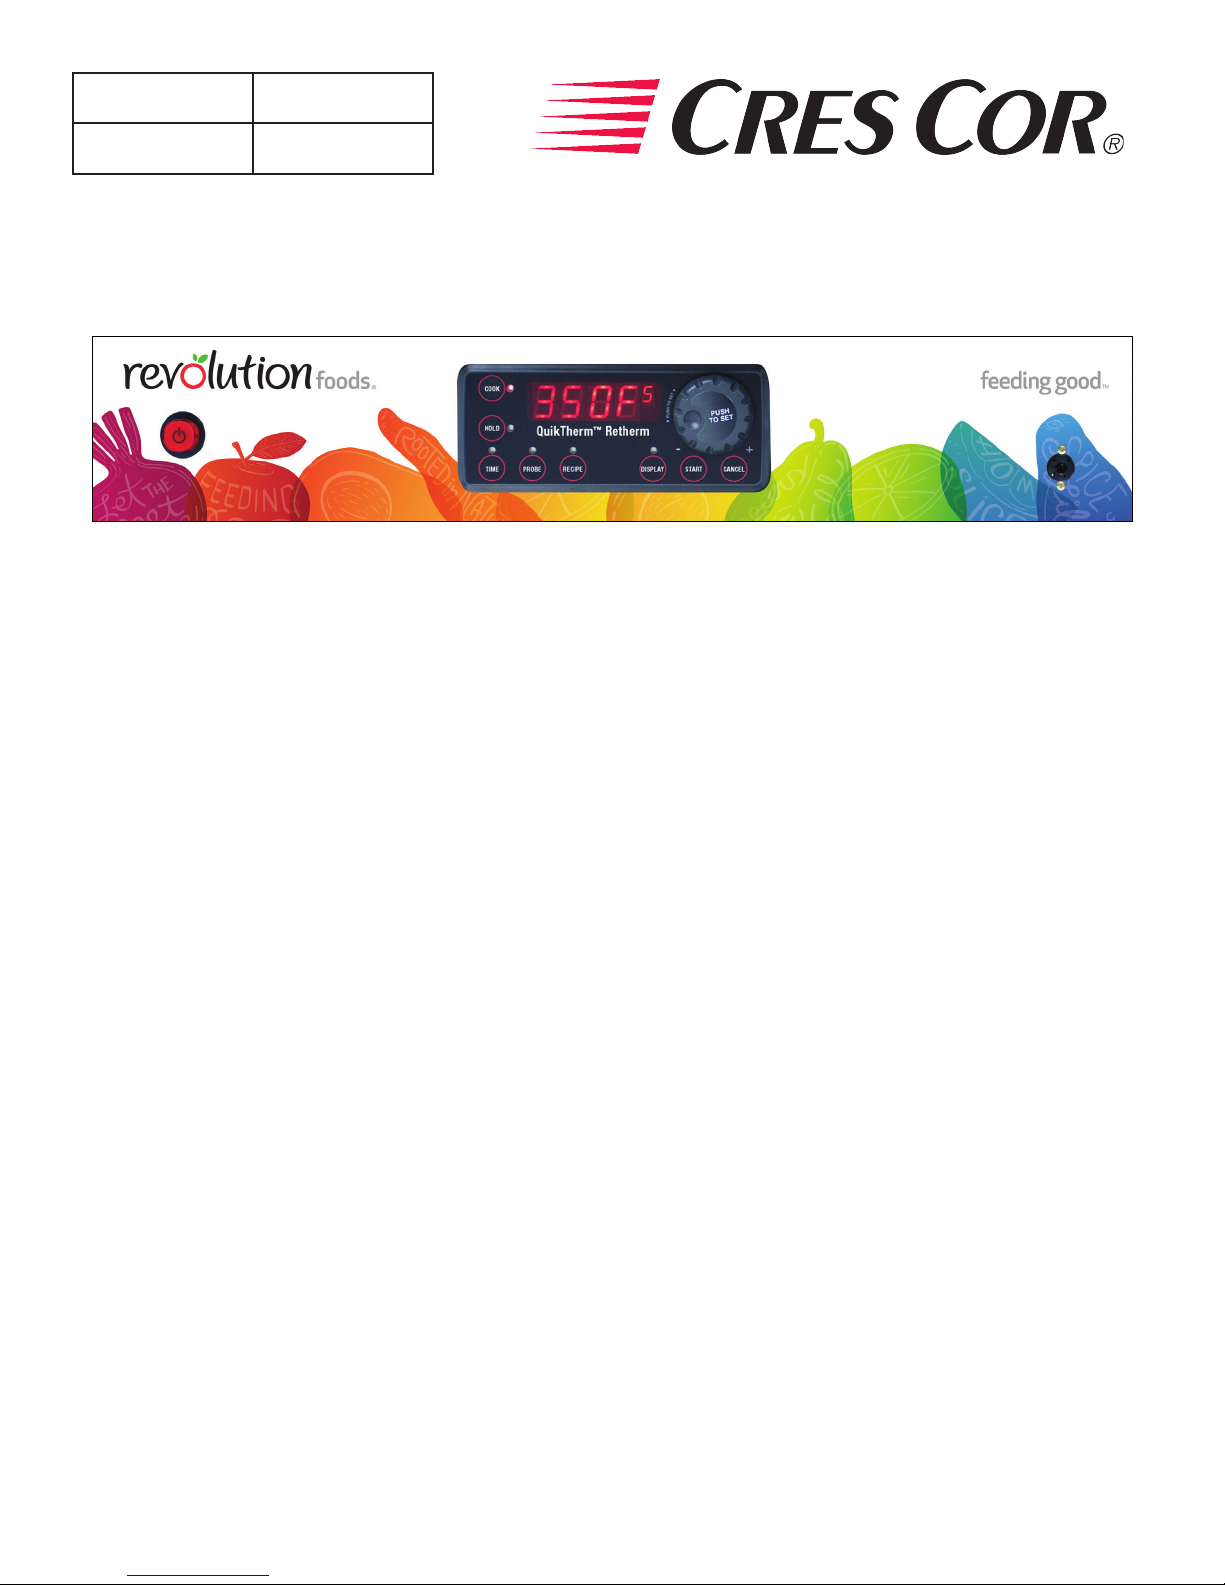
1. Push Orange Power On button. Left side of control
panel. Display will read “LOtPr” and Retherm unit
will be in HOLD mode.
2. Insert Food Probe into the probe jack on right side of
control panel. Must be done prior to programming
the control.
3. Push “COOK” button on display panel to program
Retherm temperature.
4. Turn the set knob to the required COOK/RETHERM
temperature. Push the set knob to accept the
temperature setting.
5. Display will automatically move to the “HOLD”
button.
6. Turn the set knob to the required HOLD temperature.
Push the set knob to accept the temperature setting.
7. Display will automatically move to the “PROBE”
button.
8. Turn set knob to the required internal food temperature
planned for stopping the COOK/RETHERM process.
Push the set knob to accept the setting.
9. Control will automatically go to “PrEHt” and start
heating to the set COOK temperature.
10. Control will next ash “PUSH StArt” and alarm
sounds. Load foods into the oven cavity, insert the
food probe into an item in the middle of a pan, in the
center of the oven and close the door.
11. Push the “START” button to begin the Retherm/Cook
process. Display will show the actual internal food
temperature.
12. When food probe reaches the set internal temperature,
the unit will automatically shift to HOLD and display
the set HOLD air temperature. The alarm will sound.
Notes: To check internal temperature during cooking
or holding, push the “DISPLAY” button.
To stop the cooking process and reset oven
controls, push the “CANCEL” button.
EMERGENCY NUMBER:
Call Tim Davis @ 443/ 848-7315
Call Toll-free: 877-CRES COR (273-7267) • Fax: 800-822-0393 • www.crescor.com
Page 7
Rethermalizer
FL-CO151027
5925 Heisley Road • Mentor, OH 44060-1833
MAINTENANCE INSTRUCTIONS
HOW TO CLEAN THE UNIT
WARNING
BEFORE cleaning the cabinet:
1. Unplug cord from wall. Allow cabinet to
cool.
2. Do NOT hose cabinet with water.
3. Do NOT get water on controls.
4. Do NOT use abrasives or harsh
chemicals.
5. Do NOT use “Cres Clean” (or any citrus
cleaner) on labels or plastic parts.
Rev. 1 (1/16)
Page 7 of 12
Cleaning Hints:
1. Use the mildest cleaning procedure that will do the
job.
2. Always rub in the direction of the polish lines to avoid
scratching the surface.
3. Use only a soft cloth, sponge, brous brushes, plastic
or stainless steel pad for cleaning and scouring.
4. Rinse thoroughly with fresh water after every cleaning
operation.
5. Always wipe dry to avoid water marks.
CARE & USE OF FOOD PROBES: DO’S & DON’TS
DO DON’T
1. Sanitize (clean) the stainless steel probe after every
use.
2. Wipe clean with soapy, damp cloth. Rinse with clear
water cloth.
3. Sterilize with food grade alcohol wipe prior to reuse
in another food item.
4. Pull/Remove the probe out of the food using the
plastic handle only.
5. Designate a proper storage place for probes like the
manager’s ofce.
1. NEVER remove probe from a food product and place
2. DO NOT submerge the plastic handle, wires or
3. NEVER pull on the wires to remove probe from food
4. Take care NOT to catch or bend the probe in the door
directly into new food items. Probe must be cleaned
and sanitized before reuse.
connector/plug into water. Clean as instructed with
soapy cloth and rinse with clean wet cloth.
products or the unit receptacle. Always use the plastic
handle or jack to insert and remove the probe from
the foods and unit itself.
closure. The probe is a sensitive measuring device
and should be replaced if damaged.
Call Toll-free: 877-CRES COR (273-7267) • Fax: 800-822-0393 • www.crescor.com
Page 8
Rethermalizer
FL-CO151027
Rev. 1 (1/16)
Page 8 of 12
TROUBLE-SHOOTING GUIDE, continued
HOW TO CLEAN THE UNIT:
SOIL CLEANER METHOD
ROUTINE CLEANING
CABINET
Inside and Outside
(Stainless Steel)
STUBBORN SPOTS,
STAINS
BURNT ON FOODS OR
GREASE
HARD WATER SPOTS &
SCALE
* Mild detergents include soaps and non-abrasive cleaners
5925 Heisley Road • Mentor, OH 44060-1833
MAINTENANCE INSTRUCTIONS
Soap, ammonia or mild
detergent* and water.
Mild abrasive made for
Stainless Steel.
Chemical cleaner made
for Stainless Steel.
Vinegar
1. Sponge on with cloth
2. Rinse
1. Apply with damp sponge or cloth.
2. Rub lightly.
Follow cleaner manufacturer’s
directions.
1. Swab or wipe with cloth.
2. Rinse and dry.
HOW TO ADJUST THE DOOR LATCH:
1. For vertical (up and down movement) adjustment:
a. Loosen (2) screws located in magnetic strike.
b. Move strike up or down for alignment to
magnet on latch.
c. Tighten screws to secure
TROUBLE-SHOOTING GUIDE
WARNING
IF UNIT GETS TOO HOT OR WON’T SHUT OFF, DISCONNECT
POWER AT BRANCH PANEL. DO NOT UNPLUG CORD!
If unit is NOT working, rst check the following causes:
1. Cord is unplugged from wall outlet.
2. Circuit breaker/fuse to wall outlet is blown.
2. For horizontal (greater or lesser magnetic draw)
adjustment:
a. Loosen (4) screws in door latch.
b. Move latch forward or backward to adjust
magnetism.
c. Tighten screws to secure.
3. Switch is turned off.
4. Fuse on back of unit is blown.
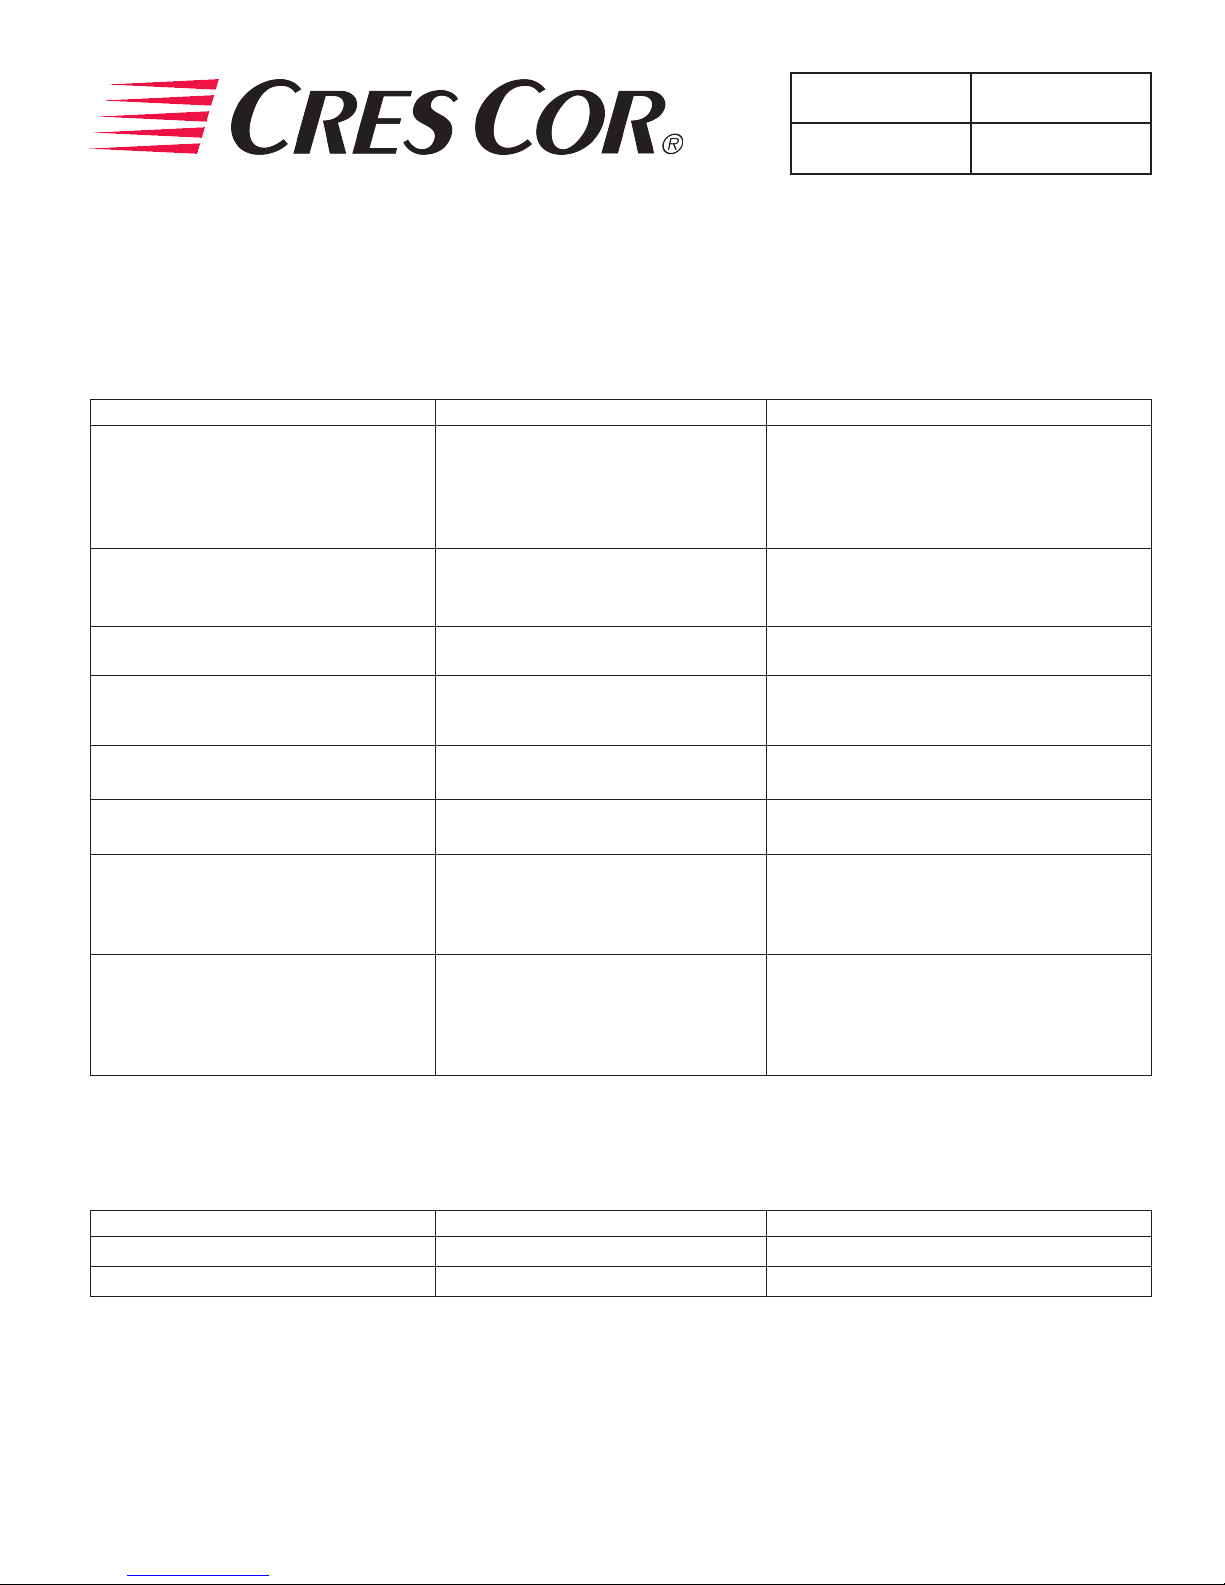
PROBLEM POSSIBLE CAUSE SOLUTION
Unit does not turn on
Call Toll-free: 877-CRES COR (273-7267) • Fax: 800-822-0393 • www.crescor.com
1. Power switch is bad
2. Thermostat control is bad.
1. Replace
2. Replace
Page 9
Rethermalizer
FL-CO151027
Rev. 1 (1/16)
5925 Heisley Road • Mentor, OH 44060-1833
MAINTENANCE INSTRUCTIONS
TROUBLE-SHOOTING GUIDE (continued)
IF THE RETHERMALIZER TURNS ON:
PROBLEM POSSIBLE CAUSE SOLUTION
1. Replace
2. Replace
3. Replace
4. Replace
5. Replace
1. Replace
2. Replace
1. Replace
2. Replace
1. Replace
2. Wait until it cools
Check “Heater will not shut off”
1. Replace
2. Replace
1. Cancel recipe and switch to “TIMED” mode
2. Replace
1. Cancel recipe and switch to “PROBE” mode
2. Plug in probe
3. Replace
4. Replace
1. Switch to “PROBE” mode
2. Set probe temperature to desired
temperature
3. Plug in probe
4. Replace
Unit does not heat, or doesn’t heat
properly
Blowers do not operate
Heater will not shut off
Vent fans do not shut off
Vent fans do not operate (See Note)
Control will not switch from “COOK” to
“HOLD” (timed mode)
Control will not switch from “COOK” to
“HOLD” (probe mode)
Control will not switch to “COOK” (probe
mode)
1. Sensor
2. Heater contactor
3. Loose wiring at heater contactor
4. Unit control
5. High Limit
1. Blower
2. Retherm control
1. Control defective
2. Heater contactor
1. Vent fan switch defective
2. Control compartment is still hot.
1. Vent fan switch defective
2. Vent fan defective
1. Unit is in “PROBE” mode.
2. Unit control defective
1. Unit is in the “TIMED” mode
2. Probe not plugged in
3. Probe defective
4. Unit control defective
1. Unit in “TIMED” mode
2. Probe temperature setting lower
than probe temperature
3. Probe not plugged in
4. Unit control defective
Page 9 of 12
ERROR CODES:
CODE DISPLAYED CAUSE SOLUTION
no p No meat probe Plug in probe
Err0 Temp probe bad Replace
NOTE: Vent fans will not operate until the control compartment requires ventilation to limit temperatures. Replacement
of electrical components must be done by a qualied electrician.
Refer to our Service Agency list, FL-1400 (found in the back of this manual), of authorized service centers.
Instructions for replacing parts are included in replacement parts list.
Call Toll-free: 877-CRES COR (273-7267) • Fax: 800-822-0393 • www.crescor.com
Page 10
Rethermalizer
FL-CO151027
Rev. 1 (1/16)
8
Page 10 of 12
5925 Heisley Road • Mentor, OH 44060-1833
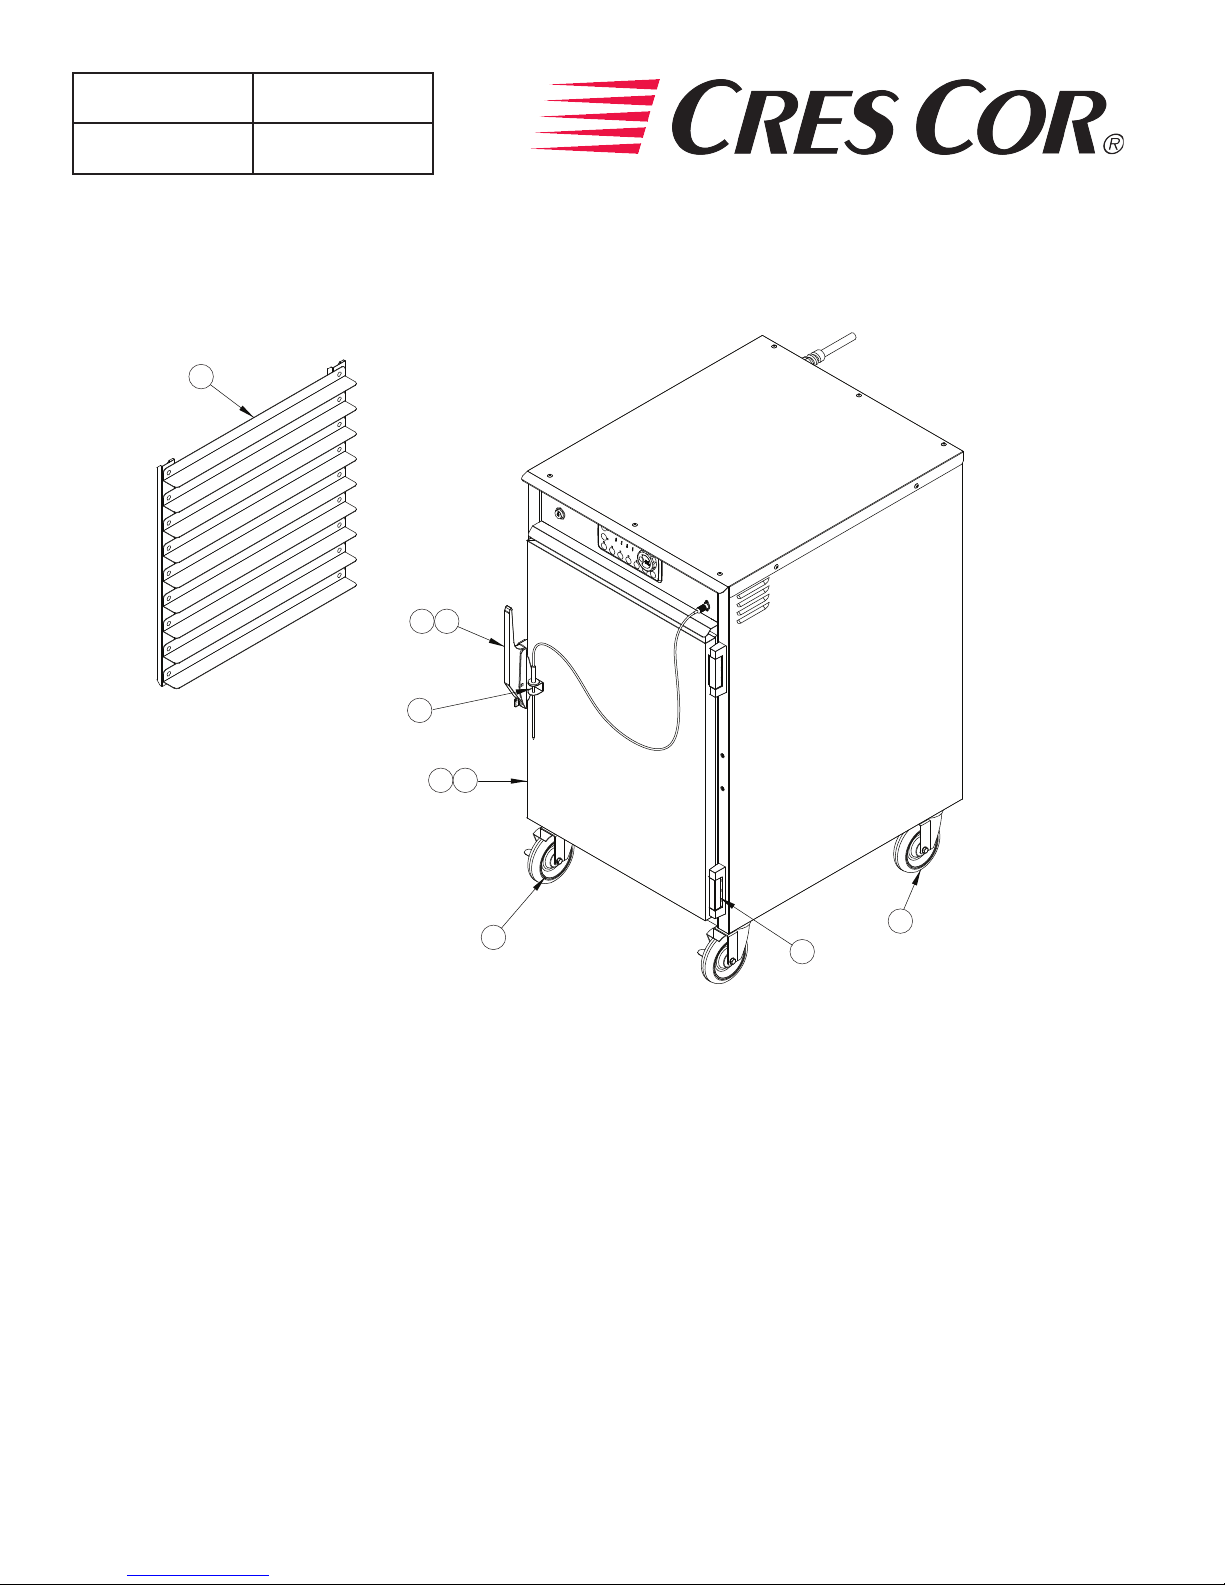
REPLACEMENT PARTS
Include all information on nameplate when ordering parts
1 2
9
4 5
7
Replacement Parts:
ITEM DESCRIPTION PART NUMBER
1. Door Latch Kit 1006-122-01-K
2. Door Strike Kit 1006-122-02-K
3. Door Hinge 0519-109-K
4. Door Assembly, Complete 1221-617-K
5. Door Gasket 0861-197-K
6. Casters 0569-306-K
7. Casters w/brake 0569-306-BK
8. Pan Slide Insert (Qty 1) 1104-119-REV
Air Tunnel (Qty 1) CO151026-03
9. Probe Holder 5456-049
6
3
Call Toll-free: 877-CRES COR (273-7267) • Fax: 800-822-0393 • www.crescor.com
Page 11
Rethermalizer
FL-CO151027
5925 Heisley Road • Mentor, OH 44060-1833
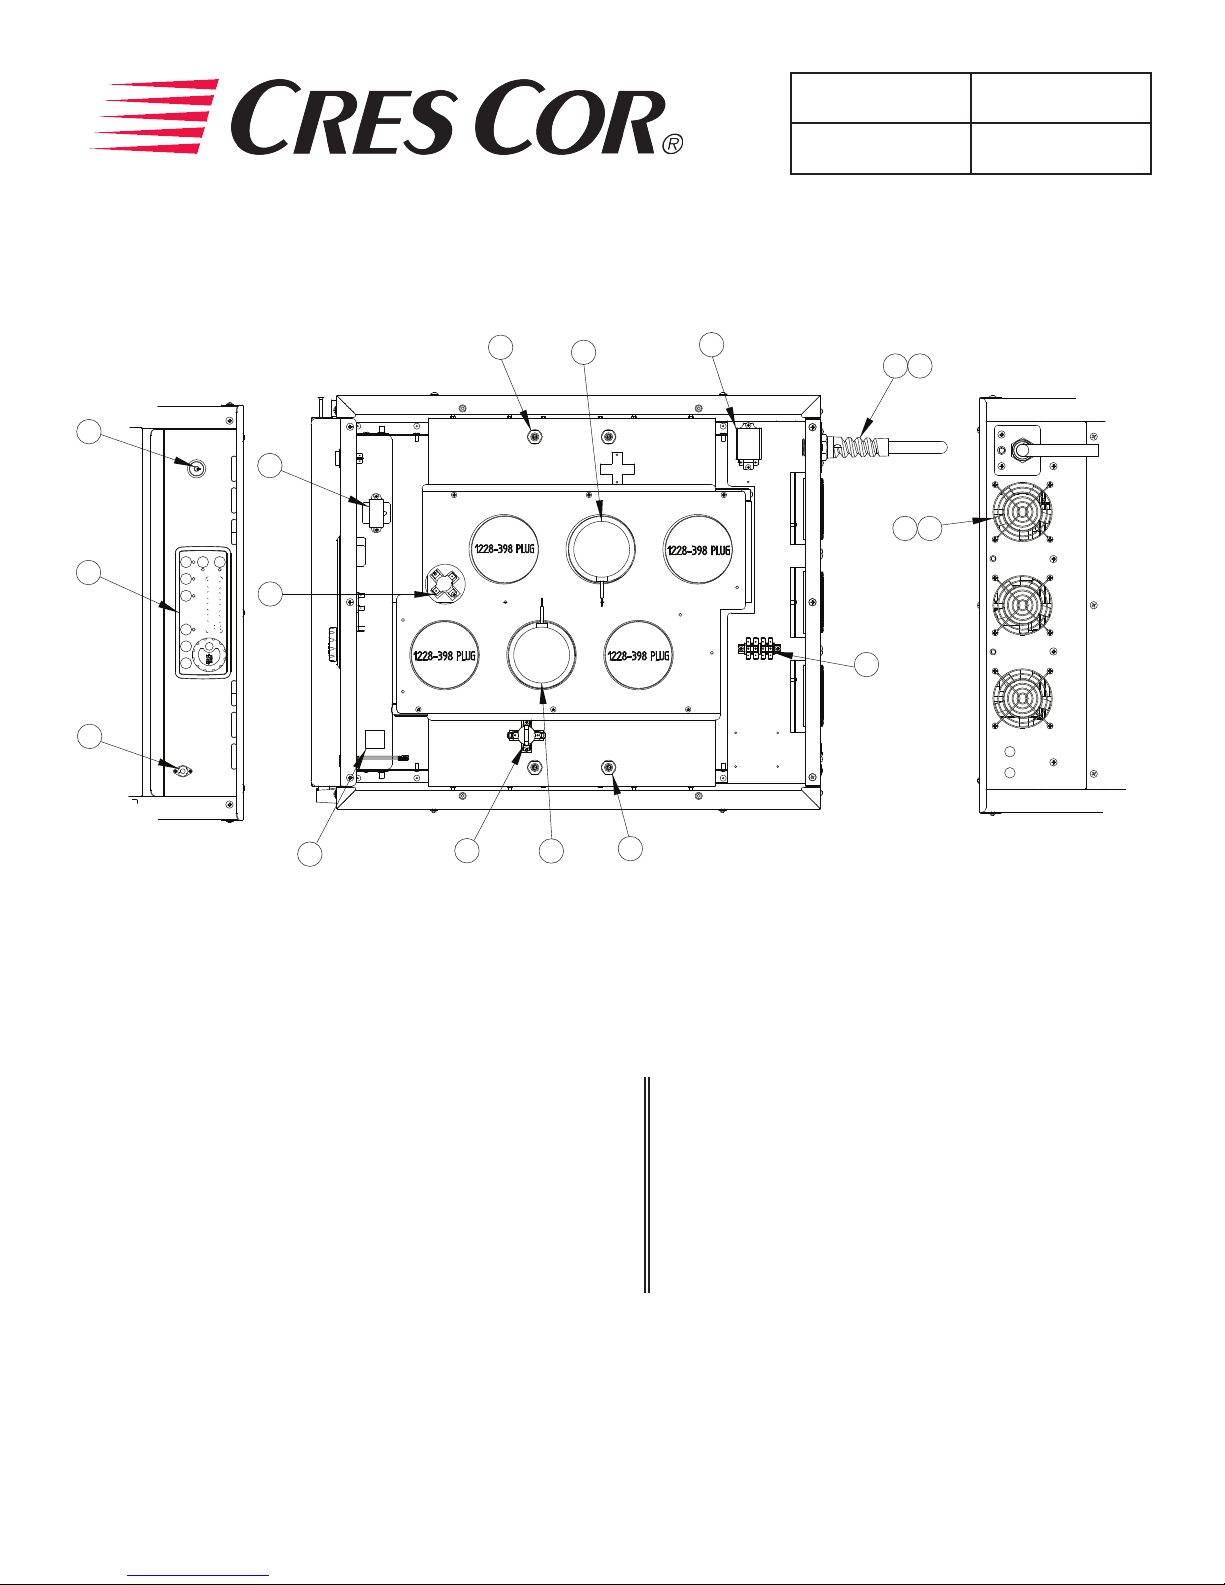
REPLACEMENT ELECTRICAL PARTS
Include all information on nameplate when ordering parts
13
1
10
2
11
Rev. 1 (1/16)
6
7
12
14
4 5
8
Page 11 of 12
3
15
9
6
TOP VIEW
WITHOUT COVER
13
REAR VIEWFRONT VIEW
Electrical Replacement Parts:
ITEM DESCRIPTION Part No. ITEM DESCRIPTION Part No.
1. Switch (On/Off) 0808-125 8. Terminal Block 0852-093
2. Retherm Thermostat Digital Control 0848-092-09-K 9. Hi Limit Switch 0848-077
Sensor
3. Probe Connector 0848-106-02 11. Fan Switch 0848-034
Food Probe 3” Long
4. Vent Fan 0769-165 13 Heater Kit, 120V 0811-074
5. Fan Guard 0769-167 14. Strain Relief 0818-050
6. Blower Kit 0769-180-SS-K 15. Alarm Assy 0908-009-01
7. Relay 0857-130
0848-091 10. Transformer 0769-197
0848-109 12. Power Cord, 2000W 0810-065-1
Call Toll-free: 877-CRES COR (273-7267) • Fax: 800-822-0393 • www.crescor.com
Page 12
Rethermalizer
TERMINAL BLOCK
EXTERNAL ALARM
FL-CO151027
Rev. 1 (1/16)
Page 12 of 12
5925 Heisley Road • Mentor, OH 44060-1833
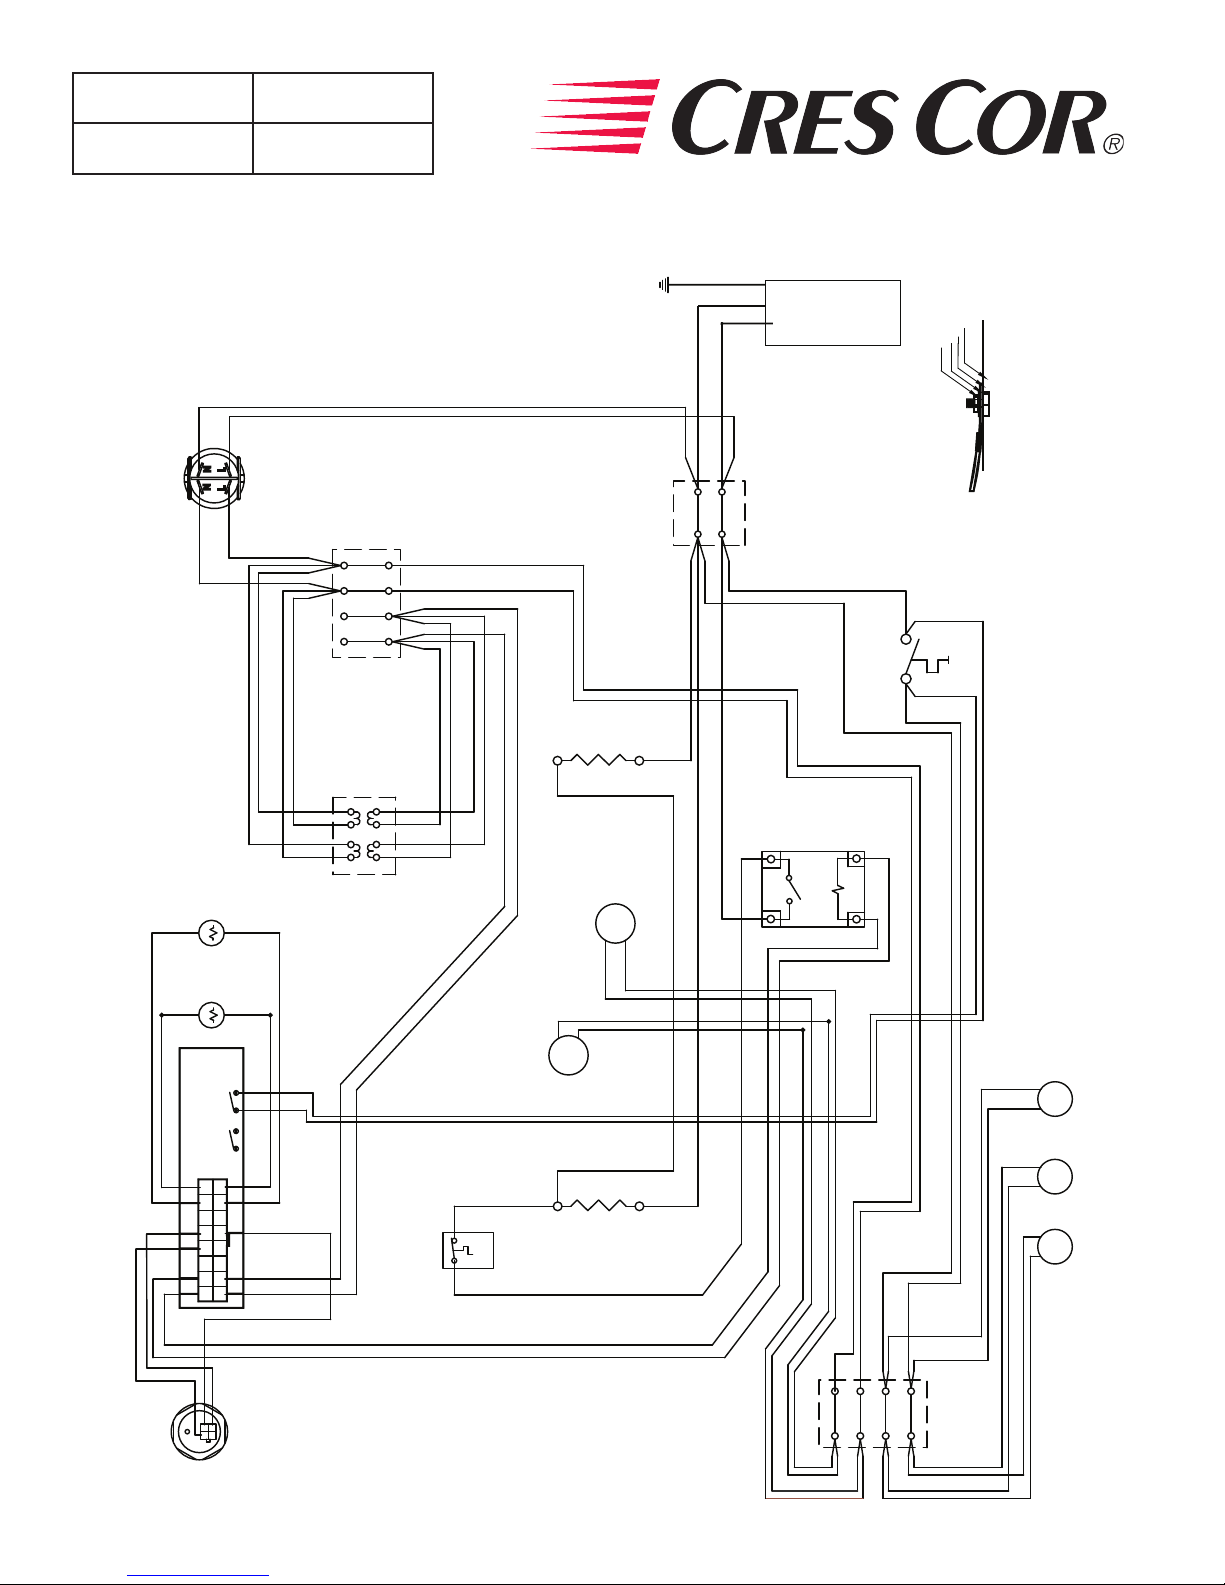
WIRING DIAGRAM - CO151026 120V 1 Ph RETHERMALIZER
Include all information on nameplate when ordering parts
GROUND*
POWER CORD
WHITE
6 AWG., 3 COND.
BLACK
2
1
L
N
N
L
POWER
SWITCH
(rear view)
4
3
TERMINAL BLOCK
5
6
2
TERMINAL BLOCK
10
11
19
1
9
7
18
HIGH TEMP
BLACK/BLACK
BROWN/BROWN
BLUE/ORANGE
WHITE/WHITE
WIRE COLORS:
TRIAD/HAMMOND
GREY/RED
YELLOW/GREY
RED/YELLOW
PURPLE/BLUE
14
17
NUT
*A lockwasher & nut (or
double nuts) are required on
ground bolt on top of cord's
9
22
closes @130F
23
8
LOCK WASHER
ground terminal.
CABINET BODY
TERMINAL
103
102
SOLID
STATE
15
AIR
PROBE
t°
MEAT
PROBE
t°
120VAC
~12VAC
TRANSFORMER
BLOWER
MOTOR
RELAY
T1
L1
20
MOTOR
BLOWER
12
A1(+)
A2(-)
13
21
FAN
VENT
22 23
K3 K1 K2
AIR TEMP
LOOKING AT REAR
RENAU CONTROL
FAN
8
16
7
15
6
14
101
5
13
4
12
3
12
11
2
10
1
9
10 11
13
101
103
102
2
1
3
4
16
15
500F
HIGH LIMIT
17
18
7
8
BLACK
WHITE
6
5
VENT
VENT
FAN
VENT FANS BLOW AIR INTO APPLIANCE
Call Toll-free: 877-CRES COR (273-7267) • Fax: 800-822-0393 • www.crescor.com
21
20
 Loading...