

Page 1
Designed and engineered
in the United Kingdom
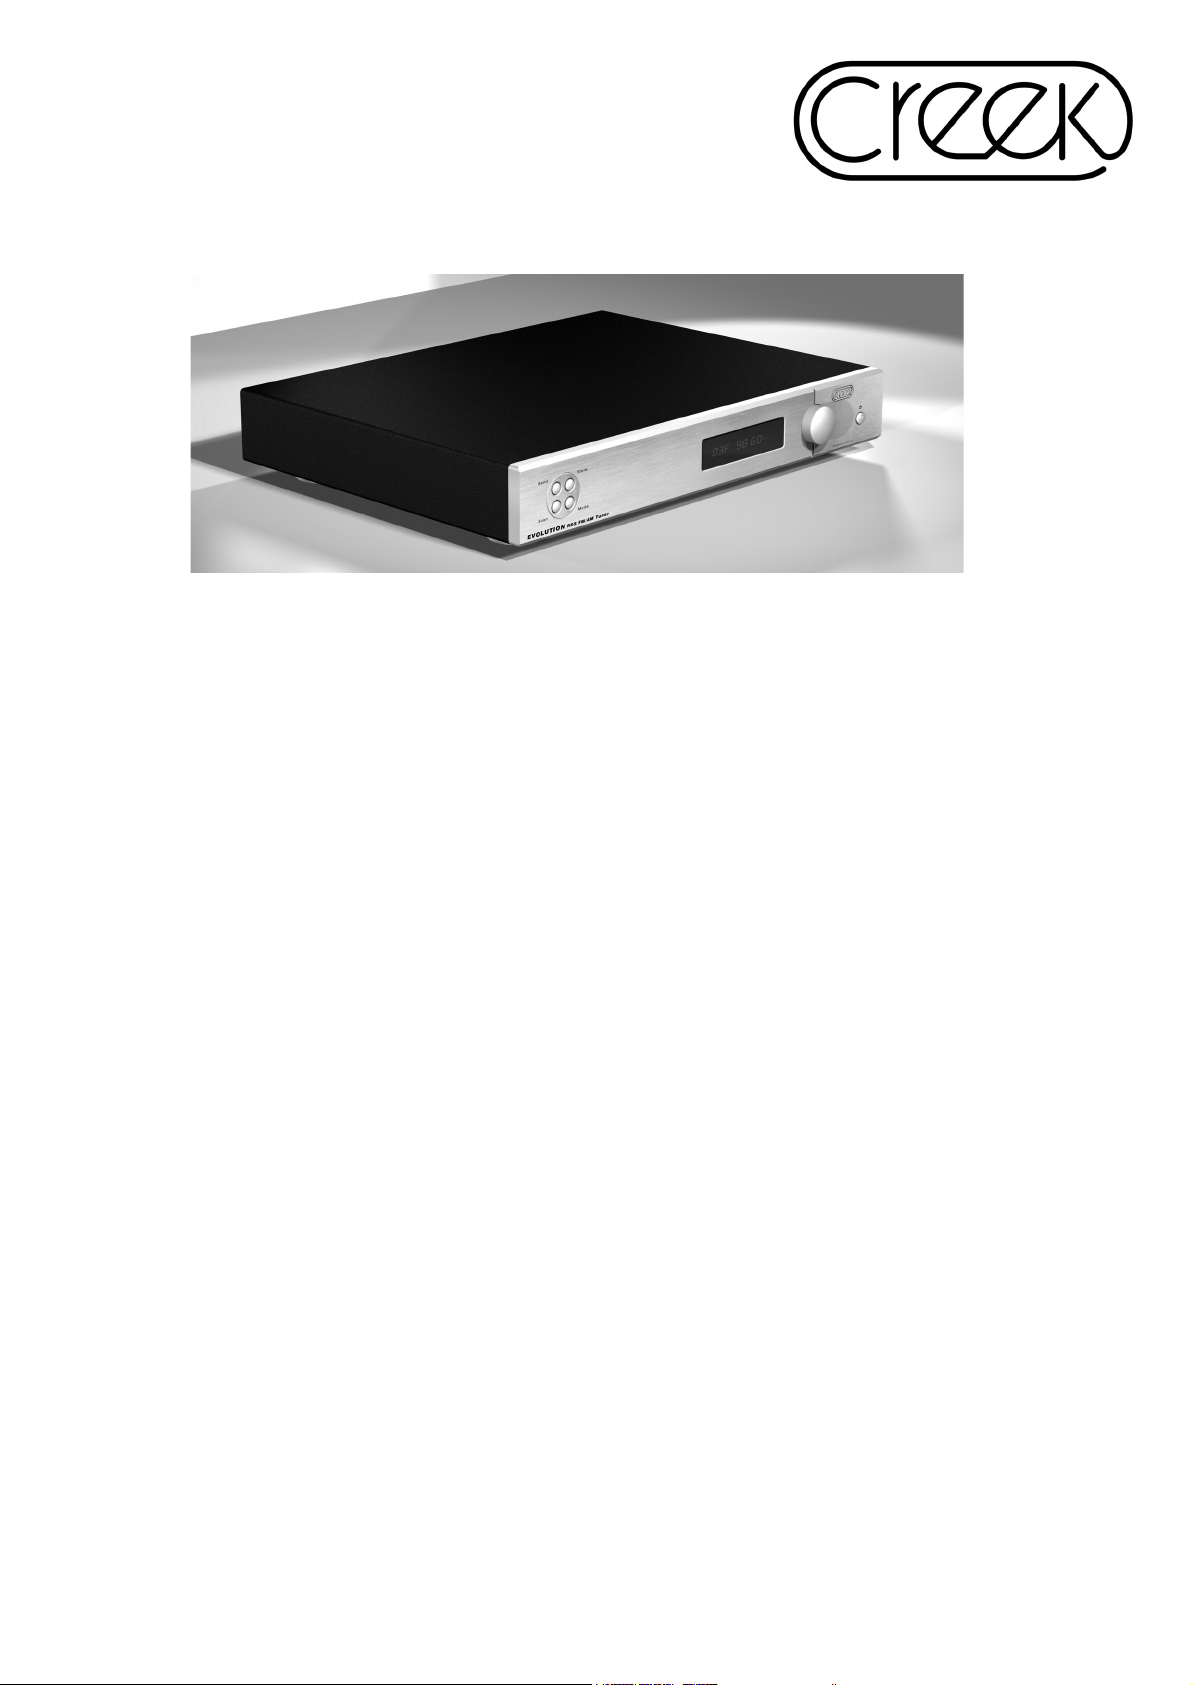
EVOLUTION
RDS AM/FM TUNER
Instruction Manual
Thank you for purchasing the Creek Evolution tuner. You are now in possession of a State of the Art RDS AM/FM tuner.
The Evolution is the matching tuner for the Evolution Integrated Amplifier and CD Player, although it will also work very well
with any other manufacturers’ amplifiers. The functions and operation of the Evolution tuner are deceptively simple for the
many features that it offers, all of which can be remotely controlled.
SAFETY REQUIREMENTS
Read all the instructions before connecting or operating the unit. Keep this manual so you can refer to these safety
instructions.
WATER & MOISTURE
To reduce the risk of fire or electric shock, do not expose the unit to moisture or water. If the unit is exposed to moisture,
immediately disconnect the power cord from the wall. Take the unit to an authorised service centre for inspection. Do not
touch the unit, power cord, or plug with wet hands.
VENTILATION
You must allow 5 cm (2 inches) of unobstructed clearance around the unit. Do not place the unit on a bed, sofa, rug, or
similar surface that could block ventilation from the bottom.
HEAT
Keep the unit away from naked flames, radiators, stoves, or any other heat-producing appliances (including amplifiers).
RACK & STANDS
Place the unit on a fixed, level surface strong enough to support its weight, such as the Creek Audio Rack. Do not place
it on a moveable device that could tip over.
CLEANING
Unplug the unit from the mains supply before cleaning. The case should normally require only a wipe with a soft lint-free
cloth.
POWER SOURCES
Only connect the unit to a power supply of the type and voltage described in the operating instructions or specified on the
rear panel of the unit.
POWER CORD PROTECTION
Connect the unit to the power outlet only with the cord supplied. Do not modify the supplied cable in any way. Do not
attempt to defeat grounding and/or polarisation provisions. Do not use extension cords. Do not route the power cord
where it will be crushed, pinched, bent at severe angles, exposed to heat, or damaged in any way.
NON-USE PERIODS
If the unit is to be left unused for a long period of time, the power cord should be unplugged from the wall outlet.
Page 1
Page 2
SAFETY REQUIREMENTS cont’d.
DAMAGE REQUIRING SERVICE
Stop using the unit immediately and have it inspected by an authorised service centre whenever:..
1. The power supply cord or plug has been damaged.
2. Liquid has been spilled into the unit.
3. The unit has been exposed to rain.
4. The unit does not operate properly.
5. The unit has been dropped or damaged.
6. Smoke or any unusual smell is detected from the unit.
CAUTION:
TO REDUCE THE RISK OF ELECTRIC SHOCK, DO NOT REMOVE COVER. NO USER-SERVICEABLE PARTS INSIDE.
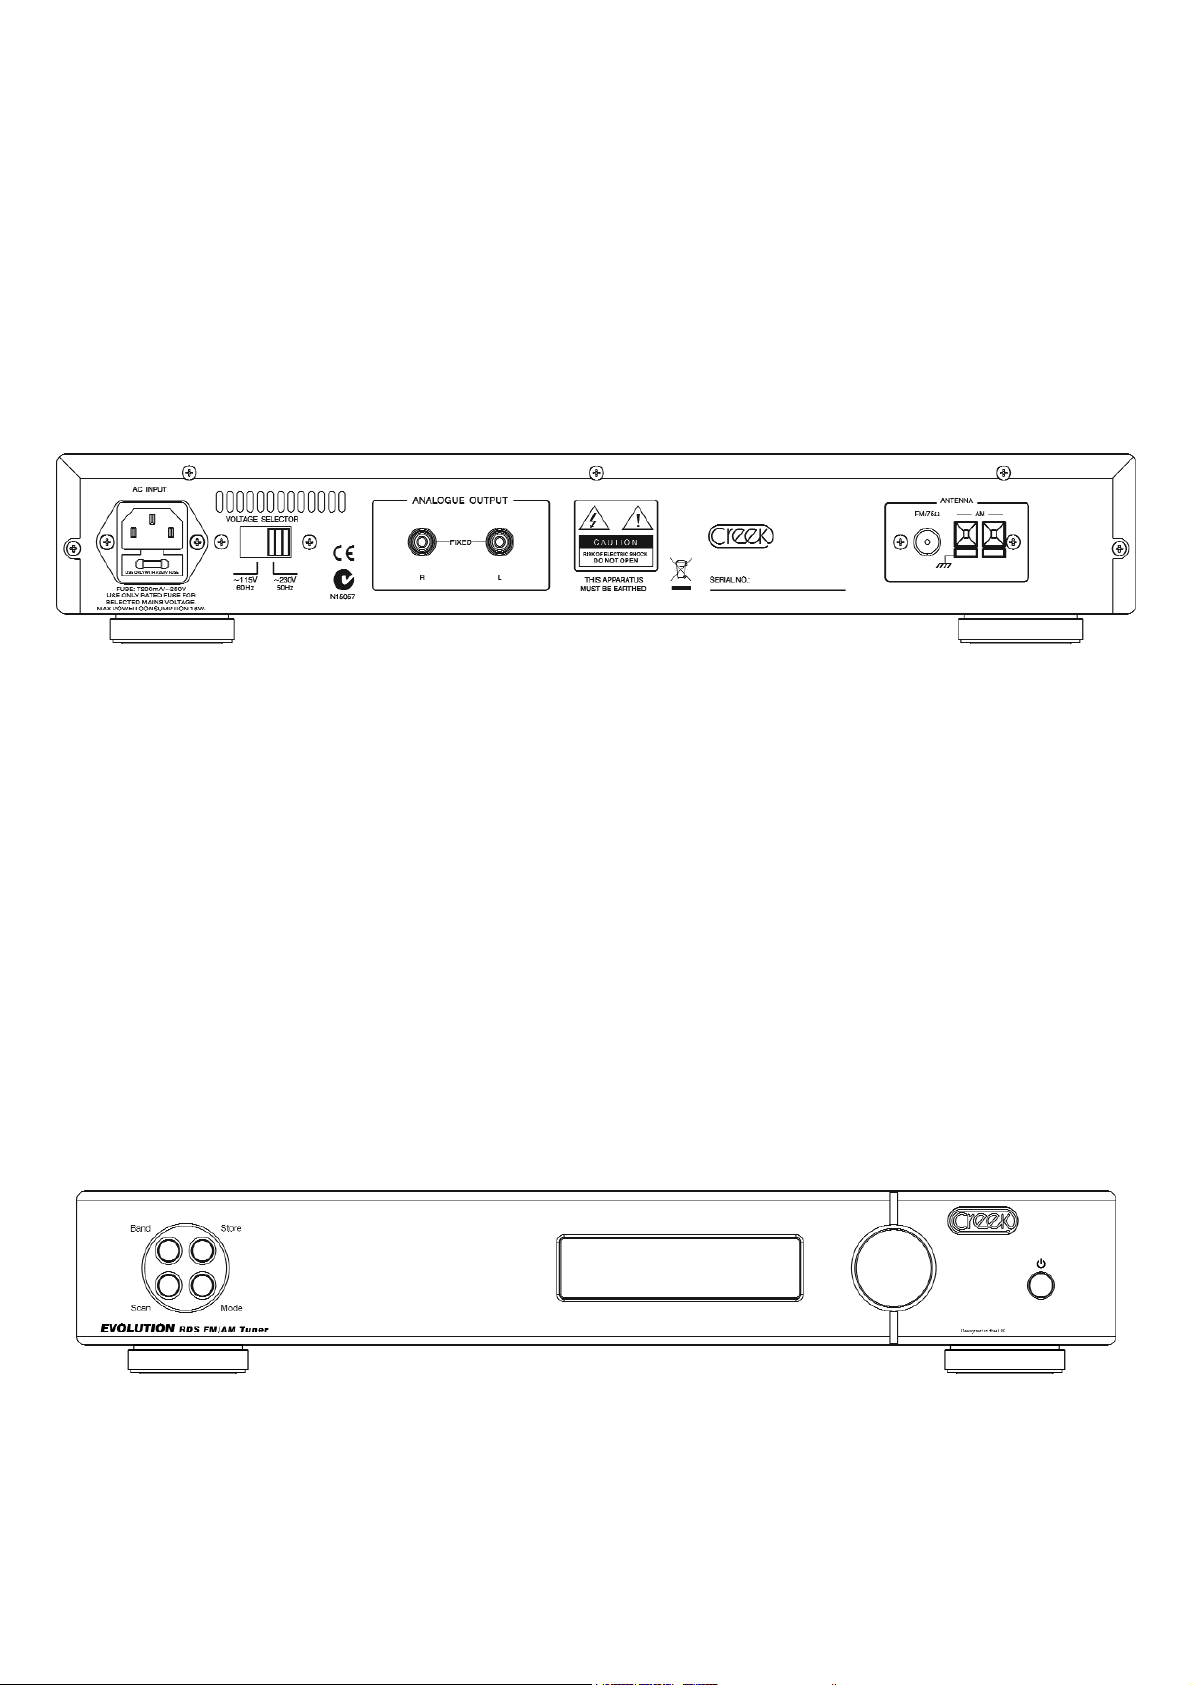
REAR PANEL
CONNECTING TO OTHER EQUIPMENT
INTERCONNECT CABLES
To connect the tuner to an amplifier an interconnect cable is required. Any cable of reasonable quality terminated with RCA
plugs will be suitable. Please consult your dealer if you are unsure.
AUDIO OUTPUT
These outputs are located on the back of the Evolution Tuner and are labelled ANALOGUE OUTPUT. Connect these
outputs to the amplifier's tuner input. Match the Red interconnect lead to the R-ANALOGUE OUTPUT and the White
interconnect lead to the L-ANALOGUE OUTPUT.
ANTENNA
One FM and one AM antenna are supplied. Connect the AM (two wire loop) antenna to the AM antenna clips on the rear
panel. Connect the FM antenna (single piece of wire) to the FM 75 Ohm connection on the rear panel. To obtain the best
FM or AM signal use a high quality directional external antenna. If in doubt consult your supplying dealer for advice.
MAINS CONNECTION
Check that the power button on the front of the unit is in the off position. Push the plug (IEC line socket) of the power cable
supplied with the Evolution Tuner into the socket (AC IN) on the rear of the unit. Make sure it is pressed in firmly. Plug the
other end of the power cable into an AC wall outlet.
FRONT PANEL
FRONT PANEL CONTROLS & OPERATION
POWER
Press this button to turn the tuner on and off.
TUNING
Turn the knob left or right to manually fine tune stations after switching Mode to tuning. When tuned to the maximum
frequency, it is possible to go to the minimum frequency quickly by continuing to turn the knob clockwise. The frequency
will flip to the bottom 87.5Mhz on FM.
Page 2
Page 3

PRE-SET
Steps up or down through pre-set stations by turning the knob on the right after switching Mode to Pre-set. When using
Pre-set mode, after reaching the last stored station in FM, the tuner will flip to any stored stations in AM, then back to FM
if the knob is turned back or forward through all of the stored AM stations.
MODE
Press this button to select manual tuning or pre-set mode, when using the 32mm knob on the right of the panel. The
button toggles between the 2 functions and the display will either show the pre-set station number, say 12F, for the station
pre-set 12, or it will show 00F at the beginning to indicate free tuning and not pre-set.
SCAN
Press to scan up the radio dial from the lowest frequency. Press once to automatically search for the next tuned (strong)
station If you want to keep it press the memory button once. The letters Mem will flash in the display and the next
available pre-set number will be shown.If you still want to keep it, press the memory button again.
STORE
Use to set a station pre-set. Tune to the station you wish to save as a pre-set. Press the STORE button. The band (FM
or AM) and a pre-set number will be displayed and begin to flash. Turn the tuning/preset knob on the front panel until the
desired number is displayed. Press the STORE button again to save the station and corresponding preset. Any number
1- 80 can be used for AM or FM pre-sets. Pre-sets can be set faster by using the remote control.
BAND
Press to toggle through FM auto/stereo, FM mono, and AM bands. FM auto/stereo is shown by the appearance Auto and
Stereo at the top of the display. Auto will disappear and Mono will change to Stereo when a station is tuned in stereo and
the signal strength is great enough to support it, noise free.
USING THE REMOTE CONTROL
Note: Install the two AAA batteries supplied with the remote control.
The Evolution handset is a system remote control and therefore not all buttons control the Evolution tuner. To use the
remote control with the Evolution tuner make sure the CD/TUNER button is in the up position. Buttons that function with
the tuner are shown in green type on the handset. CD player buttons are shown in grey against a black background. Some
buttons are dual use and will have both grey and green descriptions. Refer to the Evolution CD manual for CD player
button descriptions. Do not place anything in front of the display area of the unit, or the remote control may not work.
BUTTONS NUMBERED 0-9
Allow direct access to station pre-sets. To select a pre-set station, press the corresponding numbered button/s. In a few
moments, the tuner will automatically move to the pre-set entered.
SCAN
This button does not function with the Evolution tuner.
REP/--
Press to directly tune to a station. Enter the station's frequency using the buttons numbered 0-9. The keystrokes for
entering the station's frequency are different for AM and FM stations, see below.
Please note; the tuner must be on the desired band (AM or FM) of the station you are trying to select. If it is not, select the
appropriate band prior to proceeding.
TUNING
Press to tune up or down the radio dial. Press and hold to automatically search up or down to the next tuned (strong)
station.
PROG/MEM
Use to set a station pre-set. Tune to the station you wish to save as a pre-set. Press the MEMORY button. The band (FM
or AM) and a pre-set number will be displayed and begin to flash. Use the buttons numbered 0-9 to select a preset
number or press the preset button on the remote control to select a preset number. Press PROG/MEM again to save the
station and corresponding preset. Any number from 1-80 can be used for AM or FM presets.
DISPLAY
Press the display button to choose between three levels of brightness on the display.
AUTO
Press to automatically select and store all stations that are available in your area into the tuner's memory, in all wavebands.
To avoid accidentally doing this if you have already stored all your required selection manually, the Auto function requires
the button to be pressed for 3 seconds or more to enable it.
Page 3
Page 4

WARRANTY
If within two years of purchase date your Evolution Tuner proves to be defective for any reason other than accident,
misuse, neglect, unauthorised modification, or fair wear and tear, Creek Audio Ltd. will, at its discretion, replace the faulty
parts without charge for labour or return carriage within the U.K. This warranty is valid only in the U.K. and given in
addition to statutory rights. Service enquiries outside the U.K. should be addressed first to the supplying dealer and/or the
Creek distributor/importer. Warranties granted in these countries are entirely at the discretion of the distributor. Distributor
details can be found by visiting the Creek Audio website.
TECHNICAL SPECIFICATIONS
FM
Frequency range 87.5 - 108.0 MHz
Frequency response 15Hz to 12kHz +/- 1dB
Usable sensitivity at 30dB S/N = 30dB 90MHz FM = 9dBu
Selectivity (IHF) 30dB
Signal to noise ratio @90MHz, 60dBu and 75kHz mod = 56db
Distortion (mono) 40 kHz mod = 1%
Stereo separation @ 1kHz 40dB mod = 39dB
Output level @ 75kHz mod = 1.2 V RMS
Number of pre-sets 80 for AM and FM
AM
Frequency range 520 - 1720 USA 531 - 1620 Rest of World
Usable sensitivity at 20dB S/N and 30dB mod = 36dB
S/N ratio at 30dB mod = 36dB
Distortion @ 30dB mod = 1.2%
Output level 1.0V RMS
Number of pre-sets 80 for AM and FM
Power dissipation 230/115V 15 Watts maximum
Size W x H x D 430 x 75 x 330 mm (17” x 3” x 13”)
Weight 5 kgs (11 lbs)
Supplied Accessories
Mains lead
Remote control with 2 AAA batteries
FM antenna - piece of wire
AM antenna - 2 wire loop antenna
USA This product complies with FCC requirements
Europe CE
China CCC
Australia C Tick
Creek Audio Limited
12 Avebury Court
Mark Road
Hemel Hempstead HP2 7TA
England
Tel: +44 (0) 1442 260146
Fax:+44 (0) 870 6220846
Email: [email protected]
URL www.creekaudio.com
 Loading...