

Page 1
Page 2
Page 3
Page 4
Page 5
Page 6
Page 7
Page 8
Page 9

Page 10

1. For Our Loyal Users
Hello! Thanks for using CretiveXP
products, it is our greatest pleasure to
serve you and your recognition &
support is our motivation!
Before using the rearview mirror CAR
DVR, please read this guide carefully. In
addition, due to production date,
different batches, instructions may
differ from the actual use of the product.
If you have any suggestions or questions
don’t hesitate to contact us at
[email protected] or (646) 626
5579!
Thank you for your support again, but
also sincerely hope that your feedback
will help us improve our products every
year. Finally, we sincerely wish you all
the best & quiet moments on the road!
Page 11
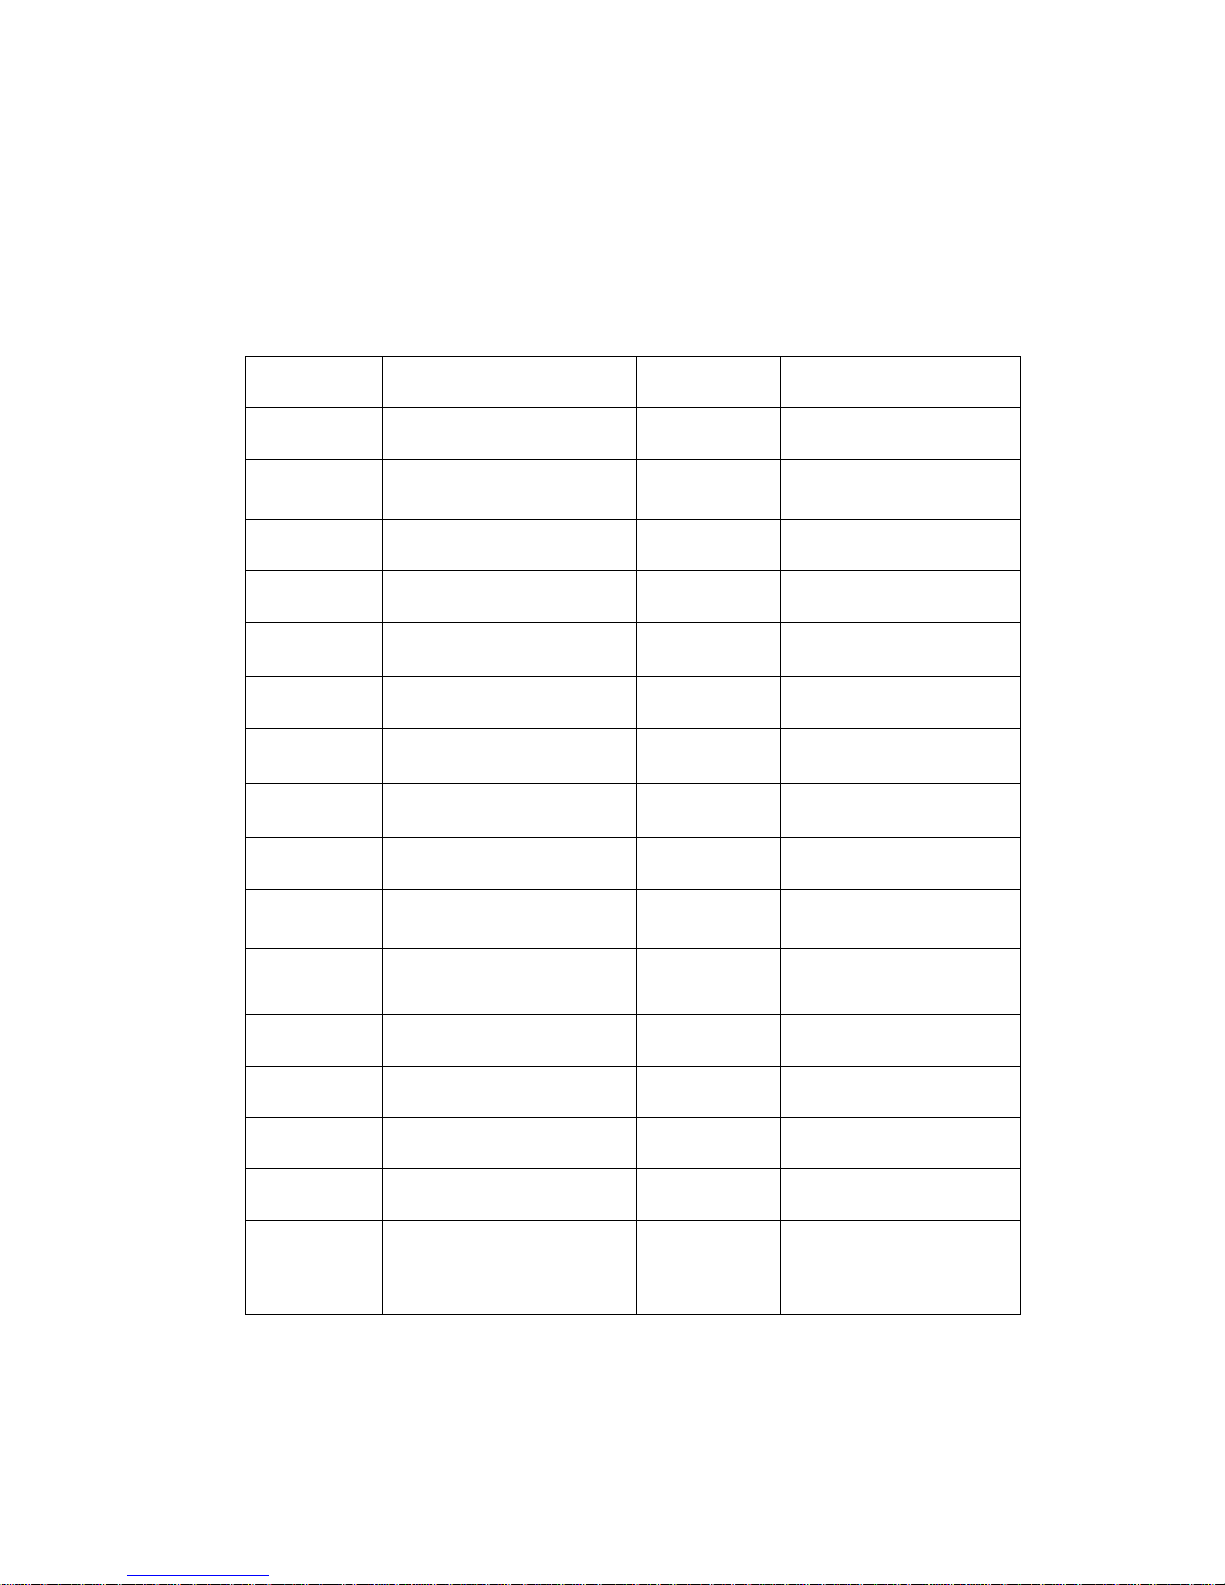
2. Product specification
Model
XP PRO1
language
Support multilingual
languages
Photo pixel
12 million
Active Picture
Element
5 million
Picture
format
JPEG
Video format
MOV
Screen size
5.0 inch
Camera lens
Front and back double
lens
Shooting
angle
First 170 degrees and 140
degrees
Lens aperture
F2.0
processor
MSC8328P
Core number
Dual core
Lens aperture
F2.0
Memory card
memory
Maximum support 32G
Icon sensor
5 million pixel COMS
Photo format
16 million pixels
RAM
Built-in 512M
ADAS
Support
Night Vision
Light night vision / light
night vision
Music play
NO
Orbit
migration
Support
Vmd
Support
Reversing
image
Support
Circular video
Support
Delayed
shutdown
Support
Gravitational
induction
Support
Recording
function
Support
Parking
monitoring
Support
GPS
trajectory
Support ( Optional )
HDR
Support
Power Supply
5V/2.0A
Working
humidity
15-65%RH
Battery
capacity
500MA
working
temperature
-20° to 70°C
Page 12
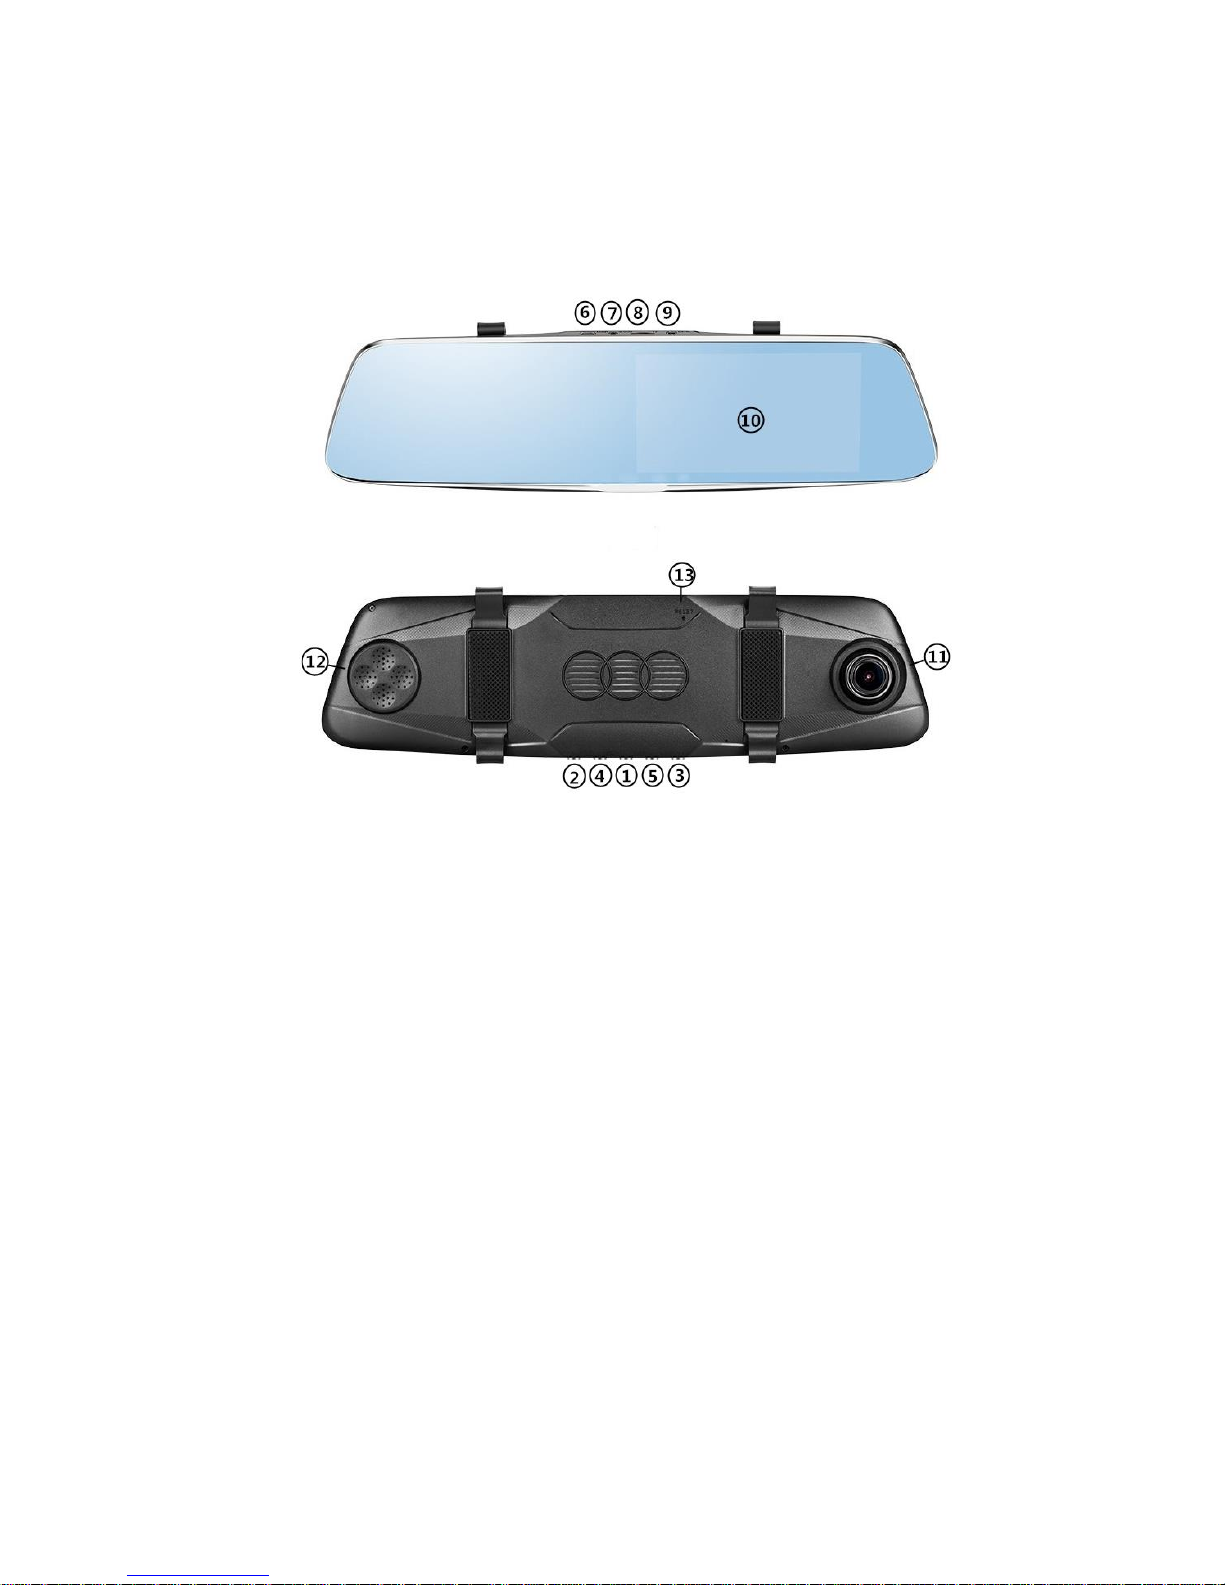
3. Pictures
1. Power supply button
2. Mode switching button
3. Confirmation button
4. Upper direction button
5. Lower direction button
6. Power USB interface
7. Rear view camera jack
8. MicroSD Card Slot
9. GPS Jack (selection)
10. IPS 5” Display
11. Front view lens
12. Horn
13. Reset Button
Page 13

4. Button functions
1. Power supply button
(1) Hold the power button to turn ON/OFF
(2) When connected to charger - automatic start
(3) Disconnect the charger - 8 seconds automatic shutdown
2. Mode switching button
It is used to switch between the available mirror dash cam main functions of the
recorder: the video interface, the photo interface, and the file view interface. *If you
long press it, you will enter the menu interface.
3.Confirmation button
It’s the confirmation button for a menu, and a switch between the controls of the
recording
4. Upper direction button
For the selection of the menu, it can also be used to adjust the volume of the
recorder
5. Lower direction button
For the selection of the menu, it can also be used to adjust the volume of the
recorder
6. Power USB interface
A power supply interface inserted into a car or a step-down line
7. Rear view camera jack
The slot of the recorder behind the camera
8. MicroSD Card Slot
The memory card insert space is elastic and ensures that the card will not pop up.
9. GPS Jack (selection)
The interface of the GPS antenna can be selected. If you chose the model without
GPS, the space will be empty.
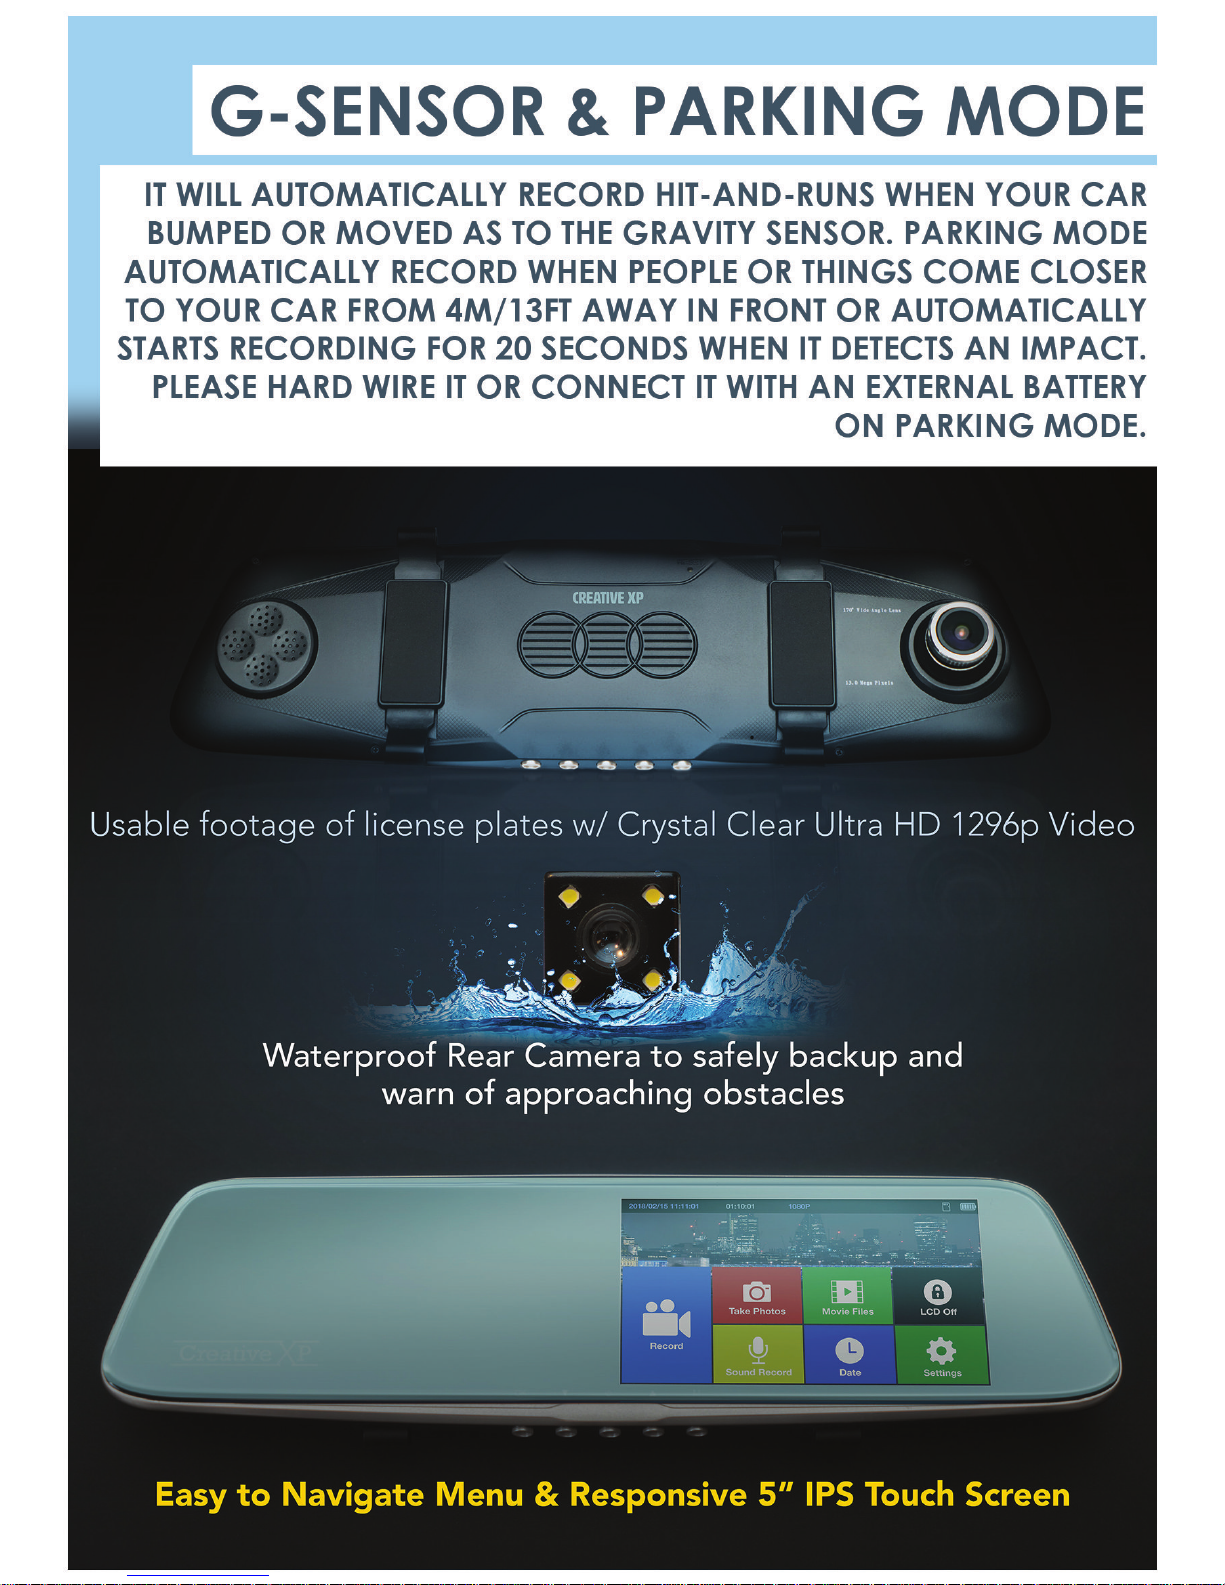
10. IPS 5” Display
The video screen of a recorder is IPS Touch Screen and anti-dazzle. You can navigate
the menu without pressing any buttons.
11. Front view lens
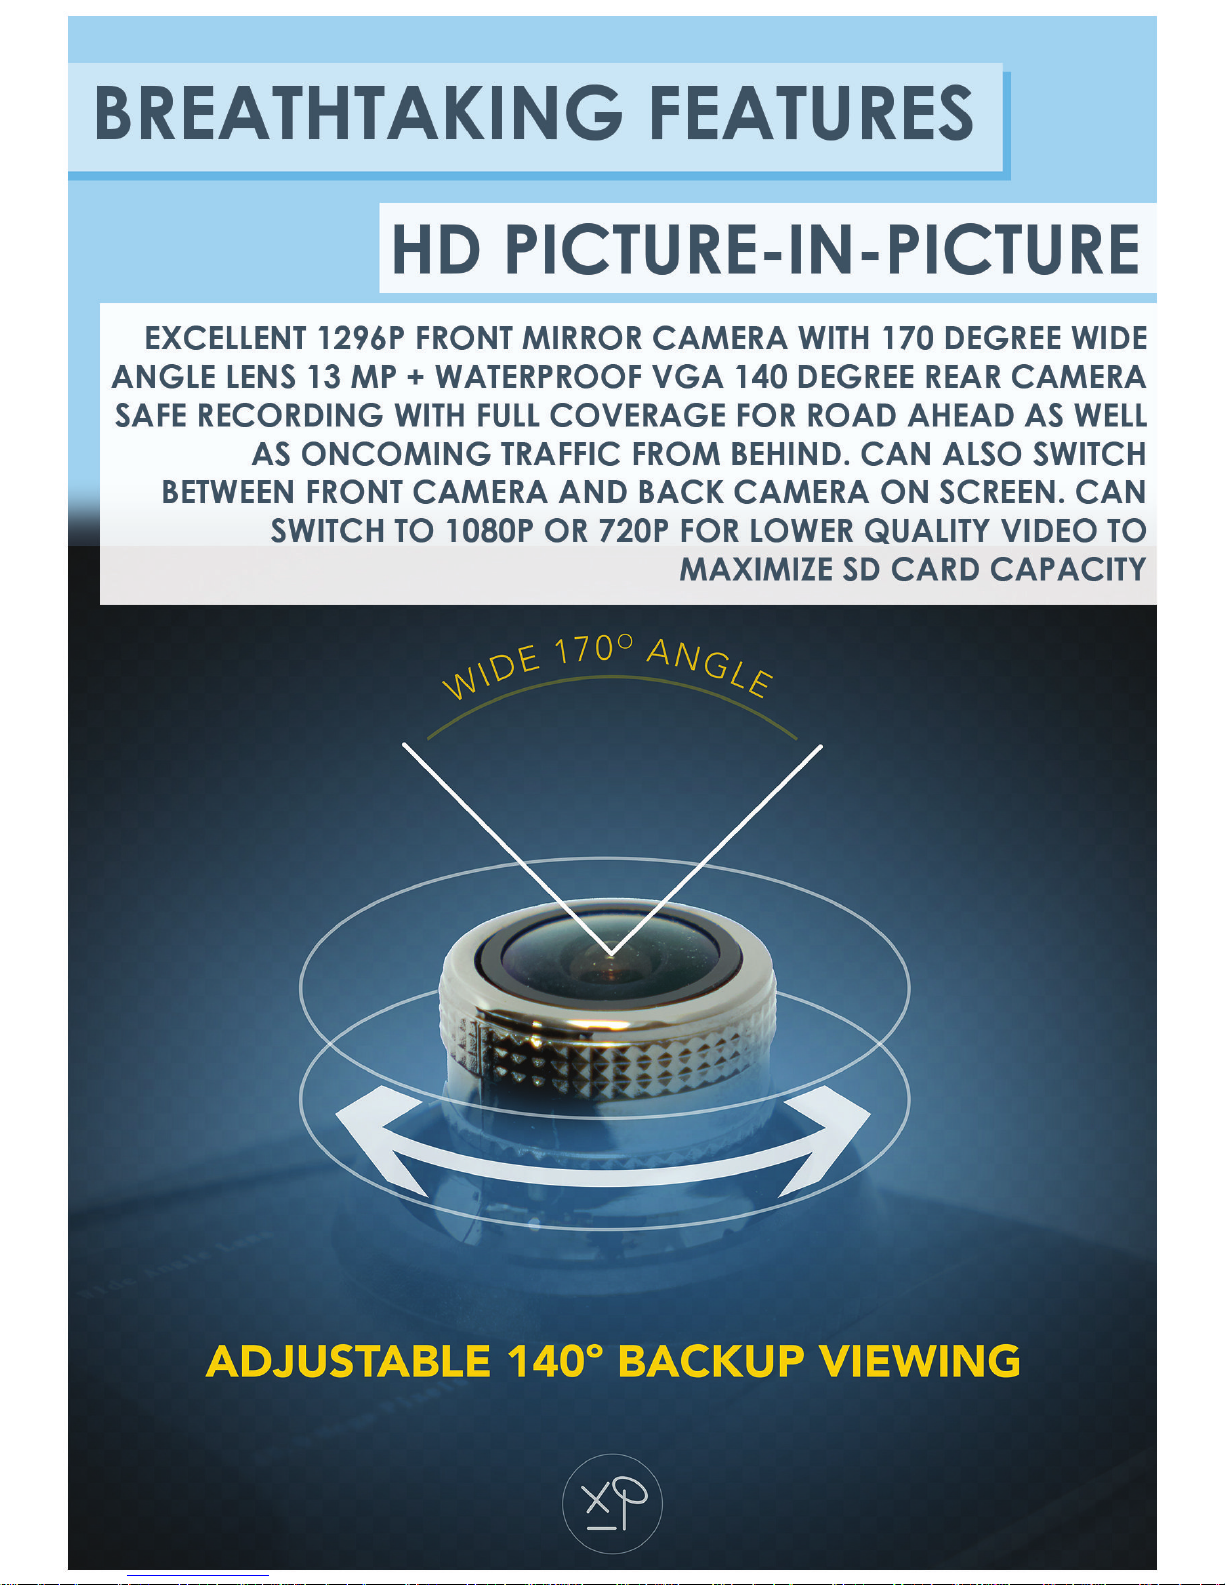
Used to record up to 1296P HD Video and 170 degrees Wide Dynamic Angle. It’s
slightly adjustable.
Page 14
12. Horn
An external device for the sound of a recorder, including tone, music, and voice in
the video.
13. Reset Button
When the recorder needs resetting or crash case, you can press this key with a
needle to reset all selected functions.
** In addition, the touchscreen menu shows most of the important features,
functions or settings to navigate the menu without pressing buttons. But if you like
more the buttons option, you have this choice too.
5. ADAS (Lane shift
alarm) calibration
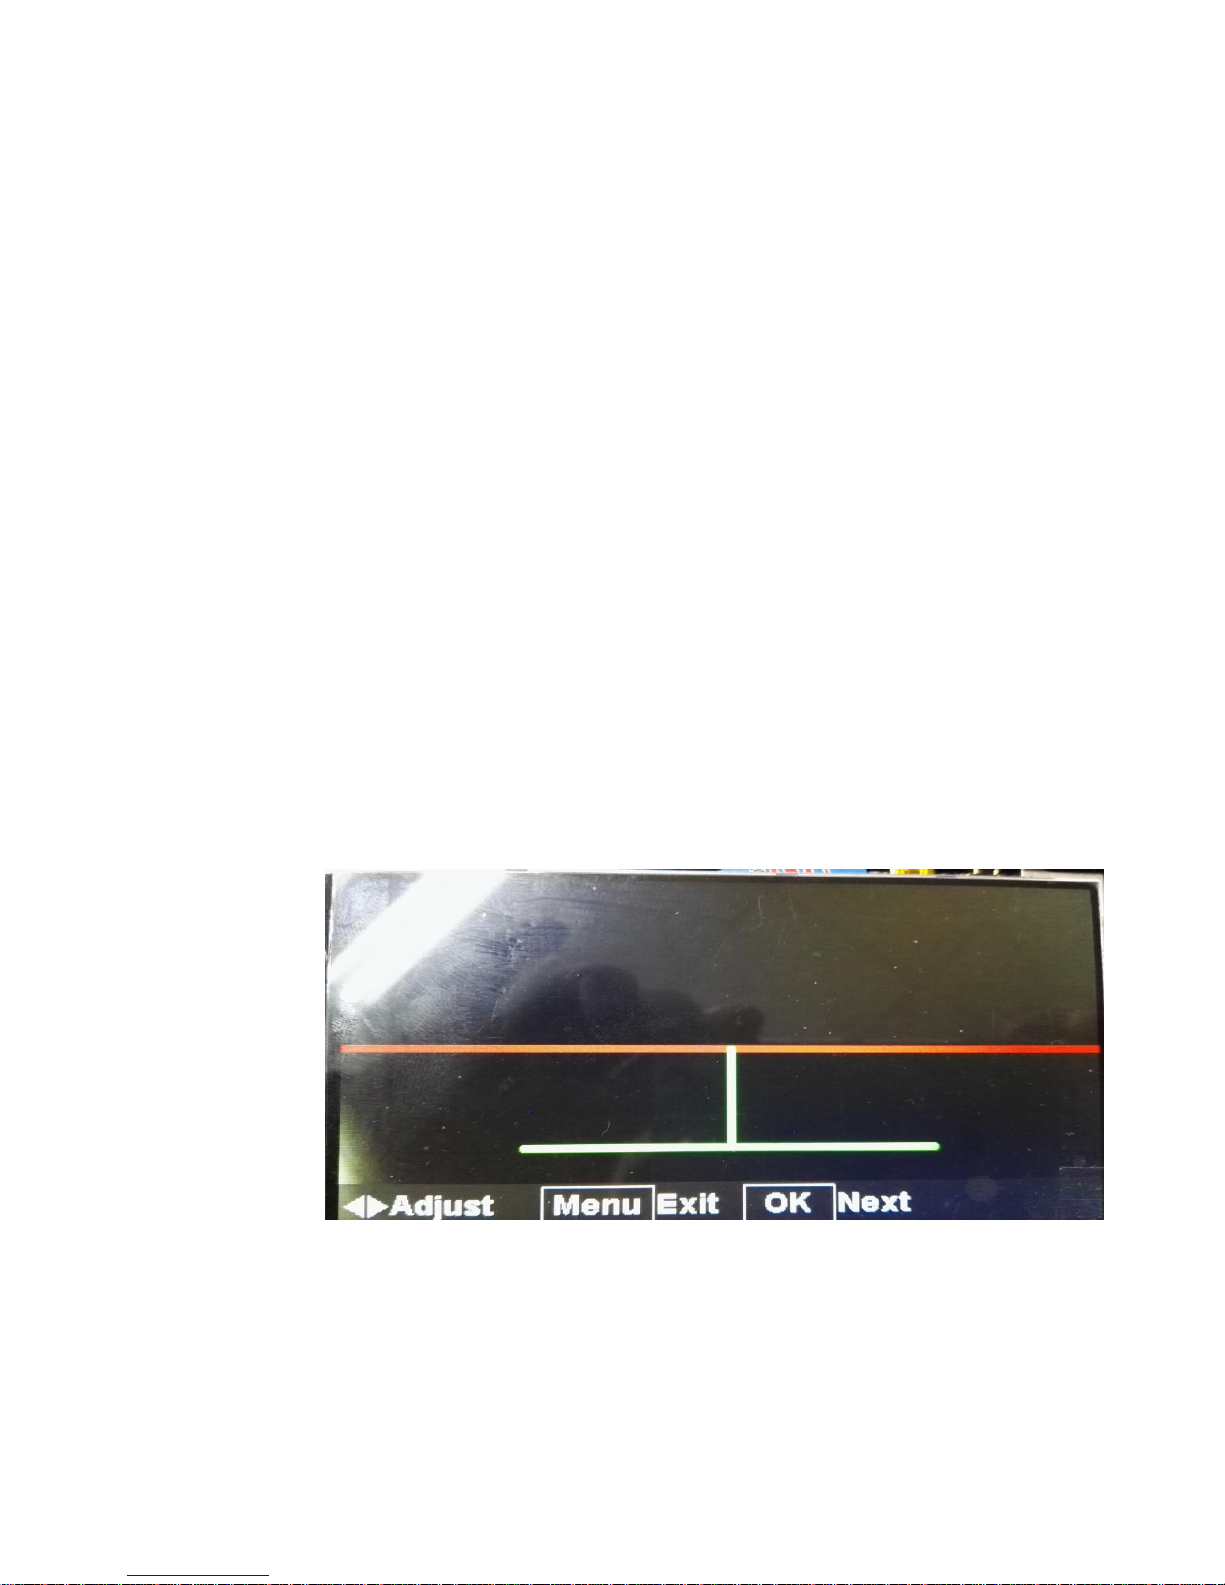
*** Set menu - ADAS calibration click into the calibration interface under system
settings
The “OK” button is the confirmation and the “up and down” buttons are for
adjusting the position of the calibration line. Adjust the mirror dash cam in the
desired position in the car (over the old rear-view mirror) after entering the
calibration set above the alignment horizontal line of the car in front of the road
disappeared and the green line represents the frontal view of the road.
Page 15
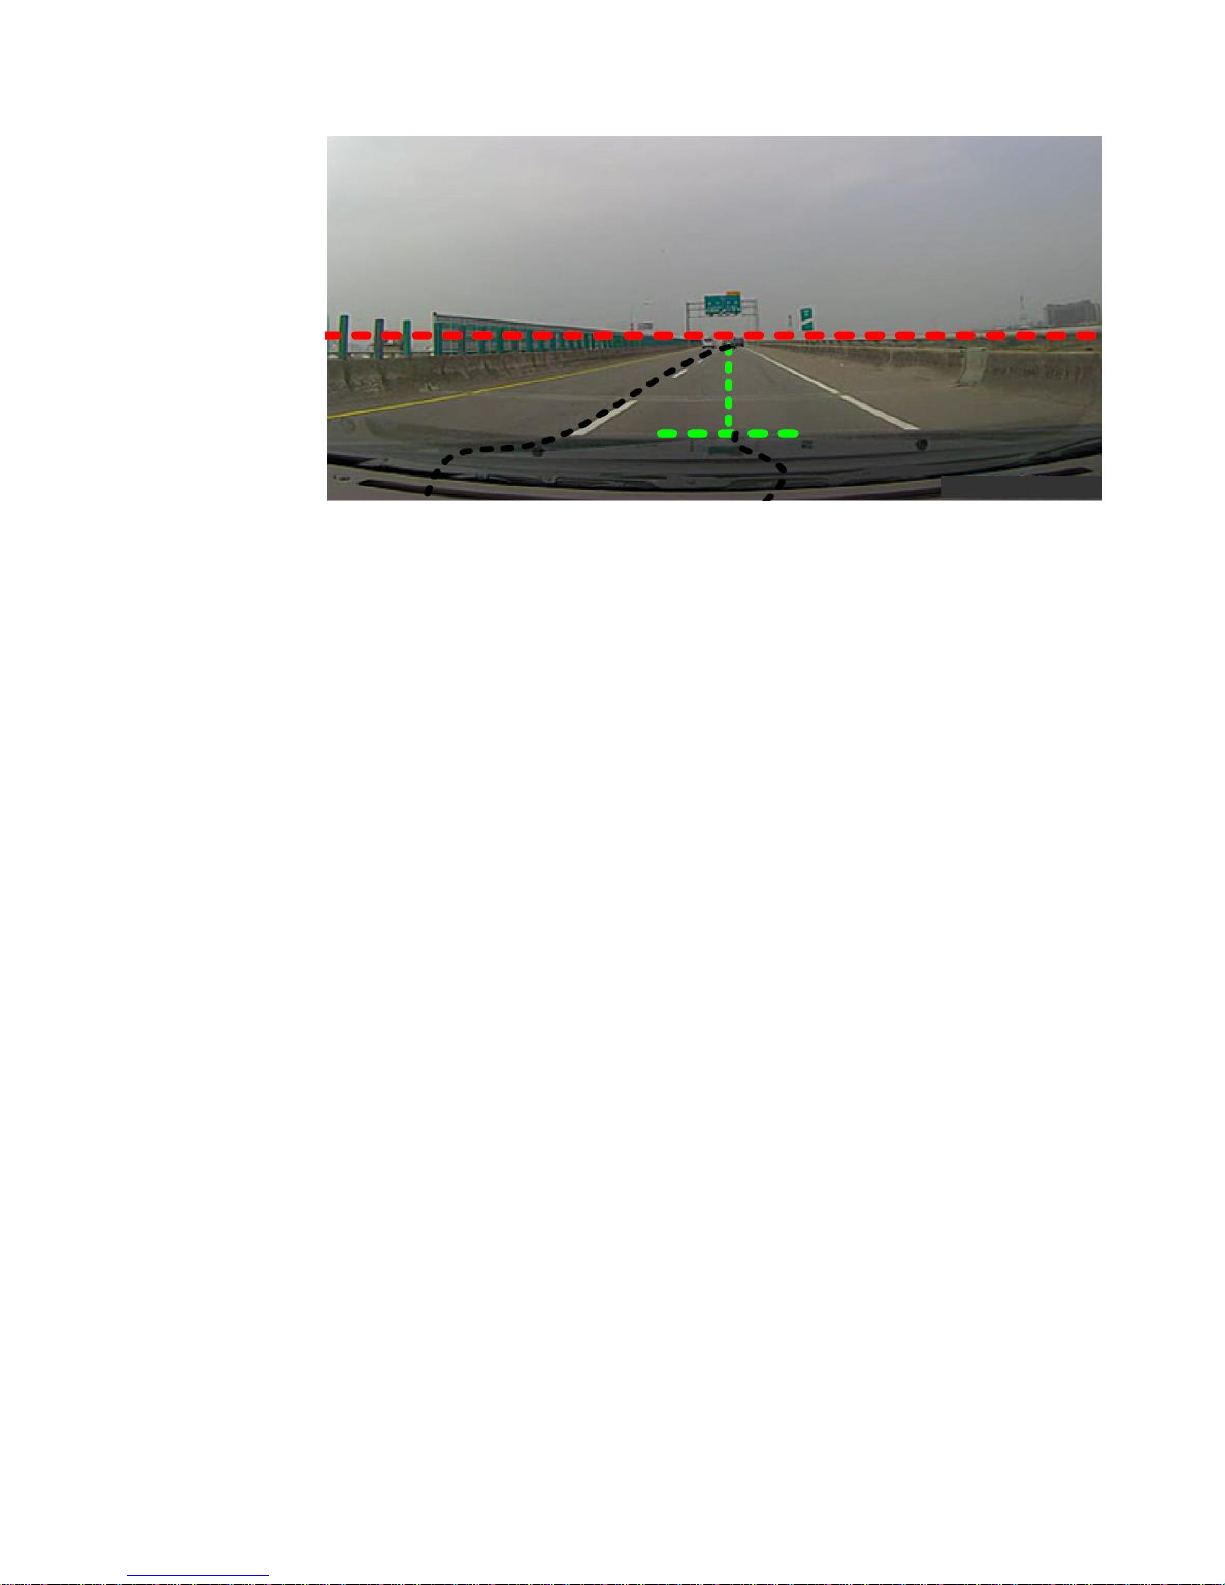
Enter the settings after the first default adjustment: 1. the red line by the next
key to adjust the good red horizontal position and press “OK”; 2. enter the green
line set and then press “OK” to enter the height setting (the location of the
installation height from the ground)
1. A Sudan Height Position is 80 - 100cm
2. An SUV Height Position is 100 - 150cm
*** Determine the adjustment position according to the height of the vehicle and
the installation position.
6. A step-by-step guide
to Install the Mirror
Dash Cam
Installation Guide
1. Turn off your vehicle engine.
2. Insert the MicroSD card into the recorder slot.
【Note】Please use the high-speed SD card(Class 10 above), capacity not less
than 512M, MicroSD card maximum support 64GB (only use the Class 10 with the
larger cards).
3. The recorder is fixed to the original car rearview mirror.
4. Insert car charger into the car cigarette lighter.
5. Use extension cable to connect car charger and car DVR USB ports.
Page 16
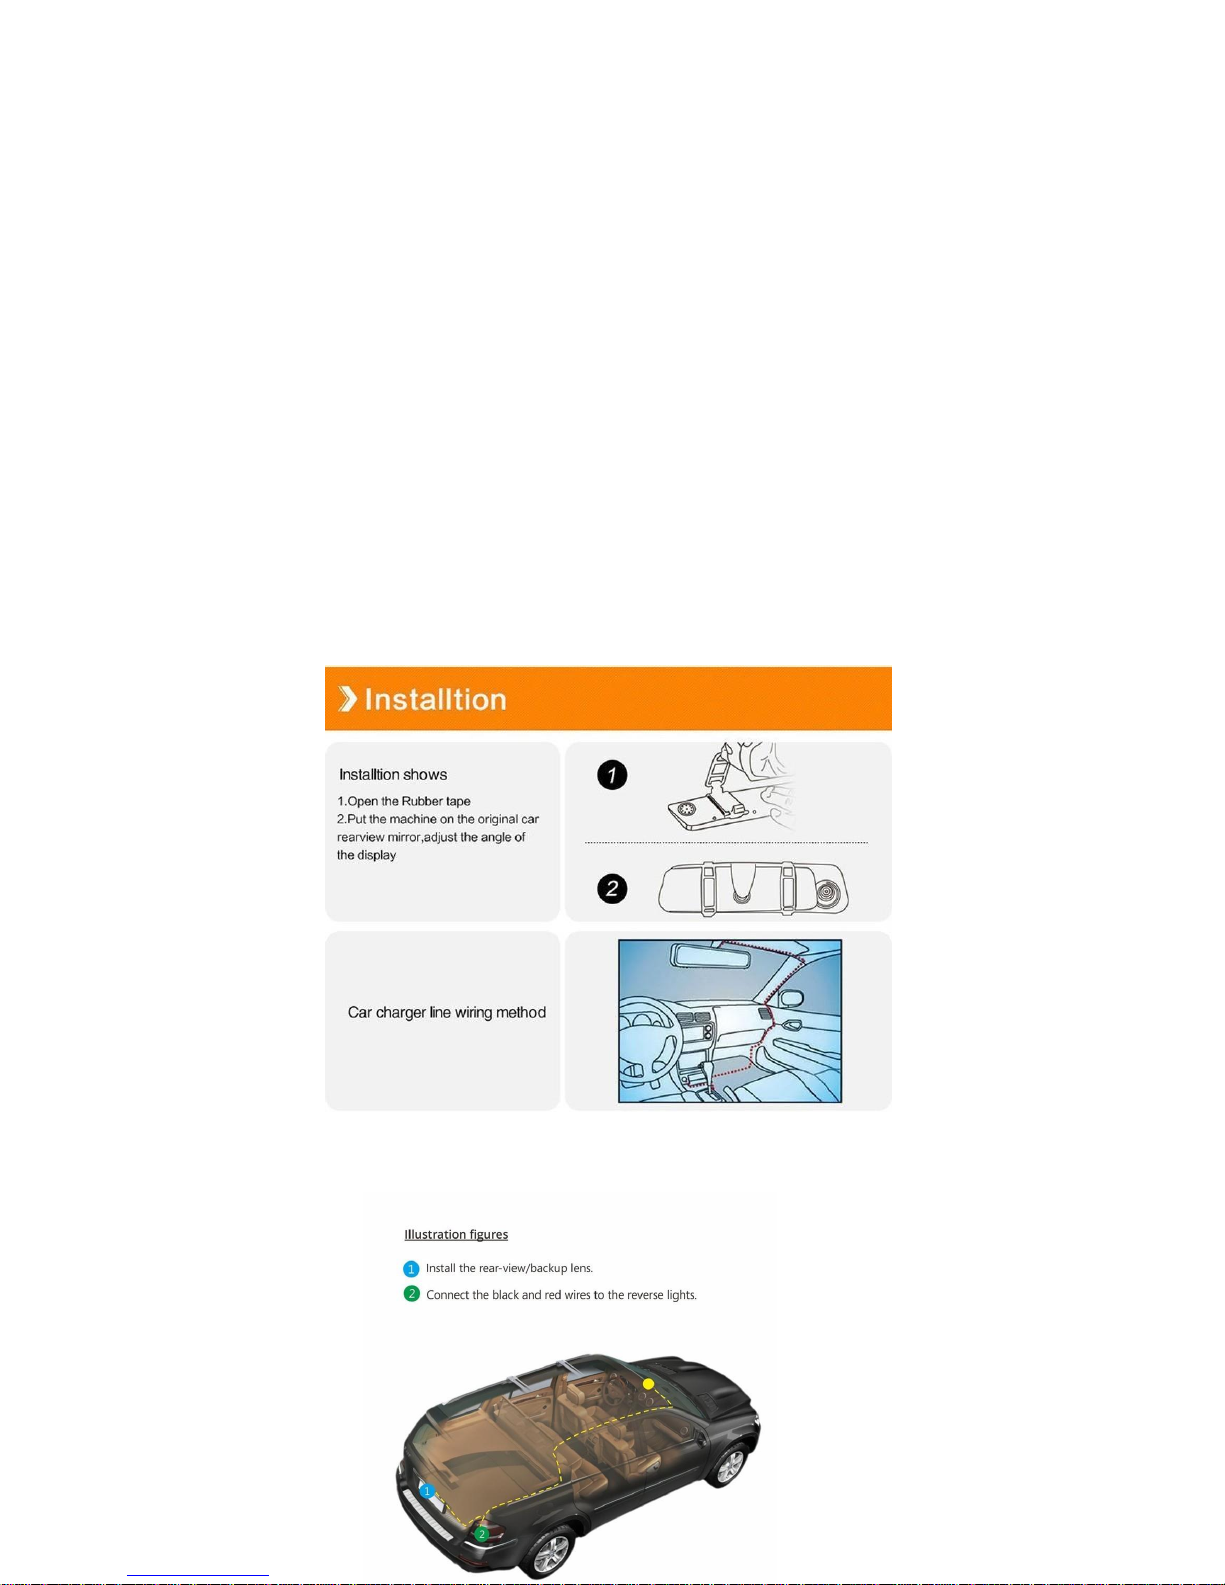
【Note】Charger extension line can lay along the edge of the windscreen when
wiring or be tucked in.
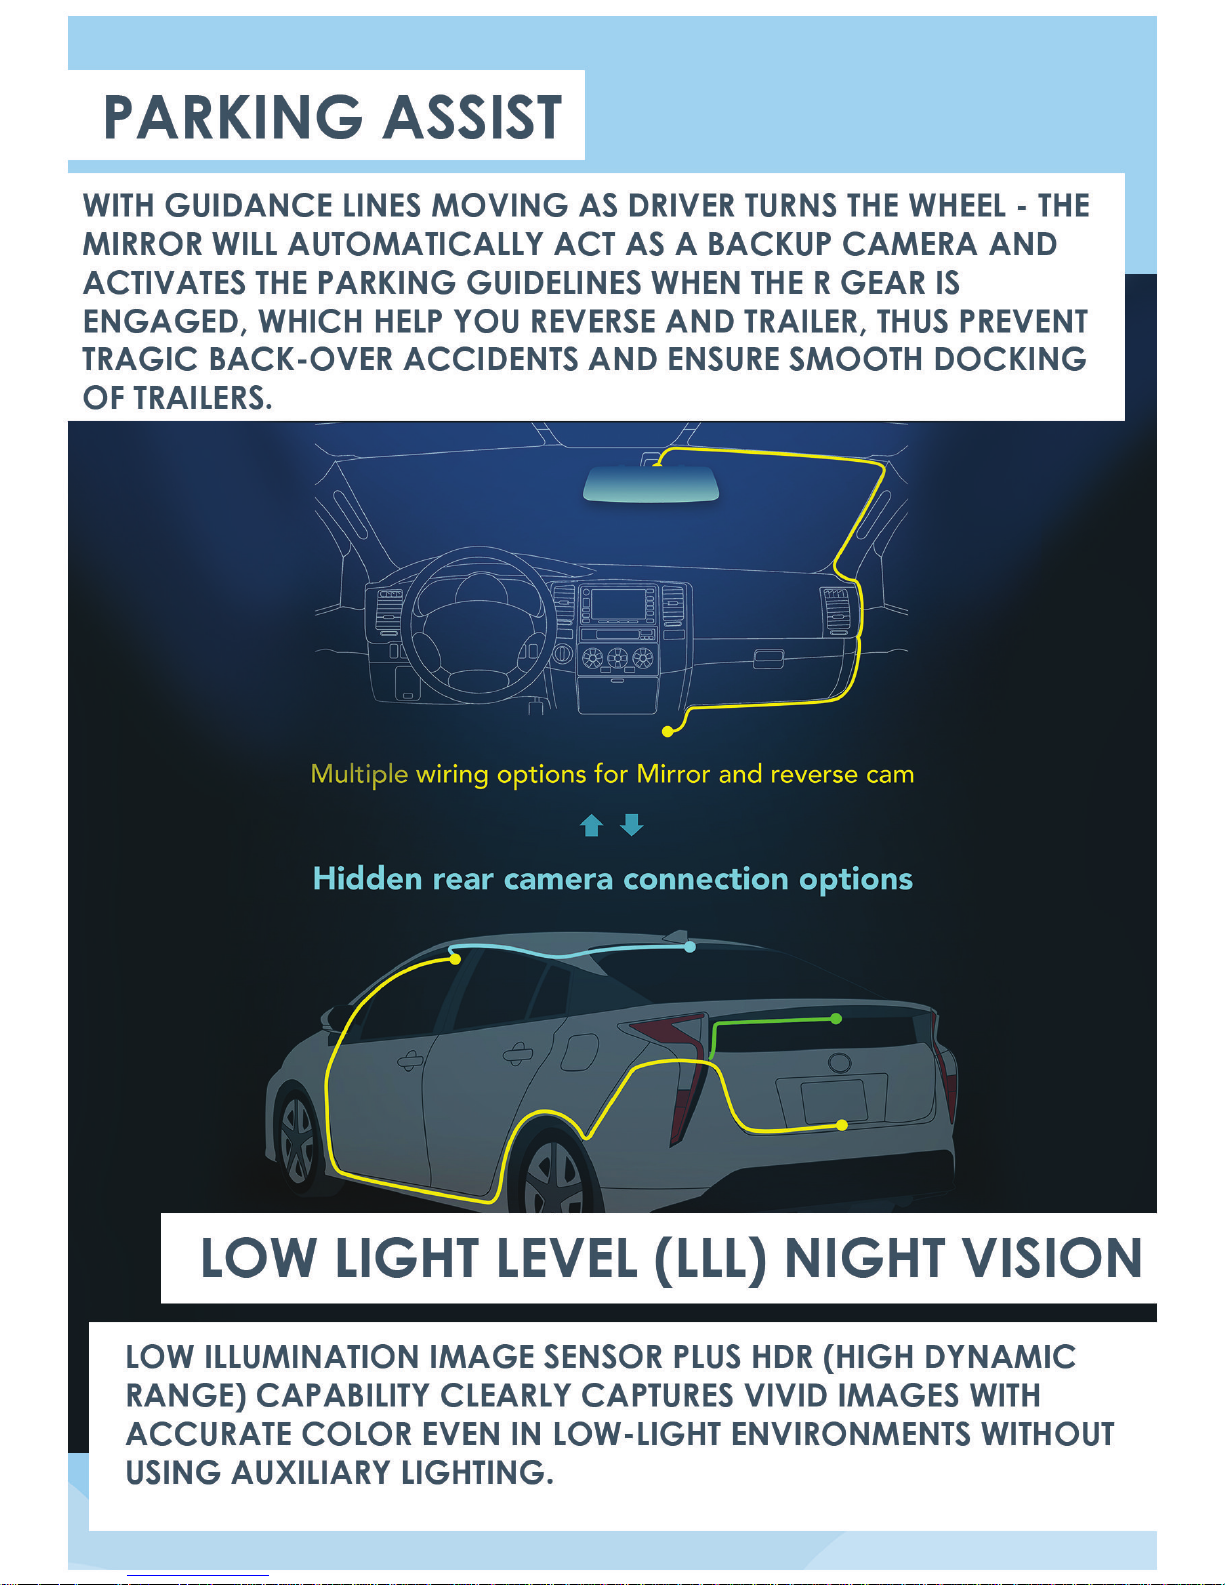
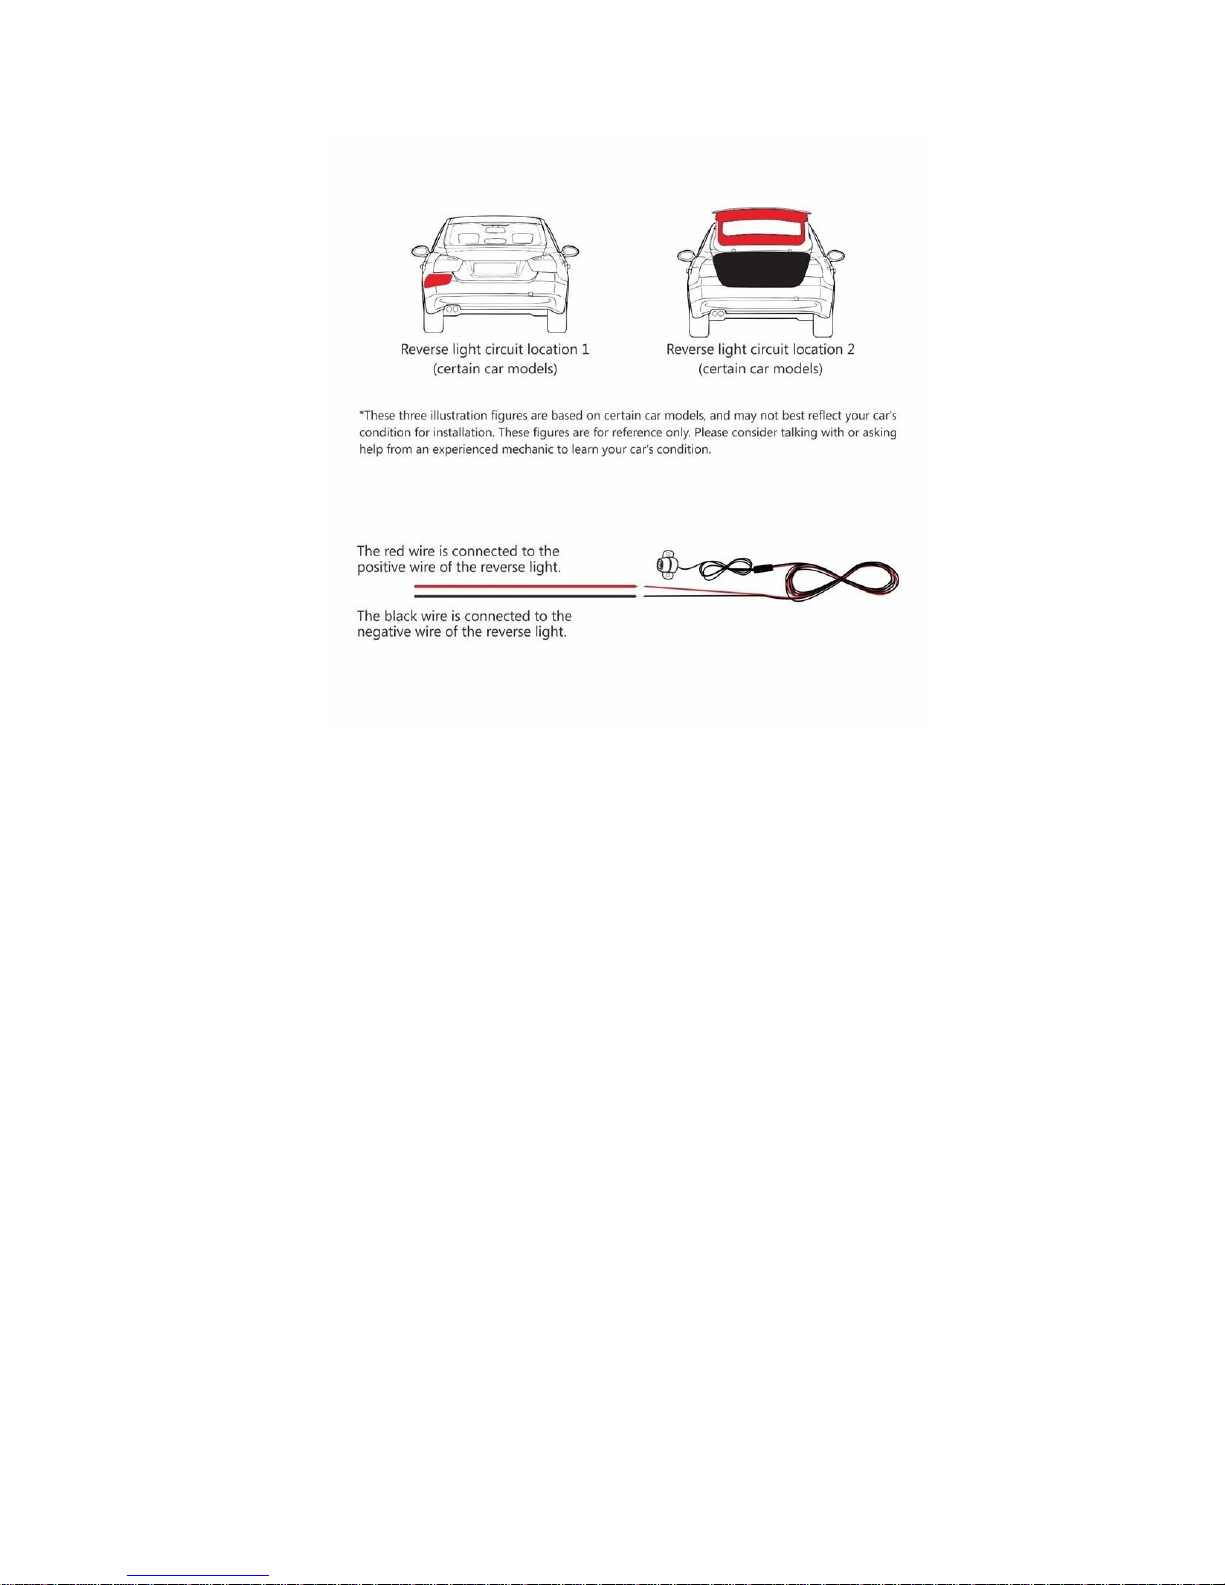
6. The backup camera is installed in the rear of the vehicle, pay attention to the
direction of installation. Wiring can be laid along the vehicle roof or through the
car and trunk (probably easier). After the installation is complete, connect rear
camera cable to the car DVR rear camera interface.
7. Adjust the lens position to ensure that the lens is parallel to the ground. The
metal hook is adjustable but make sure you don’t change it every day.
8.Start the engine, check if the machine has been installed correctly.
【Note】 When the machine is properly installed, the system indicator lights
work, the dash cam starts to enter the recording state, the recording indicator
light flashes. Remember to check on the display screen if it is normally positioned,
if the display screen is mirrored, please contact us at [email protected].
Page 17
 Loading...