

Page 1
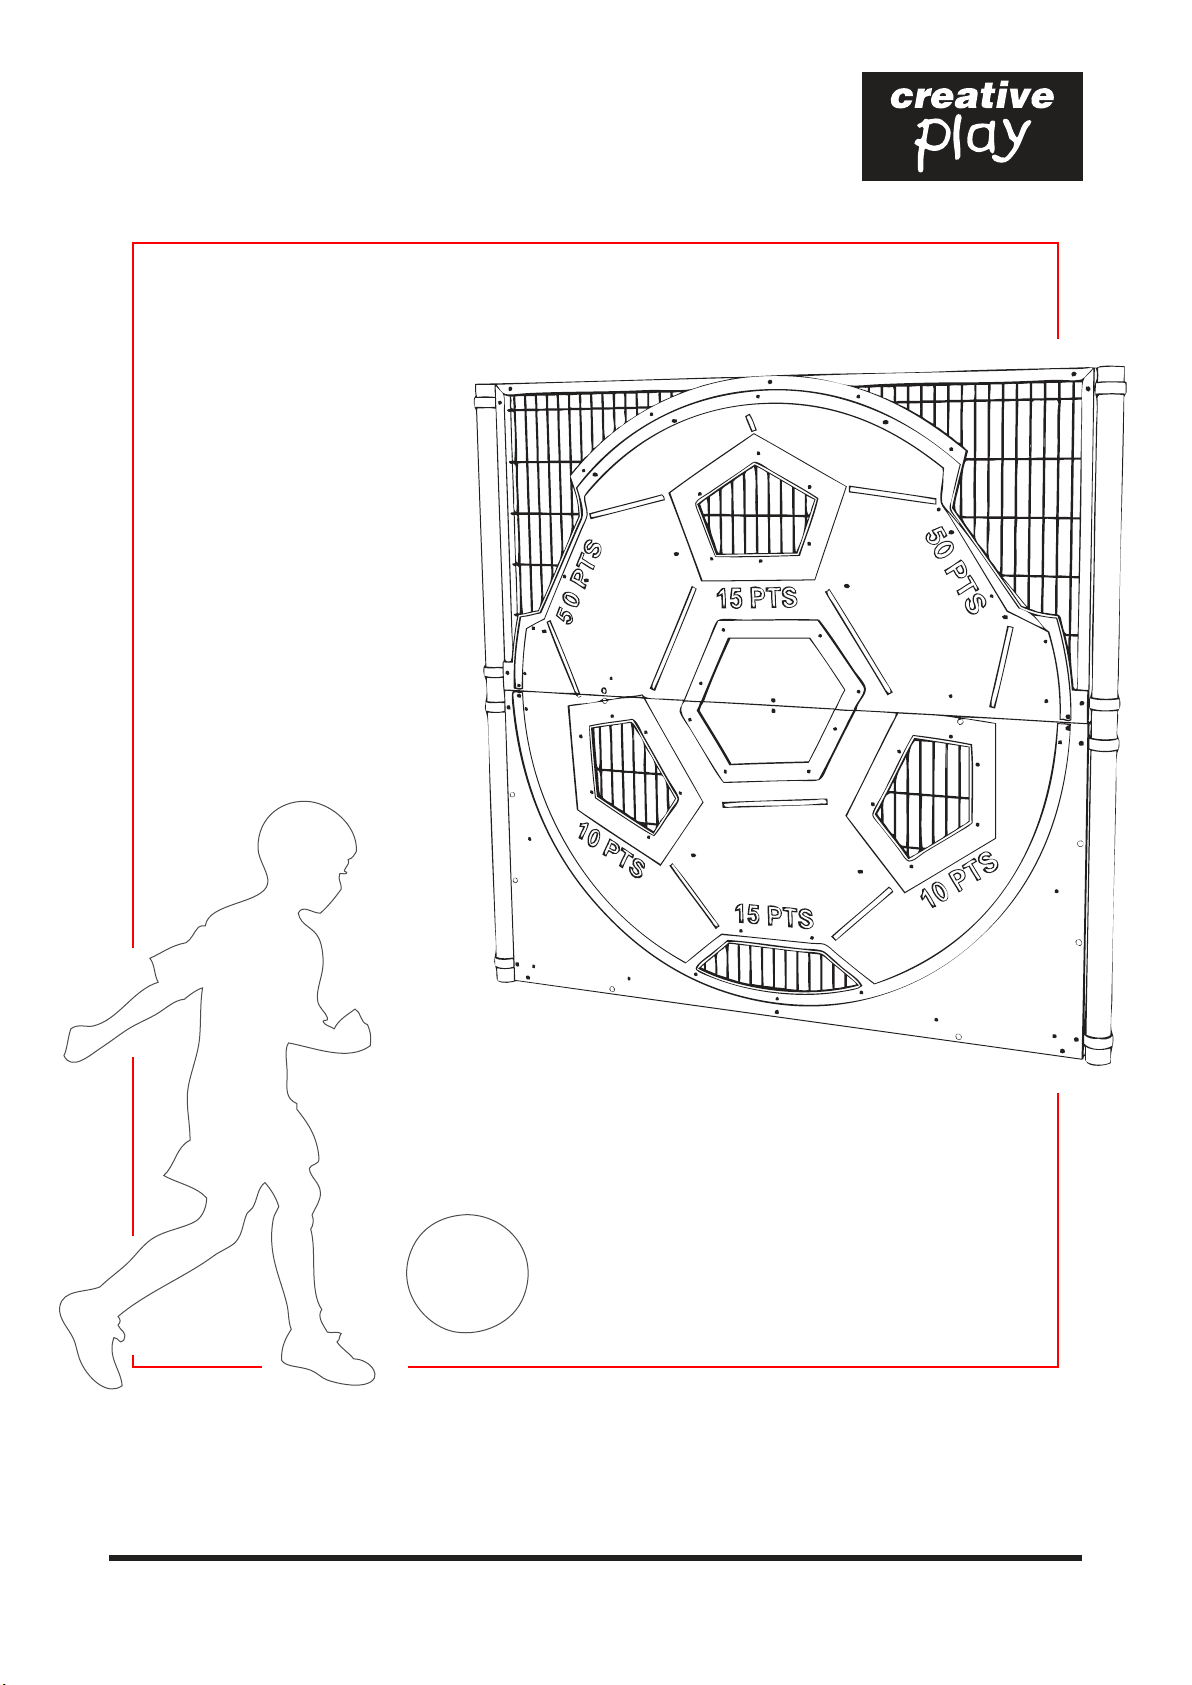
FOOTBALL TARGET PANEL
Installation Instructions
pg 1 of 11
REF: T106 - FOOTBALL TARGET PANEL
Page 2
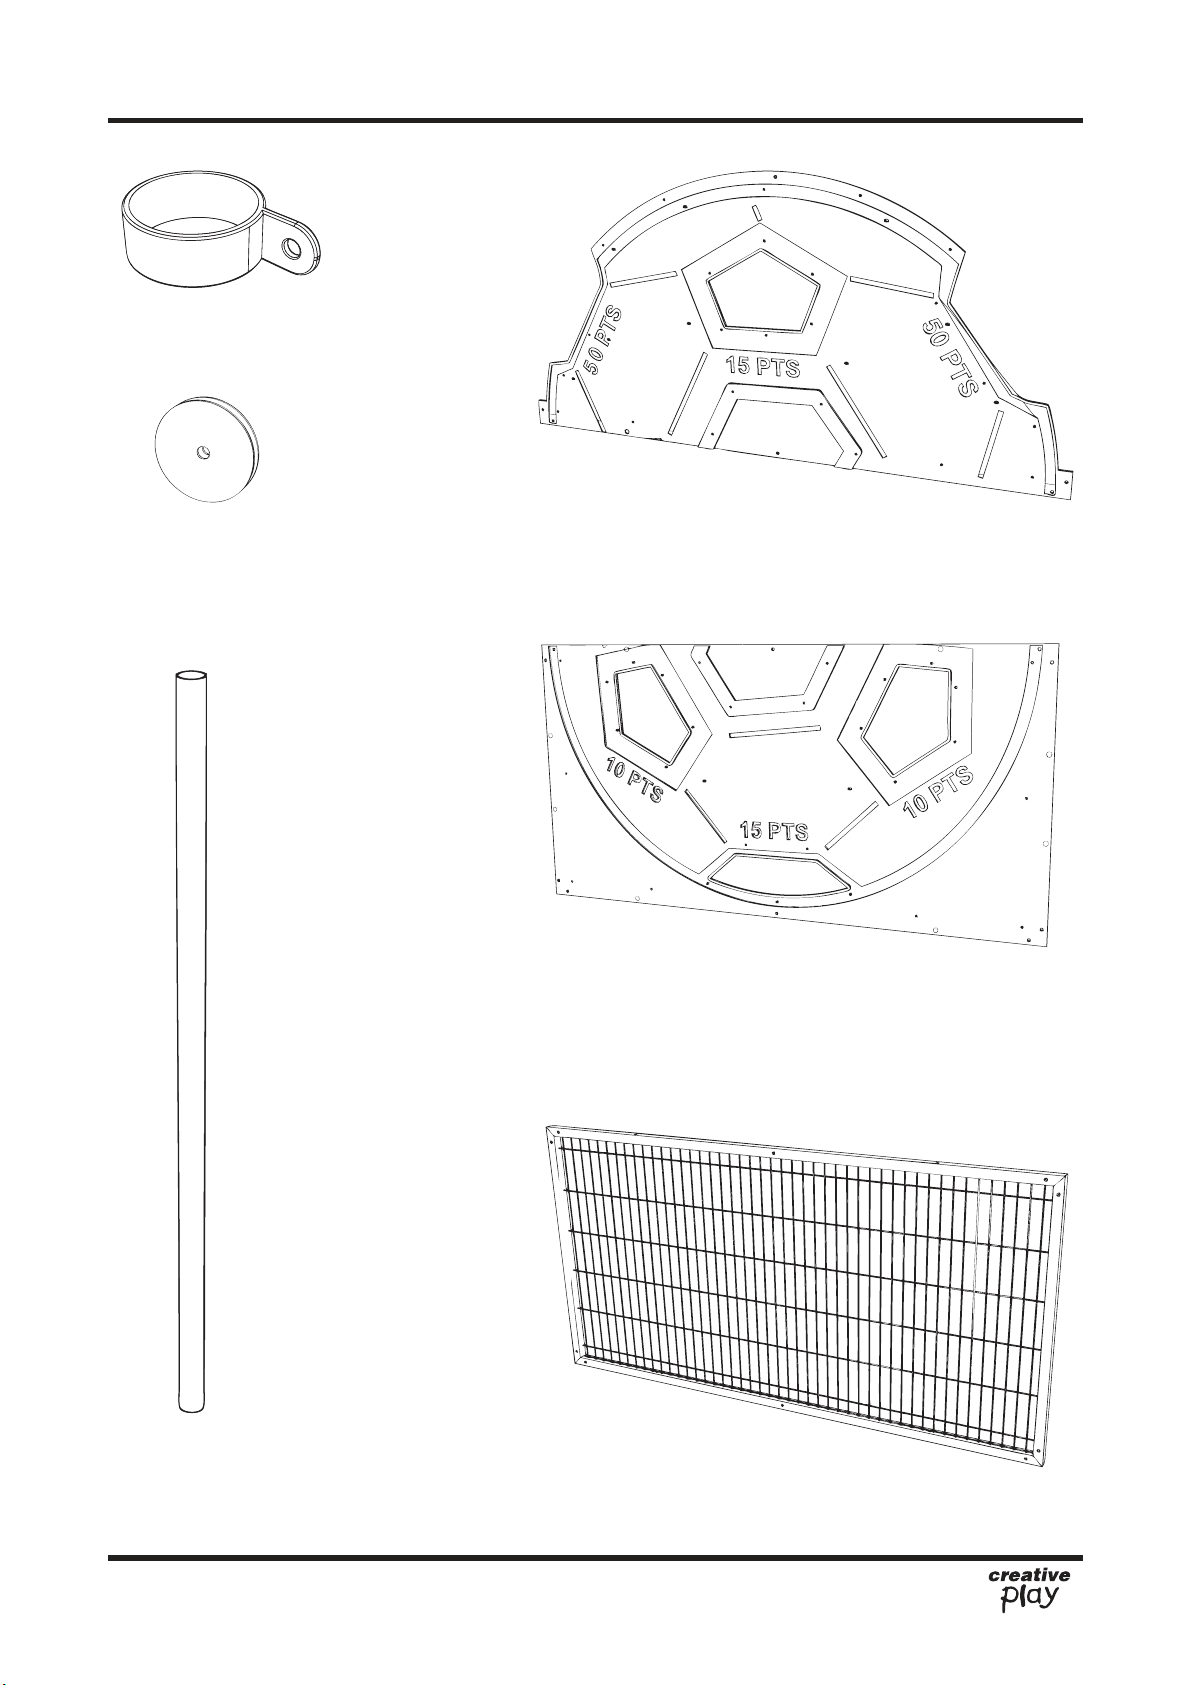
PARTS required
x8 COLLAR CLAMP CLA007
x11 PLAYTEC WASHERS
x1 FOOTBALL TOP PANEL
x2 MEDIUM POST
x1 FOOTBALL BOTTOM PANEL
x2 STEEL MESH PANELS
pg 2 of 11
REF: T106 - FOOTBALL TARGET PANEL
Page 3

PARTS required PARTS required
x2 (M10 x 100 SOCKET BUTTON BOLTS)
x14 (M10 x 70 SOCKET BUTTON BOLTS)
x2 (M10 x 60 SOCKET BUTTON BOLTS)
x14 (Self Drilling Screw)
x11 (5B Torktainers)
x18 (M10 ´NYLOC´)
x18 (End Caps)
x24 (GRUB SCREWS M10x8mm
to be used on COLLAR CLAMPS
x11 (N4 Torktainers)
TOOLS required
pg 3 of 11
REF: T106 - FOOTBALL TARGET PANEL
Page 4
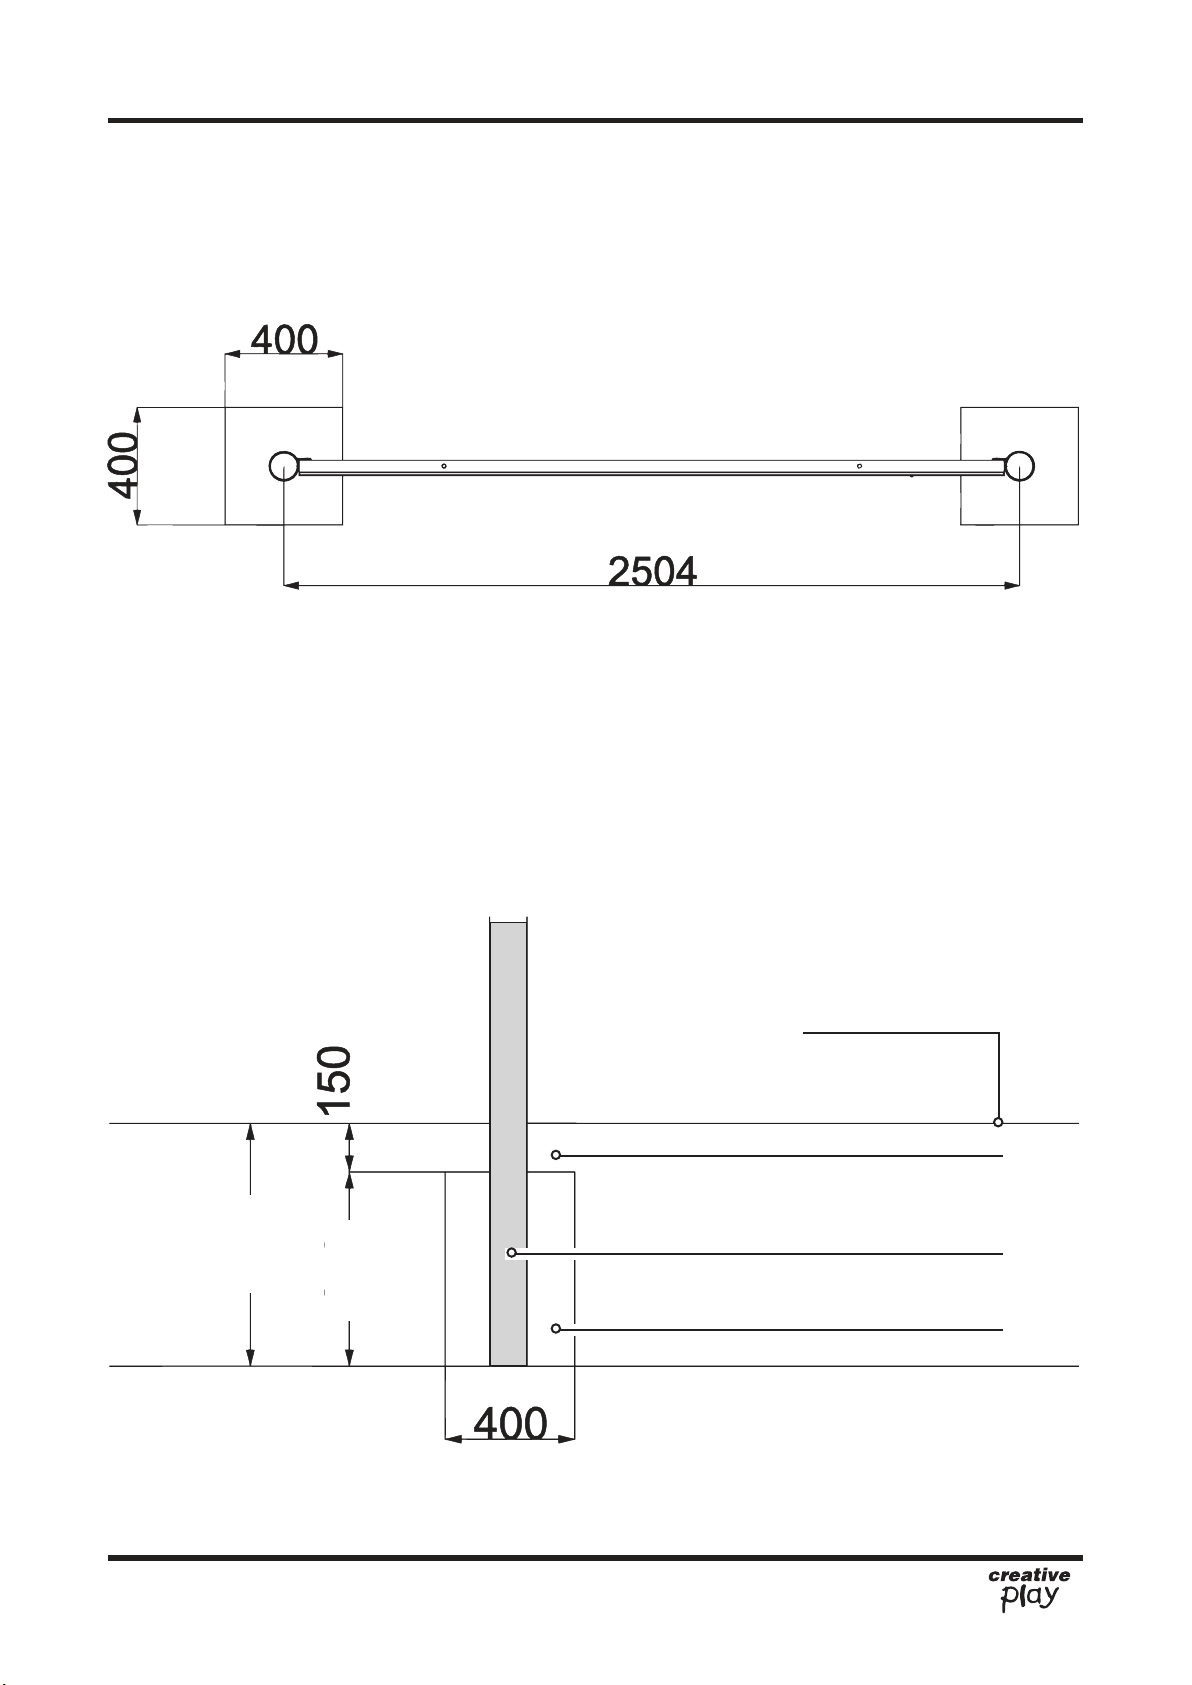
Foundation Details
pg 4 of 11
750
600
450
FINISHED GROUND LEVEL
SOIL
MEDIUM POST
CONCRETE
REF: T106 - FOOTBALL TARGET PANEL
Page 5
Installation Instructions
Installation Instructions
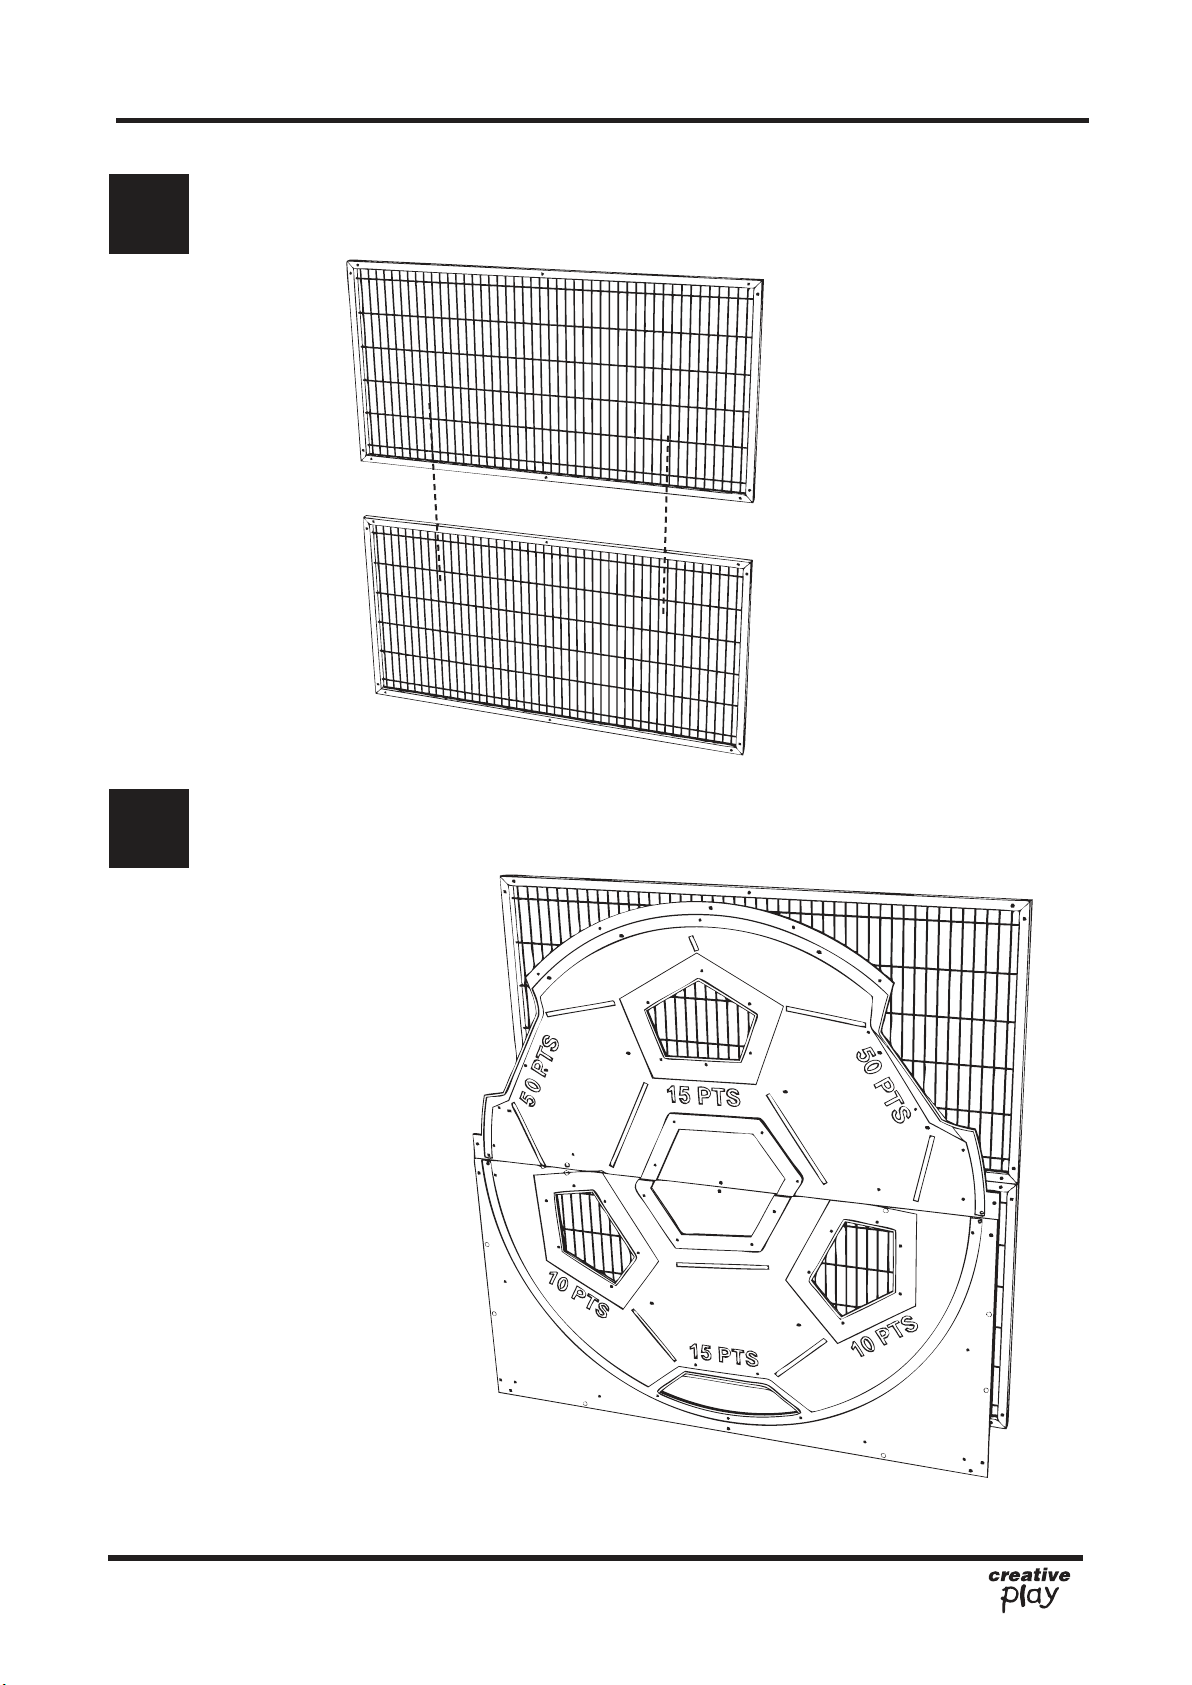
Attach the 2 x MESH FRAMES together
1
Using M10 X 100mm SOCKET BUTTON BOLTS / M10 NYLOCS / END CAPS
Attach the 2 x FOOTBALL PANELS to the FRAME
2
Notes:
SEE next step to ensure the correct holes
are used (some will be left ‘EMPTY’ to bolt
to the COLLARS and PLAYTEC WASHERS)
pg 5 of 11
REF: T106 - FOOTBALL TARGET PANEL
Page 6
Installation Instructions
Installation Instructions
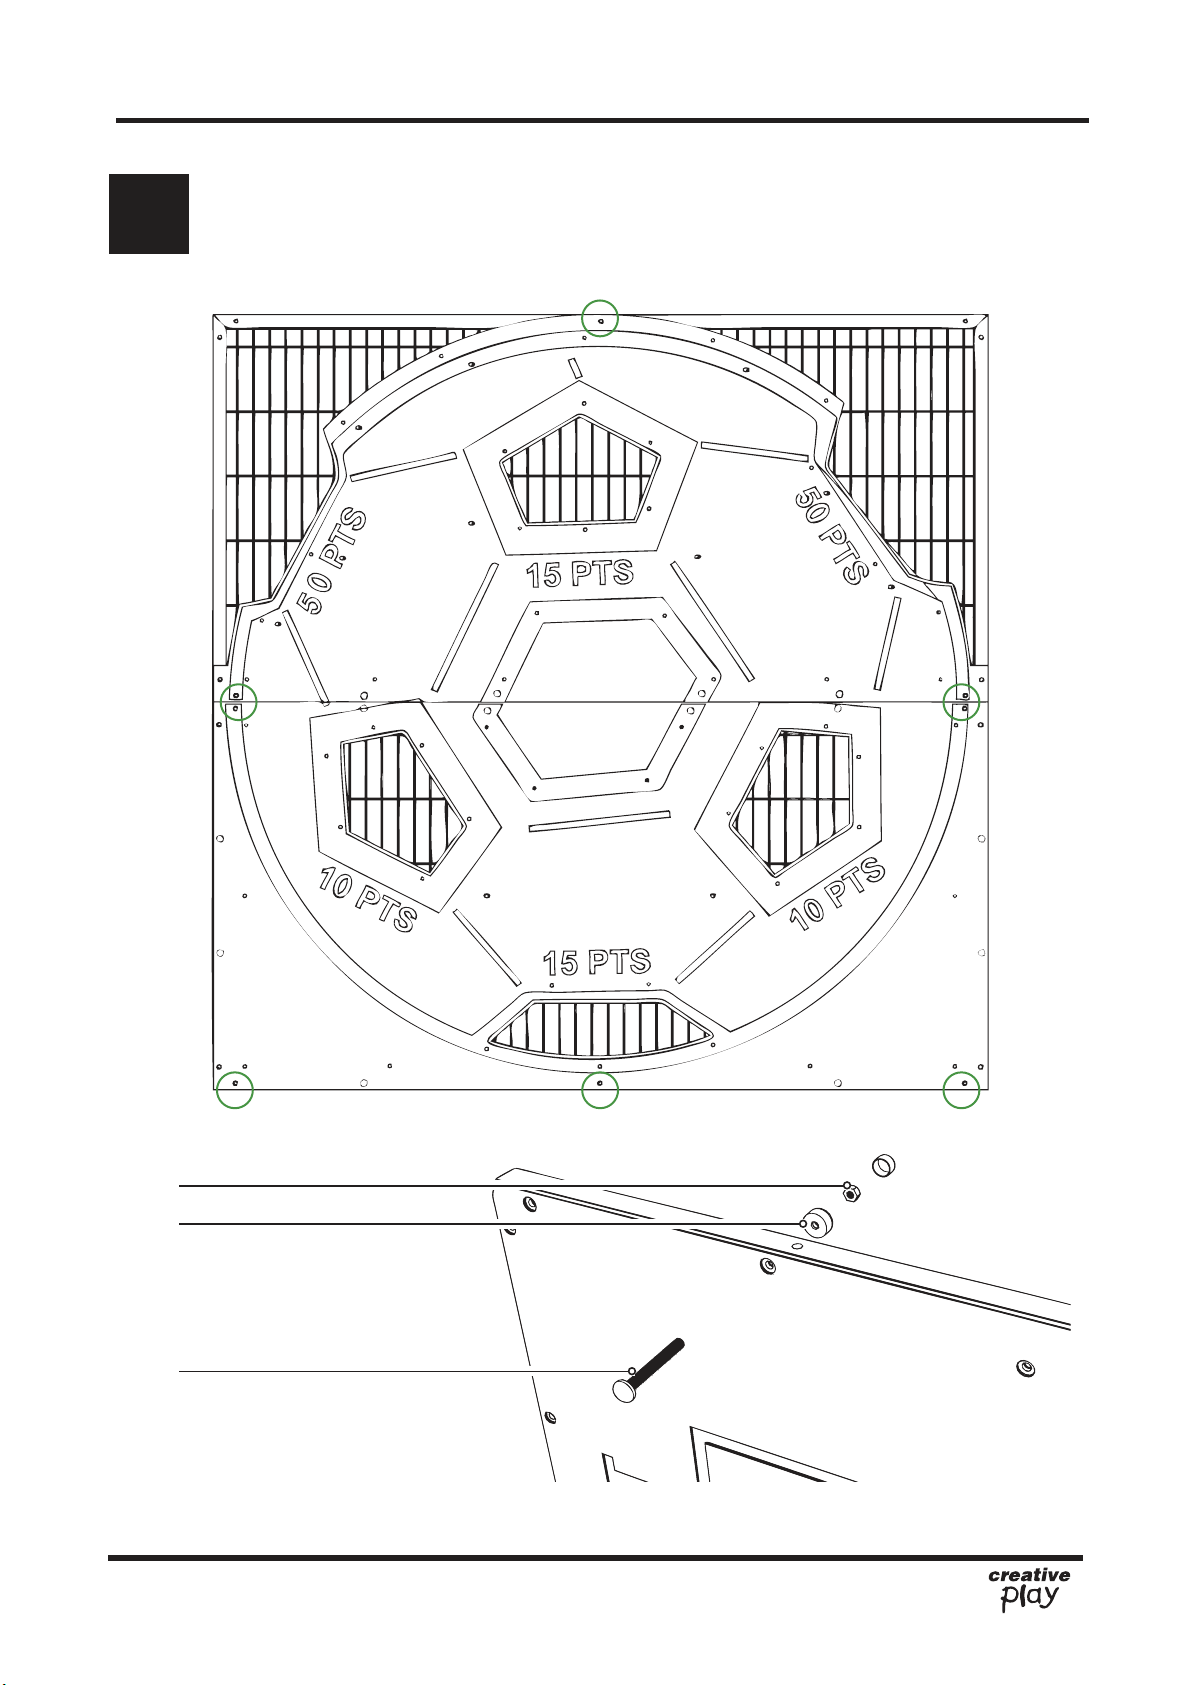
Ensure the panels are bolted as shown below
3
BOLT HOLES CIRCLED GREEN - Using 8 X M10x70mm SOCKET BUTTON BOLTS / 8 X M10 NYLOCS / 8 X END CAPS
pg 6 of 11
NYLOC
COVERED END
SOCKET BUTTON BOLT
REF: T106 - FOOTBALL TARGET PANEL
Page 7
Installation Instructions
Installation Instructions
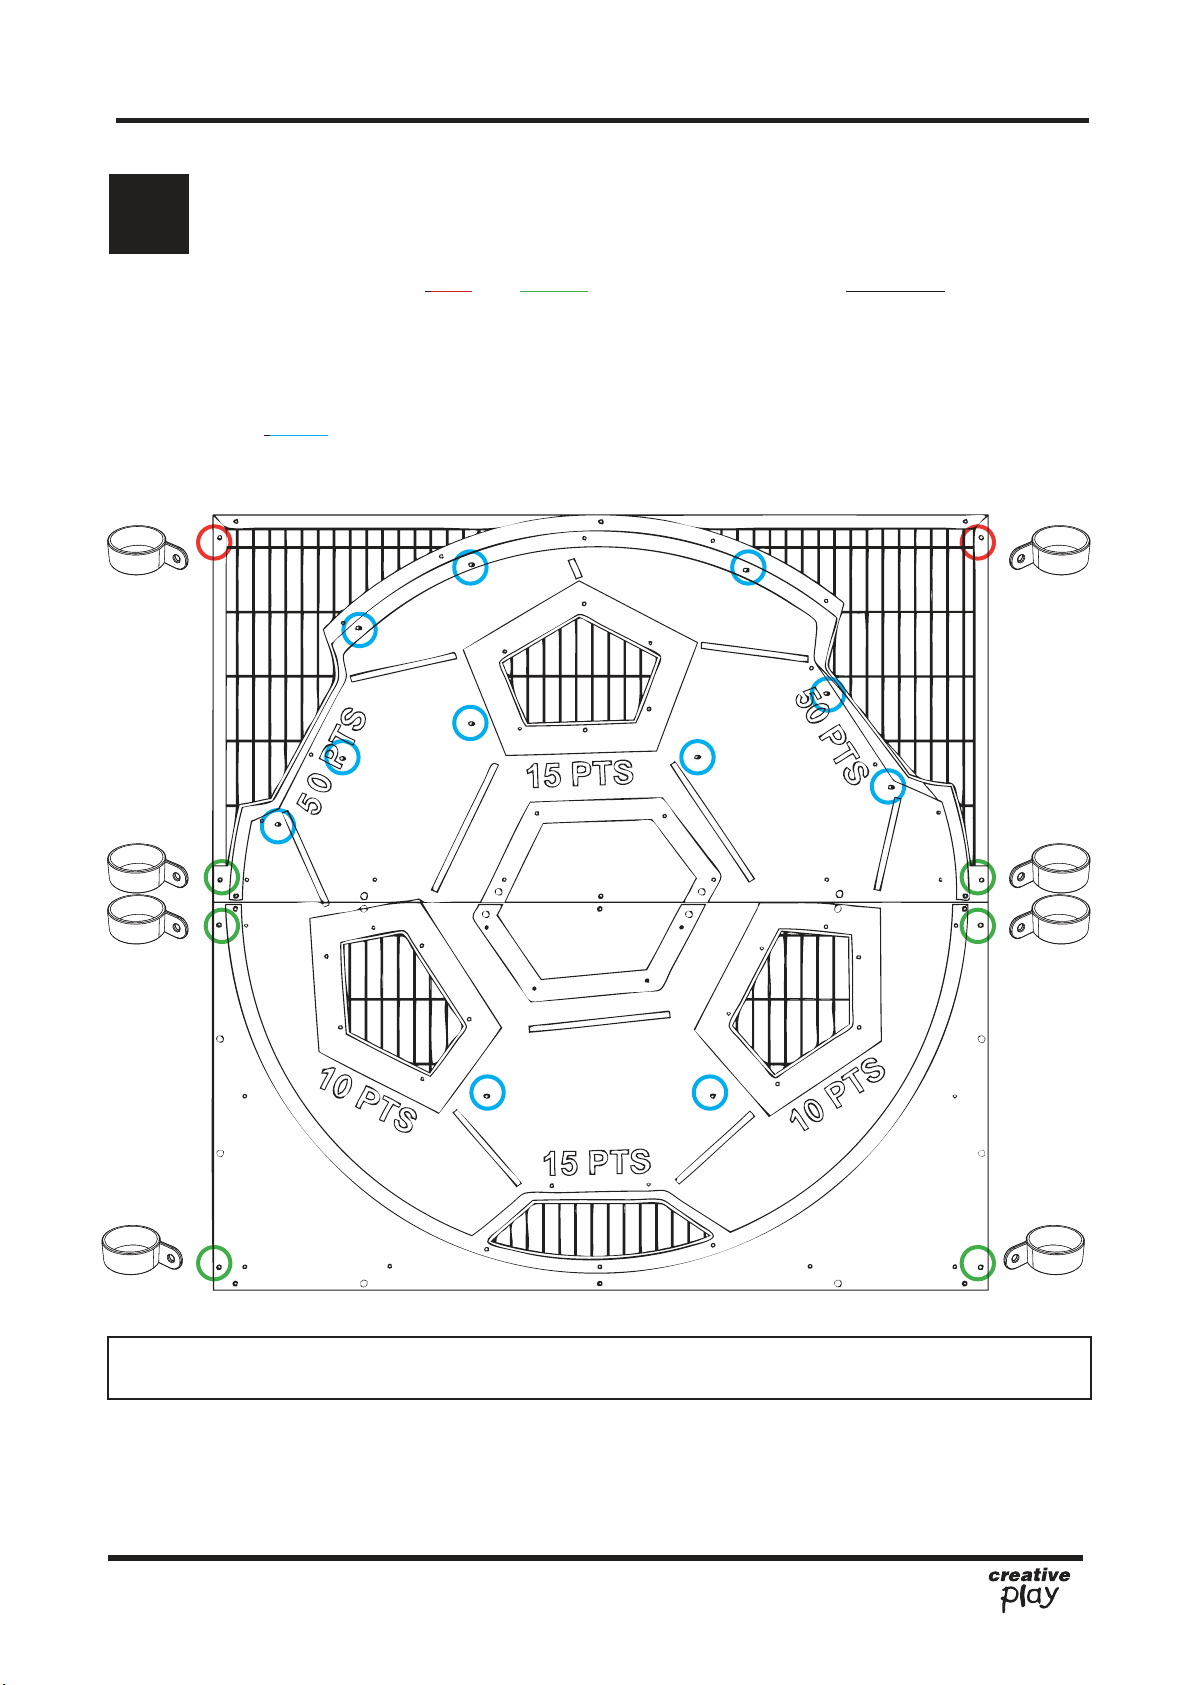
ENSURE CORRECT FIXINGS ARE USED FOR HOLES
4
HOLES CIRCLED RED and GREEN will be used to attach the COLLARS
CIRCLED RED - Use 2 X M10x60mm SOCKET BUTTON BOLTS / 2 X M10 NYLOCS / 2 X END CAPS
CIRCLED GREEN - Use 6 X M10x70mm SOCKET BUTTON BOLTS / 6 X M10 NYLOCS / 6 X END CAPS
HOLES CIRCLED BLUE will be used to secure the boards on to the mesh using the PLAYTEC WASHERS
(See following pages for details)
pg 7 of 11
NOTE: COLLARS ARE TO BE SLID ONTO POLES BEFORE ATTACHING TO BOARD
REF: T106 - FOOTBALL TARGET PANEL
Page 8
Installation InstructionsInstallation Instructions
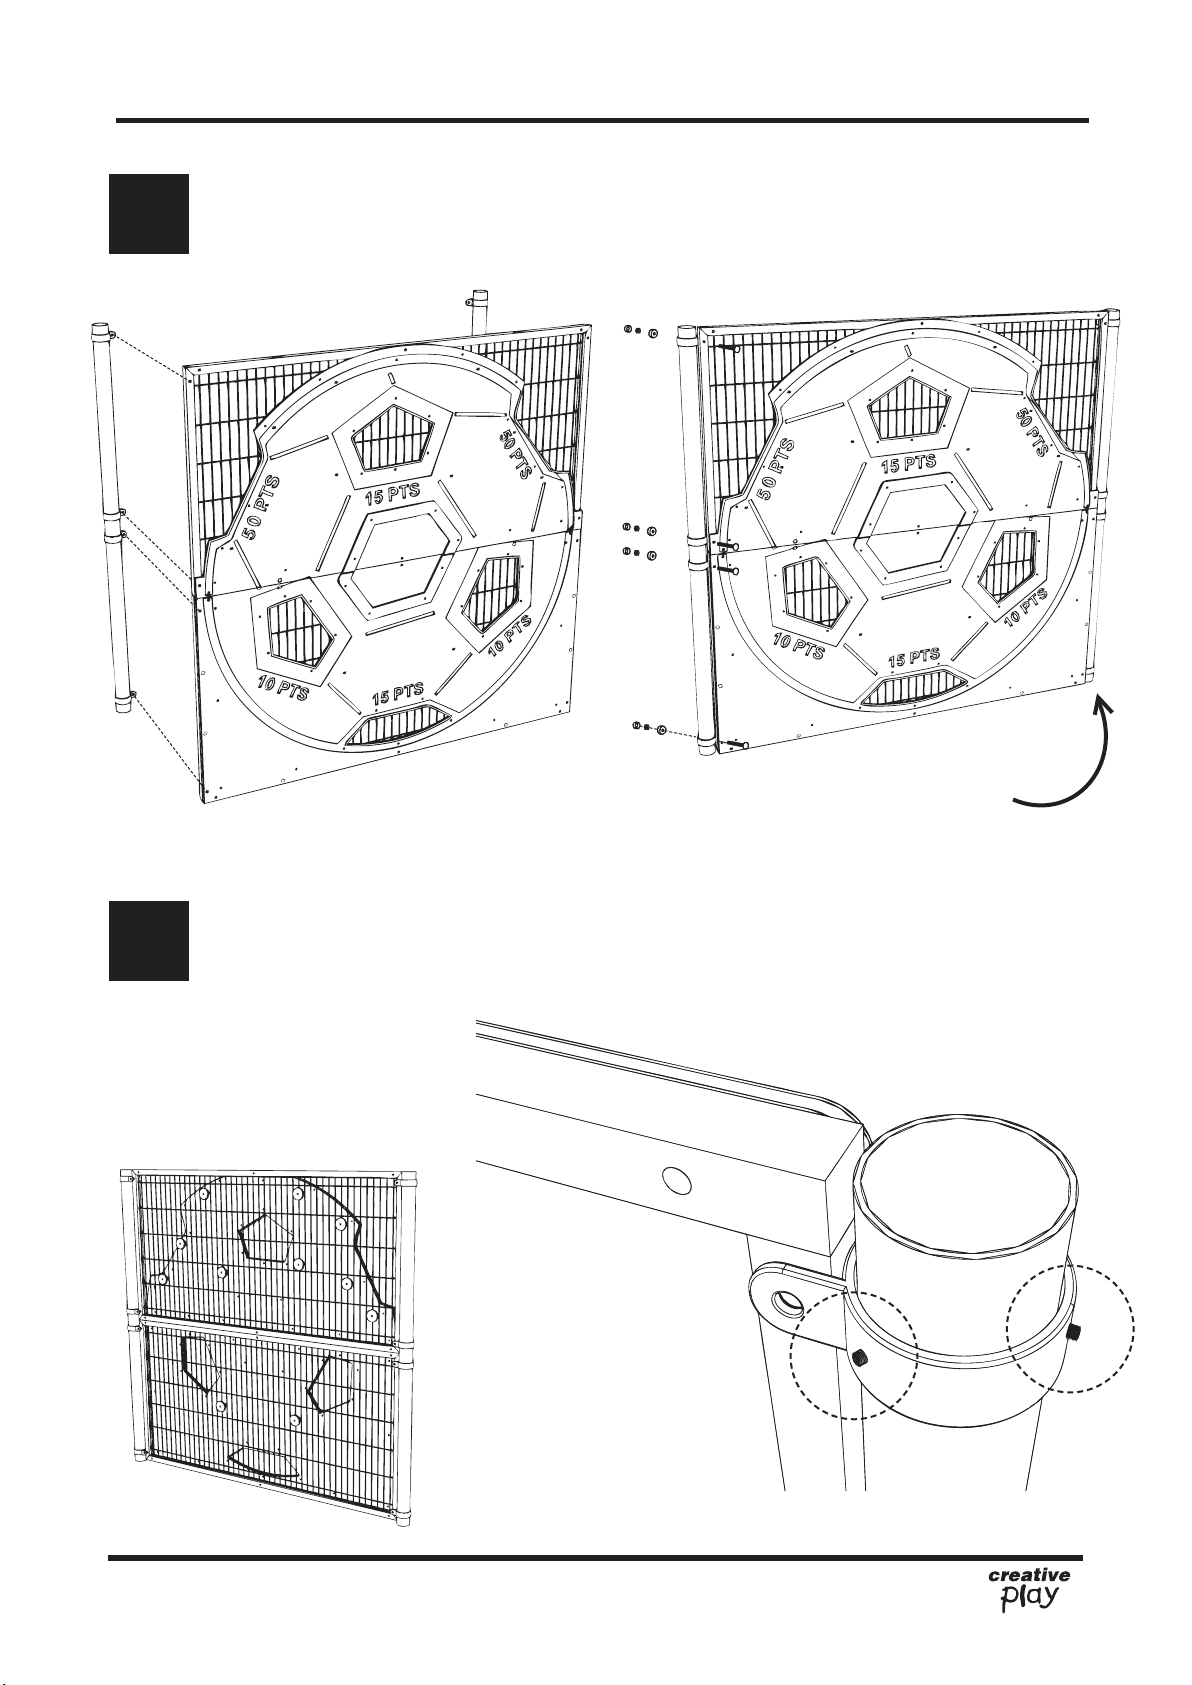
Attach the ‘PANEL ASSEMBLY’ to the COLLAR CLAMPS
5
Tighten the GRUB screws on the COLLAR CLAMPS
6
There are 3 x GRUB screws per COLLAR CLAMP
Notes:
Collar clamps are positioned as shown RIGHT
(the clamp sits ‘behind ‘ the frame)
REPEAT FOR
OPPOSITE SIDE
pg 8 of 11
REF: T106 - FOOTBALL TARGET PANEL
Page 9
Installation InstructionsInstallation Instructions
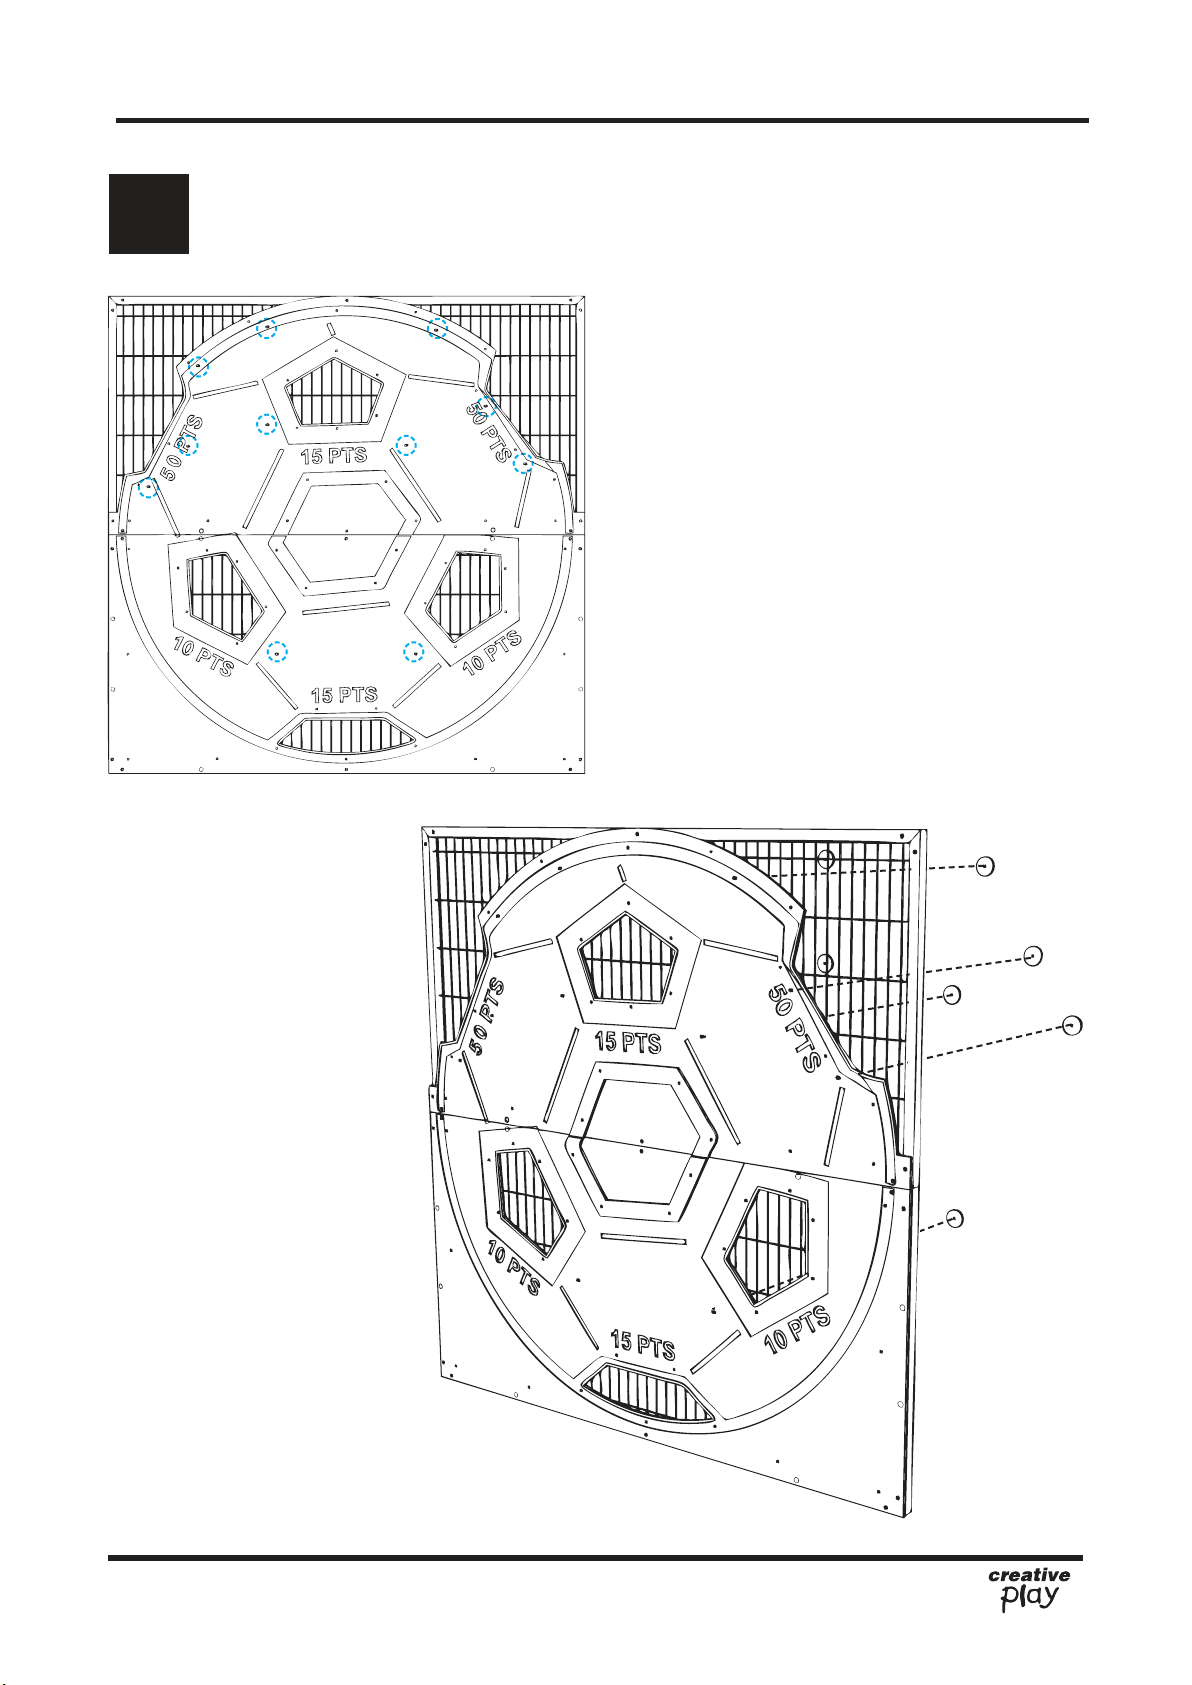
FURTHER SECURE the PLAYTEC PANELS
7
Using 11 X 5B/N4 TORKTAINERS
pg 9 of 11
REF: T106 - FOOTBALL TARGET PANEL
Page 10
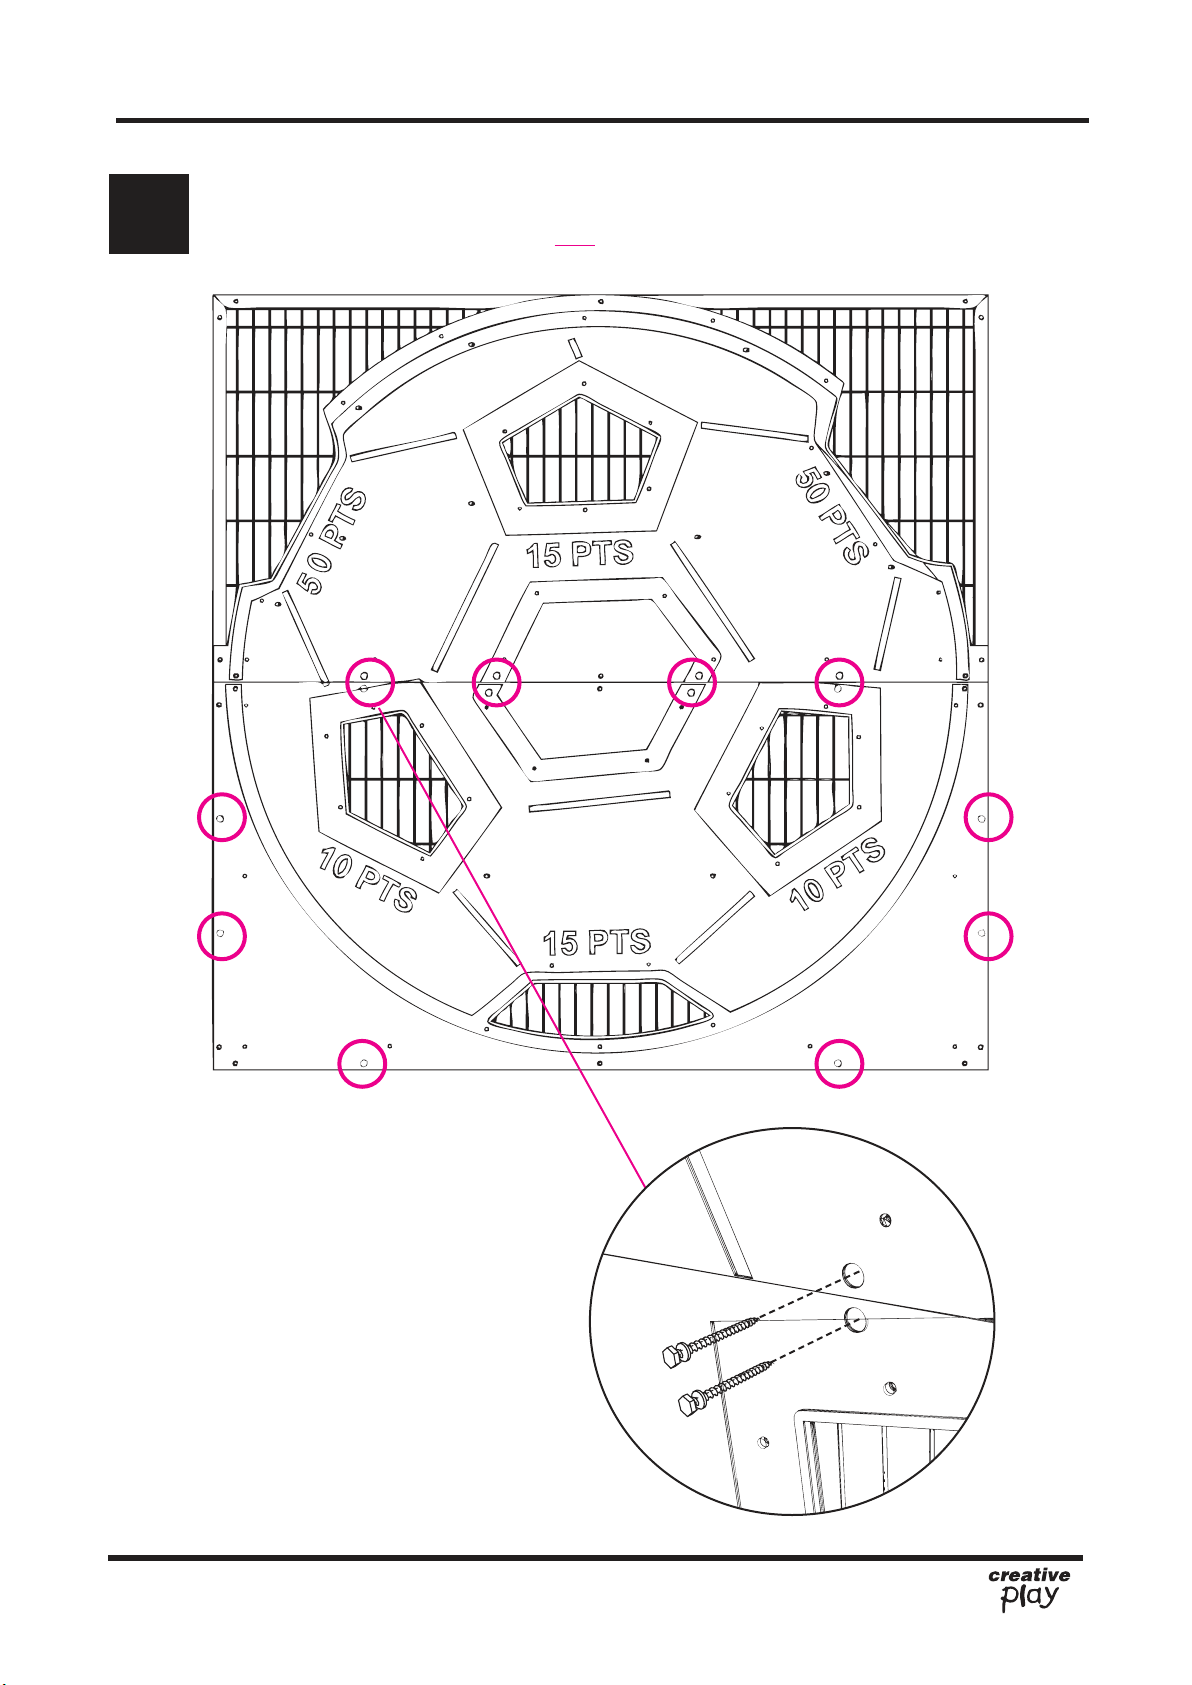
Installation InstructionsInstallation Instructions
SCREW SELF DRILLING SCREWS THROUGH PLAYTEC INTO FRAME
8
Screw into the counterbores as circled in PINK below - Using the 14 X self drilling screws provided
pg 10 of 11
REF: T106 - FOOTBALL TARGET PANEL
Page 11
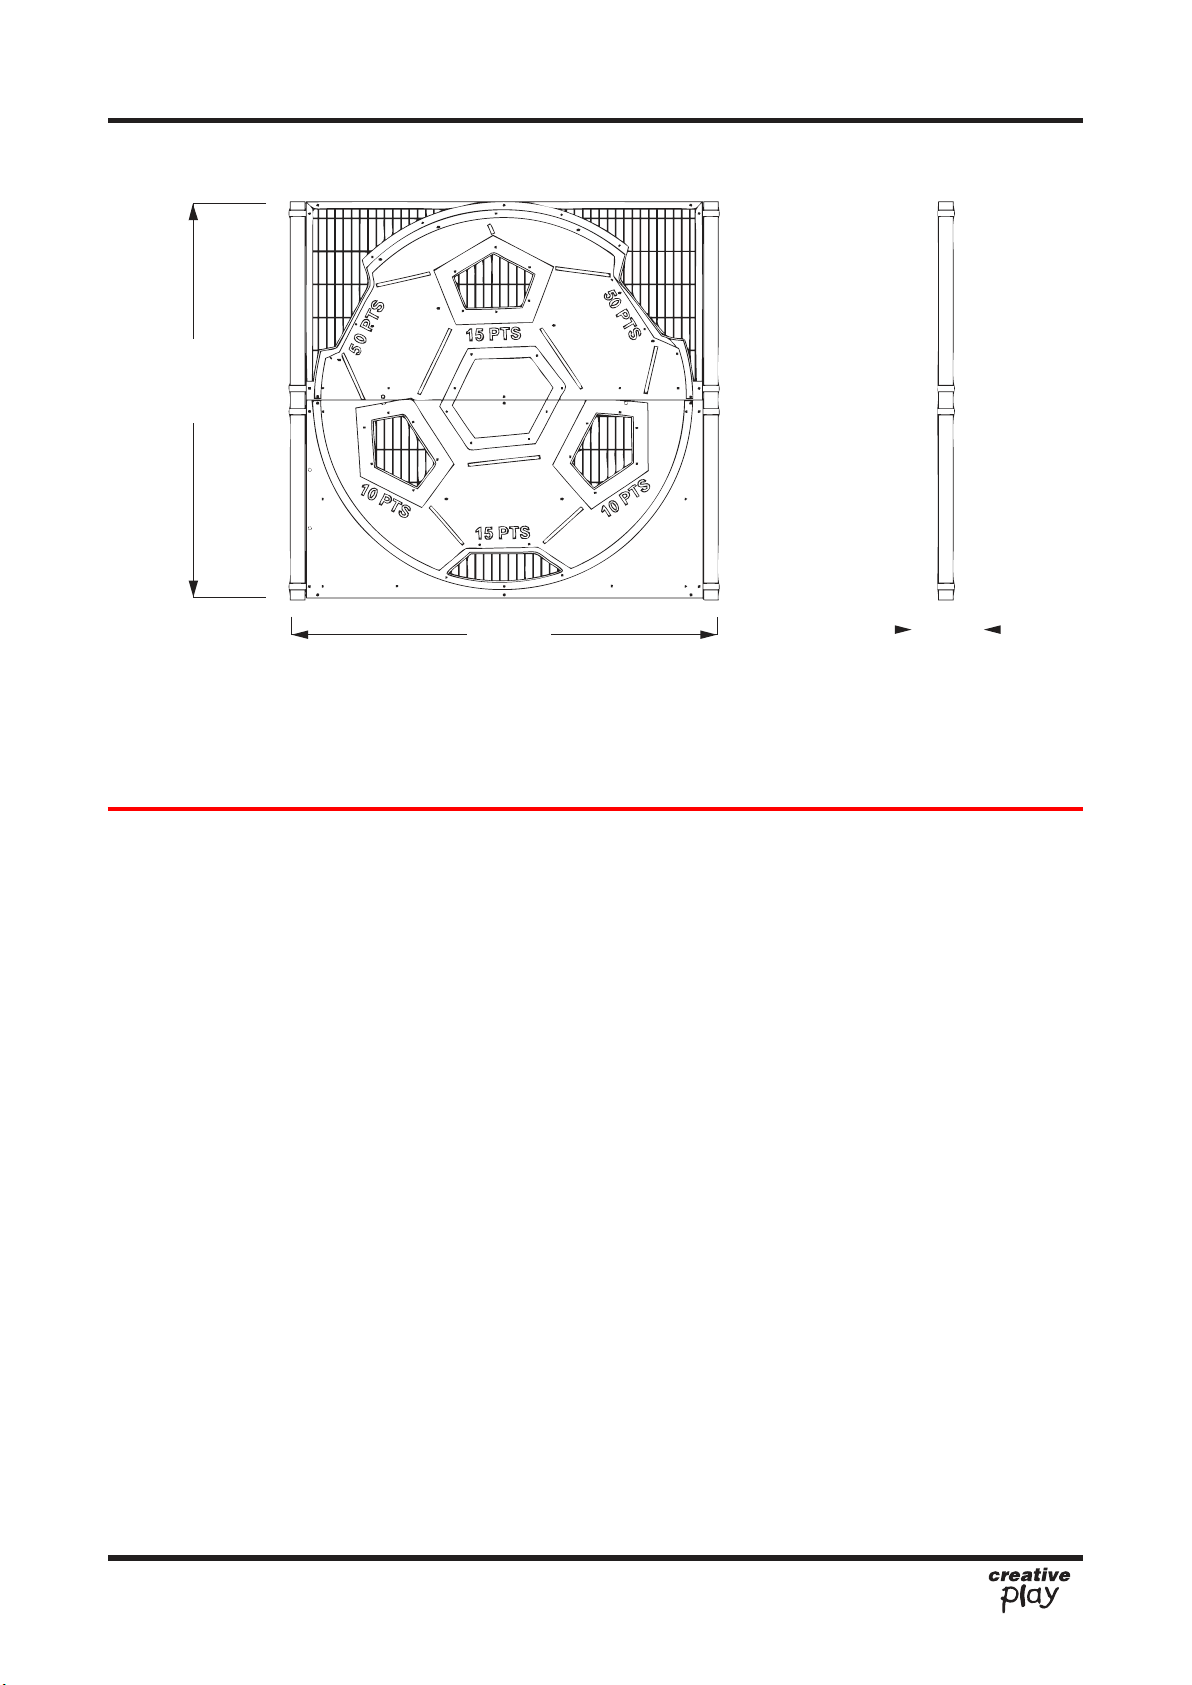
Additional Dimensions
2.41m
2.6m
0.10m
pg 11 of 11
REF: T106 - FOOTBALL TARGET PANEL
 Loading...