

Creative Enterprisese C R_N130, C R_N230 User Manual

CREATIVE ENTERPRISES PC Station
- 1 -
CR
P
P
C
C SSttaattiioonn
U
Usseerr’’ss
G
Guuiiddee
ModelCR_N130 Model CR_N230
www.creativeenterprisesindia.com, Sales manager:kaustubh@creativeenterprisesindia.com
Add: Sant tukaram vyapar sankul ,1st floor, B-13, nigdi pradhikaran,pune 411044.Maharastra, India

CREATIVE ENTERPRISES PC Station
- 2 -
CONTENTS
1. Introduction................................................................................................................................................................- 3 -
1.1 What is CR PC Station? ...................................................................................................................................- 3 -
1.2 What is the terminal services software?...........................................................................................................- 3 -
1.3 Features ............................................................................................................................................................- 3 -
1.4 Minimum System Requirements......................................................................................................................- 4 -
1.5 Conceptual Diagram.........................................................................................................................................- 4 -
2. Installation..................................................................................................................................................................- 4 -
2.1 Install the terminal services software...............................................................................................................- 4 -
2.2 Connect the CR PC Station............................................................................................................................- 12 -
2.3 Network connection .......................................................................................................................................- 12 -
2.4 Installation with monitor mounts ...................................................................................................................- 14 -
3. Uninstallation...........................................................................................................................................................- 17 -
4. Using the CR PC Station..........................................................................................................................................- 18 -
4.1 Configure the CR PC Station .........................................................................................................................- 18 -
4.1.1 The CR PC Station screen...................................................................................................................- 18 -
4.1.2 The Options Menu...............................................................................................................................- 18 -
4.1.3 The “Setup” Menu...............................................................................................................................- 19 -
4.1.4 The “Network” Tab.............................................................................................................................- 20 -
4.1.5 The “Options” Tab...............................................................................................................................- 20 -
4.1.6 The “Password” Tab............................................................................................................................- 22 -
4.1.7 The “Update” Tab................................................................................................................................- 23 -
4.2 Using the management console......................................................................................................................- 23 -
4.3 Software Settings (local)................................................................................................................................- 24 -
4.4 Sessions..........................................................................................................................................................- 25 -
4.5 Information & Settings...................................................................................................................................- 28 -
4.6 Software Settings (LAN)................................................................................................................................- 30 -
4.7 Hardware Settings (LAN/local) .....................................................................................................................- 31 -
5. Glossary ...................................................................................................................................................................- 38 -
6. FAQ..........................................................................................................................................................................- 40 -
www.creativeenterprisesindia.com, Sales manager:kaustubh@creativeenterprisesindia.com
Add: Sant tukaram vyapar sankul ,1st floor, B-13, nigdi pradhikaran,pune 411044.Maharastra, India

- 3 -
1. Introduction
1.1 What is CR PC Station?
The CR PC Station enables you to dramatically cut computing costs by sharing the untapped
power of PCs. The CR PC Station, Ethernet-based extension protocol, and terminal services
software work together to efficiently harness excess computing capacity and enable multiple
users to share a single PC. Best of all, IT staff and end users do not need special training because
this end-to-end solution is easy to manage and is compatible with standard PC applications.
1.2 What is the terminal services software?
Note: This document uses the following terms interchangeably: "User software," "host PC
software," "terminal services software" and "NCT-2000-XP".
NCT-2000-XP, the terminal services software, divides the host PC's resources into independent
sessions that give each user their own robust PC experience. One PC can support up to ten users
when running on a desktop operating system, such as Microsoft Windows XP. With a server
operating system on the host (Microsoft Windows 2003 Server or Linux), up to 30 users can be
supported simultaneously.
1.3 Features
The CR PC Stations do not have a CPU, hard drive or CD-ROM, yet most users find it
indistinguishable from a full PC environment. The CR PC STATIONS exclusive technology allows
you to add up to 30 computing terminals to your existing PC. Each EG PC Station offers a full and
independent computing experience.
Simultaneous desktop operation
Each CR PC Station accesses the host PC OS and can run its applications concurrently and
independently through Ethernet.
Minimal Maintenance Required
You only have to maintain and upgrade the host PC since the CR PC Stations have no CPU, hard
drive, or CDROM.
Small sleek design
Allows more room in your office or on your desk, and can even mount on the back of your LCD
with included bracket.
Eco-friendly
Since the CR PC Stations have no moving parts, it makes no noise and saves energy by drawing
only 5 watts.
Supports multiple resolutions
640x480, 800x600, 1024x768 and 1280x1024, by 16-bit colors.
www.creativeenterprisesindia.com, Sales manager:kaustubh@creativeenterprisesindia.com
Add: Sant tukaram vyapar sankul ,1st floor, B-13, nigdi pradhikaran,pune 411044.Maharastra, India
------------------------------------------------------------------------------------------------------------------------------------------------------------------
- 4 -
Support windows XP sp3 patch and windows 2003 server sp2 patch.
1.4 Minimum System Requirements
A host PC with at least:
• A 2 GHz processor
• 512 MB RAM
• 60 GB hard disk drive
• Ethernet switch or router
Do not use a notebook PC as the host. Notebooks use power-saving features and different
technologies than a typical desktop PC, and this causes power management and memory
problems.
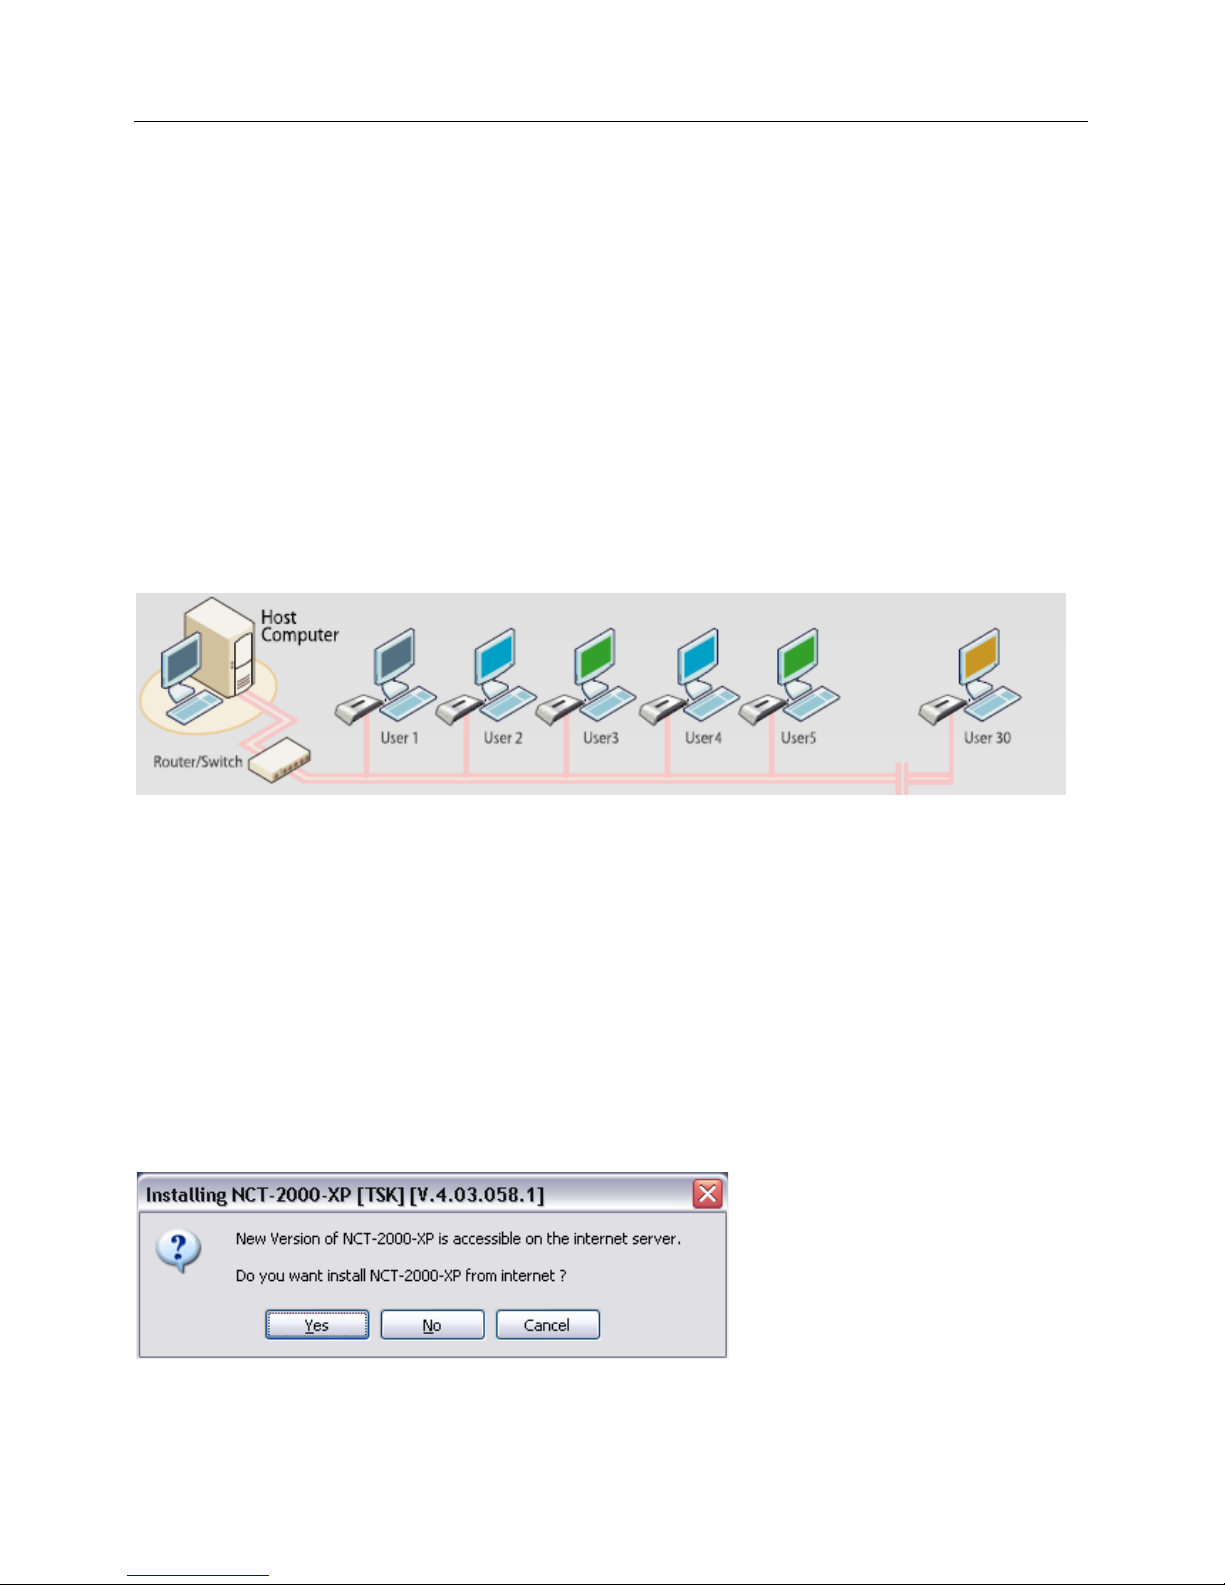
1.5 Conceptual Diagram
2. Installation
2.1 Install the terminal services software
(Optional, but must be done once)
Insert the Software Installation CD into the host PC's CD drive.
Go to "My Computer", open the CD drive's icon, and start the "Setup" application.
Before the installation starts, the installation software attempts to connect to the Internet to
compare the software version on the CD with the latest software version on the server. If there
is a later version on the server, a prompt will appear to ask if you want to use the version on the
CD or if you want to install the latest version. It is recommended to install the latest version
rather than use an older version on the CD.
Note: The following message will appear if any computer on the network is not connected to the
www.creativeenterprisesindia.com, Sales manager:kaustubh@creativeenterprisesindia.com
Add: Sant tukaram vyapar sankul ,1st floor, B-13, nigdi pradhikaran,pune 411044.Maharastra, India

- 5 -
Internet or a program such as a firewall blocks the port.
The following ports should be opened on the LAN: TCP Ports 27605, 3581, 3597, 3645, 3646,
3725; UDP Ports1027, 1283 (these are subject to change).
At the "Welcome" screen, click the "Next" button.
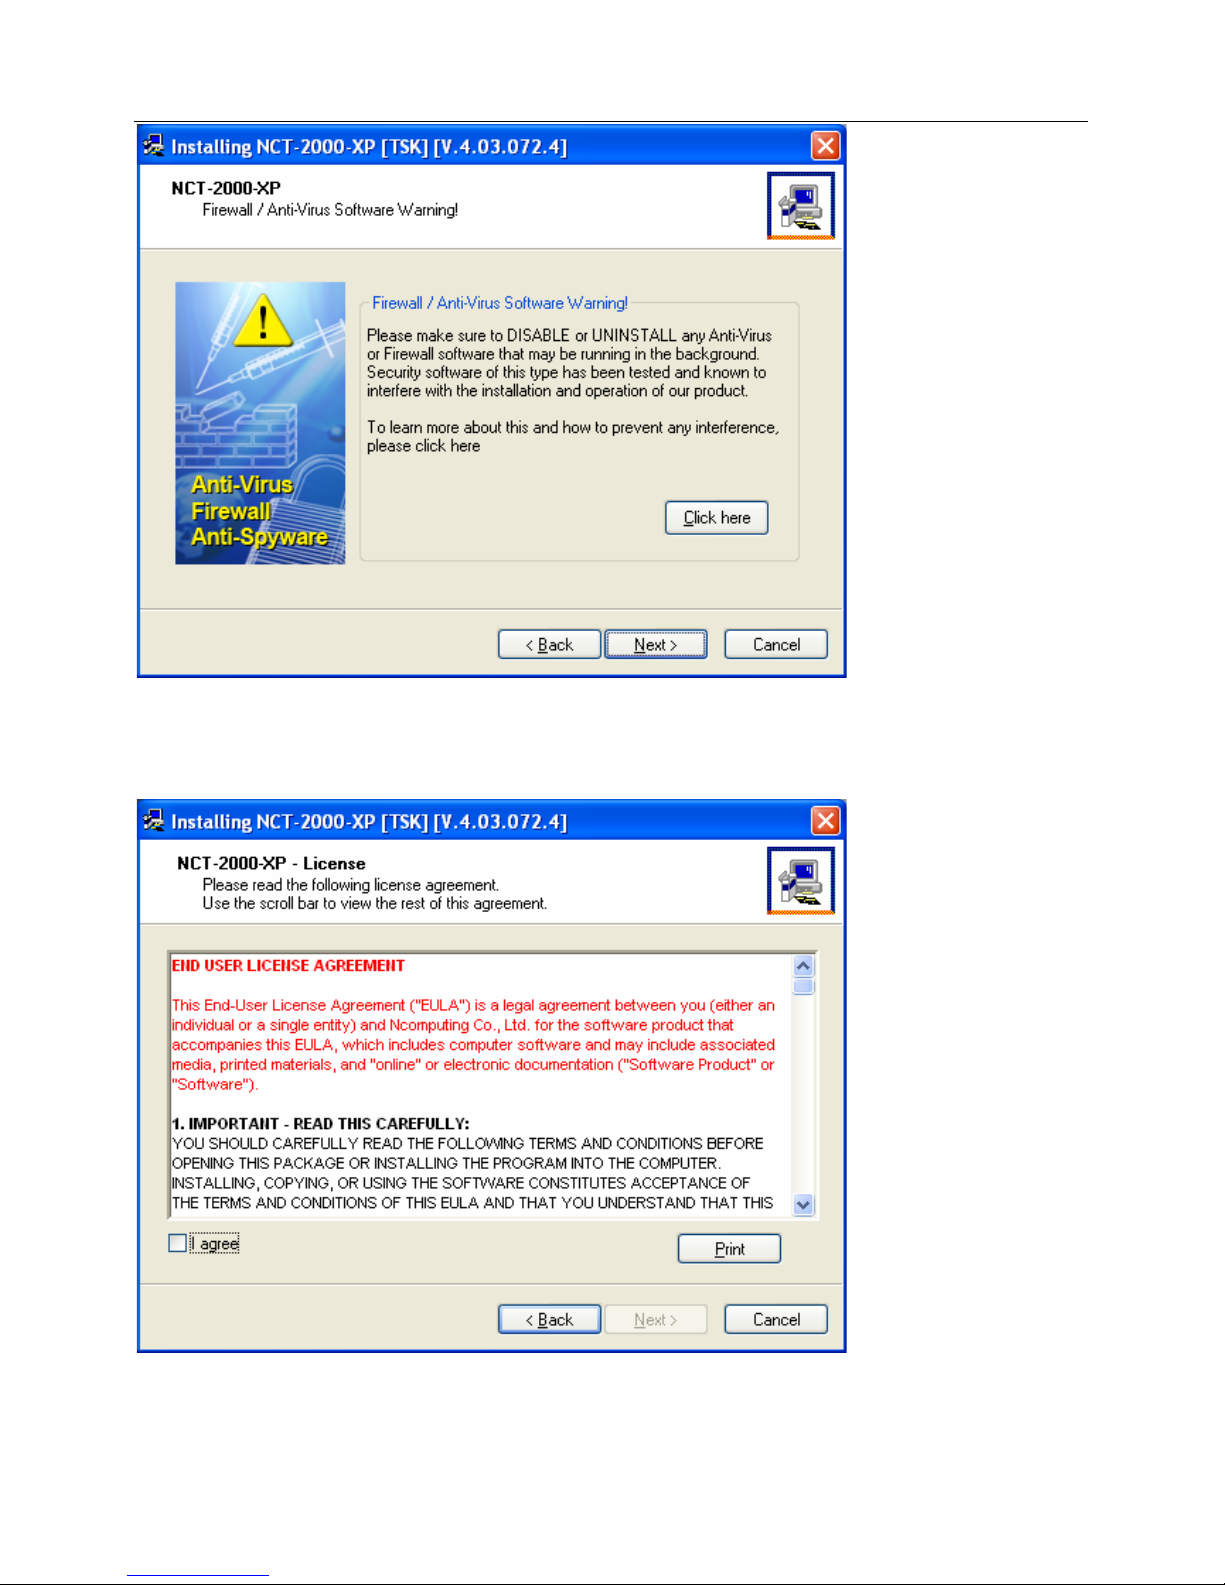
At the antivirus and firewall warning screen, click the "Next" button.
www.creativeenterprisesindia.com, Sales manager:kaustubh@creativeenterprisesindia.com
Add: Sant tukaram vyapar sankul ,1st floor, B-13, nigdi pradhikaran,pune 411044.Maharastra, India
- 6 -
At the software license screen, you may view the software license and print it out. When you are
finished, click the "I agree" checkbox, and then click on the "Next" button.
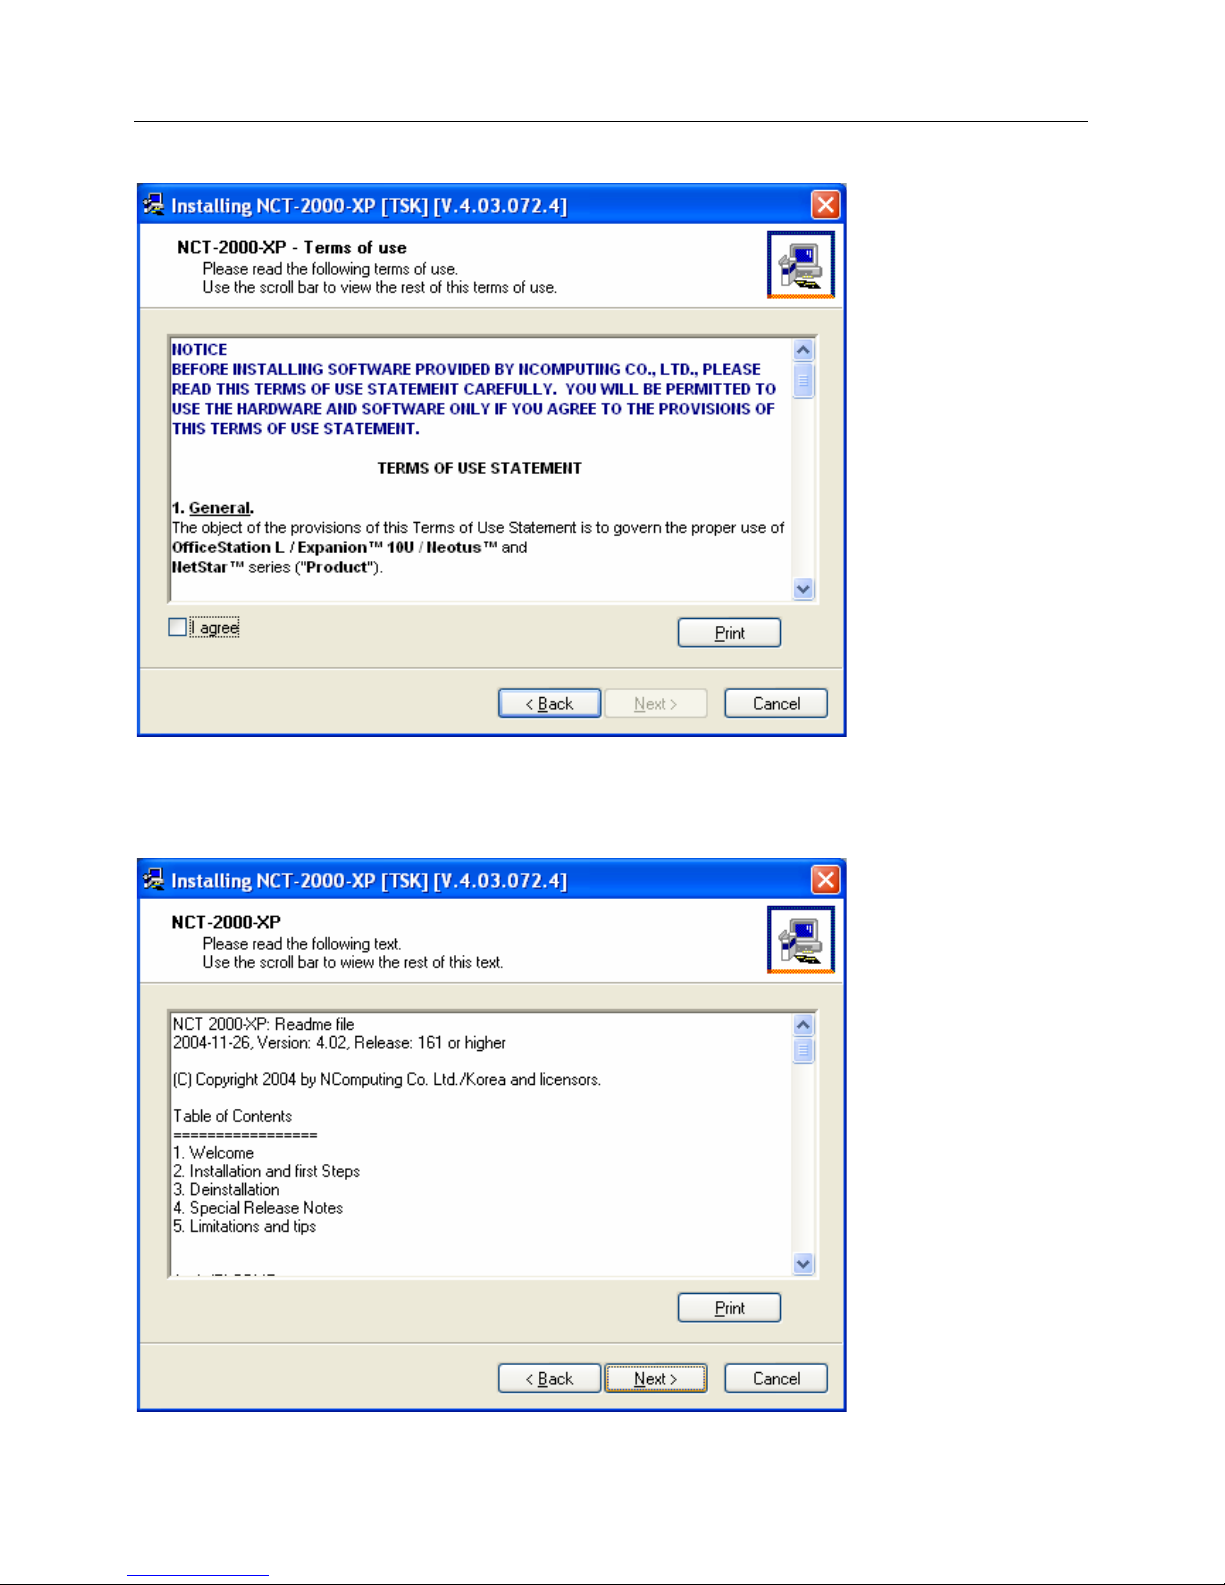
At the software terms of use screen, you may view the software terms of use document and print
www.creativeenterprisesindia.com, Sales manager:kaustubh@creativeenterprisesindia.com
Add: Sant tukaram vyapar sankul ,1st floor, B-13, nigdi pradhikaran,pune 411044.Maharastra, India
- 7 -
it out. When you are finished, click the "I agree" checkbox, and then click on the "Next" button.
At the readme file screen, you may view the readme file and print it out. When you are finished,
click on the "Next" button.
www.creativeenterprisesindia.com, Sales manager:kaustubh@creativeenterprisesindia.com
Add: Sant tukaram vyapar sankul ,1st floor, B-13, nigdi pradhikaran,pune 411044.Maharastra, India

- 8 -
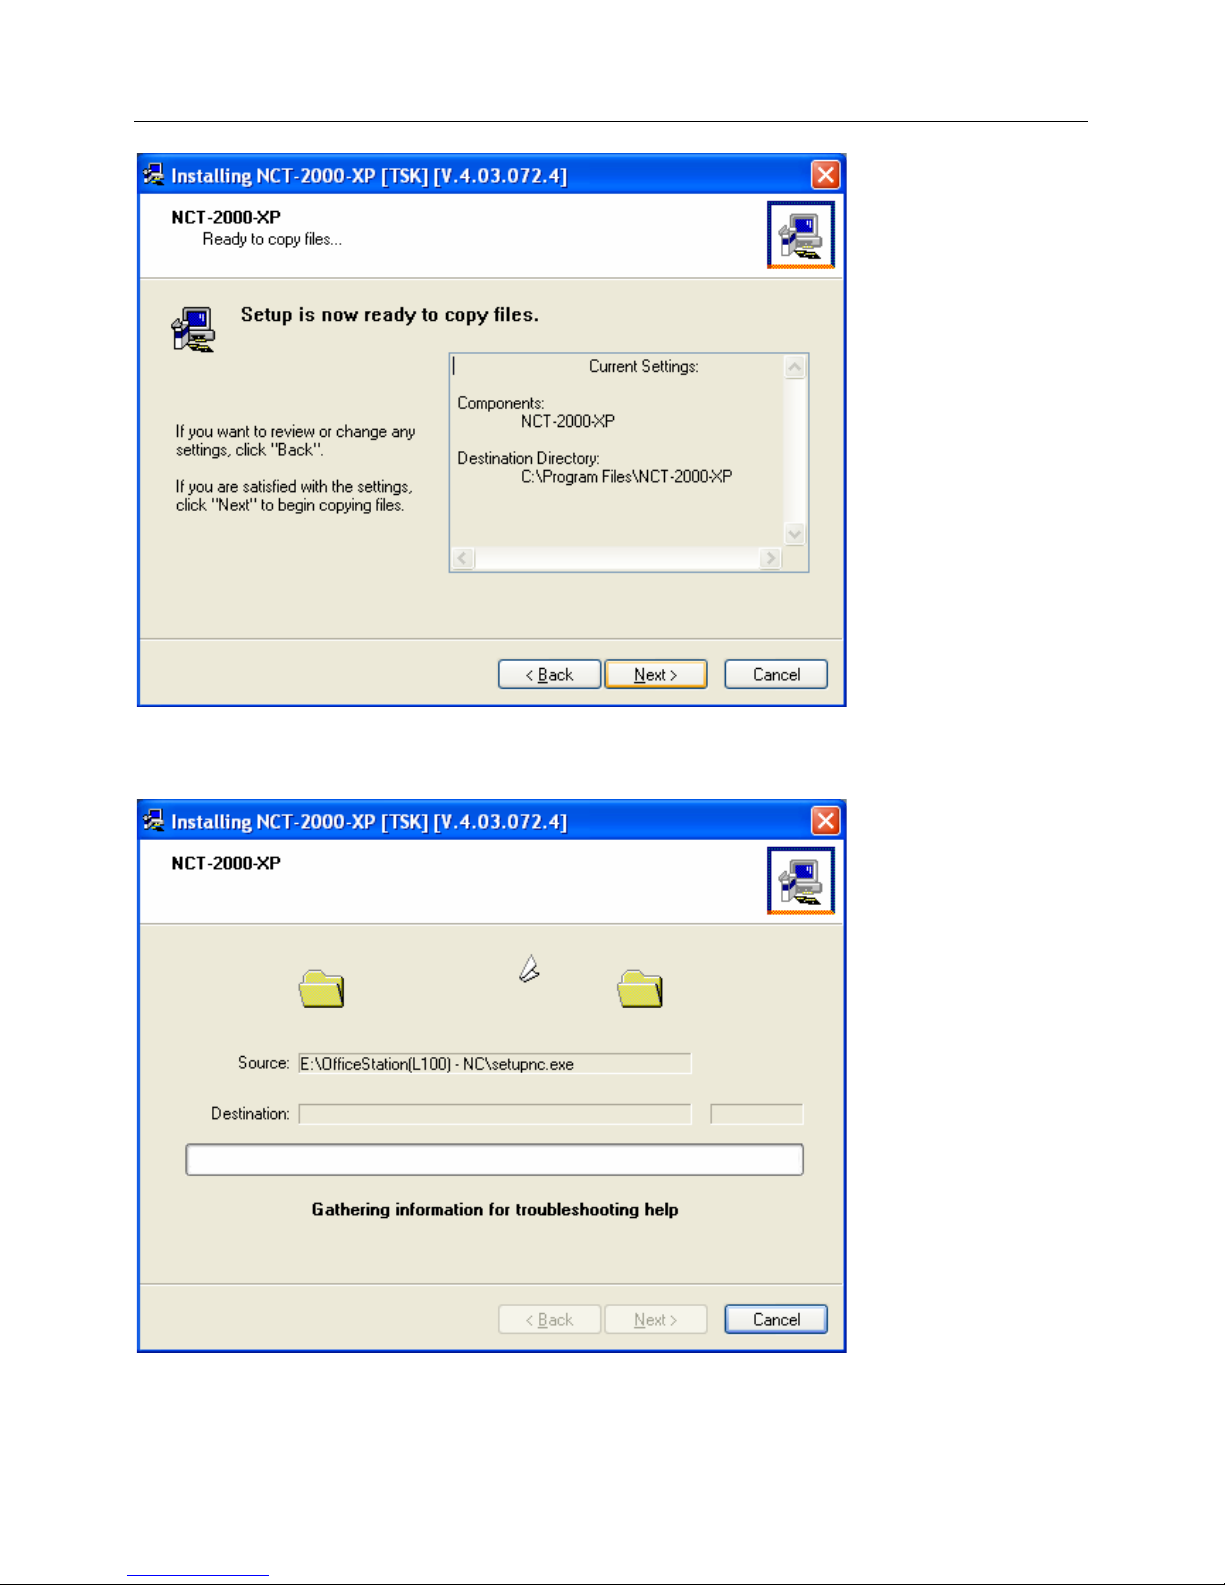
At the "Choose destination location" screen, you can install to the default location, or you can
choose a different location. When you are finished, click on the "Next" button.
At the "Choose Password for Administrator" screen, select whether or not to use an administrator
password and whether or not to install the Ne twork Administration Console. If you choose to use
an administrator password, enter it and retype it. Click on the "Next" button.
Note: The Network Administration Console allows you to administer the terminal service
software and the CR PC Stations in your network. It is recommended to be installed at least once
on each network to enable administration tasks. It may be installed on every terminal service
software installation.
www.creativeenterprisesindia.com, Sales manager:kaustubh@creativeenterprisesindia.com
Add: Sant tukaram vyapar sankul ,1st floor, B-13, nigdi pradhikaran,pune 411044.Maharastra, India
- 9 -
At the installation confirmation screen, review the selections and click on the "Next" button.
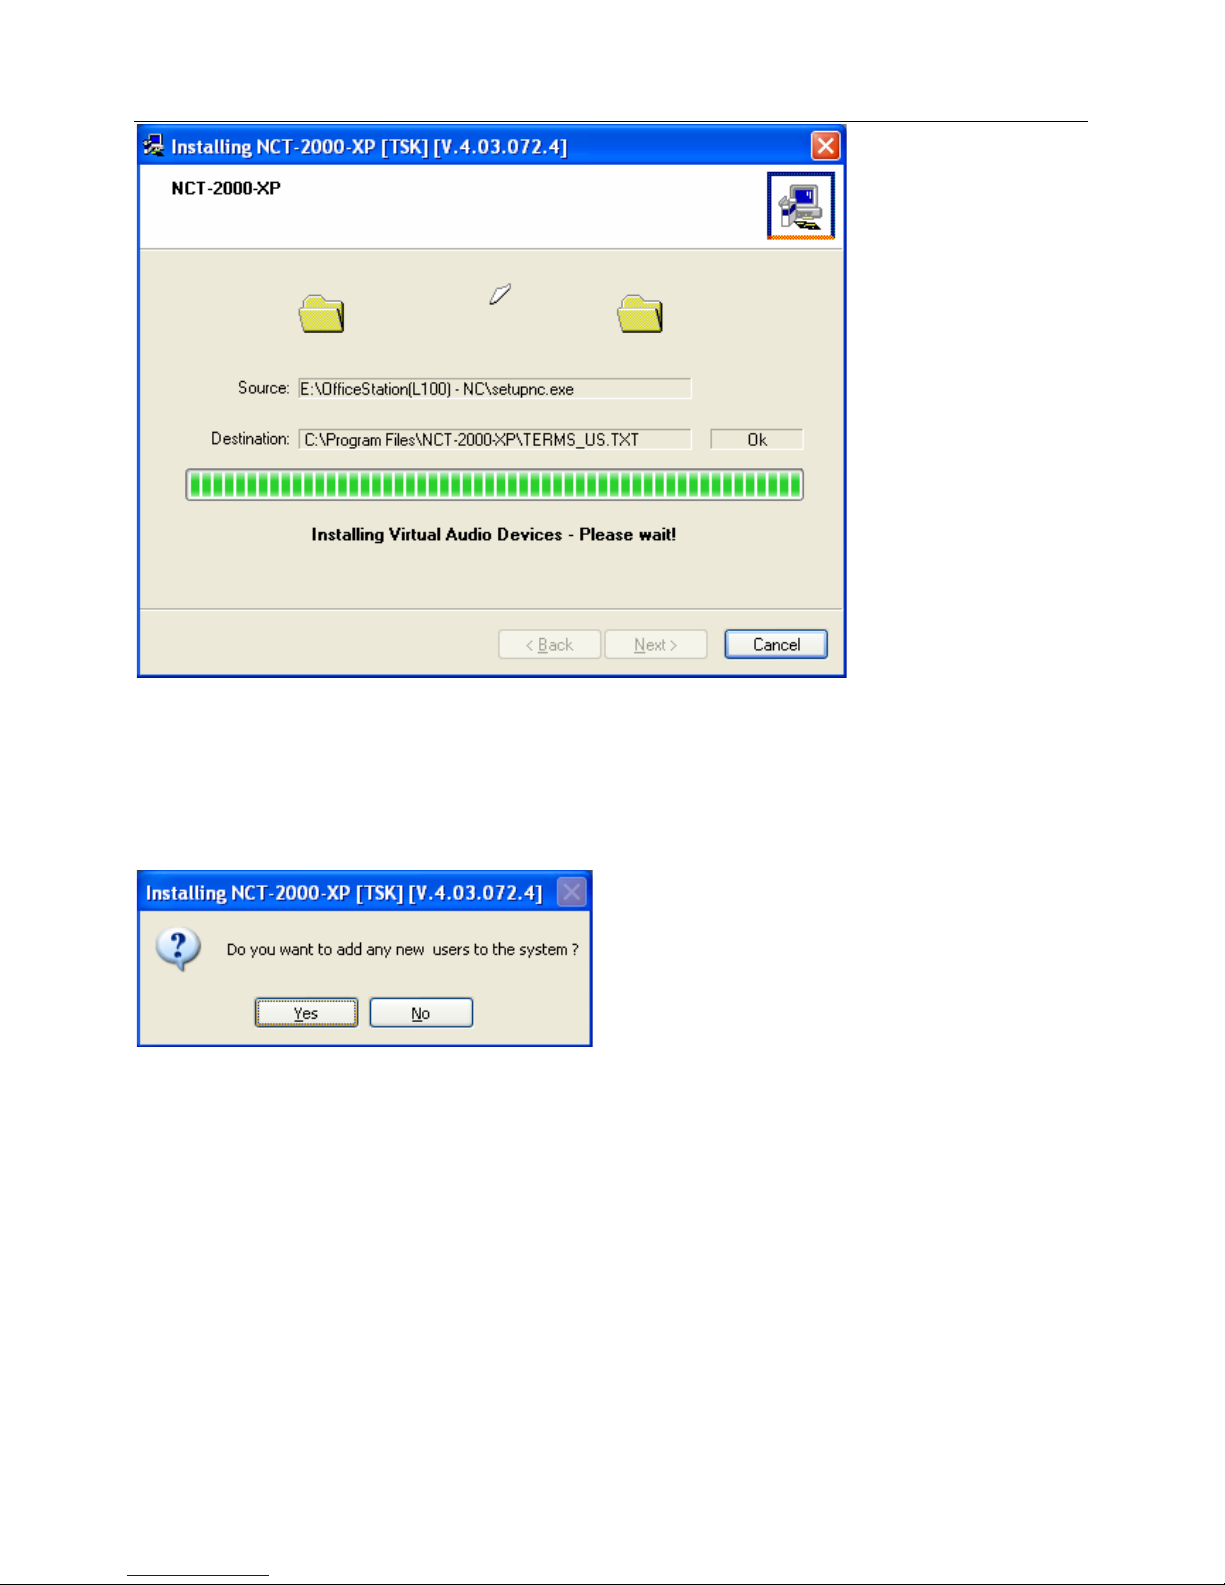
The software is installed.
www.creativeenterprisesindia.com, Sales manager:kaustubh@creativeenterprisesindia.com
Add: Sant tukaram vyapar sankul ,1st floor, B-13, nigdi pradhikaran,pune 411044.Maharastra, India
- 10 -
At the "Add new users" screen, select whether or not you would like to add new users to the
system. If you click the "Yes" button, the installation program will launch a screen to administer
user accounts on the host PC. If you click the "No" button, the installation process will continue
without bringing up the user administration screen.
Note: It is recommended that all users have their own user accounts to enable control of their
own settings.
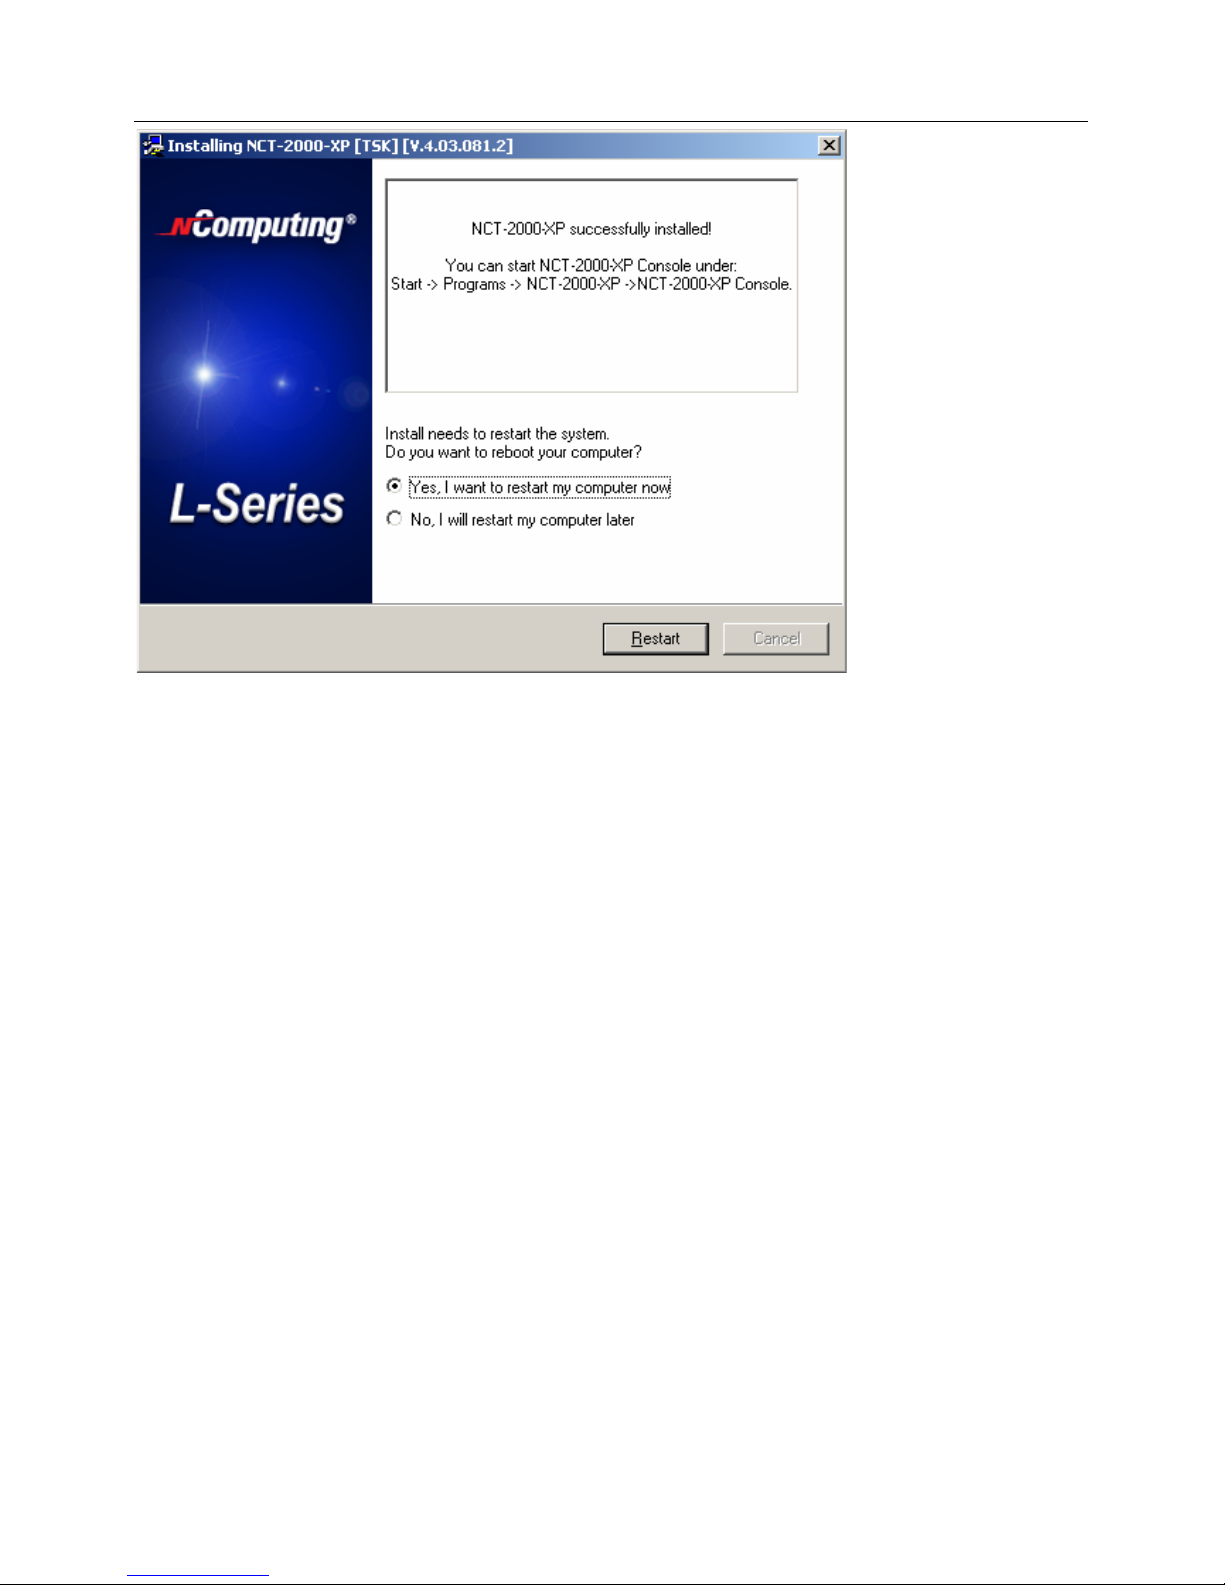
At the "NCT-2000 -XP successfully installed" screen, select whether ornot to resart the
computer.
www.creativeenterprisesindia.com, Sales manager:kaustubh@creativeenterprisesindia.com
Add: Sant tukaram vyapar sankul ,1st floor, B-13, nigdi pradhikaran,pune 411044.Maharastra, India
The above graphics image will be changed.
Note: It is required to reboot the computer before using the terminal service software or the CR
PC Stations connected to the host PC
www.creativeenterprisesindia.com, Sales manager:kaustubh@creativeenterprisesindia.com
Add: Sant tukaram vyapar sankul ,1st floor, B-13, nigdi pradhikaran,pune 411044.Maharastra, India

- 12 -
2.2 Connect the CR PC Station
The CR PC Station must be connected via Ethernet to the host PC. This can be done using an
Ethernet switch, a router, or some other network connection method.
When registering the software, all the CR PC Stations must be connected to the host PC using
Ethernet
2.3 Network connection
Note: If the network is configured to use DHCP to get dynamic IP addresses, you can setup the
PC Station to use it.
Go to the CR PC Station and select the "Options" button, and then select the “Setup” button.
www.creativeenterprisesindia.com, Sales manager:kaustubh@creativeenterprisesindia.com
Add: Sant tukaram vyapar sankul ,1st floor, B-13, nigdi pradhikaran,pune 411044.Maharastra, India
- 13 -
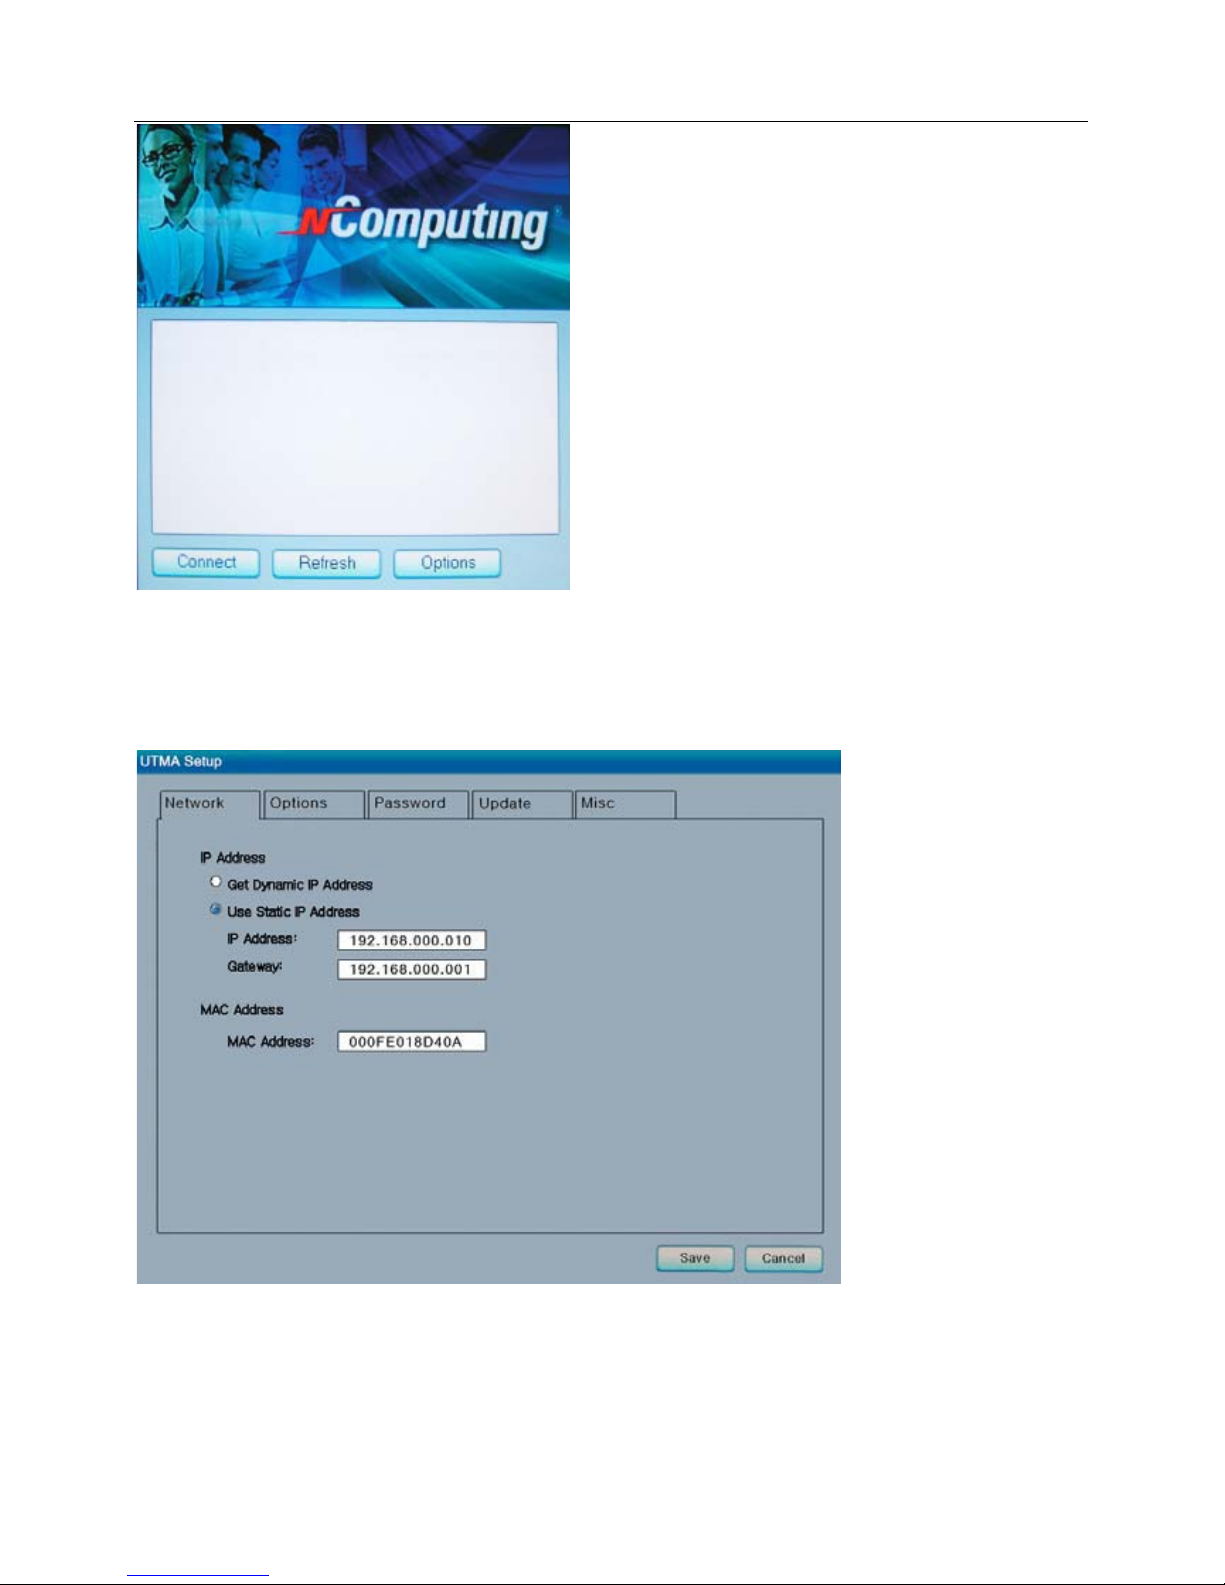
In the "Network" tab, select whether to use a dynamic IP address or a static IP address.
If you setup the CR PC Station to use a dynamic IP address, you don't need to enter anything as
the IP address.
Click the "Save" button.
If you setup the CR PC Station to use a static IP address, you must enter the IP address and the
default gateway.
Click the "Save" button.
www.creativeenterprisesindia.com, Sales manager:kaustubh@creativeenterprisesindia.com
Add: Sant tukaram vyapar sankul ,1st floor, B-13, nigdi pradhikaran,pune 411044.Maharastra, India
 Loading...