

Page 1
Page 2

User’s Guide
Zen Portable Media Center
Information in this document is subject to change without notice and does not represent a commitment on the part of Creative
Technology Ltd. No part of this manual may be reproduced or transmitted in any form or by any means, electronic or mechanical,
including photocopying and recording, for any purpose without the written permission of Creative Technology Ltd. The software
described in this document is furnished under a license agreement and may be used or copied only in accordance with the terms of
the license agreement. It is against the law to copy the software on any other medium except as specifically allowed in the license
agreement. The licensee may make one copy of the software for backup purposes only.
The Software License Agreement is found in a separate folder on the Installation CD.
Copyright © 2004 by Creative Technology Ltd. All rights reserved.
Version 1.0
July 2004
The Creative logo and Zen are registered trademarks of Creative Technology Ltd. in the United States and/or other countries.
Microsoft, MS-DOS, Windows and the Windows logo are registered trademarks of Microsoft Corporation. Intel and Pentium are
registered trademarks of Intel Corporation. MP3.com and the MP3.com logo are trademarks of MP3.com, Inc. All other products are
trademarks or registered trademarks of their respective owners and are hereby recognized as such. All specifications are subject to
change without prior notice. Actual contents may differ slightly from those pictured.
Page 3

Contents
Page 4

1 Introduction
Zen Portable Media Center................................................................................................................... 1-1
Windows Media Player 10............................................................................................................ 1-1
Terminology...................................................................................................................................... 1-1
System Requirements............................................................................................................................... 1-2
Accessories.................................................................................................................................................. 1-3
Customer Support Services and Warranty Information............................................................... 1-3
2 About Your Player
Front Views................................................................................................................................................. 2-1
Top and Bottom Views............................................................................................................................ 2-3
Selecting Menu Options........................................................................................................................... 2-4
Navigation buttons.......................................................................................................................... 2-4
Play Control buttons................................................................................................................................ 2-5
3 Getting Started
Inserting the battery ................................................................................................................................ 3-1
Powering your player .............................................................................................................................. 3-2
Charging the battery ................................................................................................................................ 3-3
Battery charge status...................................................................................................................... 3-4
Setting Up Your Player............................................................................................................................ 3-5
Connecting Your Player to a TV.......................................................................................................... 3-5
i
Page 5

Using the Protective Carrying Case.................................................................................................... 3-7
Locking and Unlocking your Player...................................................................................................... 3-7
Turning the player on or off................................................................................................................... 3-8
Navigating Menus ...................................................................................................................................... 3-8
Transferring content................................................................................................................................. 3-9
4 Personalizing Your Player
Personalizing your player......................................................................................................................... 4-1
Equalization........................................................................................................................................ 4-1
Display................................................................................................................................................. 4-1
Effects................................................................................................................................................... 4-2
International....................................................................................................................................... 4-2
Reset.................................................................................................................................................... 4-2
Information.................................................................................................................................................. 4-3
Resetting your player................................................................................................................................ 4-3
5 Managing Content
About Content Types ............................................................................................................................. 5-1
Getting Content......................................................................................................................................... 5-1
Transferring content................................................................................................................................. 5-2
Transferring Content Manually................................................................................................... 5-2
Deleting Content............................................................................................................................. 5-2
Managing Videos......................................................................................................................................... 5-3
Locating a Video............................................................................................................................... 5-3
Playing a Video.................................................................................................................................. 5-3
Managing Programs................................................................................................................................... 5-3
ii
Page 6

Managing Pictures...................................................................................................................................... 5-4
Locating a Picture............................................................................................................................. 5-4
Viewing a Slide Show...................................................................................................................... 5-4
Setting Up a Slide Show................................................................................................................. 5-4
Managing Audio.......................................................................................................................................... 5-5
Playing a Track ................................................................................................................................. 5-6
Viewing Track Information........................................................................................................... 5-6
Playing Tracks from an Album, Artist or Genre.................................................................... 5-6
Changing Play Modes...................................................................................................................... 5-7
About the Portable Playlist........................................................................................................... 5-7
Managing the Portable Playlist .................................................................................................... 5-7
Viewing the Contents of the Portable Playlist........................................................................ 5-8
Deleting All Tracks from the Portable Playlist........................................................................ 5-8
Appendixes
A General Specifications
General Specifications for your player................................................................................................ A-1
B Frequently Asked Questions
Usage............................................................................................................................................................. B-1
Updates......................................................................................................................................................... B-3
About Recovery Screens......................................................................................................................... B-4
C Terms and Technology Explained
Glossary....................................................................................................................................................... C-1
iii
Page 7

DRM.......................................................................................................................................... C-1
Li-Ion Polymer........................................................................................................................ C-1
NTSC........................................................................................................................................ C-1
PAL............................................................................................................................................ C-1
Transcoding............................................................................................................................ C-2
Windows Media Audio (WMA)....................................................................................... C-2
Windows Media Video (WMV)....................................................................................... C-2
USB............................................................................................................................................ C-2
iv
Page 8

Introduction
Page 9

Introduction
Zen Portable Media Center
Windows Media Player 10
Congratulations on making an excellent decision in purchasing the Zen Portable
Media Center!
With this device, you can have all of your favorite videos, music, and pictures at
your fingertips. Use your computer to create or download digital entertainment
programs, including recorded TV shows, videos, home movies, music, and
pictures, then store them all on your device. You can even connect it to your TV set
and view your pictures and videos!
Your player comes with Windows Mobile™ software, featuring an easy-to-use and
familiar Windows
fidelity WMA or MP3
Connect your player with the supplied USB travel cable, so that you can transfer
audio tracks, TV shows, pictures and videos quickly and easily. Enjoy easy access
to all of your favorite entertainment — anytime, anywhere.
With Windows Media Player 10, you can enjoy fast, flexible and high-quality
playback of your digital content. It also has smart jukebox features designed by
Microsoft
®
to make transferring content simple and easy.
®
Media Center Edition interface. You can easily create high-
*
files from your personal audio CD collection.
Terminology If you are unfamiliar with the terms used in this document, you can refer to "Terms
and Technology Explained" on page C-1.
* You cannot create digital audio files from Copy Control CDs.
Introduction 1-1
Page 10

System Requirements
Minimum Recommended
❍ Microsoft
Professional, Windows XP Media Center Edition, or
Windows XP Tablet PC
❍ Intel
❍ CD-ROM/DVD-ROM drive with digital audio extraction
support
❍ USB 2.0 port
❍ 64 MB RAM ❍ 256 MB RAM
❍ 100 Megabytes free hard disk space (more needed
for storing audio and video)
❍ 56 Kbps Internet connection for Internet content
downloading and CDDB2™ support (any charges
incurred are the responsibility of the user)
❍ SVGA graphics adapter (256 colors, 800 x 600
resolution or better)
❍ Internet browser (Microsoft Internet Explorer 5.01,
Netscape
®
Windows® XP Home Edition, Windows XP
®
Pentium
®
II 233 MHz or better processor ❍ Intel
®
Navigator 4.7 or better)
®
Pentium® 4 1.6GHz or better processor
❍ 300 Megabytes free hard disk space (more needed
for storing audio and video)
❍ Broadband-based Internet connection for Internet
content downloading and CDDB2™ support (any
charges incurred are the responsibility of the user)
❍ Microsoft Internet Explorer 6 Service Pack 1 or
Netscape Navigator 7.0
For web pages with embedded digital media, use
only Netscape Navigator 6.x and 7.0 with the Java 2
Runtime Environment version 1.3.x.
Introduction 1-2
Page 11
Accessories
The following accessories will be available from www.creative.com:
• Li-Ion Polymer battery
•FM Wired Remote
•IR Remote
• Docking Station
Customer Support Services and Warranty Information
You can find Customer Support Services, Warranty and other information in the
Installation CD.
Customer
Support
Services
Warranty
Regulatory d:\fcc\<language>\doc.pdf
(replace d:\ with the drive letter of your CD-ROM/DVD-ROM drive, <region> with
the region that you are in, and <language> with the language that your
document is in).
Please keep your Proof of Purchase for the duration of the Warranty
period.
d:\support\<language>\support.pdf
d:\warranty\<region>\<language>\warranty.pdf
Please keep your Proof of Purchase for the duration of the
warranty period.
Introduction 1-3
Page 12
About Your Player
Page 13
About Your Player
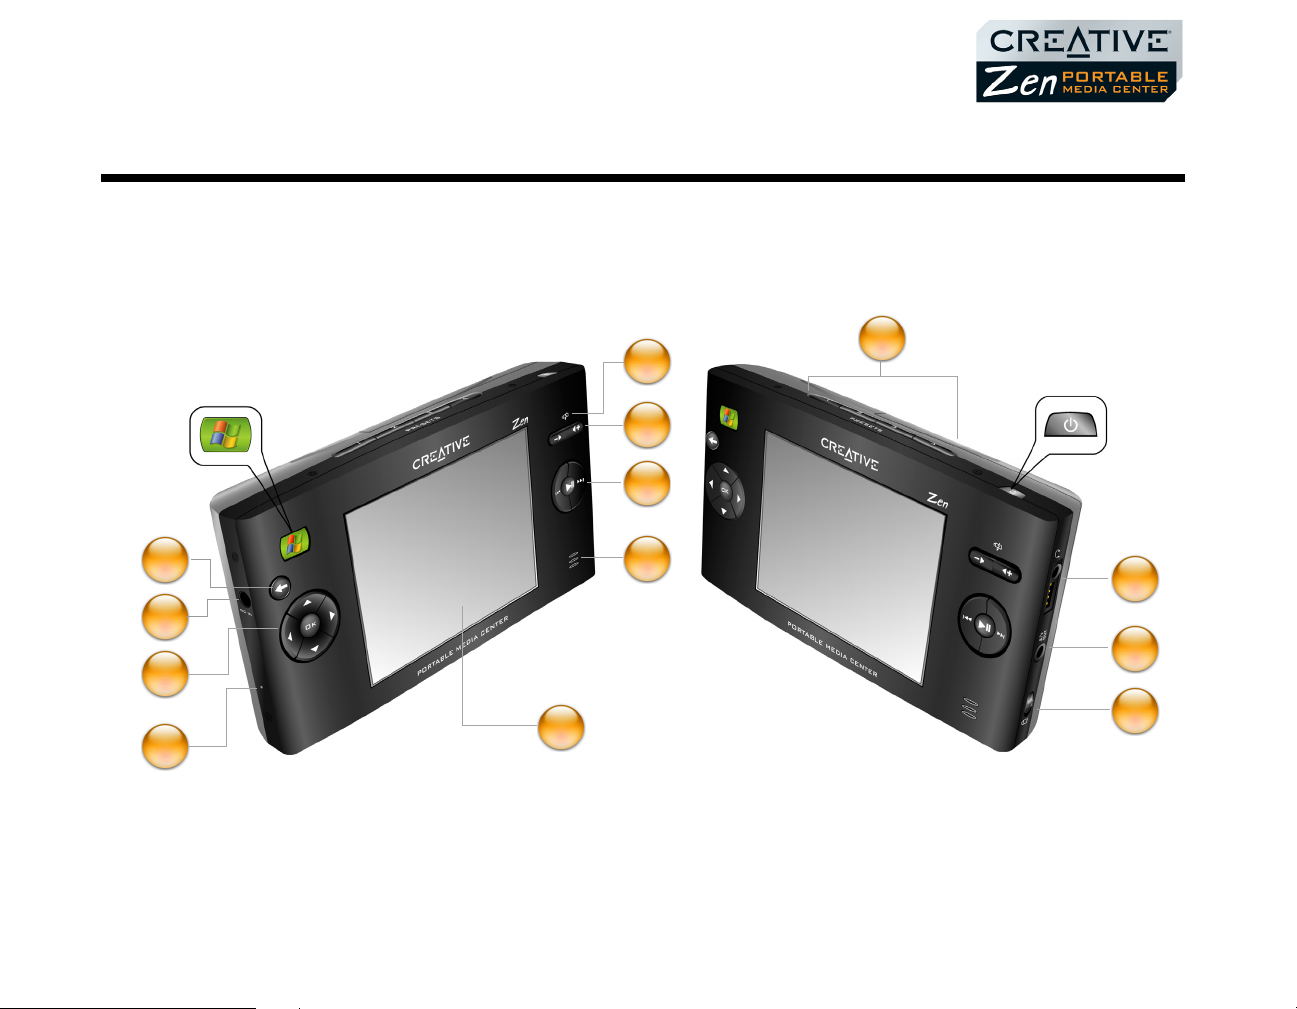
This section lists and describes your player’s buttons, controls and exterior
connectors.
Front Views
Start button
5
6
7
10
Power button
4
3
2
1
8
11
12
13
9
Figure 2-1: Your Zen Portable Media Center
About Your Player 2-1
Page 14
Button / Connector Description
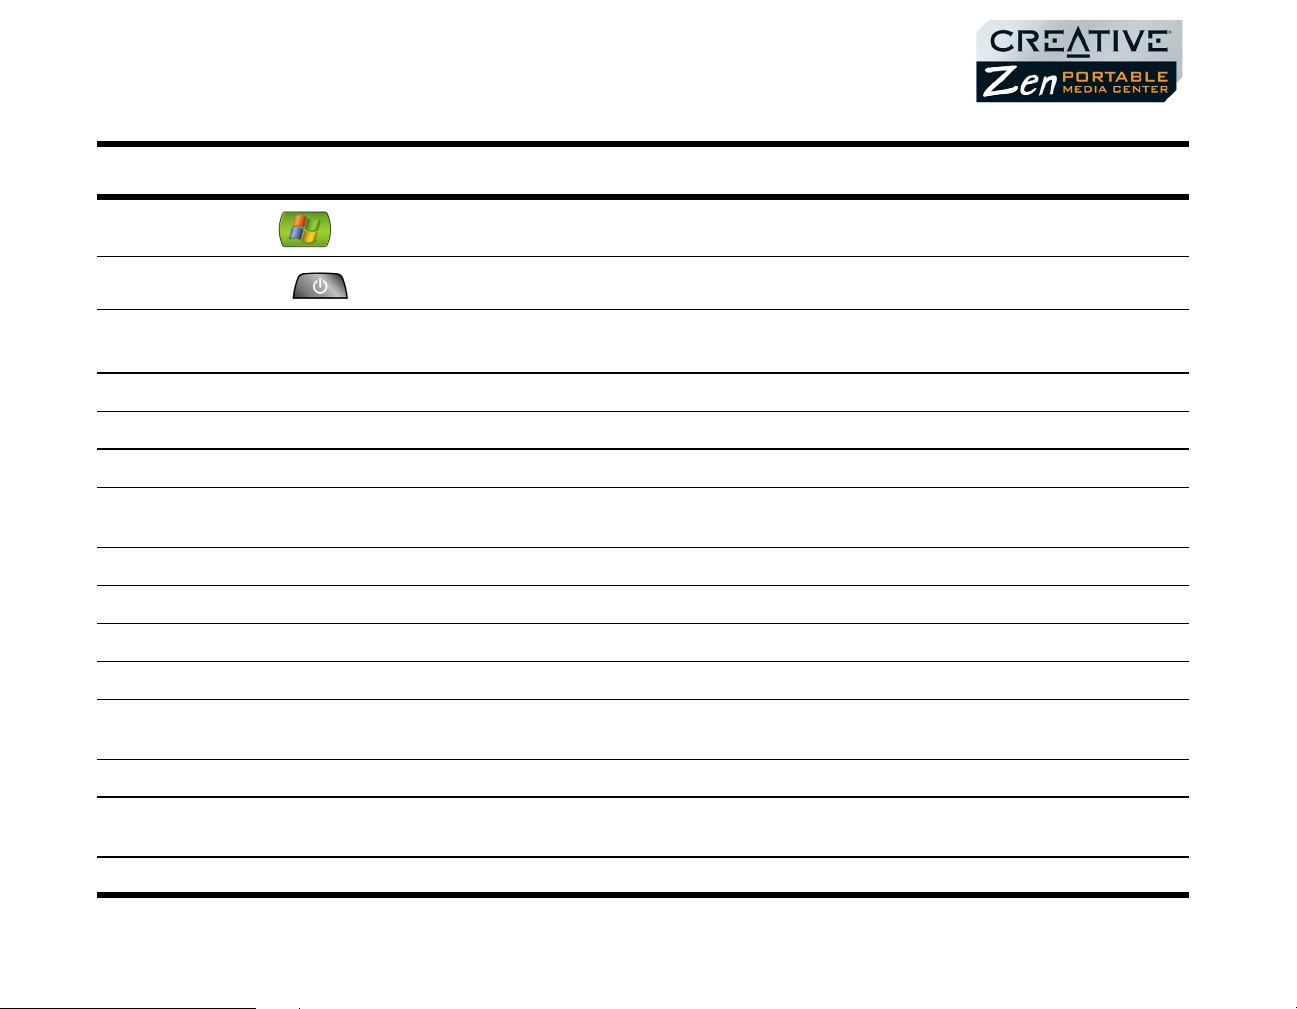
Start button
Power button
1. Reset button
2. Navigation buttons ❍ Use these to select menu options.
3. Power connector ❍ Connect this to a power outlet using the supplied power adapter.
4. Back button ❍ Press to return to the previous screen or menu.
5. Battery Charging Indicator
6. Volume Up / Down buttons ❍ Press and hold to quickly change volume levels.
7. Play Control buttons ❍ Use these to control content playback.
8. Integrated Speaker ❍ Enables you to hear audio when you have no headphones or speaker output.
9. Liquid Crystal Display (LCD) ❍ Displays menus or content.
10. Preset buttons
11. Headphone connector ❍ Connect your headphones or Wired Remote to this connector.
❍ Press to display menu options on the LCD.
❍ Press to switch between the main menu and the currently active screen.
❍ Press and hold briefly to turn your player on and off.
❍ Resets your player when you press it with the end of a thin object
(like a straightened paperclip).
❍ Lights up in amber when the battery is charging.
❍ Lights up in green when the battery is fully charged.
❍ Press and hold Preset buttons 1, 2, 3 or 4 to bookmark content.
❍ Press a Preset button to go to the bookmark.
12. Audio / Video Out connector
13. Button Lock switch ❍ Move the switch to lock or unlock your player.
❍ Connect this to your TV set to conveniently view videos, recorded TV
programs or pictures stored in your player.
About Your Player 2-2
Page 15

Top and Bottom Views
1
2
Figure 2-2: Your Zen Portable Media Center
Button /
Connector
1. Battery
Compartment
2. Data connector
Description
❍ Holds the high capacity battery.
❍ Connects to the USB travel cable or optional docking
station.
About Your Player 2-3
Page 16
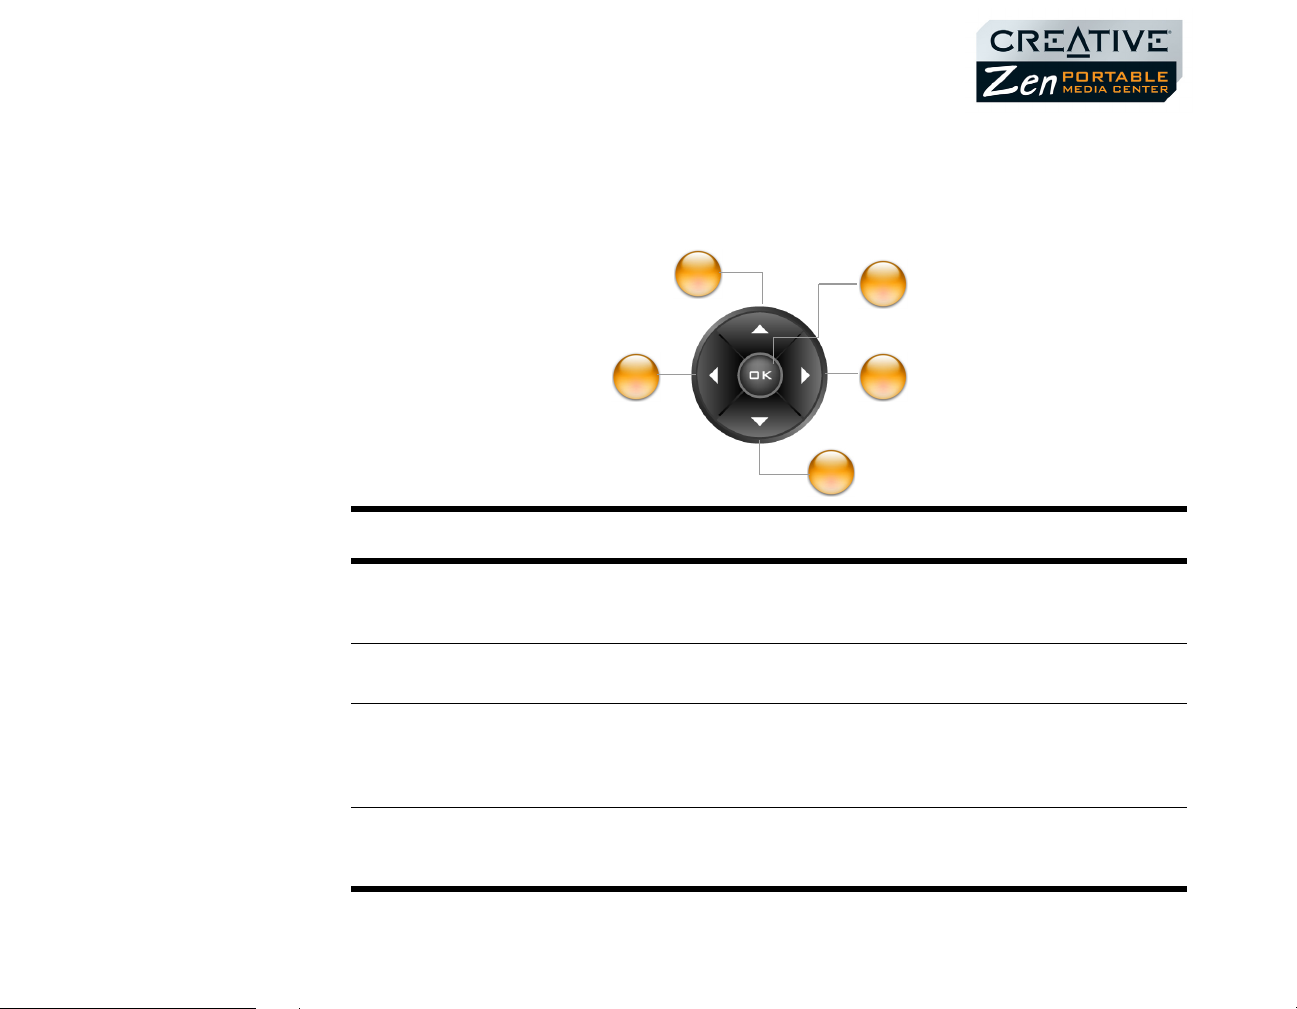
Selecting Menu Options
Navigation buttons
In the following sections of this document, we use the term ‘select’ to indicate that
you should use the Navigation buttons (Up, Down, Left or Right) to highlight
menu options, then press the OK button to select the option.
1
5 3
4
Button Description
❍ Press to go to the menu option or selection above the current
1. Up button
2. OK button
3. Right button
4. Down button
selection.
❍ When viewing pictures, press to see the previous picture.
❍ Press to select the highlighted menu option or selection on the
screen.
❍ Press to go to the menu option or selection to the right of the
current selection.
❍ When playing audio, press to see different views of the album,
genre, playlist or track.
❍ Press to go to the menu option or selection below the current
selection.
❍ When viewing pictures, press to see the next picture.
2
About Your Player 2-4
Page 17

Play Control buttons
Button Description
❍ Press to go to the menu option or selection to the left of the
5. Left button
current selection.
❍ When playing audio, press to see different views of the album,
genre, playlist or track.
2
Button Description
1. Previous button
2. Play / Pause
button
3. Next button
1
❍ Press and hold to go backwards in an audio track, video or
program.
❍ Press to go the previous content item.
❍ Press to start, pause or resume playback.
❍ Press and hold to go forwards in an audio track, video or
program.
❍ Press to go to the next content item.
3
About Your Player 2-5
Page 18

Getting Started
Page 19

Getting Started
This chapter assists you in setting up and configuring your player, and also
describes some basic operations.
Inserting the battery
Do not force the
battery in if it does not
fit. Check the battery
orientation before
trying again.
1
2
3
4
Figure 3-1: Inserting the battery in your Zen Portable Media Center
Getting Started 3-1
Page 20

1. Open the battery compartment in the direction of the arrows.
2. Move the activation switch in the direction shown in the diagram above. This
activates your player for use the first time you start it up.
3. Insert the battery as shown.
4. Close the battery compartment.
Powering your player
Remember to use only
the accessories
packaged for you.
Substitute accessories
may damage your
player, or worse yet,
hurt you.
1. Connect the power adapter as shown in the diagram.
2. Turn on the power from the power source.
Figure 3-2: Powering your Zen Portable Media Center
Getting Started 3-2
Page 21

Charging the battery
Available playtime for
audio or video may
vary, depending on
usage.
Fully charge the battery supplied with your player before you use it. For the first
time only, charge the battery for sixteen hours. From the second time onwards,
the battery should fully charge within six hours.
Your fully charged battery should give you up to twenty-two hours* of continuous
audio playback, or seven hours** of continuous video playback.
The battery charging indicator lights up in amber when the battery is charging,
and lights up in green when the battery is fully charged.
To charge your player’s battery, you should:
1. Insert the battery as shown in "Inserting the battery" on page 3-1.
2. Connect your player to a power outlet as shown in "Powering your player" on
page 3-2.
Check the battery indicator to see when the battery is fully charged.
* Battery life estimated for playback of audio tracks encoded at 64Kbps (WMA) and 128Kbps
(MP3).
** Battery life estimated for playback of WMV files encoded at 500Kbps.
Getting Started 3-3
Page 22

Battery charge status
Icon Power State Notes
Your player displays one of the following icons, depending on the battery’s charged
status or the power source (battery or external power).
❍ your player is running from external
power only, but may still be
charging the battery
❍ your player is running from battery
power only
❍ your player’s battery has up to 60%
of its capacity remaining
❍ your player’s battery has up to 30%
of its capacity remaining
❍ your player is running from external
power and is charging the battery
❍ the battery charging indicator lights up in
amber when the battery is charging, and
lights up in green when the battery is fully
charged.
❍ this battery state icon shows that the battery
is fully charged, or is near full charge.
❍ recharge the battery at the earliest
opportunity
❍ charge the battery fully before disconnecting
the player from the power outlet
Getting Started 3-4
Page 23

Setting Up Your Player
DO NOT connect your player to your computer before installing the
software.
1. Insert the Installation CD into your CD-ROM/DVD-ROM drive.
The disc supports Windows Autoplay mode and starts running automatically.
2. Follow the instructions on the screen to complete the software setup.
3. If prompted, restart your computer.
4. Connect your player to your computer as shown.
Figure 3-3: Connecting your Zen Portable Media Center
Connecting Your Player to a TV
5. Follow the instructions on the screen to complete the setup.
You can also connect your player to your TV to view content on a larger screen. To
view your player’s content on your TV, you must use the supplied video cable. A
standard video cable is not suitable.
Getting Started 3-5
Page 24

Connect your player as shown, with the supplied video cable.
Figure 3-4: Connecting your Zen Portable Media Center to your TV
Getting Started 3-6
Page 25

Using the Protective Carrying Case
Your player comes with a carrying case that you can use to prop up your player for
better picture or video viewing.
1. Insert your player into the carrying case as shown.
2. Flip the top of the case back to support your player.
Figure 3-5: Using the protective carrying case
Locking and Unlocking your Player
Lock your player to disable all buttons on the player, when you want to
prevent buttons, like PAUSE, from being accidently pressed.
To lock the player: Slide the Button Lock switch towards the icon.
To unlock the player: Slide the Button Lock switch away from the icon.
Getting Started 3-7
Page 26

Turning the player on or off
Your player must be unlocked before you can use any buttons or controls. To
unlock your player, see
To turn your player on: Press the POWER
button.
To turn your player off: Press the POWER
button. The player turns off.
The main menu appears.
"Locking and Unlocking your Player" on page 3-7.
Navigating Menus
To ’select’ a menu
option, use the
navigation buttons
(Up, Down, Left or
Right) to highlight
menu options, then
press the OK button to
select the option.
Figure 3-6: Your player’s main
menu
Most of your player’s menus are arranged vertically, as shown below. Press the Up
and Down navigation buttons to move vertically in a menu.
Figure 3-7: Your player’s main menu and Display screen
Getting Started 3-8
Page 27

After making some menu selections, you can see a horizontal menu at the top of
the screen. Press the Left or Right navigation buttons to move horizontally
between views, for example, when viewing pictures, you can sort pictures by name
or date.
Figure 3-8: Your player’s artists and my pictures views
Transferring content
You can use Windows Media Player 10 to transfer videos, programs, pictures and
audio tracks into your Zen Portable Media Center. For details on transferring
content to your player, see
media types, see "Playback Formats" on page A-1.
"Transferring content" on page 5-2. For details on
Getting Started 3-9
Page 28

Personalizing Your Player
Page 29

Personalizing Your Player
This chapter assists you in personalizing your player.
Personalizing
your player
Your player offers you many personalization options. You can:
• Select equalization presets, see "Effects" on page 4-2.
• Adjust display settings, see "Display" on page 4-1.
• Enable or disable visual and audio feedback, see "Effects" on page 4-2.
• Set the default language, see "International" on page 4-2.
• Reset the player’s settings to its original setting, see "Reset" on page 4-2.
Equalization You can choose from several equalization presets to make audio playback sound
better. For example, if you are listening to classical music, or watching a video with
a classical score, choose the Classical preset.
1. Press the Start button.
2. Select settings.
3. Select Equalizer.
4. Select a preset from the list of equalizer presets that appears.
The current preset is highlighted.
Display You can adjust your player’s display by selecting Backlight, Brightness and TV
out settings.
For TV out settings, you can choose to have content directed to your TV in NTSC
or PAL formats. Be sure to choose the correct display format, otherwise you will
not be able to watch programs or videos properly. See the User’s Guide for your TV
if you are not sure about your TV’s display format.
1. Press the Start button.
2. Select settings.
3. Select Display.
Personalizing Your Player 4-1
Page 30

4. Select Backlight, Brightness or TV out to change any of these settings.
Effects You can choose to turn effects on or off, to make using the player a little more
interesting.
1. Press the Start button.
2. Select settings.
3. In the Settings screen, select Effects.
4. Select Screen Effects or Sounds to turn the effect on or off.
International You can change the default language and the language variant used on your
player’s screens.
1. Press the Start button.
2. Select settings.
3. In the Settings screen, select International.
4. Select Language to choose a display language.
5. Select Standards to choose the language variant.
Reset You can choose this option to restore your player’s default settings, in case you
want to start configuration over from the beginning. Resetting your player’s
settings will not cause you to lose content.
1. Press the Start button.
2. Select settings.
3. In the Settings screen, select Restore original Settings.
A warning message appears.
4. To reset your player’s settings, select yes.
Otherwise, select no.
Personalizing Your Player 4-2
Page 31

Information
To ’select’ a menu
option, use the
navigation buttons
(Up, Down, Left or
Right) to highlight
menu options, then
press the OK button to
select the option.
Your player’s Information screen displays:
• the player’s firmware and operating system version — so that you know if you
have the latest updates
• the number of videos, programs, pictures and audio tracks stored in your player
• the total amount of space used in your player for storing media
• the available space in your player for storing media
1. Press the Start button.
2. Select settings.
3. Select Information.
4. Select About Portable Media Center to see firmware and operating system
versions.
5. Select About Contents to see how much content is in your player.
Resetting your player
If your player stops responding, reset the player. This should not cause you to lose
any videos, programs, pictures or audio tracks, unless you were in the middle of
transferring content.
Figure 4-1: Resetting your player
To reset the player: Gently push the end of a thin object (like a pin or
straightened paperclip) into the Reset button.
Personalizing Your Player 4-3
Page 32

Managing Content
Page 33

Managing Content
About Content Types
When you transfer a
video that has a
combined video and
audio bitrate greater
than 800kbps,
Windows Media Player
10 changes the bitrate
to less than 800kbps.
You can check a
video’s bitrate from
the Windows Media
Player 10’s Library
view.
Getting Content
Zen Portable Media Center plays many different types of content, including video
files, audio tracks, recorded TV programs and still pictures.
When you transfer video and audio files to your player, Windows Media Player 10
changes them into WMV or WMA files respectively. Windows Media Player 10
changes recorded TV programs in DVR-MS format to the WMV format. Still picture
files are unchanged, but your player only displays pictures that are in the JPEG
(.JPG) format. Windows Media Player 10 may take longer to change video files that
are not already in the WMV format.
You can acquire content from many legal sources. Here are some suggestions:
• Videos — purchased from online movie stores or digitized home video footage.
• TV programs — recorded programs from a digital video recorder, running on
Windows XP Media Center, or recorded TV programs from a Windows XP Media
Center Edition computer.
• Audio tracks — ripped from personal audio CDs, home studio recordings or
purchased from online music stores.
• Pictures — purchased from online stores, encoded from your personal digital
camera or scanned from printed pictures.
Managing Content 5-1
Page 34

Transferring content
With Windows Media Player 10, you can choose between Automatic and Manual
synchronization options.
Using Automatic synchronization, Windows Media Player 10 compares both the
media libraries in your player and computer and automatically transfers new
content from your computer to your player.
Using Manual synchronization, you can choose specific content to transfer to and
from your computer and player. For more details on Automatic and Manual
Synchronization, and other aspects of content transfer, refer to Windows Media
Player 10’s online Help.
Transferring Content Manually
Before you add or delete content to or from your player, be sure that you have
properly connected your player to your computer with the USB travel cable, and
that you have properly installed Windows Media Player 10.
1. In Windows Media Player 10, click the Library tab.
2. In the library panel, right-click the content you want to add.
3. In the menu that appears, click the Add to option, then the Sync List option.
The content appears in the right panel.
4. Click the Sync tab.
5. In the right panel, be sure that your player is the selected device.
6. In the left panel, click the checkbox next to the media file to select it for
synchronization.
7. Click the Start Sync icon.
Your player displays the "Updating" screen.
Deleting Content You may want to delete old videos, programs, pictures and audio tracks from your
player, to make space for new ones.
1. In Windows Media Player 10, click the Sync tab.
2. In the right panel, right-click the content you want to delete.
Managing Content 5-2
Page 35

3. In the menu that appears, click the Delete from Device option.
Your player displays the "updating" screen.
Managing Videos
To play videos, you must first transfer the videos to your player. The videos are
categorized by name and date in your player’s Video Library.
Use the play controls to pause or resume playback, or to go forward or backward
in the video. Use the navigation buttons to view the sorted lists of videos.
Locating a Video The videos in your player are sorted by name and date for quicker searches.
When you select my videos from the main menu, your player shows you recently
loaded videos in the "New" category. Press the Right button to list videos sorted by
name or date.
1. Press the Start button.
2. Select my videos.
A list of videos is displayed.
3. Use the navigation buttons to search for the video.
Playing a Video 1. Locate a video as described above.
2. Select a video.
Video playback starts automatically.
If playback was paused or interrupted previously, you can choose the resume
option to continue from where you left off. Otherwise, choose the play from
beginning option.
Managing Programs
You can manage recorded TV programs in the same way as videos. When locating
or playing a program, select my TV instead of my videos.
Managing Content 5-3
Page 36

Managing Pictures
With Zen Portable Media Center’s high-capacity storage, you can store thousands
of photos in your player, and even set up a slide show, so that you can share
memories with friends and family. Pictures are categorized by "date" and "name"
in Picture Library. Your player only displays pictures that are in the JPEG (JPG)
format.
Locating a Picture You can sort pictures by date or name for quicker searches.
1. Press the Start button.
2. Select my pictures.
3. Use the navigation buttons to search for the picture.
Viewing a Slide Show
Setting Up a Slide Show
A slide show is automatically set up when you have pictures in your player, and
these are sorted by name.
1. Press the Start button.
2. Select my pictures.
3. Select the play slide show option.
The slide show starts.
You can display picture names, change the order in which pictures are displayed,
and specify the delay in between picture transitions. You can also view your slide
show while playing audio tracks.
To display the picture name while viewing the slide show: Press the Right
button once.
To randomly shuffle the pictures
1. During the slide show, press the Right button twice.
2. Use the navigation buttons to highlight Shuffle.
3. Press the OK button.
To change the transition delay
1. During the slide show, press the Right button twice.
Managing Content 5-4
Page 37

2. Use the navigation buttons to highlight Transitions.
3. Press the OK button repeatedly to choose a transition time. It ranges from 5
seconds to 30 seconds.
4. Press the Left button twice to view your slide show with the new settings.
To view a slide show while playing audio tracks
1. Play audio tracks as described in "Managing Audio" on page 5-5.
2. Press the Start button.
3. View the slide show.
Managing Audio
When audio tracks are transferred to your player, they are organized into the
following Music Library categories:
•New
•Playlists
•Albums
•Artists
•Genres
•Songs
All transferred tracks can be found in the "Songs" category, but depending on your
Windows Media Player 10 settings, tracks can also be found in other categories.
For example, take a fictitious track called "Toffee Apple Smile", performed by "The
Nano Singers", from the soundtrack to the "The Big Sneeze" movie. Besides
Songs, the "Toffee Apple Smile" song would also be found in the "Soundtrack"
genre, the "Songs from The Big Sneeze" album, and the "The Nano Singers" artist
category.
Tracks not belonging to any album, artist or genre, can only be found in "Songs".
You can also use Music Library to:
• Add audio selections to the portable playlist
• Find tracks, playlists, albums, artists or genres in your player
• View track information
Managing Content 5-5
Page 38

Deleting, modifying or renaming albums, artists or genres, including renaming of
audio tracks, must be done in Windows Media Player 10.
Playing a Track 1. Press the Start button.
2. Select my music.
3. Use the Left or Right buttons to navigate to a category (album, artist, playlist,
song or genre).
Press the Left or Right
navigation buttons to
see different views of
the currently playing
album, genre, playlist
or track.
4. Select a category.
A list of tracks in the category appear.
5. Select a track, and press the Play button.
Track playback starts.
Viewing Track Information
Playing Tracks from an Album, Artist or Genre
1. Press the Start button.
2. Select my music.
3. Use the Left or Right buttons to navigate to a category (album, artist, playlist,
song or genre).
4. Select a category.
A list of tracks in the category appear.
5. Select a track.
You can see the information for that track displayed on your player’s screen.
To see information about the next track, press the Right button.
1. Press the Start button.
2. Select my music.
3. Use the Left or Right buttons to navigate to the album, artist or genre
category.
4. Select an album, artist or genre.
A list of tracks in the album, artist or genre category appear.
Managing Content 5-6
Page 39

5. Select the play all option.
Changing Play Modes
About the P ortable Playlist
Managing the Portable Playlist
To add more tracks,
use the Left or Right
buttons to navigate to
other tracks and select
the add to portable
playlist option.
When playing audio tracks, you can choose to change the play mode, enable an
equalizer preset, or purchase the track.
1. When playing audio tracks, press the Right button until you see four options
for shuffle play, repeat play, equalizer and purchase.
2. Use the Up or Down buttons to navigate to one of the options.
3. Select shuffle play to play the tracks in a random order.
4. Select repeat play to repeat playback of all the tracks.
5. Select equalizer to enable an equalizer preset. Press the OK button until you
find a preset you want.
6. Select purchase to purchase the downloaded track.
The portable playlist is a permanent playlist on your player for audio content in
your player. You can add or remove tracks, playlists, albums, artists or genres to or
from the portable playlist.
You can add tracks, artists, albums or genres to the portable playlist to play back
selected tracks in a specific order.
To add a track to the portable playlist
1. Press the Start button.
2. Select my music.
3. Use the Left or Right buttons to list tracks by album, artist, genre or song.
4. Select a track.
5. Select the add to portable playlist option.
To add a group of tracks to the portable playlist
1. Press the Start button.
2. Select my music.
Managing Content 5-7
Page 40

3. Use the Left or Right buttons to list tracks by album, artist, genre or song.
4. Select a album, artist, genre or song.
5. Select the add all to portable playlist option.
The tracks are added to the portable playlist, and start playing.
Viewing the Contents of the Portable Playlist
Deleting All Tracks from the Portable Playlist
1. Press the Start button.
2. Select my music.
3. Use the Left or Right buttons to see the portable playlist.
4. Select portable playlist, then press the OK button.
A list of tracks in the playlist appears.
1. Press the Start button.
2. Select my music.
3. Use the Left or Right buttons to see the portable playlist.
4. Select portable playlist.
5. Select the remove all from playlist option.
Managing Content 5-8
Page 41

Appendixes
Page 42

General Specifications
Page 43

General Specifications
General Specifications for your player
Size (W x H x D)
❑ 144 mm x 80.7 mm x 27 mm or 5.67" x 3.18" x 1.06"
Weight
❑ 340 gms or 12 oz with a battery
Capacity
❑ 20 GB hard drive
Display
❑ Large 96.5 mm or 3.8" 64k color 320 x 240 pixel resolution backlit display
Battery Life (playback time)
❑ Up to 22 hours
battery
❑ Up to 7 hours of continuous video playback from fully charged Lithium-Ion Polymer
battery
The following may reduce the playback time:
Data Connector
**
• playback of tracks encoded at bitrates higher than 64Kbps (WMA) or 128Kbps (MP3)
• playback of WMV files encoded at bitrates higher than 500Kbps
•use of EQ presets
• skipping, fast forward or reverse during playback
• using passive speakers or high-power headphones
• long backlight timeout setting (more than 10 secs)
*
of continuous audio playback from fully charged Lithium-Ion Polymer
❑ USB 2.0
Playback Formats
***
❑ Video playback formats — Windows Media™ Video (WMV) 7, 8 and 9
❑ Audio playback formats — WMA (Lossless, Standard, Voice), MP3
* Battery life estimated for playback of audio tracks encoded at 64Kbps (WMA) and 128Kbps
(MP3).
** Battery life estimated for playback of WMV files encoded at 500Kbps.
***Some formats may require additional codec or software support. Codec support and firmware
updates are available from www.microsoft.com and www.creative.com.
General Specifications A-1
Page 44

❑ Picture format — JPEG
❑ Windows Media Player 10 supported formats — ASF, DVR-MS, AVI, MPEG1, MPEG2
M1V, MPG, MP2, WAV, AU, SND
Frequency Response
❑ 20 Hz~20000 Hz
Headphone Out
❑ 1/8" stereo minijack
AV Out
❑ PAL or NTSC
Operating Environment
❑ Temperature: 5 to 40 ° Celsius
❑ Humidity: 10% to 80%
Storage Environment
❑ Temperature: -20 to 60 ° Celsius
❑ Humidity: 5% to 85%
*
, MPE,
* To play this format, you must install an MPEG2 decoder on your computer.
General Specifications A-2
Page 45

Frequently Asked Questions
Page 46

Frequently Asked Questions
This section covers common questions you might have while using your player. If
you have an issue with this product, you may wish to consult our self-help tool
“Knowledge Base” for online troubleshooting and solutions. Go to
www.creative.com and select your region.
Usage
Why does the player skip certain tracks?
The player will only play valid media formats. Other types of media formats are
skipped. Generally, your player plays MP3, WMV and WMA files. See
Formats" on page A-1 for more information.
Why does the player turn off immediately after it is turned on?
The battery may be too depleted to power your player. Try charging the battery.
File transfers to the player are very slow (less than 100 KB/Sec). What do
I do?
You may be transferring files that may be configured for other devices and
formats, or your computer’s CPU does not meet the recommended system
requirements. Windows Media Player 10 changes or transcodes files before
transferring them to your player.
"Playback
Frequently Asked Questions B-1
Page 47

Files that exceed the following specifications may require more time to change or
transcode:
This should be less than or equal to
Bitrate 800 kbps
Video or image resolution 320 x 240
Frames Per Second (FPS) 30
WMA Profile Simple (SP)
I have to charge the battery quite often. Is there anything I can do to
make it last longer?
❑ Set a shorter backlight setting.
❑ Set a lower brightness setting.
❑ Avoid skipping ahead and back within tracks unnecessarily.
❑ Avoid turning the player on and off unnecessarily.
❑ Avoid using passive speakers or high-powered headphones.
Should I leave my player plugged into the power adapter when it is not in
use?
You can leave your player plugged in when it is not near any heat source. However,
it is generally recommended that you disconnect it from the power adapter after
charging your battery or after use.
If I damage or lose my power adapter, can I buy a similar, off-the-shelf
adapter?
No. The power adapter may not be compatible with your player, and may even
damage it. You should get a replacement adapter from Creative at
www.creative.com , or your local Creative office/distributor.
Frequently Asked Questions B-2
Page 48

Updates
Where can I get information and updates for Zen Portable Media Center?
Visit www.creative.com for updates and downloads relating to Zen Portable Media
Center and its accessories.
You can also visit www.microsoft.com for updates and downloads relating to
Windows Media Player 10.
Frequently Asked Questions B-3
Page 49

About Recovery Screens
Recovery Screen Likely Causes Suggested Action
If an error occurs, you may see any one of the following diagrams, indicating the
general nature of the problem.
❍ Your player’s firmware may be
corrupted.
❍ Connect your device to your
computer with the USB travel cable.
Screen 2 (below) appears.
❍ Visit www.creative.com for firmware
updates.
❍ Contact Creative Customer
Support Services for assistance
Frequently Asked Questions B-4
.
Page 50

Recovery Screen Likely Causes Suggested Action
❍ Content in your player has been
corrupted by resetting the
player during a synchronization
session.
❍ Your device has encountered a
problem that cannot be
automatically fixed.
❍ Reset your player, then connect your
player to your computer and resynchronize the content.
❍ Contact Creative Customer
Support Services for assistance
.
Frequently Asked Questions B-5
Page 51

Terms and Technology Explained
Page 52

Terms and Technology Explained
Glossary
This section provides you with a brief explanation of terms, technology and
abbreviations used or referred to in this User’s Guide.
DRM Digital Rights Management (DRM) is a technology which enables the copyright
owner of intellectual property, like a digital audio track, to control how you, the
listener, can use the file. It is normally used to allow you to download digital audio
tracks while preventing you from distributing the files to other people or other
devices. With DRM, digital audio tracks contain digital signatures.
Li-Ion Polymer Lithium-Ion (Li-Ion) batteries are ideal for portable devices like your player. Your
player uses an updated form of the Li-Ion battery, the Li-Ion Polymer battery. This
type of battery has significant advantages over the older Li-Ion battery.
Li-Ion Polymer batteries can be thinner, and safer than the standard liquid
electrolyte Li-Ion battery. They come in more diverse shapes, and use a dry
polymer electrolyte that is more resistant to overcharging and virtually eliminates
the danger of flammability.
NTSC This is short for National Television System Committee, and is commonly used in
the United States of America and Japan. The NTSC standard delivers 525 lines of
resolution at 60 half-frames per second. Your computer’s video adapter may
support both NTSC and
PAL signals.
PAL This is short for Phase Alternating Line, and is commonly used in Europe and some
countries in South East Asia. Unlike the
of America, PAL delivers 625 lines at 50 half-frames per second. Your computer’s
video adapter may support both NTSC and PAL signals.
NTSC standard used in the United States
Terms and Technology Explained C-1
Page 53

Transcoding Transcoding is the process of converting a media file from one format to another.
Windows Media Player 10 transcodes digital audio files, videos, pictures and other
media types transferred from your computer to your player. Windows Media Player
10 converts videos and audio tracks to WMV and WMA formats respectively.
Windows Media Audio (WMA)
Windows Media Video (WMV)
Microsoft’s Windows Media Audio (WMA) format is suitable for audio tracks with
lower bitrates but can produce an audio quality that is almost indistinguishable
from the original audio when encoded at 128 kbps. Some WMA files are protected
by a digital signature, or
Microsoft’s Windows Media Video (WMV) format is the video counterpart of WMA.
The WMV format uses MPEG-4 compression technology to squeeze your favorite
programs and videos into smaller-sized video files.
DRM.
USB USB stands for Universal Serial Bus. It is a moderately high-speed input/output
technology for “hot swap” data transfers, meaning that you can connect or
disconnect a USB device without turning off your computer.
Terms and Technology Explained C-2
 Loading...