

Page 1
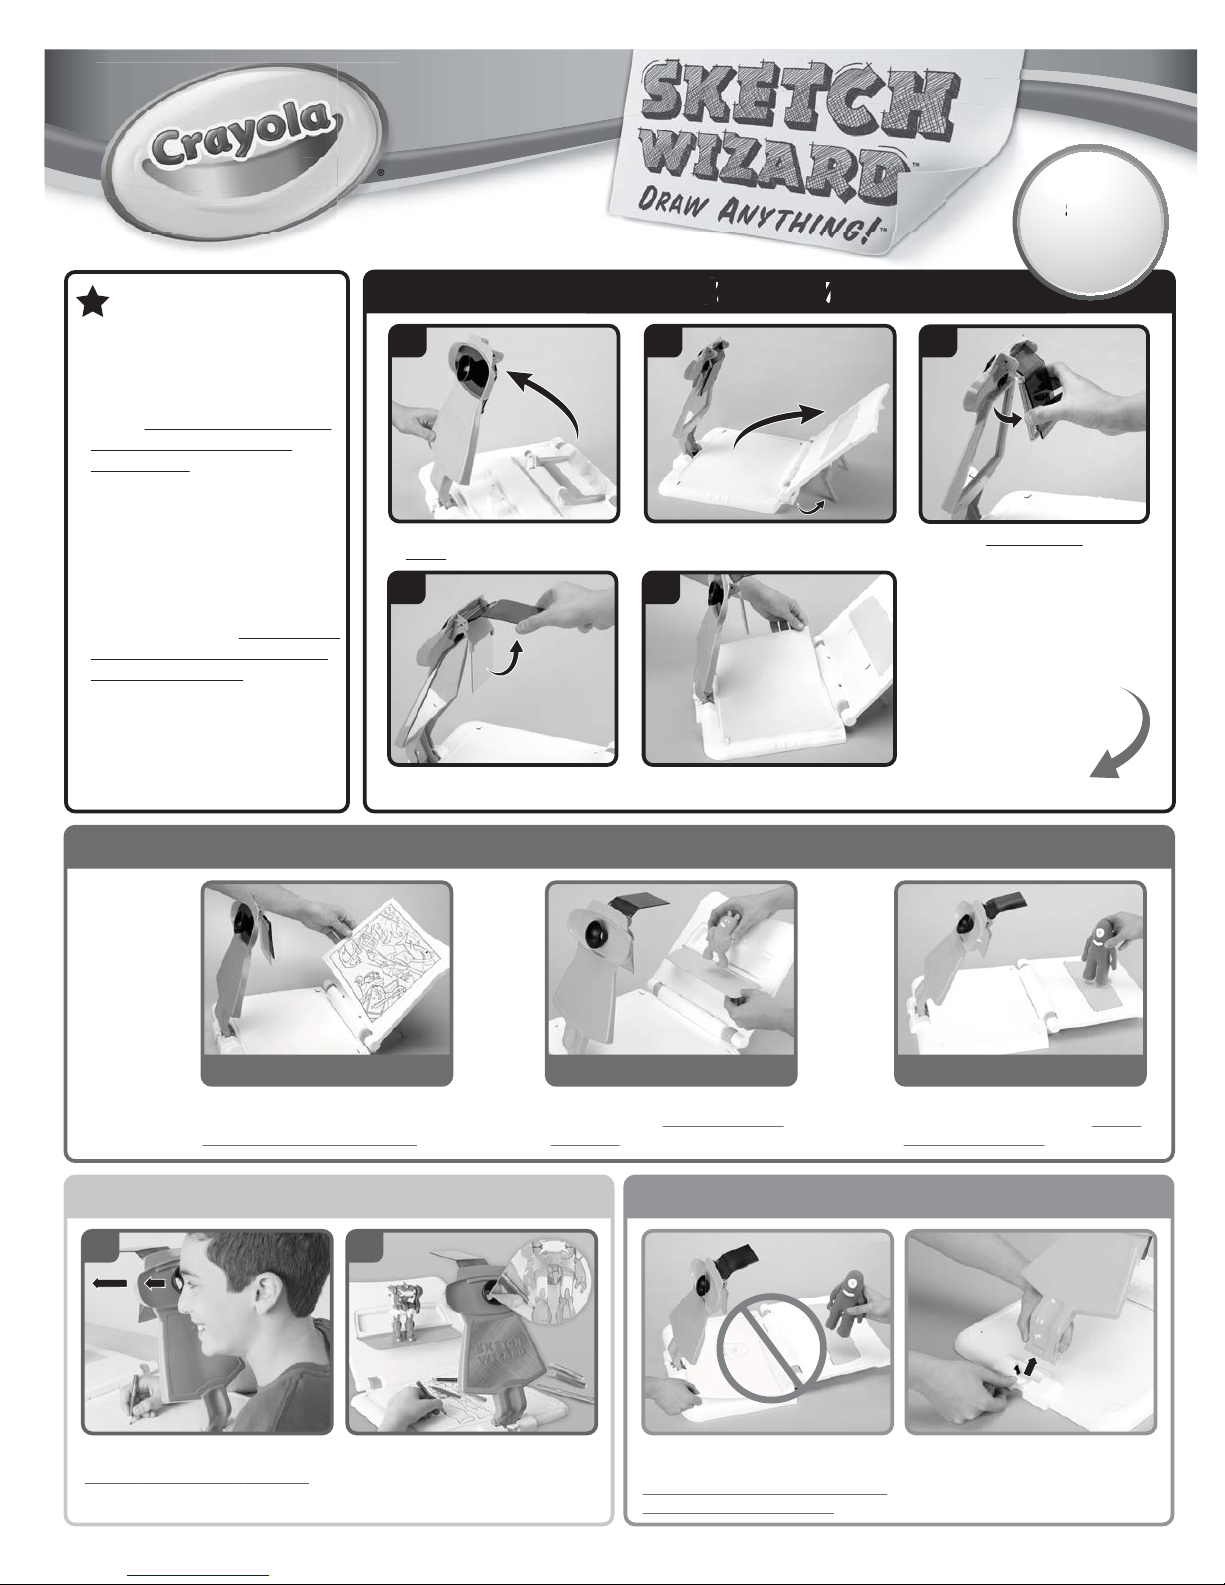
Unfold base & drop support legs to raise
the back panel.
Pull eyepiece panel to upright position
&
CLICK into place.
Firmly pull BOTH LENSES away from
the lens holder & snap into position shown.
Firmly pull the top lens up until it snaps
into position shown.
Set It Up!
1 2
3
4
Now you’re ready
to DRAW!
5
CLICK
FLIP
PULL
SNAP
Try copying from a printed scene, photo or
digital tablet image placed on back panel shelf.
(top lens should be in DOWN position)
Pull down yellow shelf for small objects
up to 3 inches high. (top lens should be in
UP position)
Fold legs under & lay back panel flat for
larger objects up to 6 inches high. (top lens
should be in UP position)
Place a sheet of white paper on base. Insert
corners under tabs to hold it in place.
Hold a pencil & place your hand on paper.
LOOK STRAIGHT AHEAD
through the eyepiece with one eye.
Once you can see your hand, pencil & object
through the eyepiece, you can start tracing.
If you need to stop & start again later, keep
art/object & paper position the same.
Moving either will put the image in a
different place on the paper.
To use the base for coloring your artwork:
pull the tab on the base, push the buttons on
the panel & slide panel out of the base.
What Do You Want To Draw?
Now Draw it!
OR
Pick
one
...
OR
Flat Art Small Objects Large Objects
For Best Results
• Use Sketch Wizard unit on a flat
surface in a brightly lit room.
• Use care near eyepiece &
panel. Slight bumps may knock
photos or 3D objects off of
yellow shelf.
• Use adhesive tape or mounting
putty (not included) to hold
photos, printed scenes, 3-D
objects in place if base moves.
• If you need to stop & start again
later, keep art/object & paper
position the same. Moving either
will put the image in a different
place on the paper.
• Store pencils in the space
behind the yellow shelf to keep
them handy & organized.
8
+
1 2
Visit
Crayola.com
to see cool
demo videos!
Tips
S
e
t
I
t
U
Cr
ay
to
dem
Page 2
8
+
04-6820-0-150
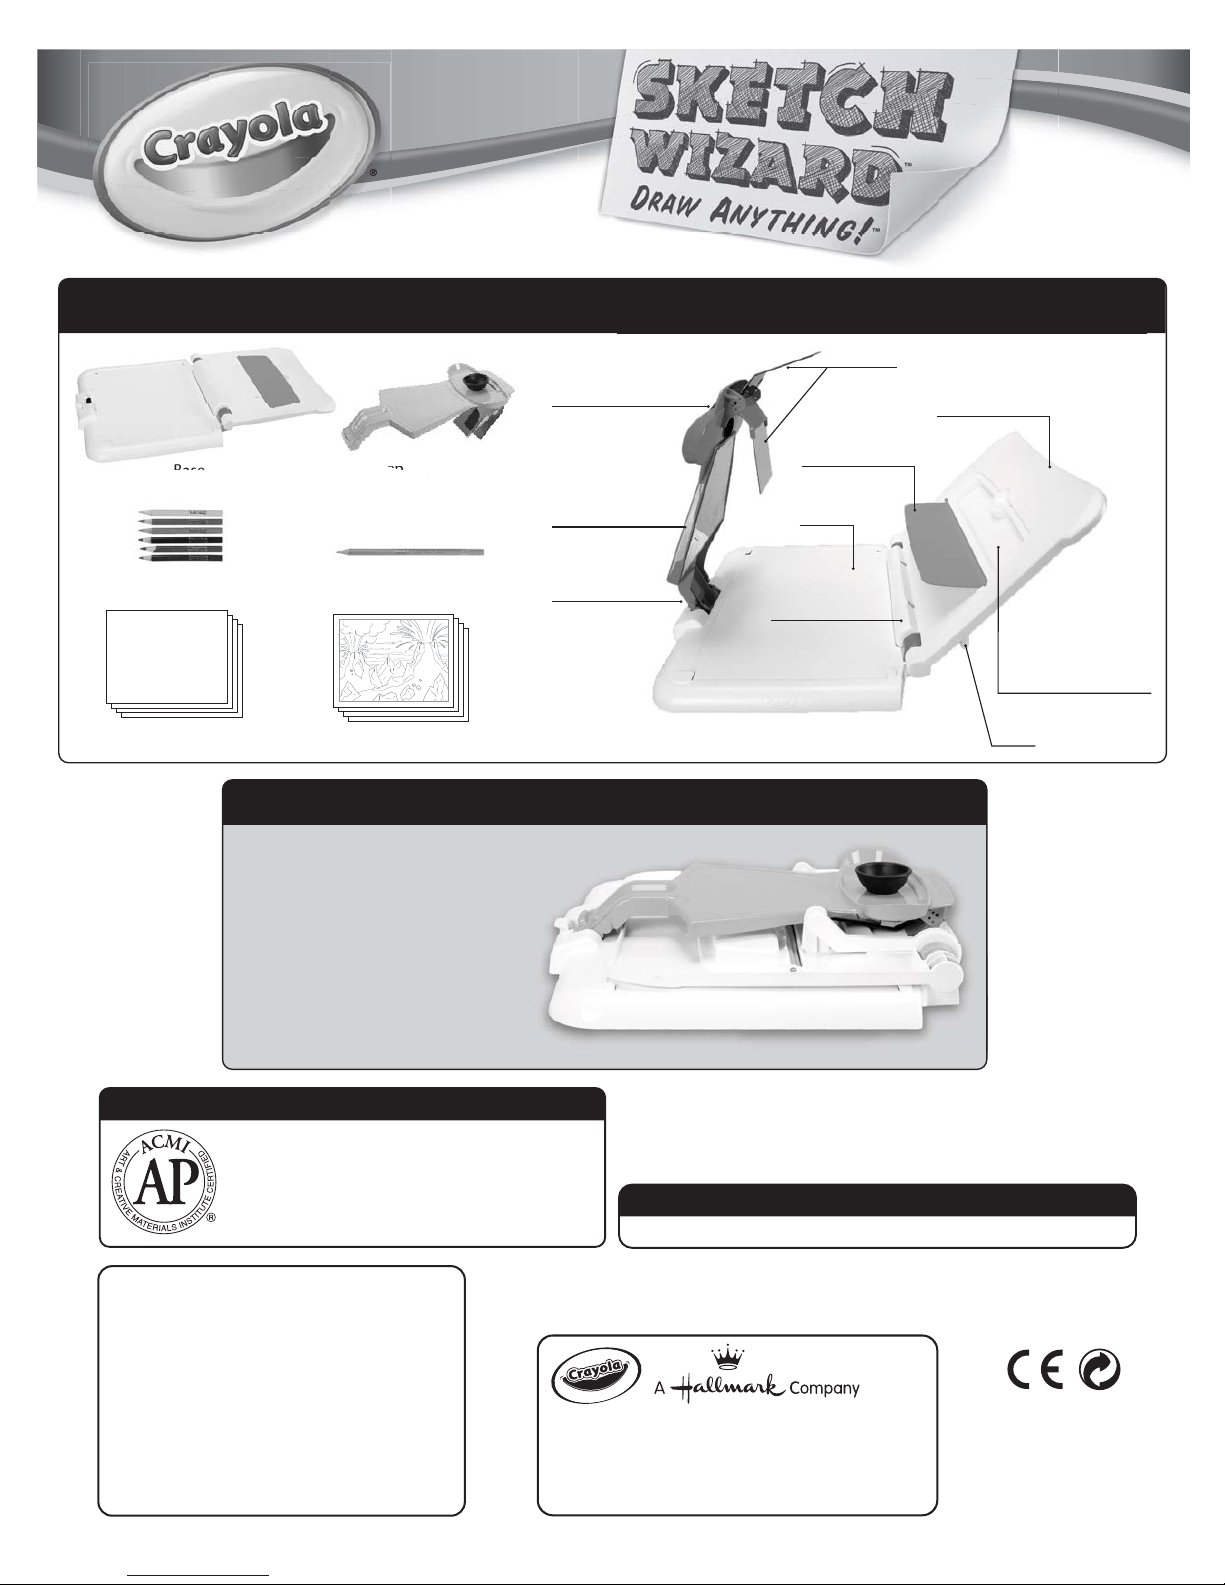
Store Your Sketch Wizard
1. Place pencils in space behind
yellow shelf to keep them handy.
2. Fold legs flat & pull back panel
forward to rest on the base.
3. Re-insert eyepiece panel & move
lenses back to flat position.
4. Pull tab & press eyepiece panel
buttons to lower panel to flat
position.
SAFETY INFORMATION
Conforms to ASTM D 4236.
All Crayola art materials are nontoxic.
WARNING! Not suitable for children under 36 months
due to small parts which may cause a choking hazard if
swallowed. Crayola Pencils are certified AP
crayola.com
Contents and colors may vary. Keep instructions for
future reference.
WASHING & CARE INFORMATION
FOR BEST RESULTS: To sharpen pencils, use a hand-held sharpener.
Contents
Lenses
Legs
Back Panel Shelf
Tab
Base
Eyepiece
Pull-Down Shelf
Built-In Pencil Storage
Back Panel
Eyepiece Panel
Base
Eyepiece Panel
6 Short Colored Pencils Graphite Pencil
5 Sheets Blank Paper
5 Printed Scenes
ce
Pan
el
Distributed in Australia by Crayola (Australia) Pty. Ltd.
Imported by Binney & Smith (Europe) Ltd., Bedford Heights,
Manton Lane, Bedford, MK41 7PH, England.
©2014 Crayola, Easton, PA 18044-0431.
QUALITY GUARANTEE
We guarantee the quality of all Crayola products. If this
product does not perform properly, please contact us.
In the U.S.A. and Canada, call 1-800-CRAYOLA
(800-272-9652), weekdays 9 AM-4 PM ET.
In Europe, call +33 (0) 1 41 06 54 54, weekdays
9 AM-5 PM local time.
In the UK, call 01702 208170, weekdays
9 AM-5 PM local time.
In Mexico, call 01800 71 78 222, weekdays
9 AM-5 PM local time.
In Australia, call Crayola AU at 1-800-657-353,
weekdays 9 AM-4 PM AEST.
 Loading...