


Pic ture 4.39
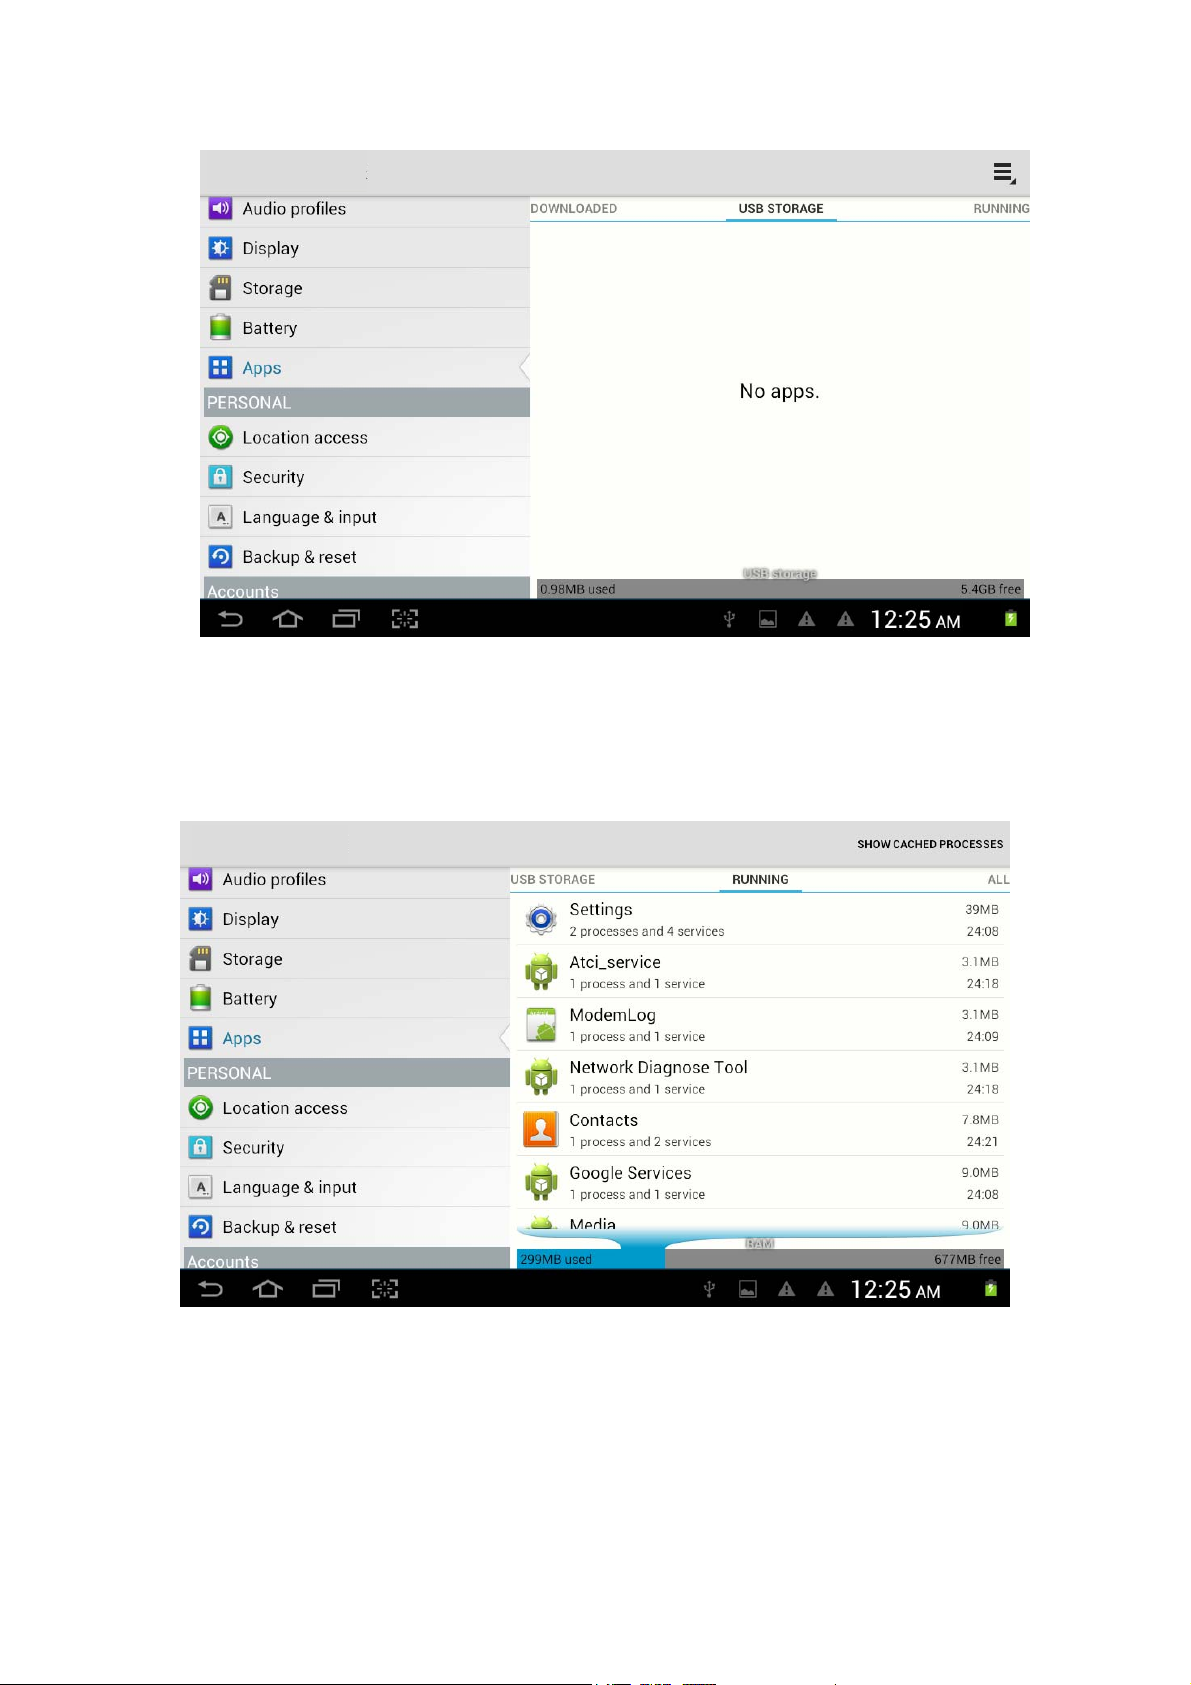
4.8 Application
1. Clic
2. Select application, after enter, you can manage and delete installed application and
k setting application in Apps.
check system used storage space and left space. (As Picture 4.40)
program
Picture 4.40
3. View internal storage used space and left space, as Picture 4.41
Picture 4.41
4. View the working device, used space and available space, as Picture 4.42
Pictur e 4.42
Picture 4.43
2.For example:choose google ,after successfully load, it will open the sync function,
(1)Disable after reboot
Clic
k disable after reboot, when you reboot your MID, A-GPS will auto turn off.
(2)Network Request
Click network request, MID can get your location through network.
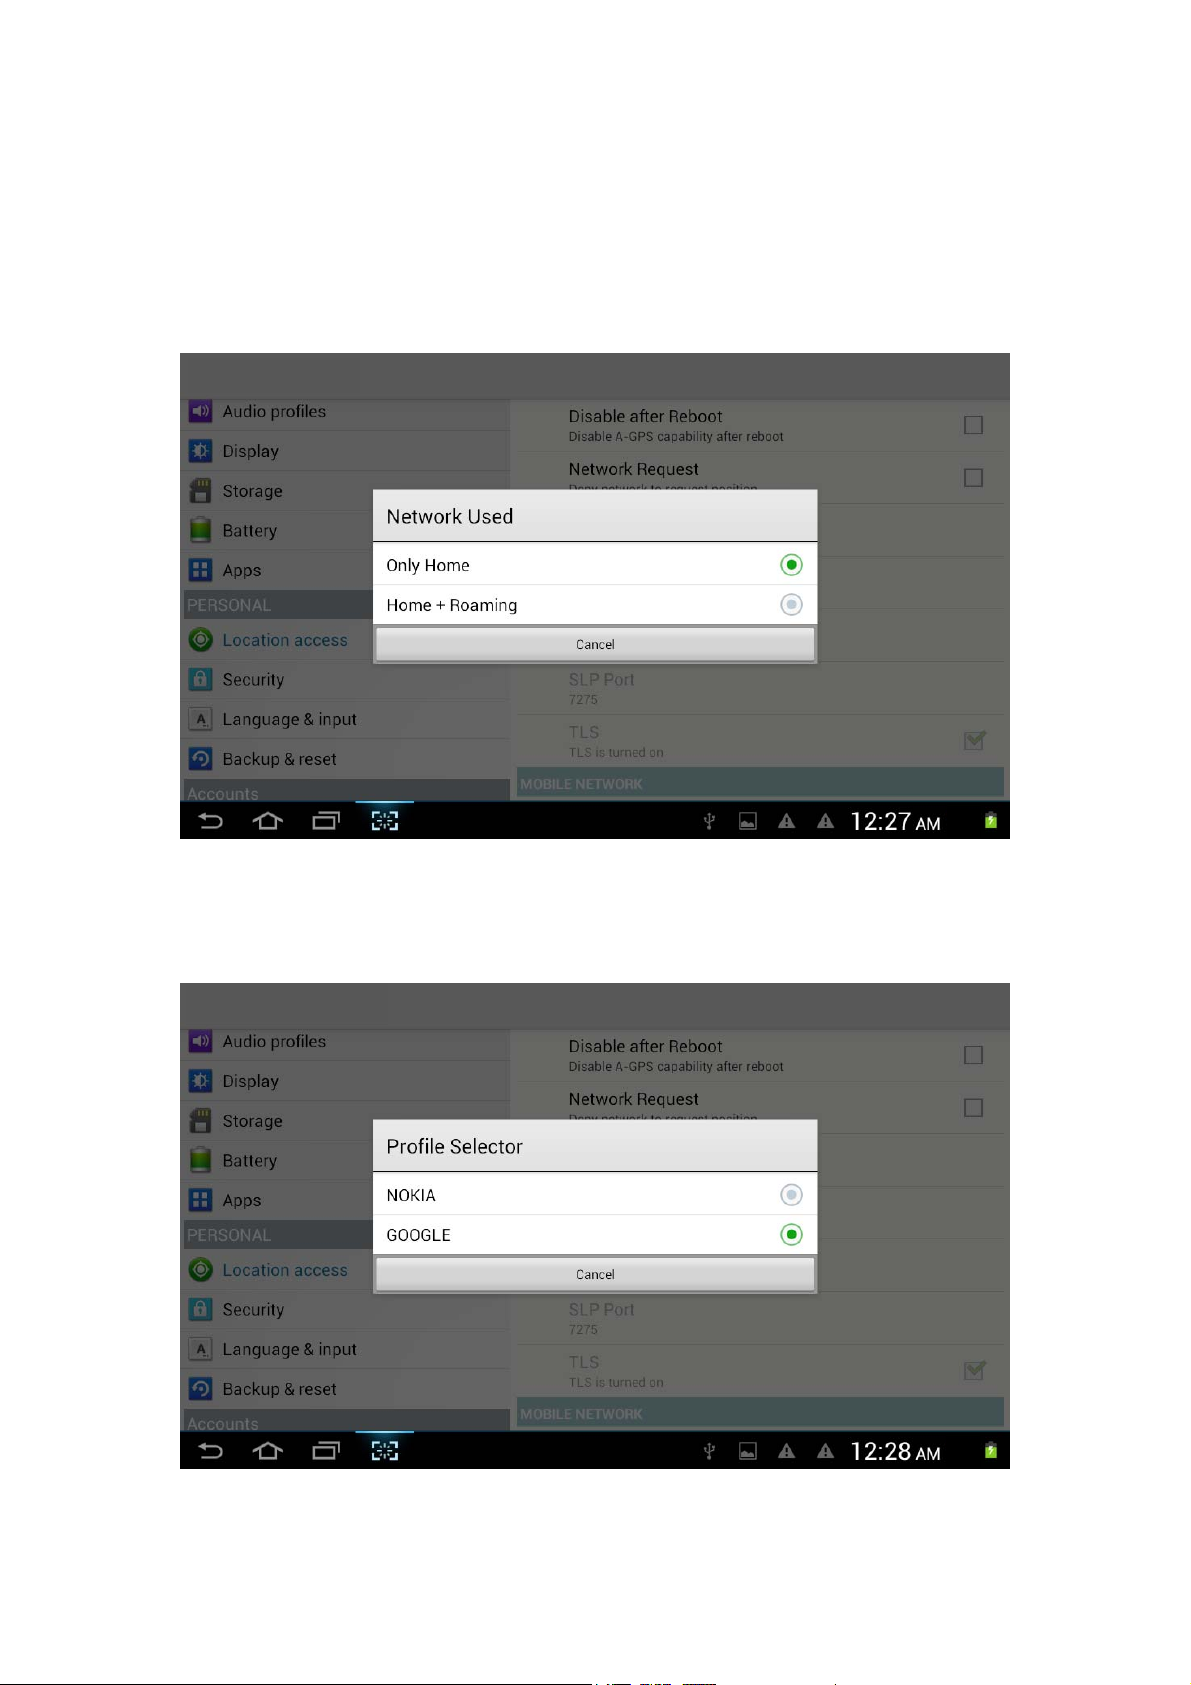
(3)Network used
Open network used, you can choose network type, as Picture 4.47
P icture 4.47
(4)Profile Selector
Click server, it can switch location service, as Picture 4.48
Pi cture 4.48
4.9 Secu
rity
Set locked sc
Lock the touch screen by unlock icon or password to protect your MID.
Note: After setting screen locked, you should enter the passcode each time when you
startup or screen is locked
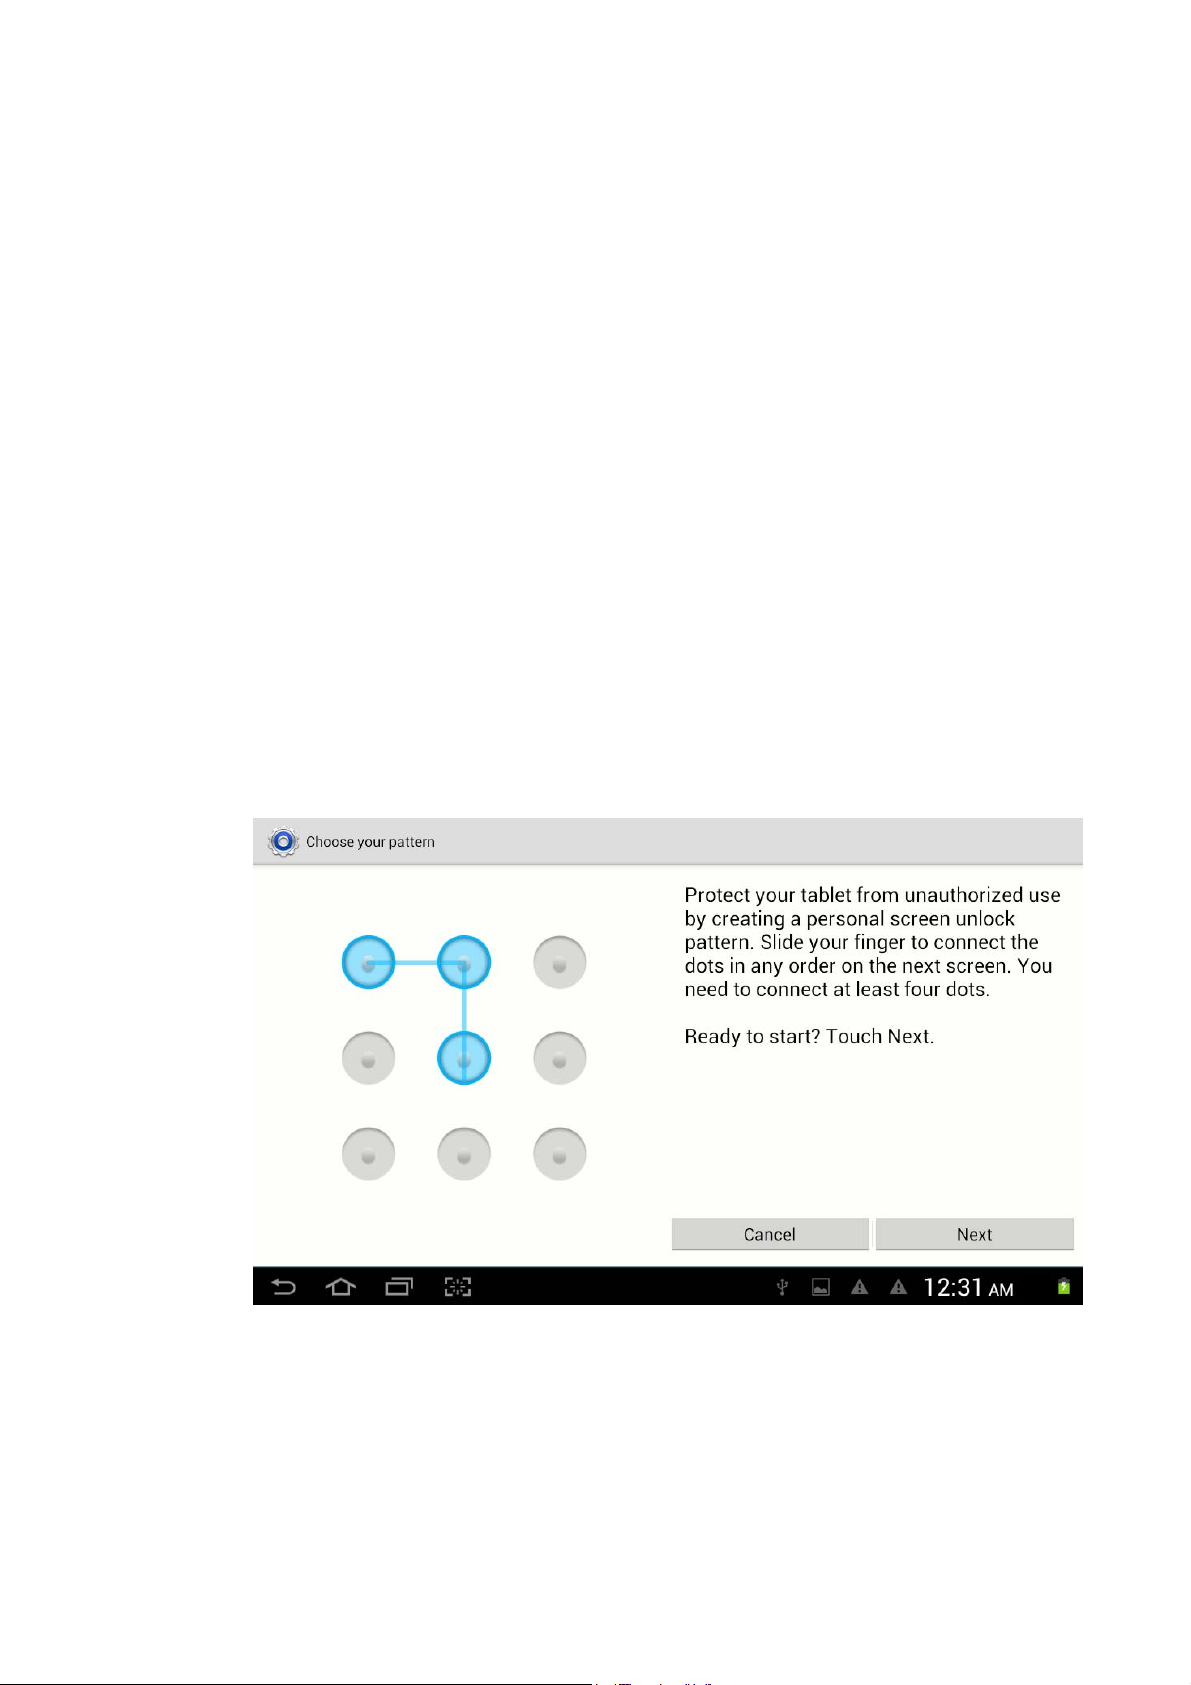
Set unlocked picture
1. Click setting application in main interface.
2. Click security
3. Click locked the screen.
4. Choose picture in text setting area.
5. Click next following the remind message.
6. The unlocked pattern board pop up, there are nine touch spots, connect 4
7. Click continue.
8. When you see the reminder, enter the unlock pattern, then click confirm.
reen
points from vertical, horizontal or diagonal direction. Move your finger from
the screen when finish. The system will record yous new unlock pattern.
Set unlock PIN code
1. Clic
2. Click safe.
3. Click screen locked.
k setting application in main interface.
Picture 4.49
4. Choose PIN
5. Enter new PIN code(numbers) and click continue.
6. Ener new PIN code again and click confirm.
Set unlock password
1.Click setting application in main interface.
2.Click safe.
3.Click screen locked.
4.Set password in text seting area.
5.Set new password(letters and numbers) and then click continue.
6.Enter the password again and the click confirm.
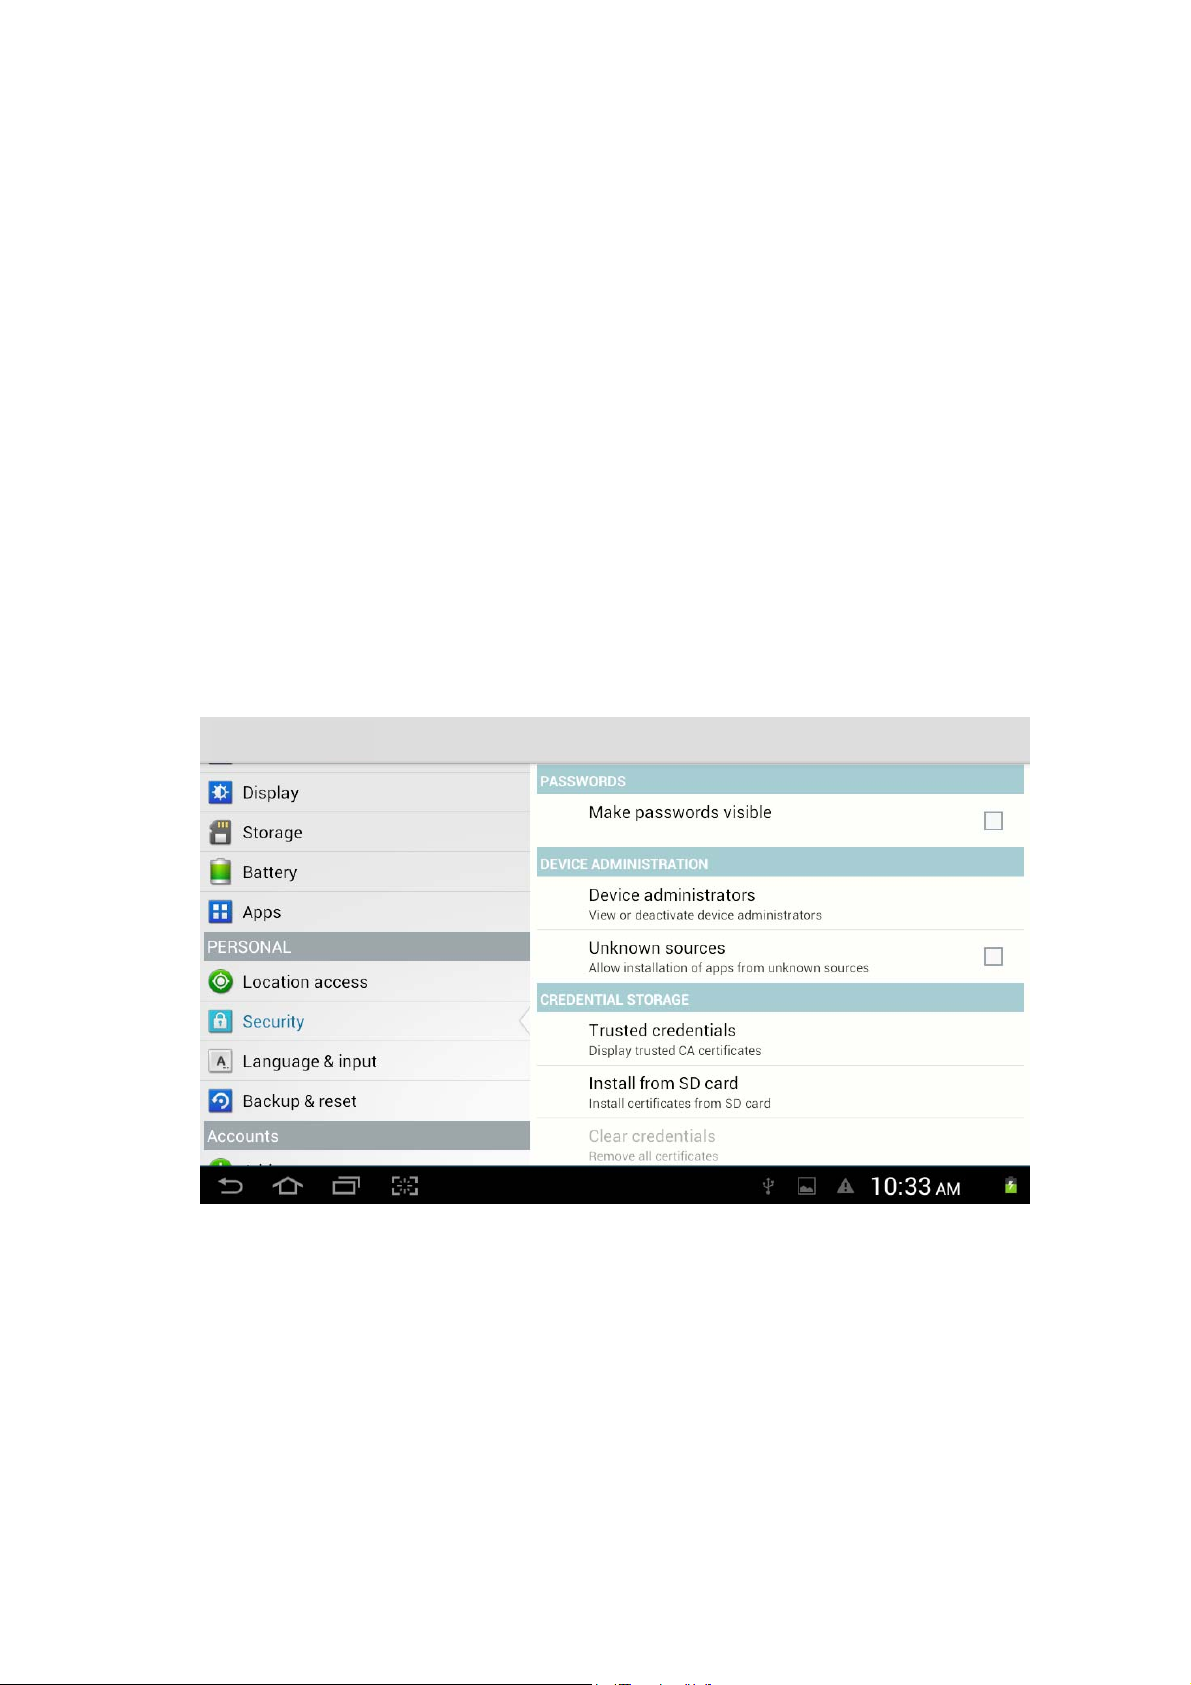
Unknown sources
1.In main interface, click setting.
2.Click security
3.Click unknown source,as Picture 4.50
in text setting area.
Pictur e 4.50
Note: Manual installing APK files needs to turn on unknown source.
4.10 Language and Input Method
k setting, select language and input method, choose language to switch language, as
Clic
Picture 4.51
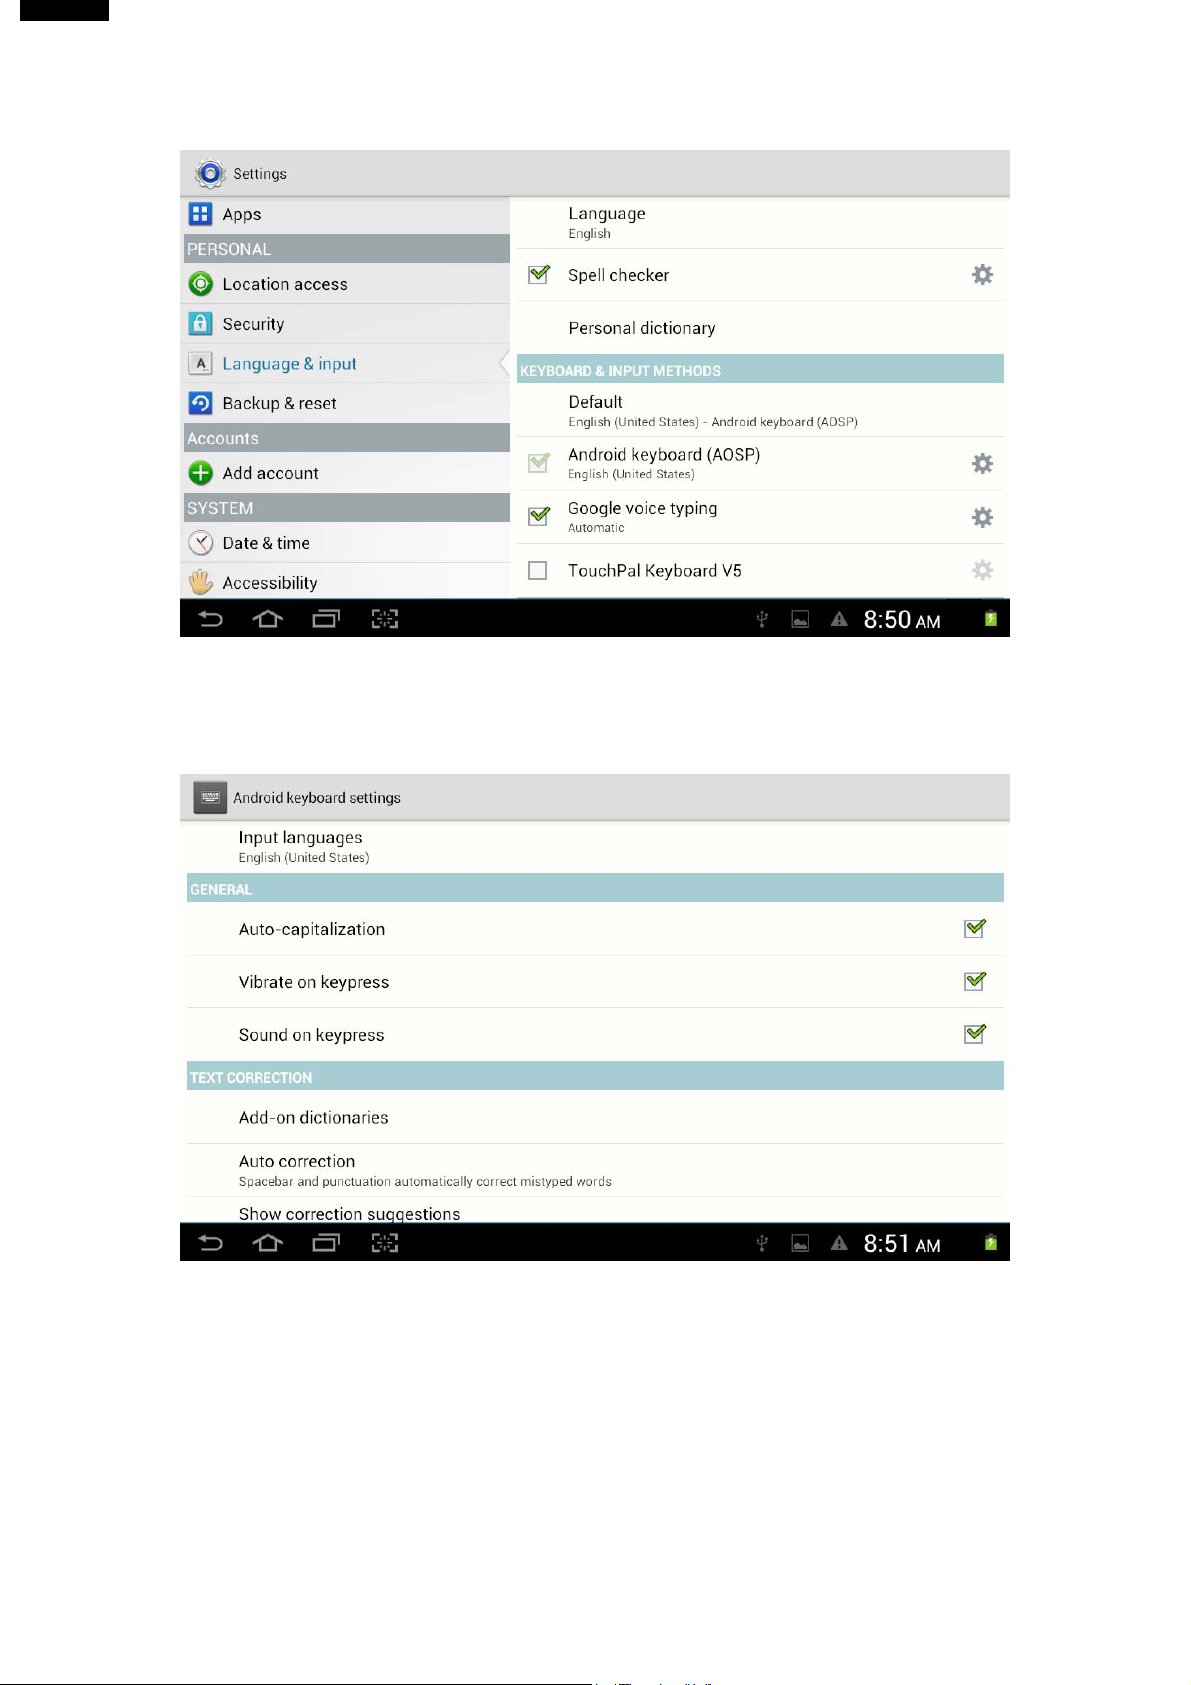
Picture 4.51
Click setting, choose language and input, choose Android keyboard setting, click input
language, as Picture 4.52
Picture 4.52
Choose the language you want to change in the language list, as Picture 4.53
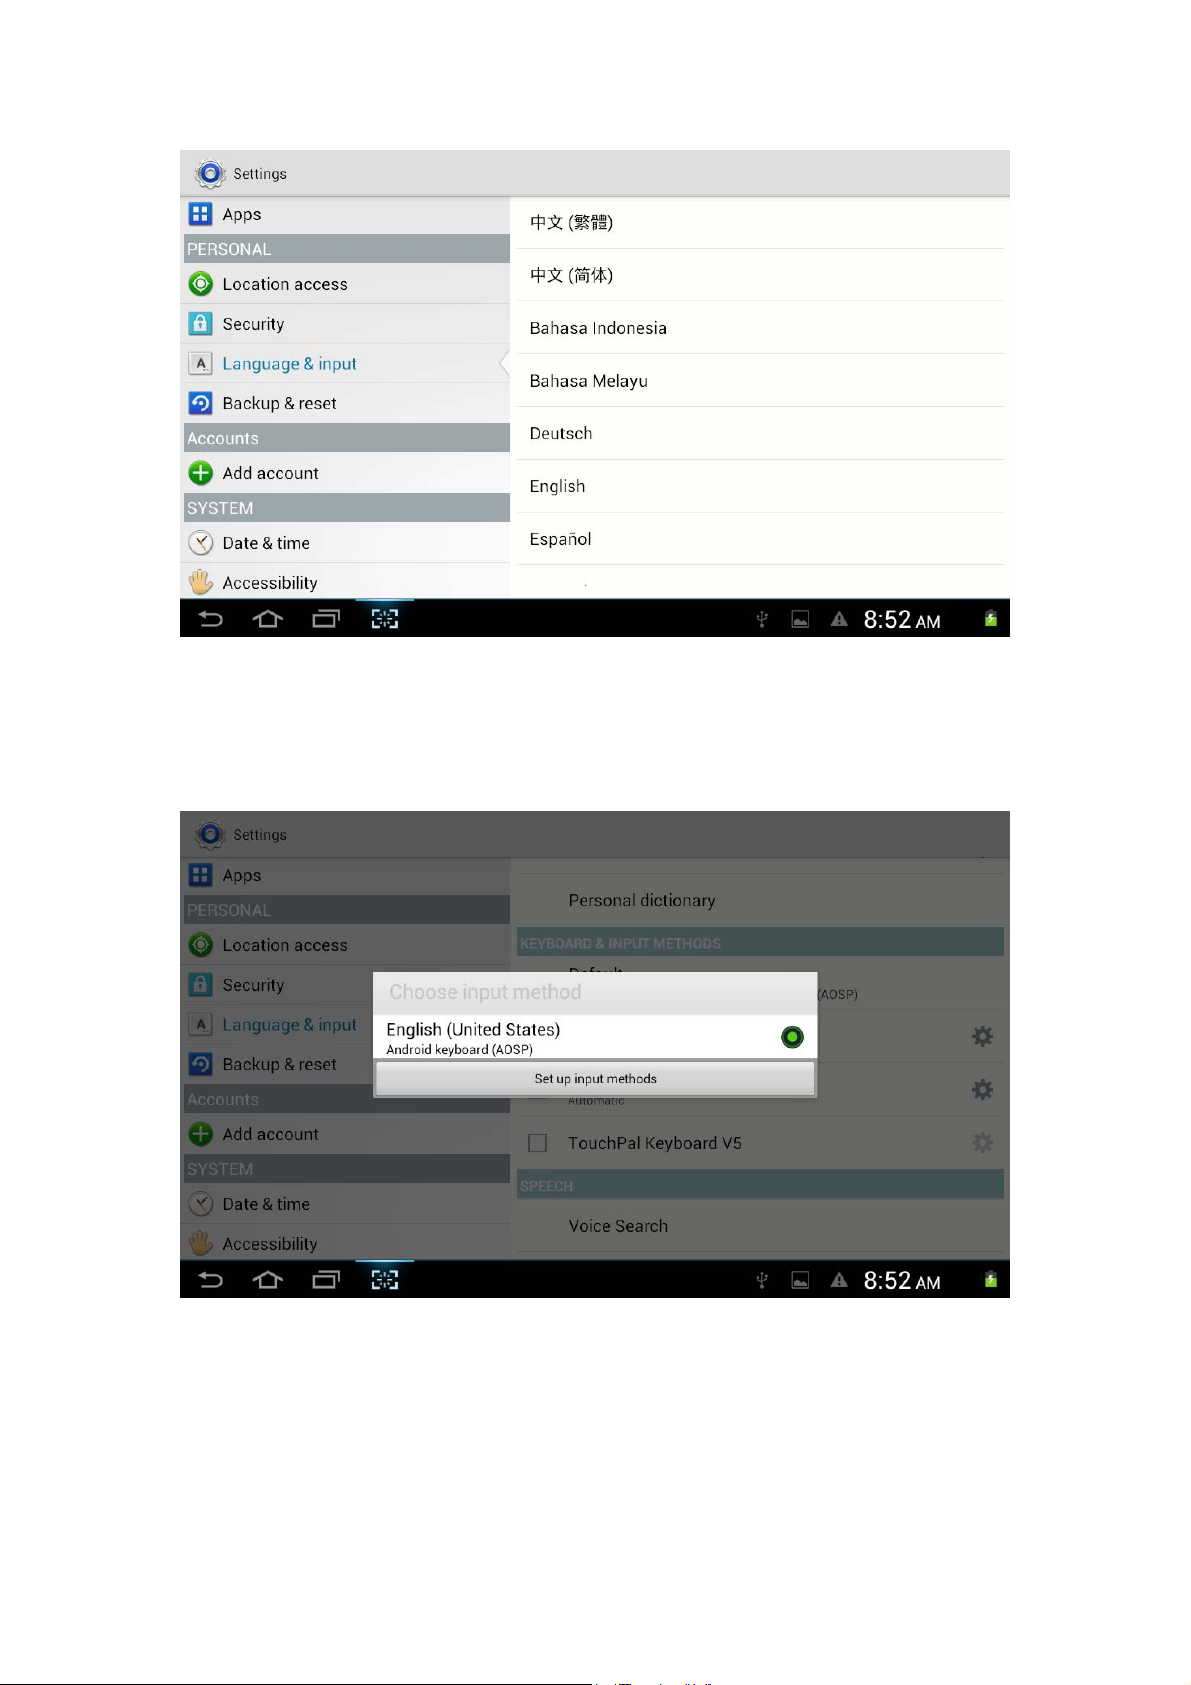
Picture 4.53
Return to langauge and input method, click default, as Picture 4.54, select input method you
want to use
P icture 4.54
4.1
1 Backup and Reset
Co
nnect WIFI and login your google account, choose backup my data, system will backup
your data into google server.
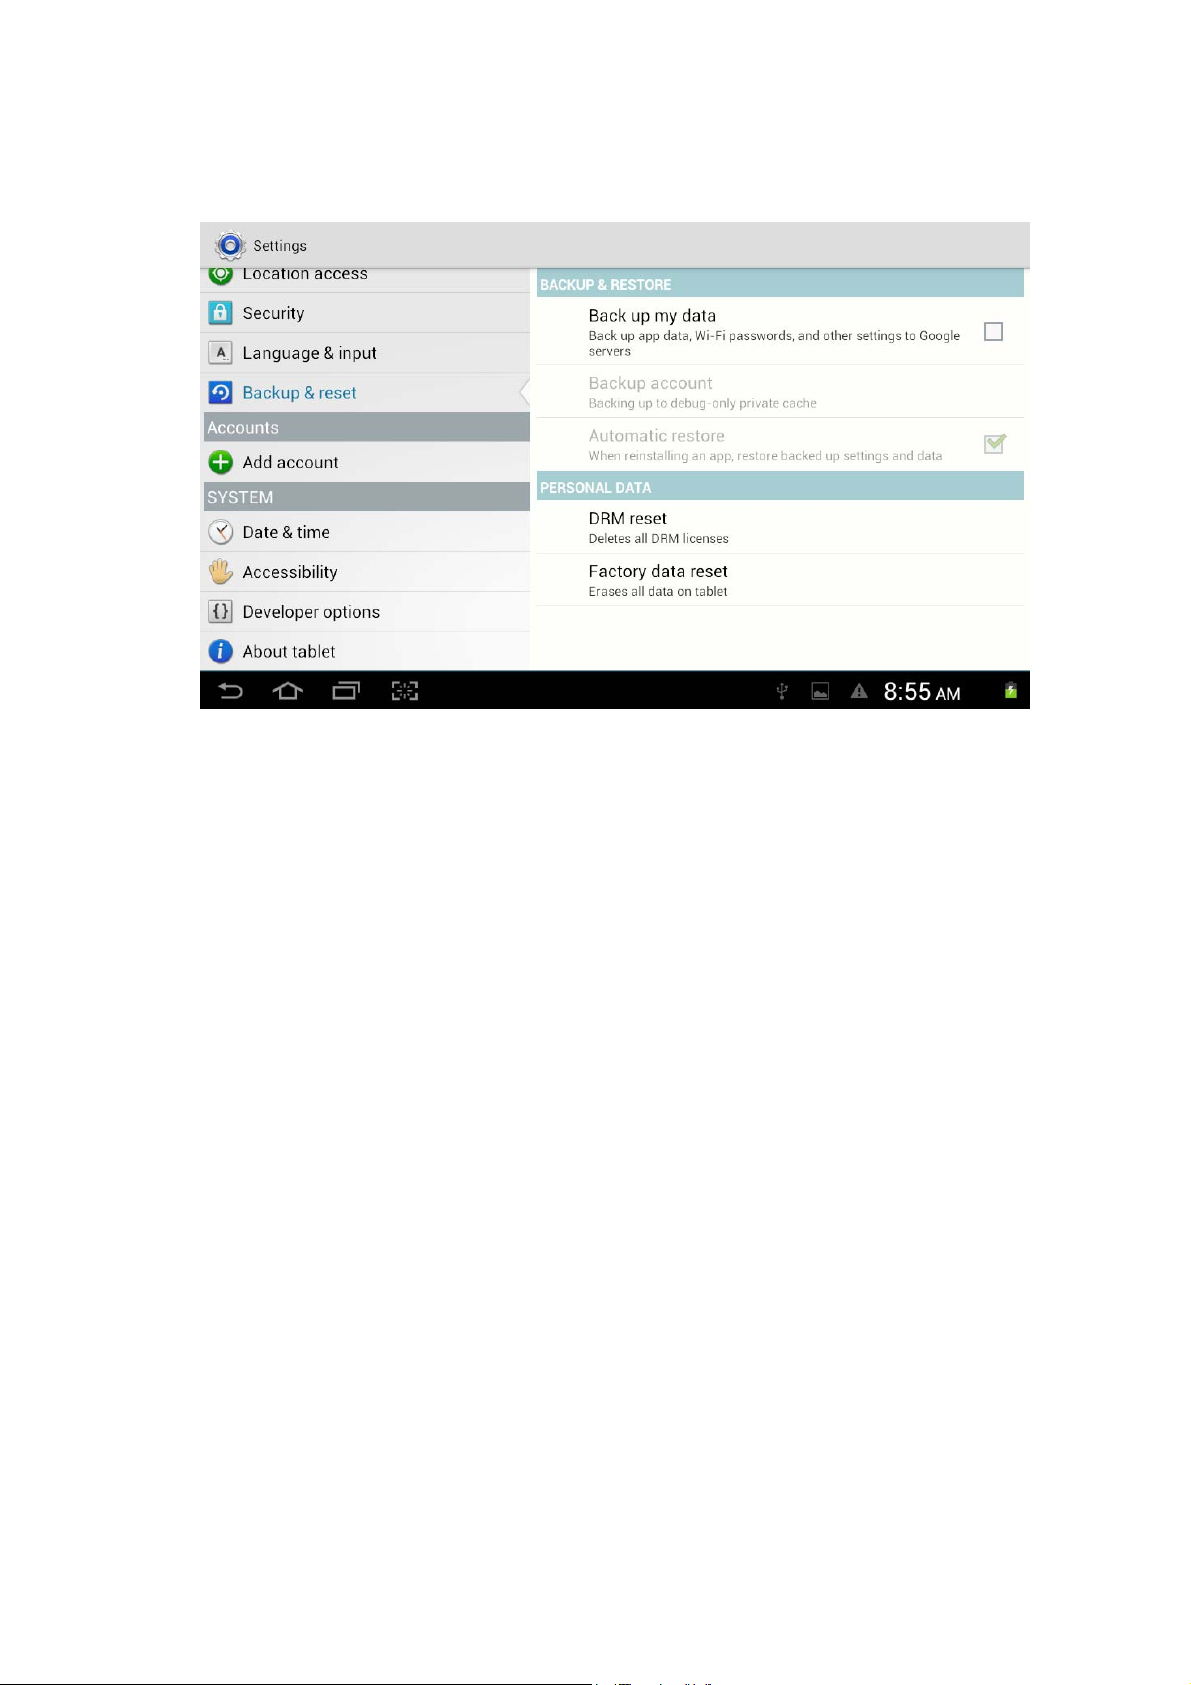
If you nee
need to formulate NAND, please click DRM reset.
d to recovery factory reset, please click Factory data reset, as Picture 4.55, if you
Picture 4.55
4.12 Dat
Accordi
internet.
Manual set date, time and zone
e and Time
ng to the preset, system will voluntorily apply the date, zone, and time provided by
1. Click Setting application procedure.
2. Slide down the screen, then click date and time.
3. Turn off “auto setting of date and time”.
4. Turn off “auto setting zone’.
5. Click Zone Selecting, then choose the zone lists. Slide down the list to view more
zones.
6. Click Date setting , then click upper or down buton to adjust date, month, and year,
click setting when you finish selection.
7. Click Time setting, then click upper or down button to adjust hour and minute, click
AM or PM to change morning or afternoon ( there is no such selection when you se
24-hour format). Click Setting to finish.
8. Click 24-hour format, switch between 12-hour or 24-hour formay, the time format you
choose will be used on the alarm clock.
9. Click date format setting, then choose the time format you want to show on MID.

Picture 4.56
Note: If you use the time internet provided, you will not able to set the date, time and time zone.
4.13 Accessibility
arge text
1. L
Click it to make system font large size
2. Power button to ends call
When Click call, press “power” button, call will end but not hold.
3. Touch and hold delay
Click touch and hold delay to increae time, as Picture 4.57

P icture 4.57
4.14 Develop
.14-1 USB adjustment
4
After opening USB adjustment, you can use some software to read MID software, but when
USB adjustment is turned on, USB storage needs to manual adjust.
4.14-2 Desktop backup password
Click Desktop backup password,you can set and change password.
4.14-3 Stay awake
If you open keep awaken state, it wll never auto sleep when your MID is charging.
4.14-4Pointer Location
If you open pointer location, it will display touch vertical and horizontal direction.
4.14-5Show touches
If you open display touch screen operation, it will display touch opeation on the screen. It is
suggested to use with same direction as pointer location.
4.14-6 Show layout bounds/Show GPU view updatas/Show surface updatas
If you open these functions, The system will reset,it will display related area when the area is
refreshing.
er options
4.14-7 Show CPU usage
After open CUP usage, in the right top of MID will show CPU usage situation.as Picture 4.58

P icture 4.58
4.15 About T
Check MID
ablet
state
1. Check Setting application.
2. Click about tablet, check syatem updates, status, model number, Android
version and so on.
3. Click status, check battery status, battery level, SIM status, IMEI number,
IP address and so on.
5 Multi-Media
5.1 Music
Enter int
player, click the music you want to play, as Picture 5.1:
o music player: in menu or desktop click music
ico
n to enter into music

lbum
A
Pictur
e 5.1
dom play
Ran
Song nam
Artist
lbum
A
e
Pi
us song
Previo
z Drag the progress bar to adjust play progress.
z Operation of music player button as Picture 5.2
cture 5.2
Nex
t song
Pause/
play
5.2 V
z En
ideo
ter video player: choose
to play.
app
lication in main menu, choose the video you want

Ad
just
play
progress
z Operati
on of video player button as Picture 5.3
e 5.3
Pictur
Play/pause
Choose
the
screen
ode
m
5.3 Ph
Edit and set pictures
When check the pictures in full screen mode, click menu key to display menu
oto Gallery
Photo ga
gallery will classify these photos and videos in folder. You can apply photo gallery to
view and edit photos, set the photos as wallpaper and watch the video.
View pictures
llery application can auto search photos and video files in SD card, and photo
1. Click gallery application in main interface.
2. Enter into gallery, click the folder you want to view.
3. Click the picture you want to view, the system will play it in full screen mode
automatically.
4. The pictures can be zoom in and zoom out, put two fingers on the screen, the
separete the fingers(gather up the fingers, the picture will be zoom in) or
double click the screen.
Note: when you browse the pictures, slide left or right to view more pictures.
selection, you can choose the selection you need to edit and setting pictures.
z Slide Show
1. Open a picture, use virtual key to click menu key, display menu selection.

2. Clic
z Crop
1. Click menu key to display menu selection.
2. Then click crop, click and drag related area to adjust the cropper.
3. Click cropper and drag it inside and outside to adjust the image.
4. After adjust the size you want, click crop.
5. If you wish to give up to crop, click cancel to return to picture browse.
z Edit
1. Click menu key, display the menu selection.
2. Click edit.
3. Adjust teh brightness, style, color, antialias setting in selection.
4. Click save.
5. If you want to give up edit, click return key, click not to return to picture
k slide s how, it will auto loop play(or choose
picture folder)
browse.
bu
tton in
6.1 Br
In case of Wi-Fi or mobile internet is connected well (Please refer to Chapter 4.1 for wireless and
internet setting), click IE browser
Picture 7.1
owser
in the main menu or desktop to enter the IE interface, as

ddress
A
column
Save bo
okmark
m
enu
e 6.1
Pictur
Click address bar to input the website, click start, enter into related webpage, then you can browse
the website information, as Picture 7.2 and you can click the menu you can refresh ,save to
bookmarks,,share page,bookmarks,,history and setting the webpage.
P icture7.2

6.2 Em
Emai
IMAP email account of normal web email service provider (For instance, Yahoo, Gmail, Hotmail
and 163),as Picture 7.3
ail
l application procedure contains email setting guide, you can add the external POP3 OR
a. Email Setting
1. After you click the sending email icon
which can help you to set.
2. Input your email address and password.
3. Click “Next step” button, choose your email type is POP3 or IMAP.
4. Click “Next Step” button to check whether the email box servicer can receive or
send emails
5. Input the email account and display the email subiject, and click finish.
6. If the email box is available, you will enter into your mail box automatically.
b. Delete the email account
You can delete setted POP3 or IMAP email account from your MID.
Pictur
e 6.3
, y
ou can see the email setting guide,
Click
。
1. En
2. Press Menu key.
3. Click Account
ter into your mail box.

4. Press the
5. Click confirm to remove.
c. Send E-mail
account you want to delete.
1. Click
2. Click the inbox, it will refresh the new emails automatically; click it to read new
email.
3. Press Menu key. Menus will popup.
4. Click Edit
5. Input the receiver’s email address.
6. Input the subject and email content.
7. If you want to add attachment, click menu key, the menu popup.
8. Click “Attach file” (photo,music, video,contacts).
9. Click “send” to send the email out.
to display your mail box.
to enter into new email editing interface.
Clic
Add
attachment
k it and
Picture 6.4
7 Other
7.1 Cl
Clic
There are clock, picture, music and homepage buttons.
ock
k Clock procedure, enter into below interface
Application Procedures

7.2 Cal
culator
1. Clic
2. Enter in
3. Soft touch the numbers or operator in calulator to calculate.
k
.
to the basic board of calculator.
Picture 7.2
7.3 File Manager
anager will copy, cut, delete, rename the documents or the folder in the TF card, it also will
File m
share the files, install apk etc.
to enter into documen ts
In the main menu or desktop, click the document manager icon
manager.

RAM
Exter
nal
SD card
Picture 7.3
a、Ch
oose right top
choose right top
icon to paste file, choose right top
icon to enter into Picture 8.5
icon to cut file Picture 8.4,
P icture 7.4

b. Share file:choose any file, long press it, it will popup “share”, choose the share way you want in
Picture7.5
the list as Picture 7.6
Picture 7.6
c、Insta
software as reminder.
d、Build new folder: Choose the menu you want to build the file, click
ll apk file:Choose the file suffixed .apk in the file manager, you can install the third part
icon in right top,

choose new
folder, you can build new folder as reminder.
7.4 Recorder
In the m
pic
Play key
this record, please choose it manually.
Play the record: choose the video player to play the recorded sound, choose the recorded sound in
the source manager, and click it to play.
ain interface or desktop, click recorder icon
ture8.7
click record
,
to play the recorded sound. The system will auto remind you to use or abandon
key
to start record. Click Stop key
to enter into record interface as
to stop recording. Click
7.5 Cal
k calendar icon
Clic
the type.Click icon
endar
Picture7.7
to into calendar interface as picture7.8.Click icon
to add calendar.Click icon
main menu.
to
choose
to

e7.8
Pictur
8 Installation of Pr
8.1 Inst
Install the third party
Note: The third party procedure searched from internet to use on the system are all suffixed
with .apk.
8.2 Unin
allation
application procedure
1. Click “file manager” application procedure; choose the application procedure
you need to install.
2. Hold the application procedure you need to install.
3. It popup install, click install apk.
4. Finish the installation as guide, it will operate.
stall
ocedures
ninstall application procedure
U
1. Click setting icon in main interface.

2. Clic
3. Click the APK you want to uninstall, click uninstall.
4. Click confirm to finish uninstallation.
Skill: The procedure manager installed by system has many convinent methods to uninstal
after opening procedure manager, click uninstall, it will list all the application procedures
installed by system.
k manage application procedure , list all the application procedures
insralled in the system.

9 T
roubles Shooting
1. The first star
After the MID system upgraded, the first startup need to install the pre-installed
2. MID can’t connect Wi-Fi
3. MID feels hot
4. Email can’t be set or Registeration of application procedure.
tup of MID is slow
application softwares, the lead time is around 2-3 minutes, the startup afterwards
will be much quicker.
z Make sure the wireless router of internet service can work in normal.
z Ensure the MID and wireless router in certain distance, and no wall or other
barrier between them.
z Ensure the user name and password both correct.
When many application procedures are used in meanwhile, or the brightness of
screen open to the lightest or under charging, MID may feel fever. It is normal.
z Ensure your internet is well connected.
z Make sure your email setting way is correct.
z Keep your system time and local time consitent.
5. The system is abnormal and can’t work.
When you install some third party application procedure, it may cause abnormal
work, you can press Reset key(next to power port) to reset the system.
6. The webpage can’t be opened
z Please keep the distance between from route to MID in effective range.
z Please restart WIFI and try again.
7. MID works terribly slow sometimes
It is normal phenomenon. Please turn off some application you don’t need
in advanced task management, or uninstall some third party application to release more system
resource.

FCC S
Cha
nges or modifications not expressly approved by the party responsible for compliance could
void the user's authority to operate the equipment.
This equipment has been tested and found to comply with the limits for a Class B digital device,
pursuant to Part 15 of the FCC Rules. These limits are designed to provide reasonable protection
against harmful interference in a residential installation. This equipment generates uses and can
radiate radio frequency energy and, if not installed and used in accordance with the instructions,
may cause harmful interference to radio communications. However, there is no guarantee that
interference will not occur in a particular installation. If this equipment does cause harmful
interference to radio or television reception, which can be determined by turning the equipmen t
off and on, the user is encouraged to try to correct the interference by one or more of the following
measures:
-- Reorient or relocate the receiving antenna.
-- Increase the separation between the equipment and receiver.
-- Connect the equipment into an outlet on a circuit different from that to which the receiver is
connected.
-- Consult the dealer or an experienced radio/TV technician for help
This device complies with part 15 of the FCC rules. Operation is subject to the following two
conditions (1)this device may not cause harmful interference, and (2) this device must accept any
interference received, including interference that may cause undesired operation
tatement
 Loading...