

Page 1
Customer Service 800-967-6696 | http://www.crateandbarrel.com
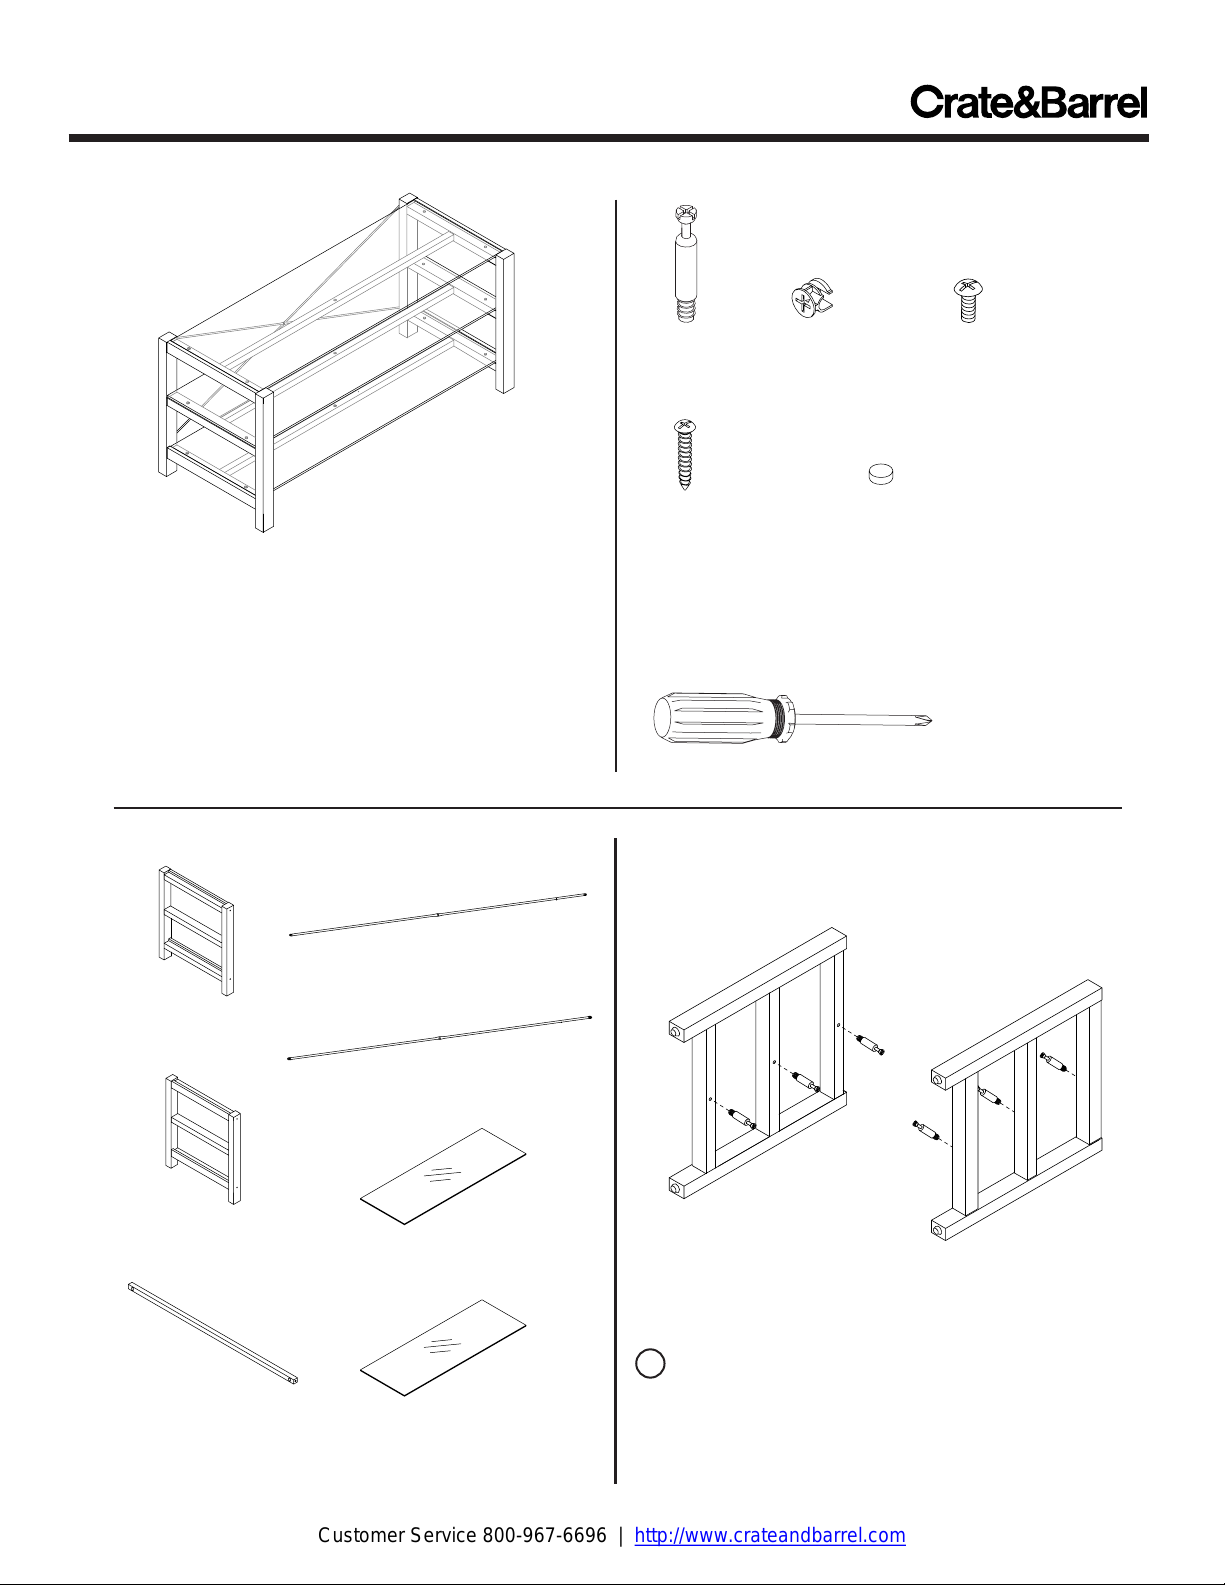
WALKER MEDIA STAND
Thank you for purchasing the Walker Media Stand.
This page
Please take the time to identify the hardware as well as
the individual components
unpack and prepare for assembly, place the contents
on a carpeted or padded area to protect them from
damage.
Note: 2 people are required to safely assemble this
product.
lists all the contents included in the box.
to this product. As you
COMPONENTS
1 - inner metal cross brace
(threaded center hole)
1 - left side frame
1 - outer metal cross brace
1 - right side frame
1 - middle glass shelf
(larger)
3 - crossbars
Made in China r03
2 - top & bottom
glass shelves (smaller)
HARDWARE
6 - cam
screws
4 - screws
Missing hardware?
Please call 800.606.6387 for replacements.
6 - cams 1 - bolt
15 - rubber pads
TOOLS REQUIRED
Phillips head screwdriver
1 Insert 3 cam screws into each side frame as shown.
Secure, but do not over tighten, with a phillips head
screwdriver.
Page 1 of 3
Page 2
Customer Service 800-967-6696 | http://www.crateandbarrel.com
WALKER MEDIA STAND
Arrow points
towards nearest
edge with hole
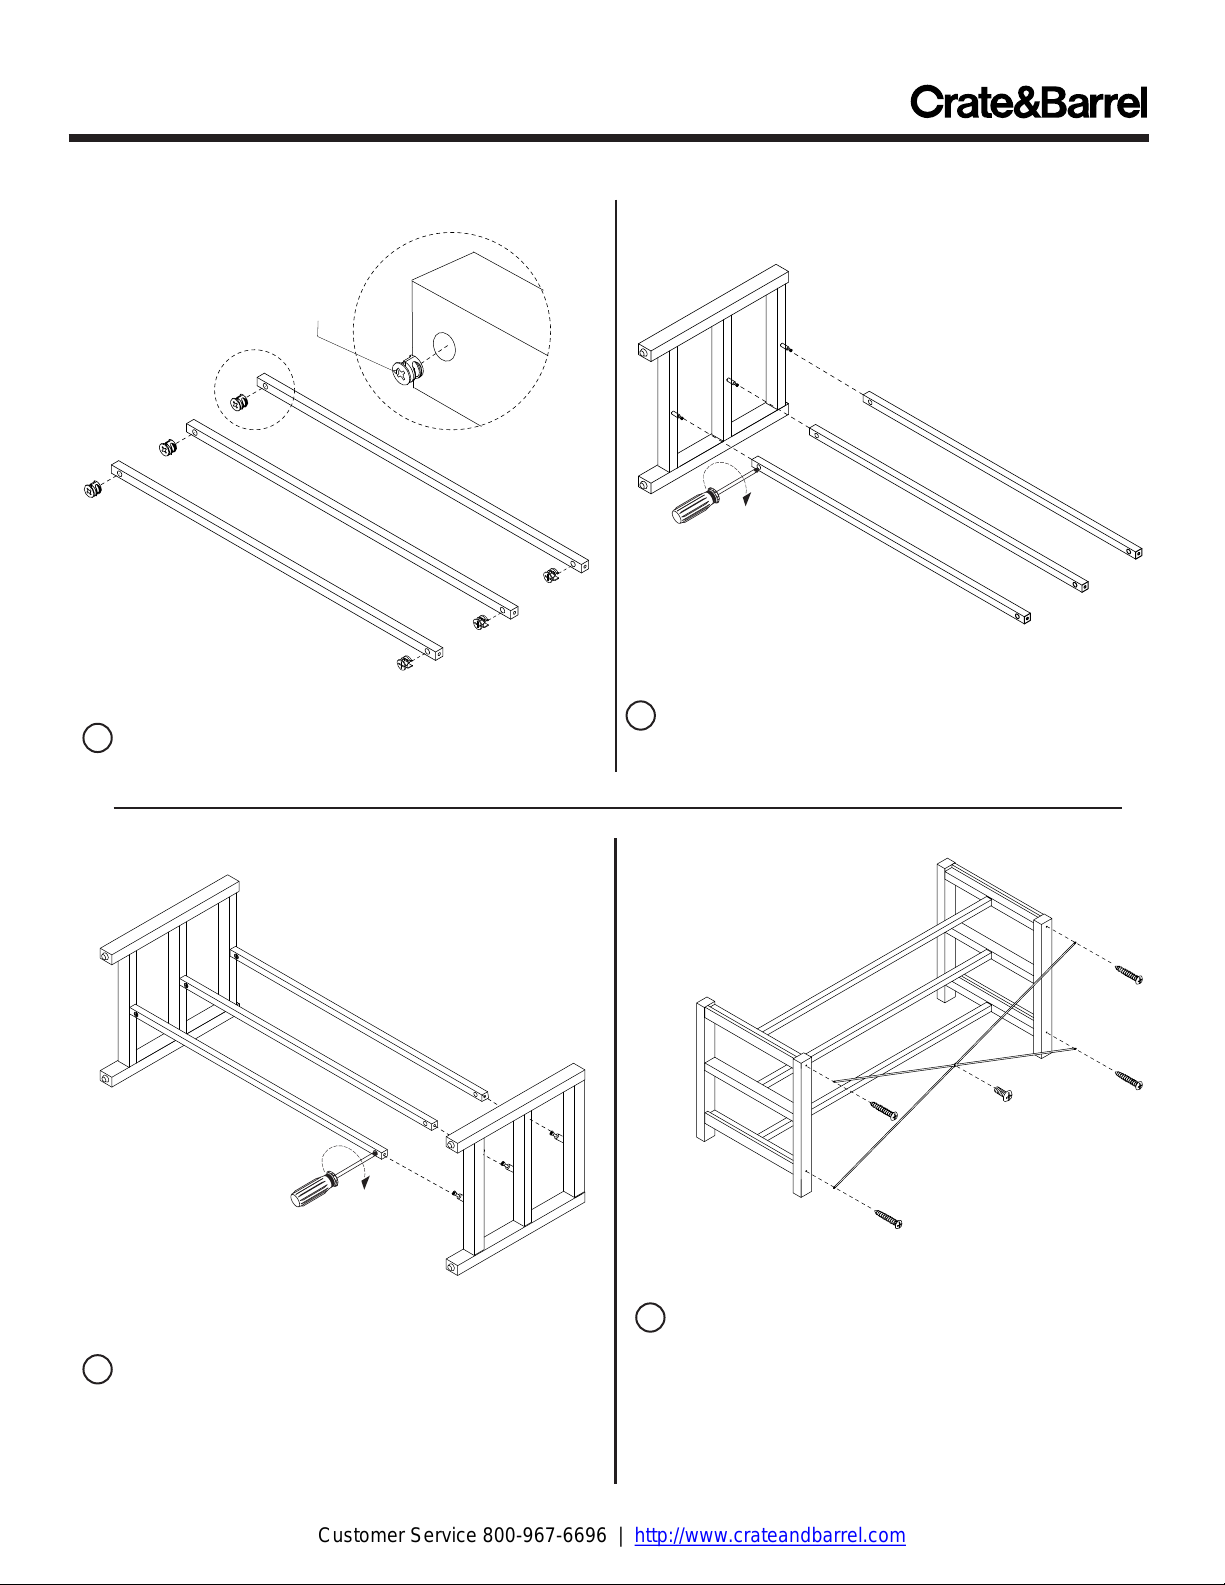
2 Insert 2 cams into each crossbar as shown. Make
sure arrow on each cam points towards the nearest edge
with a hole.
4 Fit crossbars onto cam screws of right side frame.
Secure each cam by turning clockwise with a phillips
head screwdriver.
Made in China r03
3 Fit each cross bar onto the cam screws of the left
side frame as shown. Secure each cam by turning
clockwise with a phillips head screwdriver until each
cam securely engages each cam screw.
A
B
5 Place assembly upright and turn it around.
A. Attach the inner metal cross brace (brace with
threaded center hole) to the side frames with 2 screws as
shown. Secure with a phillips head screwdriver.
B. Fit outer metal cross brace over inner metal cross
brace and fasten to side frames with 2 screws.
C. Fasten cross brace intersection with 1 bolt. Secure with
screwdriver.
C
Page 2 of 3
Page 3

Customer Service 800-967-6696 | http://www.crateandbarrel.com
WALKER MEDIA STAND
A
6 A. Adhere 5 rubber pads to each shelf frame as
shown.
B. With the assistance of another adult, carefully place 1
middle glass shelf onto rubber pads of the middle shelf.
C. Carefully place top & bottom glass shelves into
position as shown.
Assembly is now complete.
Made in China r03
B
C
CLEANING AND CARE
Clean surfaces with a dry or damp soft cloth. Use glass
cleaner on shelves as necessary.
Do not use abrasive cleaners.
Page 3 of 3
 Loading...