

Page 1
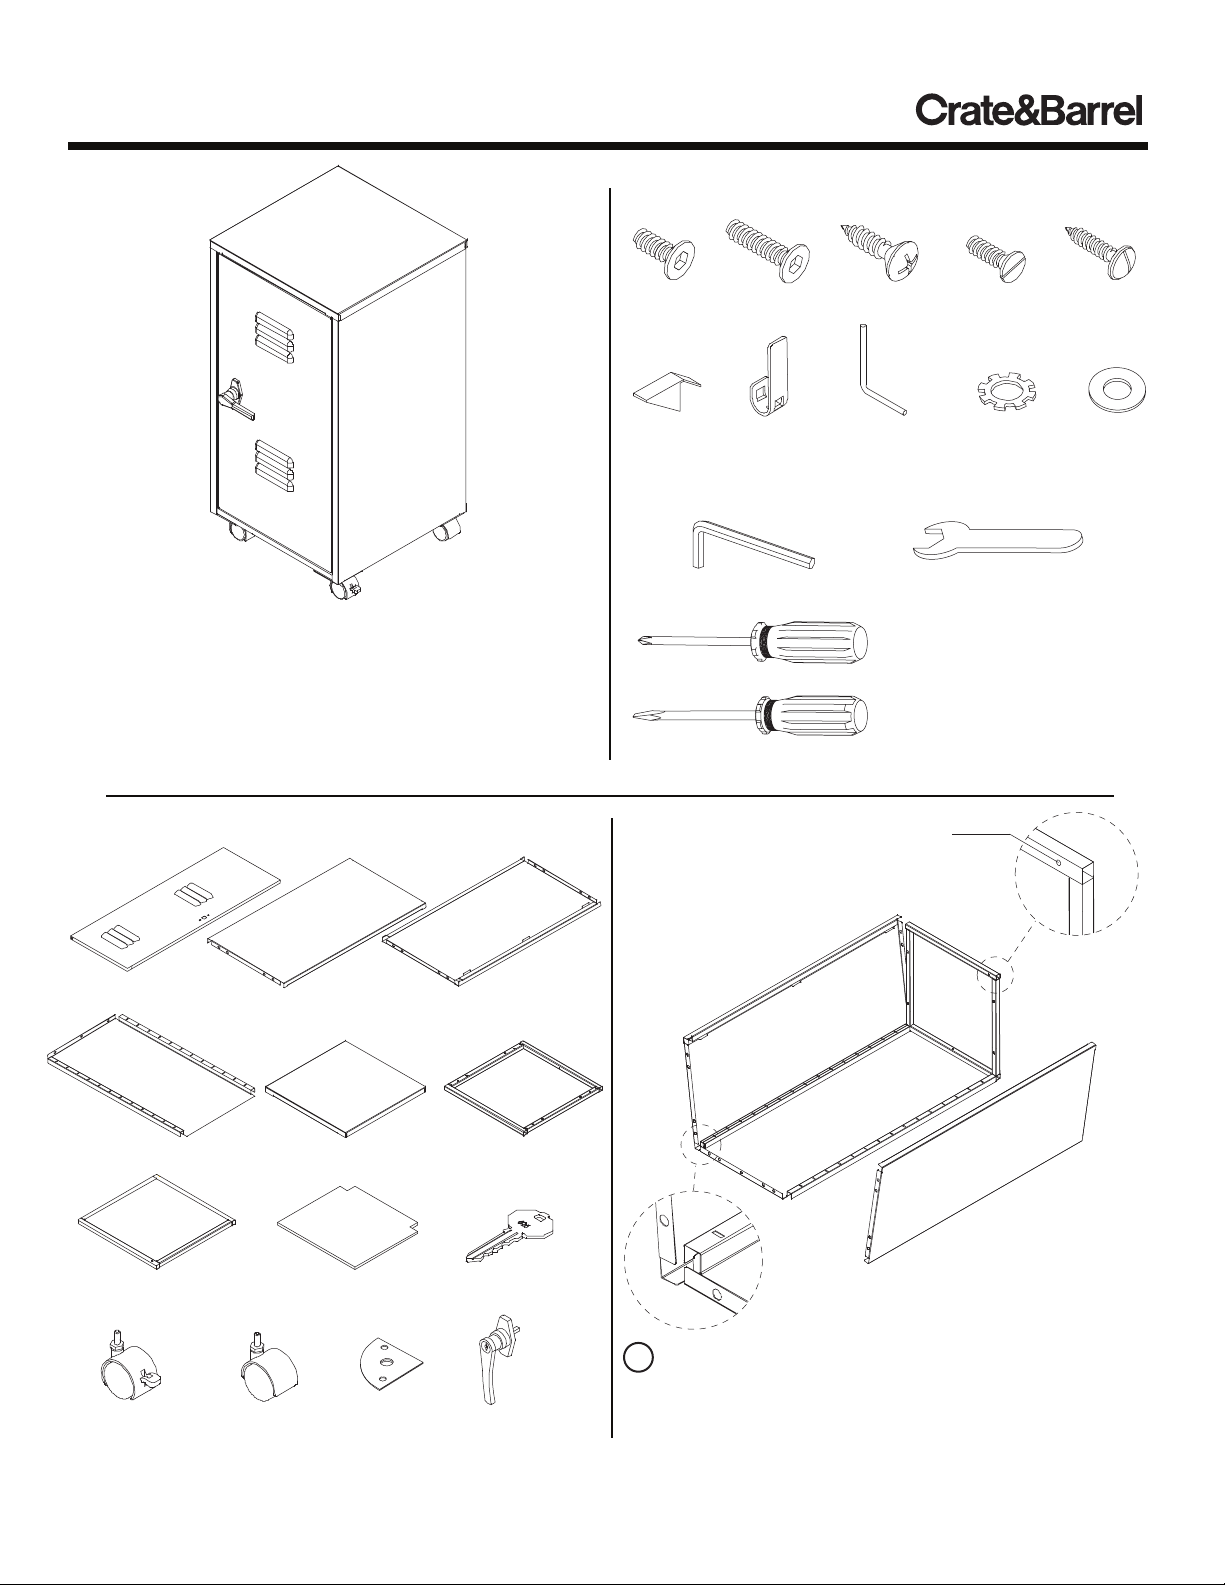
STORAGE LOCKER WITH CASTERS
Missing hardware?
HARDWARE
Please call 800.606.6387 for replacements.
Thank you for purchasing the Storage Locker with
Casters. This page lists all the contents included in the
box. Please take time to identify the hardware as well as
the individual components of this product. As you
unpack and prepare for assembly, place the contents on
a carpeted or padded area to protect them from damage.
Note: 2 people are required to safely assemble this product.
COMPONENTS
4 - small
bolts
4 - shelf
pins
8 - large
bolts
1 - lock
2 - screws 2 - handle
bolts
1 - pin
hinge
2 - lock
washers
TOOLS REQUIRED
allen wrench (included)
(We recommend the use of hand tools instead of power tools)
ASSEMBLY
NOTE: Make sure hole
of top frame is positioned
as shown
hex wrench (included)
phillips head screwdriver
(not included)
flat head screwdriver
(not included)
1 - lock
screw
1 - flat
washer
top frame
right side
panel
1 - door
1 - back panel
1 - bottom panel
2 - side panels
(1 left, 1 right)
1 - top panel
1 - shelf
left side
panel
1 - top frame
2 - keys
1 With the assistance of another adult, place left and
right side panels, back panel and top frame onto a
2 - locking
wheels
2 - wheels
4 - corner
plates
1 - handle
clean, padded surface. Fit left side panel into top panel,
right side panel and back frame as shown. Make sure
panels securely engage each other.
Made in Taiwan - r05 Page 1 of 3
Customer Service 800.967.6696 | Latest instructions available at www.crateandbarrel.com
Page 2
STORAGE LOCKER WITH CASTERS
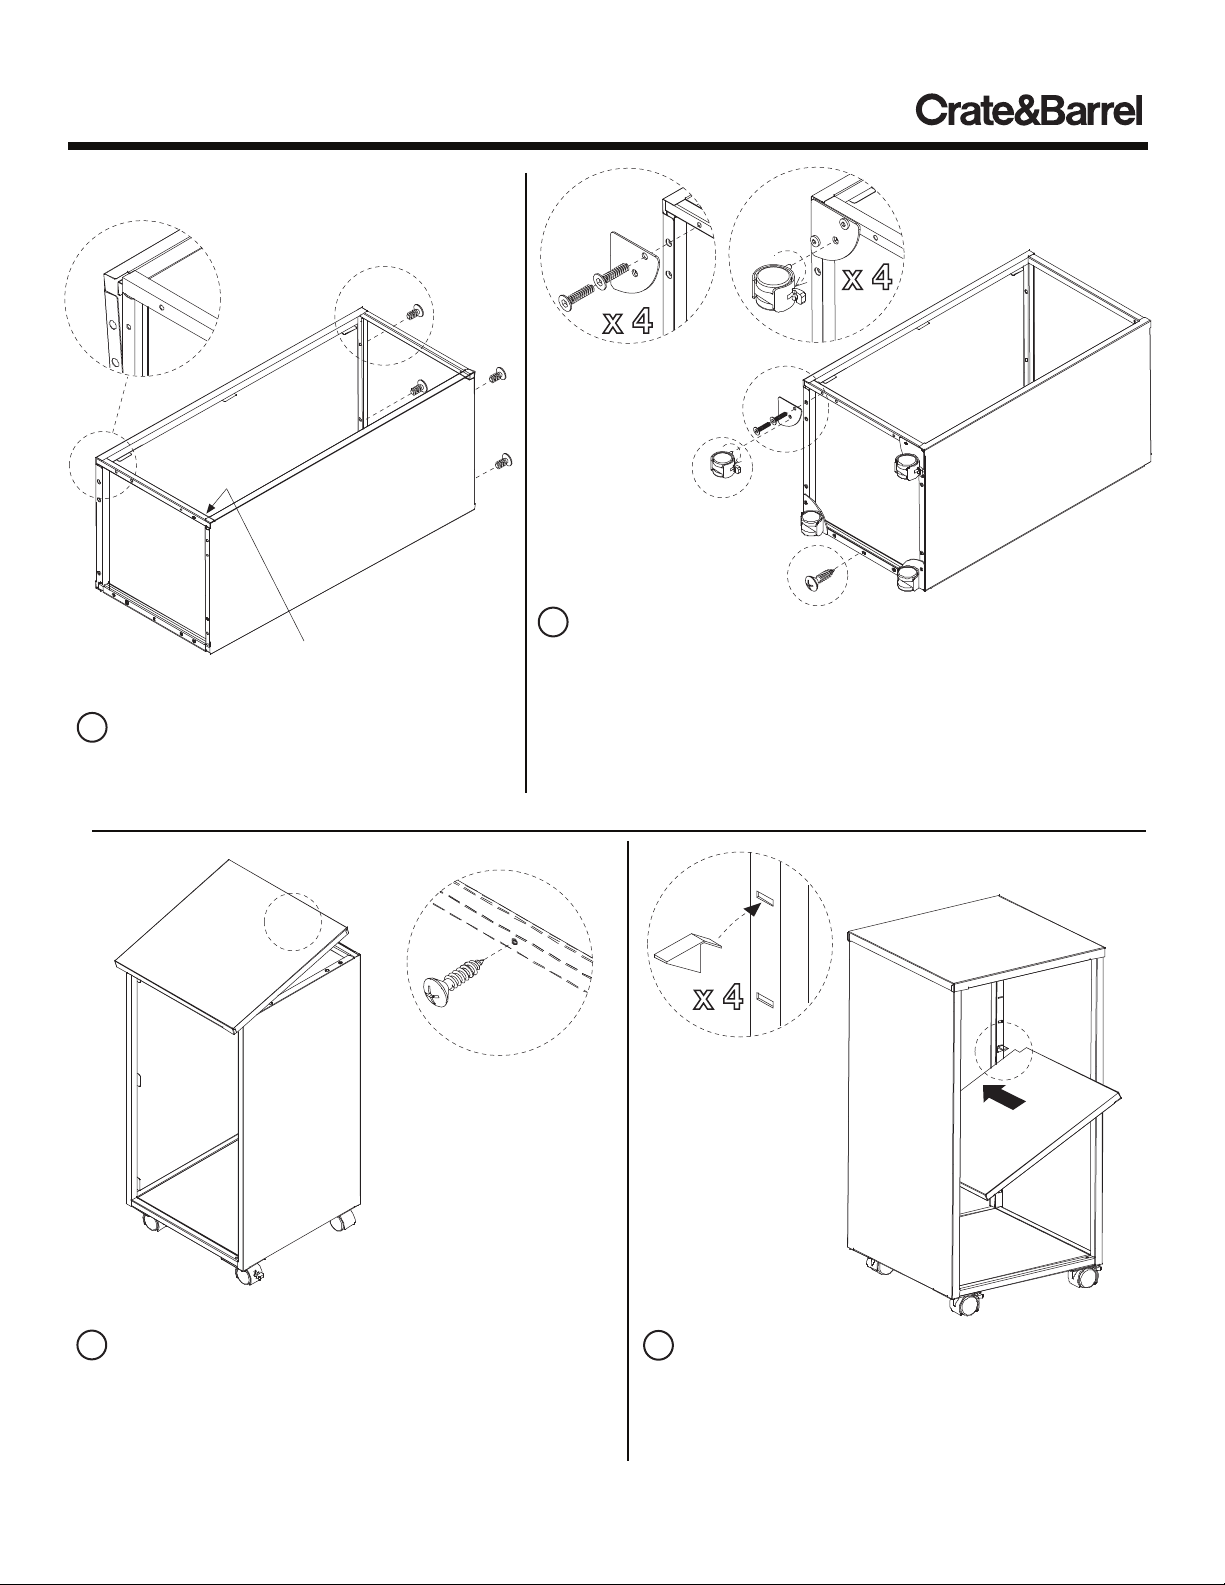
NOTE: Do not over
tighten the bolts
A
B
B
bottom
panel
2 A) Secure top frame to assembly with 4
small bolts as shown. Secure, but do not
over tighten, the bolts using an allen wrench.
B) Fit bottom panel into assembly as shown.
NOTE: Make sure hole
of bottom panel is
positioned facing up
A
corner
plate
B
NOTE: Do not over
tighten the screw
A
B
locking
wheel
wheel
C
3 A) Secure bottom panel to left/right side panels and back
panel with 4 corner plates and 2 large bolts per plate as shown,
using an allen wrench.
B) Attach 4 wheels to corner plates by turning each wheel clockwise to secure. Make sure locking wheels are at the front of the
assembly as shown.
C) Secure bottom panel with 1 screw as shown, using a phillips
head screwdriver. Do not over tighten the screws.
locking
wheel
wheel
top panel
4 With the assistance of another adult, position assembled
unit upright. Fit top panel into corresponding grooves of
top frame as shown. Secure top panel to top frame with 1
screw, using a phillips head screwdriver.
A
B
shelf
5 A) Fit 4 shelf pins into corresponding slots of
assembled unit at desired shelf height.
B) Fit 1 shelf into assembled unit as shown. Make sure
shelf is securely supported by each shelf pin.
Made in Taiwan - r05
Customer Service 800.967.6696 | Latest instructions available at www.crateandbarrel.com
Page 2 of 3
Page 3

STORAGE LOCKER WITH CASTERS
lock
washer
handle
bolt
A
handle
6 A) Attach 1 handle to front of door with 2
lock washers and 2 handle bolts as shown.
Secure, but do not over tighten, bolts using a
flat head screwdriver.
key
D
handle
peg
lock
handle
B) Fit peg of handle into corresponding hole of lock as shown.
B
ASSEMBLED
DOOR FRONT
C
lock screw
C) Secure lock to handle with 1 lock
screw as shown.
ASSEMBLED
DOOR BACK
D) Fit key into handle and ensure
key, handle and lock work properly.
B
C
A
7 A) With 1 flat washer, fit peg of door assembly into
corresponding hole of bottom panel as shown.
B) Secure door assembly to top panel by fitting pin hinge into
corresponding holes of door assembly as shown.
C) Fit pin hinge into notch of door assembly as shown to secure.
Assembly is now complete.
C
pin
hinge
peg
flat
washer
A
B
pin
hinge
notch
CLEANING AND CARE
Made in Taiwan - r05 Page 3 of 3
Customer Service 800.967.6696 | Latest instructions available at www.crateandbarrel.com
Clean surfaces with a dry soft cloth. Do not use abrasive cleaners.
 Loading...