

Page 1
Customer Service 800-967-6696 | http://www.crateandbarrel.com
NIELSEN EXTENSION DINING TABLE
Thank you for purchasing the Nielsen Extension Dining
Table. This page lists all the contents included in the
box. Please take time to identify the hardware as well as
the individual components of this product. As you
unpack and prepare for assembly, place the contents on
a carpeted or padded area to protect them from
damage.
Note: 2 people are required to safely assemble this
product.
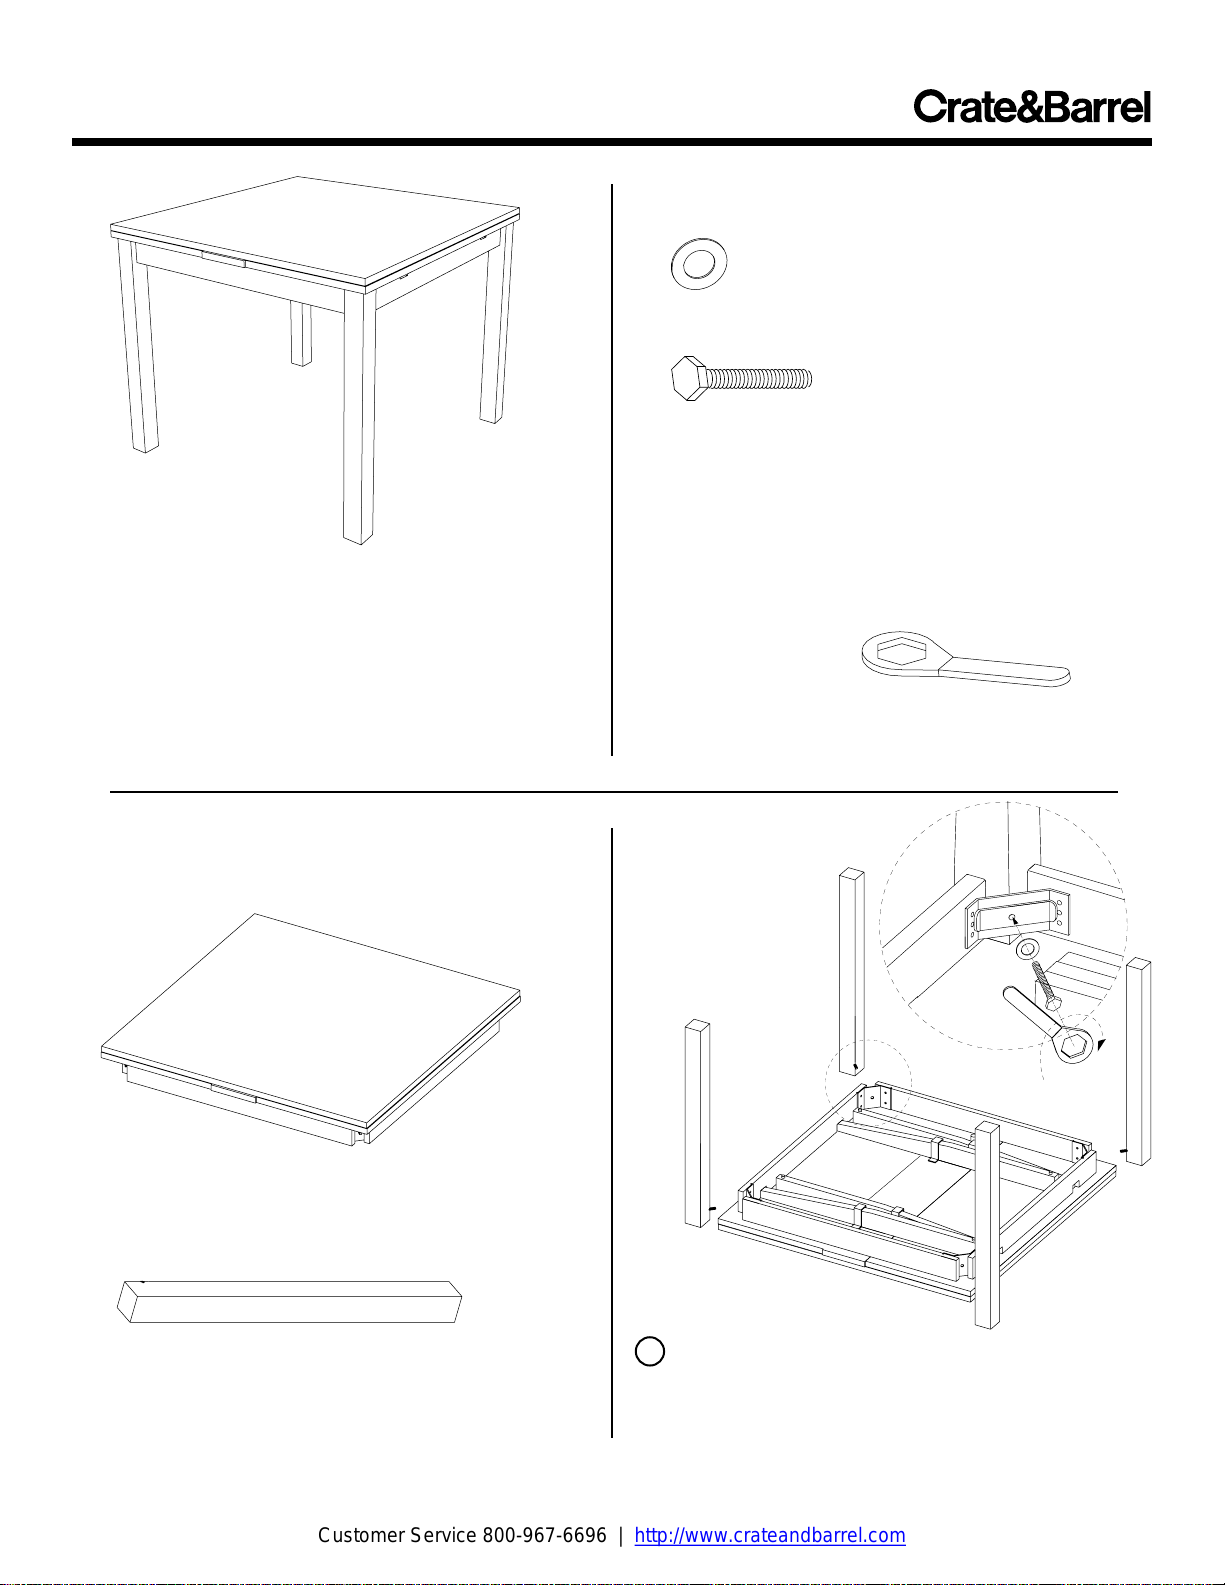
COMPONENTS
1 - table top
assembly
4 - legs
Made in Denmark - r04
HARDWARE
4 - washers
4 - bolts
Missing hardware? Please call 800.606.6387 for
replacements.
TOOLS REQUIRED
Hex wrench (included)
x 4
1 Place the table top assembly upside down on a clean,
padded surface. Place legs into position, aligning hole of
leg with hole in the metal corner bracket. Secure each leg to
table top with 1 washer and 1 bolt. Fully tighten with hex
wrench provided.
Assembly is now complete.
Page 1 of 2
Page 2
Customer Service 800-967-6696 | http://www.crateandbarrel.com
NIELSEN EXTENSION DINING TABLE
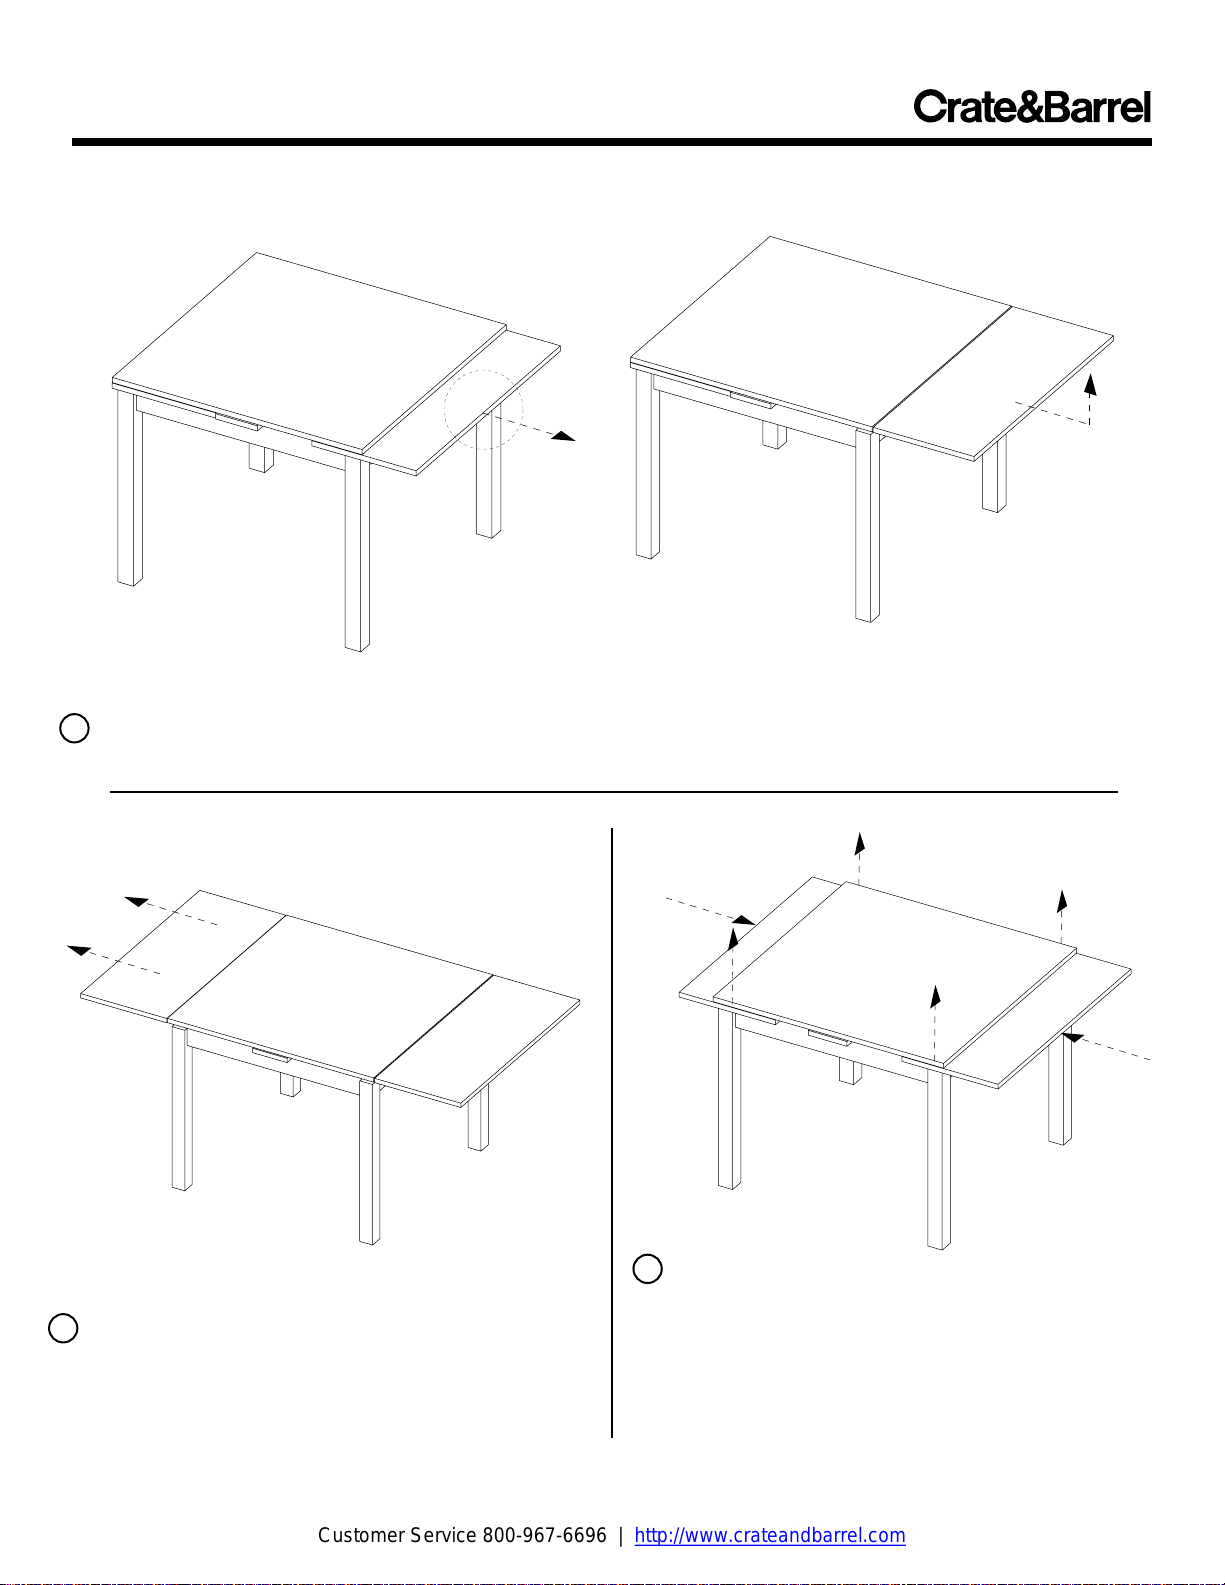
EXTENSION LEAF OPERATION
2 Grasp finger pull on underside of table top and pull out extension leaf. As you pull the leaf, it will move upwards
to be flush with the surface of the tabletop.
3 Repeat for the remaining leaf.
Made in Denmark - r04
EXTENSION LEAF STORAGE
A
B
A
A
4 A. Lift up table top slightly at each end to take the weight
off the extension leaf.
B. Slide leaf back into position under table top.
A
B
CLEANING AND CARE
Clean surfaces with a dry or damp soft cloth. Do not use
abrasive cleaners. Do not use furniture wax or polish as the
wood is finished with a protective clear lacquer.
Page 2 of 2
 Loading...