

Page 1
Customer Service 800-967-6696 | http://www.crateandbarrel.com
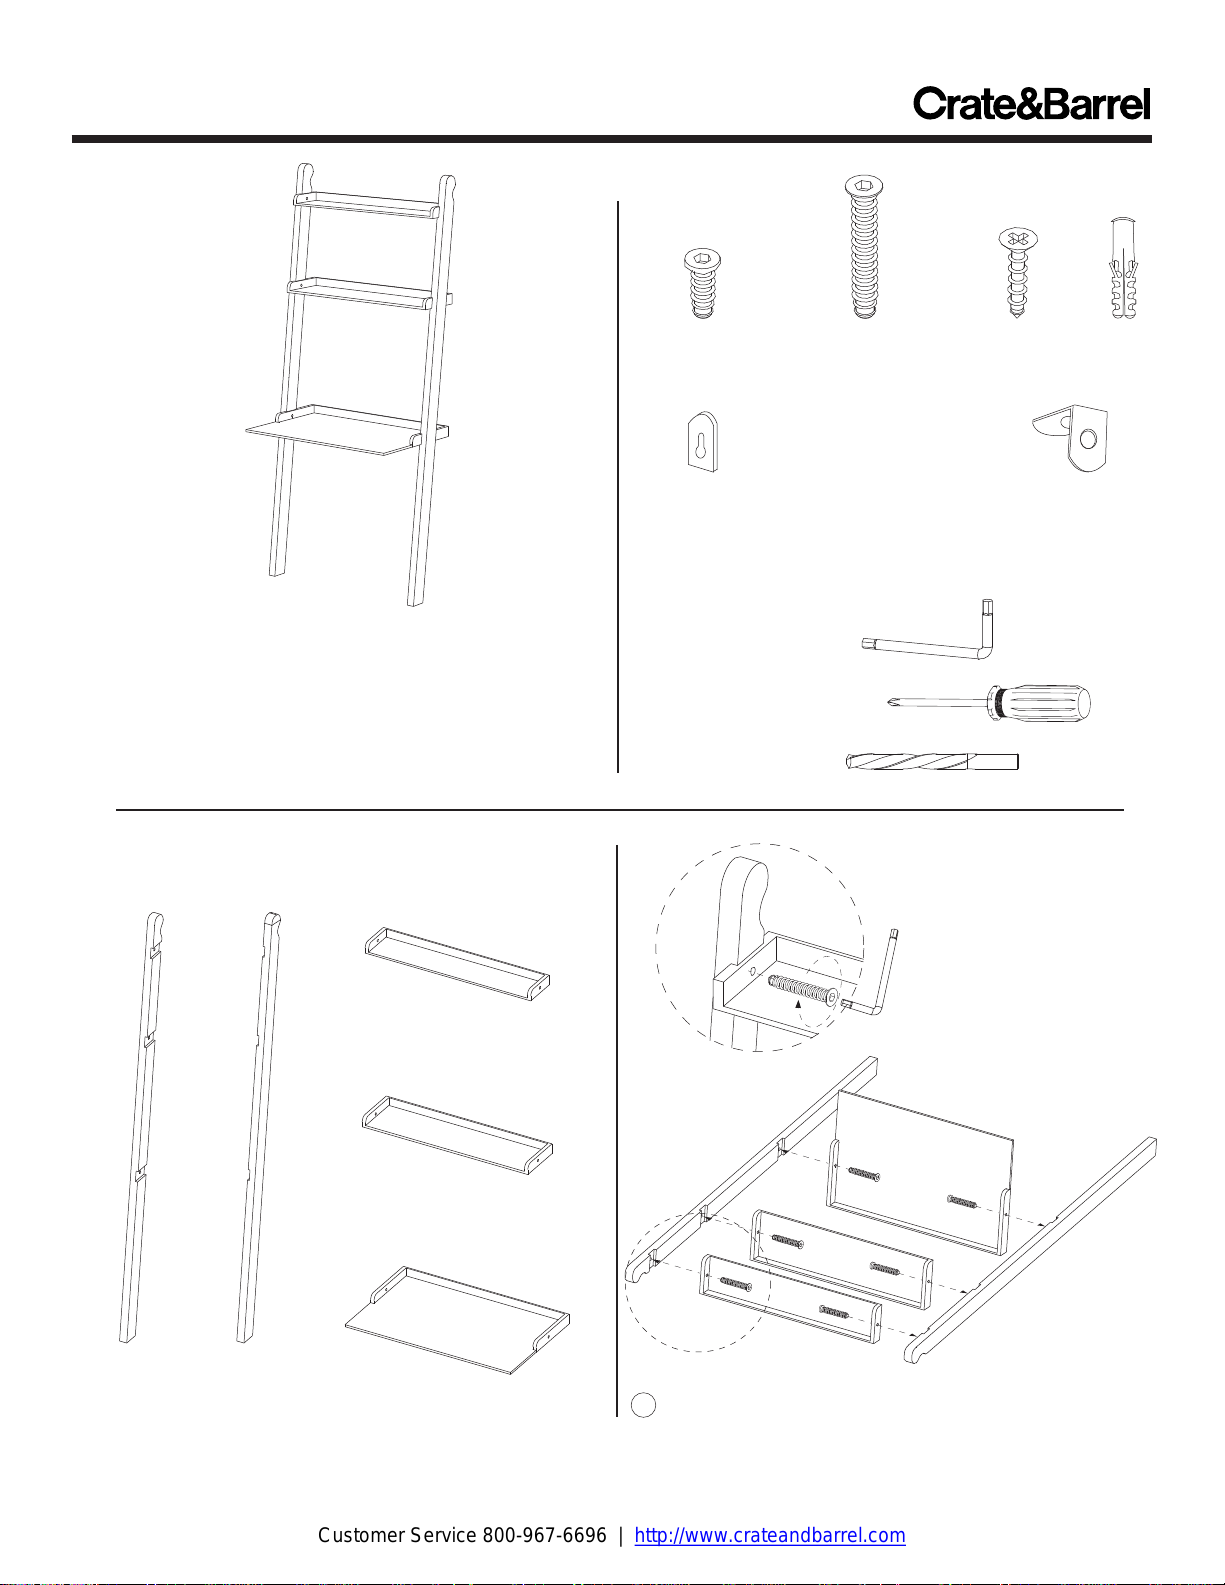
LEANING DESK
Thank you for purchasing the Leaning Desk. This page
lists all the contents included in the box. Please take the
time to identify the hardware as well as the individual
components
prepare for assembly, place the contents on a carpeted
or padded area to protect them from damage.
Note: 2 people are required to safely assemble this product.
to this product. As you unpack and
COMPONENTS
1 - small shelf
1 - medium shelf
1 - left
upright
1 - right
upright
1 - desktop A) Place small, medium, and desktop into position on
Made in China R02
HARDWARE
4 - small
connecting
screws
1 - keyhole (attached to medium shelf) 2 - desktop
Missing hardware?
Please call 800.606.6387 for replacements.
6 - large
connecting
screws
1 - small
screw
1 - wall
anchor
brackets
TOOLS REQUIRED
Allen wrench (included)
Phillips head screwdriver
Drill and 1/4"drill bit
B
x6
A
B
1
right and left uprights as shown.
B) Insert 1 large connecting screw in the side of each
shelf and securely fasten to the uprights with the Allen
wrench.
Page 1 of 2
Page 2
Customer Service 800-967-6696 | http://www.crateandbarrel.com
LEANING
DESK
2
Attach 2 desktop brackets to the bottom of
desktop and uprights with 4 small connecting
screws. Fully secure with the allen wrench.
A
B
B
leave 1/4" out
4
A) Insert wall anchor into the hole.
B) Fasten 1 small screw into the wall anchor
using a Phillips head screwdriver. Leave screw
protruding 1/4" out of the wall, as illustrated above.
Made in China R02
IMPORTANT NOTE:
The wall mounting
hardware included with
this product is intended
for drywall installation
only. Be sure to use
hardware appropriate
for your wall type.
Whenever possible,
attach mounting
hardware into a wall
stud.
If you are unsure about
your wall type or what
mounting method you
should use, consult a
qualified professional or
your local hardware
store.
3
Drill a 1/4" hole into the wall, 54" from the floor.
With assistance of another adult, position assembled
5
unit upright. Carefully align keyhole on back side of
the medium shelf with protruding screw in the wall
and fit securely into place.
Assembly is now complete.
CLEANING AND CARE
Clean surfaces with a dry or damp soft cloth. Do not use
abrasive cleaners.
54”
Page 2 of 2
 Loading...