

Page 1
Customer Service 800-967-6696 | http://www.crateandbarrel.com
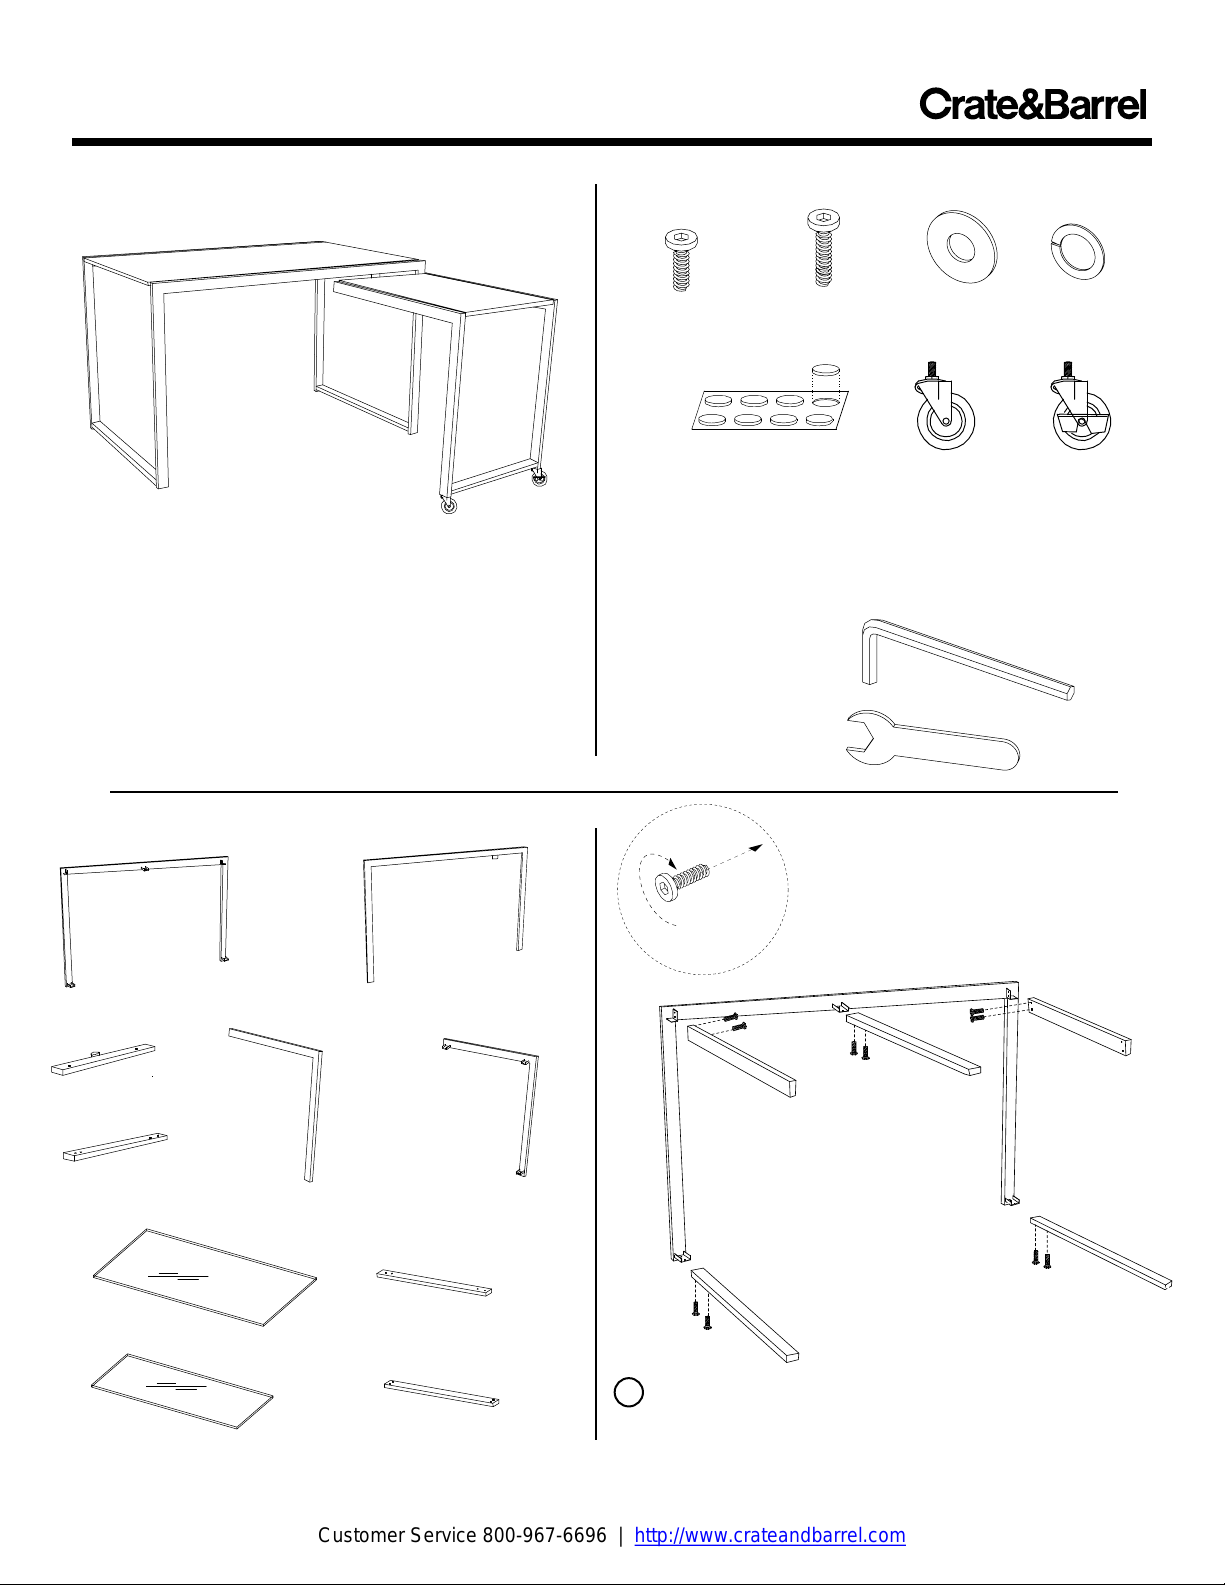
FLEX DESK
Thank you for purchasing the Flex Desk. This page lists
all the contents included in the box. Please take time to
identify the hardware as well as the individual
components of this product. As you unpack and prepare
for assembly, place the contents on a carpeted or padded
area to protect them from damage.
Note: 2 people are required to safely assemble this
product.
COMPONENTS
1 - rear frame
1 - pivot crossbar
2 - return
crossbars
1 - desktop glass
1 - return glass
Made in Taiwan- r03
1 - front frame
1 - right return leg1 - left return leg
3 - horizontal crossbars
2 - vertical crossbars
HARDWARE
32 - small
bolts
Missing hardware? Please call 800.606.6387 for
replacements.
1 - large
bolt
10 - rubber
bumpers
1 - washer
1 - caster 1 - locking
2 - split
washers
caster
TOOLS REQUIRED
Allen Wrench (included)
Hex Wrench (included)
x 10
1 Fit 3 horizontal crossbars and 2 vertical crossbars
onto the brackets as shown. Loosely attach each
crossbar with 2 small bolts. Do not fully tighten the bolts.
Page 1 of 2
Page 2

Customer Service 800-967-6696 | http://www.crateandbarrel.com
FLEX DESK
2 Fit brackets of front frame into ends of crossbars.
Secure each crossbar with 2 bolts, fully tightening with the
allen wrench. At this point, fully tighten 10 bolts installed
in Step 1 with the allen wrench.
4 With the assistance of another adult, fit return assembly
underneath desk assembly, aligning hole in pivot crossbar
with hole in underside of front frame. Attach with 1 long
bolt and 1 flat washer, securing with the allen wrench.
Made in Taiwan - r03
x 20
IMPORTANT NOTE:
Make sure pivot shaft
faces up as shown
A
B
3 A. Fit 2 return crossbars and 1 pivot crossbar onto
corresponding brackets on the right and left return frames
as shown. Secure with 4 short bolts per crossbar, fully
tightening each with the allen wrench.
B. Insert 1 caster and 1 split washer into the bottom of
one leg. In the other leg insert 1 locking caster and 1 split
washer. Secure by turning each caster clockwise with the
hex wrench until tight.
B
A
5 A. Adhere 10 rubber bumpers onto the crossbars as
illustrated above.
B. Carefully place desktop glass and return glass into
their respective positions, making sure each is firmly and
evenly supported by the bumpers.
Assembly is now complete.
CLEANING AND CARE
Clean surfaces with a dry or damp soft cloth. Do not use
abrasive cleaners.
Page 2 of 2
 Loading...