

Page 1
DANE PENDANT
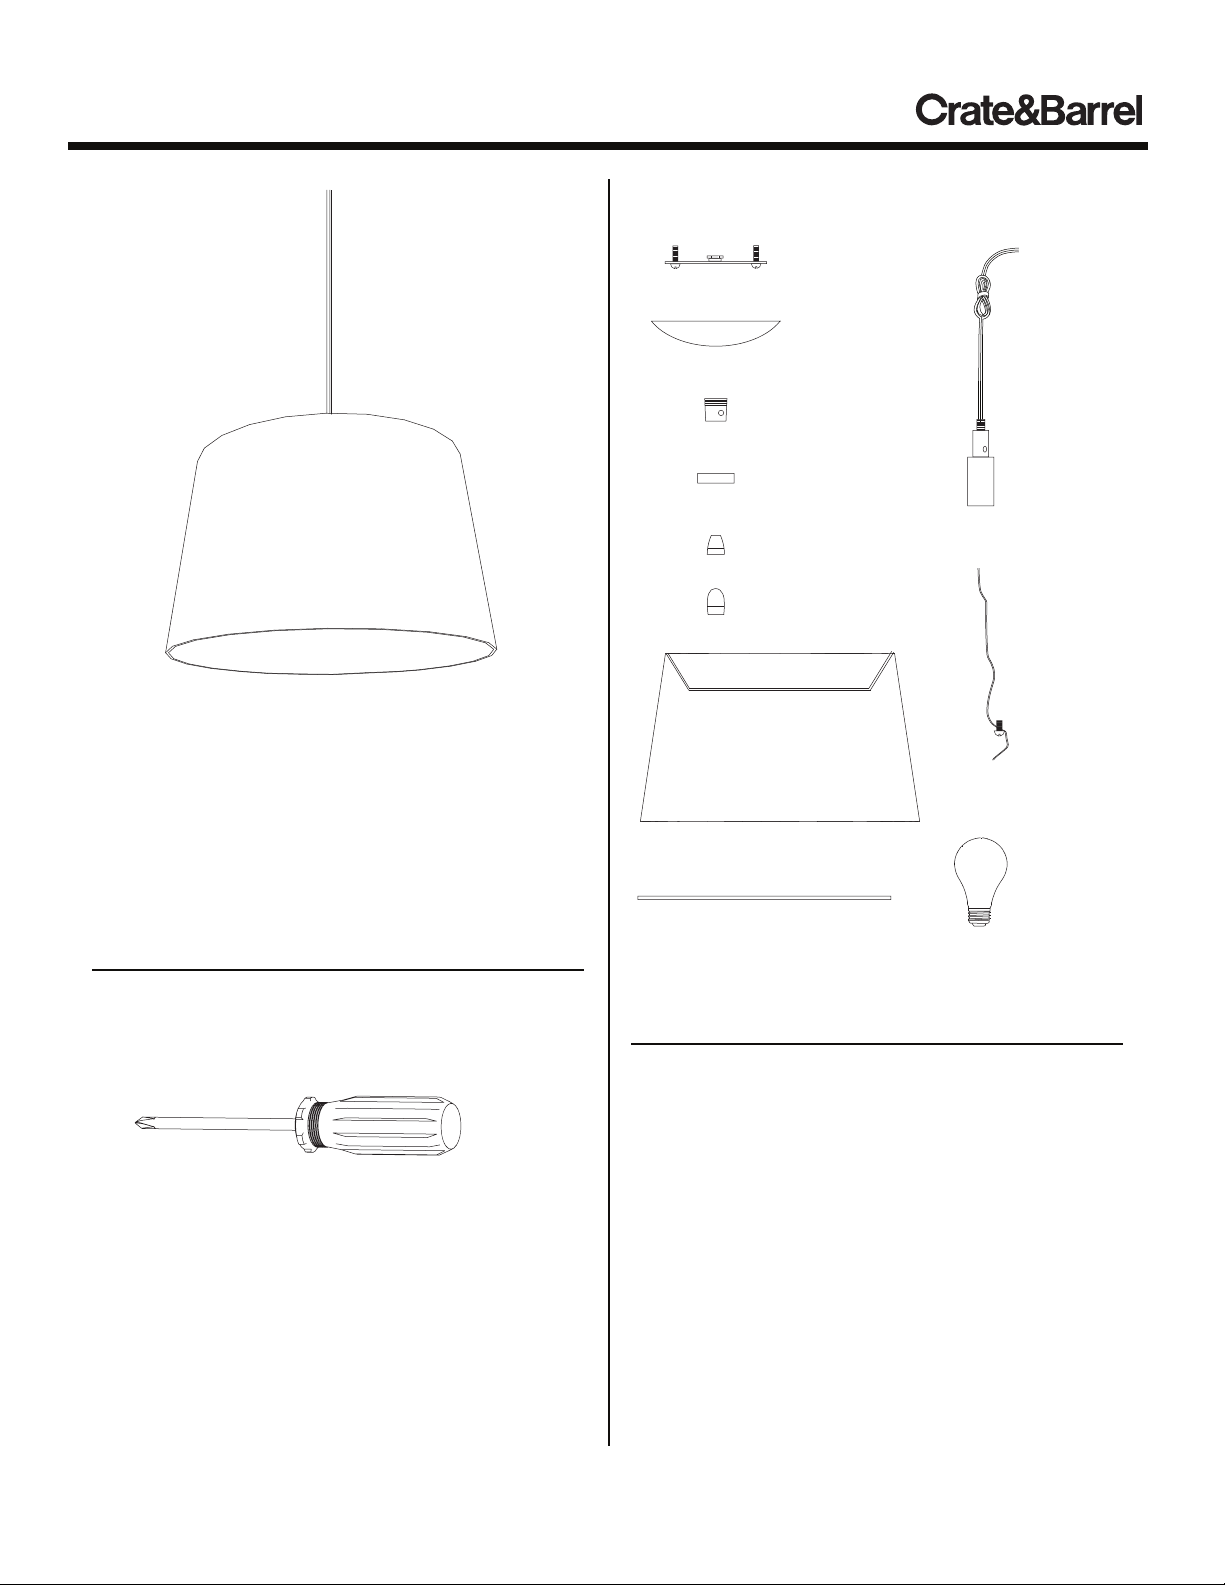
COMPONENTS & HARDWARE
1 - mounting
plate
Thank you for purchasing the Dane Pendant. This page
lists all the contents included in the box. Please take time
to identify the hardware as well as the individual
components of this product. As you unpack and prepare
for assembly, place the contents on a carpeted or padded
area to protect them from damage.
Note: 2 people are required to safely install this product.
1 - canopy
1 - collar
1 - metal ring
1 - nut
2 - wire nuts
1 - lamp shade
1 - diffuser
1 - socket
assembly
1- ground
screw
1 - 60 watt
max type A
(standard) bulb
(not included)
Missing hardware? Please call 800.606.6387 for replacements.
TOOLS REQUIRED
CLEANING & CARE
Do not use polishes or cleaners on your lamp. Dust surfaces
with a dry soft cloth.
phillips head screwdriver
(We recommend the use of hand
tools instead of power tools)
NOTE: If you are unsure about your ceiling/wall type
or what mounting method you should use, consult a
qualified professional or your local hardware store.
Made in China - r02 Page 1 of 2
Customer Service 800.967.6696 | Latest instructions available at www.crateandbarrel.com
IMPORTANT SAFETY INSTRUCTIONS:
This portable lamp has a polarized plug (one blade is wider
than the other) as a safety feature to reduce the risk of electric
shock. This plug will fit in a polarized outlet only one way. If
the plug does not fit fully in the outlet, reverse the plug. If it
still does not fit, contact a qualified electrician. Never use
with an extension cord unless plug can be fully inserted. Do
not attempt to override this safety feature.
Page 2
DANE PENDANT
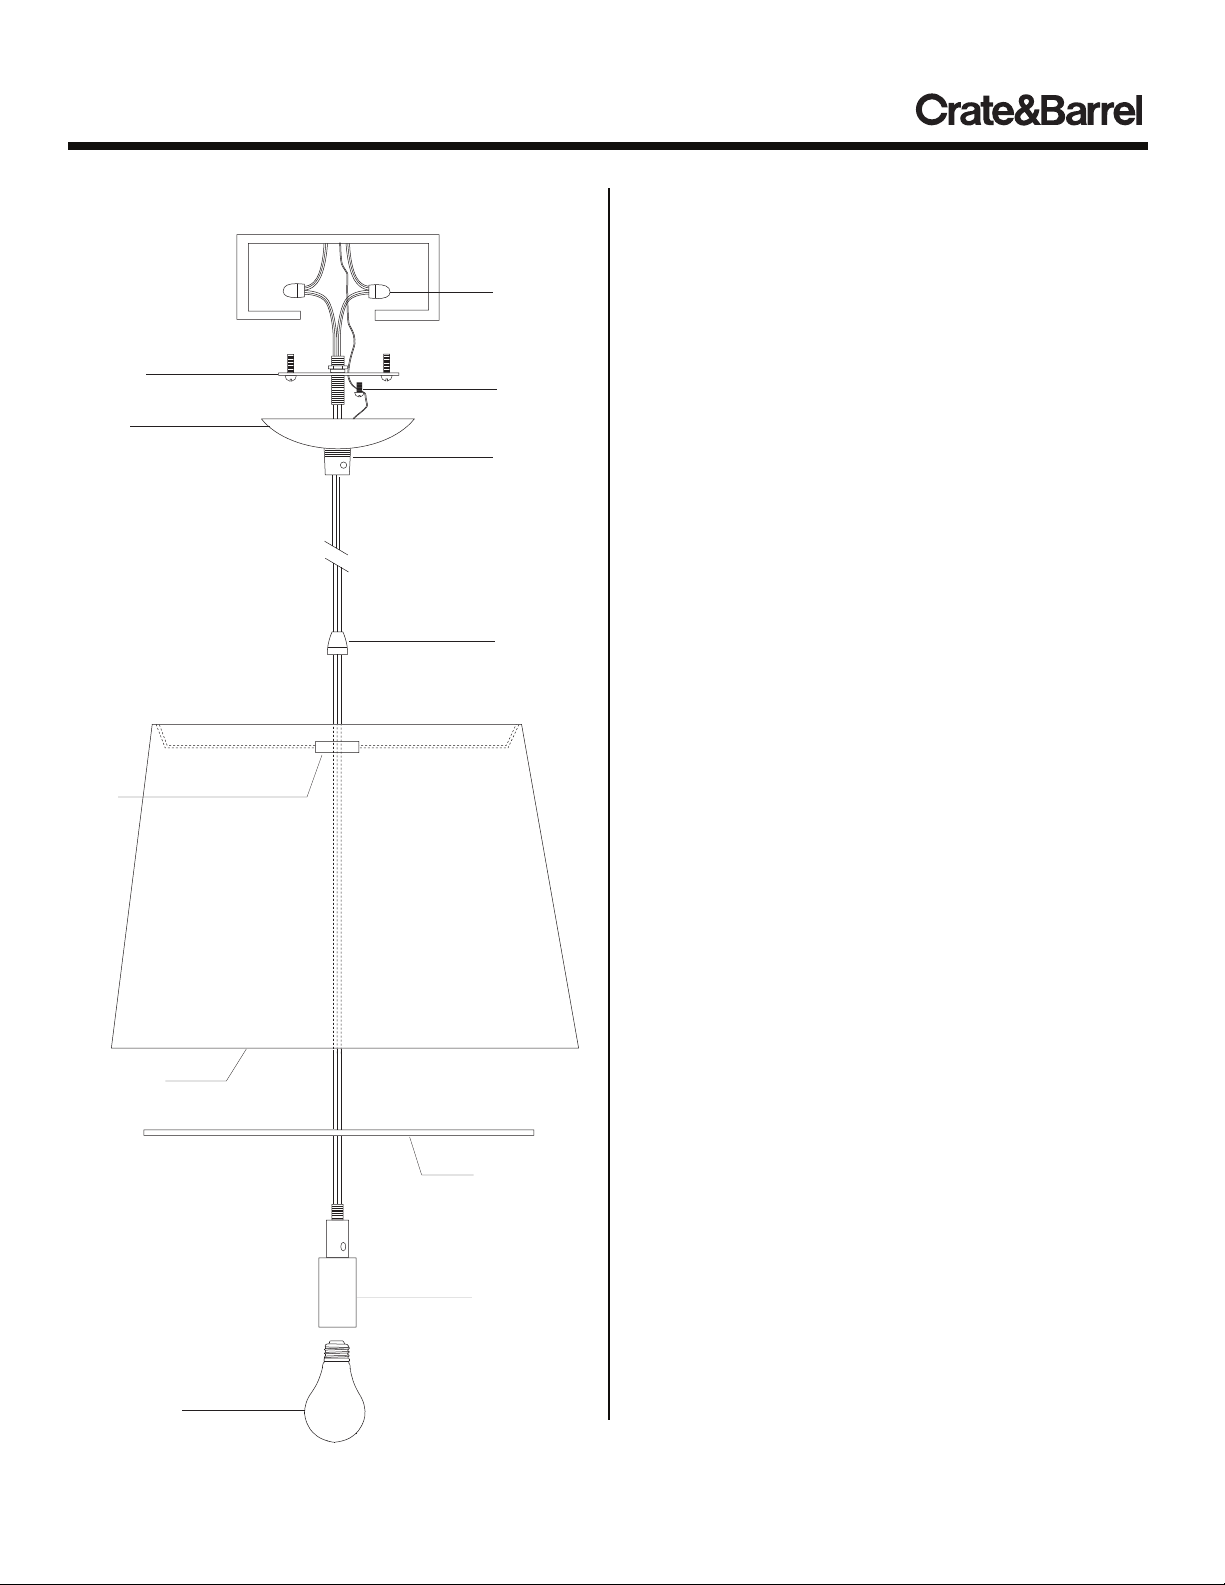
ASSEMBLY
mounting
plate
canopy
metal
ring
lamp shade
wire
nuts
ground
screw
collar
nut
diffuser
socket
assembly
1) Shut off the main electrical supply from the main fuse
box/circuit breaker.
2) Carefully unpack all fixture parts and hardware. Lay items
out on a clear workspace.
3) Insert cord through the metal ring as shown.
4) Attach socket assembly and diffuser to metal ring. At
this point, secure lamp shade by threading nut onto socket
assembly.
5) Gently pull wiring down from ceiling junction box and allow
it to hang.
6) Remove the mounting plate from the canopy by turning
collar counter-clockwise.
7) Carefully inspect the pendant’s fixture wires:
• Neutral fixture wire = white
• Hot fixture wire = black
•Ground wire = green
8) Attach the ground wire from the fixture to the ground
junction box wire from the outlet (usually green or bare wire).
Fasten each together with a wire nut and wrap the
connection with electrical tape. Be sure no strands are
exposed.
9) Connect the neutral fixture wire to the neutral junction box
wire (usually white). Fasten each together with a wire nut
and wrap the connection with electrical tape.
10) Connect the hot fixture wire to the hot junction box wire
(usually black). Fasten each together with a wire nut and
wrap the connection with electrical tape.
DO NOT REVERSE THE HOT AND NEUTRAL
CONNECTIONS OR SAFETY WILL BE COMPROMISED.
11) Gently tuck the wire connections neatly into the ceiling
junction box.
12) Attach the mounting plate to the ceiling outlet box using
the enclosed mounting screws and tighten screws with a
phillips head screwdriver.
13) Push canopy up over the mounting plate until it is flush
with the ceiling.
14) Push collar through the hole in the canopy and thread
onto mounting plate. Turn collar clockwise until the canopy
is flush with the ceiling.
15) Insert 1 - type A 60W bulb (not included) into the socket.
DO NOT EXCEED SPECIFIED WATTAGE.
16) Restore power to junction box and test fixture.
60W light bulb
(not included)
Made in China - r02 Page 2 of 2
Customer Service 800.967.6696 | Latest instructions available at www.crateandbarrel.com
Assembly installation is now complete.
 Loading...