

Page 1
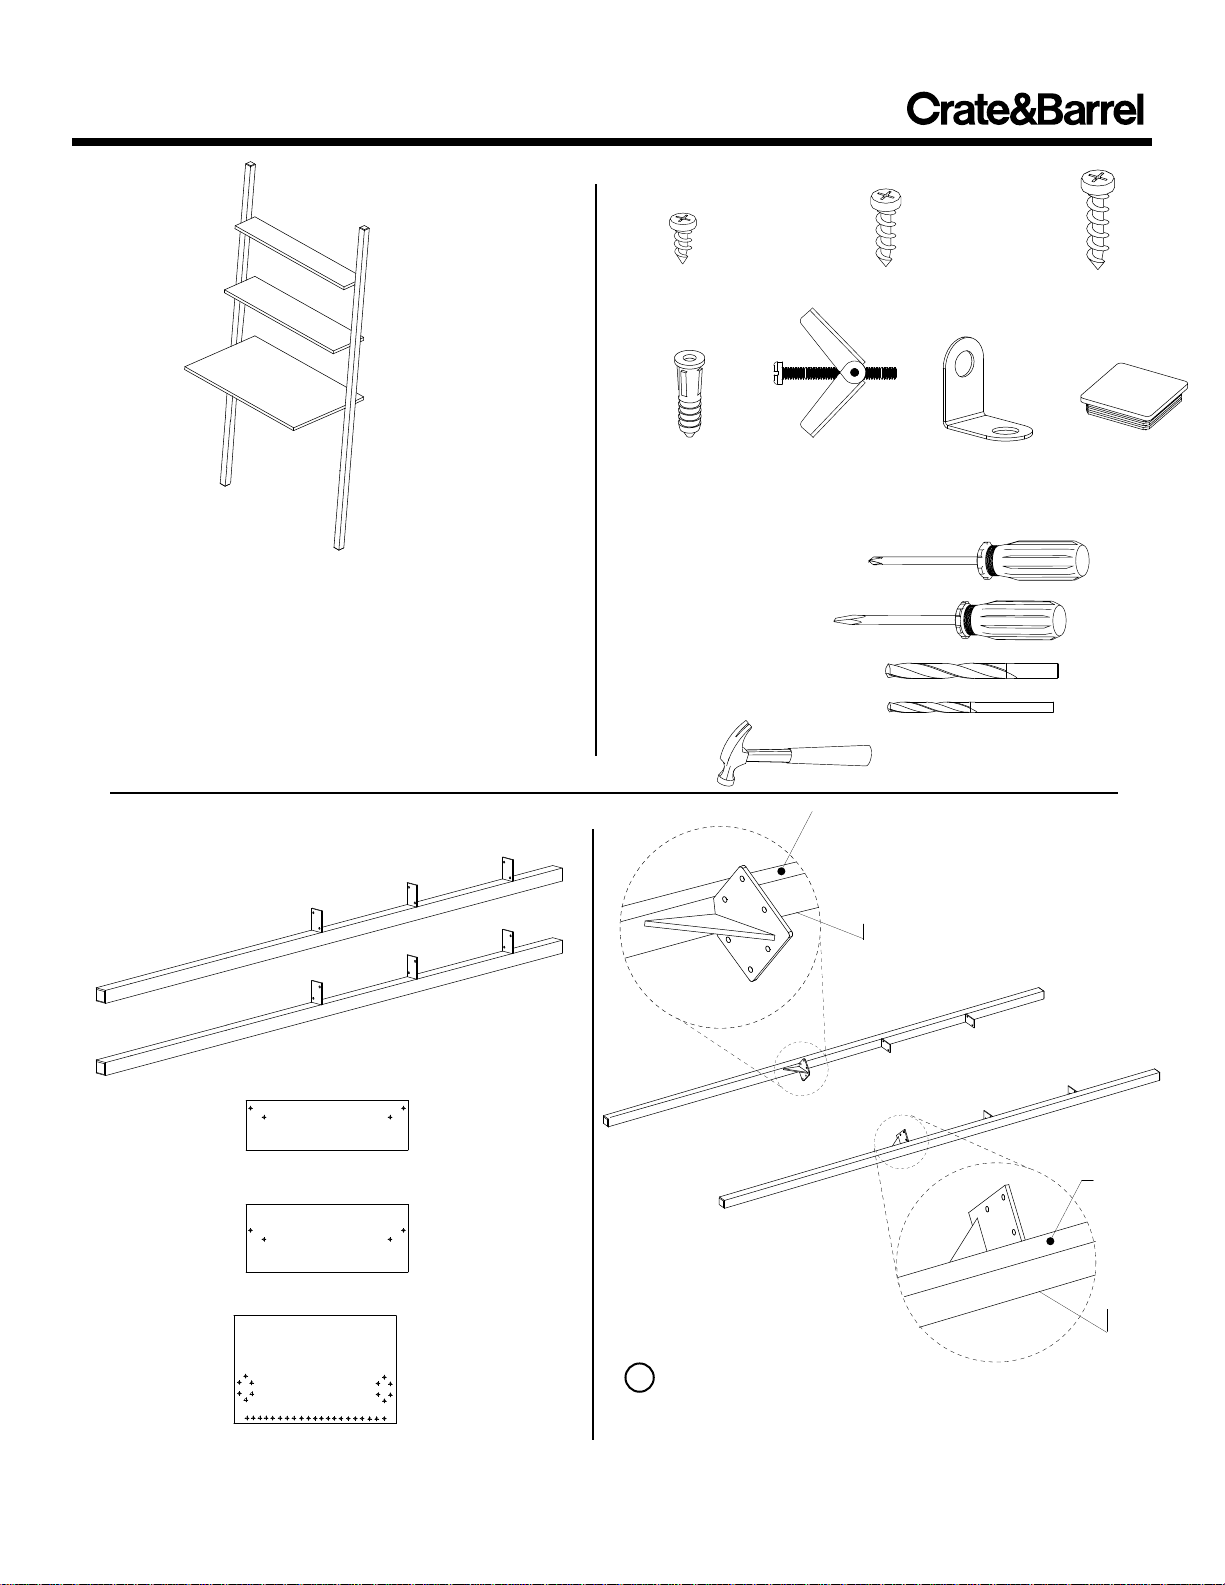
ALTO LEANING DESK
HARDWARE
Thank you for purchasing the Alto Leaning Desk.
This page lists all the contents included in the box.
Please take time to identify the hardware as well as
the individual components of this product. As you
unpack and prepare for assembly, place the
contents on a carpeted or padded area to protect
them from damage.
Note: 2 people are required to safely assemble this
product.
COMPONENTS
2 - small screws
2 - wall anchors
Missing hardware? Please call 800.606.6387 for replacements.
2 - medium screws
2 - toggle bolts
2 - brackets
20 - large screws
4 - tube caps
TOOLS REQUIRED
Phillips head screwdriver
Flat head screwdriver
Electric drill & 5/8" drill bit
(for drywall installation) &
3/16" drill bit (for masonry)
Hammer
Back
NOTE: You are
assembling the
unit face down.
Front
Made in China - r03
1 - top shelf
1 - 2nd shelf
1 - desktop
2 - side rails
(1 left, 1 right)
Bottom
1 Lay left and right side rails on a flat surface with
flanges facing each other, oriented as shown. Note the
location of the holes on the flanges to determine the
orientation of the rails.
Customer Service 800.967.6696 | www.crateandbarrel.com
LEFT RAIL
Top
(flanges
are closest
to ends)
RIGHT RAIL
Back
Front
Page 1 of 3
Page 2
ALTO LEANING DESK
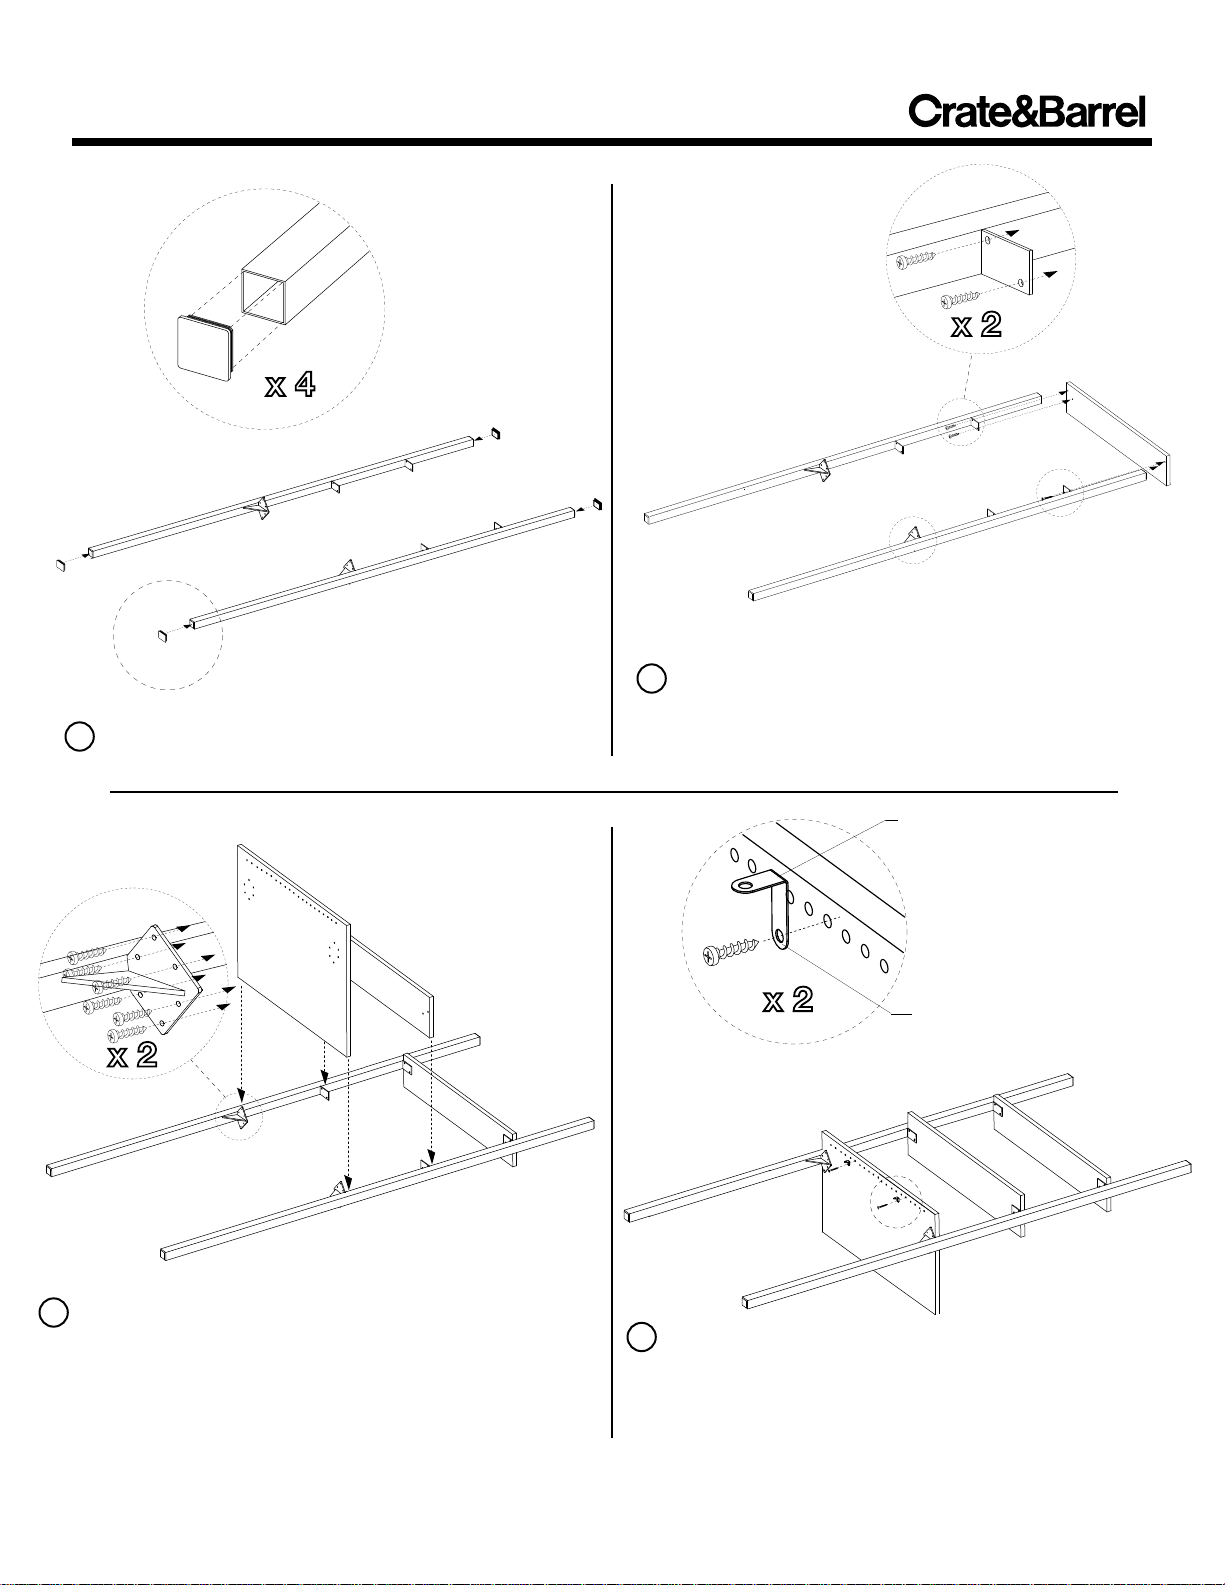
2 Insert tube caps into ends of both side rails.
NOTE:
Do not over tighten
the screws.
Top Shelf
(underside)
BOTTOM
3 Verify bottom flanges face each other. Using a phillips
head screwdriver, attach top shelf with 4 large screws by
passing screws through flange and into shelf's pre-drilled
holes. Secure all screws but do not over-tighten.
A
B
4 A) Attach 2nd shelf using same method of assembly as
Step 3. Securely fasten all screws, but do not over tighten.
B) Attach desktop with 12 large screws as shown. Securely
fasten all screws with a phillips head screwdriver.
Face of bracket should
be flush with shelf edge
Make sure longer leg of
bracket is attached to shelf
5 Using 1 small screw, attach the long leg of each bracket
to the underside of the desktop. Make sure the face of
short leg is flush with shelf edge.
NOTE: There are multiple holes in the back edge of the
desktop to locate the brackets. Attach brackets at locations
that will correspond to studs in the wall if possible.
Made in China - r03
Customer Service 800.967.6696 | www.crateandbarrel.com
Page 2 of 3
Page 3

ALTO LEANING DESK
6 With the assistance of another adult, position
assembled unit against wall in desired location. Verify
back edges of shelves all touch the wall as illustrated.
Brackets attached to the desktop should also be
touching the wall. Mark location of each bracket
mounting hole on the wall. Move unit out of workspace.
IMPORTANT NOTE:
For safe installation it is essential
to use hardware appropriate for
your wall type. Mount to wood
wall studs whenever possible. If
you are unsure of what type of
fasteners to use, consult your
local hardware store or a qualified
professional. This product is only
deterrent, it is not a substitute for
proper adult supervision.
Mounting to masonry wall:
Drill a 3/16" diameter hole at the mark. Insert a wall anchor
into each hole and gently tap until flush with a hammer. Move
shelf back to its final location by aligning the bracket holes
and anchors. Verify that back edges of shelves are against
the wall and attach using 2 medium screws.
Discard toggle bolt as it is not necessary.
Masonry wall mounting
Mounting to drywall:
A. Drill a 5/8"diameter hole at each mark. Locate the 2 toggle
bolts. The toggle bolt consists of a screw and the toggle
wings. Unscrew these two parts, put screw through bracket
hole and reattach toggle wings with a few turns of the screw.
B. Move shelf back to final location. Fold toggle
wings and insert into hole. Toggle wings will unfold inside
hole. Tighten toggle bolt with a flat head screwdriver while
pulling firmly toward you.
As the screw tightens, verify that back edges of shelves are
against the wall. If not, re-adjust and continue tightening
screw until secure. Repeat for the remaining bracket.
Discard anchors and medium screws as they are not necessary.
CLEANING AND CARE
Clean wood surfaces with a damp cloth. Do not use
furniture wax or polish as the wood is finished with a
protective clear lacquer.
Drywall mounting, Step A
Made in China - r03
Drywall mounting, Step B
Customer Service 800.967.6696 | www.crateandbarrel.com
Page 3 of 3
 Loading...