

Page 1

Customer Service 800-967-6696 | http://www.crateandbarrel.com
ACADEMY QUEEN, KING BEDS
Thank you for purchasing the Academy Bed. This page
lists all the contents included in the box. Please take
time to identify the hardware as well as the individual
components of this product. As you unpack and prepare
for assembly, place the contents on a carpeted or padded
area to protect them from damage.
NOTE: 2 people are required to assemble this product
safely.
COMPONENTS
1 - headboard
1 - footboard
2 - support
legs
1 - center rail
2 - side rails
28 - slats
Made in China 2004
HARDWARE
8 - large
screws
16 - small
washers
8 - small
screws
8 - large
washers
28 - side slat
fittings
14 - center slat
fittings
TOOLS REQUIRED
Allen wrench (included)
Small
Washer
Large
Screw
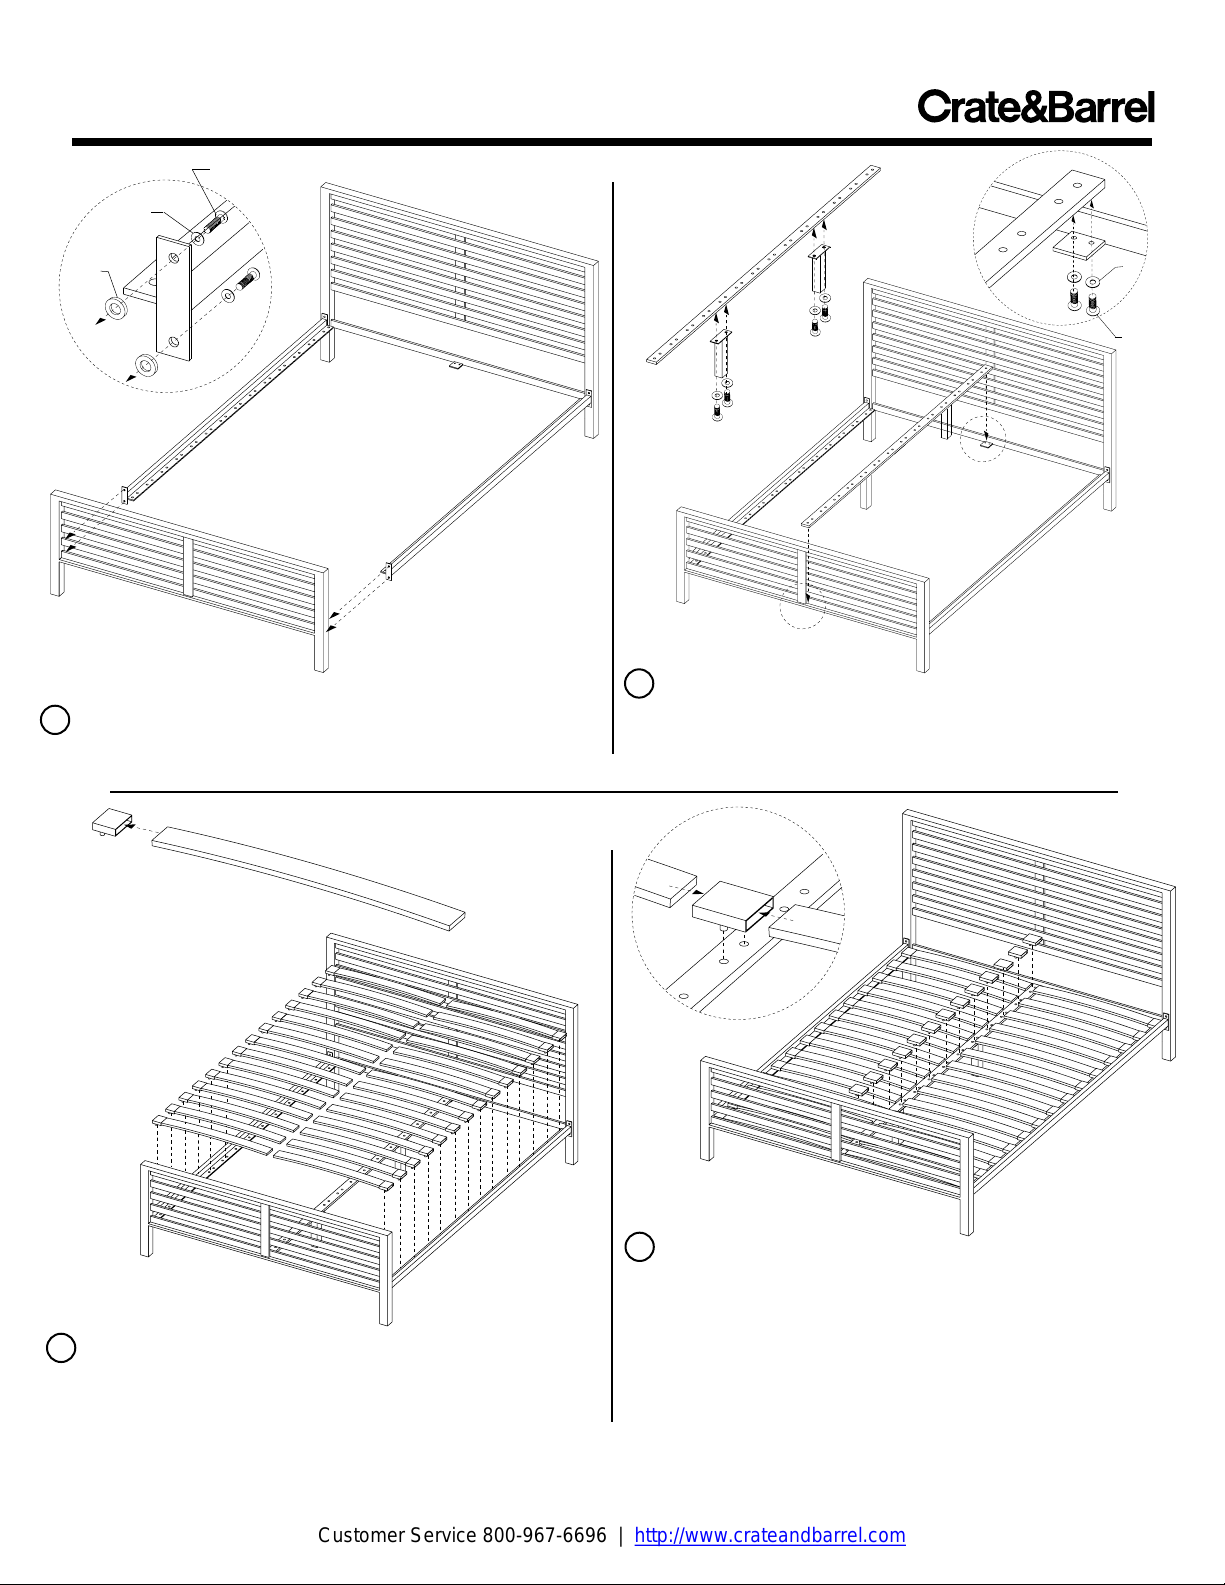
1 With the assistance of another adult, align holes in
side rail with corresponding holes in headboard. Attach with
2 large screws, 2 small washers and 2 large washers. Fully
tighten using allen wrench. Repeat for the other side rail.
Large
Washer
Page 1 of 2
Page 2
Customer Service 800-967-6696 | http://www.crateandbarrel.com
ACADEMY QUEEN, KING BEDS
Large
Small
Washer
Large
Washer
2 Align holes in side rails with corresponding holes in
footboard. Attach with 2 large screws, 2 small washers and
2 large washers per side rail. Fully tighten with allen wrench.
B
4 A. Fit 1 side slat fitting on one end of each slat.
B. Align pegs on underside of side slat fittings with
corresponding holes on side rails and fit each into position.
Made in China 2004
Screw
A
x 28
A
Small
B
3 A. Attach 2 support legs to underside of center rail with
2 small screws and 2 small washers per leg.
B. Place center rail into position and attach from below with
at the headboard and footboard with 2 small screws and
2 small washers.
Washer
Small
Screw
x 14
5 Insert each open slat end into either side of the center slat
fitting. Fit pins of each center fitting to corresponding holes
in the center rail. Repeat until all slats are securely engaged
in each fitting. Assembly is now complete.
CLEANING AND CARE
Clean surfaces with a dry or damp soft cloth. Do not use
abrasive cleaners.
Page 2 of 2
 Loading...