

Page 1
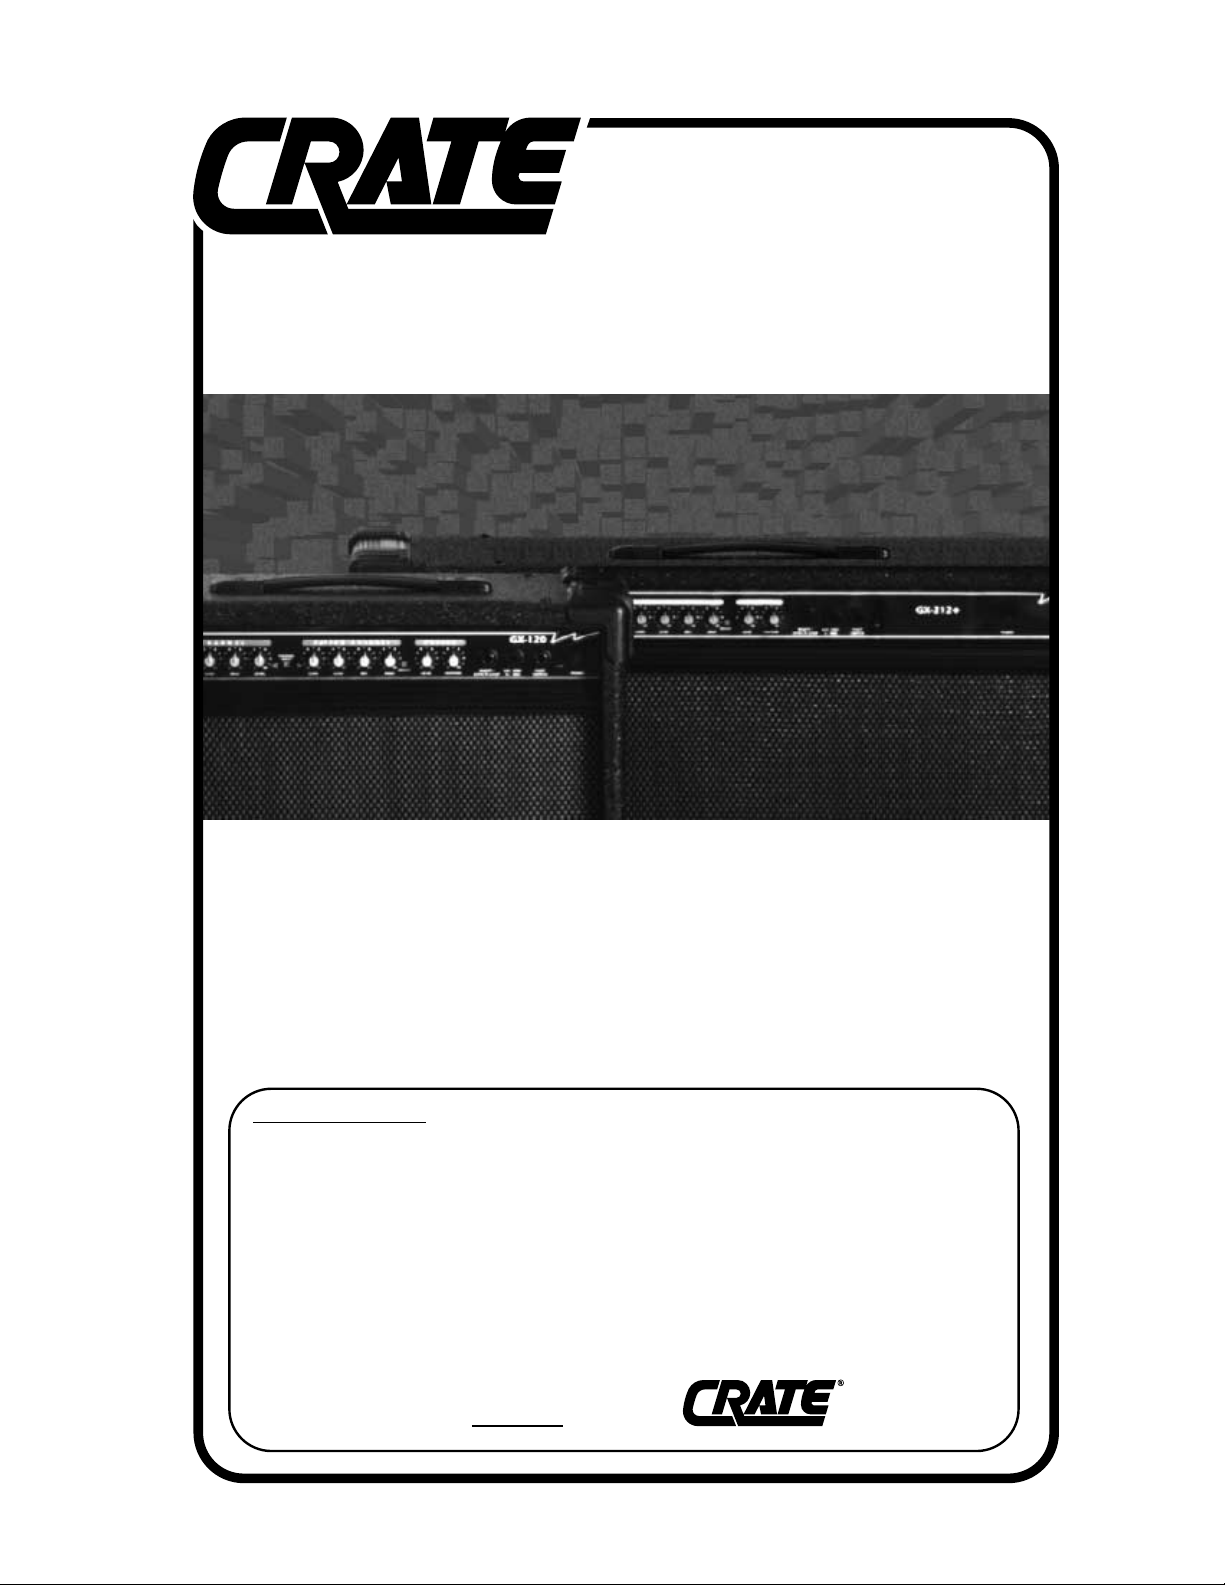
GX-120/212+
Guitar Amplifier
Congratulations!
You are now the proud owner of the Crate GX-120/212+ guitar amplifier. Each of
these rugged amplifiers delivers serious clean and distorted sounds through premium 12”
Crate Custom speakers (one in the GX-120, two in the GX-212+). Channel selection and
Crate’s Exclusive Shape circuit are controllable by use of a two-button footswitch. An
Insert jack allows virtually noise-free connection of your favorite effects.
Like all Crate products, your GX-120/212+ is Musician Made in the U.S.A., using only
the best components. Extensive testing at the hands (and ears) of skilled technicians and
musicians insures you that this amplifier is the absolute best it can be.
In order to get the most out of your new amplifier, we strongly urge you to go over
the information contained in this manual before you begin playing.
And thank you
for choosing
OWNER’S MANUAL
MANUAL DEL PROPIETARIO
Mode d’Emploi
Page 2
GX-120/212+ Guitar Amplifier
ENGLISH
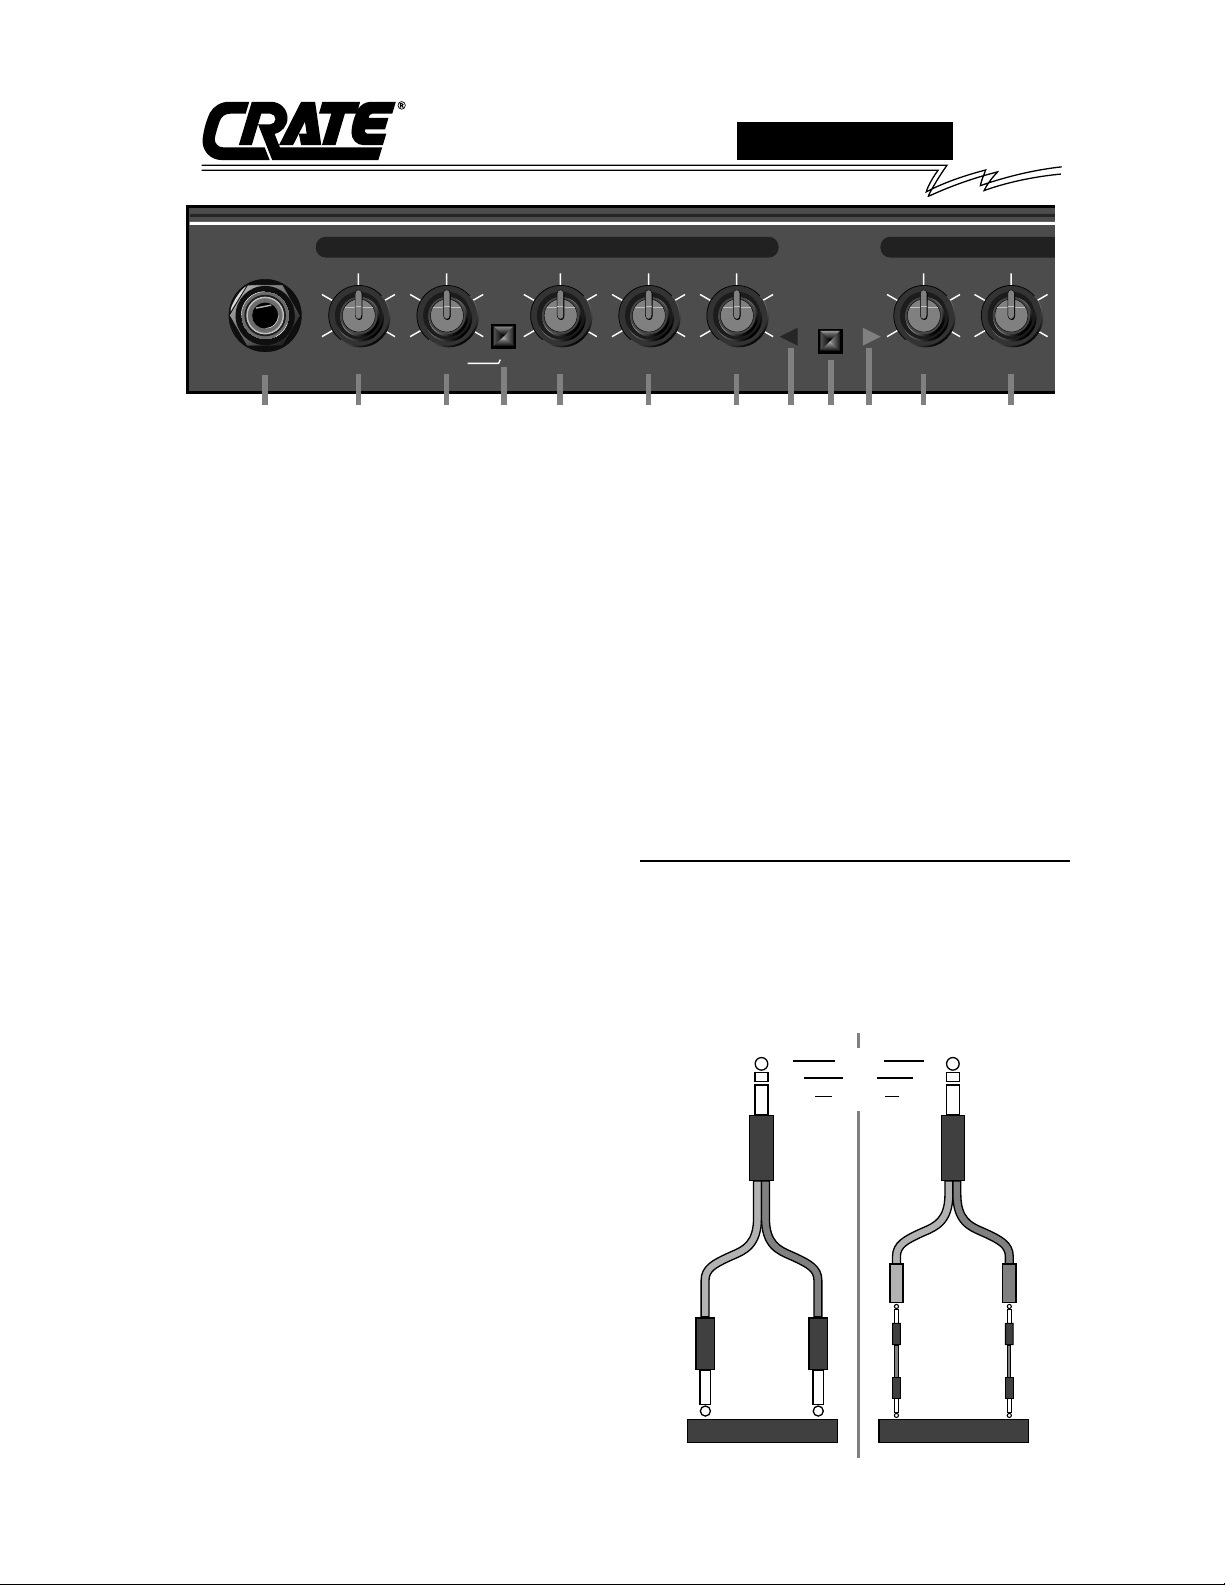
FRONT PANEL - INPUT SECTION
1: Input jack accepts a standard 1/4” phone plug and is suit-
able for any low to line level input source.
LEAD CHANNEL CONTROLS
2: Gain is used to set the level of distortion. The signal gain
setting will be boosted when the Shape active button (#4) is
pressed in.
3: Shape adjusts the general tone. Counter-clockwise emphasizes midrange frequencies and clockwise emphasizes low and
high frequencies. The Shape control is only active when the
Shape Active button (#4) is pressed in.
4: Shape Active boosts the gain of the Lead channel and activates the Shape control (#3).
5: Low adjusts the amount of low frequency tone.
6: High adjusts the amount of high frequency tone or “presence”.
7: Level controls the overall volume and should be used in
conjunction with the Gain control (#2).
CHANNEL SWITCHING CONTROL
8: Lead Channel Indicator LED will be lit when the amplifier is
in the Lead Channel mode.
9: Channel Select Switch is used to select either the Lead or
Rhythm Channel. This switch is defeated if an external
footswitch is used.
10: Rhythm Channel Indicator LED will be lit when the amplifier is in the Rhythm Channel mode.
RHYTHM CHANNEL CONTROLS
11: Volume sets the overall listening level of the Rhythm
Channel. This control is independent of any setting made in
Channel A.
12: Low adjusts the amount of low frequency tone.
13: Mid adjusts the amount of midrange frequency tone.
14: High adjusts the amount of high frequency tone.
15: Bright Switch gives a brighter tone.
REVERB CONTROLS
16: Lead sets the amount of reverb for the Lead Channel.
17: Rhythm sets the amount of reverb for the Rhythm Channel.
18: Insert/Effects Loop jack allows connection of external
effects. Use a stereo 1/4” male Y cord here: ring = send, tip =
return and sleeve is ground for both. See the illustration below
for more information.
19: Ext. Speaker jack allows connection to an extension speaker cabinet. This jack is in series with the internal speaker(s).
20: Footswitch jack allows the use of an optional dual
footswitch for remote control of the Channel Select and Shape
Active buttons.
21: Power Indicator LED will be lit when the unit is turned on.
22: Power Switch turns the AC power on and off.
REAR PANEL
23: Power Cord: Your GX-120/212+ is equipped with a heavy-
duty grounded three-wire power cord. Be sure this cord is properly plugged into a safely wired grounded 120 volt, 60Hz AC
power outlet before use. (If your GX-120/212+ was purchased
outside the United States, refer to the rear panel for power ratings.) For your safety, never attempt to defeat the ground connection on this cord.
24: Fuse protects the amplifier against damages caused from a
faulty AC power source or other problems. If the fuse blows,
replace it ONLY with the same size and type 2.5A 250V normal
blow fuse. If the fuse blows repeatedly check the AC source; if
it’s okay, contact your Crate dealer for service information.
Connecting to the Insert jack:
The Insert/Effects Loop jack (#18) lets you patch external
effects into the amplifier just prior to its power amp stage. Use
Crate’s CYC6MS stereo-to-mono Y-cord or an adapter such as
Crate’s CA11Y and 2 1/4” mono signal cables to connect to the
effect as shown below.
LEAD CHANNEL RHYTHM
46
28
010
INPUT
1
GAIN
2
46
28
010
SHAPE
3
28
ACTIVE
4
46
010
LOW
5
46
28
010
HIGH
28
6
Stereo-to-mono Y-cord:
to Insert jack
(CYC6MS)
46
010
LEVEL
7
TIP
RING
SLEEVE
"Send"
"Return"
plug:
from
effect
"OUT"
plug:
effect
"IN"
External Effect
CHANNEL
to
46
SELECT
28
010
VOLUME
11
Y-adapter and 2 cables:
RETURN
SEND
GROUND
TIP
RING
SLEEVE
(CA11Y)
Tip =
"Return"
from
effect
"OUT"
External Effect
46
28
010
LOW
1298 10
to Insert jack
Ring =
"Send"
to
effect
"IN"
Page 3

GX-120/212+ Guitar Amplifier
ESPAÑOL
PANEL DELANTERO - SECCION DE ENTRADA
1: El “jack” de Entrada acepta una clavija telefónica
estándar de 1/4” y es adecuada para cualquier fuente de
señales bajas nivel línea.
CONTROLES DEL CANAL CONDUCTOR
2: La Ganancia se usa para fijar el nivel de distorsión. El
punto de control de la ganancia de la señal se aumentarácuando el botón de Activar Configuración (#4) se oprima hacia adentro.
3: La Configuración ajusta el tono general. Contra las
manecillas del reloj se acent˙an las frecuencias del rango
medio y a favor de las manecillas del reloj se realzan las
frecuencias graves y agudas. El Control de Configuración
se activa solo cuando el botón de Activar Configuración se
encuentra oprimido hacia adentro.
4: El Activador de Configuración aumenta la ganancia del
Canal Conductor y activa el control de Configuración (#3).
5: El Bajo ajusta la cantidad de tonos de bajas frecuencias.
6: Agudos ajusta la cantidad de tonos de altas frecuen-
cias ó “presencia”.
7: El Nivel controla el volumen general y se debe usar en
conjunto con el control de Ganancia (# 2).
CONTROLES PARA CAMBIAR DE CANAL
8: El díodo LED Indicador del Canal de CONDUCTOR
se iluminará cuando el amplificador se encuentre en el
modo del Canal de Conductor.
9: El Interruptor de Selección de Canal se usa para
seleccionar ya sea el Canal Indicador ó el Canal de Ritmo.
Este interruptor queda inactivo si se usa un interruptor de
pie externo.
10: El dÌodo LED Indicador del Canal de Ritmo se ilu-
minar· cuando el amplificador se encuentre en el modo del
Canal de Ritmo.
CONTROLES DEL CANAL DE RITMO
11: El Volumen fija el nivel general auditivo del Canal de
Ritmo. Este control es independiente de cualquier ajuste
que se hiciera en el Canal Conductor.
12: El Bajo ajusta la cantidad de tonos de bajas frecuencias.
13: El Medio ajusta la cantidad de tonos de frecuencias en
el rango mediano.
14: El Agudo ajusta la cantidad de tonos
en las frecuencias altas.
15: El Interruptor de Brillo le da a este canal un tono más
brillante.
CONTROLES DE REVERBERACION
16: El Lead establece las características acústicas del
Canal de Conductor.
17: El Ritmo establece las características acústicas del
Canal de Ritmo.
18: El “jack” del Circuito para Insertar / Efectos permite
la conexión de efectos externos. Use aquí un cordón
macho de 1/4” en “Y” para estéreo: anillo = emisión, punta
= retorno, y el manguito es la tierra para ambos. Véase la
ilustración en la sección en Inglés para más información.
19: El “jack” de Bocinas Externas permite la conexión a un
gabinete de bocinas de extensión. Use solo gabinetes que
tengan una impedancia mínima de por lo menos 8 ohms.
20: El “jack” del Interruptor de Pie permite el uso opcional
de un interruptor de pie dual para el control remoto de los
botones para Seleccionar el Canal y Activar la
Configuración.
21: El díodo LED Indicador de Potencia se iluminará
cuando la unidad se prenda.
22: El Interruptor de Potencia prende ó apaga la energía
eléctrica de CA.
PANEL POSTERIOR
23: CABLE DE ENERGIA: Este cable de energía, de tres
alambres de uso pesado con tierra se debe conectar
SOLAMENTE a una conexion de energía de 60 ciclos de
Corriente Alterna, a 120 Volts con tierra y cableada de
forma que no presente ningún peligro. NO INTENTE eliminar la conexión de tierra en este cable! Si su GX-120/212+
fué adquirido fuera de los Estados Unidos vea la parte posterior de la unidad para las especificaciones de energía y
siga las instrucciones arriba mencionadas.
24: Fusible: El BX-100 es protegido de daño a causa de una
fuente de poder de la corriente alterna defectuosa o otros
problemas. Si el fusible se funde, que sea reemplazado solamente con uno del mismo tamaño y tipo indicado. Si el fusible
se funde repetidamente, comprobe la fuente de la corriente
alterna, si está bien pongase en contacto con su comerciante
de Crate para información de servicios.
CHANNEL REVERB
46
28
010
MID
13
46
28
010
HIGH
28
BRIGHT
14
46
010
LEAD
16
46
28
010
RHYTHM
EFFECTS LOOP
1715
INSERT /
18
GX-120
EXT. SPKR.19FOOT
SWITCH
20
ON
POWER
2221
Page 4

GX-120/212+ Guitar Amplifier
FRANCAIS
FACE AVANT-P ANNEAU D’ENTREE
1: Entrée accepte une fiche normale de 1/4” (6,35 mm) et
la sensibilité d’entrée s’adjuste du niveau instrument
jusqu’au niveau ligne.
CONTROLES DU PREMIER CANAL
2: Gain régle la quantité de distorsion. Le signal de Gain a
une boost quand le bouton Shape Active (#4) est engagé.
3: Contour ajuste la tonalité globale. Tourner à gauche
pour souligner la plage des médiums et à droite pour
souligner la plage des aigus et la plage des graves.
4: Contour Active augmente le gain du premier canal et
active le contrôle de Shape (3).
5: Grave régle la plage des graves.
6: Aigu ajuste la quantité ou la “présence” des aigus.
7: Niveau contrôle le volume global et fonctionne conjoin-
tement avec le contrôle de Gain (2).
SELECTION DU CANAL
8: LED du Premier Canal allume quand l’amplificateur
marche au Premier Canal.
9: Bouton pour Sélection du Canal pour choisir le
Premier Canal ou le Canal de Rythme. Ce bouton est
déconnecté quand on utilise un footswitch.
10: LED du Canal de Rythme allume quand l’amplificateur marche au Canal de Rythme.
CONTROLES DU CANAL DE RYTHME
11: Volume régle le volume global du Canal de Rythme.
Ce contrôle est indépendant des contrôles du Premier
Canal.
12: Grave régle la plage des graves.
13: Médium régle la plage des médiums.
14: Aigu ajuste la quantité des aigus.
15: Bright Switch donne une tonalité plus brillante.
CONTROLES DE REVERBERATION
16: Lead régle les qualités acoustiques du Premier Canal.
17: Rhythm régle les qualités acoustiques du Canal de
Rythme
18: Entrée/Boucle d’effets pour connecter un appareil
des effects supplémentaires. Utiliser un cordon stéréophonique mâle en Y; anneau = sortie, tête = retour, manchon = contact à la terre. Voir le dessein en langue
anglaise pour avoir plus d’information..
19: Prise Pour Enceinte Supplémentaire (Ext. Spkr.)
pour connecter aux enceintes supplémentaires. Employer
seulement les enceintes avec une impédance minimum à
moins de 8 ohms.
20: Prise pour Switch connecter un switch duel pour la
commande à distance du Bouton Channel Select et du
bouton Shape Active.
21: LED “ON” allume quand l’amplificateur est ouvert.
22: Interrupteur allume ou éteind l’amplificateur.
FACE ARRIERE
23: Cordon Secteur: Le GX-120/212+ est fourni avec un
cordon de trois fils à la masse. Etre certain que ce cordon
est branché correctement sur une prise de courant de 120
volt, 60 Hz avant de l’utiliser. (Si le GX-120/212+ a été
acheté en dehors des Etats-Unis, voir la face arrière pour
le régime de puisance de cet appareil.) Pour votre protection, n’essayez jamais de supprimer la broche correspondante à la terre.
24: Porte fusible: Le fusible garde l’amplificateur des
dommages d’une source de pouvoir CA défecteuse ou des
autres problèmes. Si le fusible saute, remplacer-le SEULEMENT avec un fusible de même grandeur et type 2.5A
250V fusible normal. Si le fusible saute souvent, vérifier la
source de pouvoir CA: si elle fonctionne correctement, contacter un marchand de Crate pour des informations concernant le service.
Page 5

GX-120/212+ Guitar Amplifier
THIS EQUIPMENT HAS BEEN
DESIGNED AND ENGINEERED
TO PROVIDE SAFE AND RELIABLE OPERATION. IN ORDER
TO PROLONG THE LIFE OF THE
UNIT AND PREVENT ACCIDENTALDAMAGES OR INJURY,
PLEASE FOLLOW THESE PRECAUTIONARY GUIDELINES:
CAUTION: TO REDUCE THE
RISK OF ELECTRIC SHOCK, DO
NOT OPEN CHASSIS; DO NOT
DEFEAT OR REMOVE THE
GROUND PIN OF THE POWER
CORD; CONNECT ONLY TO A
PROPERLY GROUNDED AC
POWER OUTLET.
WARNING: TO REDUCE THE
RISK OF FIRE OR ELECTRIC
SHOCK, DO NOT EXPOSE THIS
EQUIPMENT TO RAIN OR MOISTURE.
CAUTION: NO USER-SERVICEABLE PARTS INSIDE. REFER
SERVICING TO QUALIFIED SERVICE PERSONNEL.
CAUTION: OUR AMPLIFIERS
ARE CAPABLE OF PRODUCING
HIGH SOUND PRESSURE LEVELS. CONTINUED EXPOSURE
TO HIGH SOUND PRESSURE
LEVELS CAN CAUSE PERMANENT HEARING IMPAIRMENT
OR LOSS. USER CAUTION IS
ADVISED AND EAR PROTECTION IS RECOMMENDED IF
UNIT IS OPERATED AT HIGH
VOLUME.
CAUTION
RISK OF ELECTRIC SHOCK
DO NOT OPEN
CAUTION: TO REDUCE THE RISK OF ELECTRIC SHOCK,
DO NOT REMOVE COVER.
NO USER-SERVICEABLE PARTS INSIDE.
REFER SERVICING TO QUALIFIED SERVICE PERSONNEL.
"IT IS NECESSARY FOR THE USER TO REFER TO THE INSTRUCTION MANUAL"
“ES NECESARIO QUE EL USUARIO SE REFIERA AL MANUAL DE INSTRUCCIONES.”
"REFERREZ-VOUS AU MANUAL D'UTILISATION"
"UNBEDINGT IN DER BEDIENUNGSANLEITUNG NACHSCHLAGEN"
EXPLANATION OF GRAPHICAL SYMBOLS:
EXPLICACION DE SIMBOLOS GRAFICOS:
EXPLICATION DES SYMBÔLESGRAPHIQUES:
"DANGEROUS VOLTAGE"
“VOLTAJE PELIGROSO”
"DANGER HAUTE TENSION"
"GEFAHLICHE SPANNUNG"
=
=
PRECAUCION
RIESGO DE CORRIENTAZO
NO ABRA
PRECAUCION PARA DISMINUOIR EL RIESGO DE CORRIENTAZO
NO ABRA LA CUBIERTA
NO HAY PIEZAS ADENTRO QUE EL USARIO PUEDO REPARAR
DEJE TODO MANTENIMIENTO A LOS TECHNICOS CALIFICADOS
ATTENTION
RISQUE D'ELECTROCUTION
NE PAS OUVRIR
ATTENTION: POUR REDUIRE D'ELECTROCUTION NE PAS
ENLEVER LE COUVERCLE. AUCUNE PIECE INTERNE N'EST REPRABLE
PAR L'UTILISATEUR. POUR TOUTE REPARATION, S'ADRESSER A UN
TECHNICIEN QUALIFIE.
VORSICHT
ELEKTRISCHE SCHLAGGEFAHR
NICHT OFFENEN
VORSICHT: ZUR MINIMIERUNG ELEKTRISCHER SCHLAGGEFAHR NICHT
DEN DECKEL ABENHMEN. INTERNE TEILE KONNEN NICHT VOM
BENUTZER GEWARTET WERDEN. DIE WARTUNG IS QUALIFIZIERTEM
WARTUNGSPERSONAL ZU UBERLASSEN.
ESTE APARATO HA SIDO DISENADO Y CONSTRUIDO PARA
PROVEER ANOS DE OPERACION SEGURA Y CONFIABLE.
PARAPROLONGAR LA VIDADE
ESTAUNIDAD E IMPEDIR
DANOS ACCIDENTALES POR
FAVOR SIGA ESTAS INSTRUCCIONES PREVENTIVAS:
PRECAUCION: PARA DISMINUIR
EL RIESGO DE DESCARGAS
ELECTRICAS: (1) NO ABRA LA
CUBIERTA, (2) NO ES
RECOMENDABLE REMOVER O
DESACTIVAR LAPATADEL
POLO A TIERRA DEL CABLE DE
CORRIENTE, CONECTE CORRECTAMENTE AUNA TOMA DE
CORRIENTE A TIERRA.
ADVERTENCIA: PARA EVITAR
DESCARGAS EL ECTRICAS O
PELIGRO DE INCENDIO, NO
DEJE ESTE APARATO
EXPUESTO A LA LLUVIAO
HUMEDAD.
PRECAUCION: NO HAY PIEZAS
ADENTRO QUE EL USUARIO
PUEDE REPARAR. DEJE TODO
MANTENIMIENTO A LOS TÉCNICOS CALIFICADOS.
PRECAUCION: NUESTROS
AMPLIFICADORES PUEDEN
PRODUCIR NIVELES DE PRESION DE SONIDO ALTO.
EXPOSICION CONTINUADAA
LOS NIVELES DE PRESION DE
SONIDO ALTO PUEDE CAUSA
DANO PERMANENTE ASU
OIDO. ES ACONSEJADO QUE
USE PRECAUCION AL USUARIO
Y ES RECOMENDADO PROTECCION PARALOS OIDOS SI LA
UNIDAD ES OPERADAA VOLUMEN ALTO.
CET ÉQUIPEMENTAVAIT ÉTÉ
INVENTÉ ET ARRANGÉ POUR
POURVOIR DES ANNÉES
D'USAGE SAUF ET SÛR. POUR
PROLONGER LA VIE DE CET
APPAREILET POUR EMPÊCHER
LES DOMMAGES ET LES TORTS
ACCIDENTELS, SUIVEZ LES
INSTRUCTIONS DE PRÉCAUTION.
AVERTISSEMENT: POUR
RÉDUIRE LES RISQUES D'ÉLECTROCUTION: (1) N’OUVREZ
PAS LE CHÂSSIS, (2) NE PAS
ESSAYER DE SUPPRIMER LA
BROCHE CORRESPONDANT À
LA TERRE.
ATTENTION: POUR RÉDUIRE
LES RISQUES D'UN FEU OU
D'ÉLECTROCUTION, N’EXPOSEZ PAS L'APPAREIL À LA
PLUIE OU À LA MOITEUR.
ATTENTION: IL N'Y APAS
D’ÉLÉMENTS RÉPARABLES
DANS L'APPAREIL. CONSULTER
UN TECHNICIEN QUALIFIÉ
POUR LES RÉPARATIONS.
ATTENTION: NOS AMPLIFICATEURS SONT CAPABLES DE LA
PRODUCTION DES NIVEAUX DE
SON D'UNE HAUTE PRESSION.
L'EXPOSITION CONTINUE AUX
CES NIVEAUX PEUT CAUSER
LA SURDITÉ PERMANENTE. LA
PRUDENCE EST ADVISÉ À UTILISATEUR ET LA PROTECTION
DES OREILLES EST RECOMMANDÉ SI L'APPAREILEST
UTILISÉ À UN HAUT NIVEAU DE
VOLUME.
GX-120/212+ TECHNICAL SPECIFICATIONS:
Output Power Rating 115 watts RMS @ 5% THD, 4 ohm load
Speaker Size and Rating GX-120: Custom Design 12”, 4 ohms
(2) GX-212+ Custom Design 12”, 8 ohms
Input Impedance 470k ohms
Maximum Input Signal Level Accepted 7V peak to peak
Total System Gain Lead: 96dB all controls @ “10”, Shape active; 74dB Shape inactive
Rhythm: 53dB all controls @ “10”, Bright off
Lead: Low Control 16dB Range @100Hz
Shape Control Proprietary Circuit
High Control 18dB Range @ 7kHz
Rhythm: Low Control 24dB Range @ 70Hz
Mid Control 18dB Range @ 700Hz
High Control 33dB Range @10kHz
Bright Switch 8dB Boost @ 10kHz
Input Power Requirements 120 VAC, 60Hz, 300 watts max
Fuse Rating and Type 2.5 amp Normal Blow, 250V external
Cabinet Size and Weight GX-120: 17.5” H x 19.25” W x 9.75” D, 44 lbs.
GX-212+: 21” H x 26.5” W x 11” D, 50 lbs.
Page 6

The GX-120/212+ is covered with a durable black Tolex material: wipe it clean with a lint-free cloth. Never spray
cleaning agents onto the cabinet. Avoid abrasive cleansers which would damage the finish.
El GX-120/212+ esta cubierto con un material durable Tolex: limpielo con una toalla seca. Nunca rocie el gabinete con
sustancias limpiadoras. Evite usar materiales abrasivos con los cuales pueda danar el acabado.
Le GX-120/212+ est couvert avec «Tolex» un recêtement noir et durable. Essuyez cette matière avec une toile propre et sans charpie.
Ne pulvérisez jamais les agents de nettoyage sur l'appareil. Evitez les nettoyeurs abrasifs qui peuvent endommager le «Tolex.»
©1996 SLM ELECTRONICS, A DIVISION OF ST. LOUIS MUSIC, 1400 FERGUSON, ST. LOUIS, MO. 63133
P/N 47-579-01 • 11/96
SYSTEM
BLOCK DIAGRAM:
Crate continually develops new products, as well as improves existing ones. For this reason, the
specifications and information in this Crate manual are subject to change without notice.
Crate continuamente desarrolla nuevos productos, así como también mejora los existentes. Por esta razón,
las especifaciones é información incluidos en este manual están sujetos a cambios sin previo aviso.
Crate développe contimuellement des nouvels produits, ainsi d'améliorer ceux qui existe. Pour cette raison
les spécifications et les informations dans ce manuel peuvent se changer sans préavis.
GX-120/212+ Guitar Amplifier
BUFFER
INPUT
SHAPE ACTIVE SWITCH
BOOST
BOOST
LEAD CHANNEL
LEAD CHANNEL
LEAD CHANNEL
FLEXWAVE
DISTORTION
GAIN
CIRCUIT
GAIN
RHYTHM CHANNEL
RHYTHM CHANNEL
RHYTHM CHANNEL
EQ
LOW HIGH
EQ
LOW MID HIGH
ACTIVE
SHAPE
SHAPE
BRIGHT
LEVEL
LEVEL
CHANNEL
RING
TIP
REV.A LEVEL
REV.B LEVEL
CHANNEL SWITCH
INSERT
POWER
AMP
DAMPING
CIRCUIT
EXT.
SPEAKER
 Loading...