

CrankShooter Lacrosse Quick Start Manual
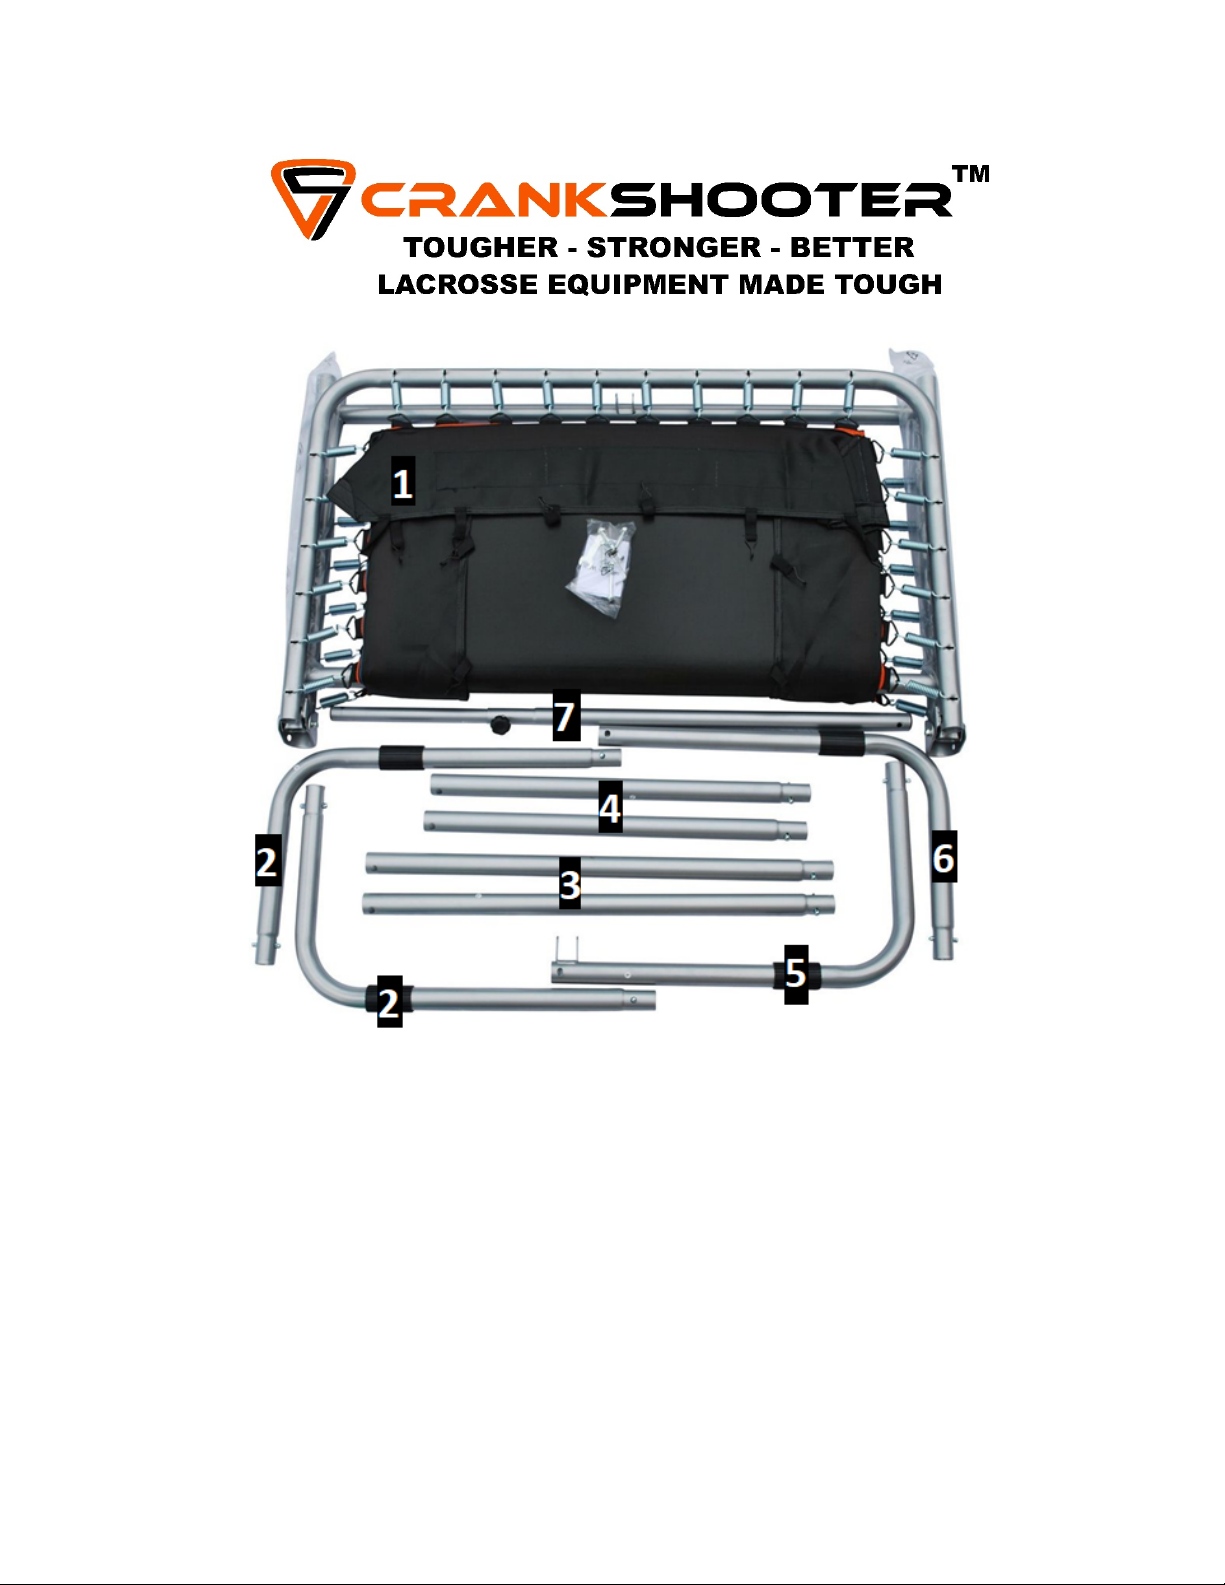
Step 1: Take inventory of all the pieces of the Lacrosse wall. You should have the following:
• 1x Wall face (piece #1)
• 2x L Poles with Pop Buttons on both sides (piece #2)
• 1x L Pole with Pop Buttons on one side (piece #6)
• 1x L Pole with a U-Shaped Bracket (piece #5)
• 2x Short Straight Poles (piece #4)
• 2x Long Straight Poles (piece #3)
• 1x Adjustable pole (piece #7)
• 2x Screws/2x Pins/Allen Wrench
Step 2: Start by laying your Lacrosse Wall Face (piece #1) flat on the ground (it will be folded in half out
of the box). Step on one side of the wall face with one foot and begin to fold the wall out flat. Pressure
will increase as you are opening it, so it will help if you step on the other side with your other foot. The
wall face will then lock into place. The wall face will not lock into place unless it is completely flat. Insert
pins on either side of the wall face to secure in place.
Step 3: Once your wall face is flat and locked into place, take the L pole (piece #2) and connect with the L
pole with the U bracket (piece #5). Repeat this process with the remaining L poles (piece #2 & piece #6).
You will have 2 U shaped poles.
Step 4: Click the long straight poles (piece #3) into the U pole (with the U-shaped bracket) you
assembled in step 3.
Step 5: Click the short straight poles (piece #4) into the U pole without the bracket.
Step 6: Insert the U-Pole without the U-shaped bracket into the front of the lacrosse wall face.
Step 7: Lay the wall on its face and insert the U pole with the U-Shaped Bracket into the back of the
Lacrosse wall face. This will pop into place with the buttons.
Step 8: You will now place the thick end of the Adjustment Pole (piece #7) into the U-Shaped bracket on
the back of the Lacrosse wall. Secure in place with the screw/nut. Place the skinny end of the
Adjustment pole into the other bracket on the back of the Lacrosse wall face piece. Secure with
screw/nut.
Step 9: Stand the Lacrosse wall upright and use the black bungees (Attached to the Lacrosse Wall Mat)
and secure them around the back of the wall face; connecting them to the D-rings on the back of the
wall.
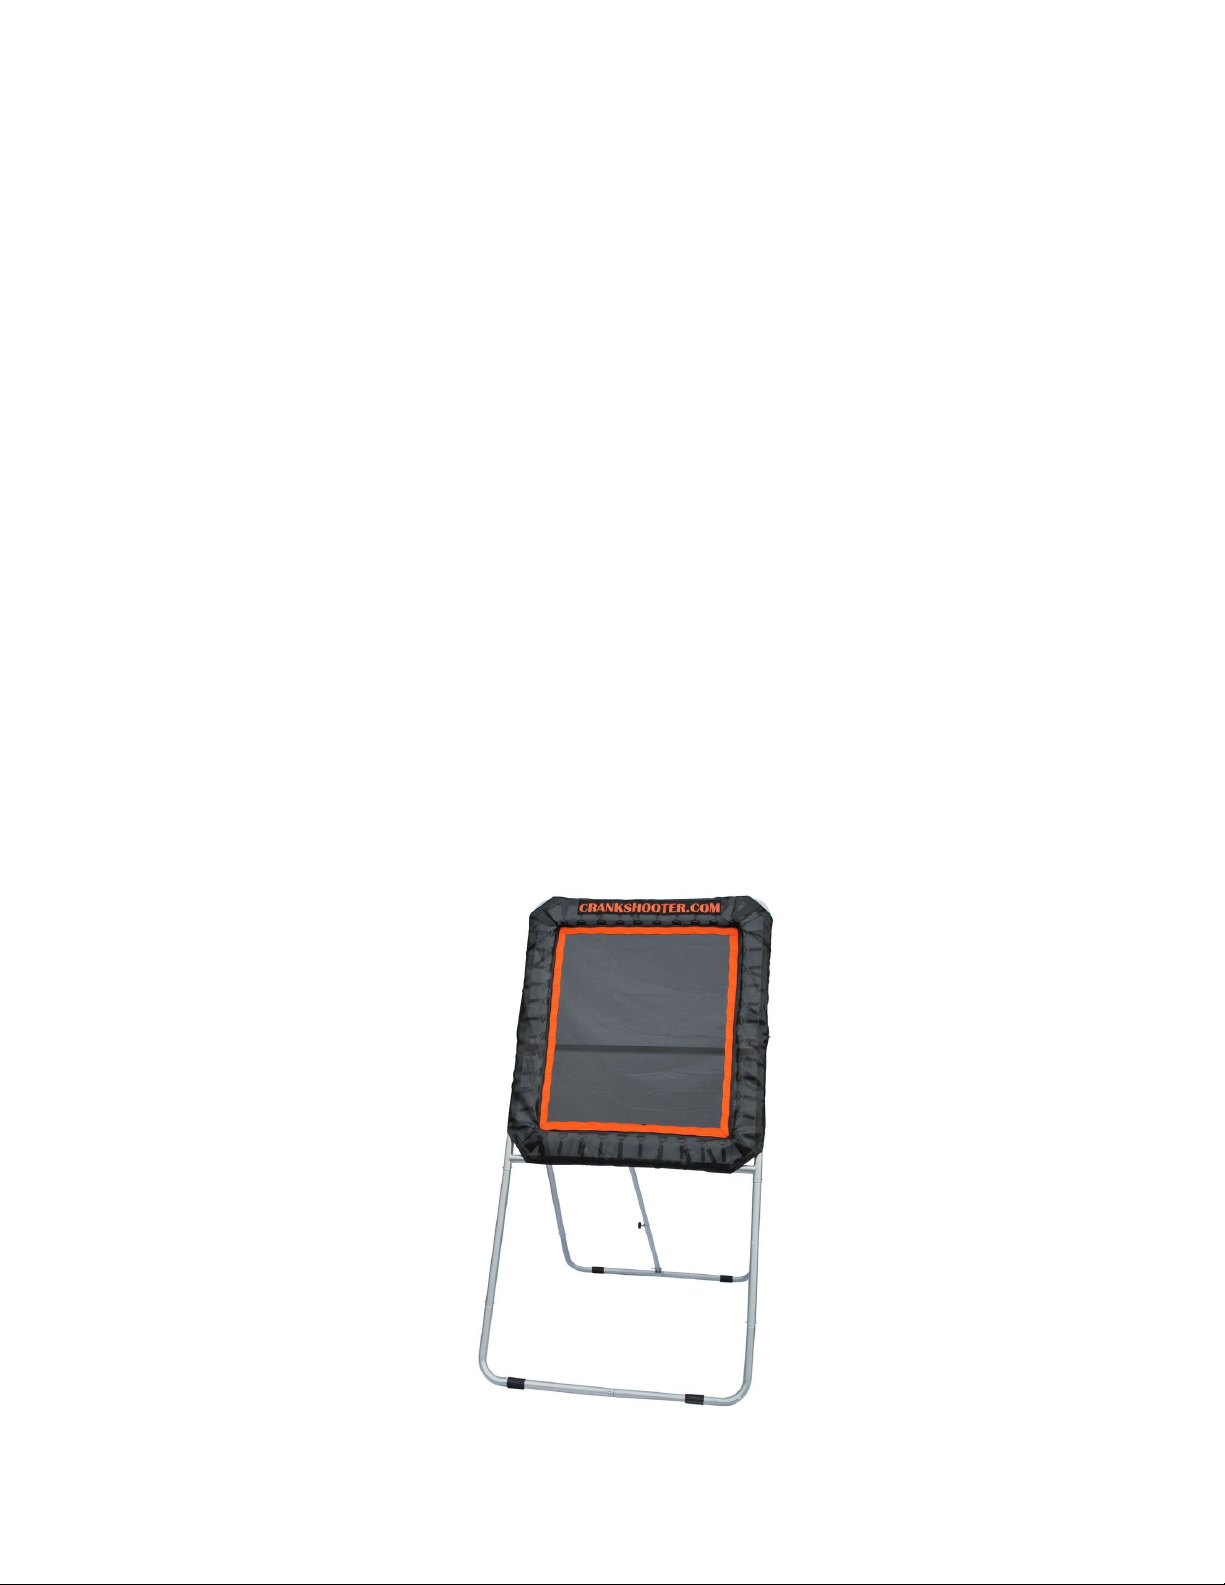
Step 10: You’re done! Enjoy your new CrankShooter Lacrosse wall! STICKS UP!
 Loading...