

Page 1
CRAIN No. 290 SEAM CUTTER PLUS INSTRUCTIONS
SEAM CUTTING INSTRUCTIONS
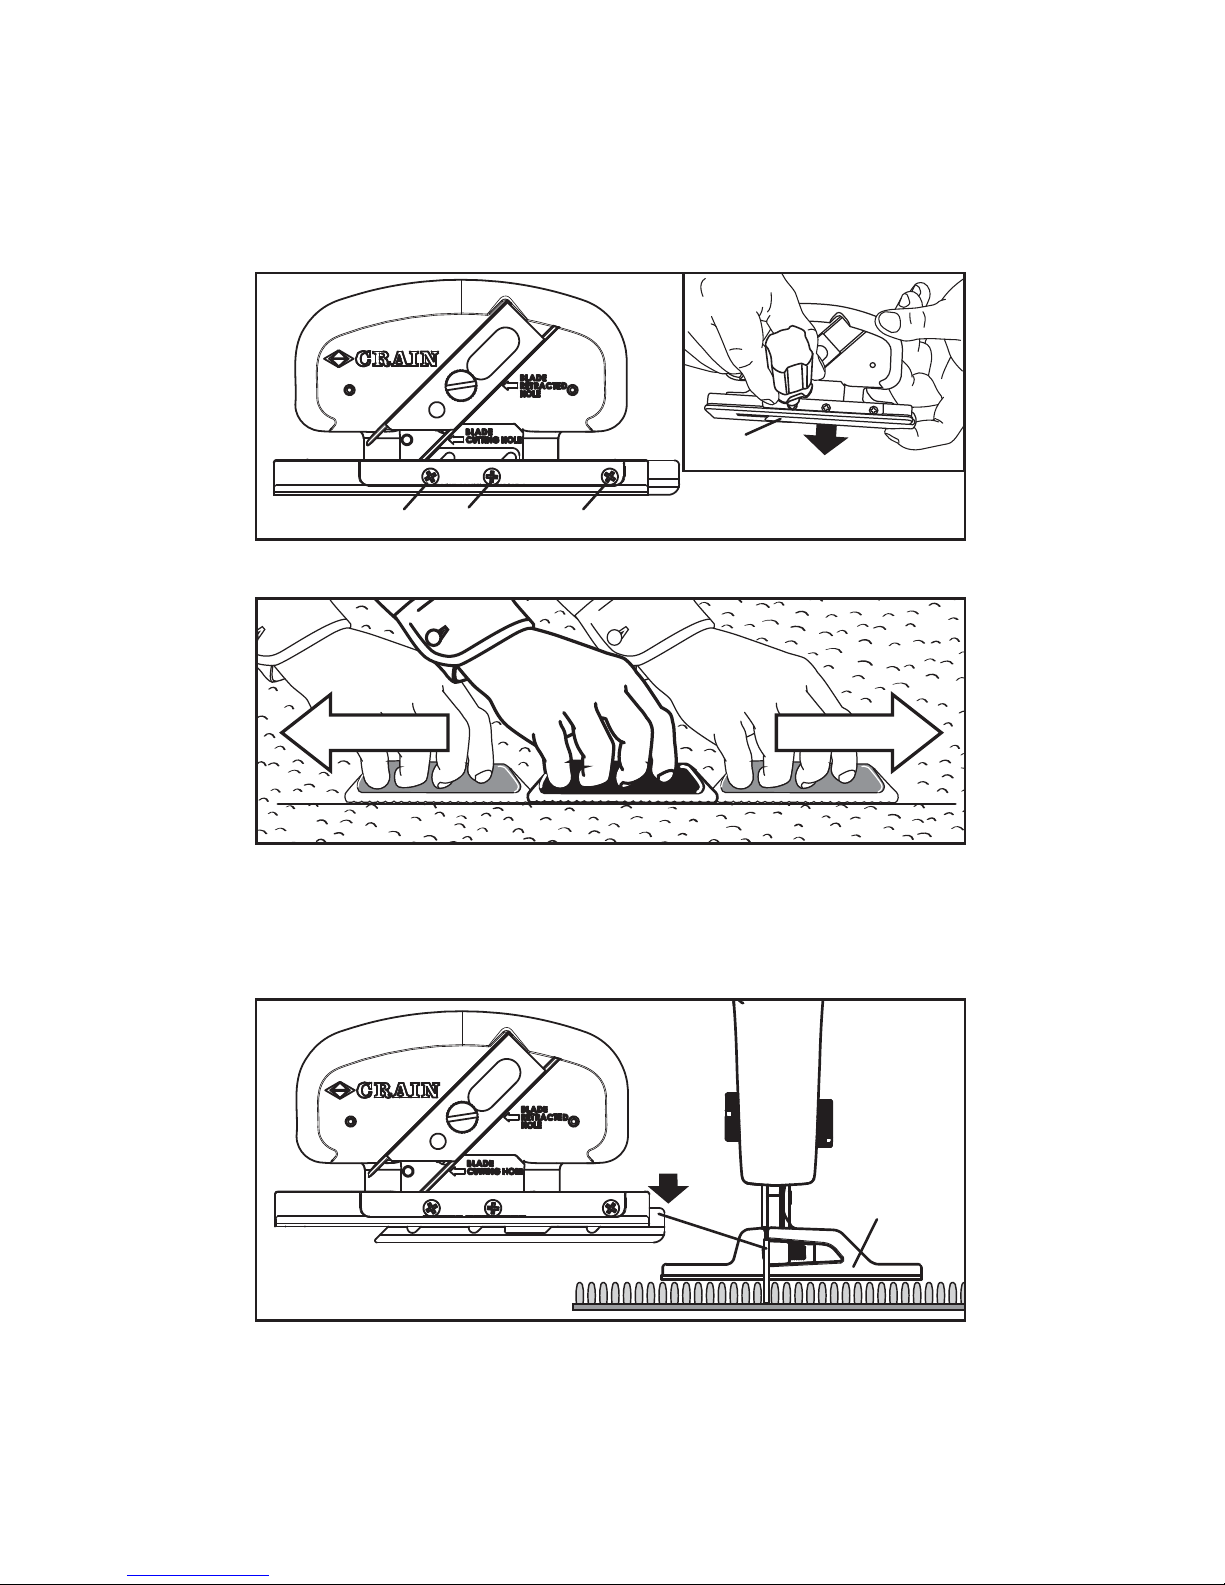
Adjusting the row guide:
Loosen the three screws which allow the row guide to move up or down.
Part the nap of the carpet to be trimmed with a row nder or separator.
Set the base of the Seam Cutter on the carpet with the extended row
guide dropping into the parted row. With some downward pressure on
the handle of the tool, press the row guide down to the bottom of the row.
Once the row guide depth is set, retighten the three screws.
NOTE: A properly adjusted row guide will ride on the bottom of the row
and the base will be at on the face of the carpet. The base should not
teeter back and forth on the row guide. If it does, shorten the depth of the
guide until there is no rocking, yet the row guide still contacts the bottom
of the row.
LOOSEN ROW GUIDE SCREWS (3)
ROW
GUIDE
PRESS DOWN ON ROW GUIDE
TO BOTTOM OF ROW
BASE
FLAT ON
FACE OF
CARPET
PRESS
Page 2
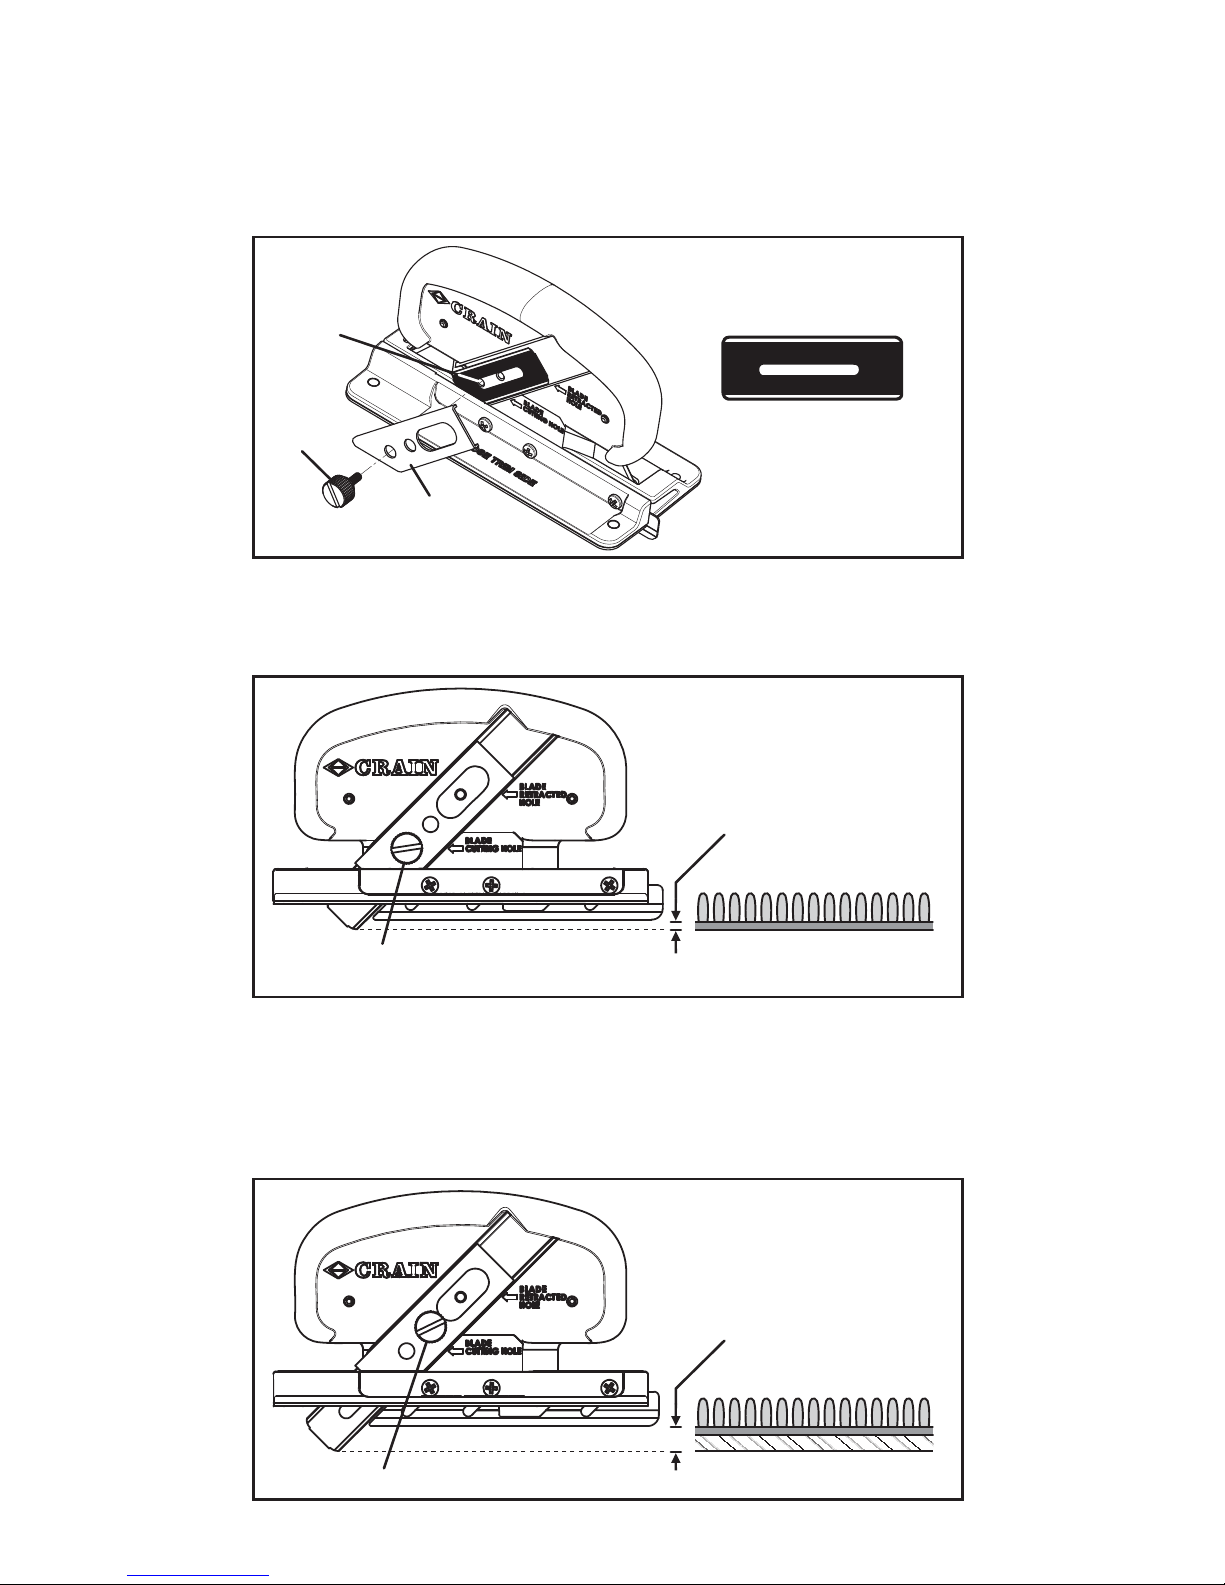
Adjusting the cutting blade:
Remove the thumbscrew that holds the slotted razor blade and the blade
clamp. Insert a slotted razor blade as shown. Replace the blade clamp
and thumbscrew in the lowest hole marked “BLADE CUTTING HOLE”.
Adjust the slotted razor blade below the row guide approximately the
thickness of the carpet’s backing. Make test cuts, and then any necessary adjustments, before proceeding.
NOTE: If the carpet being installed has an attached backing, additional
blade depth is available by the following: insert the thumbscrew in the
middle hole COMPLETELY ABOVE the slotted razor blade. Adjust the
slotted razor blade to desired depth and tighten. WARNING: It is not advisable to extend the blade more than 3/4” beyond the base.
SLOTTED RAZOR
BLADE INSTALLATION
BLADE
CUTTING
HOLE
BLADE
CLAMP
THUMBSCREW
BLADE DEPTH:
CONVENTIONAL
BACKING
BACKING
THICKNESS
INSTALL THUMBSCREW IN LOWEST
HOLE THROUGH SLOTTED BLADE
BLADE DEPTH:
ATTACHED
BACKING
INSTALL THUMBSCREW IN MIDDLE HOLE
BACKING
THICKNESS
Page 3
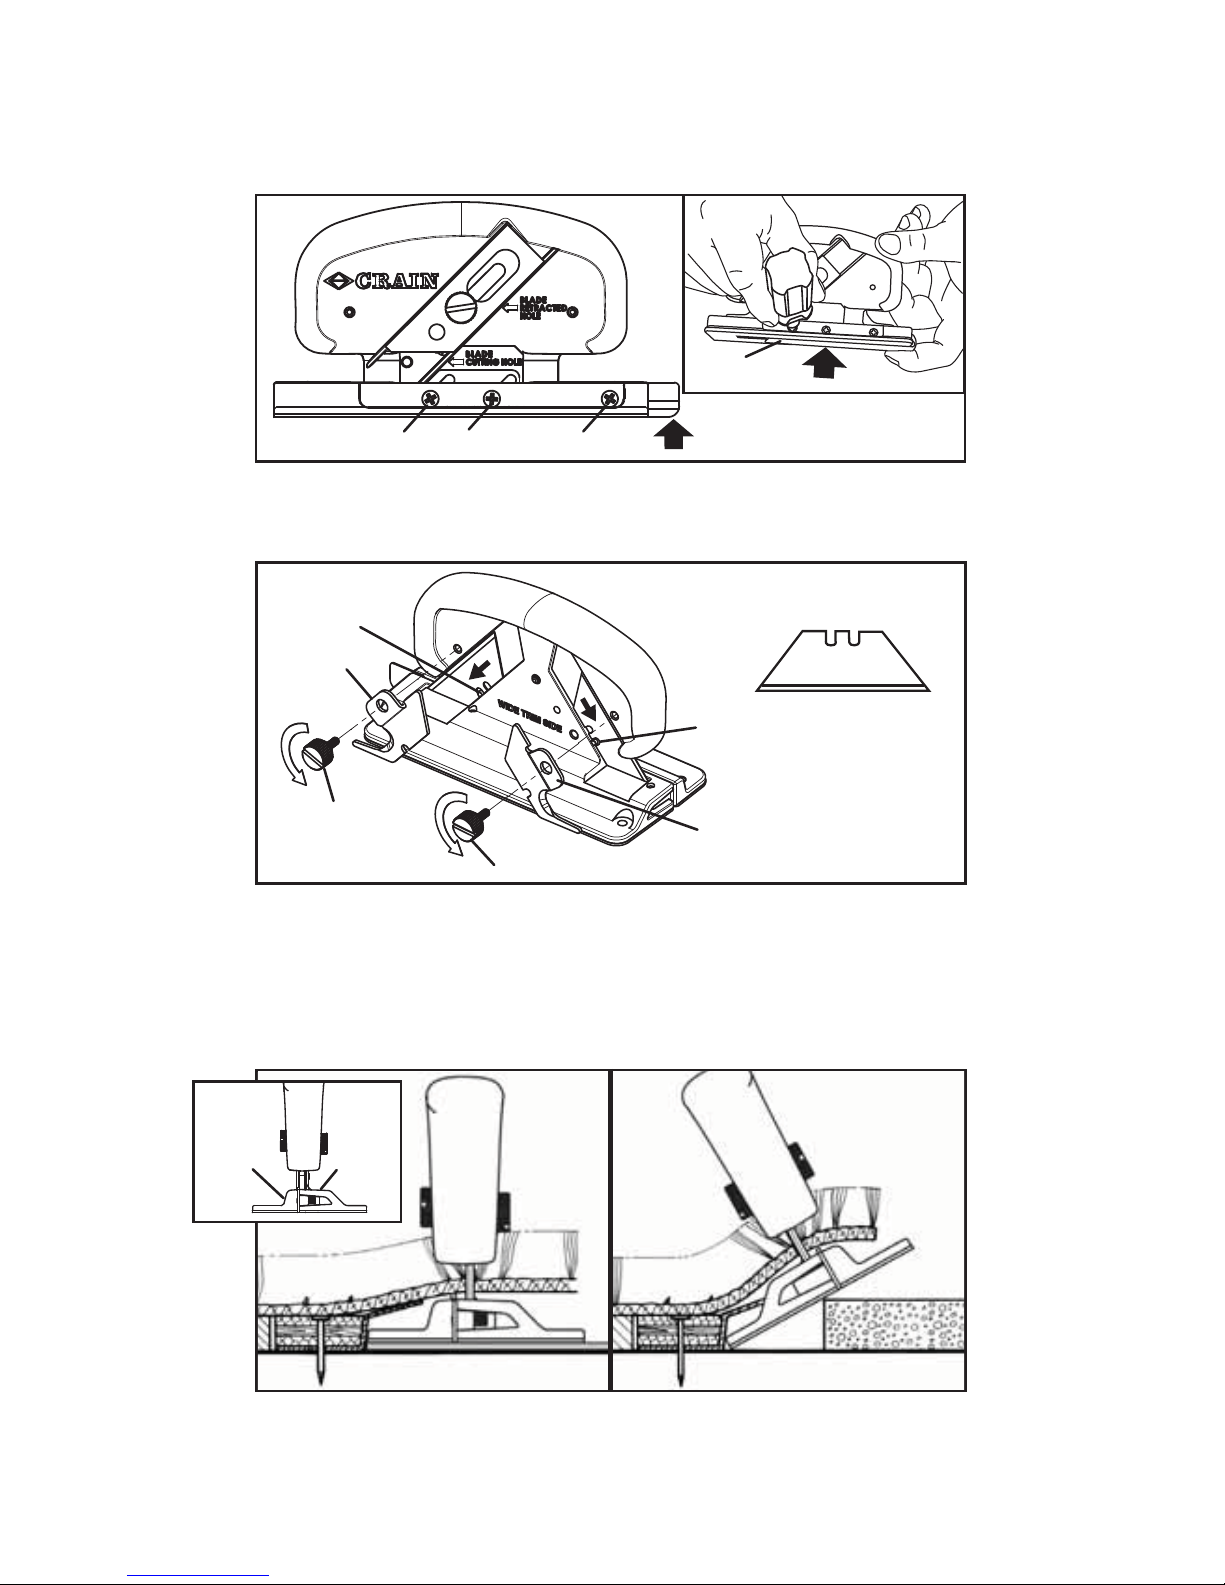
Reposition the row guide inside the base. Retighten the three screws.
Loosen the two thumb screws on the opposite side of the handle, which
loosens the blade clamps. Drop two utility blades to the lower position.
Note that on the base there is a “close trim side” and a “wide trim side”.
The close trim side is for trimming Z-bar that is being installed adjacent
to a low elevation surface (left diagram). The wide trim side is used when
installing carpet adjacent to an elevated surface, requiring the trimmer to
be tilted over (right diagram).
When trimming, keep the inside edge of the cutter’s base tight against the
Z-bar. This will give you the perfect amount of carpet to fold underneath
the Z-bar once the trimming operation is complete.
LOOSEN ROW GUIDE SCREWS (3)
ROW
GUIDE
UTILITY BLADE
INSTALLATION
BLADE
CLAMP
THUMBSCREW
NUB
NUB
BLADE CLAMP
THUMBSCREW
TRIMMING CARPET TO Z-BAR
CLOSE
TRIM
SIDE
WIDE
TRIM
SIDE
CLOSE TRIM SIDE WIDE TRIM SIDE
PRESS UP
Page 4
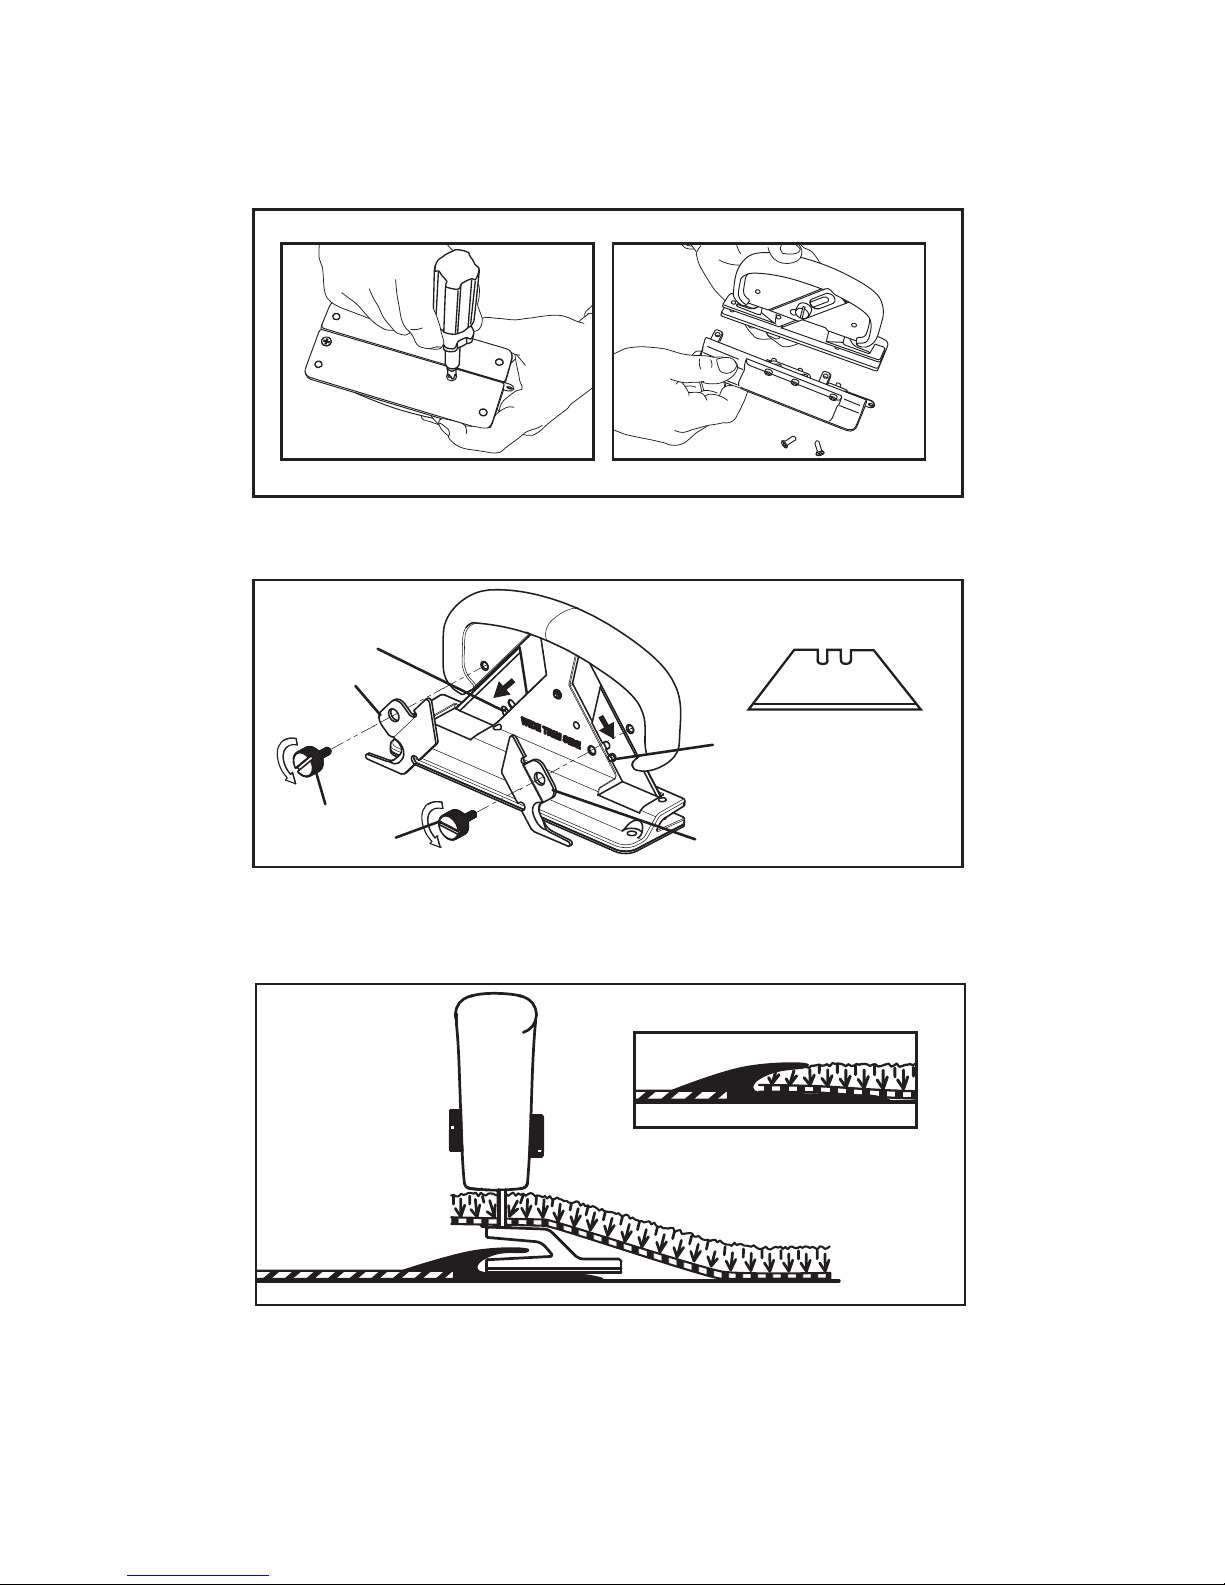
Loosen the two thumbscrews, which loosens the blade clamps. Drop the
two utility blades into their lower position.
INSTALLATION TIPS: Only glue carpet within two feet of the molding.
Fold unglued carpet over molding. Trim excess carpet using the tool.
Fold back the carpet, nish spreading adhesive, then tuck the carpet under the lip of the molding for a perfect t.
Remove the two screws from the bottom of the base in order to remove
the “close trim side” of the cutter.
TRIMMING CARPET TO VINYL MOLDING
When trimming, keep the edge of the cutter’s base tight against the inside
edge of the vinyl molding. This will give you the perfect amount of carpet
to tuck underneath the vinyl molding.
UTILITY BLADE
INSTALLATION
BLADE
CLAMP
THUMBSCREWS
NUB
NUB
BLADE CLAMP
 Loading...