

Page 1
Page 2

FCC INFORMATION
1
This equipment has been tested and found to comply with
the limits for a Class B digital device, pursuant to Part 15 of
the FCC Rules. These limits are designed to provide
reasonable protection against harmful interference in a
residential installation. This equipment generates, uses
and can radiate radio frequency energy and, if not used
these instructions, may cause harmful interference to radio
communications. However, there is no guarantee that
interference will not occur in a particular installation. If this
equipment does cause harmful interference to radio or
television reception, which can be determined by turning
the equipment of and on, the user is encouraged to try to
correct the interference by one or more of the following
mesures:
~ Reorient or relocate the receiving antenna.
~ Increase the separation between the equipment and receiver.
~ Connect the equipment into an outlet on circuit different from
that to which the receiver is connected.
~ Consult the dealer or an experienced radio radio/TV
technician for help.
Page 3
LOCATION OF CONTROLS
2
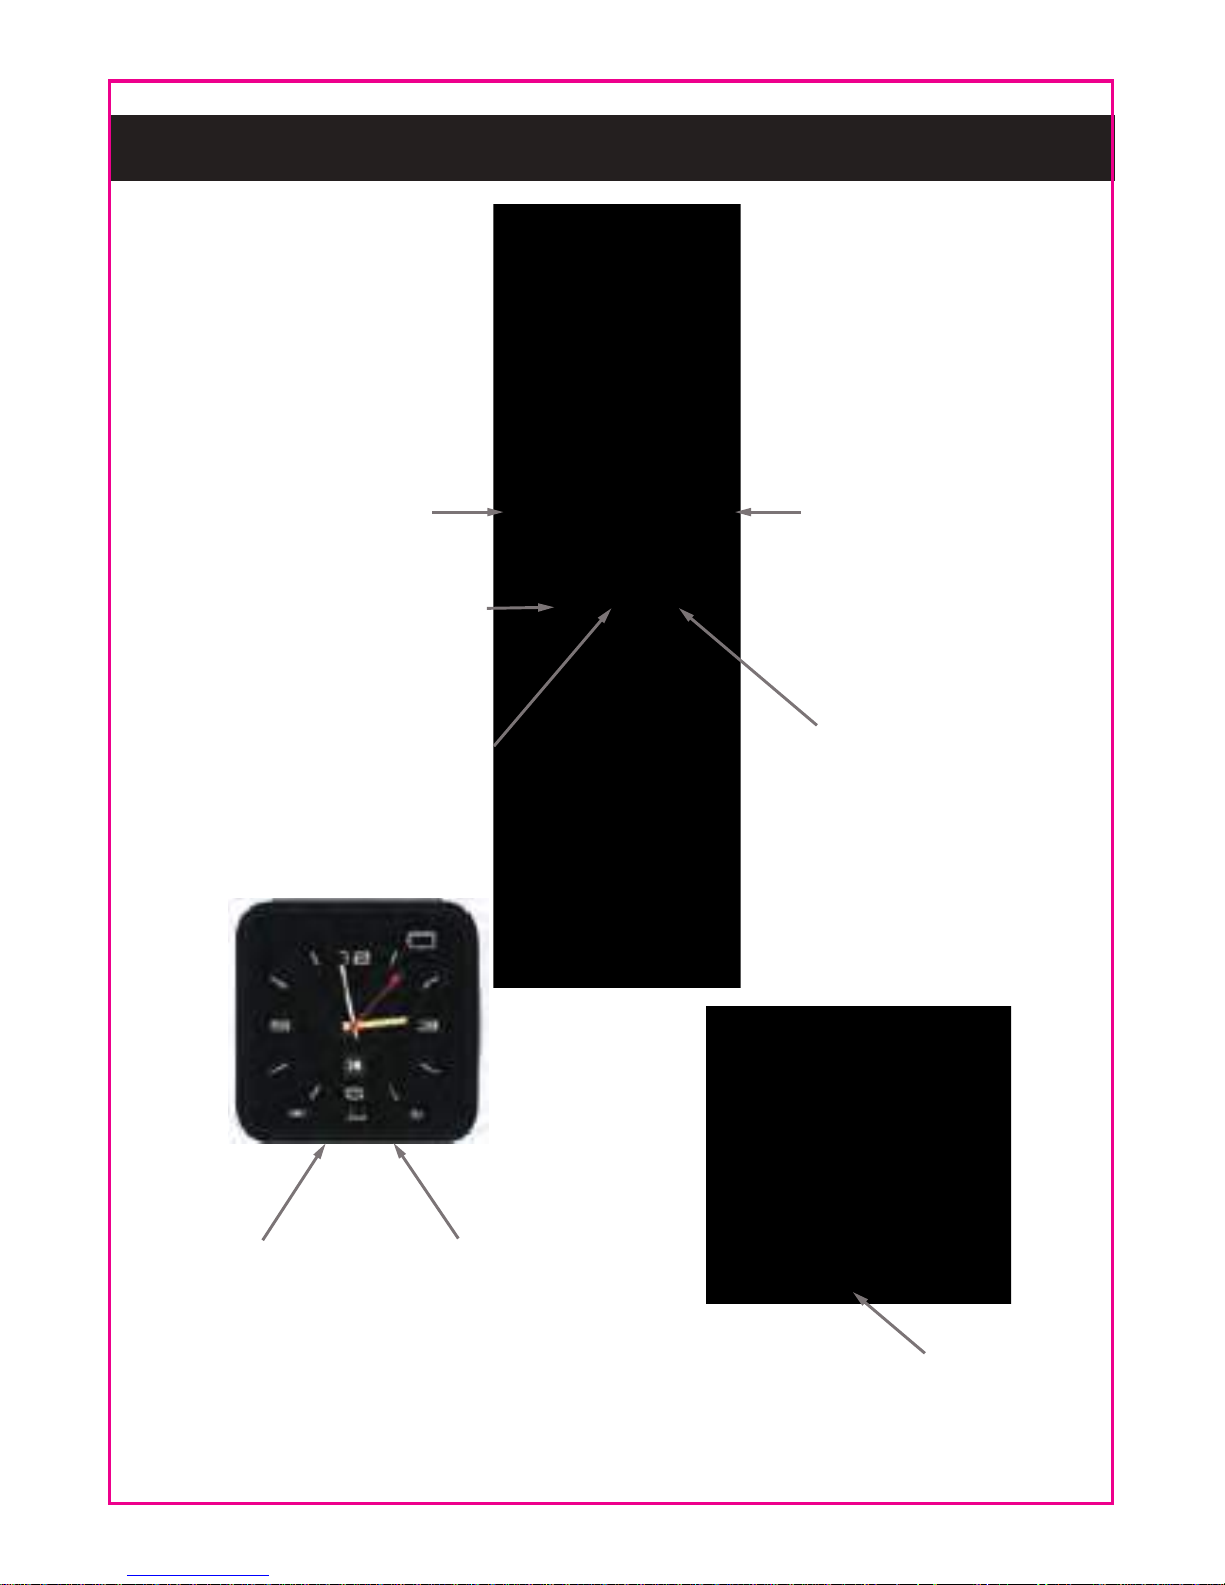
Reset
USB Microphone
Built-in Speaker
Power Button
(on the side of unit)
Volume Button Return Button
Menu/Confirm Button
Page 4
3
Power Button:
Press and hold to Power On/Off.
In power On mode, press to turn off the display to enter
to standby mode (For saving battery power). Press
again to turn back the display.
Volume Button:
In display illuminate mode, touch to enter to volume
setting menu.
Return Button:
In display illuminate mode, touch to return to previous
setting menu.
Menu/Confirm Button:
In display illuminate mode, touch to enter to setting
menu. Touch repeatedly to change setting menu.
In setting mode, touch to confirm the settings and exit.
USB Port:
For charging only.
Reset Button:
If the unit become to abnormal operation or halt. Press
the button by a small screwdriver (Not supplied) to reset
the unit.
●
●
●
●
●
●
●
●
Page 5
4
POWER SOURCE
The unit has a built in DC 3.7V, Li-poly rechargeable
battery, recharge it before first time use (or when the
battery was consumed, “ ” appear on the display) as
follows:
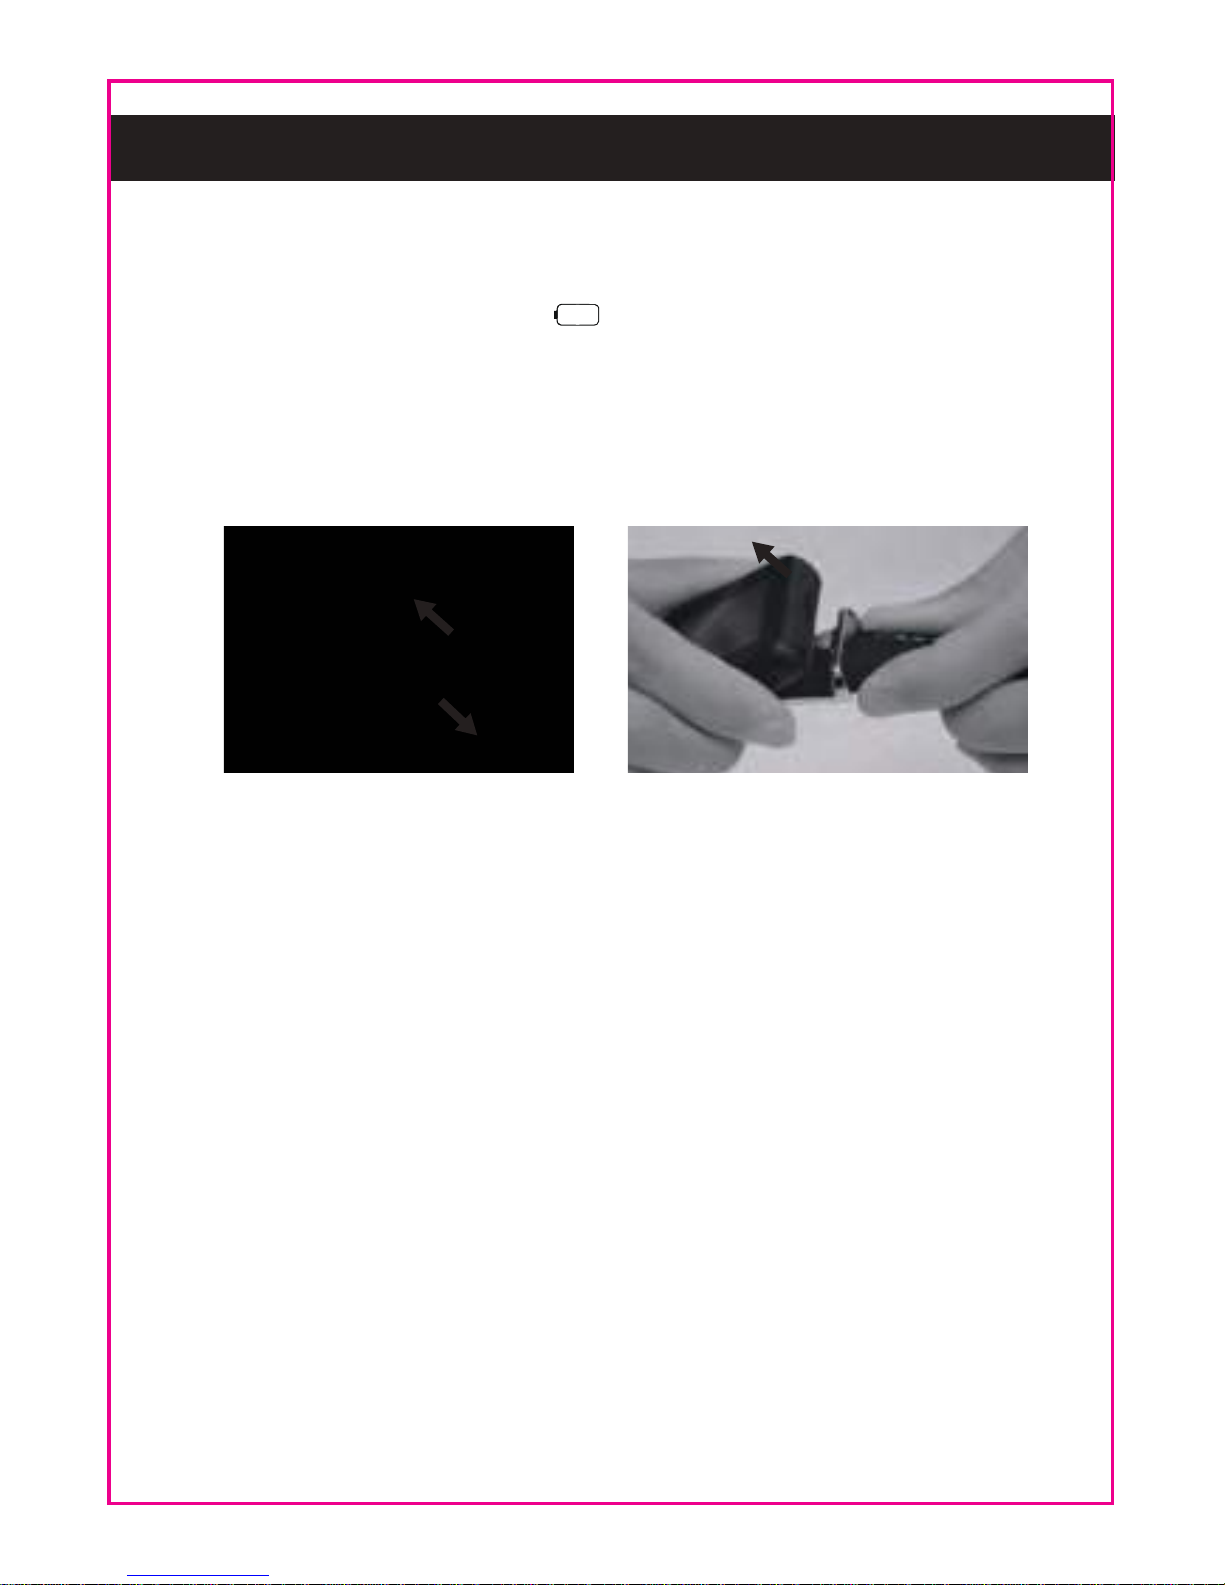
1. Take out the unit from the watch strap as the figure
below very carefully:
NOTES:
Take out the unit from metallic buckle side first as
figure A above. Then take out whole unit as figure B.
Make sure the direction you take out the unit is
correct. Otherwise, the unit and strap may damage.
Fig BFig A
●
●
Page 6
5
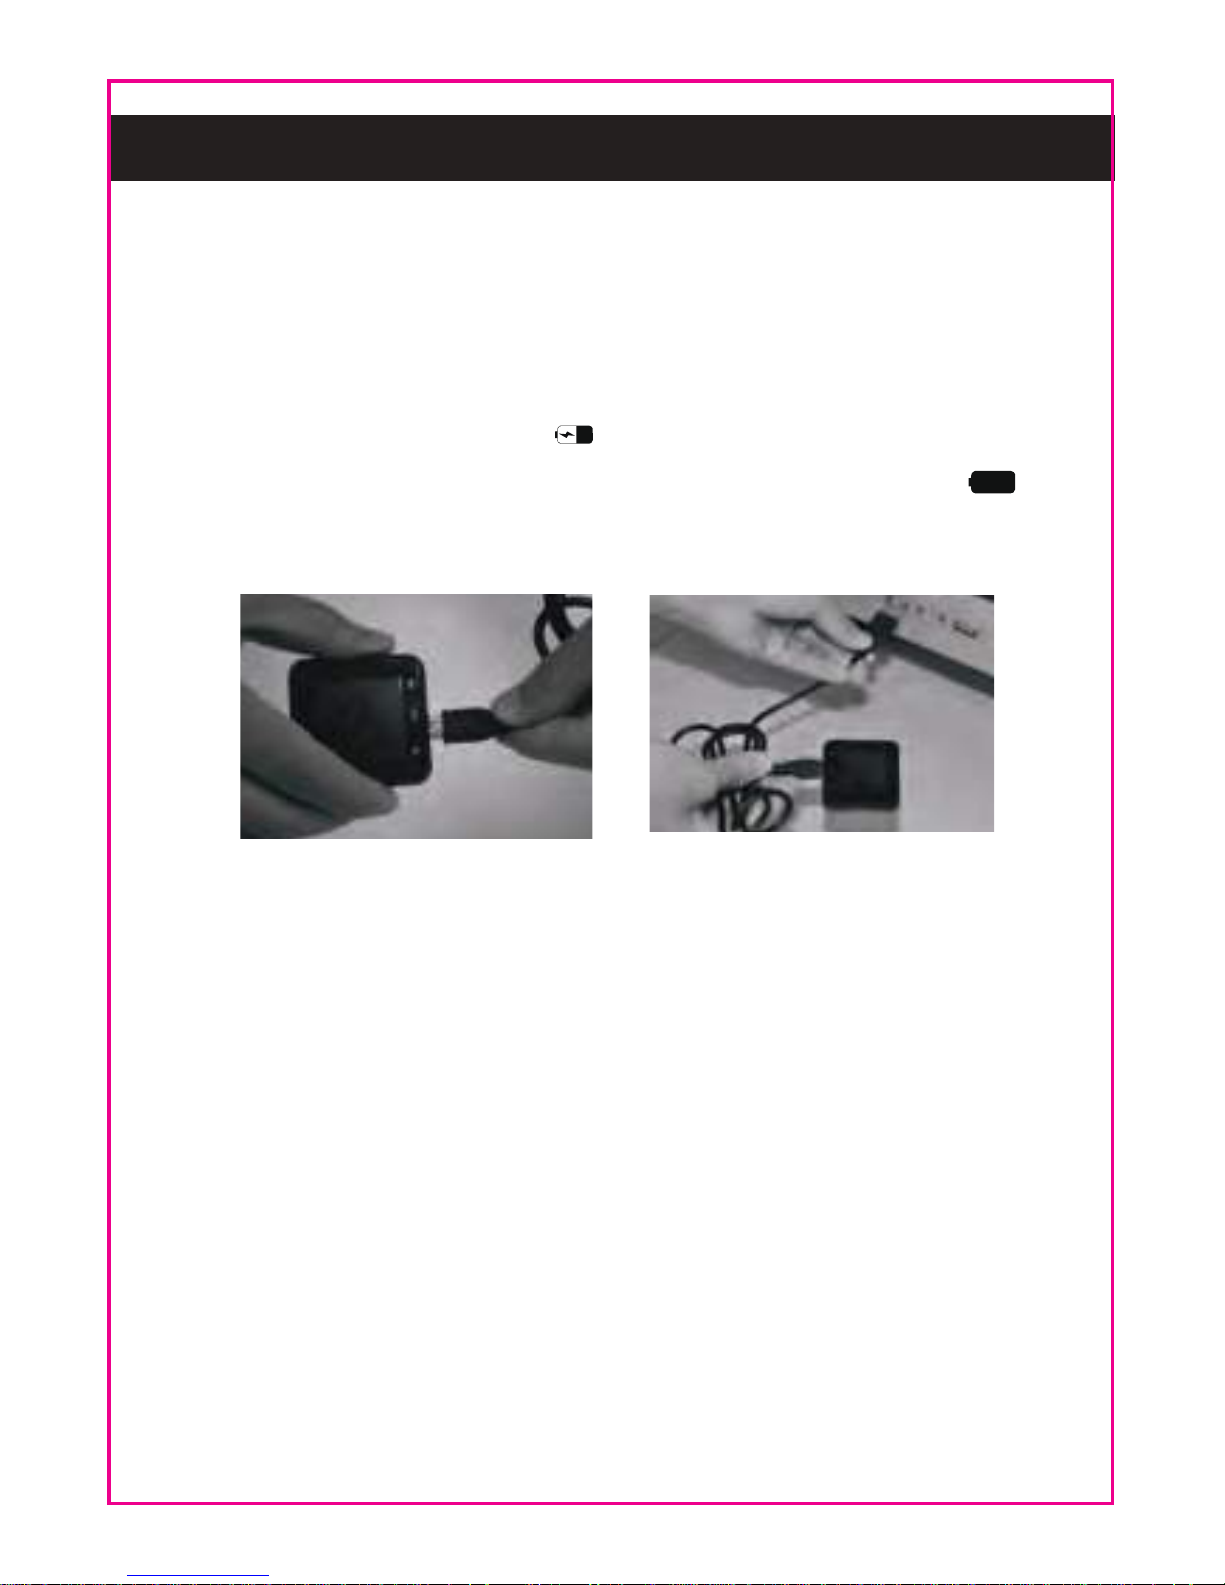
2. Connect the small plug from the supplied USB Charging
Cable to the Micro USB Port on the unit.
3. Connect the full size USB plug to the USB port on a
computer or any USB charger having DC 5V output as
the figure below. Charging will auto start. During charging,
the charging indicator “ ” will appear on the display.
When finished, the completed charging indicator “ ”
will appear on the display.
NOTES:
Your battery will last longer if you following these simple
guidelines for charging and storing.
A. Recharging and store the unit within the temperature
range of 5°C~35°C (40°F~95°F).
B. Do not over charge (longer than 24 hours). Excessive
charging or discharging may shorten the battery’s life.
C. Battery life naturally shortens slowly over time.
D. The rechargeable battery incorporated in this product is
not user replaceable.
Page 7

Android Phones:
If you are using Android phones, download and install the
app “Craig Smart Watch” from Google Play into your cell
phone before first time use.
Compatible Android Phones List:
Samsung: Galaxy S3/S4/S5, Note II/III/IV
LG: Nexus4/5/7
Moto: E/G/X
And newer version and other brands Android phones, for
details, please consult the phone's shop.
6
APPS (APPLICATIONS) INSTALLATION
iPhone:
If you are using iPhone, you are no need to download any
apps from the apps store. For details operations, please
refer to page 22.
Compatible iPhone List:
iPhone 4S/5/5S/5C/6/6 Plus
Page 8
ANDROID PHONE:
BLUETOOTH PAIRING:
In first time use, pairing the unit to your cell phone as
below:
BT PAIRING AND SETTING
7
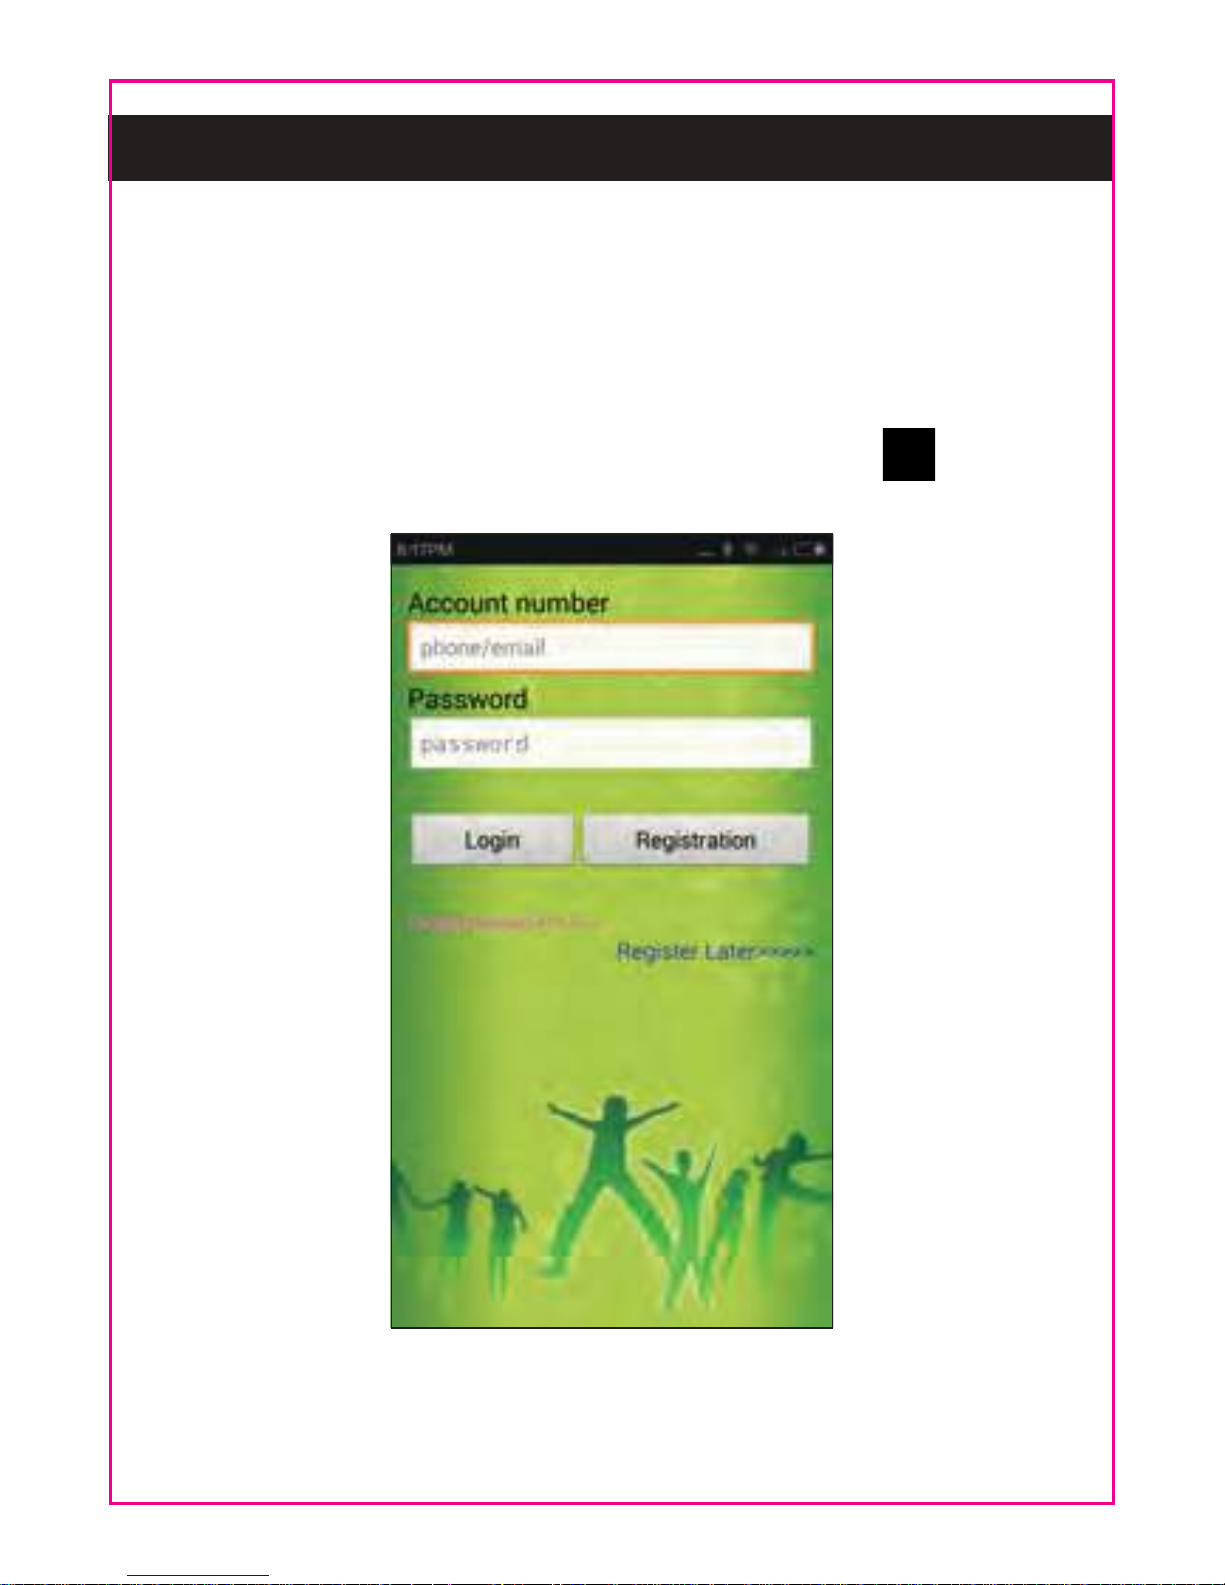
1. After installed the apps from Google Play store into your
cell phone, find the app “Craig Smart Watch” in your
phone then open it, the follows picture will appear on
the screen:
NOTE: If touch “Register Later” to skip, the exersice data
cannot be record.
Page 9
8
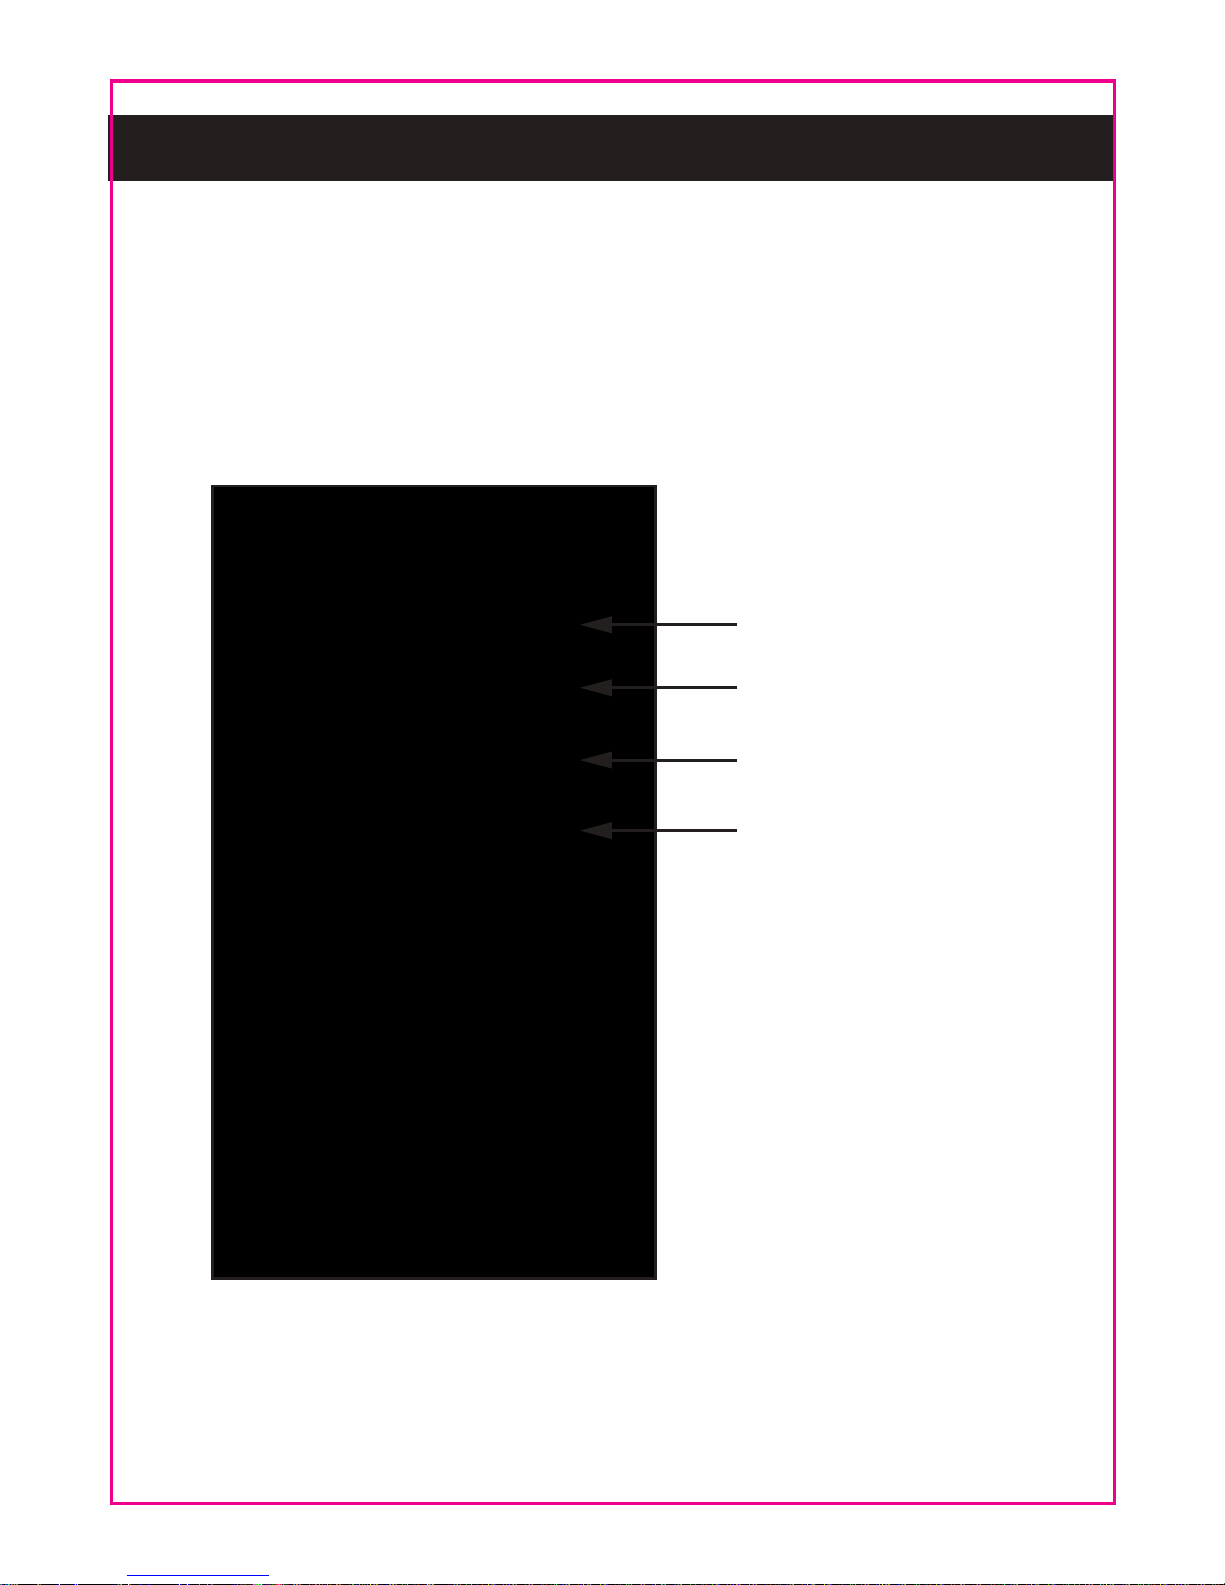
2. Touch the “Registration” Button on the screen to enter.
Then start to register your personal information into the
phone as the on screen instructions as below. (Make
sure the phone number you enter is the real phone
number of your cell phone.)
Phone
Nicknames
Password
Repeat the password
NOTE: Make sure your network is activate, or it would not
be registered successfully.
Page 10

9
3. Touch the “YES” Button on the screen to enter. Then
start to set your personal information:
NOTE: Email address is required to write. If you forgotten
your password, it can help you to get the password.
~ Birthday: Set or reset your birthday (age).
~ Gender: Set or reset your gender.
~ Height: Set or reset your height in inch.
~ Weight: Set or reset your weight in lbs.
~ Email Address: Set or reset your email.
Page 11
10
4. When finished, touch the “Start experiencing” Button to
save the setting and exit. The follows picture will appear.
Page 12

11
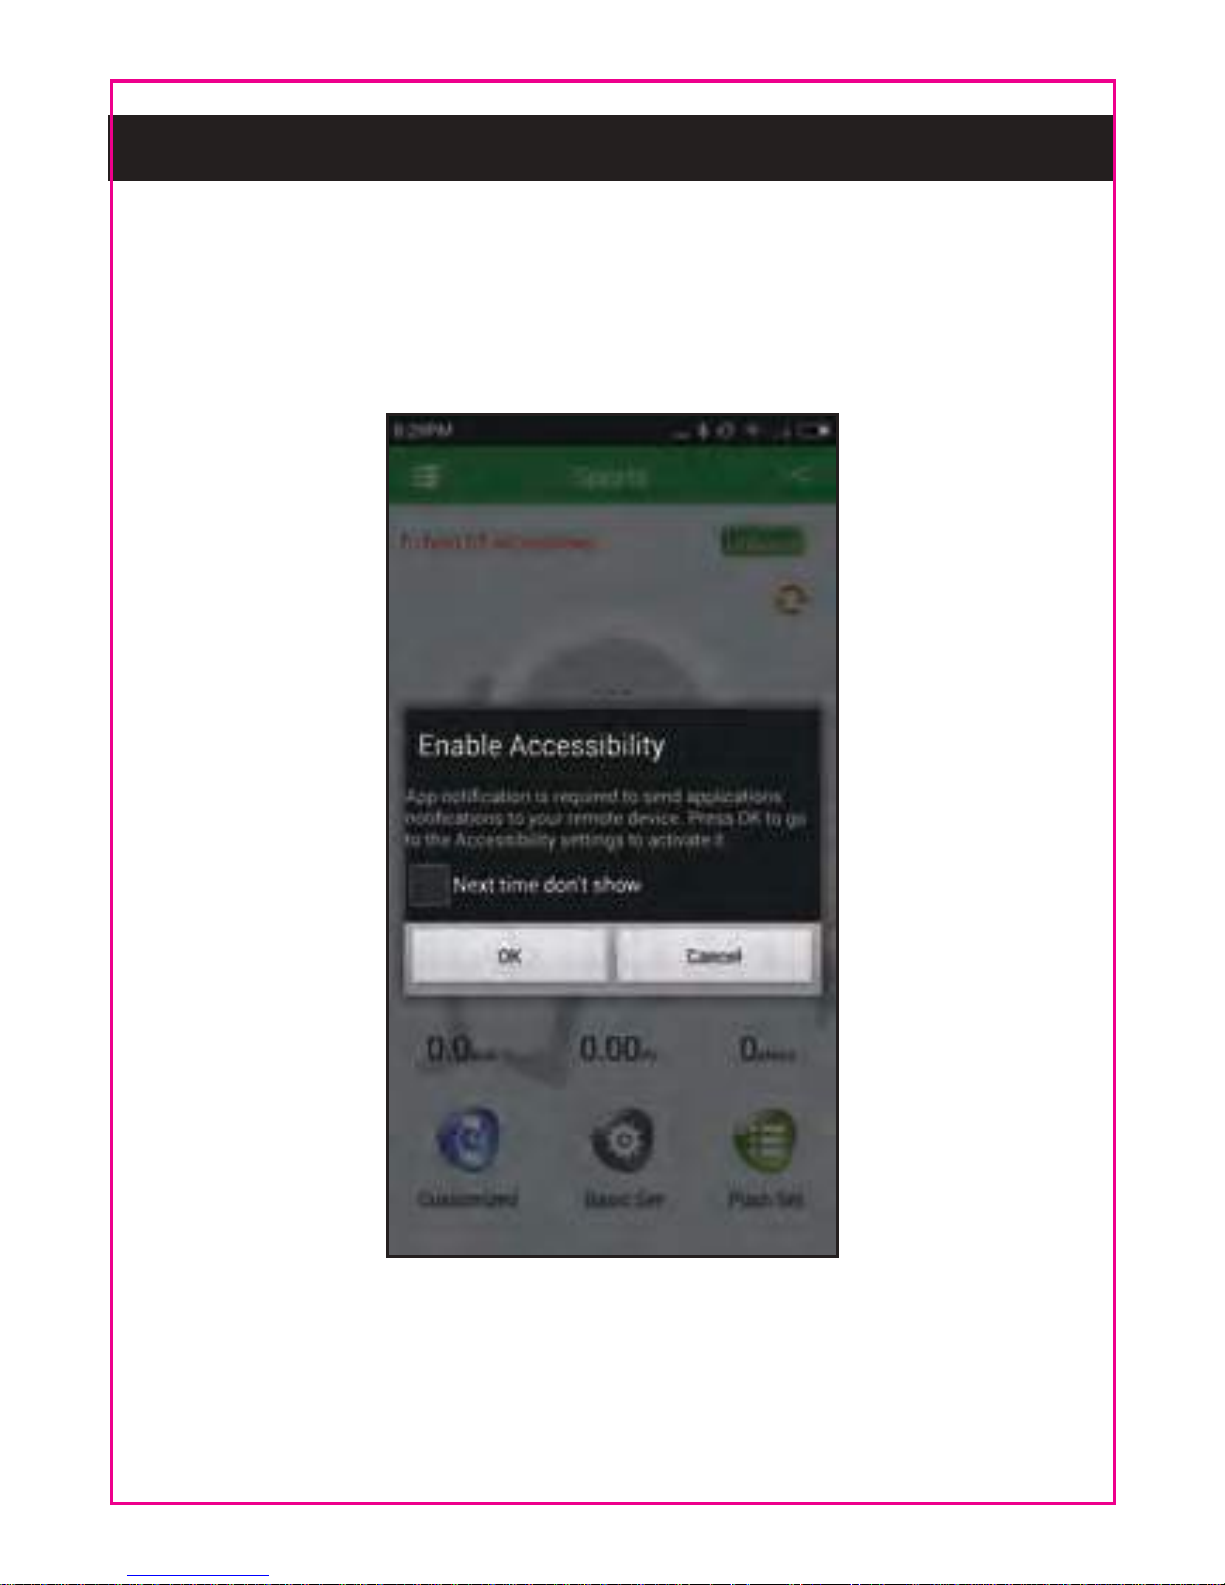
5. Touch the “OK” Button to continues as on screen
instructions. The follows picture will appear, set or
reset the functions as on screen instructions.
NOTES:
~ Slide the picture upward to find more selections.
~ After set or reset, make sure the switch of "Craig
Smart Watch" is turned to On. Otherwise, BT
connection will be not functioning.
Page 13

12
6. When finished setting, touch the "Accessibility" Button
on the left-top corner of the screen. The follows picture
will appear.
Page 14

13
7. Touch the “Unbond” Button, the follows picture will
appear on the screen and your cell phone will start to
searching the available BT devices. When our model
number CC430 appear on the list, touch it to start BT
pairing as on screen instructions.
Page 15

14
8. After paired, touch the return button on your phone to
return to home page. The follows picture will appear.
Page 16
15
9. Slide the picture to right or touch the “ ” Button on
left-top of screen to enter to setting menu, the following
picture will appear. Set or reset the settings or read the
records as on screen instructions.
Page 17

16
10. Touch the “ ” Button on right-top of screen to
enter to sharing menu, then share your records as
on screen instructions.
IMPORTANTS:
~ After BT paired, the current time of the unit will auto
set to the same time of your cell phone.
~ Ever times when your set or reset the settings, make
sure you have synchronized the new setting to the
unit. Otherwise, nothing will be changed.
Page 18
General:
1. Press and hold the Power Button on the unit until the
display is illuminated to turn On.
2. For saving battery power, the display will auto turn off
over 20 seconds idle. Or, press and release the Power
Button to turn off the display. Press and release the
button again to turn it back.
3. In display illuminate mode, touch the Volume Button,
set the volume level as desired as the on display
instructions.
17
4. In display illuminate mode, touch the Menu Button
Repeatedly to enter and select menu page. Touch the
Return Button to return to previous menu. Touch the
desired icon to enter, set/reset the settings or read the
records as the on display instructions.
OPERATION
Page 19
18
MENU
1. BLUETOOTH:
Touch Bluetooth Buttun to enter, the follow picture will
appear. Set or reset the settings as the on display
instructions as below:
BT Sync: Search and pair to the searched Bluetooth
devices.
Bluetooth Settings: Connect or disconnect the Bluetooth
connection.
Distance Alert: If set to On, when the BT connected
phone too far from the unit, alarm will goes off.
●
●
●
●
●
●
●
2. PHONEBOOK:
To read the phone book in the BT connected cell phone.
Touch the desired name to enter, the details of it will
appear.
Touch the phone number, a small window “Call” will
pop up. Touch it to starting dialing.
Page 20
19
●
●
●
●
●
●
●
3. DIALER:
Enter the phone number by touching the numeric
buttons. Touch the Button on the display to start
dialing through the BT connected cell phone.
When hook off, speak to the built-in microphone and
hearing the sound from the built-in speaker.
When finished, touch the Button on the display to
hook on.
4. MESSAGING:
To read the message in the BT connected cell phone
(Android phone only).
5. CALL LOG:
To read the phone call records in the BT connected
cell phone.
6. NOTIFIER:
Alarm goes off when received new incoming from
What’s App.
7. MUSIC:
Play and hear the music from the BT connected cell
phone in this unit.
Page 21
20
●
●
●
●
●
●
●
●
9. SETTING:
Enter to set or reset the settings of Language, Alarm
or LCD Backlight.
Enter to “About Watch” to read the version of firmware.
10. ANTI-LOST:
Turn on/off the anti-lost function. If set to on, when the
distance of the unit and BT connected cell phone over
than the settings, alarm will go off.
Set the alarm goes off distance between the unit and
cell phone.
11. POWER SAVE:
Enter to turn On/Off the power save mode.
12. RINGTONE:
Enter to set or reset the ringer type and mode.
13. BAROMETER:
Enter to read the Pressure and Temperature.
8. CAMERA:
Remote control to take photos through the camera in
the connected cell phone.
Page 22
21
●
●
●
●
●
●
●
●
●
15. PEDOMETER:
Enter “Pedometer” to start counting.
Enter “Step Setting” or “Weight Setting” to set or reset
the settings.
Enter “Clear History” to erase the records.
Enter “Units Setup” to set or reset the measurement's
units.
16. STOPWATCH:
Enter to stopwatch.
17. MENU STYLE:
Enter to set or reset the style of menu.
18. CLOCK TYPE:
Enter to set or reset the style of clock.
19. FIND PHONE:
When enter, touch the Button on the display. The BT
connected cell phone will be ringing to let you find it.
14. ALTIMETER:
Altitude meter, enter to reset the altitude you located
then measuring the altitude level of the unit you placed
or in new location later.
Page 23

IPHONE:
BT (BLUETOOTH) PAIRING:
22
1. Turn on the BT setting menu on your iphone then start
BT searching.
2. When searched the unit, our model number "CC430"
will appear on the list. Touch it to start pairing as the on
screen instruction on your iphone..
3. When paired, the follow functions on the unit can be
operated:
●
●
20. TIME DATE:
Enter to set or reset Time and Date manually.
Enter to “Time formal” to set or reset the time display
format to 12 hours or 24 hours.
~ PHONEBOOK
~ DIALER
~ CALL LOG
~ MUSIC
~ ANTI-LOST
Page 24

23
IMPORTANTS
GENERAL SPECIFICATIONS
1. Please always wear the unit on your hand and power it
on. Otherwise, the records and counting cannot show the
real status of your exercise data.
2. Always synchrony the exercise records into your BT
connected cell phone after finished exercise. Otherwise,
the old records will be auto cover by new data.
3. Always keep the power of the built-in battery will not
consumed. Otherwise, the record in it may erased.
ACCESSORIES:
1 x User’s Manual
1 x USB Charging Cable
SPECIFICATIONS AND ACCESSORIES ARE SUBJECT
TO CHANGE WITHOUT NOTICE
Power Source: Built-in DC 3.7V, 230 mAH (0.851WH)
Li-polymer rechargeable battery;
Recharge by DC 5V,100mA, through
Micro USB Ports.
BT Version: BLE 3.0
BT Effective Range: 32 Feet in open area
Battery Power: 2 Days in standby mode.
Page 25
LIMITED WARRANTY
 Loading...