

Page 1

Model: 98820
z_CAUTION: Read, understand and follow
all Safety Rules and Operating Instructions
in this manual before using this product.
• SAFETY
• OPERATION
• MAINTENANCE
• TROUBLESHOOTING
Sears Brands Management Corporation,
• ESPA_!OL PG. 19
Hoffrnan Estates, IL 60179 U.S.A.
*Maximum initial battery pack
See the full line of Craftsman @ products
at craftsman.corn
Part No. 90618521 November 2014
voltage (measured without a
workload) is 40 volts. The nominal
voltage is 36.
*El m&ximo vottaje inicial del
paquete de baterias (medido sin
una carga de trabajo) es 40 voltios.
Si se mide con una carga de
trabajo, el voltaje nominal es 36.
Page 2

CRAFTSMANLiMiTED WARRANTY
FOB FOUR YEARS from the date of sale, this product is warranted against
defects in material or workmanship.
FOB TWO YEARS from the sale date, a supplied battery pack or charger is
warranted against material or workmanship defects.
WITH PROOF OF SALE, a defective product will be replaced free of charge.
For warranty coverage details to obtain free replacement, visit the web page:
www.craftsman.com/warranty
This warranty does not cover the mower blade, which is an expendable part that
can wear out from normal use within the warranty period.
This warranty is void if this product is ever used while providing commercial
services or if rented to another person.
This warranty gives you specific legal rights, and you may also have other
rights which vary from state to state.
Sears Brands Management Corporation, Hoffman Estates, tL 60179
SYMBOL SIGNAL MEANING
/_SAFETY ALERT SYMBOL: Indicates DANGER, WARNING, OR
CAUTION. Maybe used in conjunction with other symbols or pictographs.
/_ DANGER: Indicates hazardous situation which, if not avoided, will result in death or
serious injury.
/_ WARNING: Indicates hazardous situation which, if not avoided, could result in death
or serious injury.
/_ CAUTION: Indicates a hazardous situation which, if not avoided, could result in minor
or moderate injury or property damage.
The following are explanations of
important safety hazard pictorials on
the mower.
1. User must read and
understand the instruction
manua.
_2. To avoid the risk of serious
I"="_ linjury do not mow up and
I ,_4f'J_"l d°wn slopes. Always mow
_across slopes.
I o 13.To avoid the risk of injury
_e
I _ _: Itobystanderskeepall
I_ IPers°ns and pets at a safe
_distance from the mower while
operating.
4. Rotatingblades can cause
serious injury. Keep handsand feet
clear of mower deck and discharge
opening at all times. Always be
for the blade to stop rotating (approximately
3 seconds) after releasing bail handleand
removing the safetykey) before removing and
replacing grass catcher,cleaning, servicing,
transporting or lifting the mower.
sure blade has stopped (wait
clear of the discharge from the mower
while operating. Always inspect mowing
area before mowing and remove objects
that could be thrown by blade. Release
bail handle to turn mower off and wait for
the blade to stop rotating (approximately
3 seconds) before crossing walk, roads,
patio and gravel drives.
/_WARNING: IMPORTANT
SAFETY WARNINGS AND
INSTRUCTIONS
/_WARNING: WHEN USING
ELECTRIC LAWN MOWERS, BASIC
SAFETY PRECAUTIONS SHOULD
ALWAYS BE FOLLOWED TO REDUCE
THE RISK OF FIRE, ELECTRIC SHOCK,
AND PERSONAL INJURY, INCLUDING
THE FOLLOWING:
READ ALL INSTRUCTIONS
5. Objects struck by mower
blade can cause serious injury.
Stay behind the handle when
the motor is running. Always
ensure persons and pets are
Page 3
TO REDUCE RiSK OF iNJURY:
• Before any use, be sure everyone using
this tool reads and understands all
safety instructions and other information
contained in this manual.
• Savethese instructions and reviewfrequently
priorto use and ininstructing others.
_DANGER: IMPORTANT SAFE
PRACTICES FOR WALK=
BEHIND MOWERS
This mower is capable of amputating hands
and feet and throwing objects. Failure to
observe the following safety instructions
could result in serious injury or death.
GENERAL OPERATION
1. Read, understand, and follow all
instructions on the mower and in the
instruction manual before starting.
2. Do not put hands or feet near or under
the mower. Keep clear of the discharge
opening at all times.
3. Only allow responsible adults, who are
familiar with the instructions, to operate
this mower.
4. Clear the area where the mower is
to be used of objects such as rocks,
sticks, wire, toys, bones, etc., which
could be thrown by the blade. Objects
struck by the blade can cause severe
injury to persons. Stay behind the
handle when the motor is running.
5. Be sure the area surrounding the mower
is clear of bystanders before operating. All
bystanders and pets should be kept at a
safe distance. Stop the mower if anyone
enters the area surrounding the mower.
6. Do not operate mower barefooted or
while wearing sandals. Always wear
substantial footwear.
7. Do not pull mower backward unless
absolutely necessary. Always look
down and behind before and while
moving backward.
8. Never direct discharged material toward
anyone. Avoid discharging material
against a walt or obstruction. Material
may ricochet back toward the operator.
Release bail handle to turn mower
off and stop the blade when crossing
gravel surfaces.
9. Do not operate mower without the
entire grass catcher, discharge guard,
rear guard, or other safety protective
devices in place and working.
Periodically check all guards and safety
protective devices to ensure they are
in good working order and will operate
properly and perform their intended
function. Replace a damaged latch,
guard or other safety device before
further use.
10.Never leave a running mower unattended.
11.Always release the bail handle to
stop the motor and wait until the blade
comes to a complete stop and remove
the safety key before cleaning the
mower, removing the grass catcher,
un-clogging the discharge guard, when
leaving the mower, or before making
any adjustments, repairs or inspections.
12.Operate mower only in daylight or good
artificial light when objects in the path
of the blade are clearly visible from the
operating area of the mower.
13.Do not operate mower while under the
influence of alcohol or drugs, or when
you are tired or ill. Always stay alert,
watch what you are doing, and use
common sense.
14.Avoid dangerous environments. Never
operate mower in damp or wet grass,
never use mower in the rain. Always be
sure of your footing; walk; never run.
15.Disengage the drive system, if so
equipped, before starting the motor.
16.1fthe mower should start to vibrate
abnormally, release the bail handle, wait
for the blade to stop and remove the
safety key and battery pack, then check
for the cause immediately. Vibration is
generally a warning of trouble.
17. Always wear proper eye and
respiratory protection when operating
the mower.
18.The use of any accessory or
attachment not recommended for use
with this mower could be hazardous.
Only use accessories approved by
Craftsman ®.
19.Never overreach while operating the
mower. Always be sure to keep proper
footing and balance at all times while
operating the mower.
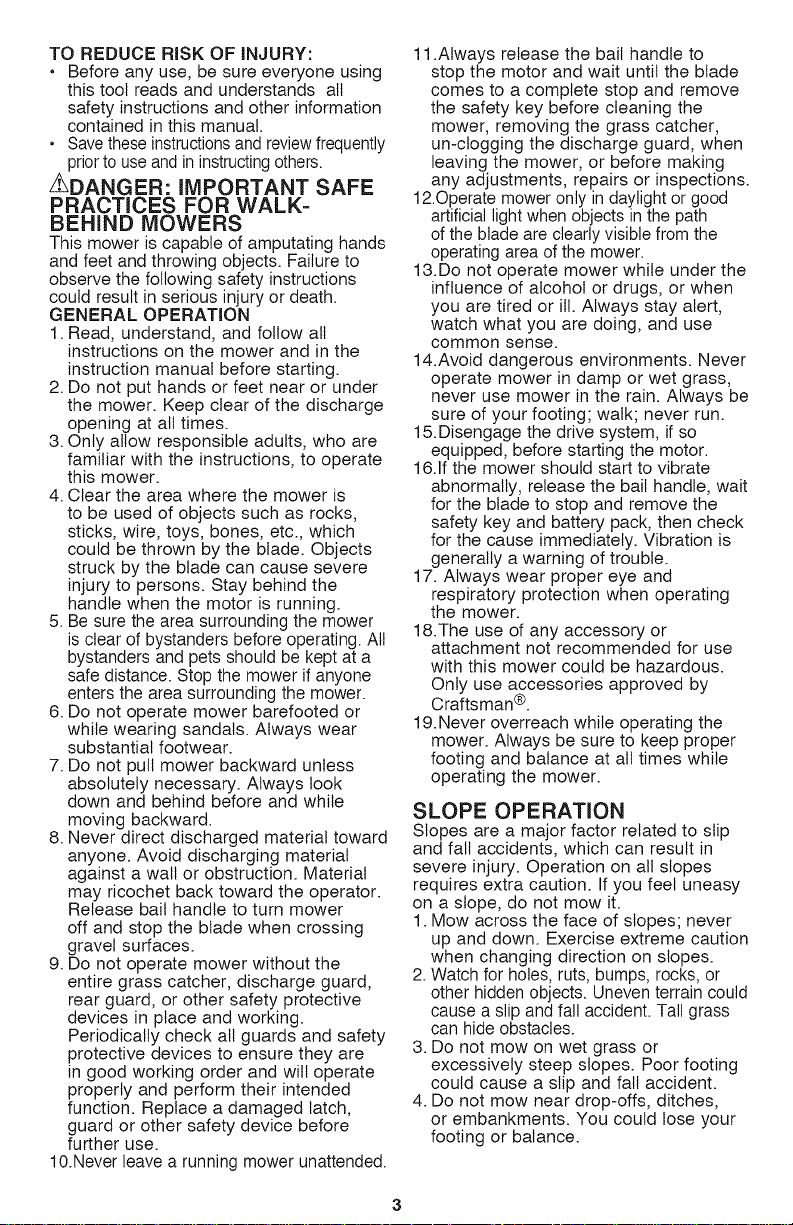
SLOPE OPERATION
Slopes are a major factor related to slip
and fall accidents, which can result in
severe injury. Operation on all slopes
requires extra caution. If you feel uneasy
on a slope, do not mow it.
1. Mow across the face of slopes; never
up and down. Exercise extreme caution
when changing direction on slopes.
2. Watch for holes, ruts, bumps, rocks, or
other hidden objects. Uneven terrain could
cause a slip and fall accident. Tall grass
can hide obstacles.
3. Do not mow on wet grass or
excessively steep slopes. Poor footing
could cause a slip and fall accident.
4. Do not mow near drop-offs, ditches,
or embankments. You could lose your
footing or balance.
Page 4
CHILDREN
Tragic accidents can occur if the operator is
not alert to the presence of children. Children
are often attracted to the mower and the
mowing activity. Never assume that children
will remain where you last saw them.
1• Keep children out of the mowing
area and under the watchful care of
a responsible adult other than the
operator•
2. Be alert and turn mower off if a child
enters the area.
3. Never allow children to operate the
mower.
4. Use extra care when approaching blind
corners, shrubs, trees, or other objects
that may block your view of a child•
GENERAL SERVICE
1. Never operate mower in a closed area.
2. Keep all nuts and bolts tight to be sure the
equipment is in safe working condition.
3. Never tamper with safety devices. Check
their proper operation regularly.
4. Keep mower free of grass, leaves, or
other debris build-up. Allow mower to
cool before storing.
5. If you strike a foreign object, release
bail handle to turn mower off, wait for
the blade to stop and remove the safety
key and battery pack, then inspect the
mower. Repair, any damage, before
starting and operating the mower.
6. Never make any adjustments or repairs
with the motor running or while the
safety key is in the mower.
7. Always remove safety key and battery
pack before adjusting, cleaning,
repairing, inspecting, transporting, storing
or leaving the mower.
8. Check grass catcher components and
the discharge guard frequently and when
necessary replace with Craftsman ®
recommended parts only.
9. Mower blades are sharp. Wrap the
blade or wear gloves, and use extra
caution when servicing them.
10.Maintain or replace safety and
instruction labels, as necessary.
This device complies with Part 15 of the
FCC Rules. Operation is subject to the
following two conditions: (1) this device
may not cause harmful interference, and
(2) this device must accept any interference
received, including interference that may
cause undesired operation.
NOTE: This equipment has been tested
and found to comply with the limits for
Class B digital device, pursuant to part
15 of the FCC Rules• These limits
are designed to provide reasonable
protection against harmful interference
in a residential installation• This
equipment generates, uses and can
radiate radio frequency energy and, if
not installed and used in accordance
with the instructions, may cause harmful
interference to radio communications.
However, there is no guarantee that
interference will not occur in a particular
installation. If this equipment does cause
harmful interference to radio or television
reception, which can be determined
by turning the equipment off and on,
the user is encouraged to try to correct
the interference by one or more of the
following measures:
• Reorient or relocate the receiving
antenna.
• Increase the separation between the
equipment and the receiver.
• Connect the equipment into an outlet
on a circuit different from that to which
the receiver is connected.
• Consult the dealer or an experienced
radio/TV technician for help.
Changes or modifications tothis unit not
expressly approved bythe party responsible
forcompliance could void the user's authority
to operate the equipment. This Class Bdigital
apparatus complies with Canadian ICES-003.
SAVETHESEINSTRUCTIONS
/_WARNING: GENERAL SAFETY
WARNINGS AND INSTRUCTIONS
FOR ALL TOOLS
• THIS TOOL CAN BE DANGEROUS.
Follow all warnings and Safety
Instructions in this manual. The
operator is responsible for following
warnings and instructions in this
manual and on unit. Restrict use of
this mower to persons who read,
understand and follow warnings and
instructions in this manual and on unit.
• Avoid dangerous environment- don't
use lawn mowers in damp or wet locations.
• Don't Use in Rain.
• Keep Children Away - All visitors
should be kept a safe distance from
work area.
• Dress Properly - Do not wear loose
clothing or jewelry. They can be caught
in moving parts• Use of rubber gloves
and footwear is recommended when
working outdoors.
• Use Safety Glasses - Always use face
or dust mask if operation is dusty•
• Use Right Appliance - Do not use
lawn mower for any job except that for
which it is intended.
• USE OF EXTENSION CORDS Make
sure the extension cord is in good
condition before using. Always use the
Page 5
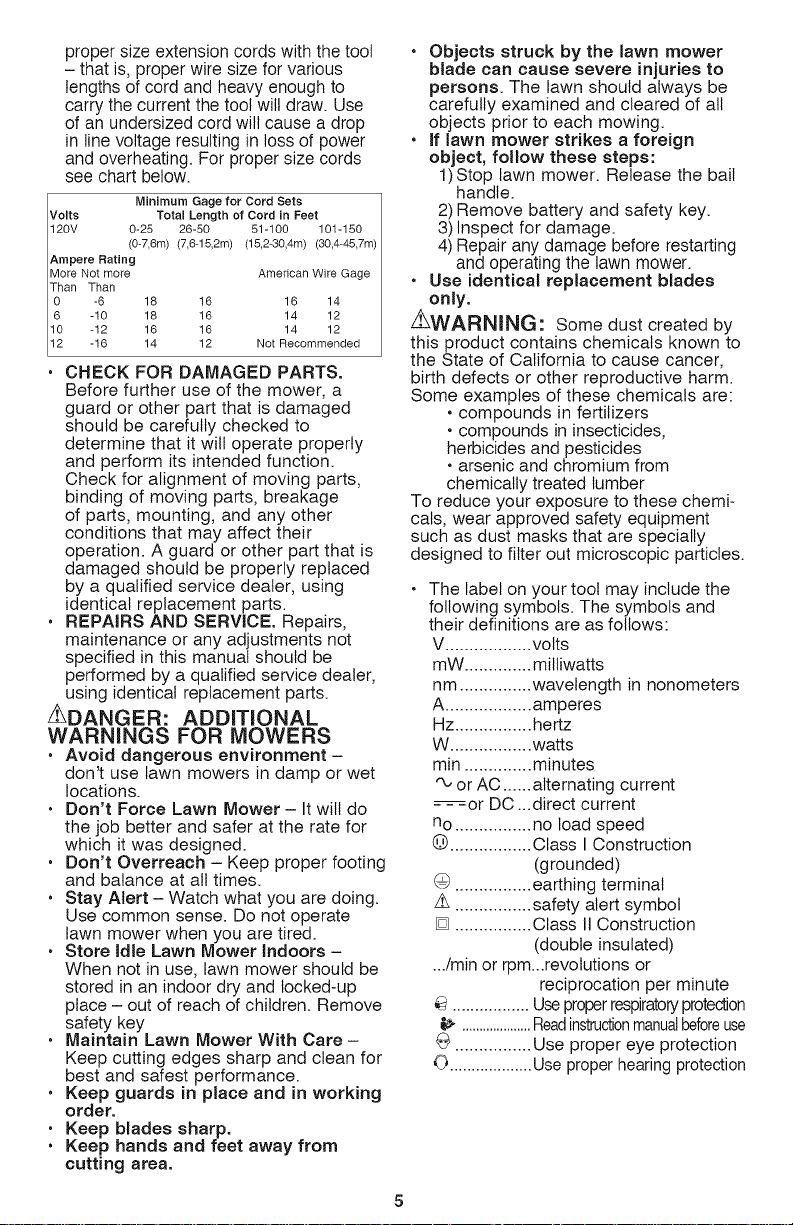
propersizeextensioncordswiththetool
- thatis,properwiresizeforvarious
lengthsofcordandheavyenoughto
carrythecurrentthetoolwilldraw.Use
ofanundersizedcordwillcauseadrop
inlinevoltageresultinginlossofpower
andoverheating.Forpropersizecords
seechartbelow.
Volts Total Length of Cord in Feet
120V 0-25 26-50 51-100 101-150
Ampere Rating
More Not more American Wire Gage
Than Than
0 -6 18 16 16 14
6 -10 18 16 14 12
10 -12 16 16 14 12
12 -16 14 12 Not Recommended
CHECK FOR DAMAGED PARTS.
Before further use of the mower, a
guard or other part that is damaged
should be carefully checked to
determine that it will operate properly
and perform its intended function.
Check for alignment of moving parts,
binding of moving parts, breakage
of parts, mounting, and any other
conditions that may affect their
operation. A guard or other part that is
damaged should be properly replaced
by a qualified service dealer, using
identical replacement parts.
• REPAIRS AND SERVICE. Repairs,
maintenance or any adjustments not
specified in this manual should be
performed by a qualified service dealer,
using identical replacement parts.
Z_DANGER: ADDITIONAL
WARNINGS FOR MOWERS
• Avoid dangerous environment -
don't use lawn mowers in damp or wet
locations.
• Don't Force Lawn Mower - It will do
the job better and safer at the rate for
which it was designed.
• Don't Overreach - Keep proper footing
and balance at all times.
• Stay Alert - Watch what you are doing.
Use common sense. Do not operate
lawn mower when you are tired.
• Store Idle Lawn Mower Indoors -
When not in use, lawn mower should be
stored in an indoor dry and locked-up
place - out of reach of children. Remove
safety key
• Maintain Lawn Mower With Care-
Keep cutting edges sharp and clean for
best and safest performance.
• Keep guards in place and in working
order.
• Keep blades sharp.
• Keep hands and feet away from
cutting area.
Minimum Gage for Cord Sets
(0-76m) (76-152m) (15,2-30,4m) (30,4-457m)
• Objects struck by the lawn mower
btade can cause severe injuries to
persons. The lawn should always be
carefully examined and cleared of all
objects prior to each mowing.
• If lawn mower strikes a foreign
object, follow these steps:
1)Stop lawn mower. Release the bail
handle.
2) Remove battery and safety key.
3) Inspect for damage.
4) Repair any damage before restarting
and operating the lawn mower.
• Use identical replacement blades
only.
Z_WARNING: Some dust created by
this product contains chemicals known to
the State of California to cause cancer,
birth defects or other reproductive harm.
Some examples of these chemicals are:
• compounds in fertilizers
• compounds in insecticides,
herbicides and pesticides
• arsenic and chromium from
chemically treated lumber
To reduce your exposure to these chemi-
cals, wear approved safety equipment
such as dust masks that are specially
designed to filter out microscopic particles.
The label on your tool may include the
following symbols. The symbols and
their definitions are as follows:
V.................. volts
mW .............. milliwatts
nm ............... wavelength in nonometers
A.................. amperes
Hz................ hertz
W................. watts
min .............. minutes
or AC ......alternating current
- -=or DC ...direct current
no ................ no load speed
@ ................. Class I Construction
G ................ earthing terminal
z_ ................ safety alert symbol
[] ................ Class II Construction
.../min or rpm...revotutions or
................. Useproperrespiratoryprotection
t_ ....................Readinstructionmanualbeforeuse
G ................ Use proper eye protection
O ...................Use proper hearing protection
(grounded)
(double insulated)
reciprocation per minute
Page 6
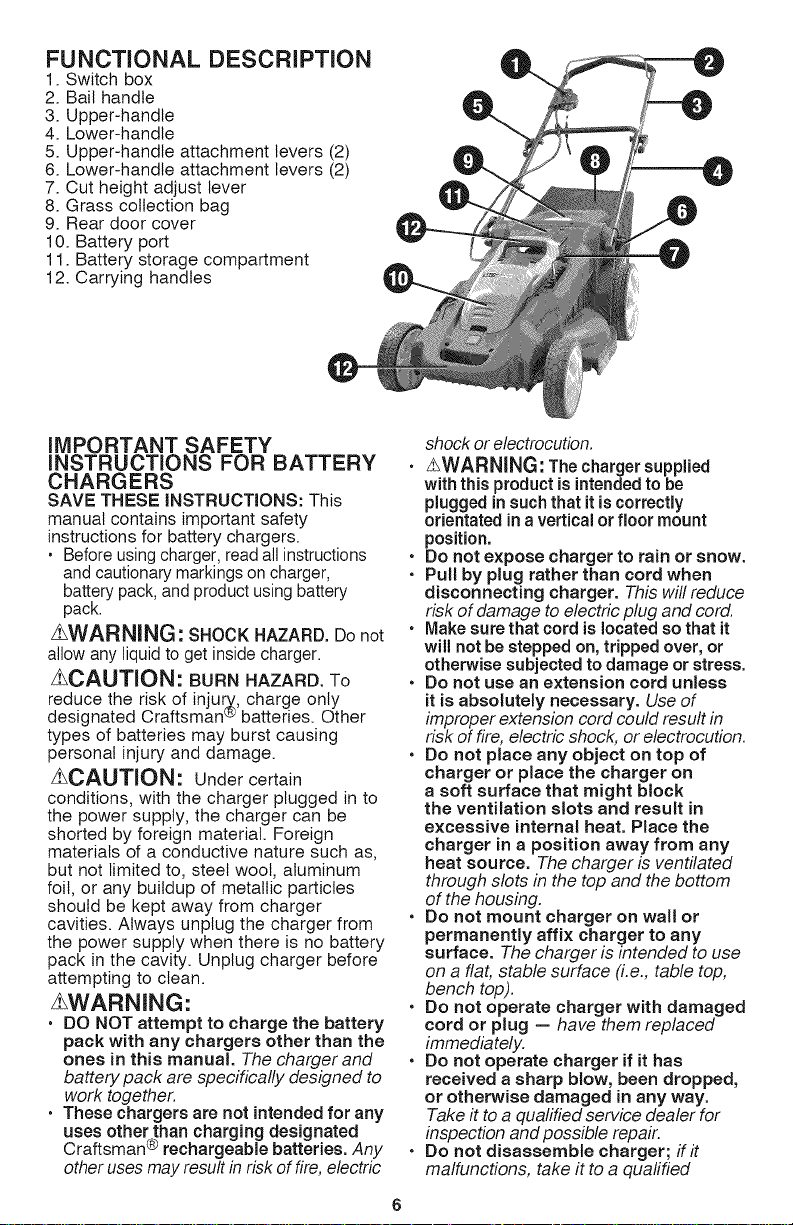
FUNCTIONAL DESCRiPTiON
1. Switch box
2. Bail handle
3. Upper-handle
4. Lower-handle
5. Upper-handle attachment levers (2)
6. Lower-handle attachment levers (2)
7. Cut height adjust lever
8. Grass collection bag
9. Rear door cover
10. Battery port
11. Battery storage compartment
12. Carrying handles
IMPORTANT SAFETY
INSTRUCTIONS FOR BATTERY
CHARGERS
SAVE THESE iNSTRUCTiONS: This
manual contains important safety
instructions for battery chargers.
• Before using charger, read all instructions
and cautionary markings on charger,
battery pack, and product using battery
pack.
z_WARNING: SHOCK HAZARD. Do not
allow any liquid to get inside charger.
zhCAUTION: BURNHAZARD.To
reduce the risk of injur_, charge only
designated Craftsman batteries. Other
types of batteries may burst causing
personal injury and damage.
z_OAUTION: Under certain
conditions, with the charger plugged in to
the power supply, the charger can be
shorted by foreign material. Foreign
materials of a conductive nature such as,
but not limited to, steel wool, aluminum
foil, or any buildup of metallic particles
should be kept away from charger
cavities. Always unplug the charger from
the power supply when there is no battery
pack in the cavity. Unplug charger before
attempting to clean.
_WARNING:
• DO NOT attempt to charge the battery
pack with any chargers other than the
ones in this manual. The chargerand
battery pack are specifically designed to
work together.
• These chargers are not intended for any
uses other than charging designated
Craftsman ® rechargeable batteries. Any
other uses may result in risk of fire, electric
shock or electrocution.
• z_WARNING: The charger supplied
with this product is intended to be
plugged in such that it iscorrectly
orientated in a vertical or floor mount
position.
• Do not expose charger to rain or snow.
• Pull by plug rather than cord when
disconnecting charger. This will reduce
risk of damage to electric plug and cord.
• Make sure that cord is located so that it
will not be stepped on, tripped over, or
otherwise subjected to damage or stress.
• Do not use an extension cord unless
it is absolutely necessary. Use of
improper extension cord could result in
risk of fire, electric shock, or electrocution.
• Do not place any object on top of
charger or place the charger on
a soft surface that might btock
the ventilation slots and result in
excessive internal heat. Place the
charger in a position away from any
heat source. The charger is ventilated
through slots in the top and the bottom
of the housing.
• Do not mount charger on wall or
permanently affix charger to any
surface. The charger is intended to use
on a flat, stable surface (i.e., table top,
bench top).
• Do not operate charger with damaged
cord or plug -- have them replaced
immediately.
• Do not operate charger if it has
received a sharp btow, been dropped,
or otherwise damaged in any way.
Take it to a qualified service dealer for
inspection and possible repair.
• Do not disassemble charger; if it
malfunctions, take it to a quafified
Page 7
servicedealerfor inspection and
possible repair. Incorrect reassembly
may result in a risk of electric shock;
electrocution or fire.
• Disconnect the charger from the
outlet before attempting any cleaning.
This will reduce the risk of electric
shock: Removing the battery pack will
not reduce this risk:
• NEVER attempt to connect 2 chargers
together.
• The charger is designed to operate on
standard household electrical power
(120 Volts). Do not attempt to use it on
any other voltage.
IMPORTANT SAFETY
INSTRUCTIONS FOR
BATTERY PACKS
z_WARNING" For safe operation, read
this manual and manuals originally
supplied with tool before using the charger.
The battery pack is not fully charged out
of the carton. Before using the battery
pack and charger, read the safety
instructions below. Then follow charging
procedures outlined.
READ ALL INSTRUCTIONS
• Do not incinerate the battery pack
even if it is severely damaged or
is completely worn out. The battery
pack can explode in a fire. Toxic fumes
and materials are created when battery
packs are burned.
• Do not charge or use battery in explosive
atmospheres, such as in the presence
of flammable liquids, gases or dust.
Inserting or removing the battery from the
charger may ignite the dust or fumes.
• if battery contents come into contact
with the skin, immediately wash area
with mild soap and water, ffbattery liquid
gets into the eye, rinse water over the open
eye for 15 minutes or until irritation ceases.
Ifmedical attention is needed, the battery
electrolyte for Li-ion batteries is composed
of a mixture of liquidorganic carbonates
and lithiumsalts.
• Contents of opened battery cells may
cause respiratory irritation. Provide
fresh air. If symptoms persist, seek
medical attention.
_WARNING: BURN HAZARD.
BATTERY LIQUID MAY BE FLAMMABLE
IF EXPOSED TO SPARK OR FLAME.
• Charge the batterypacks only in
Craftsman @chargers.
• DO NOT splash or immerse in water or
other liquids. This may cause premature
cell failure.
• Do not store or use the tool and
battery pack in locations where the
temperature may reach or exceed
105°F (40°C) (such as outside sheds or
metal buildings in summer).
z_WARNING: Never attempt to open the
battery pack for any reason. If battery pack
case is cracked or damaged, do not insert into
charger. Do not crush, drop or damage
battery pack: Do not use a battery pack or
charger thathas received a sharp blow, been
dropped, run over or damaged in any way
(i.e., pierced with a nail, hit with a hammer,
stepped on). Damaged battery packs should
be returned to a service center for recycling.
zhWARNING: Fire hazard. Do not
store or carry battery so that metal
objects can contact exposed battery
terminals. For example, do not place
battery in aprons, pockets, tool boxes,
product kit boxes, drawers, etc., with loose
nails, screws, keys, etc. Transporting
batteries can possibly cause fires if the
battery terminals inadvertently come in
contact with conductive materials such
as keys, coins, hand tools and the like.
The US Department of Transportation
Hazardous Material Regulations (HMR)
actually prohibit transporting batteries in
commerce or on airplanes (i.e., packed in
suitcases and carry-on luggage) UNLESS
they are properly protected from short
circuits. So when transporting individual
batteries, make sure that the battery
terminals are protected and well insulated
from materials that could contact them and
cause a short circuit.
NOTE: Batteries should not be put in
checked baggage.
STORAGE RECOMMENDATIONS
1. The best storage place is one that is
cool and dry away from direct sunlight
and excess heat or cold.
2. Long-term storage wilt not harm the
battery pack or the charger as long as the
battery is not depleted..
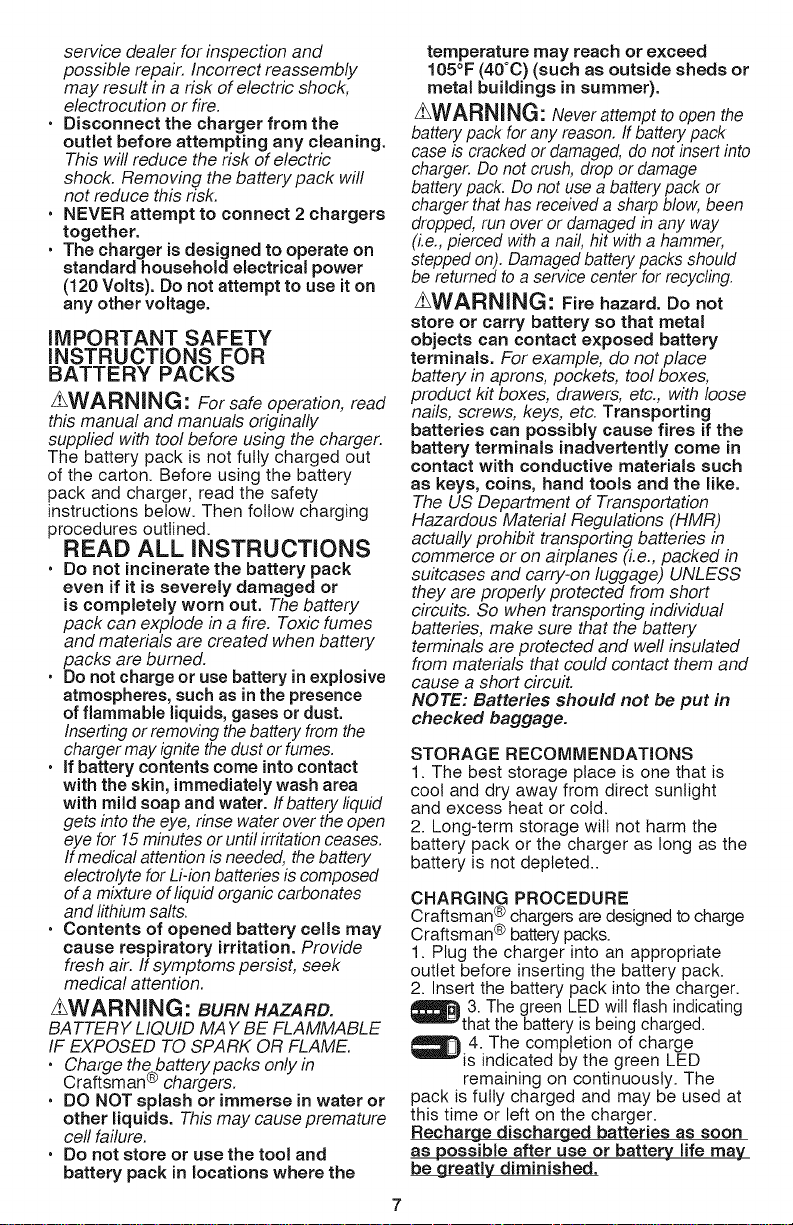
CHARGING PROCEDURE
Craftsman @chargers are designed to charge
Craftsman @batterypacks.
1. Plug the charger into an appropriate
outlet before inserting the battery pack.
2. Insert the battery pack into the charger.
_3. The green LED will flash indicating
that the battery is being charged.
_4. The completion of charge
is indicated by the green LED
remaining on continuously. The
pack is fully charged and may be used at
this time or left on the charger.
Recharge discharged batteries as soon
as possible after use or battery life may_
be greatly diminished.
Page 8

CHARGER DIAGNOSTICS
This charger is designed to detect certain
problems that can arise with the battery packs
or the power source. Problems are indicated
byone LED flashing in different patterns.
BAD BATTERY
_The charger can detect a weak
or damaged battery. The red LED
flashes in the pattern indicated on the
label. If you see this bad battery blink
pattern, do not continue to charge the
battery. Return it to a service center or a
collection site for recycling.
HOT/COLD PACK DELAY
_When the charger detects a battery
that is excessively hot or excessively
cold, it automatically starts a Hot/Cold
Pack Delay, suspending charging until the
battery has normalized. After this happens,
the charger automatically switches to the
Pack Charging mode. This feature ensures
maximum battery life. The red LED flashes
in the pattern indicated on the label when
the hot / cold pack delay is detected.
IMPORTANT CHARGING NOTES
1. Longest life and best performance can
be obtained if the battery pack is charged
when the air temperature is between 60°F
and 80°F (16°- 27°C). DO NOT charge
the battery pack in an air temperature
below +40°F (+4.5°C), or above +105°F
(+40.5°C). This is important and will
prevent serious damage to the battery
pack.
2. The charger and battery pack may
become warm to touch while charging.
This is a normal condition, and does
not indicate a problem. To facilitate the
cooling of the battery pack after use,
avoid placing the charger or battery pack
in a warm environment such as in a metal
shed, or an uninsutated trailer.
3. If the battery pack does not charge properly:
a. Check current at receptacle by
plugging ina lamp or other appliance
b. Check to see if receptacle is
connected to a light switch which
turns power off when you turn out
the lights.
c. Move charger and battery pack
to a location where the surrounding
air temperature is approximately 6O°F
_80OF (16° - 27°C).
d. If charging problems persist, take
the tool, battery pack and charger
to a qualified service center for
inspection and possible repair.
4. The battery pack should be recharged
when it fails to produce sufficient power on
jobs which were easily done previously.
DO NOT CONTINUE to use under these
conditions. Follow the charging procedure.
You may also charge a partially used pack
whenever you desire with no adverse
affect on the battery pack.
5. Foreign materials of a conductive
nature such as, but not limited to, steel
wool, aluminum foil, or any buildup of
metallic particles should be kept away
from charger cavities. Always unplug the
charger from the power supply when there
is no battery pack in the cavity. Unplug
charger before attempting to clean.
6. Do not freeze or immerse charger in
water or any other liquid.
zLWARNING: SHOCK HAZARD. Do not
allow any liquid to get inside charger. NEVER
ATTEMPT TOOPEN THE BATTERY PACK
FOR ANY REASON. IF THE PLASTIC
HOUSING OF THE BATTERY PACK
BREAKS OR CRACKS, RETURN TOA
SERVICE CENTER FOR RECYCLING.
STATE OF CHARGE iNDiCATOR
The battery is equipped with a state
of charge indicator. This can be used
to display the current level of charge
in the battery while in the mower and
during charging. It does not indicate
tool functionality and is subject to
variation based on product components,
temperature and end-user application.
Checking state of charge during use:
• Press the state of charge indicator
button (A1).
• The four LEDs (A2) will illuminate
indicating the percent of charge in the
battery. See chart in figure A.
• If LED light does not illuminate, charge
battery.
:::::::::::::::::::::::::::::::::
Page 9

iNSTALLiNG AND REMOVING THE
BATTERY PACK
z_WARNING: MAKE CERTAIN THE
SAFETY KEY IS REMOVED TO
PREVENT ACTUATION BEFORE
REMOVING OR INSTALLING BATTERY.
TO INSTALL BATTERY PACK:
• Depress the battery port cover release
button (14) and pull the battery port cover
(15) up to expose the battery port (10) as
shown in figure B.
• Slide the battery (16) into the battery
port until it is fully seated and an audible
click is heard (figure C). Make sure
battery pack is fully seated and fully
latched into position.
• Close the battery port cover. Ensure the
cover is fully latched before starting mower.
BATTERY STORAGE
An extra battery can be stored using the
battery storage compartment (11).
• Lift the storage compartment cover and
slide the battery into the compartment
as shown in Figure E. Battery in this
compartment will not actuate the mower.
ASSEMBLY
Z_WARNING: Before assembly make
sure the ba hande s re eased and the
safety key is removed.
ATTACHING LOWER HANDLE
• Lift lower handle (4) into place making
sure the arrow (18) on the base of the
mower lines up with 1 or 2 on the base of
the handle (19) (inset of Figure F)
Z_CAUTION: Ensure each side of the lower
handle is set on the same number. The arrow
must be lined up with 1 or 2 for operation.
• Close the handle height adjust levers
(7) as shown in Figure F. As you close
each, make sure the teeth are engaged
as shown in Figure G.
• If the connection between the handle
and lever is too tight or loose open the
lever and adjust tSe depth of the lever
by turning the lever. Close it again until
the teeth are fully clasped and each
lever stays securely closed.
TO REMOVE BATTERY PACK:
• Open the battery port cover (15) as
described above.
• Depress the battery release button (17) on
the battery pack and pull battery pack out
of tool as shown infigure D.
Page 10
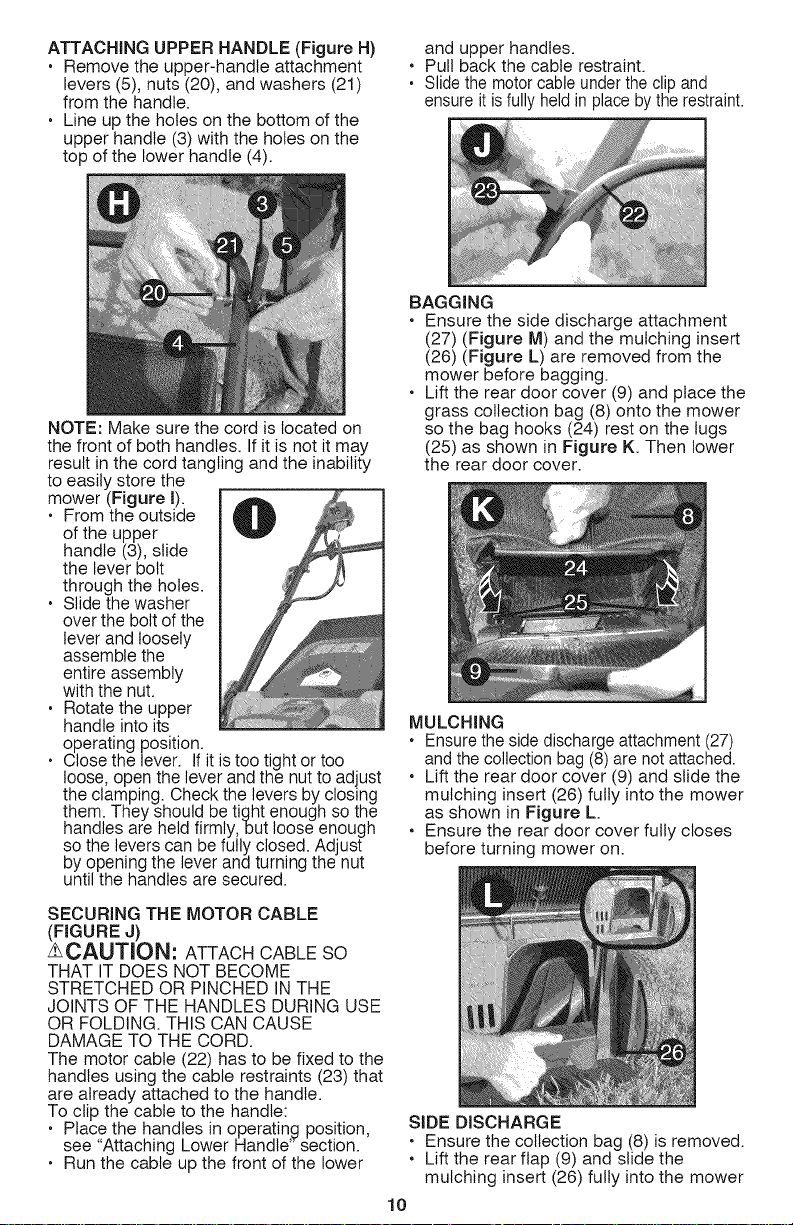
ATTACHING UPPER HANDLE (Figure H)
• Remove the upper-handle attachment
levers (5), nuts (20), and washers (21)
from the handle.
• Line up the holes on the bottom of the
upper handle (3) with the holes on the
top of the lower handle (4).
NOTE: Make sure the cord is located on
the front of both handles. If it is not it may
result in the cord tangling and the inability
to easily store the
mower (Figure I).
• From the outside
of the upper
handle (3), slide
the lever bolt
through the holes.
• Slide the washer
over the bolt of the
lever and loosely
assemble the
entire assembly
with the nut.
• Rotate the upper
handle into its
operating position.
• Close the lever. If it is too tight or too
loose, open the lever and the nut to adjust
the clamping. Check the levers by closing
them. They should be tight enough so the
handles are held firmly,but loose enough
so the levers can be fully closed. Adjust
by opening the lever and turning the nut
until the handles are secured.
SECURING THE MOTOR CABLE
(FIGURE J)
zLCAUTION: ATTACH CABLE SO
THAT IT DOES NOT BECOME
STRETCHED OR PINCHED IN THE
JOINTS OF THE HANDLES DURING USE
OR FOLDING. THIS CAN CAUSE
DAMAGE TO THE CORD.
The motor cable (22) has to be fixed to the
handles using the cable restraints (23) that
are already attached to the handle.
To clip the cable to the handle:
• Place the handles in operating position,
see "Attaching Lower Handle" section.
• Run the cable up the front of the lower
and upper handles.
• Pull back the cable restraint.
. Slide the motorcable under theclip and
ensure it isfully held in place by the restraint.
BAGGING
• Ensure the side discharge attachment
(27) (Figure M) and the mulching insert
(26) (Figure L) are removed from the
mower before bagging.
• Lift the rear door cover (9) and place the
grass collection bag (8) onto the mower
so the bag hooks (24) rest on the lugs
(25) as shown in Figure K. Then lower
the rear door cover.
MULCHING
• Ensure the side discharge attachment (27)
and the collection bag (8) are not attached.
• Lift the rear door cover (9) and slide the
mulching insert (26) fully into the mower
as shown in Figure L
• Ensure the rear door cover fully closes
before turning mower on.
SIDE DISCHARGE
• Ensure the collection bag (8) is removed.
• Lift the rear flap (9) and slide the
mulching insert (26) fully into the mower
10
Page 11
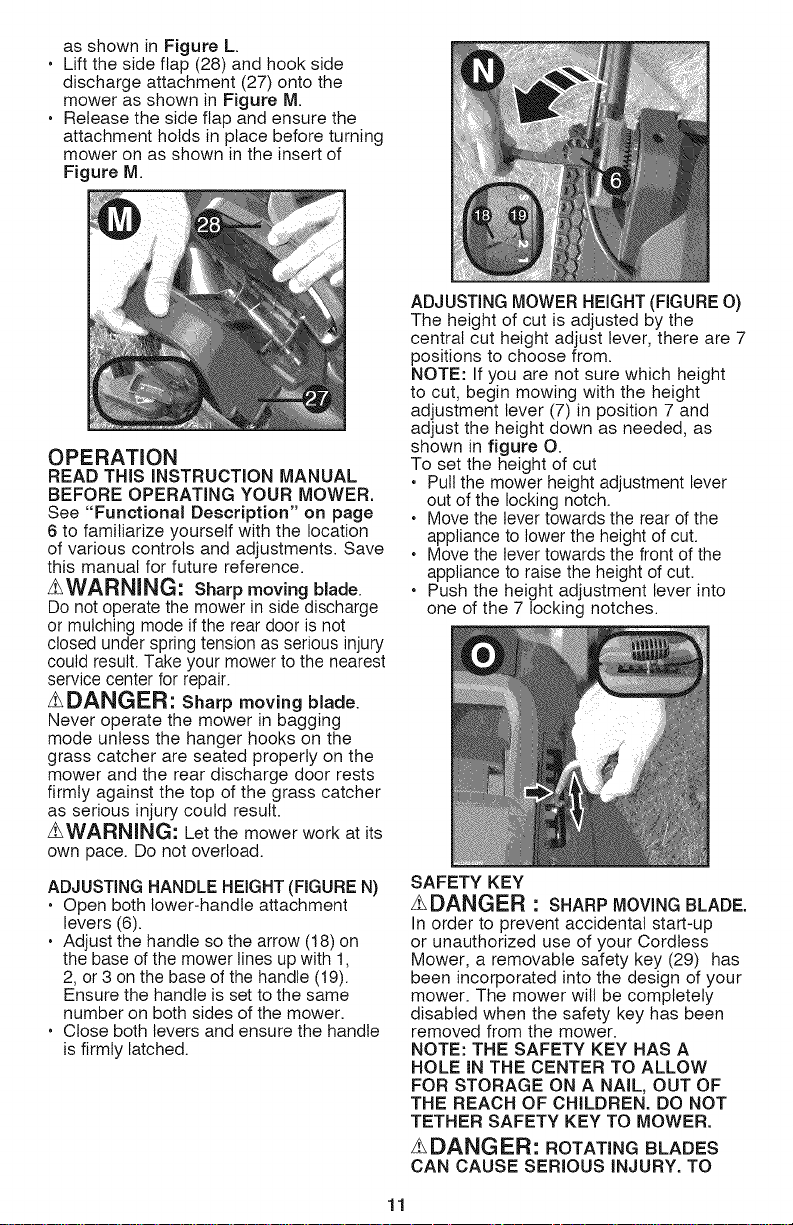
asshowninFigureL
• Liftthesideflap(28)andhookside
dischargeattachment(27)ontothe
mowerasshowninFigureM.
• Release the side flap and ensure the
attachment holds in place before turning
mower on as shown in the insert of
Figure M.
OPERATION
READ THIS iNSTRUCTION MANUAL
BEFORE OPERATING YOUR MOWER.
See "Functional Description" on page
6 to familiarize yourself with the location
of various controls and adjustments. Save
this manual for future reference.
zLWARNING: Sharp moving blade.
Do not operate the mower in side discharge
or mulching mode if the rear door is not
closed under spring tension as serious injury
could result. Take your mower to the nearest
service center for repair.
2_DANGER: Sharp moving blade.
Never operate the mower in bagging
mode unless the hanger hooks on the
grass catcher are seated properly on the
mower and the rear discharge door rests
firmly against the top of the grass catcher
as serious injury could result.
z_WARNING: Let the mower work at its
own pace. Do not overload.
ADJUSTING HANDLE HEIGHT (FIGURE N)
• Open both lower-handle attachment
levers (6).
• Adjust the handle so the arrow (18) on
the base of the mower lines up with 1,
2, or 3 on the base of the handle (19).
Ensure the handle is set to the same
number on both sides of the mower.
• Close both levers and ensure the handle
is firmly latched.
ADJUSTING MOWER HEIGHT (FIGURE O)
The height of cut is adjusted by the
central cut height adjust lever, there are 7
positions to choose from.
NOTE: If you are not sure which height
to cut, begin mowing with the height
adjustment lever (7) in position 7 and
adjust the height down as needed, as
shown in figure O.
To set the height of cut
• Pull the mower height adjustment lever
out of the locking notch.
• Move the lever towards the rear of the
appliance to lower the height of cut.
• Move the lever towards the front of the
appliance to raise the height of cut.
• Push the height adjustment lever into
one of the 7 locking notches.
SAFETY KEY
zLDANGER • SHARP MOVING BLADE.
In order to prevent accidental start-up
or unauthorized use of your Cordless
Mower, a removable safety key (29) has
been incorporated into the design of your
mower. The mower wilt be completely
disabled when the safety key has been
removed from the mower.
NOTE: THE SAFETY KEY HAS A
HOLE iN THE CENTER TO ALLOW
FOR STORAGE ON A NAIL, OUT OF
THE REACH OF CHILDREN. DO NOT
TETHER SAFETY KEY TO MOWER.
zLDANGER: ROTATING BLADES
CAN CAUSE SERIOUS iNJURY. TO
11
Page 12

PREVENT SERIOUS iNJURY, REMOVE
SAFETY KEY WHEN UNATTENDED,
OR WHEN CHARGING, CLEANING,
SERViCiNG, TRANSPORTING,
LiFTiNG, OR STORING MOWER.
STARTING MOWER
_DANGER: SHARP MOVING BLADE.
NEVER ATTEMPT TO OVERRIDE THE
OPERATION OF THiS SWITCH BOX AND
SAFETY KEY SYSTEM AS SERIOUS
iNJURY COULD RESULT.
• Insert safety key (29) into the switch
housing until it is fully seated inside
housing as shown in Figure P. The
mower is now operational.
• Your mower is equipped with a special
on-off switch box. To operate the mower,
push the button (30) on the switch box
(1), then pull the bail handle (2) to the
handlebar as shown in Figure Q.
grass at one time. Stow down your cutting
pace, or raise the cut height.
STORAGE
2_DANGER: Rotatingblade can
cause serious injury. Release BAIL
HANDLE (2) to turn mower off and
remove battery before lifting, transporting,
or storing the mower. Store in a dry
place.
z_CAUTION: PINCHPOINT.TO
AVOID BEING PINCHED, KEEP
FINGERS AWAY FROM AREA
BETWEEN HANDLES WHEN FOLDING
DOWN HANDLES.
zLCAUTION" MAKE SURE CORD
DOES NOT BECOME STRETCHED OR
PINCHED IN THE JOINTS OF THE
HANDLES DURING FOLDING. THIS
CAN CAUSE DAMAGE TO THE CORD.
The handle of the mower can be easily
folded down for quick and convenient
storage.
• Holding onto the handle, open, but do not
remove, the Lower-handle attachment
levers (6) and fold the handle to the front
of the mower as shown in Figure R.
• To turn the mower off, just release the
bait handle.
z_WARNING: Never attempt to lock a
switch or bail handle in the on position.
NOTE: Once the bail handle has returned
to the original position it will activate
the "Automatic Braking Mechanism".
The motor is electrically braked and
the mower blade will stop rotating in 3
seconds or less.
MOWER OVERLOAD
To prevent damage due to overload
conditions, do not try to remove too much
• Open, but do not remove, the upper-
handle attachment levers (5) and fold
the upper handle (3) back over the lower
handle (4) as shown in Figure S.
12
Page 13

• The mower shold be compacted down as
shown in Figure T.
CARRYING THE MOWER
ZLDANGER: ROTATING BLADES
CAN CAUSE SERIOUS INJURY.TO
PREVENT SERIOUS iNJURY, REMOVE
SAFETY KEY WHEN UNATTENDED,
OR WHEN CHARGING, CLEANING,
SERViCiNG, TRANSPORTING, LiFTiNG,
OR STORING MOWER.
• The mower can be carried using the
convenient carry handles (12) as shown
in Figure U. DO NOT attempt to lift the
mower by grasping the upper handle (3)
or lower handle (4).
MOWING TIPS
zLWARNING: ALWAYS INSPECT
AREA WHERE MOWER IS TO BE USED
AND REMOVE ALL STONES, STICKS,
WIRE, BONES, AND OTHER DEBRIS
WHICH MIGHT BE THROWN BY THE
ROTATING BLADE.
1.2_WARNING: Mow across the face
of slopes, never up-and-down. Exercise
extreme caution when changing
direction on slopes. Do not mow
excessively steep slopes. Always
maintain good footing.
2. Release bail handle to turn mower
"OFF" when crossing any gravel area
(stones can be thrown by the blade).
3. Set mower at highest cutting height
when mowing in rough ground or in
tall weeds. Removing too much grass
at one time can cause the motor to
be overloaded and to stop. Refer to
troubleshooting guide.
4. If a grass collection bag (8) is used
during the fast growing season, the grass
may tend to clog up at the discharge
opening. Release bail handle to turn
mower off and remove the safety key.
Remove the catcher and shake the grass
down to the back end of the bag. Also
clean out any grass or debris which may
be packed around the discharge opening.
Replace the grass catcher.
5. If mower should start to vibrate
abnormally, release bail handle to turn
mower off and remove safety key. Check
immediately for cause. Vibration is a
warning of trouble. Do not operate mower
until a service check has been made.
Refer to troubleshooting guide in manual.
6. ALWAYS RELEASE BAIL HANDLE
TO TURN MOWER OFF AND
REMOVE SAFETY KEY WHEN
LEAVING iT UNATTENDED EVEN
FOR A SHORT PERIOD OF TIME.
THE FOLLOWING SUGGESTIONS
WiLL HELP YOU TO OBTAIN OPTIMUM
RUN TiME FROM YOUR CORDLESS
MOWER:
1. Slow down in areas where the grass is
especially long or thick.
2. Avoid mowing when the grass is wet
from rain or dew-soaked.
3. Cut your lawn frequently, especially
during high growth periods.
NOTE: it is recommended that your
mower be recharged after use to
prolong the battery life. Frequent
charging will not harm your battery,
and will ensure that the battery is fully
charged and ready for its next use.
Storing battery not fully charged will
shorten battery life.
REMOVING AND INSTALLING
BLADE
i_DANGER: Risk of injury. When
reassembling the blade system, ensure
each part is reinstalled correctly, as
described below. Improper assembly of the
blade or other parts of the blade system
may cause serious injury.
1. /_WARNING: RELEASE BAIL
HANDLE TO TURN MOWER OFF,
WAIT FOR THE BLADE TO STOP,
AND REMOVE SAFETY KEY AND
BATTERY PACK.
2. Cut a piece of 2x4 wood (31) (about 2
feet long) (610 mm) to keep blade from
turning while removing bolt (32).
3. Wear gloves and proper eye protection.
Turn the mower on its side. Be careful
of sharp edges of blade. Position wood
and unscrew bolt with1/2" wrench (33)
as shown in Figure V.
13
Page 14

4. Removeboltandwasher(34).Putt
offblade(35)asshowninFigureW.
Thefan(36)shouldnotberemoved.
Examineallpiecesfordamageand
replaceifnecessary.
5.Thebladecanonlybeattachedtothe
faninonedirection.Toreassemble,line
uptheD-shapedholeofthebladewith
theD-shapedpostofthefan,ensuring
thewritingonthebladefacesoutaway
fromthemower.
6.Totightenfirmly,positionthepieceof
woodasshowninFigureXtokeep
thebladefromturning.Slidethebolt
throughthewasherandscrewboltinto
place.Tightenwiththewrench.
BLADE SHARPENING
KEEP BLADE SHARP FOR BEST MOWER
PERFORMANCE. A DULL BLADE DOES
NOT CUT GRASS CLEANLY.
USE PROPER EYE PROTECTION
WHILE REMOVING, SHARPENING,
AND INSTALLING BLADE. ENSURE
THAT SAFETY KEY AND BATTERY
PACK IS REMOVED.
Sharpening the blade twice during a
mowing season is usually sufficient under
normal circumstances. Sand causes the
blade to dull quickly. If your lawn has
sandy soil, more frequent sharpening
may be required.
REPLACE BENT OR DAMAGED BLADE
IMMEDIATELY.
WHEN SHARPENING THE
BLADE:
1. Make sure blade remains balanced.
2. Sharpen blade at the original cutting
angle.
3. Sharpen cutting edges on both ends
of blade, removing equal amounts of
material from both ends.
TO SHARPEN BLADE iN A VISE:
(Figure Y)
1. Be sure the bail handle is released,
the blade has stopped and safety
key and battery pack removed before
removing the blade.
2. Remove blade from mower. See
instructions for removing and installing
blade.
3. Secure blade (35) in a vise (38).
4. Wear proper eye protection and gloves
and be careful notto cut yourself.
5. Carefully file the cutting edges of
the blade with a fine tooth file (39)
or sharpening stone, maintaining the
angle of the original cutting edge.
6. Check balance of blade. See
instructions for blade balancing.
7. Replace blade on mower and tighten
securely.
14
Page 15

BLADE BALANCING (Figure Z)
Check balance of the blade (35) by
placing center hole in the blade over a
nail or round shank screwdriver (40),
clamped horizontally in a vise (38). If
either end of the blade rotates downward,
file along the sharp edge of that dropping
end. Blade is properly balanced when
neither end drops.
LUBRICATION
No lubrication is necessary. Do not oil
the wheels. They have plastic bearing
surfaces which require no lubrication.
CLEANING
Release bait handle (2) to turn mower
off, let the blade come to a stop and then
remove safety key. Use only mild soap
and a damp cloth to clean the mower.
Clean out any clippings which may
have accumulated on the underside of
the deck. After several uses, check all
exposed fasteners for tightness.
PREVENTING CORROSION
Fertilizers and other garden chemicals
contain agents which greatly accelerate
the corrosion of metals. If you mow in
areas where fertilizers or chemicals have
been used, the mower should be cleaned
immediately afterward as follows:
Release bail handle (2) to turn mower off
and unplug mower. Wipe all exposed parts
with a damp cloth.
Z_CAUTION: DO NOT POUR OR
SPRAY WATER ON THE MOWER IN AN
ATTEMPT TO CLEAN IT. Do not store the
tool on or adjacent to fertilizers or chemicals.
Such storage can cause rapid corrosion.
MEETS CPSC SAFETY
REQUIREMENTS
Craftsman ® Mowers conform to the
safety standards of the American
National Standards Institute, and the U.S.
Consumer Product Safety Commission.
The Blade turns when the motor is running.
MAINTENANCE
IMPORTANT: To assure product
SAFETY and RELIABILITY, repairs,
maintenance and adjustment should be
performed by qualified service dealers,
always using identical replacement parts.
ACCESSORIES
_WARNING" The use of accessories
not recommended in this manual may be
hazardous.
• Replacement blade is available. Use
replacement blade 5140161-49.
THE RBRC TM SEAL
The RBRC TM (Rechargeable
Battery Recycling Corporation)
Seal on the LI-ION battery (or
battery pack) indicates that the
costs to recycle the battery (or battery
pack) at the end of its useful life have
already been paid by Craftsman ®.
RBRC TM in cooperation with Craftsman @
and other battery users, has established
programs in the United States to facilitate
the collection of spent LI-ION batteries.
Help protect our environment and
conserve natural resources by returning
the spent LI-ION battery to an authorized
Craftsman ® service center or to your
local retailer for recycling. You may also
contact your local recycling center for
information on where to drop off the spent
battery. RBROTM is a registered trademark
of the Rechargeable Battery Recycling
Corporation.
15
Page 16

Item Qty Part Number Part Description
No Per
2 1 5140161_07 COVER
3 2 5140161_08 GASKET
4 1 5140161_09 LOWER COVER
5 1 5140161-10 SELF TAPPING
6 4 5140161-11 HANDLE
7 4 5140149_65 SPRING PIN
8 2 5140161-12 PLATE
9 1 5140161-13 LOWER HANDLE
t0 2 5140149-67 CLAMP LEVER
tl 4 5140161-14 PAD
t2 2 5140161-15 KNOB
t3 4 5140149-71 HEX NUT
14 1 5140149-58 WIRE PIE
15 1 5140161-16 BAG
16 1 5140161_17 GRASS CATCHER
17 2 5140161_18 QUICK CLAMP
18 2 5140161-19 SHAFT
19 2 5140161-20 ADJUSTING GEAR
20 2 5140161-21 WHEEL COVER
21 4 5140161-22 RETAINING RING
22 8 5140161-23 COLLAR
23 2 5140161-24 REAR WHEEL
24 1 5140161-25 REAR AXLE
25 2 5140161-26 WHEEL PLATE
26 28 5140161_27 SELF TAPPING
27 6 5140150-12 WHEEL SHAFT ASSY
28 2 5140161-28 SELF TAPPING
29 2 5140161-29 FIXED PLATE
30 1 5140161-30 SOFT PLATE
31 2 5140161-31 COMBINATION
32 1 5140161-32 BLOCK
33 1 5140161-33 FIXED GEAR
34 2 5140161-34 WASHER
35 1 5140161-35 FIXED GEAR
SCREW
SCREW
SCREW
SCREW
Item Qty Part Number Part Description
No Per
36 4 5140161_36 SELF TAPPING
37 1 5140161-37 CORD CLAMP
38 9 5140161-38 SELF TAPPING
39 4 5140158-91 SCREW
40 1 5140161-39 GUIDE PLATE
41 1 5140161*40 AXLE
42 1 5140161.41 LOCK WASHER
43 1 5140161*42 RUBBER CAP
44 1 5140161*43 TORSION SPRING
45 1 5140161*44 SIDE COVER
46 1 5140161*45 SIDE
47 1 5140161-46 SIDE PANEL
48 1 5140161-47 HOUSING
49 1 5140150-01 FAN
50 1 5140161-48 PLATE
51 1 5140161*49 BLADE
52 1 5140150-06 BLADE CLAMP
53 1 5140150_07 BLADE BOLT
54 2 5140161_50 FRONT COVER
55 2 5140161-51 WHEEL
56 1 5140161-52 FRONT AXLE
57 2 5140161-53 PLATE
58 3 5140150-31 SCREW
59 1 5140161-54 MOTOR ASSEMBLY
60 2 5140150-30 CLAMP HANDLE
61 1 5140161-55 BATTERY CONTROLLER
62 1 5140161-56 BUTTON BLOCK
63 1 5140161-57 WEDGE PLATE
64 1 5140150*43 SWITCH BUTTON
65 1 5140161-58 BRACKET
66 1 5140161-59 PUSH-BUTTON
67 2 5140161-60 BATTERY PACK
68 1 5140161-61 COVER
SCREW
SCREW
SWITCH
FLANGE HEAD
SCREW
item Qty Part Number Part Description
No Per
70 2 5140150*45 ANTILQCK SPRING
71 1 5140150_37 CLAMP
72 2 5140150_39 TERMINAL
73 1 5140161-63 LEADWIRE
74 1 5140161-64 LEADWIRE
75 1 5140161-65 SOFT BOARD
76 1 5140161-66 PLATE
77 2 5140161-67 SELF TAPPING
78 1 5140161-68 FRONT CONNECTING
79 4 5140161-69 SELF LOCK NUT
80 1 5140161-70 SUPPORT PLATE
81 1 5140161-71 ROD
82 1 5140161-72 TORSION SPRING
83 1 5140161-73 COTTER PIN
84 1 5140161-74 CONNECTING ROD
85 1 5140161-75 TENSION SPRING
86 1 5140161-76 GASKET
87 1 5140161_77 SCREW
88 1 5140161_78 HANDLE
89 1 5140161W9 COVER
90 1 5140161-80 BATTERY COVER
91 1 5140161-81 SUPPORT ROD
92 1 5140161-82 HANDLE
93 1 5140161-83 COVER
94 1 5140161-84 BATTERY BOX
95 1 5140161-85 CHARGER
96 2 5140161-86 CIRCLIP
97 1 5140161_87 SHAFT
98 1 5140161-88 TORSION SPRING
99 1 5140161-89 COVER
100 1 5140161_90 PLATE
101 4 5140161-91 SCREW
102 2 5140161-92 SELF TAPPING
201 1 5140160_97 SWITCH BQXASSY
211 1 5140149-38 HANDLE COVER
SCREW
ROD
SCREW
Item Qty Part Number Part Description
212 1 5140160_98 HANDLE
213 1 5140160_99 BUTTON
214 1 5140149-41 SPRING
215 1 5140161-00 COVER
216 1 5140161-01 SWITCH CABLE
217 1 5140161-02 TRIGGER BUTTON
218 1 5140149-46 TRIGGER BUTTON
219 1 5140149-42 BUTTON
220 1 5140149-43 SCREW
22I 1 5140149-51 SCREW
222 1 514014%50 HOOK pLATE
223 1 514014%54 HEX NUT
224 1 5140149-52 TORSION SPRING
225 1 5140161-03 GUIDE
226 1 5140149-61 CABLE
227 1 5140149-57 CONNECTOR-WIRE
228 1 5140149-59 CABLE
229 4 5140149-47 SELF TAPPING
230 1 5140149-48 CLAMP
231 2 5140149-60 BUSHING
232 1 5140149-56 HEAT SHRINK
233 1 5140161-04 LOWER COVER
234 1 5140149-55 CABLE CLAMP
235 8 5140149-49 SELF TAPPING
236 1 5140161-05 KEY BOX ASSY.
237 1 5140161-06 KEY STRAP
SCREW
SLEEVE
SCREW
Page 17

201
21"
212
2
F3 4
92
98
38
95
89
15
94
1
88
77
7,3
72
71
35
23
2O
29
28
33
36
59
58
65
63
6S i
38
67
26
Page 18

PROBLEM
1. Mower doesn't run when bail handle is activated.
2. Motor stops while mowing.
3. Mower runs but cutting performance is unsatisfactory,
or does not cut entire/awn.
4. Mower is too hard to push.
5. Mower is abnormally noisy and vibrates.
6. Battery charger LEDs not on.
7. Mower not picking up clippings with bag.
TROUBLESHOOTING
SOLUTION
A. Check to make sure safety key has been installed and is fully seated and that
button on switch housing is being completelydepressed before pullingbail handle.
B. Release bail handle to turn mower off. Remove safety key andbattery
pack, turn mower over and check that blade is free to turn.
C. Check that the battery port is free of debris and is connected properly.
D. Has battery been fully charged? Plug in charger and wait for green light to come on.
A. Release bail handle to turn mower off. Remove safety key and battery
pack. Turn mower over and check that blade is free to turn.
B. Raise cutting height of wheels to highest position and start mower.
C. Check that the battery port is free o7debris and is connected properly.
D. Has battery been fully charged? Press state of charge button.
E.Avoid overloadinq the mower. Slow down the cuttinq pace, or raise the cut heiqht.
A. Has battery been fully charged? Press state of charge button.
B. Release bail handle to turn mower off. Remove safdty key key and battery
pack. Turn mower over and check:
Blade for sharpness - Keep blade sharp.
Deck and discharge chute for clogging.
C. Wheel height adjustment may be settoo low for grass condition. Raisecutting height.
A. Release bail handle to turn mower off. Remove safety key and battery
pack. Raise cutting height to reduce deck drag on grass. Check each wheel
for free rotation.
A. Release bail handle to turn mower off. Remove safety key and battery
pack. Turn mower on side and check blade to ensure it has not been bent or
damaged. If blade is damaged, replace with a Craftsman ® replacement blade.
If the underside of the deck is damaged, take the mower to a qualified service
dealer for inspection and possible repam
B. If there is no visible damage to the blade and the mower still vibrates: Release
bail handle to turn mower off. Remove safety key and battery pack. Disassemble
entire blade assembly as described in the "Removing and Installing Blade"
section. Remove any debris and clean each piece. Replace each piece as
described in the "Removing and Installing Blade" section. If mower still vibrates,
take the mower to a qualified service dealer for inspection and possible repair:
A. Check plug connection.
B. Replace cRarger.
A. Chute clogged. Release bail handle to turn mower off. Remove safety key
and battery pack. Clear chute of grass clippings.
B. Raise cutting height of wheels to shorten length of the cut.
C. Bag full. Emptybag more often.
Page 19

UNAkIODEGARANTIALIMITADA PARA LOS PRODUCTOS CRAFTSMAN
Este producto esta garantizado contra defectos de material o mano de obra
DUBANTE UN ANO a partir de la fecha de compra. Se reemplazara un producto
defectuoso sin cargo al presentar el comprobante de compra.
Para conocer detalles sobre la cobertura de la garantia para obtener un
reemplazo gratuito, visite el sitio web: www.craftsman.com
Esta garantia no cubre la hoja, que es una pieza consumible que puede
desgastarse con el uso normal dentro del periodo de garantia.
Esta garantia queda nula si el producto se utiliza alguna vez para proporcionar
servicios comerciales o si se alquila a otra persona.
Esta garantia le concede derechos legales especfficos yes posible que ademas
usted tenga otros derechos que varien de un estado a otro.
Sears Brands Management Corporation, Hoffman Estates, tL 60179
PAUTAS DE SEGURIDAD/DEFINICIONES
Es importante que lea y comprenda este manual. La informaci6n.que contiene se
relaciona con la protecci6n de SU SEGURIDAD y la PREVENCION DE PROBLEMAS.
Los simbotos que siguen se utilizan para ayudarlo a reconocer esta informaci6n.
Z_ PEUGRO: indica una situaci6n de peligro inminente que, si no se evita, provocar& la
muerte o lesiones graves.
Z_ADVERTENOIA: indica una situaci6n de peligro potenciat que, si no se evita,
provocar_, la muerte o lesiones graves.
ZLPRECAUCION" indica una situaci6n de peligro potencial que, si no se evita,
provocar& lesiones leves o moderadas.
PRECAUCION: utilizado sin et simboto de alerta de seguridad indica una
situaci6n de petigro potencial que, si no se evita, puede provocar dados en la
propiedad.
A continuaci6n se presentan
e×plicaciones de las ilustraciones
de importantes riesgos de seguridad
correspondientes a la podadora.
comprender el manual de
instrucciones.
1. El usuario debe leer y
2. Para evitar el riesgo de
lesiones graves no corte et
c6sped subiendo y bajando
pendientes. En pendientes,
siempre corte el c6sped
transversalmente.
lesiones hacia las personas
de alrededor, mantenga a
3. Para evitar el riesgo de
-- mascotas a una distancia
la podadora en todo momento. Antes de
retirar y votver a cotocar el recolector de
todas las personas y las
segura de la podadora
mientras este en funcionamiento.
provocar lesiones graves.
Mantenga las manos y los
4. Las hojas giratorias pueden
pies lejos de ta ptataforma y
la abertura de descarga de
c6sped, limpiar, transportar, levantar o
realizar el mantenimiento de la podadora,
siempre asegOrese de que la hoja se haya
detenido (espere hasta que la hoja deje
de girar, aproximadamente 3 segundos,
despu6s de soltar la palanca det
interruptor y retirar la Ilave de seguridad).
5. Los objetos gotpeados por
la hoja de la podadora pueden
provocar lesiones graves.
Mant6ngase detr&s del mango
cuando el motor est6 en
funcionamiento. Siempre asegQrese de
que las personas y las mascotas est6n
lejos de la descarga de la podadora
mientras est6 en funcionamiento. Siempre
inspeccione el &rea de trabajo antes
de cortar el c6sped y retire los objetos
que podrian ser lanzados por la hoja.
Antes de cruzar aceras, calles, patios
y senderos de grava, suelte la patanca
del interruptor para apagar la podadora
y espere hasta que la hoja deje de girar
(aproximadamente 3 segundos).
Z_ADVERTENCIA:
INSTRUCCIONES Y
ADVERTENCIAS DE
SEGURIDAD IMPORTANTES
19
Page 20

ZLADVERTENClA: AL UTILIZAR
HERRAMIENTAS ELE_CTRICAS PARA EL
JARDiN, SIEMPRE .SEDEBEN T©MAR
PRECAUCIONES BASICAS DE
SEGURIDAD PARA REDUCIR EL RIESG©
DE.INCENDIOS, DESCARGAS
ELECTRICAS Y LESIONES PERSONALES,
INCLUIDAS LAS SIGUIENTES.
LEA TODAS LAS
INSTRUOCIONES
PARA REDUCIR EL RIESGO DE
LESIONES:
• Antes de cada uso, asegQrese de que
todos los que utilizan esta herramienta
lean y comprendan todas las
instrucciones de seguridad y el resto de
la informaci6n incluida en este manual.
• Conserve estas instrucciones y
reviselas con frecuencia antes del uso
Z_yal instruir a otras personas.
PELIGRO: PRACTICAS DE
SEGURIDAD IMPORTANTES
PARA PODADORAS DE
EMPUJAR
Esta podadora puede amputar manos y
pies, y lanzar objetos. El incumplimiento
de las siguientes instrucciones de
seguridad puede producir lesiones graves
o la muerte.
OPERAOION GENERAL
1. Antes de hacerla arrancar, lea, com-
prenda y siga todas las instrucciones
en ta podadora yen el manual de
instrucciones.
2. No ponga las manos ni los pies cerca
o debajo de la podadora. Mant6ngase
alejado de la abertura de descarga en
todo momento.
3. S61o permita que adultos respon-
sables, familiarizados con las
instrucciones, operen esta podadora.
4. Despeje el &rea donde se utilizar& la
podadora de objetos como piedras,
palos, alambre, juguetes, huesos, etc.,
que la hoja podria lanzar. Los objetos
golpeados por la hoja pueden cau-
sar graves lesiones alas personas.
Mant6ngase detr&s del mango cuando
el motor est6 en funcionamiento.
5. AsegQrese de que no haya personas
en el &rea que rodea a ta podadora
antes de utilizarta. Todas las personas
y mascotas en los alrededores deben
mantenerse a una distancia segura.
Detenga la podadora si alguien entra
en el &rea que la rodea.
6. No opere la podadora descalzo o con san-
dallas. Siempre use calzado resistente.
7. No tire de la podadora hacia atr#,sa
menos que sea absolutamente necesario.
Siempre mire hacia abajo y hacia atr#,s
antes y durante movimientos de retroceso.
8. Nunca descargue material en forma
directa en la direcci6n donde hay per-
sonas. No descargue material contra
una pared o contra algo que provoque
una obstrucci6n. El material puede
rebotar y golpear al operador. At cruzar
superficies de grava, suelte la palanca
del interruptor para apagar la podadora
y detener la hoja.
9. No opere la podadora si el recolector
de c6sped completo, el protector de ta
descarga, el protector posterior u otros
dispositivos de seguridad no est&n
en su lugar y funcionando. Verifique
peri6dicamente todos los protecto-
res y dispositivos de seguridad para
asegurarse de que est6n en buenas
condiciones, que funcionen correcta-
mente y que cumptan con su funci6n
correspondiente. Reemptace un seguro,
protector u otro dispositivo de seguridad
daSado antes de un uso posterior.
10. Nunca deje funcionando una poda-
dora sin supervisi6n.
11. Antes de limpiar la podadora, retirar
el recolector de c6sped, desatascar el
protector de la descarga, alejarse de la
podadora o antes de realizar cualquier
ajuste, reparaci6n o inspecci6n, siem-
pre suelte la patanca del interruptor
para detener el motor y espere hasta
que la hoja se detenga por compteto
para retirar la llave de seguridad.
12. Opere la podadora s61ocon luz diuma
o buena iluminaci6n artificial para que
los objetos en el trayecto de la hoja
sean visibtes claramente desde el &rea
de funcionamiento de la podadora.
13. No opere la podadora bajo la influen-
cia del alcohol o las drogas, ni cuando
est6 cansado o enfermo. Siempre man-
t6ngase alerta, ponga atenci6n a Io que
hace y use el sentido comQn.
14. Evite los entornos peligrosos. Nunca
opere la podadora sobre c6sped hQm-
edo o mojado; nunca use la podadora
bajo la Ituvia. Siempre asegQrese de
tener los pies bien apoyados; camine,
nunca corra.
15. Desconecte el sistema de acciona-
miento, de haberlo, antes de arrancar
el motor.
16. Si el cortac6sped comienza a vibrar
de manera anormal, suelte la empuSa-
dura de estribo (interruptor de palanca)
(2), espere a que la hoja se detenga y
desconecte segadora, a continuaci6n,
busque la causa inmediatamente. La
vibraci6n es generalmente una adver-
tencia de algQn probtema.
17. Siempre use protecci6n adecuada
para los ojos y las vias respiratorias
20
Page 21

cuandooperelapodadora.
18.Elusodeaccesoriosodispositivosnoreco-
mendadosparautilizarconestapodadora
puedeserpeligroso.S61outiliceaccesorios
aprobadosporCraftsman<RL
19.Nuncaseestiredemasiadomientras
operalapodadora.SiempreasegQrese
detenerlospiesbienapoyadosyde
conservarelequilibrioentodomomen-
tomientrasoperalapodadora.
OPERACION EN PENDIENTES
Las pendientes son un factor importante
en los accidentes de resbatamiento y
caida, que pueden provocar lesiones
graves. La operaci6n en todas las pen-
dientes requiere de cuidado adicionat. Si
se siente inc6modo en una pendiente,
no corte el c6sped en ella.
1. En tas pendientes corte el c6sped
transversalmente a la superficie; nunca
subi6ndolas y baj&ndotas. Sea extrem-
adamente cuidadoso cuando cambie
de direcci6n sobre pendientes.
2. Tenga cuidado con agujeros, surcos,
bultos, piedras u otros objetos ocultos.
Un terreno irregular puede provocar un
accidente de resbalamiento y caida. El
cesped alto puede ocultar los obstb,culos.
3. No corte el c6sped si 6ste est& mojado
o en pendientes demasiado pronuncia-
das. No tener los pies bien apoyados
puede provocar un
accidente de resbalamiento y caida.
4. No corte el c6sped cerca de barrancos,
zanjas o terraplenes. Puede perder el
apoyo de los pies o el equilibrio.
Pueden producirse accidentes tr&gicos
si el operador no est,. atento a la pres-
encia de nifios. Con frecuencia los nifios
se sienten atraidos por la podadora y
la actividad de cortar el c6sped. Nunca
d6 por sentado que los nifios per-
manecer&n donde los vio por t_ltima vez.
1. Mantenga a los nifios fuera del &reade tra-
bajo y bajo el cuidado atento de un aduito
responsable que no sea el operador.
2. Est6 atento y apague la podadora si un
nifio entra al &rea.
3. Nunca permita que los nifios operen la
podadora.
4. Tenga especial cuidado at acercarse
a esquinas ciegas, arbustos, &rbotes u
otros objetos que puedan bloquear su
vista de un nifio.
iVlANTENIMIENTO GENERAL
1. Nunca opere la podadora en un &rea
cerrada.
2. Mantenga ajustados todos los pernos y
tuercas para asegurarse de que el equipo
este en condiciones de trabajo seguras.
3. Nunca haga cambios indebidos en los
dispositivos de seguridad. Verifique reg-
utarmente que funcionen correctamente.
4. Mantenga la podadora libre de c6sped,
hojas u otras acumutaciones de residu-
os. Espere a que la podadora se enfrie
antes de guardarla.
5. Si golpea un objeto extrafio, suelte
empufiadura de estribo (interruptor de
palanca) (2) para apagar la podadora,
espere que la hoja se detenga y desco-
necte cortadora, luego inspeccione ta
podadora. Reparaci6n, cualquier dafio,
antes de arrancar y operarla..
6. Nunca reatice ajustes o reparaciones
con el motor en funcionamiento o con
la Ilave de seguridad en la podadora.
7. Desenchufe siempre podadora antes de
ajustar, limpiar, reparar, inspecci6n, trans-
porte, almacenamiento o salir de la corte.
8. Verifique frecuentemente los compo-
nentes del recolector de c6sped y el
protector de la descarga, y cuando sea
necesario reempt&celos s61ocon pie-
zas recomendadas por Craftsman CRy.
9. Las hojas de la podadora son filosas.
Envuelva la hoja o use guantes, y
tenga especial cuidado al realizar man-
tenimiento en eltas.
10. Cuideo reemplace las etiquetas de seguri-
dady de instrucciones, segt_nsea necesafio.
Este aparato digital Clase B cumple con
la norma canadiense ICES-003.
Este mecanismo cumple con la parte 15
de las normas de la Comisi6n Federal
de Comunicaciones de Estados Unidos
(FCC). La operaci6n est& sujeta alas dos
condiciones siguientes: (1) Este mecanismo
posiblemente no cause interferencia
perjudicial; y (2) este mecanismo puede
aceptar cualquier interferencia recibida,
incluso interferencia que podria provocar
una operaci6n no deseada.
NOTA" Este equipo ha sido probado y se
encontr6 que cumple con los limites para
dispositivo digital Clase B, seg0n la parte
15 de las normas de la FCC. Estos limites
est_.n disefiados para brindar protecci6n
razonable contra interferencia perjudicial
en una instalaci6n residencial. Este equipo
genera, usa y puede irradiar energia en
frecuencia de radio y, si no se instala y
se usa de acuerdo con las instrucciones,
puede provocar interferencia perjudicial en
las comunicaciones de radio. Sin embargo,
no hay garantia de que la interferencia no
ocurra en una instalaci6n en particular. Si
este equipo provoca interferencia perjudicial
en la recepci6n de radio o televisi6n, Io que
se puede determinar al apagar y encender
el equipo, el usuario debe tratar de corregir
21
Page 22

lainterferenciamedianteunaom&sdelas
siguientesmedidas:
Cambiarlaorientaci6nola
ubicaci6ndelaantenaderecepci6n.
Aumentarlaseparaci6nentreel
equipoyelreceptor.
Conectarelequipoaun
tomacorrientesobreuncircuito
diferentedeaquelalqueest&
conectadoelreceptor.
Consuttaralvendedoropedirla
ayudadeunt6cnicoenradioy
televisi6nconexperiencia.
Loscambiosolasmodificacionesquese
lereaticenaestaunidadsinaprobaci6n
expresadelterceroresponsabte
delcumplimientopuedenanularla
autorizaci6ndelusuarioparaoperarel
equipo.EsteaparatodigitaldelaclaseB
seconformaconICES-003canadiense.
/_ADVERTENClA:
INSTRUCClONES Y
ADVERTENClAS GENERALES
DE SEGURIDAD PARA TODAS
LAS HERRAMIENTAS
• ESTA HERRAMIENTA PUEDE SER
PELIGROSA. Respete todas las
advertencias y las instrucciones de
seguridad de este manual. El operador
es responsable de respetar las
advertencias e instrucciones de este
manual y las que est&n en la unidad.
Restrinja el uso de esta podadora a
las personas que lean, comprendan
y respeten las advertencias e
instrucciones de este manual y las que
est&n en la unidad.
• Evite los entornos peligrosos: No
utilice podadoras de c6sped en lugares
hOmedos o mojados.
• No utilice la unidad bajo la Iluvia.
• Mantenga a los niSos alejados: Todos
los visitantes deben mantenerse a una
distancia segura del &rea de trabajo.
• Use la vestimenta adecuada: No use
ropa holgada ni joyas. Pueden quedar
atrapadas en las piezas m6viles. At
trabajar al aire libre, se recomienda
usar guantes de goma y calzado.
• Use anteojos de seguridad: Siempre
use una careta o una m&scara contra
el polvo si la operaci6n produce polvo.
• Utilice el aparato correcto: No utitice la
podadora de c6sped para ningOn trabajo
salvo aquel para el cual se disefi6.
• Se debe contar con la protecci6n de
un interruptor de corte por falla a tierra
(GFCI, por sus siglas en ingles) en el
o los circuitos o tomacorrientes que se
utilizar&n para la cortadora de c6sped.
Existen recept&culos disponibles con
protecci6n GFCI incorporada y pueden
utilizarse para esta medida de seguridad.
o
USO DE CABLES PROLONGADORES
Antes de utilizar un cable prolongador,
asegOrese de que est6 en buenas
condiciones. Siempre utilice cables
prolongadores del tamafio adecuado
para la herramienta; es decir, un
tamafio de conductor adecuado para
las diversas longitudes de cable y con
la suficiente capacidad para conducir la
corriente que utilizar& la herramienta.
El uso de un cable de menor capacidad
provocar& una caida del voltaje de linea
que resuttar& en p6rdida de potencia
y sobrecalentamiento. Consulte la
tabta a continuaci6n para conocer las
capacidades adecuadas de los cables.
Calibre minimo para cables de extensi6n
Volts Longitud total del cable en
pies
120V 0-25
(0-7,6m)
Amperaje
M&s No m&s American Wire Gage
de de
0 - 6 18 16 16 14
6 10 18 16 14 12
10 12 16 16 14 12
12 - 16 14 12 No se recomienda
• VE_FIQUE QUE NO HAYA PIEZAS
DA NADAS. Antes de volver a usar la
podadora, se debe controlar cualquier
protecci6n u otra pieza que est6
averiada para determinar si funcionar&
correctamente y realizar& la funci6n
para la clue fue disefiada. Verifique ta
alineaci6n de tas piezas m6viles o si
6stas se traban, la rotura de piezas, el
montajey cualquier otra condici6n que
pueda afectar su operaci6n. Un protector
u otra pieza que est6 dafiada debe
reemptazarse correctamente por un
distribuidor autorizado, utilizando piezas
de repuesto id6nticas.
MANTENIMIENTO Y REPARAClONES.
Reparaci6n, mantenimiento o ajustes
no especificados en este manual deben
realizarse por un distribuidor autorizado,
utitizando piezas de repuesto id_nticas.
26-50 51-100 101-150
(7,6-15,2m) (15,2-30,4m)(30,4-45,7m)
Z_PELIGRO: ADVERTENClAS
ADIClONALES PARA
PODADORAS
• Evite ambientes peligrosos - no
use cortadoras de c6sped en lugares
hOmedos o mojados.
• No fuerce la podadora de ces.ped:
Funcionar& mejor yen forma mas
segura si la utiliza a la vetocidad para
la que rue disefiada.
No se estire dernasiado: Conserve la
estabilidad y el equitibrio adecuados en
todo momento.
22
Page 23

• Mantengase alerta Fijese en lo que
esta haciendo. Use e/sentido com_n.
No utilice la podadora de c6sped si
est& cansado.
• Guarde la podadora de cesped en
desuso bajo techo: Cuando no se
utitice, la podadora de c6sped debe
guardarse bajo techo en un lugar seco y
bajo Ilave, lejos del alcance de los nidos.
Reatice el rnantenimiento de la
_odadora de cesped con cuidado:
antenga afilados y limpios los bordes
de corte para obtener e/mejor y m&s
seguro rendimiento.
Mantenga los protectores en su
lugar yen buenas condiciones.
• Mantenga afiladas las hojas.
Mantenga las rnanos y los pies
alejados del area de corte.
Los objetos golpeados pot la hoja
de la podadora de cesped pueden
provocar lesiones graves alas
personas. Siempre debe examinar
el c6sped cuidadosamente y remover
todo objeto antes de cada poda.
• Si la podadora de cespedgolpea
un objeto extra,o, siga los pasos a
continuaci6n:
• Detenga la podadora de c6sped. Suelte
el interruptor.
Desenchufe el cable de alimentaci6n.
• Inspeccione si hay dafios.
• Repare cualquier dafio antes de volver a
arrancar y utilizar la podadora de cesped.
• Utilice _nicamente hojas de repuesto
identicas.
/_ADVERTENClA: Parte del potvo
generado por este producto contiene
producto quimicos reconocidos por el
Estado de California como causantes de
c&ncer, defectos de nacimiento u otros
problemas reproductivos. Algunos
ejemptos de estos productos quimicos son:
• compuestos en fertilizantes
• compuestos en insecticidas,
herbicidas y pesticidas
• ars6nico y cromo de madera con
tratamiento quimico
Para reducir su exposici6n a estos
productos quimicos, use equipo de
seguridad aprobado, como m&scaras para
potvo que est&n disefiadas especialmente
para fittrar las particulas microsc6picas.
• La etiqueta de su herramienta puede
incluir los siguientes simbolos.
V................. voltios
mW ............. mitivatios
nm .............. Iongitud de ondas en
A................. amperios
Hz ............... hertz
W ................ vatios
min .............. minutos
o AC ...... corriente altema
- - = o DC.... corriente directa
(_ ............... no velocidad sin carga
................ Construcci6n Clase I
D]IIIIIIIIIIIIIII Construcci6n de clase II
Zh .............. simbolo de alerta
•../min .......... revoluciones o minuto
t# ............ Lea el manual de
................ Use protecci6n adecuada
G ................ Use protecci6n adecuada
O ................ Use protecci6n adecuada
nan6metros
(mis & la terre)
terminal a tierra
seguridad
instrucciones antes det uso
para las vias respiratorias
para los ojos
para los oidos
FUNCTIONAL DESCRIPTION
DESCRIPCION DE LAS
FUNCIONES
1. Caja del interruptor
2. Mango de suspensi6n
3. Mango superior
4. Mango inferior
5. Palancas de fijaci6n del mango
superior (2)
6. Palancas de fijaci6n del mango inferior (2
7. Palanca de ajuste de altura de corte
8. Bolsa de recolecci6n de c6sped
9. Cubierta de la puerta trasera
10. Puerto de la bateria
11. Compartimiento para
almacenamiento de bateria
12. Mangos de transporte
23
Page 24

INSTRUCCIONES DE
SEGURIDAD IMPORTANTES
PARA LOS CARGADORES DE
BATERIAS
CONSERVE ESTAS INSTRUCCIONES:
Este manual contiene instrucciones de
seguridad importantes para los cargadores
de baterfas.
• Antes de utilizar el cargador, lea todas
las instrucciones y las prevenciones en el
cargador, en el paquete de baterias yen el
producto que utiNzael paquete de baterias.
ztADVERTENCIA: Riesgo de
descarga electrica. No permita que
ning@nliquido entre en el cargador.
zhPRECAUCION: Riesgo de
quemaduras. Para reducir el riesgo de
lesiones, cargue solamente baterias
Craftsman @.Otros tipos de baterias pueden
estallar y provocar dados personales y
materiales.
ztPRECAUCION: En determinadas
circunstancias, con el cargador enchufado
en el tomacorriente, algunos materiales
extrados pueden provocar un cortocircuito
en el cargador. Se deben mantener lejos de
las cavidades del cargador los materiales
extrados de naturaleza conductora, entre los
que se incluyen la lana de acero, el papel
de aluminio o cualquie,r acumulaci6n de
particulas metalicas. Estos son s61oalgunos
ejemplos y no constituyen una lista taxativa.
Siempre desenchufe el cargador del
tomacorriente cuando no haya un paquete
de baterias en la cavidad. Desenchufe el
cargador antes de intentar limpiarlo.
ztADVERTENClA:
• NO intente cargar el paquete de
baterfas con otros cargadores que no
sean de la mares. Los cargadores y los
paquetes de baterfas estgn disedados
especificamente para trabajar juntos.
• Estos cargadores estan disefiados
pars utilizarse e×clusivamente con
las baterfas recargables Craftsman @
designadas. Otros usos pueden
provocar riesgo de incendio, descarga
el_ctrica o electrocuciSn.
. Z_ADVERTENClA: EIcargador
suministrado con este producto debe
enchufarse de manera que quede
correctamente orientado en posiciSn de
montaje vertical o en el piso.
• No e×ponga el cargador a la lluvia ni a
la nieve.
• Para desconectar el cargador o los
cables para cadena de margarita, tire del
enchufe en lugar del cable. Esto reducir9
el riesgo de dat_arel enchufe o et cable.
• AsegOrese de que el cable este ubicado
de modo que no Io pise o se tropiece
con el y que no este sujeto a dafios o
tensiones de alguna otra forma.
• No utilice un cable prolongador a menos
que sea absolutamente necesario. El
uso de un cable prolongador incorrecto
puede provocar riesgo de incendio,
descarga et6ctrica o electrocuci6n.
• No coloque objetos en la parte
superior del cargador ni coloque el
cargador en una superficie blanda
que pueda bloquear las ranuras
de ventilaci6n y provocar un calor
interno e×cesivo. Coloque el
cargador en una posici6n alejada de
cualquier fuente de calor. El cargador
se ventila a trav6s de ranuras en la
parte superior e inferior de la cubierta.
• No monte el cargador en la pared ni
Io instale en forma permanente aobre
ninguna superficie. El cargador est&
disedado para ser utilizado sobre una
superficie ptana y estable (p. ej., un
banco o una mesa).
• No opere el cargador con cables o
enchufes dafiados: reempl_celos de
inmediato.
• No opere el cargador si este ha
recibido un golpe fuerte, ae ha
cafdo, o se ha dafiado de cualquier
otra manera. Ll_velo a un centro de
mantenimiento autorizado.
• No desarme el cargador; llevelo a un
centro de mantenimiento autorizado
cuando se requiera mantenimiento o
una reparaci6n. El armado incorrecto
puede impficar un riesgo de descarga
el_ctrica, electrocuciSn o incendio.
• Antes de Iimpiarlo, desconecte el
cargador del tomacorriente. Esto
reducir& el riesgo de descarga el6ctrica.
Quitar el paquete de baterias no reducir&
este riesgo.
• NUNCA intente conectar 2
cargadores juntos.
• El cargador esta disefiado para operar
con corriente electrica domestica
estandar (120 voltios). No intente
utilizarlo con otto voltaje.
INSTRUCCIONES
IMPORTANTES DE SEGURIDAD
PARA LOS PAQUETES DE
BATERIAS
ztADVERTENCIA: Para un
funcionamiento seguro, lea _ste y todos
los manuales de instrucciones incluidos
con la herramienta antes de usar el
cargador. El paquete de baterias incluido
en la caja no est& completamente cargado.
Antes de utilizar el paquete de baterias y
el cargador, lea las instrucciones de
24
Page 25

seguridadacontinuaci6n.Luego,sigalos
procedimientosdecargadescritos.
LEA TODAS LAS
INSTRUCCIONES
• No incinere et paquete de baterias,
aun si tiene daSos importantes o
esta completamente desgastado. El
paquete de baterias puede explotar en el
fuego. Cuando se queman los paquetes
de baterias, se generan vapores y
materiales tSxicos.
• No cargue ni use la bateria en
atm6sferas e×plosivas, como
ambientes en los que hay liquidos,
gases o polvo inflamables. Insertar
o retirar la bateria del cargador puede
encender el polvo o los vapores.
• Si el contenido de las baterias entra
en contacto con la piel, lave el area
de inmediato con agua y jab6n suave.
Si el liquido de la bateria entra en
contacto con los ojos, enjuague con agua
manteniendo los ojos abiertos durante
15 minutos o hasta que la irritaciSn
cese. Si se necesita atenciSn m6dica,
el electrofito de las baterias de iones de
fitio contiene una mezcla de carbonatos
orgbnicos liquidos y sales de fitio.
• El contenido de las c61ulasde la
bateria abierta puede causar irritaci6n
respiratoda. Respireaire fresco. Si los
sintomas persisten, busque atenciSnm6dica.
z_ADVERTENClA; RIESGO DE
QUEMADURAS. EL LIQUIDO DE LA
BATERIA PUEDE ENCENDERSE SI SE
EXPONE A CHISPAS 0 LLAMAS.
• Cargue los paquetes de baterias solamente
en cargadores Craftsman _>.
• NO salpique ni sumerja en agua u
otros liquidos. Esto puede causar una
falla prematura de las c61ulas.
• No almacene ni utilice la herramienta
y el paquete de baterias en lugares
en los que la temperatura pueda
alcanzar o superar los 40 °C (105
°F) (como en toldos al aire libre o
construcciones de metal en verano).
z_ADVERTENClA: NUNCA INTENTE
ABRIR EL PAQUETE DE BA TER/AS
POR NINGUN MOTIVO. SI LA CAJA DEL
PAQUETE DE BATE RIAS ESTA
AGRIETADA 0 DANADA, NO LA
INTRODUZCA EN EL CARGADQR. NO
COMPRIMA, DEJE CAER NI DANE EL
PAQUETE DE BA TERIAS. NO UTILICE
UN PAQUETE DE BA TERIAS 0 UN
CARGADOR QUE HAYA RECIBIDO UN
GOLP.E FUERTE, SE HA YA CAIDO,
ESTE AGOTADO 0 DANADO DE
ALGUNA FORMA (POR EJEMPLO,
PERFORADO CON UN CLA VO,
GOLPEADO CON UN MARTILLO,
PISADO). LOS FAQUETES DE
BA TERIAS DANADOS DEBEN
DEVOL VERSE AL CENTRO DE
MANTENIMIENTO PARA SU REClCLADO.
_ADVERTENCIA: Riesgo de
incendio. No guarde o transporte la
bateria de ninguna manera que permita
que los terminales e×puestos de la
bateria entren en contacto con objetos
metalicos. Por ejemplo, no coloque la
bateria en delantales, bolsillos, cajas de
herramientas, cajas de juegos de
productos, cajones, con clavos, tornillos,
llaves sueltos, etc. Transportar baterias
puede provocar incendios si los
terminales de la bateria entran en
eontacto aceidentalmente con
materiales conduetores como Ilaves,
monedas, herramientas manuales y
similares. Las Normas para Materiales
Peligrosos del Departamento de
Transporte de los EE.UU. (HIVIR)
eoncretamente prohiben transportar
baterias comercialmente o en aviones
(es decir, empacadas en maletas y
equipaje de mano) A MENOS que esten
debidamente protegidas de cortocircuitos.
Por Io tanto, cuando transporte baterias
individuales, aseg0rese de que los
terminales de la bateria esten protegidos y
bien aislados de materiales que puedan
hacer contacto y causar un cortocircuito.
NOTA: Las baterias de IONES DE LITIO
no deben guardarse en el equipaje que se
despacha.
RECOMENDACIONES CON RESPECTO
AL ALMACENAMIENTO
1. El mejor lugar de almacenamiento es
uno que sea fresco y seco fuera de la luz
solar directa y de un exceso de cator o frio.
2. Et almacenamiento protongado no
dafiar& el paquete de baterias o el
cargador, siempre y cuando la bateria no
est6 completamente descargada.
PROCEDIMIENTO DE CARGA
Los cargadores Craftsman@ est&n
disefiados para cargar paquetes de
baterias Craftsman@.
1. Enchufe el cargador en un
tomacorriente adecuado antes de insertar
el paquete de baterias.
2. Introduzca el paquete de baterias en el
cargador.
_3. El indicador LED verde
destetlar& indicando que la bateria
se est& cargando.
_4. La bateria est& completamente
cargada cuando el indicador LED
verde permanece encendido
continuamente. El paquete est&
comptetamente cargado y puede utilizarse
en este momento o dejarse en el cargador.
25
Page 26

Despues del uso, recargue las baterias
descargadas a la brevedad posible o de
Io contrario la vida _til de las baterias
podria acortarse en gran medida.
DIAGN6STICO DEL CARGADOR
Este cargador est& disefiado para
detectar ciertos probtemas que pueden
surgir con los paquetes de baterias o
el cargador. Los problemas se indican
mediante el indicador LED &mbar, que
destella en diferentes patrones.
BATER|A DANADA
_EI cargador puede detectar una
bateria d6bit o dafiada. El indicador
LED destetlar& en el patr6n indicado en
la etiqueta. Si observa este patr6n de
desteflo de bateria dafiada, no continQe
cargando la bateria. Devu61vala a un
centro de mantenimiento o a un lugar de
recolecci6n para reciclado.
RETRASO POR PAQUETE CALIENTE/FRiO
_Cuando el cargador detecta que
la bateria est& excesivamente
catiente o fria, comienza un Retraso por
paquete catiente/frio, y suspende la carga
hasta que la bateria se haya normalizado.
Despu6s que ocurra esto, el cargador
cambia autom&ticamente al modo de
Paquete cargando. Esta funci6n garantiza
la duraci6n m&xima de ta bateria. El
indicador LED rojo desteltar& en un patr6n
indicado en la etiqueta cuando detecte el
retraso por paquete caliente / frio.
NOTAS IMPORTANTES SOBRE LA
CARGA
1. Se puede obtener una mayor
duraci6n y 6ptimo rendimiento si se
carga el paquete de baterias cuando la
temperatura del aire est& entre los 16°C
y los 27°C (60°F y 80°F). NO cargue el
paquete de bateria con una temperatura
ambiental por debajo de +4,5 °C
(+40 °F) o por encima de +40,5 °C (+105
°F). Esto es importante y evitar& dafios
graves en el paquete de baterias.
2. El cargador y el paquete de baterias
pueden estar calientes at tacto durante
la carga. Esto es una condici6n normal
y no indica un problema. Para facilitar el
enfriado del paquete de baterias despu6s
de su uso, evite colocar el cargador o
el paquete de baterias en un ambiente
c&lido, como debajo de un toldo de metal
o en un remolque sin aislamiento.
3. Si el paquete de baterias no se carga
adecuadamente:
a. Revise el tomacorriente enchufando
una I&mpara u otro aparato
b. Verifique si el tomacorriente est&
conectado a un interruptor que corta
la energia cuando usted apaga la luz.
c. Mueva el cargador y el paquete
de baterias a un tugar donde la
temperatura ambiental sea alrededor
de16°Ca27°C
(6O°F a 8O °F).
d. si persisten los probtemas de
carga, tome la herramienta, bateria
y cargador a un centro de servicio
t6cnico cualificado para su inspecci6n
y reparaci6n posibte.
4. Se debe recargar el paquete de baterias
cuando no produce energia suficiente
para tareas que previamente realizaba
con facilidad. NO CONTINUE utilizando la
herramienta en estas condiciones. Siga el
procedimiento de carga. Tambi6n se puede
cargar un paquete de baterias parcialmente
agotado cuando se desee, sin ningOn efecto
negativo sobre 6stas.
5. Se deben mantener lejos de las
cavidades del cargador los materiales
extrafios de naturaleza conductora,
entre los que se incluyen la lana de
acero, el papel de aluminio o cualquier
acumulaci6n de particutas met&ticas.
Siempre desenchufe el cargador det
tomacorriente cuando no haya un
paquete de baterias en la cavidad.
Desenchufe el cargador antes de intentar
limpiarlo.
6. No congele ni sumerja el cargador en
agua ni en ningQn otro liquido.
z_ADVERTENCIA: RIESGO DE
DESCARGA EL.ECTRICA. NO PERMITA
QUE NINGUN LIQUIDO ENTRE EN EL
CARGADOR. NUNCA INTENTE ABRIR
EL PAQUETE DE BA TERIAS POR
NINGUN MOTIVO. SI L,4 CUBIERTA
PROTECTORA DE PLASTICO DEL
PAQUETE DE BATERIAS SE ROMPE 0
AGRIETA, DEVUEL VALA A UN
CENTRO DE MANTENIMIENTO PARA
SU RECICLADO.
INDICADOR DEL ESTADO DE
LA CARGA (FIGURA A)
La bateria est& equipada con un
indicador de estado de la carga. Esto
se puede utilizar para visualizar el nivel
actual de carga de la bateria durante el
uso y durante la carga. No indica el nivel
de funcionalidad de la herramienta y
puede variar de acuerdo alas piezas del
producto, la temperatura y la aplicaci6n
que el usuario led&
Verificaci6n del estado de carga
durante el uso:
• Oprima el bot6n del indicador de
estado de la carga (A1).
26
Page 27

• LoscuatroLED(A2)seencender_.n
paraindicarelporcentajedecargade
labateria.Consutteelrecuadroenla
FiguraA.
• SilaluzLEDnoenciende,carguela
bateria.
INSTALAClONYEXTBACCl0NDEL
PAQUETEDEBATERIAS
z_ADVERTENClA: Aseg_rese de
quitar la Itave de seguridad para evitar el
accionamiento antes de extraer o instalar
la bateria.
PARA INSTALAR EL PAQUETE DE
BATER|AS:
• Oprima el bot6n de liberaci6n de la
cubierta del puerto de la bateria (14)
y tire de la cubierta del puerto de la
bateria (15) para exporter el puerto de
la bateria (10) como se muestra en la
Figura B.
PARA EXTRAER EL PAQUETE
DE BATERIAS:
• Abra la cubierta del puerto de la bateria
(15) como se describi6 antes.
• Oprima el bot6n de liberaci6n de la
bateria (17) del paquete de baterias
y tire de este para extraerto de la
herramienta como se muestra en la
Figura D.
• Destice la bateria (16) en el puerto
de la bateria hasta que quede bien
asentado y se escuche un clic (Figura
C). AsegOrese de que el paquete
de baterias est6 bien asentado y
comptetamente asegurado en su lugar.
• Cierre la cubierta del puerto de la
bateria. AsegOrese de que la cubierta
est6 completamente asegurada antes
de arrancar la cortadora de c6sped.
ALMACENAlVIIENTO DE
BATERiA
Se puede almacenar una bateria adicional
utilizando et compartimiento para
almacenamiento de bateria (11).
• Levante la cubierta del compartimiento
para almacenamiento y deslice la
bateria dentro del compartimiento como
se muestra en la Figura E. La bateria
en este compartimiento no accionar& la
cortadora de c6sped.
27
Page 28

ENSAMBLAJE
z_ADVERTENCIA: Antes det
ensamblaje, asegQrese de que el mango
de suspensi6n est6 suelto y se haya
quitado la Itave de seguridad.
INSTALACION DEL MANGO INFERIOR
• Levante el mango inferior (4) a su
posici6n asegur&ndose de que la fiecha
(18) en ta base de la cortadora de
c6sped est6 alineada con los nQmeros
1,2 o 3 en la base del mango (19)
(recuadro de la Figura F).
2_PRECAUClON: AsegQrese de
que cada lado del mango inferior est6
ajustado en el mismo nQmero. La fiecha
debe estar alineada con el nQmero 1,2 o
3 para el funcionamiento.
• Cierre las palancas de ajuste de attura
del mango (7) como se muestra en la
Figura F. AI cerrar cada una, asegQrese
de que los dientes se enganchen como
se muestra en la Figura G.
• Si la conexi6n entre el mango y la palanca
est& demasiado apretada o suelta, abra la
palanca y ajuste la profundidad de esta.
Ci6rrela nuevamente hasta que los dientes
esten completamente asegurados y cada
palanca se mantenga firmemente cerrada.
INSTALACl0N DEL MANGO
SUPERIOR (FIGURA H)
• Quite las palancas de fijacion del
mango (5), las tuercas (20) y las
arandelas (21) del mango.
• Alinee los orificios de la parte inferior del
mango superior (3) con los orificios en la
parte superior del mango inferior (4).
NOTA: AsegOrese de que el cable est6
ubicado en et frente de ambos mangos.
De no ser asi, el resultado puede ser
que el cable se enrede y haga imposible
guardar la cortadora de c6sped con
facitidad (Figura I).
• Desde el exterior
del mango
superior (3),
deslice el perno
de la palanca
a traves de los
orificios.
• Deslice la arandela
sobre el perno
de la palanca
y ensamble
sin ajustar el
ensamblaje
completo con la tuerca.
• Rote et mango superior a su posici6n
de funcionamiento.
• Cierre la palanca. Si est& demasiado
apretado o demasiado suelto, abra la
palanca y afloje la tuerca para ajustar
la sujeci6n. Revise las palancas
cerr&ndotas. Estas deben estar
suficientemente apretadas como para
que los mangos se mantengan firmes,
pero suficientemente sueltas como
para que las palancas puedan cerrarse
por compteto. Ajuste abriendo la
palanca girando la tuerca hasta que los
mangos est6n firmes.
FIJACiON DEL CABLE DEL
MOTOR (FIGURA J)
ZLPRECAUClON: Conecte el cable
para que no Ilega a ser estirada o
pettizcado en las articulaciones de las
asas durante el uso o plegabte. Esto
puede causar dafio a la m6dula.
El cable del motor (22) debe sujetarse
a los mangos utilizando las fijaciones
para cable (23) que ya se encuentran
instatadas en el mango.
Para enganchar el cable en el mango:
• Coloque los mangos en la posicion de
28
Page 29

funcionamiento, consulte la secci6n
"lnstalaci6n del mango inferior".
o
Extienda el cable pot el frente de los
mangos inferior y superior.
o
Tire hacia atr&s de la fijaci6n para cable.
o
Destice el cable del motor por debajo
del sujetador y asegQrese de que
quede completamente sujeto en su
lugar pot la fijaci6n.
RECOLECClON EN BOLSA
• AsegQrese de quitar de la cortadora
de c6sped el aditamento de descarga
lateral (27) (Figura M) y el inserto de
formaci6n de mantitto (26) (Figura L)
antes de la recolecci6n en bolsa.
• Levante la cubierta de la puerta trasera
(9) y coloque la botsa de recolecci6n de
c6sped (8) en la cortadora de c6sped
de manera que los ganchos de la bolsa
(24) se apoyen sobre las lengQetas (25)
como se muestra en la Figura K. Luego
baje lacubierta de la puerta trasera.
DESCARGA LATERAL
• AsegQrese de que la botsa de
recolecci6n (8) no est6 instalada.
• Levante la aleta posterior (9) y destice
el inserto de formaci6n de mantillo (26)
comptetamente dentro de la cortadora de
c6sped como se muestra en la Figura L
• Levante la ateta lateral (28) y enganche
el aditamento de descarga lateral (27)
en ta cortadora de c6sped como se
muestra en la Figura M.
• Suelte la aleta lateral y asegOrese de
que el aditamento se mantenga en su
lugar antes de encender la cortadora de
c6sped como se muestra en el recuadro
de la Figura M.
FORMACION DE MANTILLO
• AsegQrese de que el aditamento de
descarga lateral (27) y la bolsa de
recolecci6n (8) no est_n instalados.
• Levante la cubierta de ta puerta trasera
(9) y destice el inserto de formaci6n de
mantillo (26) comptetamente dentro de
la cortadora de c6sped como se muestra
en la Figura L
• AsegOrese de que la cubierta de la puerta
trasera este completamente cerrada antes
de encender lacortadora de cesped.
FUNCIONAMIENTO
LEA ESTE MANUAL DE
INSTRUCCIONES ANTES DE UTILIZAR
LA CORTADORA DE CcSPED. Consulte
"Descripci6n de las funciones" en la p&gina
6 para famitiarizarse con ta ubicaci6n de
los diversos controles y ajustes. Conserve
este manual para futuras consuttas.
z_ADVERTENCIA: Hoja m6vil filosa. No
utilice la cortadora de c6sped en el modo de
descarga lateral o de formaci6n de mantillo si
la puerta trasera no est,. cerrada bajo tensi6n
de resorte, ya que pueden producirse
lesiones graves. Lleve la cortadora de
c6sped al centro de mantenimiento m&s
cercano para reparaci6n.
zLPELIGRO: Hoja m6vil filosa. Nunca
utilice la cortadora de c6sped en modo de
29
Page 30

recolecci6nenbolsaamenosquelos
ganchosparacolgardelrecolectordec6sped
estendebidamenteasentadosenla
cortadoradec6spedyquelapuertade
descargatraseraseapoyefirmementecontra
lapartesuperiordelrecolectordecesped,ya
quepodrianproducirsegraveslesiones.
z_ADVERTENClA: Permita que la
cortadora de c6sped trabaje a su propio
ritmo. No la sobrecargue.
AJUSTE DE LA ALTURA DEL
MANGO (FIGURA N)
• Abra ambas palancas de fijaci6n del
mango inferior (6).
• Ajuste el mango de manera que la
flecha (18) en la base de la cortadora
de c6sped est_ alineada con los
nOmeros 1,2 o 3 en la base det mango
(19). AsegQrese de que el mango est6
ajustado en el mismo nQmero a ambos
lados de la cortadora de c6sped.
• Cierre ambas palancas y asegOrese
de que el mango est6 firmemente
asegurado.
AJUSTE DE LA ALTURA DE
LA CORTADORA DE CESPED
(FIGURA O)
La altura de corte se ajusta mediante la
palanca de ajuste de altura de corte central y
puede elegirse entre 7 posiciones distintas.
NOTA: Si no est& seguro de la altura de
corte, comience cortando con la patanca
de ajuste de altura (7) en la posici6n 7 y
redQzcala segQn sea necesario, como se
muestra en ta FJgura O.
Para ajustar la altura de corte:
• Tire de la palanca de ajuste de altura
de la cortadora de c6sped fuera de la
muesca de bloqueo.
• Mueva la palanca hacia la parte
posterior del aparato para reducir la
altura de corte.
• Mueva la patanca hacia la parte
delantera del aparato para aumentar la
altura de corte.
• Empuje la palanca de ajuste de altura a
una de las 7 muescas de bloqueo.
LLAVE DE SEGURIDAD
z_PELIGRO: HOJA MOVIL FILOSA.
Con el fin de evitar un arranque accidental
o un uso no autorizado de la cortadora
de c6sped inal&mbrica, se ha incorporado
una Itave de seguridad desmontabte (2) en
el dise5o de esta. La cortadora de c6sped
quedar& comptetamente desactivada
cuando se haya quitado la Ilave de
seguridad de esta.
NOTA: LA LLAVE DE SEGURIDAD
TIENE UN ORIFIClO EN EL CENTRO
PARA COLGARLA DE UN CLAVO,
LEJOS DEL ALCANCE DE LOS
NINOS. NO AMARRE LA LLAVE DE
SEGURIDAD A LA PODADORA.
Z_PELIGRO: LAS HOJAS
GIRATORIAS PUEDEN PROVOCAR
LESIONES GRAVES. PARA EVlTAR
LESIONES GRAVES, RETIRE LA
LLAVE DE SEGURIDAD CUANDO
DEJE LA PODADORA SIN
SUPERVISION O CUANDO LA
CARGUE, LIMPIE, MANTENGA,
TRANSPORTE, LEVANTE O GUARDE.
_PELIGRO: HOJAM6VlL FILOSA.
NUNCA IN.TENTE ANULAR LA
OPERACION DE ESTE INTERRUPTOR Y
DEL SlSTEMA DE LA LLAVE DE
SEGURIDAD YA QUE PUEDEN
PRODUCIRSE LESlONES GRAVES.
• Inserte laIlave de seguridad (29) en
la caja del interruptor hasta que est6
completamente inserta en la caja como se
muestra en la FJgura P.Ahora, la cortadora
de c6sped se encuentra operativa.
3O
Page 31

• Lacortadoradec6spedest&equipada
conunacajadelinterruptorespecial
deencendido-apagado.Parautilizarla
cortadoradec6sped,oprimaelbot6n
(30)enlacajadelinterruptor(1)y
luegotiredelmangodesuspensi6n
(2)hacialabarradelmangocomose
muestraenlaFiguraQ.
antesdelevantarla,transportarlao
almacenarla.Gu&rdelaenunlugarseco.
zLPRECAUCION: Punto de pellizco.
Para evitar peltizcos, mantenga los dedos
lejos del _.rea entre los mangos al plegar
los mangos.
Z_PRECAUCiON: Aseg_rese de que
el cable no se estire o pellizque en las
articulaciones de los mangos durante el
ptegado. Esto puede provocar dafios en
el cable.
El mango de la cortadora de c6sped
puede plegarse f&cilmente para un
almacenamiento r&pido y c6modo.
• Mientras sostiene el mando, abra, pero
no quite, las palancas de ajuste de
altura det mango (6) y pliegue el mango
hacia la parte delantera de la cortadora
de c6sped como se muestra en la
Figura R.
• Para apagar la cortadora de c6sped,
simplemente suelte el mango de
suspensi6n.
z_ADVERTENCIA: Nunca intente
bloquear un interruptor o mango de
suspensi6n en la posici6n de encendido.
NOTA: Una vez que el estribo de
suspensi6n ha vuelto a su posici6n
original, se activar& et "mecanismo
de frenado autom&tico". El motor
se frena el6ctricamente y ta cuchilla
del cortac6sped dejar& de girar en 3
segundos o menos.
SOBRECARGA DE LA
PODADORA
Para evitar dafios debido a condiciones
de sobrecarga, no intente extraer
demasiado c6sped a la vez. Reduzca el
ritmo de corte o eleve la altura de corte.
ALMACENAMIENTO. DE LA
CORTADORA DE CESPED
z_PELIGRO: Una hoja girando puede
provocar lesiones graves. Suelte la
palanca de suspensi6n (3) para apagar la
cortadora de c6sped y quite la bateria
• Abra, pero no quite, las palancas de
fijaci6n del mango (5) y pliegue el
mango superior (3) hacia atr&s sobre el
mango inferior (4) como se muestra en
la Figura S.
• La cortadora de c6sped debe
compactarse como se muestra en la
Figura T.
31
Page 32

TRANSPORTE DE LA
CORTADORA DE CESPED
z_PELIGRO: LAS HOJAS GIRANDO
PUEDEN PROVOCAR LESIONES
GRAVES. PARA EVITAR LESIONES
GRAVES, QUITE LA LLAVE DE
SEGURIDAD CUAND,O DEJE LA
CORTADORA DE CESPED SIN
SUPERVISION O CUANDO LA CARGUE,
LIMPIE, MANTENGA, TRANSPORTE,
LEVANTE O ALMACENE.
• La cortadora de cesped puede
transportarse utilizando los c6modos
mangos de transporte (12) como se
muestra en la Figura U. No intente levantar
la podadora agarrando la manija superior
(3) o baje el mango (4).
3. Para cortar el cOsped en terreno
escabrosos o con malezas altas,
seleccione la m&xima altura de corte.
Si intenta cortar demasiada cantidad
de cOspedde una vez, puede causar
que se sobrecargue el motor y que se
detenga. Consulte la guia de soluci6n de
problemas.
4. Si se utitiza un recolector de cOsped
durante la estaci6n de crecimiento
r&pido, es posible que el cOsped
tienda a obstruirse en la abertura
de descarga. Suelte la palanca del
interruptor para apagar la podadora
y retire la Itave de seguridad. Retire
el recolector y sacQdalo para que
el cOsped caiga hacia el extremo
posterior de la bolsa. Adem&s, timpie
el cOsped o los residuos que se hayan
compactado alrededor de la abertura
de descarga. Vuelva a colocar el
recolector de cOsped.
5. Si la podadora comienza a vibrar
en forma anormal, suelte la palanca
det interruptor para apagarla y retire
la Itave de seguridad. Verifique de
inmediato para encontrar la causa.
La vibraci6n indica un probtema. No
opere la podadora hasta que no se
haya realizado una verificaci6n de
mantenimiento. Consutte la guia de
soluci6n de problemas en et manual.
6. SIEMPRE SUELTE LA PALANCA
DEL INTERRUPTOR PARA APAGAR
LA PODADORA Y RETIRE LA
LLAVE DE SEGURIDAD CUANDO
LA DEJE SIN SUPERViSiON
AUN.QUE SEA DURANTE UN
PERIODO BREVE.
CONSEJOS PARA EL CORTE
DE CESPED
ZLADVERTENClA: SIEMPRE
INSPECClONE EL AREA DONDE VA A
UTILIZAR LA PODADORA Y RETIRE
TODAS LAS PIEDRAS, PALOS,
ALAMBRES, HUESOS y OTROS
RESlDUOS QUE PODRIAN SER
LANZADOS POR LA HOJA EN ROTACION.
1. z_ADVERTENCIA: En tas
pendientes corte el cOsped
transversalmente, nunca subiOndotas y
baj&ndolas. Sea extremadamente
cuidadoso cuando cambie de direcci6n
sobre pendientes. No corte el cOsped
en pendientes demasiado
pronunciadas. Siempre mantenga los
pies bien apoyados.
2. Suelte la palanca del interruptor para
apagar la podadora alcruzar cualquier &rea
con grava (la hoja podrialanzar piedras).
LAS SIGUIENTES SUGERENCIAS LE
AYUDARAN A OBTENER UN TIEMPO
DE FUNCIONAMIENTO OPTIMO DE LA
PODADORA INALAMBRICA:
1. Reduzca la velocidad en las _.reas
donde el cOsped est6 demasiado alto
o sea demasiado tupido.
2. Evite cortar et cOsped cuando est&
moiado porque ha Ilovido o ha caido
rocto.
3. Corte el cOsped a menudo,
especialmente durante los periodos de
crecimiento r&pido.
NOTA: SE RECOMIENBA QUE LA
PODADORA SE RECARGUE DESPUES
DEL USO PARA PROLONGAR LA VIDA
0TIL DE LA BATER|A. LA CARGA
FRECUENTE NO DA=A LA BATERiA
Y, DE ESTA MANERA., USTED SE
ASEGURA QUE ESTE TOTALMENTE
CARGADA PARA LA PROXlMA
VEZ QUE DESEE UTILIZAR LA
PODADORA. Sl GUARDA LA BATERiA
SIN CARGARLA COIVlPLETAMENTE
32
Page 33

SEACORTARA SU VIDA 0TIL.
EXTRACCION E INSTALACION
DE LA HOJA
z_PELIGRO: RIESGO DE LESION, AL
VOLVER A ENSAMBLAR EL SISTEMA DE
LA HOJA, ASEGURESE DE QUE CADA
PIEZA SE REINSTALL
CORRECTAMENTE, COMO SE DESCRIBE
A CONTINUACION. EL ENSAMBLE
INCORRECTO DE LA HOJA U OTRAS
PIEZAS DEL SISTEMA DE LA HOJA
PUEDE PROVOCAR LESIONES GRAVES.
1. zLADVERTENClA: SUELTEEL
MANGO DE SUSPENSION PARA
APAGAR LA CORTADORA DE CESPED,
ESPERE A QUE LA HOJA SE DETENGA
Y QUITE LA LLAVE DE SEGURIDAD Y
EL PAQUETE DE BATERIAS.
2. Corte un trozo de madera (31)
de 51 x 102 mm (2 x 4 pulg.)
(aproximadamente 0,6 m [2 pies] de
largo) para evitar que la hoja gire at
quitar el perno (32).
3. Use guantes y protecci6n adecuada para
los ojos. Gire la cortadora de c6sped
sobre un costado. Tenga cuidado con
los bordes filosos de ta hoja. Coloque el
trozo de madera y desenrosque et perno
con ta Ilave de 12,7 mm (1/2 pulg.) (33)
como se muestra en la Figura V.
4.Quite el perno y la arandela (34). Extraiga
la hoja (35) como se muestra en la Figura
W. E]ventilador (36) no debe quitarse.
Examine todas las piezas en busca de
dafios y reemplb,celas si es necesario.
5.La hoja solo puede instalarse en el
ventilador en una direcci6n. Para volver a
ensamblar, alinee el orificio en forma de
D de la hoja con la clavija en forma de D
del ventilador, asegur_.ndose de que la
inscripci6n sobre la hoja mire en direcci6n
opuesta a la cortadora de cesped.
6.Para un ajuste firme, coloque la pieza de
madera como se muestra en ta Figura
X para evitar que la hoja gire. Destice el
perno a trav6s de la arandeta y enrosque
el perno en su lugar. AjQstelo con la Ilave.
AFILADO DE LA HOJA
MANTENGA LA HOJA AFILADA PARA
OBTENER EL MEJOR RENDIMIENTO
DE LA PODADORA. UNA HOJA
DESAFILADA NO PRODUCE UN CORTE
LIMPIO DEL ClaSPED NI CORTES
ADECUADOS PARA MANTILLO.
UTtLICE PROTEOOtON ADEOUADA
PARA LOS OJOS MIENTRAS RETtRA,
AFILA E tNSTALA LA HOJA. VERIFtQUE
QUE SE HAYA RETIRADO LA LLAVE DE
SEGURIDAD Y EL PAQUETE DE BATERiAS.
En circunstancias normales, generatmente
es suficiente afilar la hoja dos veces
durante una temporada de corte del
c6sped. La arena hace que la hoja se
desafile r_.pidamente. Si su cesped tiene
un suelo arenoso, es probable que se
requiera un afilado m&s frecuente.
REEMPLACE DE INMEDIATO UNA
HOJA DOBLADA O DANADA.
AL AFILAR LA HOJA:
1. Asegt_rese de que la hoja se
mantenga sim_trica.
2. Afite la hoja seg_n el &ngulo de corte
original.
3. Afile los bordes de corte en ambos
extremos de la hoja, retirando la misma
cantidad de material en ambos extremos.
PARA AFILAR LA HOJA EN
UNA PRENSA: (FIGURA Y)
1. AsegQrese de soltar la palanca del
interruptor, que la hoja se haya
detenido y que ta Itave de seguridad
y el paquete de baterias se hayan
retirado antes de quitar la hoja.
33
Page 34

2. Retireiahojadelapodadora.Consuiteias
instruccionespararetirareinstaiariahoja.
3.Asegurelahoja(35)enunaprensa(38).
4. Useguantesyprotecci6nadecuadapara
losojos,ytengacuidadodenocortarse.
5. Limeconcuidadolosbordesdecorte
delahojautilizandounalimade
dientesfinos(39)ounapiedradeafilar,
manteniendoel&ngulodelbordede
corteoriginal.
6.Verifiquelasimetriadelahoja.
Consultelasinstruccionespara
simetriadelahoja.
7.Vuelvaacotocarlahojaenla
podadorayajQstelafirmemente.
SIMETRiA DE LA HOJA
(FIGURA Z)
Revise la simetria de la hoja (35)
cotocando el agujero central de esta
sobre un clavo o un destomiltador
de v&stago redondo (40), sujeto
horizontalmente en una prensa (38). Si
alguno de los extremos de la hoja gira
hacia abajo, lime el borde filoso de ese
extremo. La hoja tiene una simetria
adecuada cuando ninguno de los
extremos baja.
hoja se detenga y luego retire la Ilave de
seguridad y el paquete de baterias. Para
limpiar la podadora, utilice Onicamente
jab6n suave y un patio hQmedo. Limpie
todos los recortes de cesped que podrian
haberse acumulado por debajo de la
plataforma. Despues de varios usos,
verifique el ajuste de todos los elementos
de fijaci6n expuestos. AsegQrese de que los
terminales y el compartimiento de baterias
de la podadora esten libres de residuos.
PREVENCI.ON DE LA
CORROSION
Los fertilizantes y otros productos
quimicos para el jardin contienen agentes
que aceleran considerabtemente la
corrosi6n de los metates. Si corta el
c6sped en _.reas donde se hart utilizado
fertitizantes o productos quimicos, se
debe limpiar la podadora inmediatamente
despu6s del modo siguiente: Suelte el
mango de suspensi6n (2) para apagar la
cortadora de c6sped y quite la Ilave de
seguridad y la bateria. Limpie todas las
piezas expuestas con un patio hQmedo.
Z_PRECAUCION: NO VIERTA NI
ROCIE AGUA SOBRE LA PODADORA
PARA LIMPIARLA. No guarde la
herramienta sobre o junto a fertitizantes o
productos quimicos. Dicho
almacenamiento puede provocar una
r&pida corrosi6n.
CUMPLE CON LOS REQUISITOS
DE SEGURIDAD CPSC
Craftsman _ Cortadoras se ajustan a
las normas de seguridad del American
National Standards Institute, y de la
Comisi6n de Seguridad de Productos
del Consumidor EE.UU.. La cuchilla gira
cuando el motor est& en marcha.
LUBRICACION
No se necesita ningQntipo de lubricaci6n.
No aceite ias ruedas. Tienen superficies
plb,sticas en los rodamientos que no
requieren lubricaci6n alguna.
LIMPIEZA
Suelte la palanca del interruptor para
apagar la podadora, espere hasta que la
iVlANTENIMIENTO
IMPORTANTE: Para garantizar seguridad
y confiabitidad, las reparaciones, el
mantenimiento y los ajustes deber_.
efectuarse por los concesionarios de
servicio catificado, usando siempre piezas
de repuesto id_nticas.
ACCESORIOS
/KADVERTENCIA: El uso de
cualquier accesorio no recomendado
para uso con esta herramienta puede
resultar peligroso.
• Cuchilla de repuesto est,. disponible.
Utilice la cuchilla de repuesto de
5140161-49.
34
Page 35

EL SELLO RBRC TM
El sello RBRC TM (CorporaciSn
de recictado de baterias
recargabtes) que se encuentra
en la bateria de iones de litio
(o paquete de baterias) indica que los
costos de recictar la bateria (o el paquete
de baterias) al final de su vida Qtit ya
fueron pagados por Craftsman (R_.
RBRC TM en cooperaci6n con Craftsman _.
y otros usuarios de baterias, ha
establecido programas en los Estados
Unidos para facilitar la recolecci6n de
baterias de iones de litio agotadas. Ayude
a proteger nuestro medio ambiente y a
conservar los recursos naturales: devuelva
las baterias de iones de litio agotadas a
un centro de mantenimiento autorizado de
Craftsman (R_.o a un comerciante minorista
local para que se reciclen. Tambi6n
puede comunicarse con el centro local
de reciclado para obtener informaci6n
sobre d6nde dejar las baterias agotadas.
RBRC TM es una marca comercial
registrada de la Corporaci6n de reciclado
de baterias recargables.
35
Page 36

6) Registered Trademark / Trademark of KCD IP, LLC in the United States, or Sears Brands, LLC in other countries
6) Marca Registrada / Marca de F&brica de KCD IP, LLC en Estados Unidos, o Sears Brands, LLC in otros paises
TM
TM
36
 Loading...