

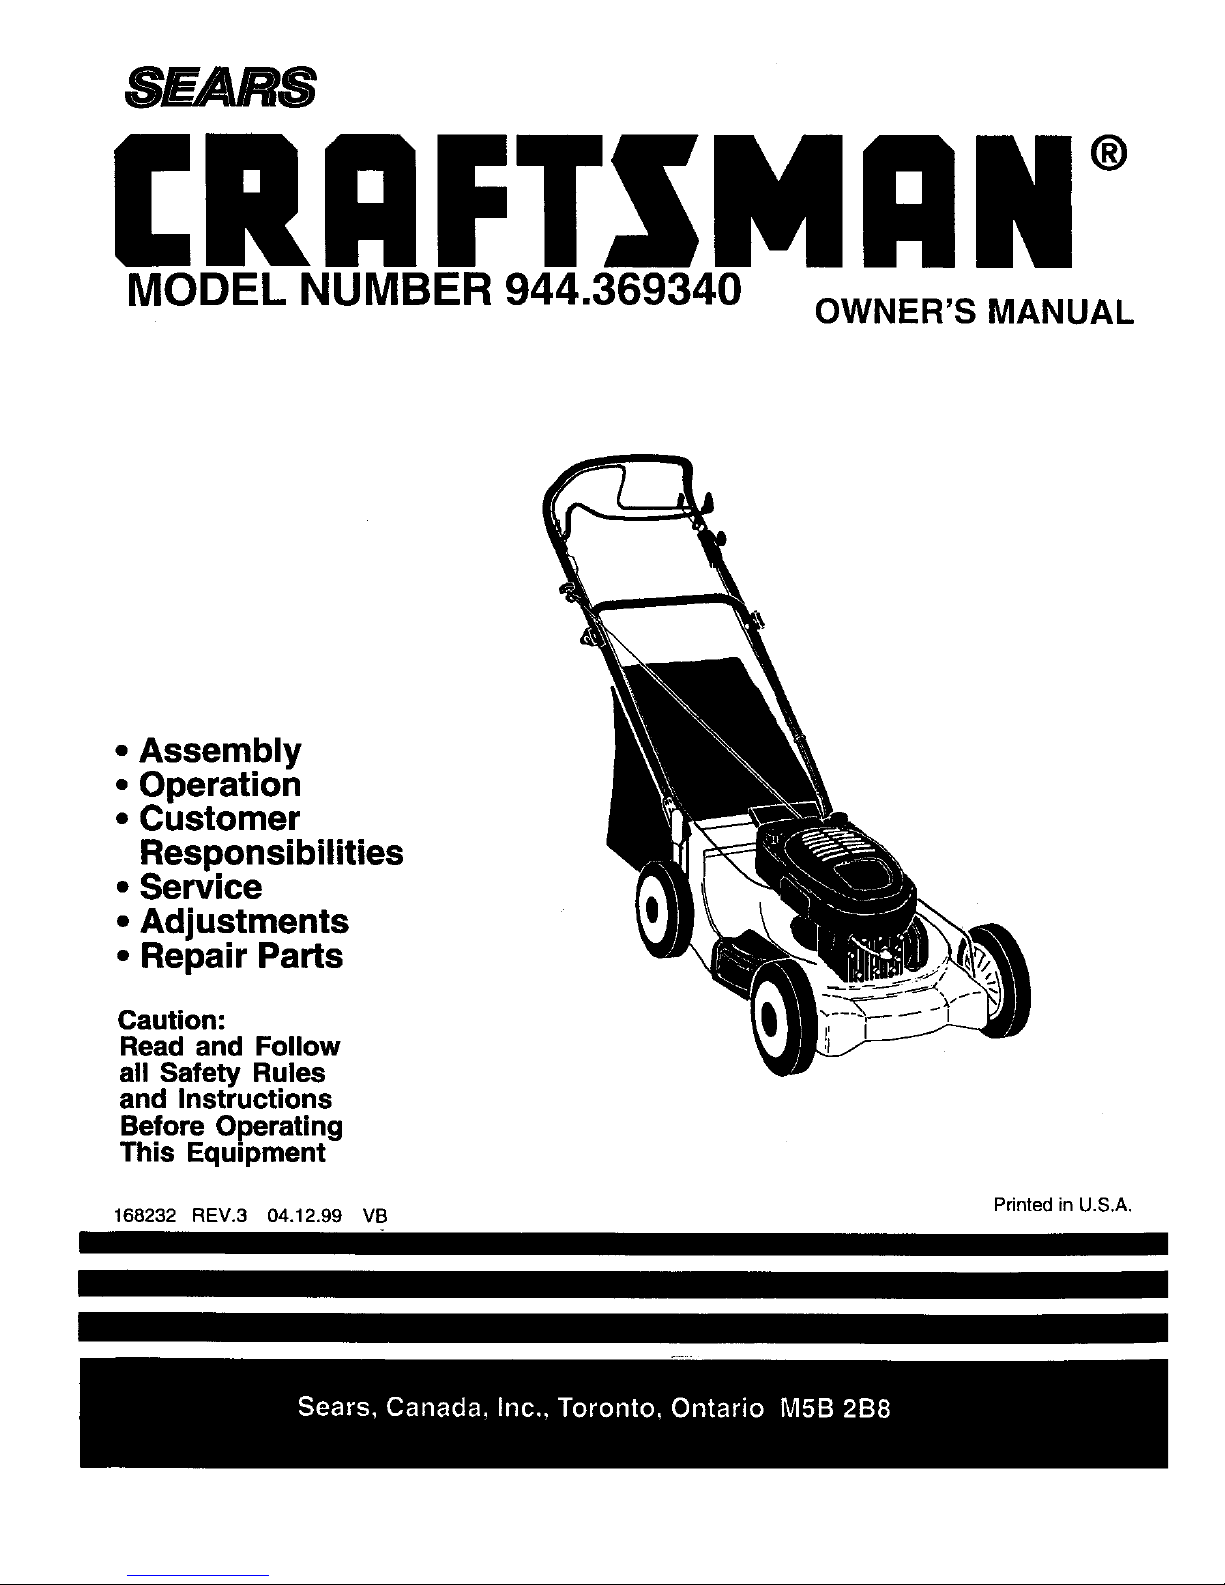
Craftsman 944.369340 Owner's Manual
SEAR8
nFTZMnN°
Ik
Iv
MODEL NUMBER 944.369340
OWNER'S MANUAL
• Assembly
• Operation
• Customer
Responsibilities
• Service
• Adjustments
• Repair Parts
Caution:
Read and Follow
all Safety Rules
and Instructions
Before Operating
This Equipment
168232 REV.3 04.12.99 VB Printed in U.S.A.
SAFETY RULES
Safe Operation Practices for Walk-Behind Mowers
IMPORTANT: THIS CUTTING MACHINE IS CAPABLE OF AMPUTATING HANDS AND FEET AND THROWING OBJECTS.
FAILURE TO OBSERVE THE FOLLOWING SAFETY INSTRUCTIONS COULD RESULT INSERIOUS INJURY OR DEATH.
SAFETY STANDARDS REQUIRE OPERATOR PRESENCE CONTROLS TO MINIMIZE THE RISK OF INJURY. YOUR UNIT IS
EQUIPPED WITH SUCH CONTROLS. DO NOT ATTEMPT TO DEFEAT THE FUNCTION OF THE OPERATOR PRESENCE
CONTROLS UNDER ANYCIRCUMSTANCES.
TRAINING:
• Read this operator's manual carefully, Become familiar with
the controls and know how to operate your mower properly.
Learn how to quickly stop mower.
• Do not allow children to use your mower. Never allow adults
to use mower without proper instructions.
• Keep the area of operation clear of all persons, especially
small children and pets.
• Use mower only as the manufacturer intended and as de-
scribed in this manual.
Do not operate mower if it has been dropped or damaged in
any manner. Always have damage repaired before using
your mower.
Donotuseaccessoryattachmentsthatarenotrecommended
by the manufacturer. Use of such attachments may be
hazardous,
• Theblade turnswhenthe engineis running.
PREPARATION:
• Alwaysthoroughlychecktheareatobemowedandclearit of
all stones,sticks,wires, bones,and otherforeignobjects.
These objectswill be thrownby the blade and can cause
severeinjury.
• Alwayswearsafetyglassesoreye shieldswhenstartingand
whileusingyourmower.
• Dressproperly. Do not operate mowerwhen barefootor
weadngopen sandals. Wear onlysolid shoeswith good
tractionwhenmowing.
• Checkfuel tankbeforestartingengine. Do notfillgastank
iodoom,whentheengineisrunningorwhentheengineishot.
Allowtheenginetocoolforseveralminutesbeforefillingthe
gastank. Clean offany spilledgasolinebeforestartingthe
engine.
• Alwaysmakewheel heightadjustmentsbeforestartingyour
mower.Neverattempttodothiswhiletheengineis running.
• Mowonlyin daylightor goodartificiallight.
OPERATION:
• Keepyoureyes and mindonyourmowerandthearea being
cut. Donot letother interestsdistractyou.
• Donotmowwetor slipperygrass.Neverrunwhileoperating
yourmower.Alwaysbe sureofyourfooting-keepafirmhold
onthe handlesand walk.
Do not put hands or feet near or under rotating parts. Keep
clear of the discharge opening at all times.
Always stop the engine whenever you leave or are not using
your mower, or before crossing driveways, walks, roads, and
any gravel-covered areas.
Never direct discharge of matedal toward bystanders nor
allow anyone near the mower while you are operating it.
Before cleaning, inspecting, or repairing your mower, stop the
engine and make absolutely sure the blade and all moving
partshave stopped. Then disconnect the spark plugwire and
keep it away from the spark plug to prevent accidental
starting.
Donotcontinuetorunyourmowerifyouhita foreignobject.
Followtheprocadumoutlinedabove,then repairany dam-
agebefore restartingandoperatingyoumower.
Do not change the govemor settings or overspeed the
engine. Enginedamageorpersonalinjurymay result.
Do notoperateyourmowerifitvibratesabnormally.Exces-
sivevibrationisan indicationof damage; stopthe engine,
safelycheckforthecause ofvibrationandrepairasrequired.
Donotrunthe engineindoors.Exhaustfumes are danger-
ous. ,
Never cutgrassby pullingthe mowertowardsyou. Mow
acrossthe face ofslopes, neverupand downoryoumight
loseyourfooting.Donotmowexcessivelysteepslopes.Use
cautionwhenoperatingthemoweronuneventerrainorwhen
changingdirections- maintaingoodfooting.
Never opdrateyourmowerwithoutproper guards,plates,
grasscatcheror othersafetydevicesin place.
MAINTENANCE AND STORAGE:
• Check the blade and the engine mounting bolts often to be
sure they are tightened properly.
• Check all bolts, nuts and screws at frequent intervals for
proper tightness to be sure mower is in safe working condi-
tion.
• Keep all safety devices in place and working.
• To reduce fire hazard, keep the engine free of grass, leaves
or excessive grease and oil.
• Check grass catcher often for detedoration and wear and
replace wom bags. Use only replacement bags that are
recommended by and comply with specifications of the
manufacturer of your mower.
• Always keep a sharp blade on your mower,
• Allow engine to cool before storing in any enclosure.
• Never store mower with fuel in the tank inside a building
where fumes may reach an open flame or an ignitionsource
such as a hot water heater, space heater, clothes dryer, etc.
&
Look for this symbol to point out Impor-
tant safety precautions. It means
CAUTION!I! BECOME ALERTIn YOUR
SAFETY IS INVOLVED.
CAUTION: Always disconnect spark plug
wireand placewirewhere Itcannot contact
spark plug in order to prevent accidental
starting when setting up, transporting,
adjusting or making repairs.
2
CONGRATULATIONS on your purchase ofa Sears Lawn
Mower. Ithas been designed, engineered and manufactured
togiveyouthe bestpossible dependabilityand performance.
Should you experience any problem you cannot easily
remedy, please contact your nearest Sears Authorized
Service Center/Department. We have competent, well-
trained technicians and the proper toolsto service or repair
this lawn mower.
Please read and retain this manual. The instructionswill
enable you to assemble and maintain your lawn mower
properly. Always observe the "SAFETY RULES".
MODEL
NUMBER 944.369340
SERIAL
NUMBER
DATEOFPURCHASE
THE MODELAND SERIAL NUMBERS WILL BE FOUND
ON A DECALATTACHED TOTHE REAR OFTHE LAWN
MOWER HOUSING
YOUSHOULDRECORDBOTHSERIALNUMBERAND
DATE OF PURCHASE AND KEEP IN A SAFE PLACE
FORFUTUREREFERENCE.
PRODUCT SPECIFICATIONS
HORSEPOWER: 6.5
GASOLINE CAPACITY 1.25 quarts
ANDTYPE: UNLEADED REGULAR ONLY
OILTYPE (API-SF/SG): SAE 30 (above32°F)
SAE 5W-30 (BELOW32°F)
OIL CAPACITY: 20 ozs.
SPARK PLUG: Champion RJ19LM
(GAP: .030")
VALVE CLEARANCE: INTAKE: .004 -.008
EXHAUST: .004 - .008
SOLID.STATE IGNITION
AIRGAP: .0125 IN.
BLADEBOLTTORQUE: 35-40 FT. LBS.
MAINTENANCE AGREEMENT
A Sears Maintenance Agreement is available on this product, Contact your nearest Sears store for details.
CUSTOMER RESPONSIBILITIES
• Read and observe the safety rules.
• Follow a regular schedule inmaintaining, cadng for and usingyour lawn mower.
• Follow the instructions under"Customer Responsibilities"and "Storage" sections ofthis owner's manual.
3

TABLE OF CONTENTS
SAFETY RULES ........................................................... 2
PRODUCT SPECIFICATIONS ....................................... 3
CUSTOMER RESPONSIBIUTIES ....................... 3,10-13
WARRANTY .................................................................. 4
ASSEMBLY ................................................................... 5
OPERATION ............................................................... 6-9
MAINTENANCE SCHEDULE ....................................... 10
SERVICE AND ADJUSTMENTS ................................. 14
STORAGE ................................................................... 15
TROUBLESHOOTING ................................................. 16
REPAIR PARTS - LAWN MOWER .......................... 18-21
REPAIR PARTS - ENGINE ...................................... 22-25
PARTS ORDERING/SERVICE .................................... 26
LIMITED TWO (2) YEAR WARRANTY ON CRAFTSMAN POWER MOWER
ForTwo (2) yearsfrom date ofpurchaseSearsCanada, Inc.willrepairor replaceat Searsoptionfree of chargepartswhich
are defectiveas a resultof matedalor workmanship.
COMMERCIAL OR RENTAL USE:
Warrantyon PowerMower(Gas) willbe ninety(90) daysfromdateof purchaseifusedforcommercialorrental purposes.
This Warranty does NOTcover:
1. Pre-dellvery set-up.
2. Expendable Items which become worn duflng normal use, such as rotary mower blades, blade adapters, belts,
filters and spark plugs.
3. Repairs necessary because of operator abuse or negligence, Including bent crankshafts and the failure to
operate and maintaintheequipment accordingto the instructionscontalnndinthe Owner's Manual.
Warranty serviceis availableby returningthe CraftsmanPower Mower to the nearestSears ServiceCentre/Departmentin
Canada. Thiswarrantyappliesonlywhilethis productis inuse inCanada.
This warrantyis in additionto any statutorywarrantyand does notexcludeor limitlegal rightsyou may have but shallrun
concurrentlywith applicable provinciallegislation. Furthermore,some provincesdo NOT allow limitationon how long an
impliedwarrantywilllastsothe abovelimitationsmay notapplyto you.
SEARS CANADA, INC., TORONTO, ONTARIO M5B 2B8
4
ASSEMBLY
TO INSTALL AI"rACHMENTS
Read these instructionsand this manual initsentiretybefore
you attempt toassemble or operate your new lawn mower.
IMPORTANT: THIS LAWN MOWER ISSHIPPED WITHOUT
OIL OR GASOLINE IN THE ENGINE.
Your new lawn mower has been assembled at the factory
with the exception of those parts left unassembled for
shippingpurposes. To ensure safe and properoperation of
yourlawn mower, allparts and hardware you assemble must
be tightened securely. Use the correct toolsas necessary
toensure propertightness. Allparts such as nuts,washers,
bolts,etc., necessary tocomplete the assembly have been
placed inthe parts bag.
TO REMOVE LAWN MOWER FROM
CARTON
• Remove loose parts included with mower.
• Cut down two end corners of carton and layend panel
down flat,
• Remove allpacking materiels except padding between
upper and lower handle and padding holdingoperator
presence control bar toupper handle.
• Roll lawn mower out of carton and check carton
thoroughly for additional loose pads.
HOWTO SET UPYOUR LAWN MOWER
TO UNFOLD HANDLE (SEE FIG. 1A & 1B)
IMPORTANT: UNFOLD HANDLE CAREFULLY SO AS
NOT TO PINCH OR DAMAGE CONTROL CABLES.
• Raise lower handle section to operating position and
squeeze the bottom endsof lowerhandletowards each
other untilthe pin inhandle can be inserted intoone of
the three height adjustment holes.
• Removeprotective padding, raiseupper handlesecUon
tooperating positionand tightenhandle knobssecurely.
• Remove any packing material from around control bar.
• Your handles may be adjusted for yourmowing comfort.
Refer to Service and Adjustments section of this
manual.
OPERATOR PRESENCE
CONTROL BAR
UPPER
LIFT UF
SUPPORT
BRACKET
MOWING POSI-
TION
LOWER HANDLE
FIG. 1A
HANDLE
PIN
f 3-POS_ION
HANDLE
ADJUSTMENT
BRACKET
Your lawn mower was shipped ready to be used as a
mulcher. To convert to bagging or discharging; See
OPERATION section ofthis manual
TO ASSEMBLE & ATTACH GRASS CATCHER (SEE
FIGS. 2A & 2B)
• Putgrasscatcher frameinto gress bag with rigidpart of
bag on the bottom. Make sure the frame handle is
outside of the bag top.
• Slip vinyl bindings over frame.
NOTE: Ifvinylbindingsare toostiff,holdthem inwarmwater
for a few minutes. If bag gets wet, let itdry before using.
• Close the lifttop lid. Lifttop lid must be closed while
operating lawn.mower.
• Liftthe rear on the mower and place the grass catcher
frame hooks into the slots of the rear door.
• The grasscatcherissecured tothe lawn mower housing
when the rear door is lowered onto the grass catcher
frame.
&
CAUTION: Do not run your lawn mower
without mulcher plug In place or grass
catcher inplace. Never attemptto operate
the lawn mower with the rear door
removed or propped open
CATCHER
FRAME
HANDLE
FRAME
OPENING
RG.2A
REAR DOOR
SLOTS
GRASS
CATCHER
FRAME
HOOK
FIG. 2B
FIG. 1B 5

OPERATION
KNOW YOUR LAWN MOWER
READ THIS OWNER'S MANUAL AND SAFETY RULES BEFORE OPERATING YOUR LAWN MOWER. Compare the
illustrationswithyour lawn mower tofamiliarize yourselfwiththelocationofvarious controlsand adjustments. Savethis manual
for future reference, _ , ,
Thesesymbols mayappear onyour lawn mower orin literature suppliedwiththe product. Learnand understandtheir meaning.
CAUTION ENGINE ENGINE FAST SLOW CHOKE FUEL OIL DANGER, KEEP HANDS
OR WARNING ON OFF AND FEET AWAY
DRIVE CONTROL BAR
PRESENCE CONTROL BAR
ENGINE ZONE CONTROL
DRIVE SPEED'CONTROL
LEVER
STARTER HANDLI
GRASS CATCHER
HANDLE KNOB
GAS
PRIMER
WHEEL ADJUSTER
MULCHER PLUG
OIL
MULCHER
IMPORTANT: THIS LAWN MOWER IS SHIPPEDWlTHOUT
OIL OR GASOLINE IN THE ENGINE.
LAWN MOWER HOUSING
MEETS CPSC SAFETY REQUIREMENTS
Sears rotary walk-behind power lawn mowers conform to the safety standards of the American National Standards Institute
and the U.S. Consumer Product Safety Commission. The blade turns when the engine is running.
OPERATOR PRESENCE CONTROL BAR - must be held
down to the handle to start the engine. Re ease to stopthe
engine.
PRIMER - pumps additional fuelfrom the carburetor to the
cylinderfor use when starting a cold engine.
MU LCHER PLUG - locatedat the discharge opening, must
be removed when converting to bagging operation.
STARTER HANDLE - used for starting the engine.
6

OPERATION
The operation ofany lawn mower can result inforeign objects thrown into the eyes, which can
result in severe eye damage. Always wear safety glasses or eye shields while operating your
lawn mower orpedorming any adjustments or repairs. We recommend widevision safetymask
over spectacles or standard safety glasses.
HOW TO USE YOUR LAWN MOWER
CAUTION: Do not run your lawn mower
without mulcher plate in place and door
closed or approved clipping deflector or
grass catcher in place. Never attamptto
operate the lawn mower with the rear
door removed or propped open.
ENGINE SPEED
The engine speed was set at the tactory for optimum
performance. Speed isnot adjustable.
ENGINE ZONE CONTROL
CAUTION: Federal regulations require
an engine control to be Installed ORthis
lawn mower In order to minimize the
dek of blade contact injury. Do not under
any circumstances attempt to defeat the
function of the operator control. The
bladeturns when the engine Is running.
GROUND DRIVE SPEEDS
(See Rg. 4A)
Your lawnmowerprovidesmultiplespeedsto letyouselectthe
speedthatsuitsyoubest.
• Lowerspeeds arefor, heaw/th'P..,kgrass¢_ing ortrimming.
• Medium speeds arefor non-naigrasscutting or trimming.
• High isfor light cuttingand for groundtransport.
NOTE! Do not mQve speed control lever unless the engine
isrunning
TO OPERATE DRIVE SYSTEM
(SEE RGS. 4A & 4S)
• W_henginerunningselectgroundspeed bymovingspeed
controllevertodesiredposition.
• To startforward motion,pulldrivecontrolbar backagainst
handle.
• To stopforward motion,releaseddvecontrolbar.
IMPORTANT: ALWAYSKEEP DRIVE CONTROL BAR FULLY
ENGAGEDAGAINSTHANDLEWHEN INUSE.
• Your lawn mower is equipped withan operatorpresence
control barwhich requires the operator tobe positioned
behind the lawn mower handle to start and operate the
lawn mower.
TO ADJUST CU'I-FING HEIGHT (SEE FIG.3 )
• All four wheels are adjusted by a single lever.
• Pull adjuster lever toward wheel.To ralee mower, move
lever forward to desired position,To towermower, move
the lever toward the rear.
DRIVE SPEED
CONTROL
LEVER
LOWER WHEELS
FOR _GH CUT
WHEEL
ADJUSTER--s-
FIG. 3
FIG. 4A
OPERATOR
DRIVE CONTROL PRESENCE
ENGAGED CONTROL
BAR
_ DRIVE
CONTROL
DISEN-
GAGED
FIG. 4B
7
OPERATION
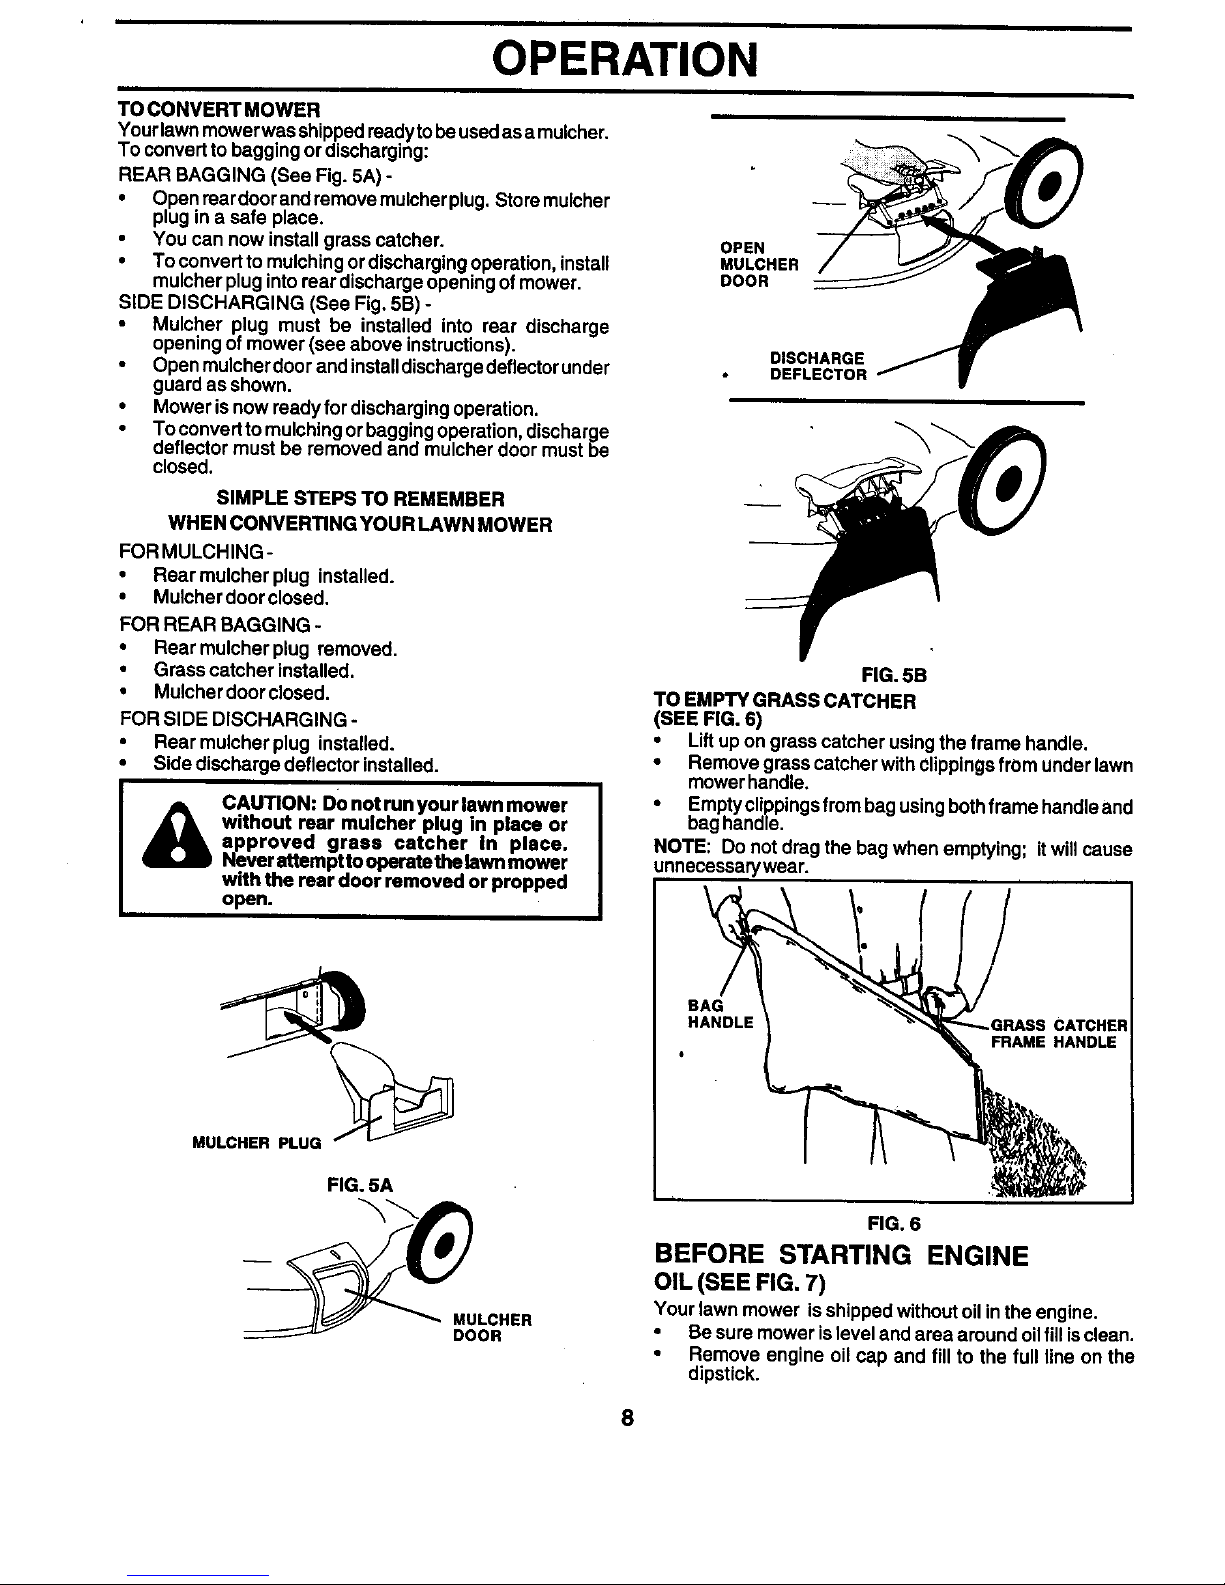
TO CONVERT MOWER
Yourlawn mowerwas shipped readytobe usedasa mulcher.
To convert to bagging or discharging:
REAR BAGGING (See Fig. 5A) -
• Openreardoorandremovemulcherplug. Storemulcher
plug in a safe place.
• You can now install grass catcher.
• To convert to mulching or discharging operation, install
mulcher plug into rear discharge opening of mower.
SIDE DISCHARGING (See Fig. 5B) -
• Mulcher plug must be installed into rear discharge
opening of mower (see above instructions).
• Open mulcherdoor and installdischarge deflectorunder
guard as shown.
• Mower isnow ready for discharging operation.
• To convert to mulching or bagging operation, discharge
deflector must be removed and mulcher door must be
closed.
SIMPLE STEPS TO REMEMBER
WHEN CONVERTING YOUR LAWN MOWER
FOR MULCHING-
• Rear mulcher plug installed.
• Mulcher door closed.
FOR REAR BAGGING -
• Rear mulcher plug removed.
• Grass catcher installed.
• Mulcher door closed.
FOR SIDE DISCHARGING -
• Rear mulcher plug installed.
Side discharge deflector installed.
CAUTION: DOnot run your lawn mower
without rear mulcher plug in place or
approved grass catcher In place.
Never attempt to operate the lawn mower
with the rear door removed or propped
open.
MULCHER PLUG
FIG. 5A
MULCHER
DOOR
OPEN
MULCHER
DOOR
DISCHARGE
DEFLECTOR
FIG. 5B
TO EMPTY GRASS CATCHER
(SEE FIG. 6)
• Liftup on grass catcher using the frame handle.
• Remove grass catcher with Clippingsfrom under lawn
mower handle.
• Emptyclippings from bagusing bothframe handle and
bag handle.
NOTE: Do not drag the bag when emptying; it will cause
unnecessarywear.
BAG
HANDLE
CATCHER
FRAME HANDLE
FIG. 6
BEFORE STARTING ENGINE
OIL (SEE FIG. 7)
Your lawn mower isshipped without oil in the engine.
• Be sure mower is level and area around oilfillisclean.
• Remove engine oil cap and fill to the full line on the
dipstick.
8
 Loading...