

Page 1
-r-
OWNERS
MANUAL
MODEL NO.
919.762000
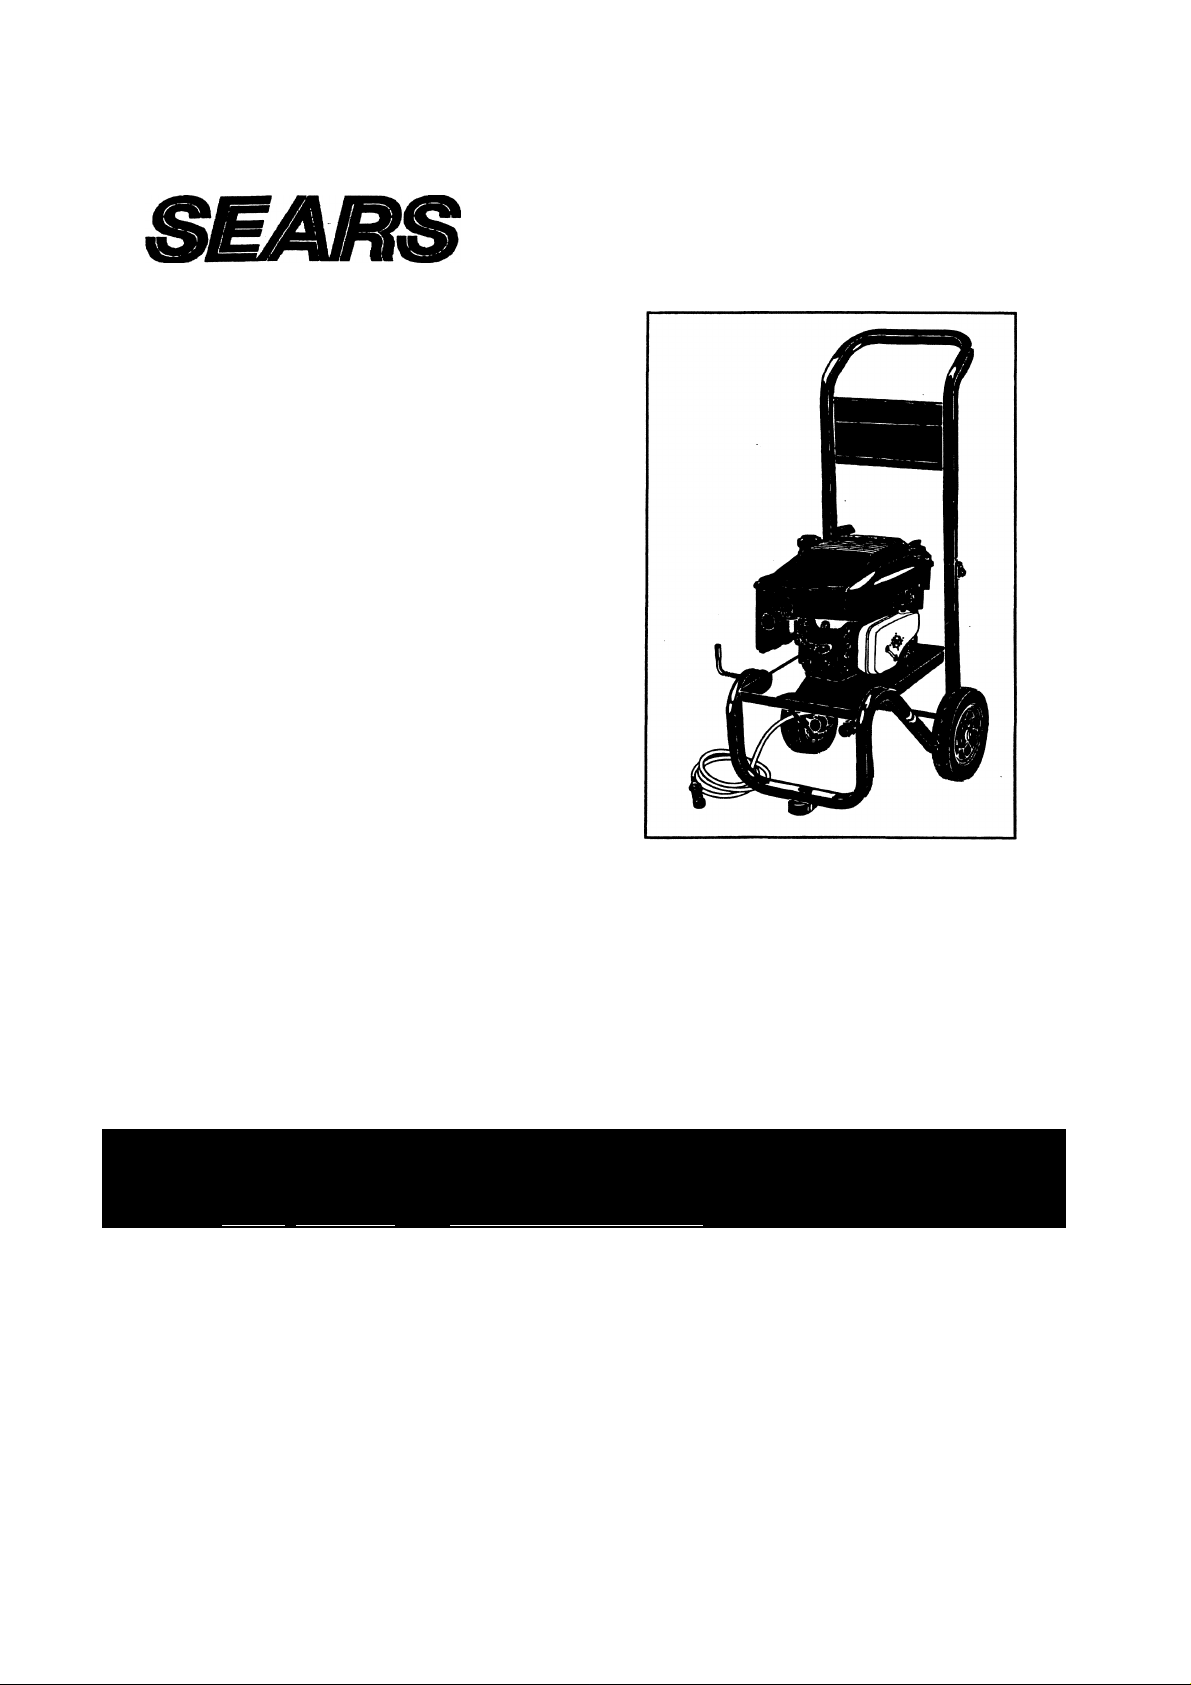
CRAFTSMAN.
6HP 2000 PSI2 GPM
HIGH PRESSURE POWER WASHER
WARNING
Read Owner's Manual. Do not operate equipment until you have read Owners Manual for Safety. Operation, and Maintenance Instructions.
•This product is not equipped with a spark arresting muffler. If the product will be used around flammable materials, or
on land covered with materials such as agricultural crops, forest, brush, grass, or other similar items, then an approved
spark arrester must be installed and is legally required in the state of California It is a violation of California statutes
section 130050 and/or sections 4442 and 4443 of the California Public Resources Code, unless the engine is equipped
with a spark arrester, as defined in section 4442, and maintained in effective working order. Spark arresters are also
required on some U.S. Forest service land and may also be legally required under other statutes and ordinances.
Engine exhaust from this product contains chemicals known, in certain quantities, to cause cancer, birth defects or
other reproductive harm.
1S256 «18.782000 7/1/07
Searis, Roebuck and Co., Hoffman Estates, IL 60179 U.S.A.
Page 2

Safety Guidelines
TABLE OF CONTENTS
...................
" r -
« -
i-'- - -. :^.'i
4-
.....
3-4
!•
Operating Instructions
^^^)ntents ■••■■•■■■■■■■•••■•••■•■•■■>>••>■••■
Assembly Instructions
Prestart instructions
........................
........................
.........................
Starting Instructions.............................
High Pressure Instructions
Usings Soap/Chemicais
Nozzle Cleaning
....................................
.......
..........
.......................
^Proul^le ^}h^)^)ting
Pump Breakdown
Parts List
...............................................
Pressure Washer Breakdown
.................................
..............
S
......
...........
6
.................
...........
■••••«■■■■•a 8
................
•■■••■■•■■■a 8
...........
.
..............
...................
6
7
8
9
10
12
Parts List
Warranty/Repair/Replacement Parts.
aaaaaaa aa aa aa a aaaa a 13
aa Back Cover
ini,'-' - ..
-T-'-'i,
-rji, . - ■
Page 3
SAFETY <
QUIDELINES - DEFI
NITIONS
This manual contains information
that is important for you to know
and understand. This information
relates to protecting YOUR
SAFETY and PREVENTING
EQUIPMENT PROBLEMS. To help
you recognize this information, we
use the symbols to the right. Please
read the manual and pay attention
to these sections.
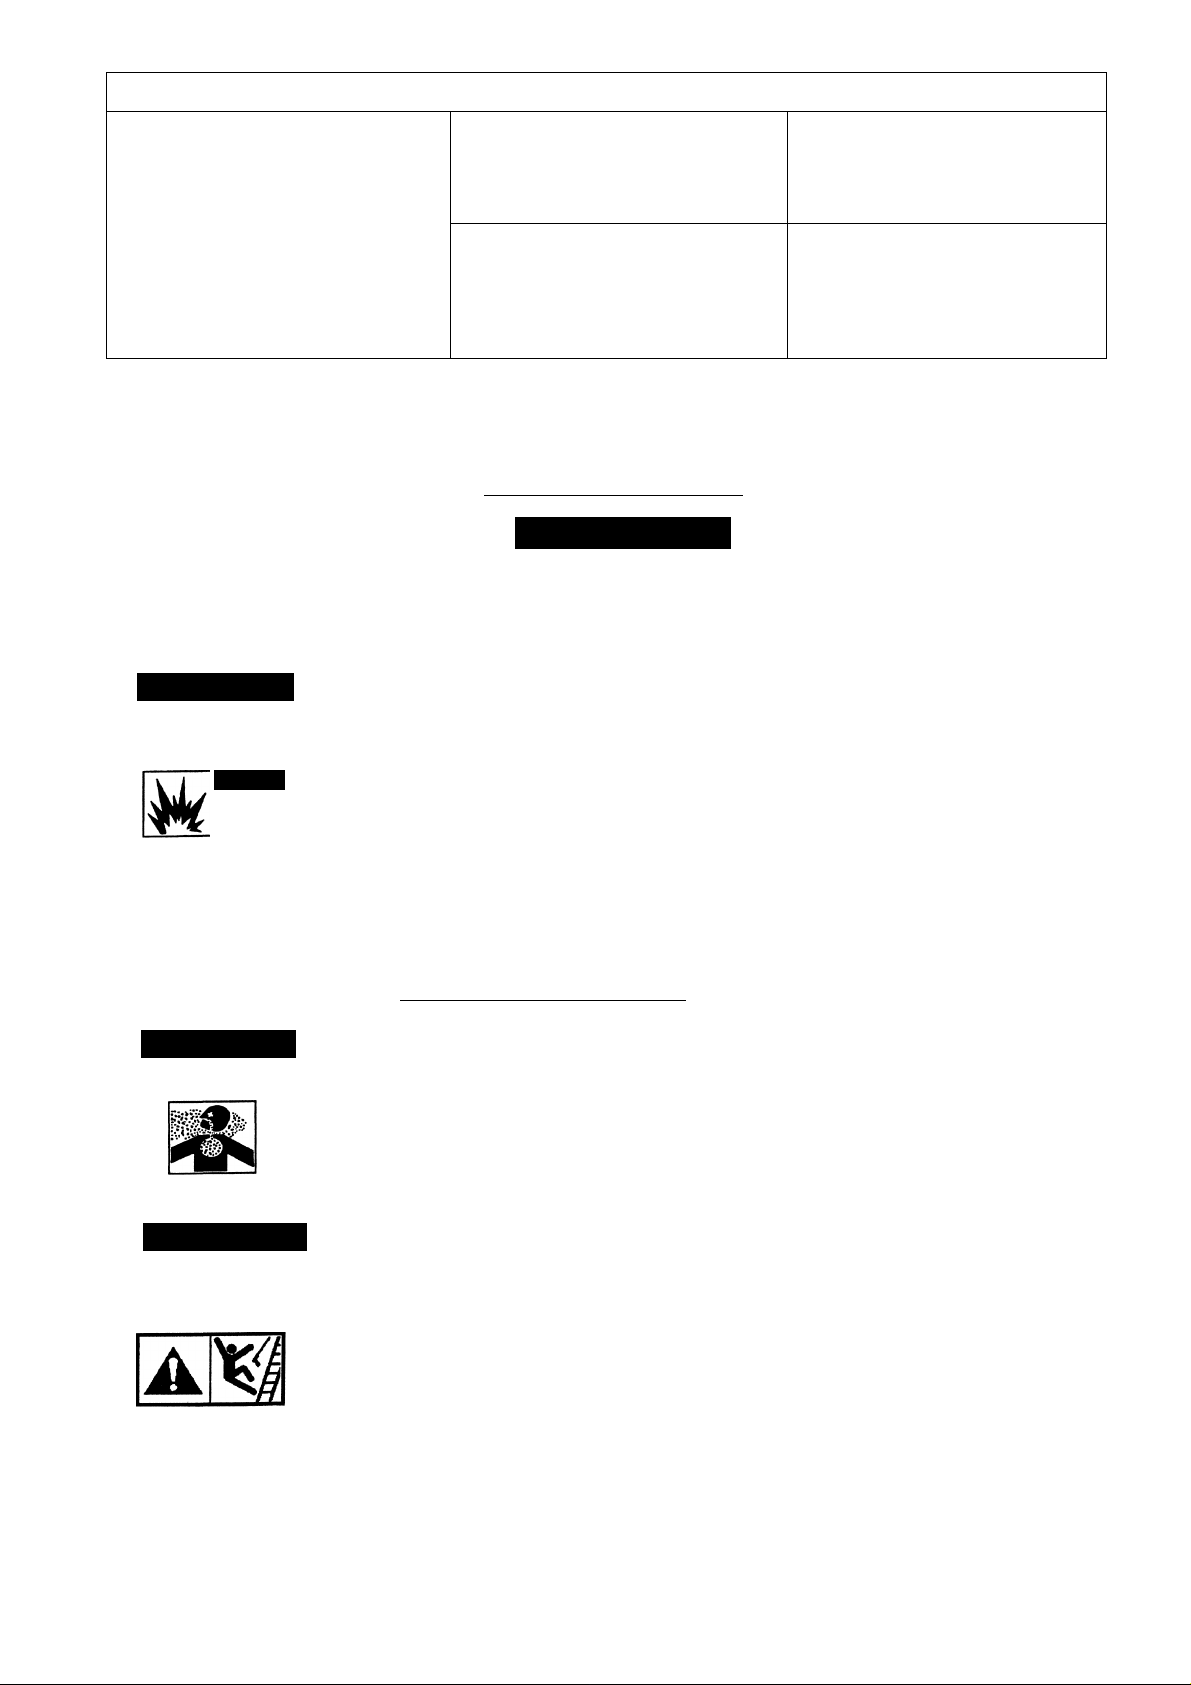
Iadangeri
URGENT SAFETY INFORMATION - A
HAZARD THAT WILL CAUSE SERI
OUS INJURY OR LOSS OF LIFE.
1A WARNING 1
IMPORTANT SAFETY INFORMATION - A
HAZARD THAT MIGHT CAUSE SERIOUS
INJURY OR LOSS OF LIFE.
Information that you should pay
special attention to.
Information for preventing damage
to equipment.
Ia cautioni
1 NOTE 1
IMPORTANT SAFETY
INSTRUCTIONS
• SAVE THESE INSTRUCTIONS »
AWARNING
IMPROPER OPERATION OR MAINTENANCE OF THIS PRODUCT COULD RESULT IN SERIOUS INJURY AND PROPERTY
DAMAGE. READ AND UNDERSTAND ALL WARNINGS AND OPERATING INSTRUCTIONS BEFORE USING
ha2:ard
Adanger
RISK OF EXPLOSION
OR FIRE
WHAT CAN HAPPEN
Spilled gasoline and it’s vapors can
become ignited from cigarette sparks,
electrical arcing, exhaust gases, and
hot engine components such as the
muffler.
Heat will expand fuel in the tank which
could result in spillage.
Operating the pressure washer in an
explosive environment could result in a
fire.
Materials placed against or near the
pressure washer can interfere with its
proper ventilation features causing
overheating and possible ignition of
the materials.
Improperly stored fuel could lead to
accidental ignition. Fuel improperly
secured could get into the hands of
children or other unqualified persons.
Shut off engine and allow it to cool
before adding fuel to the tank.
Use care in filling tank to avoid spilling
fuel. Move pressure washer away from
fueling area before starting engine.
Keep maximum fuel level W' below top
of tank to allow for expansion.
Operate and fuel equipment in well
ventilated areas free from obstructions.
Equip areas with fire extinguishers
suitable for gasoline fires.
Never operate pressure washer in an
area containing dry brush or weeds.
Store fuel in container approved for
gasoline, in a secure location away
from woric area.
HOW TO PREVENT IT
Adanger
RISK TO BREATHING
AWARNING
RISK OF UNSAFE
OPERATION
Breathing exhaust fumes will cause
serious injury or death.
Some cleaning fluids contain sub
stances which could cause injury to
skin, eyes, or lungs.
Unsafe operation of your pressure
washer could lead to serious injury or
death to you or others.
The spray gun/wand is a powerful
cleaning tool that could look like a toy
to a child.
Reactive force of spray will cause gun/
wand to move, and could cause the
operator to slip or fall, or misdirect the
spray. Improper control of gun/wand
can result in injuries to self and others.
Operate pressure washer in a well
ventilated area. Avoid enclosed areas
such as garages, basements ,etc.
Never operate unit in a location
occupied by humans or animals.
Use only cleaning fluids specifically
recommended for high pressure
washers. Follow manufacturers
recommendations.
Become familiar with the operation and
controls of the pressure washer.
Keep children away from the pressure
washer at all times.
Never defeat the safety features of this
product.
Do not operate machine with missing,
broken, or unauthorized parts.
Never leave wand unattended while
unit is running.
Keep work area free of obstacles.
Stand on a stable surface and grip gun/
wand firmly. Expect the gun to kick
when triggered.
Page 4
r-
IMPORtANT SAFETY INSTRUCTIONS (cont’d)
HAZARD
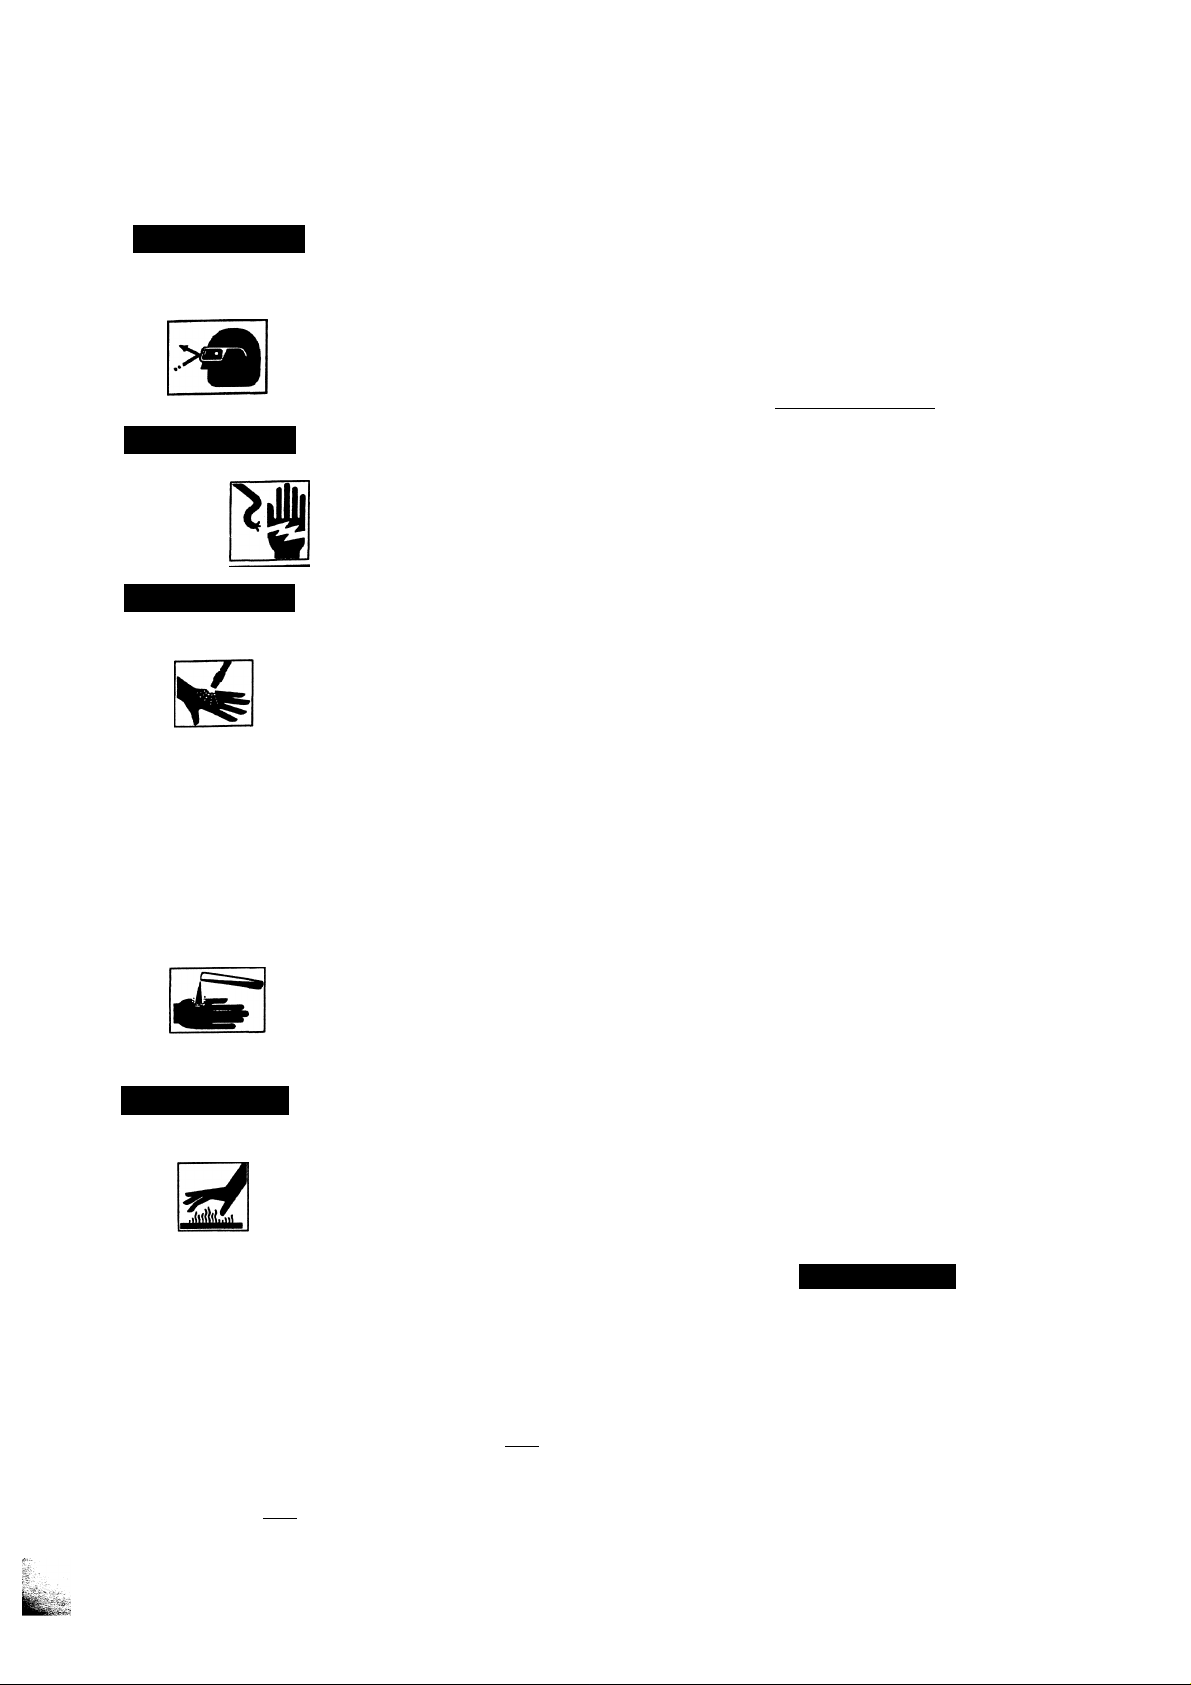
AWARNING
RISK OF INilURY FROM
SPRAY
AWARNING
RISK OF
ELECTRICAL
SHOCK
Awarning
RISK TO FLUID INJECTION
WHAT CAN HAPPEN
High velocity fluid spray can cause
objects to break, propelling particles at
high speed.
Light or unsecured objects can become
hazardous projectiles.
Spray directed at electrical outlets or
switches, or objects connected to an
electrical circuit, could result in a fatal
electrical shock.
• Your washer operates at fluid pressures
and velocities high enough to penetrate
human and animal flesh, which could
result in amputation or other serious
injury. Leaks caused by loose fittings or
worn or damaged hoses can result
in injection injuries. DO NOT TREAT
FLUID INJECTION AS A SIMPLE CUT!
See a physician immediately!
• Relieve system pressure before attempt
ing maintenance or disassembly of
equipment.
HOW TO PREVENT IT
Always we^ ANSI approved Z87 safety
glasses. Wear protective clothing to
protect against accidental spraying.
Never point wand at, or spray people or
animals.
Always secure trigger lock when wand is
not in service to prevent accidental
operation.
Never permanently secure trigger in pull
back (open) position.
Unplug any electrically operated product
before attempting to clean it. Direct spray
away from electric outlets and switches.
Never place hands in front of nozzle.
Direct spray away from self and others.
Make sure hose and fittings are tightened
and in good condition. Never hold onto
the hose or fittings during operation.
Do not allow hose to contact muffler.
Never attach or remove wand or hose
fittings while system is pressurized.
Use only hose and high pressure
accessories rated for 2000 PSI service.
To relieve system pressure, shut off
engine, turn off water supply, and pull gun
trigger until water stops flowing.
__________________
Use of acids, toxic or corrosive
chemicals, poisons, insecticides, or any
RISK OF CHEMICAL BURN
Awarning
kind of flammable solvent with this
product could result in serious injury or
death.
Contact with hot surfaces, such as
engines exhaust components, could
result in serious bum.
RISK OF HOT SURFACES
GLOSSARY
PSI: Unit of measure, pounds per square inch.
FLOW RATE: This is the amount of water that passes
through your wand. (Usually measured in G.P.M.,
gallons per minute).
PRESSURE WASHER PUMP: Delivers high water
pressure. Pressure washer pump is shipped with oil.
No oil should be added to this pump.
Engine: Gasoline powered engine drives pump.
Engine is shipped with oil. See Manufacturers Owner's
Manual for oil recommendations.
Do not use acids, gasoline, kerosene, or
any other flammable materials in this
product. Use only household detergents,
cleaners and degreasers recommended
for use in pressure washers.
Wear protective clothing to protect
eyes and skin from contact with sprayed
materials.
During operation, touch only the control
surfaces of the pressure washer. Keep
children away from the pressure washer
at all times. They may not be able to
recognize the hazards of this product.
ACAUTION
Operating unit with water suppiy shut-off
without flow of water will result in
equipment damage.
BYPASS MODE: This pertains to the time that the
pressure washer is running without the trigger on the
gun engaged to spray. You should never run this
pressure washer for more than 2 minutes without
pulling the trigger to allow cool waterto enterthe pump
and the heated (recirculated) waterto exit. Running the
pressure washer with water supply shut-off would void
your warranty.
Page 5

ACAUTiON
THE POWERFUL SPRAY FROM YOUR PRESSURE WASHER IS CAPABLE OF CAUSING
DAMAGE TO FRAGILE SURFACES SUCH AS; WOOD, GLASS, AUTOMOBILE PAINT,
AUTO STRIPPING AND TRIM, AND DELICATE OBJECTS SUCH AS FLOWERS AND
SHRUBS. BEFORE SPRAYING, CHECK THE ITEM TO BE CLEANED TO ASSURE
YOURSELF THAT IT IS ROBUST ENOUGH TO RESIST DAMAGE FROM THE FORCE OF
THE SPRAY. AVOID THE USE OF THE CONCENTRATED SPRAY STREAM EXCEPT FOR
VERY STRONG SURFACES LIKE CONCRETE AND STEEL.
OPERATING UNIT WITH WATER SUPPLY SHUT-OFF WITHOUT FLOW OF WATER
WILL RESULT IN EQUIPMENT DAMAGE. YOU SHOULD NEVER RUN THIS PRESSURE
WASHER FOR MORE THAN 2 MINUTES WITHOUT PULLING THE TRIGGER TO
ALLOW COOL WATER TO ENTER THE PUMP AND THE HEATED (RECIRCULATED)
WATER TO EXIT. RUNNING THE PRESSURE WASHER WITH WATER SUPPLY SHUT
OFF WOULD VOID YOUR WARRANTY.
Everything Below is Detailed
in this Manual — Please See
Reference Pages Noted Below
lASSEMBLY
^JiNsmucnoNS
I Reference Below Right)
Connect Handle to Frame
• Connect Wand to Gun
Attach High Pressure Hose
Attach Water Source (Garden
Hose)
PRESTART INSTRUCTIONS
ijrencgPage 5)
ill Gas tank
j # Check Engine Oil
S T^lifn Water Source On
^• Check for Leaks
OPERATING INSTRUCTIONS
Quick Reference Guide
¡STARTING
Imstruciions
(Reference Page 5)
1 SLIDETHROTTLECONTROL
TO RUN POSITION
2 PUSH PRIMER BULB 3TIMES-WAIT
2SECONDS BETWEEN EACH PUSH
3 PULLSTART
(NOTE: If engine doesn't
start right away, trigger
gun to depressurize the unit)
HELPLINE;
\-stryy
Page 6

BOX CONTENTS
STEP#1
STEP #2
Handle
Hose
ASSEMBLY INSTRUCTIONS
Connect Handle
to Frame
Pi
HkikJfelj
Gun
Chemical Hose
Tighten
Knob
by Turning
STEP#3
STEP#4
Connect Wand
to Gun
Attach High
Pressure Hose
ater
ce
(Garden Hose)
Discharge Fitting
Front Vbw
Garden
Hose
QpgneQtign
Page 7

PRESTART INSTRUCTIONS
STEP#1
Fill Gas Tank
phlyl
STEP#2
Check
Engine
Oil
• Be sure the engine is in a level position.
• Remove the oil filler cap.
• To check oil level, check to ensure oil is to full
mark on the dipstick.
• If the level is low, add oil to the full mark with
30 weight detergent oil.
• Reinstall the oil filler cap/dipstick.
30 Weight
Oil
STEP#3
Turn Water
Source On
STEP#4
Check for Leaks
Leaking from Water Inlet Source
Does Not Affect Performance
if; leRKS’ ora!
onQ CliQCK Ql
RAOT TlOni
r mnlaM
- mm
WII llliil
o-ringi
M
11*10^'-'
IMPORTANT: Running the engine with a low oil level can cause engine damage.
STARTING INSTRUCTIONS
m 1
u 0
Damaifie ^ Pump.
TO RUN POSITION
2 PUSH PRIMER BULB
3 TIMES-WAIT 2 SECOND
BETWEEN EACH PUSH
3 PULLSTART
(NOTE: If engine doesn't
start right away, trigger gun
/>^\
( X M 1
iTN.
1—1
m
\±i
SPECIFICATIONS:
Model 919.762000
Operating Pressure 2000 PSI • Gallons Per Minute — 2GPM
• Engine: 6.0 HP Craftsman • Pump: Wobble Plate Oil Bath
• Chemical Injection - Under L ;« ■,(<r
Hose:V4”x25’ • Gun: Trigger Control
• Wheels: Two 8” Semi-Pneumatic
Page 8

HIGH PRESSURE INSTRUCTIONS
Push Nozzle Forward
for Low Pressure
Pull Back Nozzle
for High Pressure
1. The power washer spray pattern may be adjusted by rotating the nozzle head, clockwise or
counterclockwise.
2. For the narrowest spray pattern (greatest cleaning impact), rotate nozzle head counterclockwise.
3. For widest spray pattern (greatest cleaning coverage), rotate nozzle head clockwise.
OPEN (3/8" GAP)
to Draw Chemical
This Pressure
Washer is Preset at
the Factory to
Achieve Majdmum
Pressure at Fuii
Throttie
CLOSED (1/8" GAP)
for High Pressure
0° Degree Narrow
Spray Pattern Greatest
Cleaning Impact Turn
Counterclockwise
60° Degree Wide
Spray Pattern Great
est Cleaning Coverage
Turn Clockwise
USING SOAP/CHEMICALS
Excessive soap concentration does not necessarily improve cleaning
power.
NOTE: Follow chemical manufacturer’s label & safety directions!
For chemical recommendations specific to your application, contact your local
janitorial supply or chemical manufacturer.
A
Use EX-CELL 5000 (Formulated for EX-CELL Pressure Washers) Or Contact Your Local Janitorial
or Chemical Supplier for Recommendations for Your Specific Application.
NOZZLE CLEANING
1. Remove wand from gun by unscrewing at coupler.
2. Open the adjustable nozzle atthe end of the wand to the 0 position by
turning counterclockwise. (See Diagram 1). This will allow maximum
accessibility to clean the nozzle. Be carehji not to damage metal
spray fins.
3. insert the nozzle cleaning wire or straightened paper clip into the
nozzle orifice. Move gently in and out to clear blockage from nozzle.
(See Diagram 2).
Diagram 1
Nozzle Fins Open
4. Flush water through the nozzle backwards with garden hose.
5.
8
Diagram 2
Insert Cleaning Tool
Page 9

■
TROUBLE
SHOOTING
SYMPTOM
Engine won’t start
Won’t Draw
Chemical
Pump running
normally but
pressure does
not achieve
rated values.
Fluctuating
Pressure
CAUSE
Engine throttle is in "OFF" Position
Primer bulb hasn't been pushed
Pressure build up after initial use
Nozzle not in chemical draw position
Chemical screen is obstructed
Chemical screen not working
Chemical injector orifice obstructed or stuck
Water supply restricted
Nozzle is in low PSI position
Nozzle incon’ect or worn
Pump sucking air
Nozzle blocked
Pump sucking air
Garden hose inlet strainer clogged
Worn Seals or Packing.
Inadequate water supply.
Fouled or dirty inlet or discharge valves.
Leaky discharge hose.
SOLUTION
Slide throttle to “Run" position.
Push primer bulb 3 times, waiting 2 seconds between
pushes.
Depress triqaer qun
Push nozzle forward at end of wand.
Check chemical screen, clear) of obstructed.
Make sure chemical screen is submerged in chemical/
water
Check and clean
Check water supply and filter screen for blockage. Check
hoses for blockage, kinks, leaks, etc..
Pull nozzle at end of wand back to the high pressure
position.
Check and replace.
Check that hoses and fitting are air tight.
Clean nozzle.
Check that hoses and fittings are airtight. Purge air from garden
hose.
Clean. Checkfilterfrequently.
Check and replace
Check flow available to pump. Check for excessive heat 145^ F
Clean inlet and discharge valve assemblies. Replace if damaged.
Pressure drops
after period of
normal use
Pump noisy
Presence of
water in oil (Oil
milky) Water
dripping
from Dumo
Water dripping
from
pump
Oil Dripping
Nozzle clogged, partially obstructed
Nozzle worn
Valves worn, dirty or stuck
Worn piston packing
Water too hot
Pump sucking air
Valves dirty or worn
Worn bearings
High humidity
Piston packing and oii seal worn
Fittings Loose
0-rings of piston guide or retainer worn
Piston packing worn
Oil seal worn
Loose drain plug or worn drain plug o-ring.
Clean or replace.
Check and replace.
Check, clean or replace.
Check and replace.
Reduce temperature below 63° C or 145° F.
Check that hoses and fittings are air tight.
Check, clean or replace.
Check and replace if necessary.
Change Oil.
Check and replace oil seals.
Tighten
Check and replace.
Check and replace.
Check and replace
Tighten drain plug or replace O-ring. Do not over torque.
9
Page 10

I
о
<
111
cc
Э
Q.
Page 11

SERVICE KITS
KEY# DESCRIPTION
16286 OIL SEAL KIT
16287 PLUNGERKIT
16288 WOBBLE PLATE/
BEARING KIT
16289 INLET EXTENSION KIT
16290 OUTLET EXTENSION KIT
16304 PACKING KIT
16305 VALVE KIT
16306 UNLOADERCHECK
16307 INJECTORREPAIR
16308 UNLOADERSET
REF.
COMPONENTS
3 VENTED VALVE
0-RING [117]
10
0-RING [80]
16
0-RING [114]
18
19
OILSIGHT GLASS
OIL SEAL
63
OIL FILL CAP
69
F^NG
58
PISTON
59
SPRING
60
11
BEARING DISC
12
NEEDLE BEARING
WOBBLE PLATE
13
CAP
14
15 BE/VRINGDISC
CONNECTION RING
20
NUT
INLETEXTENSION
21
UNDER CAP
23
WASHER
77
O-RING[140]
78
GASKETW/FILTER
80
UNDERPLUG
43
aRING[14X2]
78
CX/TUETEX7ENSICX^
81
aRING[2093]
65
0-RING
67
0-RING [22X14X1,5]
76
0-RING[2050]
25
VALVE
26
0-RING[12X2]
68
WASHER
79
37 NO RETURN VALVE
SPRING
38
INJECTORNOZZLE
39
aRING[8X2]
40
0-RING [2037]
41
IMECnONNIPPLE
42
0-RING [5X2]
75
CHEMICALSPRING
31
BALL STAINLESS 16302
32
STEEL
0-RING [2031]
35
O-RING [2015]
62
VALVE SEAT PLATE
46
VALVE SEAT
47
BALL STAINLESS
52
STEEL
O-RING [2037]
41
KEY# DESCRIPTION
16309
16310
16311
15955
UNLOADERSTEM
MANIFOLD ASSEMBLY
HEAD,BRASS PUMP
MANIFOLD
COMPLETE PUMP ASSY.
REF.
COMPONENTS
22
O-RING [2050]
24
O-RING [108]
33
O-RING [2025]
48
BACK-RING FORO-RING [lOi
49
O-RING [2056]
50
BY-PAS VALVE BODY
53
BY-PAS PISTON
54
BACK-RING FOR O-RING [20:
55
SPACER
56
PRESSUREREG. SCREW
57
PRESSUREREG.NUT
82
PW
22
O-RING [2050]
24
O-RING [108]
27
O-RING [15X2]
28
MANIFOLD
30
SCREW
31
CHEMICALSPRING
32
BALL STAINLESS STEEL
33
O-RING [2025]
34
CHEMICAL DOSING BODY
35
O-RING [2031]
36
CHEMICAL DOSING SCREW
37
NO RETURN VALVE
38
spmm
39
INJECTORNOZZLE
40
O-RING [8X2]
41
O-RING [2037]
INJECnONNI№LE
42
44
SCREWTCEL [M5X3012K]
45
BYPASS PIN
46
VALVE SEAT PLATE
47
VALVE SEA
48
BACK-RING [FORO-RING 1C
49
O-RING [2056]
50
BY-PASS VALVE BODY
51
PLUG
52
BALLSTAINLESS STEEL
53
BY-PAS PISTON
54
BACK-RING [FOR O-RING 2i
55
SPACER
56
PRESSUREREG. SCREW
57
PRESSUREREG. NUT
62
O-RING [2015]
75
O-RING [5X2]
82
PIN[M2X10]
73
28
11
Page 12

PRESSURE WASHER BREAKDOWN
90 89
12
Page 13

PARTS LIST
KEY#
83
84
85
86
87
88
89
90
91
92
93
94
95
96
97
98
PART NUMBER
16272
C042
15226
W137
16303
15223
15231
15972
16273
16257
ADI 87
H040
WA100
15227
HI 28
16270
Not Illustrated
16256
DESCRIPTION
Handle
Knob, 5/16
Tire, Semi, 8x13/4
Nut, Pal, 1/2
Label, Hot Surface
Foot, 2x1
Hose, Chemical
Cap, 5/16
Frame
Label, Craftsman
Label, Warning
Hose, 1/4x25 ft.
Wand, Rotary
Lance, Multi-Reg.
Gun, 1/4 Male
Oil, 27 oz., 30 Wt.
Owners Manual
13
Page 14

OWNERS
MANUAL
CRAFTSMRN.
6HP 2000 PSI2 GPM
HIGH PRESSURE POWER WASHER
For the repair or replacement parts you need
Call 7 am - 7 pm, 7 days a week
MODEL NO.
919.762000
When requesting service or ordering
parts, aiways provide the following
information:
• Model Number
• Part Number
• Part Description
• Name of Item
1-800-366-PART
(1-800-366-7278)
For in-home major brand repair service
Call 24 hours a da% 7 days a week
1-800-4-REPAIR
(1-800-473-7247)
For the location of a
SearsPaitsand RepairCenterfeiyourarea
Call 24 hours a day, 7 days a week
1-800-488-1222
FULL ONE YEAR WARRANTY
AIR COMPRESSOR
If this aircompressorfails due to a defect in
material or workmanship within one year
from the date of purchase, RETURN IT TO
THE NEAREST SEARS REPAIR CENTER
THROUGHOUTTHE UNITED STATES AND
SEARS WILL REPAIR IT, FREE OF
CHARGE.
If this air compressor is used for commercial
or rental purposes, the warranty will apply
for ninety days from the date of purchase.
This wanantygivesyou specific legal rights
and you may have other rights which vary
from state to state.
Sears, Roebuck and Co., Hoffman Estates, IL 60179 U.S.A.
For information on purchasing a Sears
Maintenance Agreement or to inquire
about an existing Agreement
call 9 am - 5 pm, Monday-Saturday
1-800-827-6655
America's Repafa’ Spedaliats
 Loading...