

Page 1

Owner’s Manual
llllllFTIliflN
5.0 HORSEPOWER
19” REAR BAGGER
ROTARY LAWN MOWER
Mode! No.
917.389190
Safety
Assembly
Operation
Maintenance
Espano!
Repair Parts
CAUTION:
Read and follow all
Safety Rules and Instructions
before operating this equipment
Sears, Roebuck and Co,, Hoffman Estates. iL60179
Visit our Craftsman website:www sears-com/craftsman
Page 2
WARRANTY
A
: ■■■.
JVlfTED TWO YEAR WARRANTY ON CRAFTSMAN POWER MOWER.
For two years from date of puichasa, when this Craftsman Lawn Mower is maintained, lubricated, and
tuned up according to the operating and maintenance instnictions in the owner’s manual, Sears will repair
free of charge any defect in material orworionanship. If this Craftsman Lawn Mower is used for
commeraial or rental purposes, this warranty applies for only 90 days from the date of purchase.
This Wananty does not cover:
• Expendable items which become worn during nomtai use, such as rotary mower blades, blade
adapters, bells, air cleanais and spark piug. .
« Repairs necessary because of oparator abuse or negligence, including bent crarrkshafts and the failure
to maintain the equipment according to the instructions contained in the owneris manual.
Wananty service is available by reluming the Craftsman power movrerto the nearest Sears Service
Center/Department in the United St^ This vrananty applies only while this product is in use in the United StatesThis Warranty gives you specific legal rights, and you may also have other ri^rts which vary from state to stats.
SEARS, ROEBUCK AND CO„, D/817WA, HOFFMAN ESTATES, ILUN01S 60179
SAFETY RULES
........
'
[KNOW VOUR LAWNIMUWER
READ THIS OWNER'S MANUAL AND SAFETY RULES BEFORE OPERATING YOUR
LAWN MOWER.
Compare the illustrations with your lawn mower to famiiiarize yourself with the location of
warious controls and adjustments. Save Ihts manual for future reference.
_____________
A
^
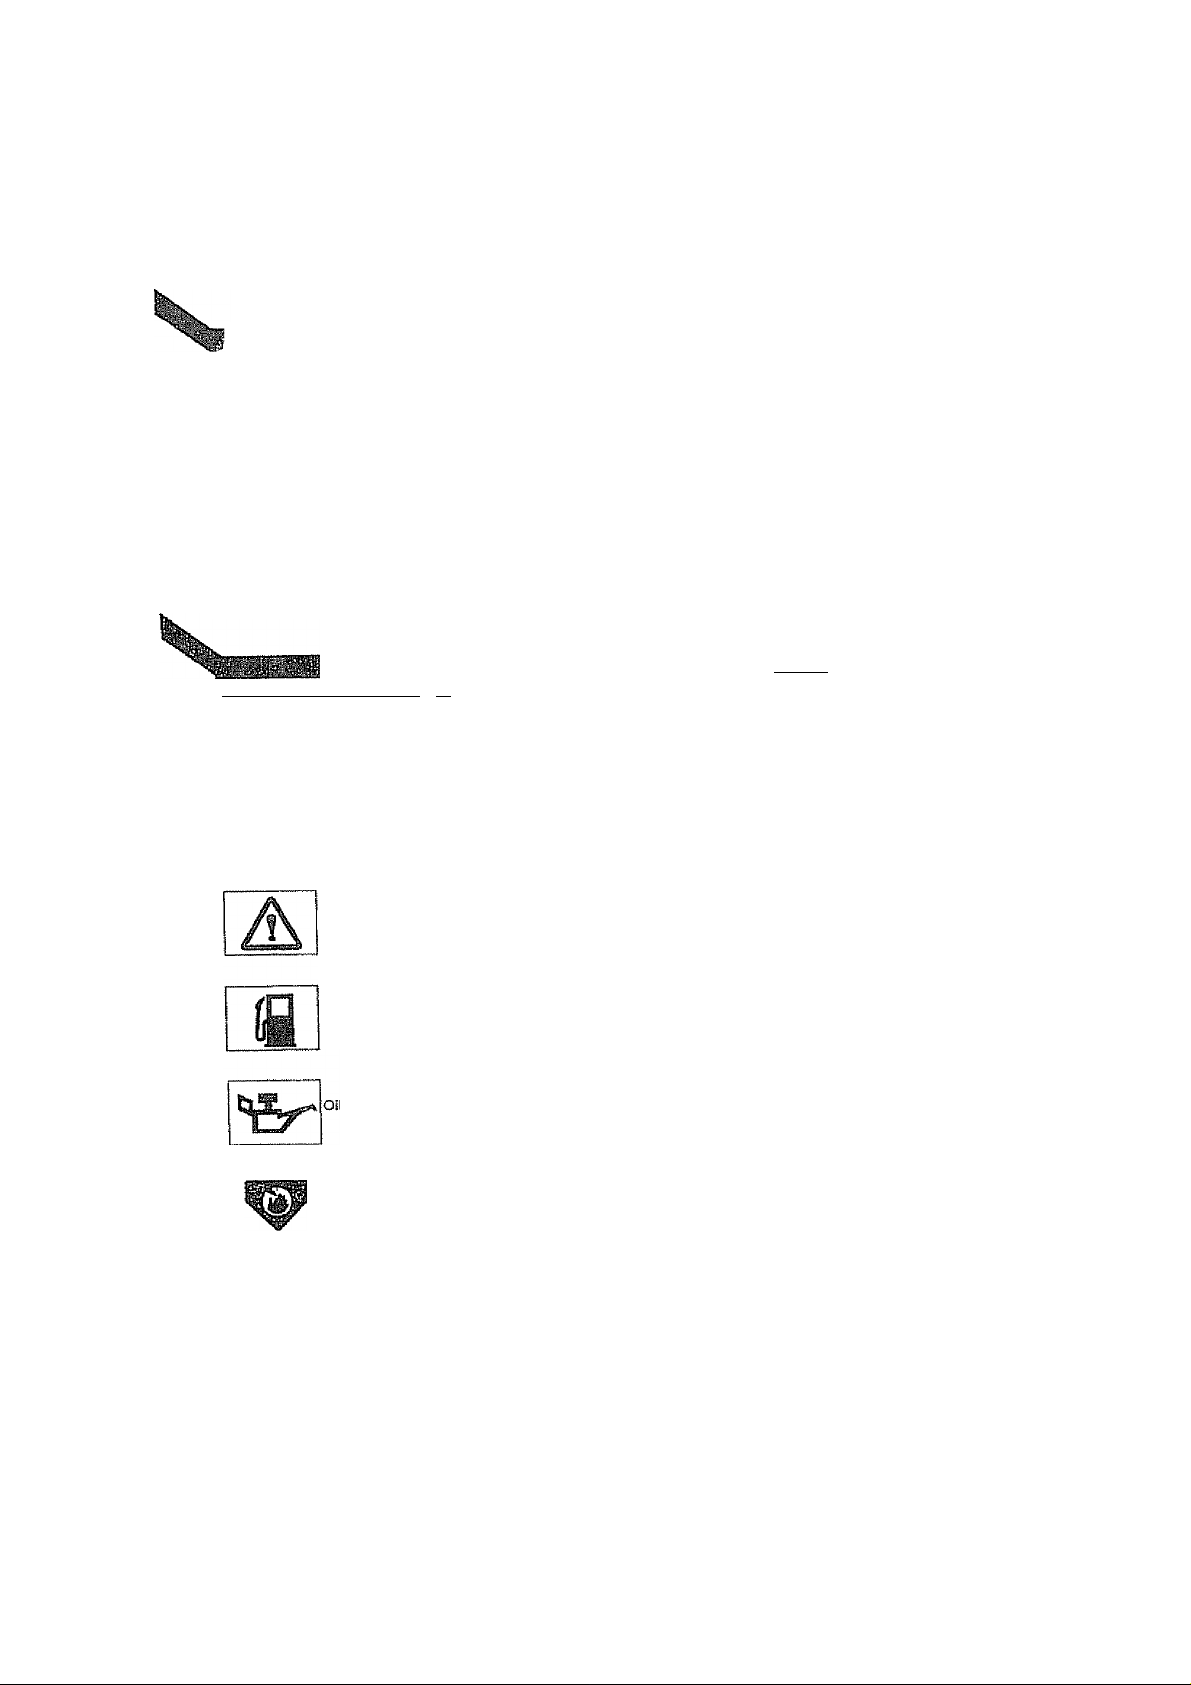
These symbols may appear on your lawn
mower or In literatura supplied with product
team and understanrd their meaning.
Warning
Fuel
Danger, keep hanrJs and feet away.
Safety standards require operator presence controls
to minimize the risk pf injury. Your unit is equipped
with such controls. Domot aitempt to defeat the
function of the controls under any drcumstances.
TRAINING;
» Read Ihisoperators manual caretuliy. Become familiar
with lha COntitte and know how to qjerala your mower
properly, Leam how to quchly stop mower.
" Do not allow children to use yogrmower. Neverallow
adults to use mower wHhout proper instmclions.
• Keep the area of operation clear of ail persons,
espedaily small children and pels,
» Use mower only as the manufacturer intended
and as described in this manual.
• Do not operate mower if it has been dropped or
damaged in any manner. Always have damage
repaired before using your mower.
• Do not use accessory attachments that are not
recommended by the manufacturer. Use of such
attachments may be hazardous..
- The blade turns when the engine is running,
Page 3

A
SAFETY RULES
PflEPARATION:
• Always thoEDUghiy check the area to be mowed
and daarit of alt stones, slicks, wras, bones and
foreign objects. These objects will be
other
thrown by the blade and can cause severe
injuty,
• Always wear safety glasses or eye shields when
starting and while using your mower.
» Dress properly. Do not operate mower when
barefoot or wearing open sandais. Wear only
solid shoes with good traction when mowing.
• Checkfijel tank before starting engine. Do notfili
gas tank indoors, when the engine is running or
when the engine is hot Aliow the engine to cod for
several minutes beftjre fining the gas tank. Clean off
any spiiled gasoline before starting the engine.
• Always make wheat height adjustments before
starting your mower, Never attempt to do this
while the engine is running,
• Mow only in daylight or good artificiat light,
OPEBATION;
" Keep your eyes and mind on your mower and
the area being cut Do not let other interests
distract you..
• Do not mow wet or slippery grass. Never run
white operating your mower. Always be sure of
your (doting -keepafirmholdonthehandles
and walk,
» Do not put hands or feet near or under rotating
parts. Keep clear of the discharge opening at al!
times,
• Always stop the engine whenever you ieave or
are not using your mower, or before crossing
driveways, wallts, roads and any grave! covered areas.
» Never direct discharge of material toward
bystanders nor allow anyone near the mower
while you are operating it.
• Before deaning, inspecting, or repairing your
mower, stop the engine and make absoiuteiy
sure the blade and all moving parts have
stopped. Then disconnect the spark plug wire
and keep it away from the spark plug to prevent
accidental starting,.
« Do not continue to run y our mower if you hit a
foreign object. Follow the procedure outlined
above, then repair any damaged before
restarting and operating your mower.
» Do not change the governor settings or
overspeed the engine. Engine damage or
personal injury may resuit.
• Do not aparata your mower If it vibrates
abnormally. Excessive vibration is an indication
of damage; stop the engine, safely check for the
causa of vibration and repair as required.
• Do not am the engine indoors. Exhaust fumes
are dangerous.
» Never cut grass by pulling the mower towards
you. Mow across the face of slopes, never up
and down or you might lose your footing. Do not
mow excessively sleep stapes. Use caution
when operating the mower on uneven terrain or
when changing directions - maintain good
footing.
• Never operate your mower without proper
guards, plates, grass bag or other safety devices
in place,
MAINTENANCE AND STORAGE:
° Check the blade and the engine mounting bolts
often to be sure they are tightened properly.
• Check all bolls, nuts and screws at frequent
intervals for proper lightness to be sure mower
is in safe working condtHon,
• Keep ail safety devices in place and woridng.
• To reduce fira hazard, keep the engine free of
grass, leaves or excessive grease and oil,
" Check gras&bag often for deterioration and
wear and replade worn bags. Use only
replacement bags that are recommended by
and comply with specifications of the
manufachj rer of your mower.
• Always keep a sharp blade on your mower.
• Allow engine to coot before storing in any
enclosure,
» Never store mower ¡with fuel in the tank inside a
building where fumes may reach an open
flame or an ignition source such as a hot water
healer, space heater, clothes dryer, etc.
ACAUTION: Always disconnect spark plug wire
and place wire where It cannot contact spark plug
in order to prevent accidental starting when setting
up, transporting, adjusting or making repairs,
WARNING
The engine exhaust from this product contains
chemicals known to the Slate of California to cause
cancer, birth defects.'or other reproductive harm.
Page 4
nTTREBlOVE LAWN IMOWER FftOM CARTOW
Remove loose parts included with mower
• Cut down two end comers of carton and lay end panel down flat.
Roll lawn mower out of carton and check carton thoroughly for additional loose
parts.
______ __
Read these instructions and this manual in its entirety before you attempt to
assemble ot operate your new lawn mower. Your new lawn mower has been
assembled at the tfie factory with exception of those parts left unassembled for
shipping purposes. All parts such as nuts, washers, bolts, etc,, necessary to
complete the assembly have been placed in the parts hag. To ensure safe and
proper operation of your lawn mower, ail parts and hardware you assemble must be
tightened securely. Use the correct tools as necessary to ensure proper tightness.
To Unfold Handle.
Handles
/
ЬалсИа
collar
n
4^
Ш
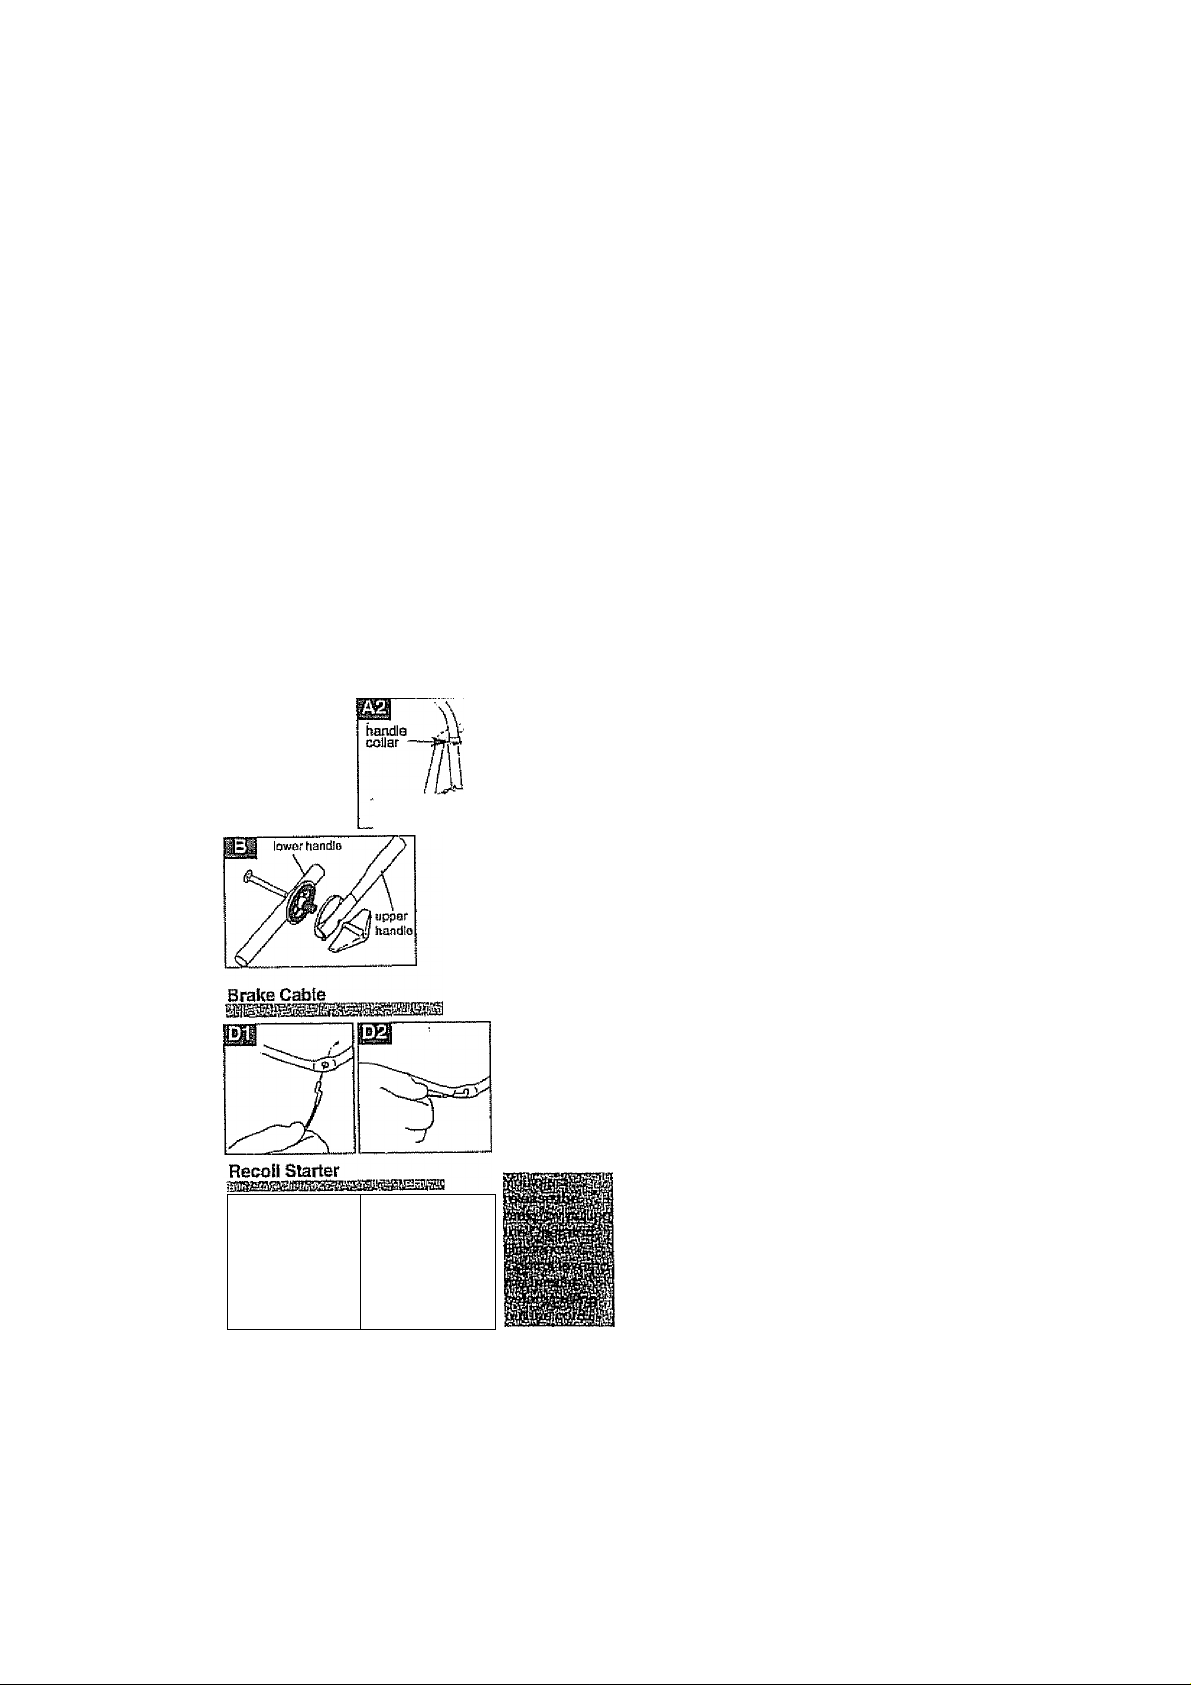
ÍMPORTANT; Unfold handles carefully
so as not to pinch or damage control
cablas.
Lower Handles
1 „ Insert lower handles into deck (A1)
2. Push handle firmly down unü! the
handle collar is located securely Into
the deck (A2).
3 . Insert screws into holes and using a
pozidrive screwdriver tighten fully into
deck (A2).
Handle Adjusters fiued to product (B)
1 Adjust handle assembly to the most
comfortable operating position and
tighten handle adjuster knob (B) on
both sides of the product,.
To insert the Brake Cable
1 insert cable into hole In Operator
Presence Control lever from the insida
of the !ever.(D1).
2 . Lock into position. (D2)
3. Rt the cables to the handles with the cable
ties provided, rnaking sure fire cables ana
not trapped between file handles.
Recoil Starter
1. Disconnect the spark plug lead.
2. Pull the Operator Presence Control
lever to release the brake on the
engine.
3. Extend the puli cord fully (Cl). _
4. Locate the cord in the puli cord guide
positioned on handle (C2).
%
Page 5

ASSEMBLY INSTRUCTIONS
Warning
• Da not aparata mower unless bag Is properly Installed,
• Do not remove bag wh" a blade Is moving.
• During normal use jag Is subject to wear and deterioration.
• Check bag fretiuenti!; tor any damage,
• Replace only with a SEARS approved part.
1. Insatt *U' frame Into lop {E2).
2. AtSacb tl’ftarneto fetetebag (E3).
3. LrxalB fully assenrdjIadgrassbCK
□nto2localkxi poInlsBltbe rearof
ihedeck(E4).
4. Locate safety flap onto the top of
the grass bag. Ensure the grass
bag is sBcuraly !ocated,(E5)
• Hetnowaf Is the ravensB procedure
BEFORE STARTING ENGINE
OIL
Your lawn mower is shipped without oii in the engine.
• Be sure mowar Is level and area around oil fill is dean.
- Remove engine oil cap and fiil to the full fine on the dipstidc,
" Use20a2S,ofoll, Fortypeandgradeordltousa.see
"Engine Lubricatlari" in Maintenance seciion of this manual
- Pour oil slowly. Do not over fln.
■ Check oil level before each use., Add oil if needed, Rll
to full line on dipstick.
• To read proper level, tighten engine oil cap each time.
• Reinstall engine oil cap and tighten.
- Change the oil after every 25 hours of operation or each
season. You may need lo change the oii more often
under dusty, dirty condlUons.
gasoune
" Fiil lue! tank. Use fresh, clean, regular unleaded
gasoline with a rnlnimum of 87 octane. Do not mix oil
wilh gasoline. Purchase fuel In quantities that can be
used within 30 days lo assure fuel freshness,
WARNING
Experience indicates that alcohol blended fuels (called
gasohol or using ethanol or methanol) can attract moisture
which leads to separation and formation of acids during
storage. Acidic gas can damage the fuel system of an
engine while in storage. To avoid engine problems, the
fuel system should be emptied before storage of 30 days
of longer. Drain the fuel tank, start the engine and let it run
until fuel lines and crarburalor are empty. Use fresh fuel
next season. See Storage Instructions for additional
information. Never use engine or crarburetar cleaner
products in fuel tank or permanent damage may occur.
Grass Bag Assembly
Engine
oil cap
Gasoline
filler cap
Page 6

MEETS CPSC SAFETY REQUiHEMENTS
Sears fotaty waik-bshind power !awi mowers
conform to the safety standards of the
American National Standards Institute and the
U,S. Consumer Product Safety Commission,
The blade turns when the engine is running.
Operator Presence Control Lever - must be
held dowi to’tha handle to start the engine.
Release to stop the engine.
Primer - pumps additional fuel from the
carburetor, to the cylinder for use when starting
a cold engine.
Starter handle - used for starting the engine.
Power Olive lever - Forward drive is engaged
and disengaged with the Powerdtive lever at
the top of the handle
The operation of any tawn mower can result in foreign objects thrown Into the eyes, which can result In
severe eye damage. Always wear safety glasses or eye shields while operating your lawn mower or
perfonning any adjustments or repairs, We recommend a wide vision safety mask over spectacles or
standard safety glasses.
ENGINE SPEED CONTROL
The engine speed wasset at the factory ior optimum performance. Speed Is not adjustable,
ENGINE ZONE CONTROL
CAUTION: Federal regulations require an engine control to be inslalieri on this lawn mower in order to
minimize the risk of blade contact Injury, Do not under any circumstances attempt to defeat the function of
the operator control. The blade turns when the engine is running. ,'
Starting and Stopping
1 Whan starting a cold engine, push primer bulb
(G) flmily five times, allowing primer bulb to
return completely to original position between
pushes. Repeat the above for each starter
Qperadon as necessary'“
NOTE: DO NOT USE PRIMER TO RESTART
WARM ENGINE AFTER A SHORT SHUTDOWN.
2. Connect the spatk plug lead.
3 Pull the Operator Presence Control lever to the
handle (H1), this releases the brake.
4. Grasp starter handle and pull rope out slowly
until you fee! drag (H2). Lot rope rewind slowly.
Pull with rapid, full arm stroke. Return rope
slowly to original position.
5. Forward drive is engaged and disengaged with
the Powerdrive lever underneath the handle (J).
6. Releasing the Powerdrive Laver stops the
forward drive automah'cally.
To siop your lawn mower - release the
Powardrh/e lever, then Operator Presence Control
lever.
Page 7

Power Drive Cable
1. if the drive does not engage when
the powerdttve tever Is pulled
Sewards She handle, screw adjuster
counter-clockwise (K) whilst In
operaSore position.
2., Scraw adjuster in apposite direction
if the powerdrive does not
disengage with the powerdrive lever
free (K).
PowerDrive Cable
How to Mow
1.. Start mowing from the outside edge
of the lawn, mowing In strips in
alternate directions (L),
2. Mow twice a week In the growing
season, your lawn will suffer if more
that one third of Its length is cut at
one time and this may also result In
poorcoliaction..
Please Note:Do not overload your Lawn mower
When mowing In tong third« grass a first
cut with the cutting height adjusted to Its
highest setting, sea Cutting Height, wilt
help reduce motor overload and will help
prevent damage to your lawn mowar.
Cutting Height
• Raise wheels for low cut and lower
wheals for high cut
• Adjust cutting height to suit your
requirements. Medium position is
best for most lawns.
” The height of cut Is changed by
pulling the adjustment lever away
from the location slots and moving to
the desired position (Wl),
How to Mow
Cutting Height
Page 8

Cutting System
Removing Uie Blade
■ Always observe safety rules when performing
any maintenance.
1 „ DisasrmecS sparir plug wire 1mm spaA plug and place
wins where it cannot come in contact with spa Aplug,
2. Turn lawn mower on Its side. Make sura aii tiitar
and carburetor are up.
3. Use a wrench to loosen blade bolt by turning
countar-<dockwise (N1).
4. Remove the blade bolt, blade and washer.(N2)
5. Inspect for damage and dean as necessary.
Replacing the Blade
1. Fit the blade t6 Ihe machine with the sharp edges
pointing away from the machine.
2. Re-fit the blade bolt through the washerensuting that
the side stamped with ‘0’ on the washer is facing
away from the blade (N2).
3. Hold firmly and tighten blade bolt firmly with a
wrench. Do not over tighten. The recommended
lightening torque Is 22-26 ft,, lbs.
Cleaning
IIVIPOHTANT: For bast performance, keep mower
housing free of hulit-up grass and trash. Clean
underside of mower housing after each usa.
CAUTIQH: Dlsconnacl spark plug wire from sparlc
plug and place wire where it cannot come In contach
with the spark plug.
f.Tum lawn mower on Its side. Make sure air filter
and carburetor areup.*
2. Remove grass from underthe deck velh a brush (PI).
3, Using a soft brush - remove grass dippings from all air
Intakes, the discharge chute and the grass bag (P2),
3. Wipe over the surface of your lawn mower with a
dry clolh.
MODEL NUMBER
SERIAL NUMBER ..........................................................................................................................................................
DATE OF PURCHASE
HORSEPOWER:
DISPLACEMENT:
GASOLINE CAPACITY/ type;
OILTYPE (API-SF/SG/SH);
OIL CAPACITY:
SPARK PLUQ(GAP; -03Q')
VALVE CLEARANCE:
SOLID STATE IGNITION
AIR GAP:
BLADE BOLT TORQUE:
• The model and serial numbers will be found on a decal attached to the rear of the fawn mower housing.
Record both serial number and date of purchase in space provided above.
See Product Ratirsg Labef-
5.0
11.5 cu. in.
1.25 quarts
UNLEADED REGULAR
5AE 30 (above 32-F)
SAE 5W-30 (below 32“F)
20 OZS.
Champion R J19LM or J19LM
INTAKE: ,004-.008
EXHAUST; .004-.008
.0125 in.
22-26 FT. LBS.
Page 9

Tha wananty on Ihb lavm mowerdoes not cover
items that h^re been sutijecJed to operatDrabosa
ornegfiganca. To irscehie full value from the
warranty, operator must maintain moweres
Inslntcled In this manual
Soma adlustmants will neetj to be made
periodically to propetiy maintain your unit.
All adjustments In the Service and
Adjustments section of this rnanual should be
checked at least once each season,
• Once a year, replace the spark plug,
replace air filter element and chock blade
for wear, A new spark plug and clean/new
air filter element assures proper air-fuel
mrxtura and helps your engine nrn better
and last longer '
BEFORE EACH USE
• Check engine oil level,
• Check (or loose fasteners.
LUBRICATION
Keep unit welt lubricated (See
■LUBRICATION CHARr (Q)).
NOTE: Although multi—viscosity oils (SW30,
10W30 etc.) improve starting in cold weather,
these multi—viscosity oils will result in ,
Increased oil consumption when used above
32° F. Check your engine oil level more
frequently to avoid possible engine damage
from running low on oil, ■ ‘ '
Change the oti after every 25 hours of
operation or at least once a year if tha lawn
mower is not used for 25 hours In one year.
Check the crankcase oil level before starting
the engine and after each five (5) hours of
continuous use. Tighten oil plug securely
each lime you check the oil level,,
General Recommendations
ffiSBimEBaBSBMBBsraBEBMiiag
LUBRICATION
CHART
® spray lubricant
@SAE 30 MOTOR OIL
®Roor ©
door EngkiB oil
^iandle brackol
NOTE; Before lipping lawn mower to drain oii, drain
fuel tank by running engine until fuel tank is empty.
' Disconnect spark plug wire from spark plug and
place wire where it cannot come in contact with
spark plug.
• Remove engine o3 cap; lay aside on a deansurfacs.
' Tip lawn mower on its side and drain oil into a
suitable container. Rock lawn mower back and
Your carburetor has a non-adjustable fixed main jet
for mixture conlnel. if your engine does not operate
properly due to suspected carburetor problems, take
your lawn mowerto an authorized service center for
repair or adjustmenL
forth to remove any oil trapped inside of engine,
« Wipe off any spltled oil on lawn mower and on
side of engine,
» Rll engine with oil, Fill only to the "FULL" line on
the dipstick. DO NOT OVER RLL
" Replace engine oil cap.
” Reconnect spark plug wire to spark plug.
Engine i
Your engine speed has been factory set Do not
attempt to increase engine speed or it may result in
personal injury, if you believe that the engne is running
too fast ortoo slow, lake your lawn mowerto an
aulhorized servicecenterforrepairandadjustmenL
Page 10

-FIAMGE
RlTBt REMOVE
НЕШШ>И
Т4Л /
---
/ TUHNCOVS!
covai ' татнЕшонг
Ain FILTER (R)
Your engina will not tun properly and may be
darnagad by using a dirty air (lltar.
Raplace the airfittaravoty year, mots often If you mow
In uGiy dusty, ditty conditions. Do not wash alrfiltar.
1. Turn cower to the left (counterdockwisa) and
TUHNcovHîimreLHT
(CDUHîBictoawKiïîD
2. Clean covarand flange Ihoroughly.
3. Insert new filtarlnlo crauer.
4. PosSion cover and titter against flanga with tab on
5. Push cover firmly against flange and turn ft to
MUFFLER
Inspect and replace corroded muffler as it could
create a fire hazard and/or damage.
SPARK PLUG
Change your spark plug each year to make your
engine start easier and run better Set spark plug
gap at .030 inch.
ramova It and filter from flanga. Discard filler.
cover inserted Into lowsrlett comer of slot in flange..
the tight (dookwisa) as far as It will go. Be sure
retainers are locked around flange.
Immediately prepare your lawn mower for storage
at the end of the season or If the unit will not be
used for 30 days or more.
кйжмжшЕа . ^ ,
When lawn mower is to be stored for a period of
lime, dean it thoroughly, remove all dirt, grease,
leaves, etc. Slora in a dean, dry area.
• Clean entire lawn mower (See "Cleaning’ In the
Maintenance section of this manual). _
■ Lubrioala as shown in the Maintenance section of
this manual.
• 00 sure that all nuts, bolts, screws, and pins are
securely fastened- inspectmoving pans for
damage, breakage and wear. Replace If necessary.
• Touch up all rusted or chipped paint surfaces;
sand lightly before painflng,
EMGtNE
FUEL SYSTEM
IMPORTANT: It is important to pravantgum
deposits from fonning in essential fuel system parts
such as carburetor, fuel filiar, fuel hose, or lank
during storage. Also, experfenca Indioates that
alcohol blandad fuels (called gasohol or using
alhanol or melhanol) can attract moisture which
leads to separation and formation of adds during
storage. Addle gas can damage the foe! system of
an engine while in storage.
- Drain Jhe fuel tank..
- Start the engine and let U гол until the foal lines
and carburetor ara empty,.
• Naverusa engina or carburetor cleaner produtrts
in the foal lank or permanent damage may occur.
- Use fresh fuel next season,.
NOTE: Fuel stabilizer is an acceptable allsmativa
in minimizing the formation of foe! gum deposils
during storage. Add stabilizer to gasoline In fuel
tank or storage conlalner. Always follow the mix
ratio found on stfosllizar container. Run engine at
least 10 minutes after adding stabilizer lo allow the
stabilizer to reach fheTcarburetor. Do not drain the
gas lank and carburetor if using fuel stabilizer.
ENGINE OIL
Drain oil (virith engine warm) and replace with clean
engine oil, (See “To Change Engine OH* In the
Maintananco seciton of this manual),
CYUNDER
' Remove spark plug,.
• Pour one ounce (29 ml) pi oil through sparit plug
hole Into cylinder. ,
" Pull starter handle slowly a few times to distribute oil.
• Replâtra with now spark plug,
OTREH
- Done! store gasdino from one season to anoiher.
» Replace your gasoline can if your can starts to rust
Rust and/or rirtin your gasoline will cause probiems .
• If possible, store your unit indoors and cover it to
give protection from dust and dirt.
•> Covaryouf unit with a suitable protective cover that
does not retain moisture. Do not iraa piastio. PlasUc
cannot breathe which allows condensation to form
and wilt cause your unit to rust
IMPORTANT: Never cover mower while engitte
and exhaust areas are still warm.
CAUTION; Never store the lawn mower with
gasoline in the tank Inside a building where fumes
may reach an open flame or spark- Allow the
engina fo cool before staring In any enclosure.
Page 11

PROBLEM CAUSE CORRECTION
WIil tio! siart • Dirty airfilter,
Loss of power
Poorcut - uneven • Worn, bent or loose hieda,
BKcassive vibration
starter mpe hand to puli • Engine flywheel brake is on
Loss of drive
{Self-Propelled Mowing)
Grass bag not filling • Cutting height too low.
Hard to push • Grass is too high or wheel '
• Outoffua!.
• Stale fuel.
• Water in fuel,
• Spark plug wire Is disconnected..
• Bad spartt plug.
• Loosa blade or broken
blade adapter.
• Operator Presence Control
Lever In teleesed posttien
■ Operator Prasenca Control
Laver defective
• Rear of Sawn mower housing/
blade dragging in heavy grass,
• Cutting too much grass.
» Ditty air filiar.
• Build up Oí grass, leaves and
Irash under mower.
• Too much oil in engine.
■ Wheel heights uneven.
• Build up ol grass, leaves and
trash undar mower.
* Worn, bent or loose blade.
■ Bent engine crankshaft
when Operator Presence
Control lever is released.
• Bent engine crankshaft
- Blade adapter bnpkan.
• Blade dragging In grass.
• Drive wheals not turning
with power drive engaged.,
• Belt not driving.
• Litton blade worn off.
• Grass bag not venting air..
height is loo low.
• Hear of lawn mower housing/
blade dragging in grass..
• Grass bag too full,
• Handle haight position
not right for you.
• Clean/replace airfilter,
• Fill fuel tank,
- Drain tank and rafill with fresh clean fuef.
• Drain fuel tank and carburetor and refill
tank with fresh gasoline.
• Connect wire to plug.
• Replace spark plug.
• Tighten blade bolt or replace blade adapter,
• Pull Operator Prasance Control lever to
handle.
• Repleoe Operator Prasance Control Lever.
• Raise cutting height
• Raise cutting height
• Clean/replace airfilter..
• Clean underside of mower housing.
• Check oil level. ,
• Replace blade. Tighten blade bolt.
• Sot all wheels at same height .
• Clean underside of mower housing
" Replace blade, Tighten blade bolt
• Contact ap authorized service
center/department
• Depress control bar to upper handle
before pulling starter rope.
• Contact an authorized service
center/department
• Replace blade adapter.
• Move lawn mcwar to cut grass or to hard
surface to start engine.
■ Adjust or rapiaca drive control
cable, If broken.
• Put bell on pulleys or replace bells if broken.
* Raise culling height
* Replace blade .
* Dean grass bag.
* Raise cutting height.
- Raise cutting height
* Empty grass bag.
* Adjust hartdle height la suit
Trouble Shooting
Page 12

12
 Loading...