

Page 1
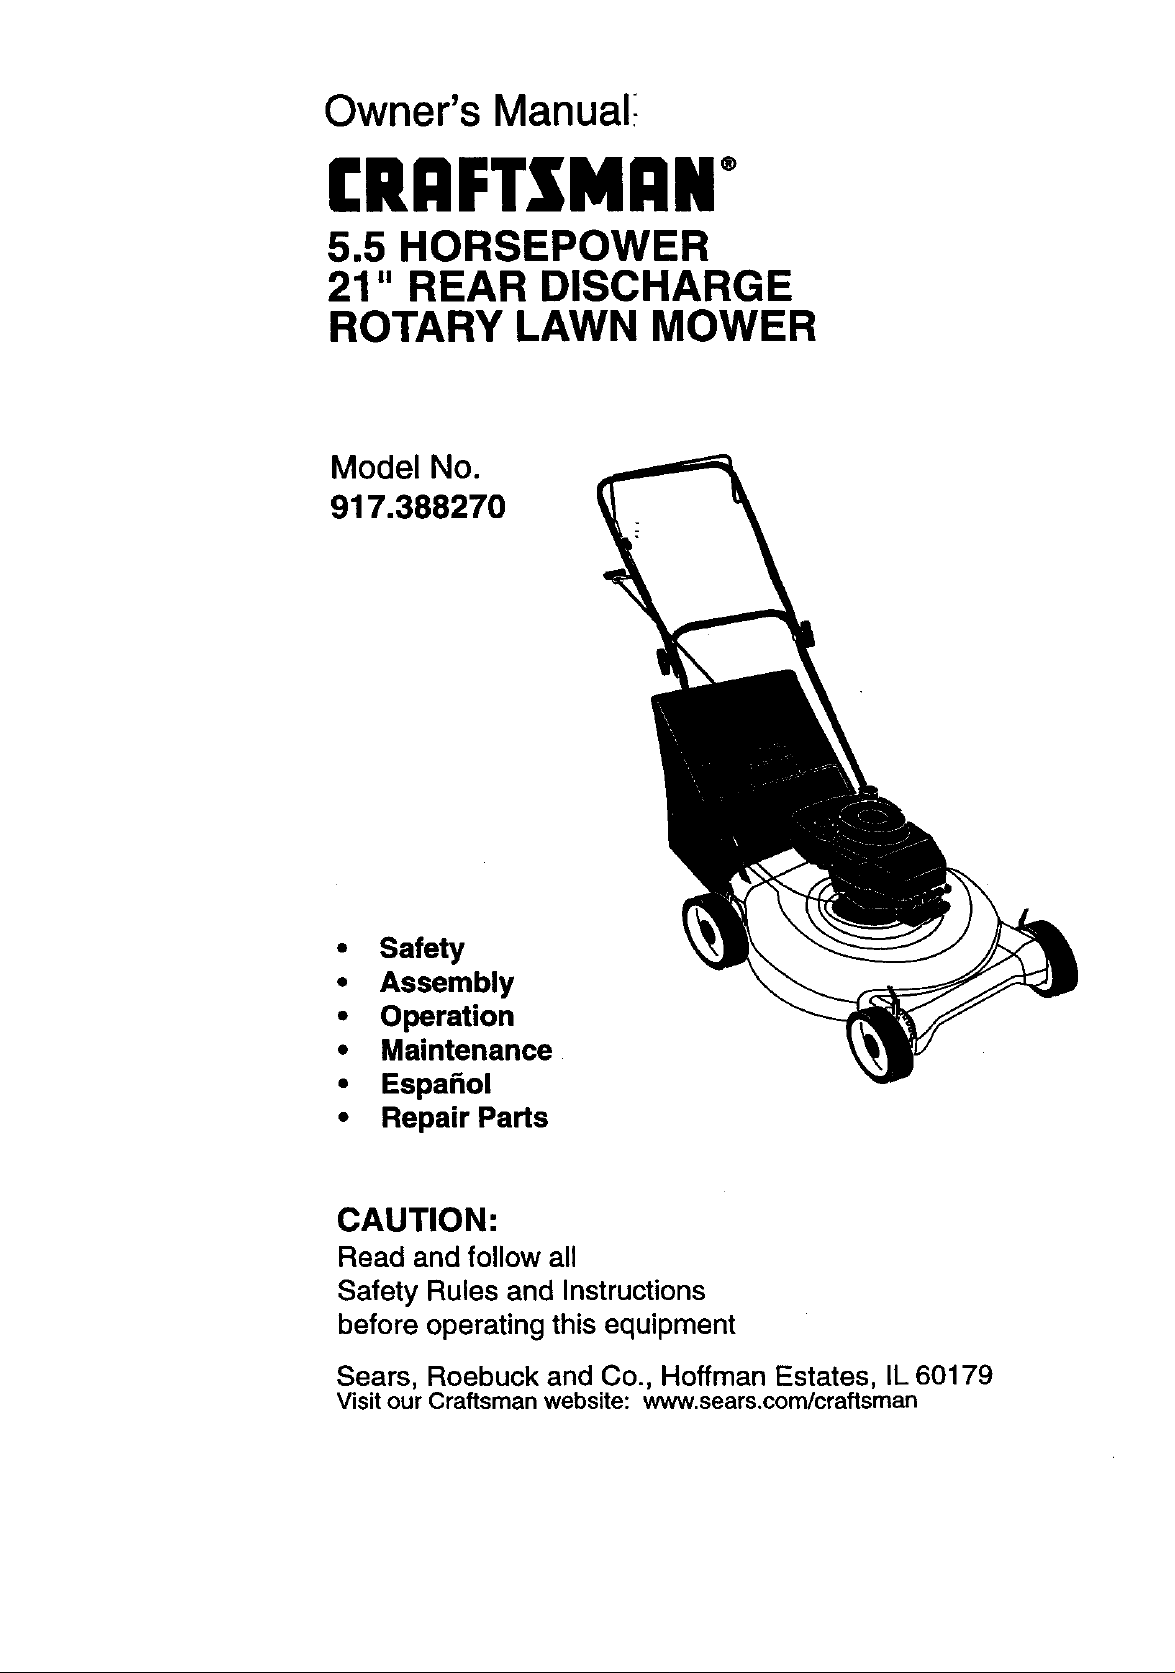
Owner's Manual;
CRAFTSMAN
5.5 HORSEPOWER
21" REAR DISCHARGE
ROTARY LAWN MOWER
Model No.
917.388270
• Safety
• Assembly
• Operation
• Maintenance
• Espa_ol
• Repair Parts
CAUTION:
Read and follow all
Safety Rules and Instructions
before operating this equipment
Sears, Roebuck and Co., Hoffman Estates, IL 60179
Visit our Craftsman website: www.sears.com/craftsman
Page 2
Warranty _ ' 2 Product Specifications 10
Safety Rules 2 Service and Adjustments 12
Assembly 4 Storage 13
Operation 6 Troubleshooting 15
Maintenance Schedule 9 Repair Parts 32
Maintenance 9 Parts Ordering Back Cover
LIMITED I'WO YEAR WARRANTY ON CRAFTSMAN POWER MOWER
For two years from date of purchase, when this Craftsman Lawn Mower is maintained,
lubricated, and tuned up according to the operating and maintenance instructions in the
owner's manual, Sears will repair free of charge any defect in material or workmanship.
If this Craftsman Lawn Mower is used for commercial or rental purposes, this warranty
applies for only 90 days from the date of purchase.
This Warranty does not cover:
• Expendable items which become worn during normal use, such as rotary mower
blades, blade adapters, belts, air cleaners and spark plug.
• Repairs necessary because of operator abuse or negligence, including bent crank-
shafts and the failure to maintain the equipment according to the instructions con-
tained in the owner's manual.
Warranty service is available by returning the Craftsman power mower to the nearest
Sears Service Center/Department in the United States. This warranty applies only while
this product is in use in the United States.
This Warranty gives you specific legal rights, and you may also have other rights which
vary from state to state.
SEARS, ROEBUCK AND CO., D/817 WA, HOFFMAN ESTATES, ILLINOIS 60179
Safety standards require operator pres-
ence control to minimize the risk of injury.
Your unit is equipped with cuch controls.
do not attempt to defeat the function of the
operator presence controls under any
circumstances.
TRAINING:
• Read this operator's manual carefully.
Become familiar with the controls and
know how to operate your mower
properly. Learn how to quickly stop
mower.
• Do not allow children to use your
mower. Never allow adults to use
mower without proper instructions.
• Keep the area of operation clear of all
persons, especially small children and
pets.
• Use mower only as the manufacturer
intended and as described in this
manual.
• Do not operate mower if it has been
dropped or damaged in any manner.
Always have damage repaired before
using your mower.
• Do not use accessory attachments that
are not recommended by the manufac-
turer. Use of such attachments may be
hazardous.
• The blade turns when the engine is
running.
PREPARATION:
• Always thoroughly check the area to be
mowed and clear it of all stones, sticks,
wires, bones, and other foreign objects.
These objects will be thrown by the
blade and can cause severe injury.
• Always wear safety glasses or eye
shields when starting and while using
your mower.
• Dress properly. Do not operate mower
when barefoot or wearing open sandals.
Page 3
Wear only solid shoes with good traction
when mowing.
• Check fuel tank before starting engine.
Do not fill gas tank indoors, when the
engine is running or when the engine is
hot. Allow the engine to cool for several
minutes before filling the gas tank.
Clean off any spilled gasoline before
starting the engine.
• Always make wheel height adjustments
before starting your mower. Never
attempt to do this while the engine is
running.
• Mow only in daylight or good artificial
light.
OPERATION:
• Keep your eyes and mind on your
mower and the area being cut. Do not
let other interests distract you.
• Do not mow wet or slippery grass.
Never run while operating your mower.
Always be sure of your footing - keep a
firm hold on the handles and walk.
• Do not put hands or feet near or under
rotating parts. Keep clear of the
discharge opening at all times.
• Always stop the engine whenever you
leave or are not using your mower, or
before crossing driveways, walks, roads,
and any gravel-covered areas.
• Never direct discharge of material
toward bystanders nor allow anyone
near the mower while you are operating
it.
• Before cleaning, inspecting, or repaidng
your mower, stop the engine and make
absolutely sure the blade and all moving
parts have stopped. Then disconnect
the spark plug wire and keep it away
from the spark plug to prevent acciden-
tal starting.
• Do not continue to run your mower if you
hit a foreign object. Follow the proce-
dure outlined above, then repair any
damage before restarting and operating
your mower.
• Do not change the governor settings or
overspeed the engine. Engine damage
or personal injury may result.
• Do not operate your mower if it vibrates
abnormally. Excessive vibration is an
indication of damage; stop the engine,
safely check for the cause of vibration
and repair as required.
• Do not run the engine indoors. Exhaust
fumes are dangerous.
• Never cut grass by pulling the mower
towards you. Mow across the face of
slopes, never up and down or you might
lose your footing. Do not mow exces-
sively steep slopes. Use caution when
operating the mower on uneven terrain
or when changing directions - maintain
good footing.
• Never operate your mower without
proper guards, plates, grass catcher or
other safety devices in place.
MAINTENANCE AND STORAGE:
• Check the blade and the engine
mounting bolts often to be sure they are
tightened properly.
• Check all bolts, nuts and screws at
frequent intervals for proper tightness to
be sure mower is in safe working
condition.
• Keep all safety devices in place and
working.
• To reduce fire hazard, keep the engine
free of grass, leaves or excessive
grease and oil.
• Check grass catcher often for detedora-
tion and wear and replace worn bags.
Use only replacement bags that are
recommended by and comply with
specifications of the manufacturer of
your mower.
• Always keep a sharp blade on your
mower.
• Allow engine to cool before stodng in
any enclosure.
• Never store mower with fuel in the tank
inside a building where fumes may
reach an open flame or an ignition
source such as a hot water heater,
space heater, clothes dryer, etc.
ALook for this symbol to point out
important safety precautions. It means
CAUTION!tt BECOME ALERT!!! YOUR
SAFETY IS INVOLVED.
_CAUTION: Always disconnect spark
plug wire and place wire where it cannot
contact spark plug in order to prevent
accidental starting when setting up,
transporting, adjusting or making repairs.
_.WARNING: The engine exhaust from
this product contains chemicals known to
the State of California to cause cancer,
birth defects, or other reproductive harm.
3
Page 4
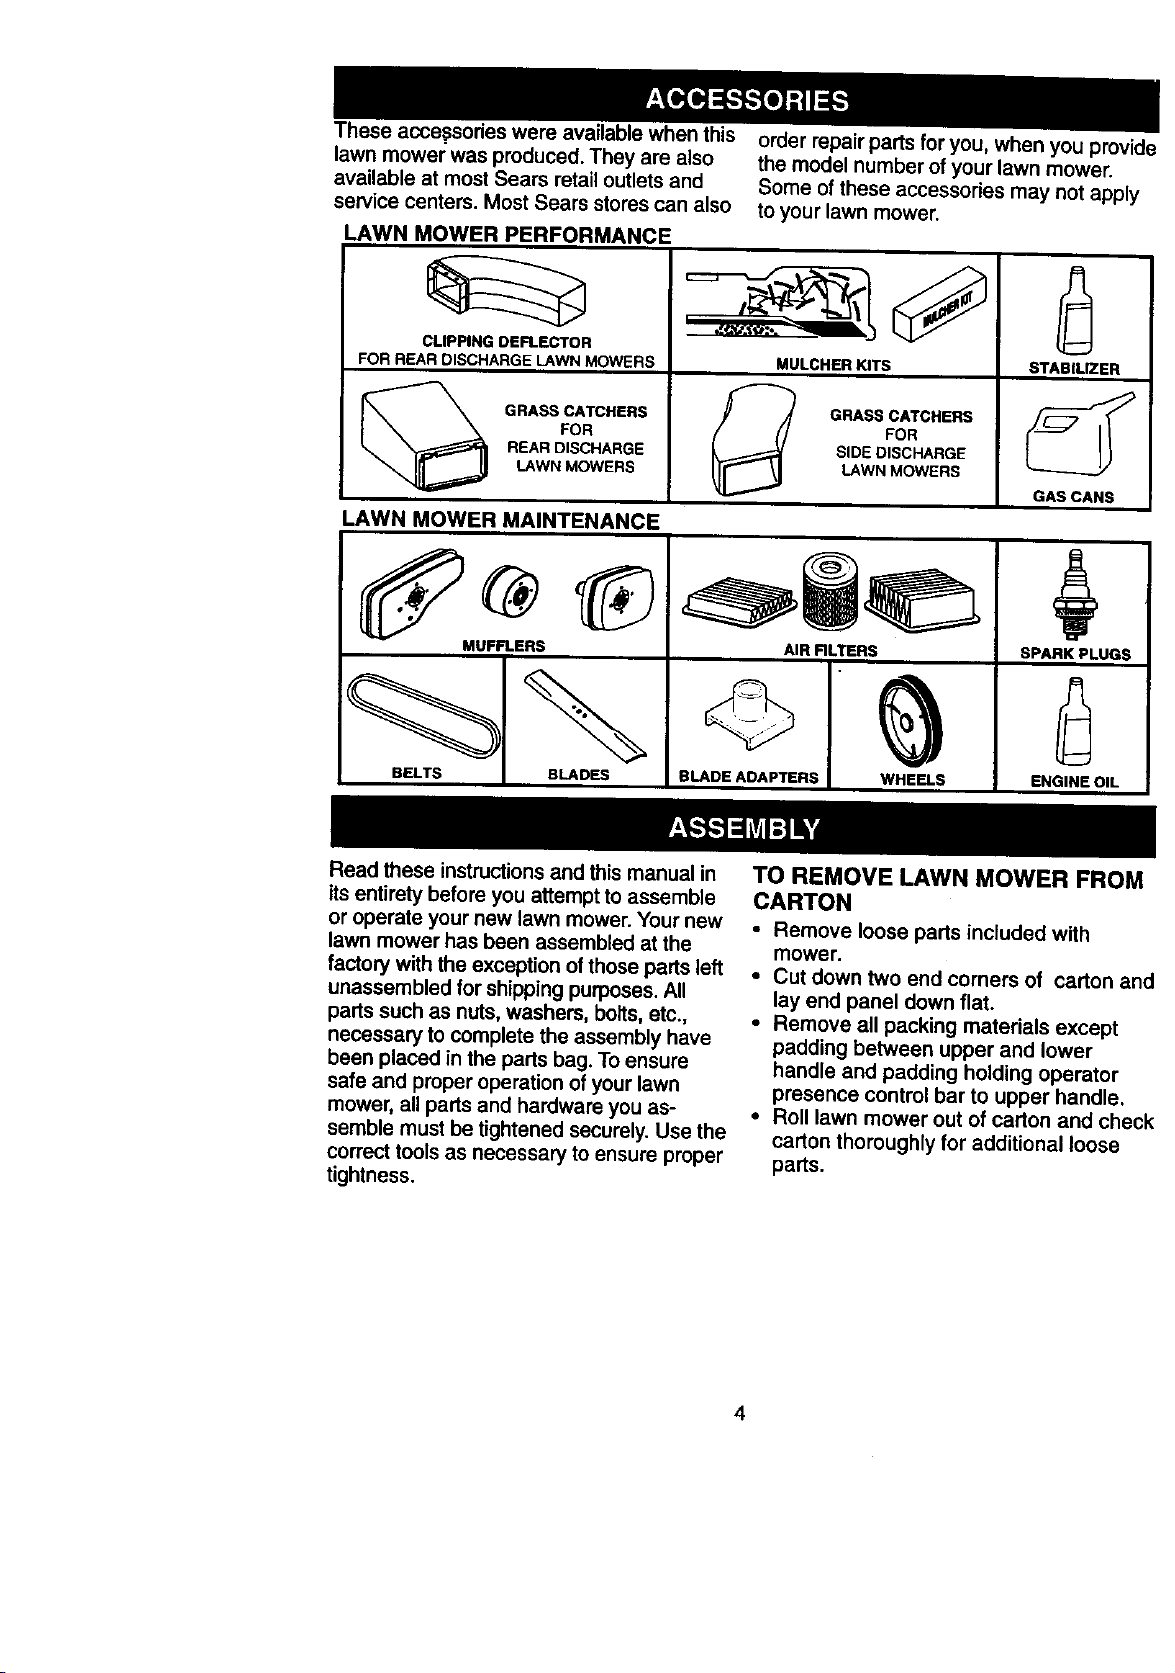
Theseacce_;sodeswereavailablewhenthis
lawnmowerwasproduced.They are also
available at most Sears retail outlets and
service centers. Most Sears stores can also to your lawn mower.
LAWN MOWER PERFORMANCE
order repair parts for you, when you provide
the model number of your lawn mower.
Some of these accessories may not apply
FOR HEAH DISCHARGE LAWN MOWERS MULCHER KITS
LAWN MOWER MAINTENANCE
CLIPPING DEFLECTOR
FOR FOR
REAR DISCHARGE SIDE DISCHARGE
GRASS CATCHERS _ GRASS CATCHERS
LAWN MOWERS LAWN MOWERS
MUFFLERS
AIR RLTERS
©
BELTS BLADES
Read these instructions and this manual in
its entirety before you attempt to assemble
or operate your new lawn mower. Your new
lawn mower has been assembled at the
factory with the exception of those parts left
unassembled for shipping purposes. All
parts such as nuts, washers, bolts, etc.,
necessary to complete the assembly have
been placed in the parts bag. To ensure
safe and proper operation of your lawn
mower, all parts and hardware you as-
semble must be tightened securely. Use the
correct tools as necessary to ensure proper
tightness.
BLADE ADAPTERS WHEELS
TO REMOVE LAWN MOWER FROM
CARTON
• Remove loose parts included with
mower.
• Cut down two end corners of carton and
lay end panel down fiat.
• Remove all packing materials except
padding between upper and lower
handle and padding holding operator
presence control bar to upper handle.
• Roll lawn mower out of carton and check
carton thoroughly for additional loose
parts.
STABILIZSR
GAS CANS
SPARK PLUGS
ENGINE OIL
4
Page 5
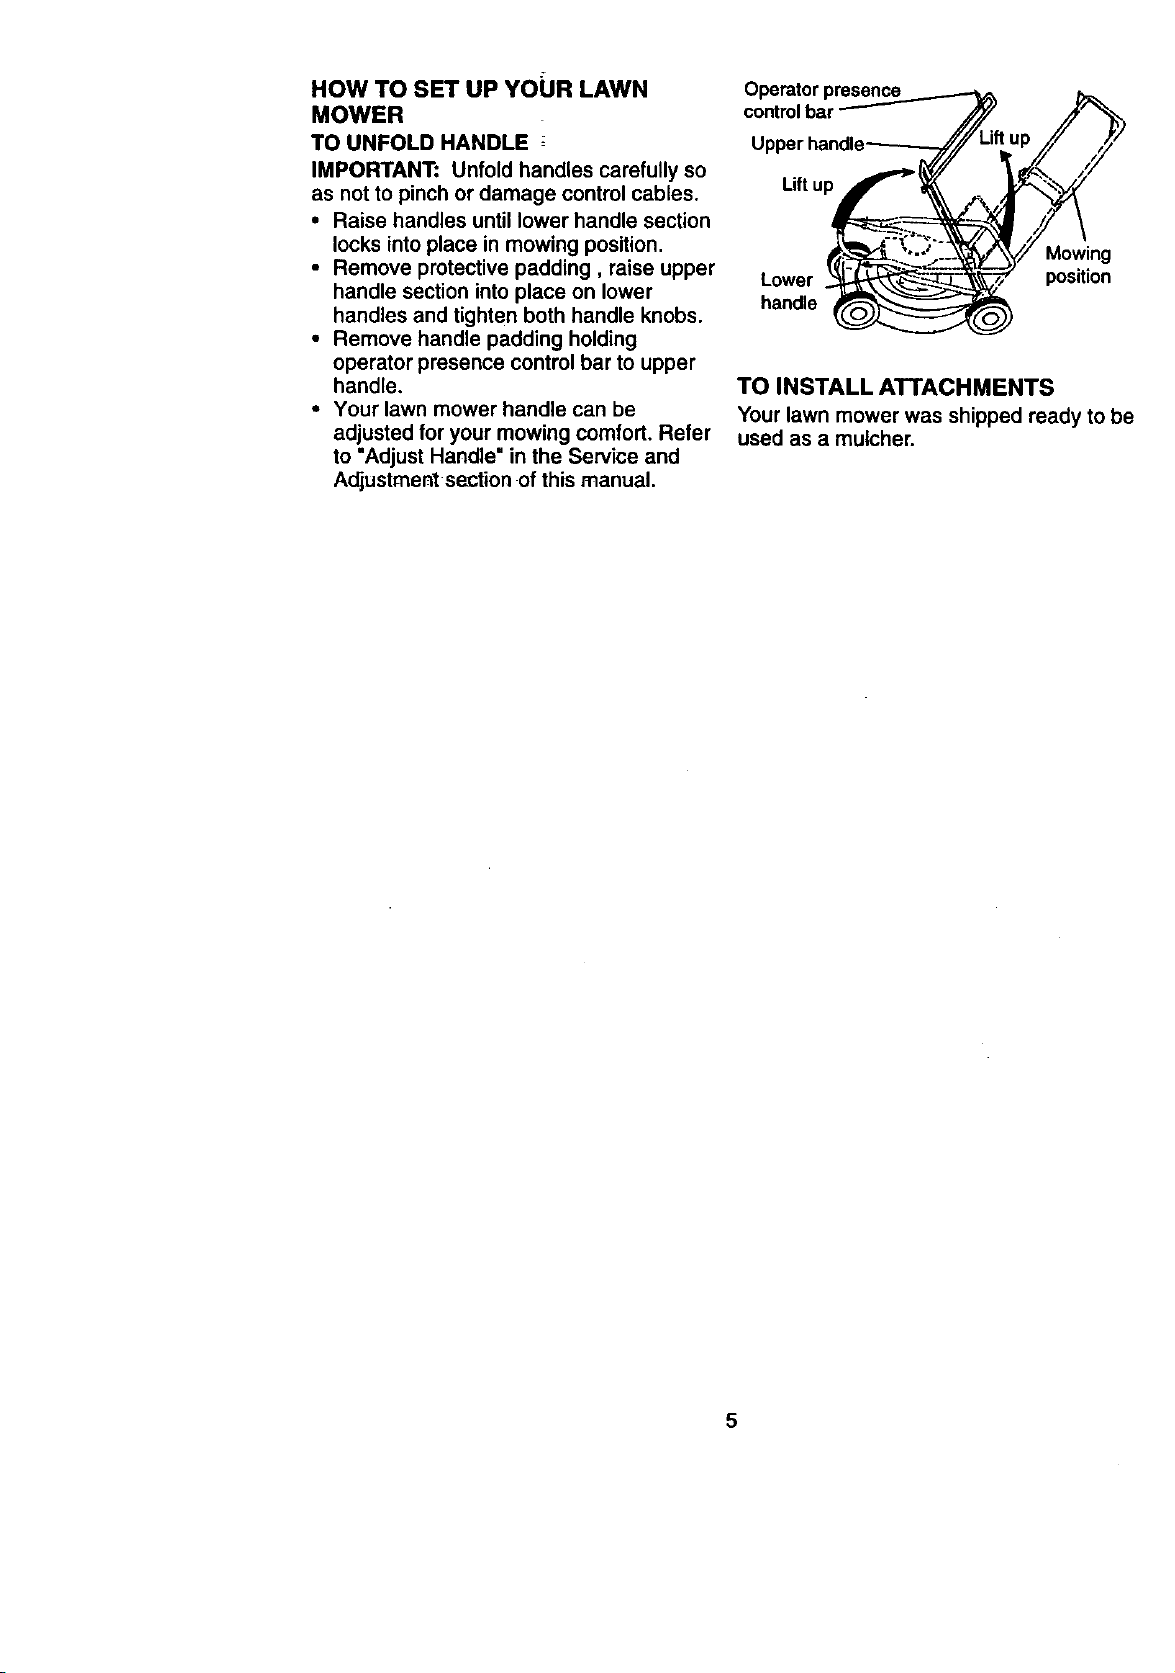
HOW TO SET UP YOUR LAWN
MOWER
TO UNFOLD HANDLE ;
IMPORTANT: Unfold handles carefully so
as not to pinch or damage control cables.
• Raise handles until lower handle section
locks into place in mowing position.
• Remove protective padding, raise upper
handle section into place on lower
handles and tighten both handle knobs.
• Remove handle padding holding
operator presence control bar to upper
handle.
• Your lawn mower handle can be
adjusted for your mowing comfort. Refer
to "Adjust Handle" in the Service and
Adjustment section of this manual.
Operator presence
controlbar
Liftup
Mowing
Lower
handle
TO INSTALL ATTACHMENTS
Your lawn mower was shipped ready to be
used as a mulcher.
position
Page 6

KNOW YOUR LAWN MOWER
READ THIS OWNER'S MANUALAND SAFETY RULES BEFORE OPERATING YOUR LAWN
MOWER. Compare the illustrationswithyour lawn mower to familiarize yourselfwiththe
locationof variouscontrolsand adjustments, Save this manual for future reference.
These symbols may appear on your lawn mower or in literature supplied with the
product, Learn and understand their meaning.
CAUTION ENGINE ENGINE FAST SLOW CHOKE FUEL OIL DANGER, KEEP HANDS
OR WARNING ON OFF AND FEET AWAY
Operatorpresence controlbar
Grasscatcher_
Engineoilcap
withdipstick
Lawn mowerhousing
Wheel adjuster
(on each wheel)
MEETS CPSC SAFETY REQUIREMENTS
Sears rotary walk-behind power lawn mowers conform to the safety standards of the American
National Standards Institute and the U.S. Consumer Product Safety Commission. The blade
tums when the engine is running.
Operator presence Control Bar- must he
held down to the handle to start the engine.
Release to stop the engine.
Primer - pumps additional fuel from the
carburetor tothe cylinderfor use when starting
a cold engine.
Starter Handle - used for startingthe engine.
6
Page 7

Theoperationofanylawnmowercanresultin
foreign objects thrown intothe eyes, which can
resultin severe eye damage. Always wear
safety glasses or eye shields while operating
your lawn mower or performingany adjust-
ments or repairs. We recommend a wide
vision safety mask over spectacles or standard
safety glasses.
HOW TO USE YOUR LAWN MOWER
ENGINE SPEED CONTROL
The engine speed was setat the factoryfor
optimum performance. Speed is notadjust-
able.
ENGINE ZONE CONTROL
ACAUTION: Federal regulationsrequire an
engine controlto be installed on this lawn
mower inorderto minimize the riskof blade
contact injury.Do not under any circumstances
attempt to defeat the function ofthe operator
control, The blade turns when the engine is
running.
• Your lawn mower is equipped with an
operator presance control bar which
requires the operator to be positioned
behind the lawn mower handle to start and
operate the lawn mower.
TO ADJUST CUTTING HEIGHT
• Raise wheels for low cutand lowerwheels
for high cut.
• Adjust cutting heightto suit your require-
ments. Medium positionisbest for most
lawns.
• To change curlingheight, squeeze adjuster
lever toward wheel. Move wheel up or down
to suityour requirements. Be sureall wheels
are inthe same setting.
NOTE: Adjuster isproperlypositionedwhen
plate tab inserts into holein lever.Also, 9-
positionadjusters (ifso equ_oped)allow lover
to be positionedbetween the platetabs.
LowerWheels for High Cut
J
Raise Wheels for LowCut
TO A'B'ACH GRASS CATCHER
• Liftthe rear door of the lawn mowerand
place the grass catcher frame side hooks
onto the doorpivot pins.
• The grass catcher is secured tothe lawn
mower housingwhen the rear dooris
lowered onto the grass catcher frame.
Plate Tab
Lever
CAUTION: Do not runyour lawn mower
witli_outchppmgdeflectoror approved grass
catehar inplace. Never attempt toope_ratethe
lawn mower withthe reardoor removed or
propped open.
Pivot pins
TO EMPTY GRASS CATCHER
• Lift up on grass catcher using theframe
handle.
• Remove grasscatcher withclippingsfrom
under lawn mower handle.
• Emptyclippingsfrom beg usingboth frame
handle and bag handle.
NOTE: Do not drag the bag when emptying;
itwillcause unnecessary wear.
Bag /
handle Grasscatcher
framehandle
BEFORE STARTING ENGINE
OIL
Your lawn mower is shippedwithoutoil inthe
engine.
• Be suremower is level and area aroundoil
figis clean.
• Remove engine oilcap and fillto the full
line onthe dipstick.
• Use2Oozs.of oil. For type and grada of oil
to use, see "ENGINE" in the Maintenance
sectionof this manual.
• Pour oil slowly. Do notover fill.
• Check oillevelbefore each use. Add oilif
needed. Fillto fulllineon dipstick.
• To read properlevel, tighten engine oil cap
each time.
• Reinstallengine oilcap and tighten.
• Change the oil after every 25 hours of
operationor each season• You may need
tochange the oilmore often under dusty,
dirty conditions.
GAS
• Fillfuel tank. Use fresh, clean, regular
unleaded gasoline witha minimum of87
octane. Do not mix oil withgasoline.
Purchase fuel inquantitiesthat can be used
7 within30 days toassure fuel freshness.
Page 8

WARNING: Experience indicatesthat alcohol
blanded fuels (called gasoho_or using ethanol
or methanol) can attractmoisturewhich loads
to separation and formation of acids during
storage. Acidic gas can damage the fuel
system of an engine while in storage. To avoid
engine problems, the fuel system should be
emptied before storage of 30 days or longer.
Drain the fuel tank, start the engine and lot it
run until fuel lines and carburetor are empty.
Use fresh fuel next season. See Storage
Instructionsfor additionalinformation. Never
use engine or carburetor cleaner productsin
fuel tank or permanent damage may occur.
Engine oilcap _ Gasolinefiller
TO START ENGINE
• To start a cold engine, push primer five (5)
times before t_ng to start. Use a firm push.
This step isnot usually necessary when
starting an engine which has already runfor
a few minutes.
• Hold operator presence controlbar down to
the handle and pullstarter handle quickly.
Do not allow starter rope to snap back.
• To stop engine, release operator presence
control bar.
NOTE: In cooler weather itmay be necessary
to repeat primingsteps. In warmer weather
over I:_"ning may cause flooding and engine
will not start.Ifyou do flood engine, wait a few
minutes before attempting to start and do not
repeat priming steps.
MOWING TIPS
• Under certain conditions, such as very tall
grass, it may be necessary to raise the
height of cut to reduce pushing effort and to
keep from overloading the engine and
_eavingclumps of grass d,lppings. It may
also be necessary to reduce ground speed
and/or run the lawn mower over the area a
second time.
• For extremely heavy cutting, reduce the
width of cutby overlappingpreviouslycut
path and mow slowly.
• For better grass bagging and mostcutting
conditions, the enginespeed should be st
in the fast position.
• Pores inclothgrass catchers can become
tilled with dirt and dust with use and
catchers will collect loss grass. To preven
this, regularly hose catcher off with water
and let dry before using.
• Keep top of engine around starter clear an
clean ofgrass clippingsand chaff. This w1
help engine airflow and extend engine life
MULCHING MOWING TIPS
IMPORTANT: For best performance, keep
mower housing free ofbun-up grass and
trash. Clean UNDERSIDE OF MOWER
HOUSING after each use. See "Cleaning" ir
MAINTENANCE section of this manual.
• The special mulching blade will recut the
grass clippings many times and reduce
them in size so that as they fall onto the
lawn they will disperse into the grass and
not be noticed. Also, the mulched grass wi
biodegrade quicklytoprovide nutrientsfor
the lawn. Always mulch with your highest
engine (b_de) speed as thiswilt provide tt_
best recuttingactionofthe blades.
• Avoid cuttingyour lawn when it is wet. We
grass tendsto form clumps and interferes
withthe mulchingaction. The best timeto
mow your lawn is the early afternoon. Att_
time the grass has dried and the newlycul
area will not be exposed to the direct sun.
• For best results, adjust the lawn mower
cuttingheight so thatthe lawn mower cuts
offonly the top one-thirdof the grass blad_
Ifthe lawn isovergrown it will be necessar
to raise the height ofcut to reduce pushin(
effortand to keep from overloading the
engine and leavingclumpsof mulched
grass. For extremely heavy mulching,
reducayour widthof cut, mow slowiy an_
raise the rear of the lawn mower one whec
adjuster settinghigher than the front.
• Certain types of grass and grass condition
may require that an area be mulched a
second time to completely hide the
clippings.When doing a second cut, mow
across or perpendicular to the firstcut pa_
• Change yourcuttingpattem from week to
week. Mow nerth to south one weekthen
change to east to west the next weak. Thi=
willhelp prevent matting and graining of th
lawn.
8
Page 9

MAINTENANCE SCHEDULE _.,_. _._.._._ _O_._,_ ''
,sYOO
BEGu .sE.v,c SERV,CEDATES
Check for Loose Fasteners _ li/
Clean/Inspect Grass Catcher
a Clean Lawn Mower
_ Clean Under Dnve Cover(Power-Propelled Mowers) ¥t
Check drive belt/pulleys
ER (Power-Propened Mowers) I1_
Check]Sharpen/Replace Blade I/=
LubricationChart IV/ I_
Clean Battery/Recharge
IElectdc Start Mowers/ II/ 1'#'4
E Check En_line Oil Level
iN Chan_e En_lineOil _112
G Clean Air Filter Ill 2
I InspectMuffler
N Clean or Replace Spark Plug i,'
E ReplaceAirFilterPaperCartddge IV42
1 - Change mora olten when ope(aUng under a haa'/y load or in high ambient temperatures.
2 - Se_k:e mo_e o_ten "=_len _erating in didy o( d_=ty conditions.
3 - Replace black)s more olten V/hen mow._ insendy sol.
4 - Charge 48 hours at et_l o( season,
GENERAL RECOMMENDATIONS
The warranty on this lawn mower does not
cover items that have been subjected to
operator abuse or negligence.To receive full
value from the warranty, operator must
maintain mower as instructed in this manual.
Some adjustments will need to be made
periodically to property maintain your unit.
All adjustments in the Service and Adjustments
sectionof this manual shouldbe checked at
least once each season.
• Once a year, replace the spark plug, replace
air filterelement and check blade for wear. A
new spark plug and clean/new air filter
element assures proper air-fuelmixture and
helpsyour engine runbetter and last longer.
• Follow the maintenance schedule in this
manual.
BEFORE EACH USE
• Check engine oillevel.
• Check forloose fasteners.
LUBRICATION
Keep unit well lubricated (See "LUBRICATION
CHART").
LUBRICATION CHART
Wheel
adjusters
Brake spring
"_ Engineoil
(_ Rear
door (_) Handle bracket
hinge mountingpin
(_) SPRAYLUBRICANT
(_) SAE 30 MOTOR OIL REFER TO
ENGINE - MAINTENANCESECTION.
IMPORTANT: DGnot oilorgrease plastic
wheel bearings. VL_:ouslubricantswill attract
dust and dirt thatwill shorten the lifeof the self
lubricatingbearings. If youfeel they must be
lubricated,use onlya dry,powdered graphite
type lubricantsparingly.
9
Page 10

PRODUCT SPECIFICATIONS
MODEL NUMBER 917.388270
SERIAL NUMBER
DATE OF PURCHASE
HORSEPOWER: 5.5
GASOLINE CAPACITY/TYPE: 1.5 QUARTS
UNLEADED REGULAR
OIL TYPE (API-SF/SG/SH): SAE 30 (ABOVE 32°F)
SAE 5W-30 (BELOW 32°F)
OIL CAPACITY: 20 OZS.
SPARK PLUG(GAP: .030") CHAMPION RJ19LM OR J19LM
VALVE CLEARANCE: INTAKE: .004 - .008
EXHAUST: .004 - .008
SOLID STATE IGNITION
AIR GAP: .0125 IN.
BLADE BOLT TORQUE: 35-40 FT. LBSo
• The model and serial numbers will be found on a decal attached to the rear of the
lawn mower housing.Record both serial number and date of purchase in space
provided above.
LAWN MOWER
Always observe safety ruleswhen performing
any maintenance.
TIRES
• Keep tires free ofgasoline, oil,or insect
controlchemicals which can harm rubber.
• Avoid stumps, stones, deep ruts,sharp
objectsand other hazards that may cause
tire damage.
BLADE CARE
For best results, mower blade must be
kept sharp. Replace bent or damaged
blades.
TO REMOVE BLADE
• Disconnect spark plug wire from spark
plug and place wire where itcannot
come in contact with spark plug.
• Turn lawn mower on its side. Make sure
air filter and carburetor are up°
• Use a wood block between blade and
mower housing to prevent blade from
turning when removing blade bolt.
• Protect your hands with gloves and/or
wrap blade with heavy cloth.
• Remove blade bolt by turning counter-
clockwise.
• Remove blade and attaching hardware
(bolt, lock washer and hardened
washer).
NOTE: Remove the blade adapter and
check the key inside hub of blade adapter.
The key must be in good condition to work
properly. Replace adapter if damaged.
TO REPLACE BLADE
• Position the blade adapter on the engine
crankshaft. Be sure key in adapter and
crankshaft keyway are aligned.
• Position blade on the blade adapter
aligning the two (2) holes in the blade
with the raised lugs on the adapter.
• Be sure the trailing edge of blade
(opposite sharp edge) is up toward the
engine.
• Install the blade bolt with the lock
washer and hardened washer into blade
adapter and crankshaft.
• Use block of wood between blade and
lawn mower housing and tighten the
blade bolt, turning clockwise.
• The recommended tightening torque is
35-40 ft. Ibs.
IMPORTANT: Blade bolt is grade 8 heat
10treated"
Page 11

TO SJHARPEN BLADE
NOT_: We do not recommend sharpening
blade - but if you do, be sure the blade is
balanced.
Care-should be taken to keep the blade
balanced. An unbalanced blade will cause
eventual damage to lawn mower or
engine.
• The blade can be sharpened with a file
or on a grinding wheel. Do not attempt
to sharpen while on the mower.
• To check blade balance, drive a nail into
a beam or wall. Leave about one inch of
the straight nail exposed. Place center
hole of blade over the head of the nail.
If blade is balanced, it should remain in
a horizontal position. If either end of the
blade moves downward, sharpen the
heavy end until the blade is balanced.
Blade Crank shaft
adapter
Bolt Crank
Lockwasher Hardened Blade shaft
washer Trailing adapter
edge
GRASS CATCHER
• The grass catcher may be hosed with
water, but mustbe dry when used.
• Check your grass catcher often for damage
or deterioration.Through normal use itwill
wear. ffcatcher needs repladng, replace
onlywith a manufacturer approved
replacement catcher. Give the lawn mower
model number when ordering.
ENGINE
LUBRICATION
Use only high quality detergent oil rated
with API service classification SF, SH or
SG. Select the oil's SAE viscosity grade
according to your expected operating
temperature.
SAE VISCOSITY GRADES
NOTE: Although multi--viscosity oils
(5W30, 10W30 etc.) improve starting in
cold weather, these multi--viscosity oils
will result in increased oil consumption
when used above 32°F. Check your engine
oil level more frequently to avoid possible
engine damage from running low on oil.
Change the oil after every 25 hours of
operation or at least once a year ifthe
lawn mower is not used for 25 hours in
one year.
Check the crankcase oil level before
starting the engine and after each five (5)
hours of continuous use. Tighten oil plug
securely each time you check the oil level.
TO CHANGE ENGINE OIL
NOTE: Before tipping lawn mower to drain
oil, drain fuel tank by running engine until
fuel tank is empty.
• Disconnect spark plug wire from spark
plug and place wire where it cannot
come in contact with spark plug.
• Remove engine oil cap; lay aside on a
clean surface.
• Tip lawn mower on its side and drain oil
into a suitable container. Rock lawn
mower back and forth to remove any oil
trapped inside of engine.
• Wipe off any spilled oil on lawn mower
and on side of engine.
• Fill engine with oil. Fill only to the "FULL"
line on the dipstick. DO NOT OVER
FILL.
• Replace engine oil cap.
• Reconnect spark plug wire to spark
plug.
Container
AIR FILTER
Your engine will not run properly and may
be damaged by using a dirty air filter.
Replace the air filter every year, more
often if you mow in very dusty, dirty
conditions. Do not wash air filter.
TO CHANGE AIR FILTER
• Remove the air filter cover by turning
counterclockwise to the stop and pull
away from collar.
• Remove filter from inside of cover.
11
Page 12

• Cleantheinside of the cover and the
collar to remove any dirt accumutation.
• Insert new filter into cover.
• Put air filter cover and filter into collar
aligning the tab with the slot.
• Push in on cover and turn clockwise to
tighten.
Clip Tum
counter--
remove
Slot
totighten
Airfilter cover
MUFFLER
Inspect and replace corroded muffler as it
could create afire hazard and/or damage.
SPARK PLUG
Change your spark plug each year to
make your engine start easier and run
better. Set spark plug gap at .030 inch.
CLEANING
IMPORTANT: For best performance, k_
mower housing free of built---up grass s
trash. Clean.underside of mower housin
after each use.
_h, CAUTION: Disconnect spark plug
from spark plug and place wire where it
cannot come in contact with the spark
plug.
• Turn lawn mower on its side. Make st
air filter and carburetor are up. Clean
underside of your lawn mower by
scraping to remove build--up of gras
and trash.
• Clean engine often to keep trash fren.
accumulating. A clogged engine runs
hotter and shortens engine life.
• Keep finished surfaces and wheels fr,
of all gasoJine, oil, etc.
• we DO NOT recommend using a
garden hose to clean lawn mower
unless the electrical system, muffler,
filter and carburetor are covered to k_
water out. Water in engine can result
shortened engine life,
_,CAUTION: Before performing any
service or adjustments:
• Release control bar and stop engine.
• Make sure the blade and all moving
parts have completely stopped.
• Disconnect spark plug wire from spark
plug and place where it cannot come in
contact with plug.
LAWN MOWER
TO ADJUST cu'n'ING HEIGHT
See "TO ADJUST CUI-rlNG HEIGHT" in
the Operation section of this manual.
REAR DEFLECTOR
The rear deflector, attached between the
rear wheels of your lawn mower, is
provided to minimize the possibility that
objects will be thrown out the rear of the
lawn mower into the operator's mowing
position.
If the rear deflector becomes damaged, it
should be replaced.
TO ADJUST HANDLE
The handle can be mounted in a high o
low position. The mounting holes in th_
bottom of lower handle are off center fo
raising or lowering the handle.
• Remove upper handle and all parts
attached to lower handle.
• Remove hairpin cotters from lower
handle bracket mounting pin.
• Squeeze lower handle in to remove it
from mounting pins.
• Turn lower handle over to raise or Io_
handle.
• Squeeze lower handle in and positior
holes onto mounting pins on handle
bracket.
• Reassemble upper handle and all pa
removed from lower handle.
Lower
,,-";__: handle
Rotate
12
Page 13

ENGINE
CARBURETOR
Yourcarburetor has a non-adjustable fixed
main jet formixture control. Ifyour engine
does not operate propertydue to suspected
carburetor problems, take your lawn mower to
an authorized service canter for repairor
adjustment.
IMPORTANT: Never tamper with the engine
governor,which isfactory set for properengine
speed. Overspeeding the engine above the
factory high speed setting can be dangerous.
Immediately prepare your lawn mower for
storage at the end ofthe season or if the unit
willnotbe used for 30 days or more.
LAWN MOWER
When lawn mower isto be storedfor a period
of time, clean it thoroughly, remove all dirt,
grease, leaves, etc. Store in a dean, dryarea.
• Clean entire lawn mower (See "CLEANING"
in the Maintenance section ofthis manual).
• Lubricate as shown in the Maintenance
sectionof this manual.
• Be sure that all nuts, bolts, screws, and pins
are securely fastened. Inspect moving
parts for damage, breakage and wear.
Replace if necessary.
• Touch upall rusted or chipped paint
surfaces;sand lightlybefore painting.
HANDLE
You can fold your lawn mower handle for
storage.
• Squeeze the bottom ends of the lower
handle toward each other until the lower
handle clears the handle bracket, then
move handle forward.
• Loosen upper handle mounting bolts
enough to allow upper handle to be
folded back.
IMPORTANT: When folding the handle for
storage or transportation, be sure to fold
handle as shown or you may damage the
control cables.
• When setting up your handle from the
storage position, the lower handle will
automatically lock into the mowing
position.
Lower handle
Handle
Squeeze to
fold
bracket
ifyou think the engine-gove_ed highspeed
needs adjusting,contact your nearest
AUTHORIZED service canter, which has
proper equipment and e_erienca to make
any necessary adjustments. -
ENGINE SPEED
Yourengine speed has been factory set. Do
not attempt to increase engine speed or it
may resultin personal injury. Ifyou believe
that the engine is runningtoo fast ortoo slow,
take your lawn mower to an authorized
service canter for repairand adjustment.
Control Bar
:old
Backward
Fold
For Storage
Lower Handle
Mowing
) Position
ENGINE
FUELSYSTEM
IMPORTANT: Itis importantto prevent gum
deposits from forming in essentialfuel system
parts suchas carburetor, fuel filter,fuel hose,
or tank during storage.
Also, esperienca indicatesthat alcohol
blended fuels (calledgasohol orusingethanol
or methanol) can attractmoisturewhich leads
to separation and formation of acidsduring
storage. Acidic gas can damage the fuel
system of an engine while in storage.
• Drain the fuel tank.
• Start the engine and let it run until the fuel
lines and carburetor are empty.
• Never use engine or carburetor cleaner
products in the fuel tank Orpermanent
damage may occur.
• Use fresh fuel next season.
NOTE: Fuel stabilizer is an acceptable
aitemative in minimizing the formation of fuel
gum deposits during storage. Add stabilizer to
gasoline in fuel tank or storage container.
Always follow the mix ratio found on s_ilizer
container. Run engine at least 10 minutes
after adding stabilizer to allow the stabilizer to
reach the carburetor. Do not drain the gas
tank and carburetor ifusing fuel stabilizer.
ncotter
13
Page 14

ENGINE OIL
Drain oil (with engine warm) and,re...placewith
dean engine oil. (See ENGINE in the
Maintenance section ofthis manual).
CYLINDER
• Remove spark plug.
Pour one ounce (29 ml) of oil through spark
plug hote into cylinder.
• Pull starter handle slowly a few times to
distribute oil.
• Replace with new spark plug.
OTHER
• Do not store gasoline from one season to
another.
• Replace yourgasoline can if yourcan starts
to rust. Rust and/or dirt in your gasoline w111
cause problems.
• Ifpossible,store your unit indoors and cover
ifto give protection from dust and dirt.
• Cover your unit with a suitable protective -
cover that does not retain moisture. Do not
use plastic. Plastic cannot breathe which
allows condensation to form and will cause
your unit to nJst.
IMPORTANT: Never cover mower while
engine and exhaust areas are stillwarm.
_CAUTION: Never store the lawn mower
withgasoline inthe tank inside a building
where fumes may reach an open flame or
spark. Allow_e engine to cool before storing
inany enclosure.
14
Page 15

FROUBLESHOOTINGCHART
PROBLEM CAUSE
Does n_start • _airfi_
Loss of power
• Out offcel.
• Stale fuel.
• Water in fuel.
• Spark plug wire is
disconnected.
• Bed spark plug.
• Loose blade or broken blade
adapter.
• Control bar in released
pos'_ion.
• Control bar defective.
• Rear of lawn mower housing
or cuttingblade dragging
in heavy grass.
• Cutting too much grass.
: Dirtyair filter.
Buildup of grass, leaves,
and trash under mower.
• Too much oilin engine.
• Walking speed too fast.
CORRECTION
• Clean/rsplace airfilter.
• Fillfuel tank.
• Draintankand refillwith
freshcleanfuel.
• Drainfueltankand
carburetorand refilltank
withfreshgasoline.
• Connect wire to plug.
• Replace sparkplug.
• 13ghten blade bolt or
replace blade adapter.
• Depress control barto
handle.
• Replace control bar.
• Set to "Higher Cut"
position.
• Set to"Higher Cut"
position.
• Clean/replace airfilter.
• Clean undersideof mower
housing.
• Check oil level.
• Cut at slower walking
speed.
Poor cut- uneven
Excessive • Replace blade. T_jhten
vibration blade belt.
Starter rope hard
to pull
Grass catcher
not filling (if so
equipped)
Hard to push
• Worn, bent or loose blade.
• Wheel heights uneven.
• Buildup of grass, leaves
and trash under mower.
•Wom, bent or loose blade.
• Bent engine crankshaft.
• Engine flywheel brake is on
when control bar is released.
• Bent engine crankshaft.
• Blade adapter broken.
• Blade dragging in grass.
• Cutting height too low.
• Lift on blade wom off.
• Catcher not venting air.
• Grass istoo high or wheel
height is too low.
• Rear oflawn mower
housing orblade dragging
in grass.
• Grass catcher too full.
• Handle height positionnot
rightfor you.
• Replace blade. 13ghten
blade belt.
• Set all wheels at same
height
• Clean underside of
mower housing.
• Contact an authorized
service center.
• Depress control bar to
upper handle before
pullingstarter rope.
• Contact an authorized
service center.
• Replace blade adapter.
• Move lawn mower to cut
grass or to hard surface
•to start engine.
• Raise cutting height.
• Replace blade.
• Clean grass catcher.
• Raise cutting height.
• Raise rear of lawn mower
housing one (1) setting
higher.
: Empty grasscatcher.
Adjust handle height to
suit.
• 15
Page 16

For in-home major brand repair service:
Call 24 hours a day,7 days a week
1-800-4-MY-Home s" (1-800-469-4663)
Para pedir servicio de reparacibn a domicilio
1-800-676-5811
In Canada for all your service and parts needs call
Au Canada pour tout le service ou les pibces
1-800-885-4455
For the repair or replacement parts you need:
Call 6 am-11pm CST, 7 days a week
PartsDirect sM
1-800-366-PART (1-800-366-7278)
Para ordenar piezas con entrega a domicilio
1-800-659-7084
For the location of a Sears Parts and Repair Center
in your area:
Call 24 Hours a day, 7 days a week
1-800-488-1222
For information on purchasing a Sears Maintenance Agreq
ment or to inquire about an existing Agreement:
Call 9 am-5 pro, Monday - Saturday
1-800-827-6655
166363 03.01.99 VB Printed in U.S., _
 Loading...