

Craftsman 61101 Operator's Manual

perator's Manual
I:RI FrSMAN°
LAWN TRACTOR
46-iNCH MULCH KiT
Model No. 61101 (19A30005599)
CAUTION: BEFORE USING THIS
PRODUCT, READ THIS MANUAL
AND FOLLOW ALL SAFETY RULES
AND OPERATING iNSTRUCTiONS.
Sears Canada inc., 290 Yonge Street, Toronto, On iVl5B 2C3
Visit our web: sears.ca FormNo.769-06686
1/4/11
Thismulchkitisdesignedforusewith select46-inchtwo-blade
cuttingdecks.Referto yourlawntractor'sOperator'sManualtoassure
compatibility
CARTON CONTENTS
Beforebeginninginstallation,removeallpartsfromthe cartontomake
sureeverythingispresent.Cartoncontentsarelistedbelowandshown
inFig,1-1,Partnumbersare showninparentheses,
• TwoMulching Blades(742-04268)
• One46"DeckMulchPlugAssembly(631-04327A)
Figure 14
BLADE INSTALLATION
WARNING:Beforebeginninginstallation,placethe
tractorona firmand levelsurface,settheparkingbrake,
placethe PTOinthedisengaged(OFF)position,stopthe
tractor'sengineandremovetheignitionkeytoprevent
unintendedstarting.
WARNING:Cuttingbladesare sharp.Alwaysprotect
handsbywearingheavyleatherworkglovestograsp
blades,
J
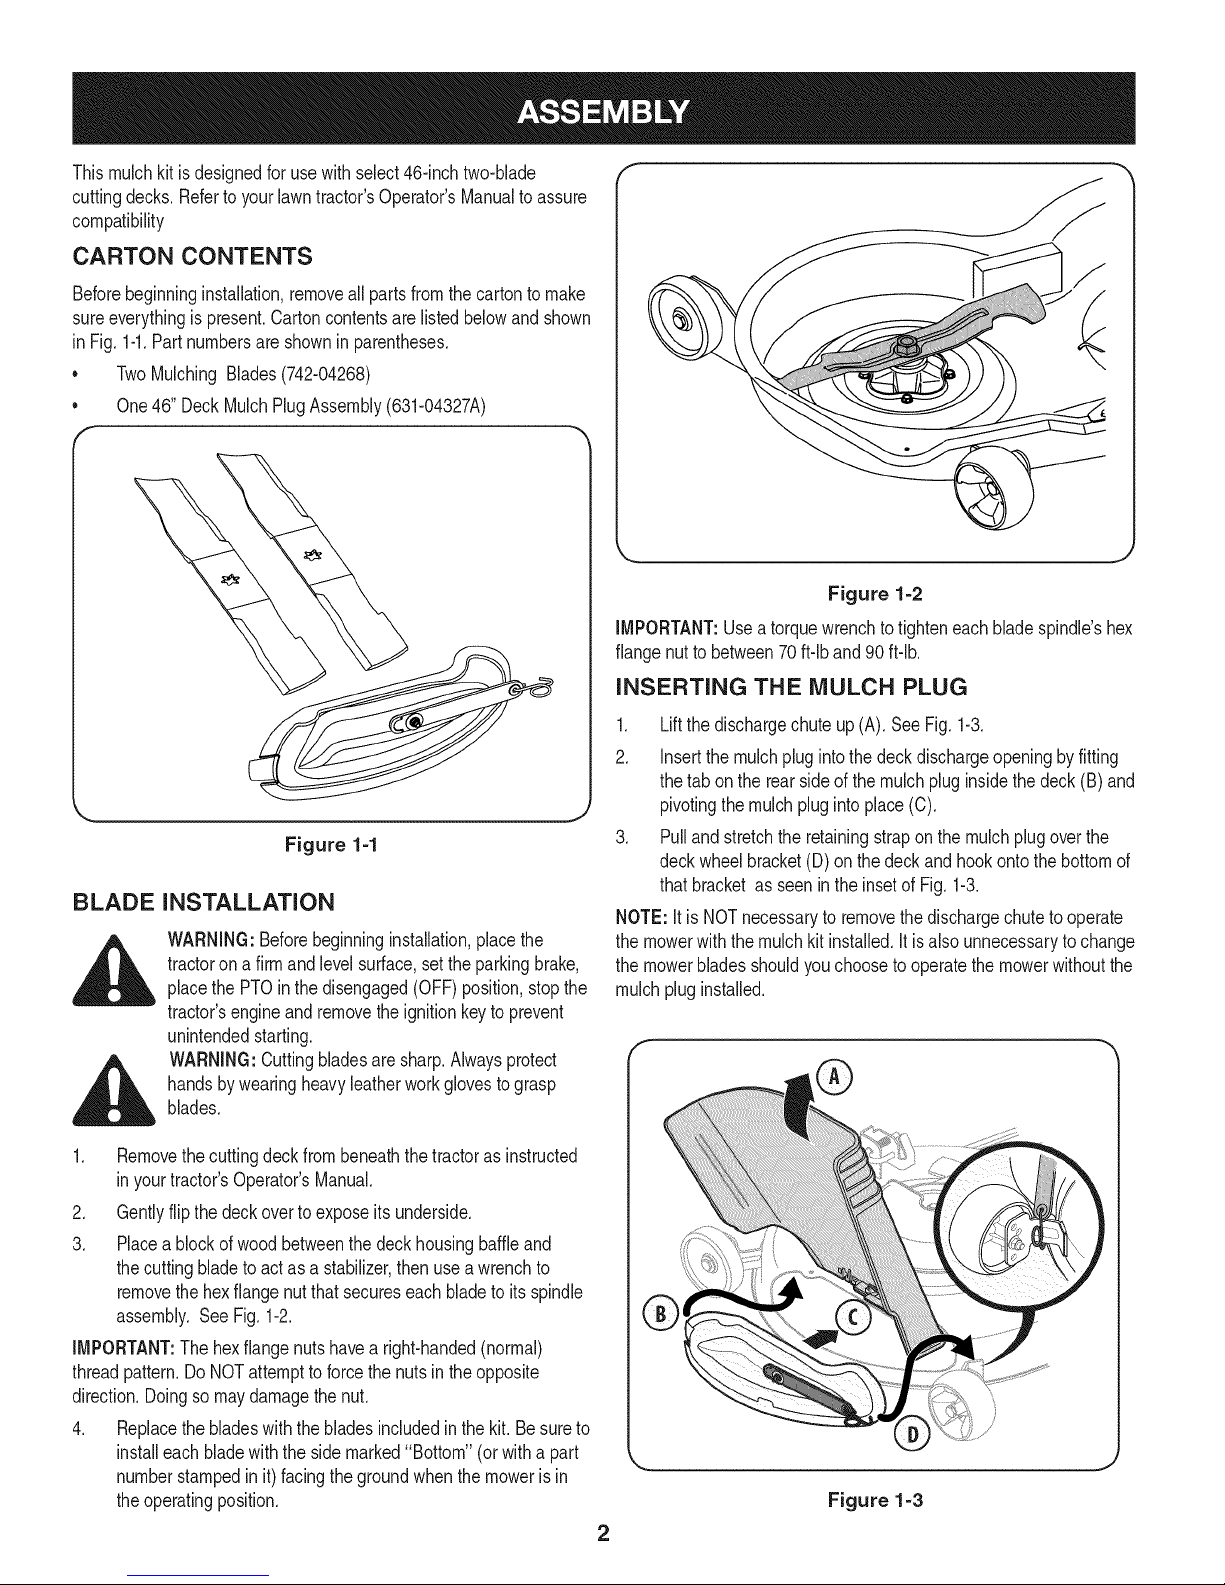
Figure 1=2
IMPORTANT:Usea torquewrenchtotighteneachbladespindle'shex
flangenut tobetween70ft-lband90 ft-lb.
INSERTING THE MULCH PLUG
1. Liftthedischargechuteup(A).SeeFig.1-3.
2. Insertthemulchplugintothe deckdischargeopeningbyfitting
thetab onthe rearsideof themulchpluginsidethedeck (B)and
pivotingthemulchpluginto place(C).
3. Pullandstretchtheretainingstraponthemulchplugoverthe
deckwheelbracket(D)on thedeckandhookontothe bottomof
that bracketasseenin theinsetof Fig.1-3.
NOTE:It isNOTnecessarytoremovethedischargechutetooperate
themowerwiththe mulchkit installed.Itisalsounnecessaryto change
themowerbladesshouldyouchoosetooperatethemowerwithoutthe
mulchpluginstalled.
1. Removethecuttingdeckfrombeneaththetractorasinstructed
inyourtractor'sOperator'sManual.
2. Gentlyflipthedeckovertoexposeitsunderside.
3, Placeablockofwood betweenthedeckhousingbaffleand
thecuttingbladetoactas a stabilizer,thenuse a wrenchto
removethehexflangenutthatsecureseachbladetoitsspindle
assembly,See Fig,1-2,
IMPORTANT:Thehexflange nutshavearight-handed(normal)
threadpattern.DoNOTattemptto forcethenutsintheopposite
direction.Doingsomaydamagethenut.
4. Replacethebladeswiththe bladesincludedinthekit. Besureto
installeachbladewiththe sidemarked"Bottom"(or witha part
numberstampedinit)facingthe groundwhenthemowerisin
theoperatingposition.
J
Figure 1-3
2

3
 Loading...