

Craftsman 580752090 Owner’s Manual
Operator'sManual
3408 PSi MAX
2.8 GPM MAX
Model No. 580.752090
®
CUSTOMERHELPUNE
PRESSUREWASHER
HOUriS: Non. - Fri. 8 a.m. to 5 p.m. (CT)
WARmeG
Before usingthis product, readthis
manualand follow atI Safety Rules
and Operating Instructions.
Sears, Roebuck and Co., Hoffman Estates, [L 68179 U.S.A.
Visit our Craftsman website: www.craftsman.eom
Part No. 203780GS Draft A (05/02/2007)
i ]
R, IADVERTENCJA
Antes de utiiizar el producto, iea este
manuaiy siga todas ias Reglasde
Seguridade Instrucciones de Use.
®Safety
®Assembly
®Operation
+ Maintenance
++Parts
+ Espa_oi, p. 36
0 4 } 5
WARRANTY.......................................... 2
SAFETYRULES...................................... 2-5
FEATURESANDCONTROLS.............................. 6
ASSEMBLY........................................ 7-11
OPERATION....................................... 12-16
SPECIFICATIONS..................................... 17
MAINTENANCE.................................... 18-22
STORAGE........................................... 23
TROUBLESHOOTING.................................. 24
NOTES............................................. 25
REPLACEMENTPARTS.............................. 26-33
EMISSIONCONTROLWARRANTY..................... 34-35
ESPA_!OL......................................... 36-63
HOWTO ORDERPARTS........................ BACKPAGE
If this pressurewasher faiis dueto a defectin materiai or workmanship within one year from the date of purchase,return it to
any Searsstore, other Craftsman outlet, or SearsParts & Repair Centerin the UnitedStates or Canadafor free repair (or
replacementif repair proves impossible).
Ali warranty coverageapplies for only 90 days from dateof purchaseif this pressure washer is ever usedfor commercial or
rentaipurposes.
This warranty gives you specific legal rights, and you mayalso haveother rights which vary from stateto state.
Sears, Roebuck and Ce,, Heffman Estates, JL6e179
Sears Canada Jnc,, Terente, entarie, Canada MSB 2B8
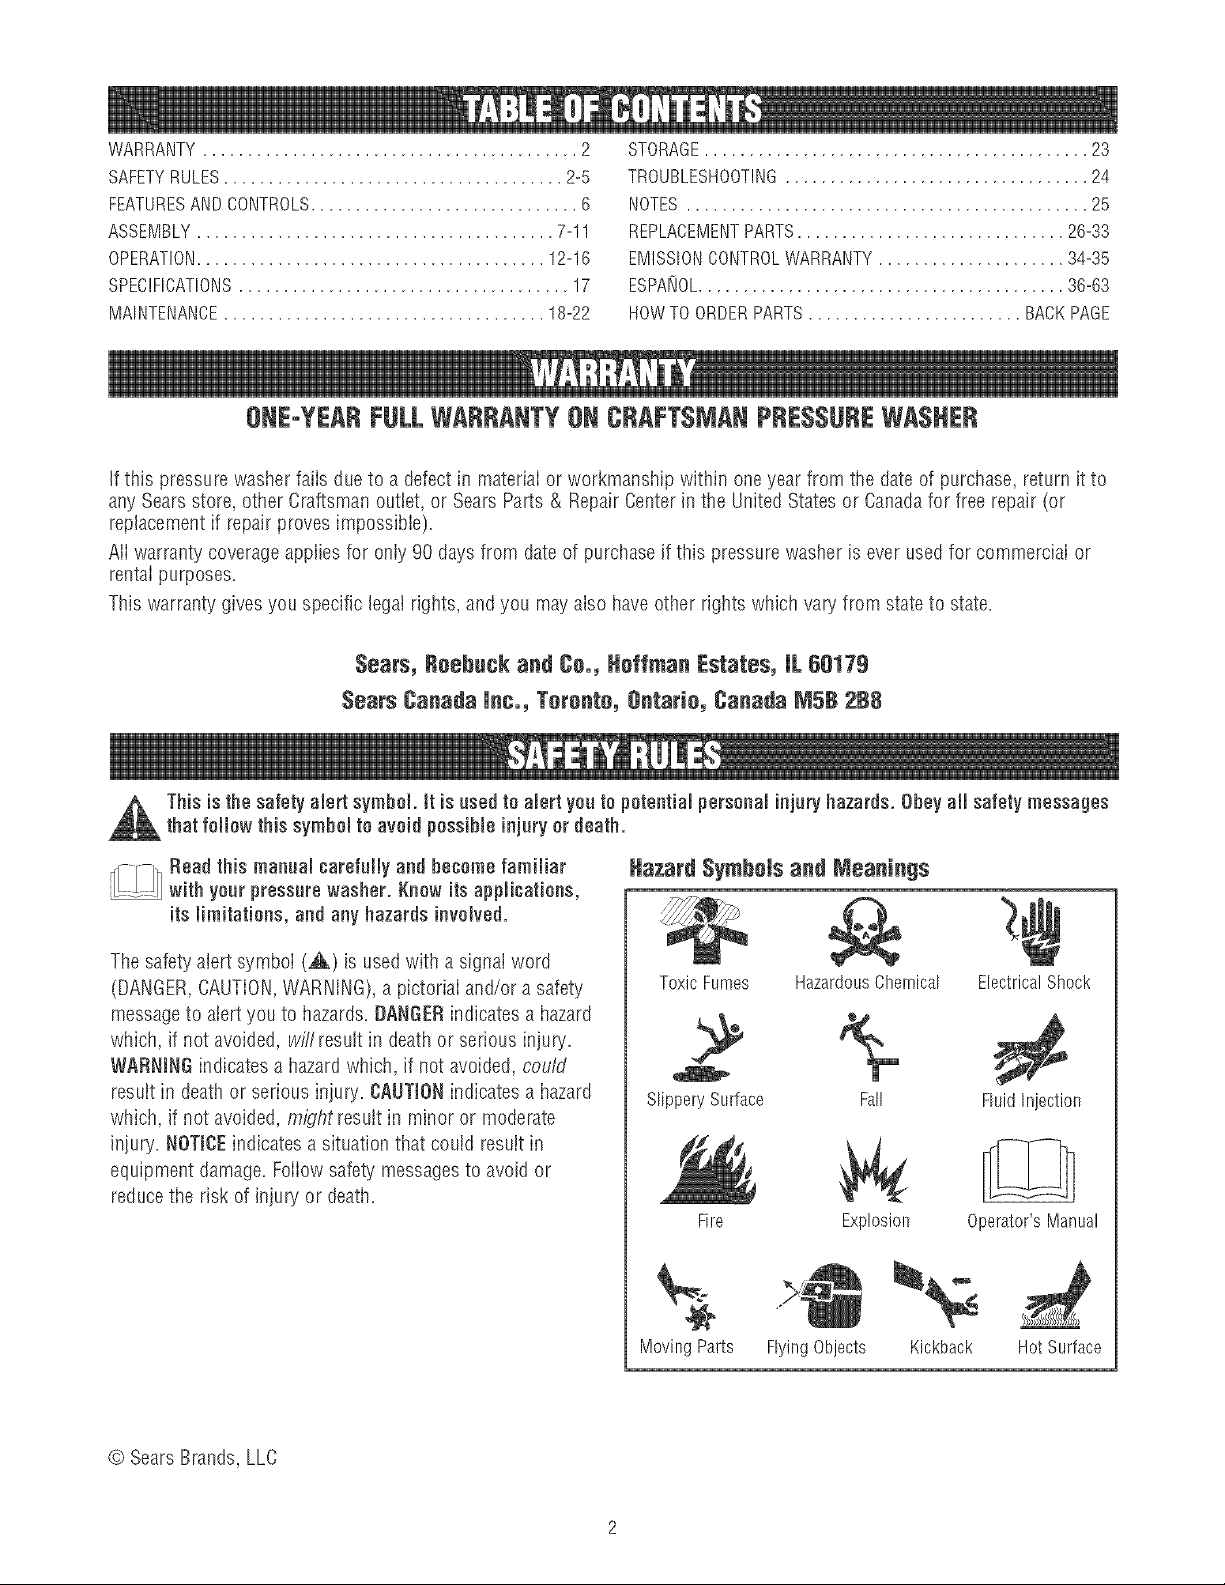
Thisis the safety alert symbol, tt is used to alert yea to potentialpersenaminjary hazards. ObeyaHsafety messages
that fellow this symbemto avoid pessiMe injury or death.
_Read this manual carefully and become familiar
..... with your pressurewasher. Knew its applications,
Hazard SymhoJsand Nteanings
itslimitations, and any hazardsinvolved.
Thesafety alert symbol (,_) is usedwith a signal word
(DANGER,CAUTION,WARNING),a pictorial and/or a safety
ToxicFumes HazardousChemical
ElectricalShock
messageto alert you to hazards.BANGERindicatesa hazard
which, if not avoided, wi/'/resuIt in death or serious injury.
WARNINGindicates a hazard which, if not avoided, cou/d
result in deathor serious injury. CAUTIONindicatesa hazard
SlipperySurface
Fall FluidInjection
which, if not avoided, might resultin minor or moderate
injury. NOTIgEindicatesa situation that could result in
equipment damage. Foiiow safety messagesto avoid or
reducethe risk of injury or death.
Fire
Moving Parts
FlyingObjects Kickback Hot Surface
Explosion Operator'sManual
© SearsBrands, LLC
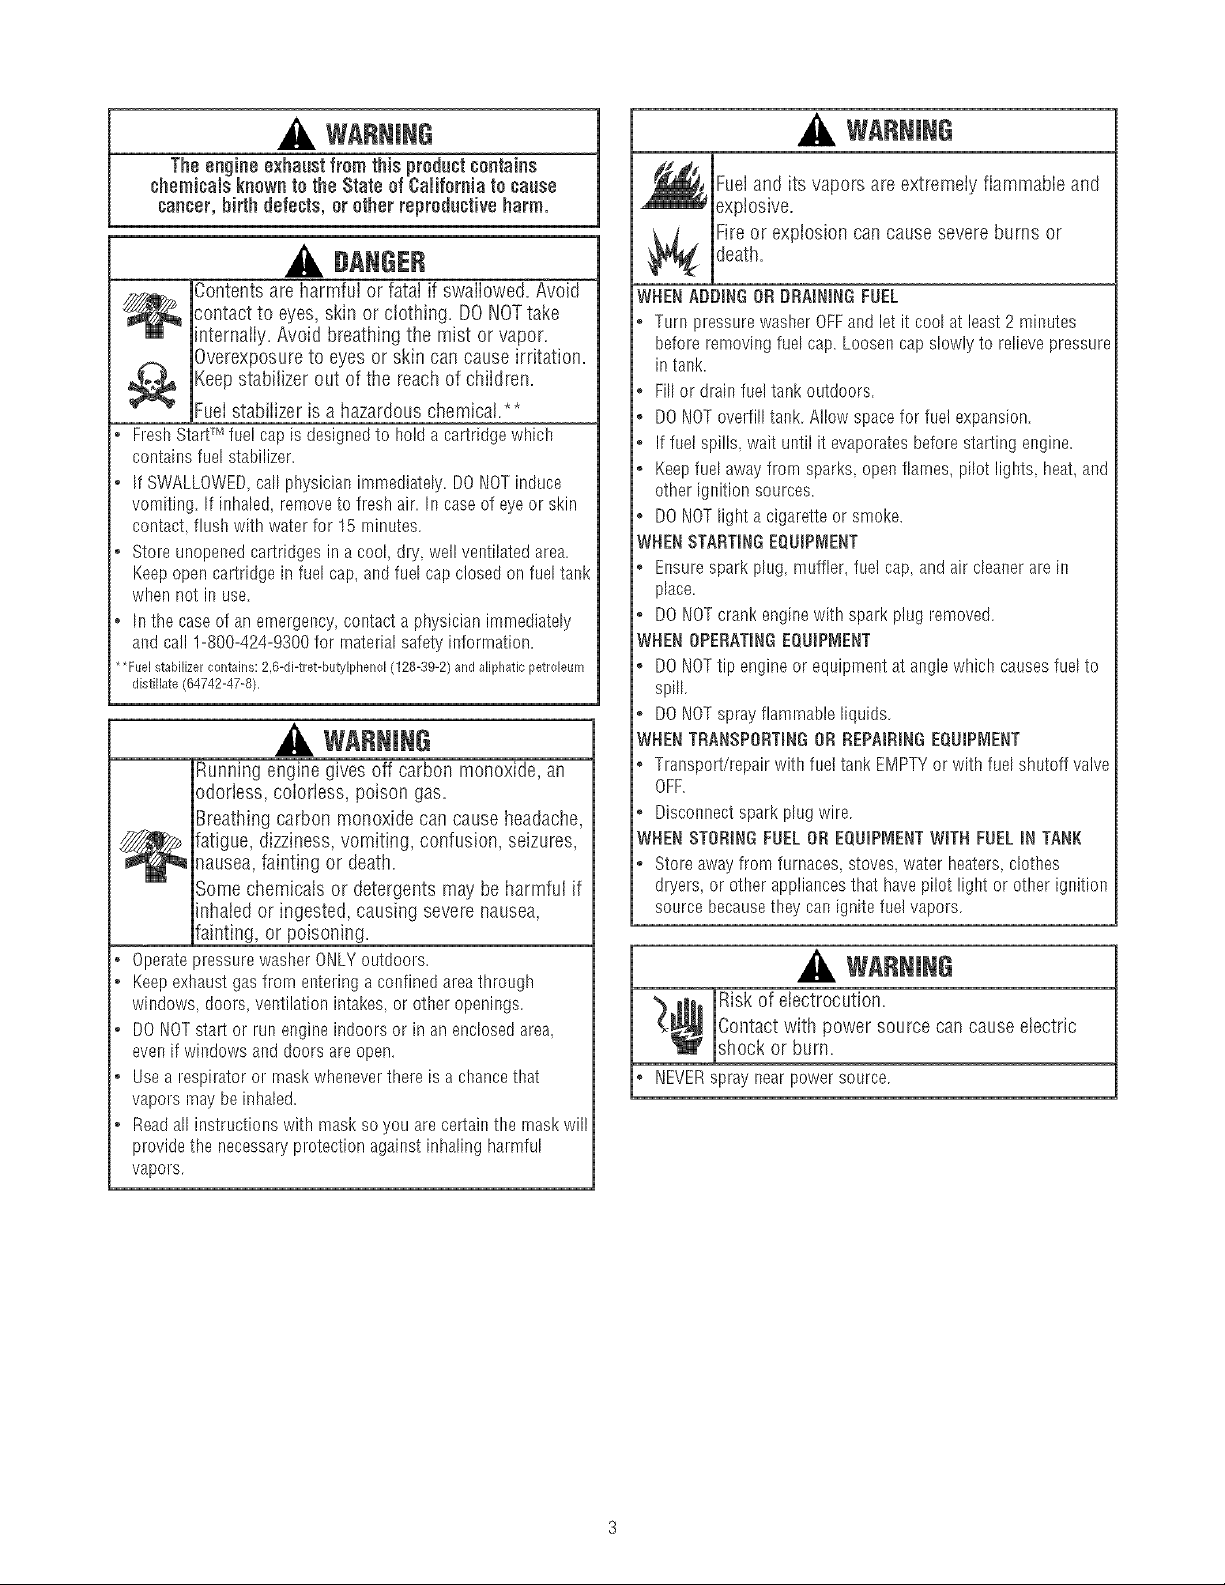
Contentsareharmfulorfatalifswailowed.Avoid
contacttoeyes,skinorclothing.DONOTtake
internaiiy.Avoidbreathingthemistorvapor.
Overexposuretoeyesorskincancauseirritation.
Keepstabilizeroutofthereachofchiidren.
Fueistabiiizerisahazardouschemical.**
", Fresh StartTM fuel cap is designedto hold a cartridge which
contains fuel stabilizer.
o If SWALLOWED,call physician immediately. DONOTinduce
vomiting. If inhaled, removeto fresh air. hscaseof eye or skin
contact, flush with water for 15 minutes.
o Store unopenedcartridges in a cool, dry, well ventilated area.
Keepopen cartridge in fuel cap, and fuel cap c!osed on fuel tank
when not in use.
o hsthe caseof an emergency,contact a physician immediately
and call 1-800-424-9300 for material safety inforrnation.
**Fuel stabilizer contains: 2,6-di-tret-butylphenol (128-39-2) and aliphatic petroleum
distillate (64742-47-8),
WARNING
Runningengine gives off carbon monoxide, an
odoriess, coloriess, poison gas.
Breathingcarbon monoxide can cause headache,
fatigue, dizziness,vomiting, confusion, seizures,
nausea,fainting or death.
Some chemicais or detergents may be harmful if
inhaied or ingested, causing severe nausea,
fainting, or poisoning.
• OperatepressurewasherONLYoutdoors.
• Keepexhaustgasfromelsteringaconfinedareathrough
windows,doors,ventilationintakes,or otheropenings.
o DONOTsta!t or runengineindoorsor in anenclosedarea,
evenif windowsanddoorsareopen.
o Usea respiratoror rnaskwheneverthereisa chancethat
vaporsrnaybeinhaled.
• Readall instructionswith masksoyouarecertainthemaskwill
providethenecessaryprotectionagainstinhalingharmful
vapors.
WARNING
Fuel and its vapors are extremely flammable and
explosive.
death.
Fire or explosion can cause severe burns or
WHENADDmNGORDRAiNiNG FUEL
• Turn pressure washer OFFand let it cool at least 2 minutes
before removing fuel cap. Loosen cap slowly' to relievepressure
in tank.
• Fillor drain fuel tank outdoors.
o DONOToverfill tank. Allow space for fuel expansion.
• Iffuel spills, wait until it evaporates before starting engine.
o Keepfuel away frorn sparks_openflames, pilot lights_heat,and
other ignition sources.
o DONOTlight a cigarette or smoke.
WHENSTARTINGEQUmP_dENT
• Ensurespark plug, muffler, fuet cap, and air cleaner are in
place.
• DO NOTcrank enginewith spark plug removed.
WHENOPERATINGEQUIPI_IENT
o DONOTtip engine or equipment at anglewhich causes fuel to
spill.
• DONOTspray flammable liquids.
WRENTRANSPORTmNGOR REPAiRmNGEQUiPI'_IENT
• Transport/repair with fuet tank EMPTYor with fuel shutoff valve
OFF.
• Disconnect spark plug wire.
WHENSTORmNGFUELOR EQUiPIVlENTWiTH FUELmNTANK
o Store away from furnaces, stoves, water heaters,clothes
dryers, or other appliances that havepilot light or other ignition
source becausethey can ignite fuet vapors.
WARNING
Risk of electrocution=
Contact with power source can cause etectric
shock or burn,
• NEVERspray near power source.
WARNING
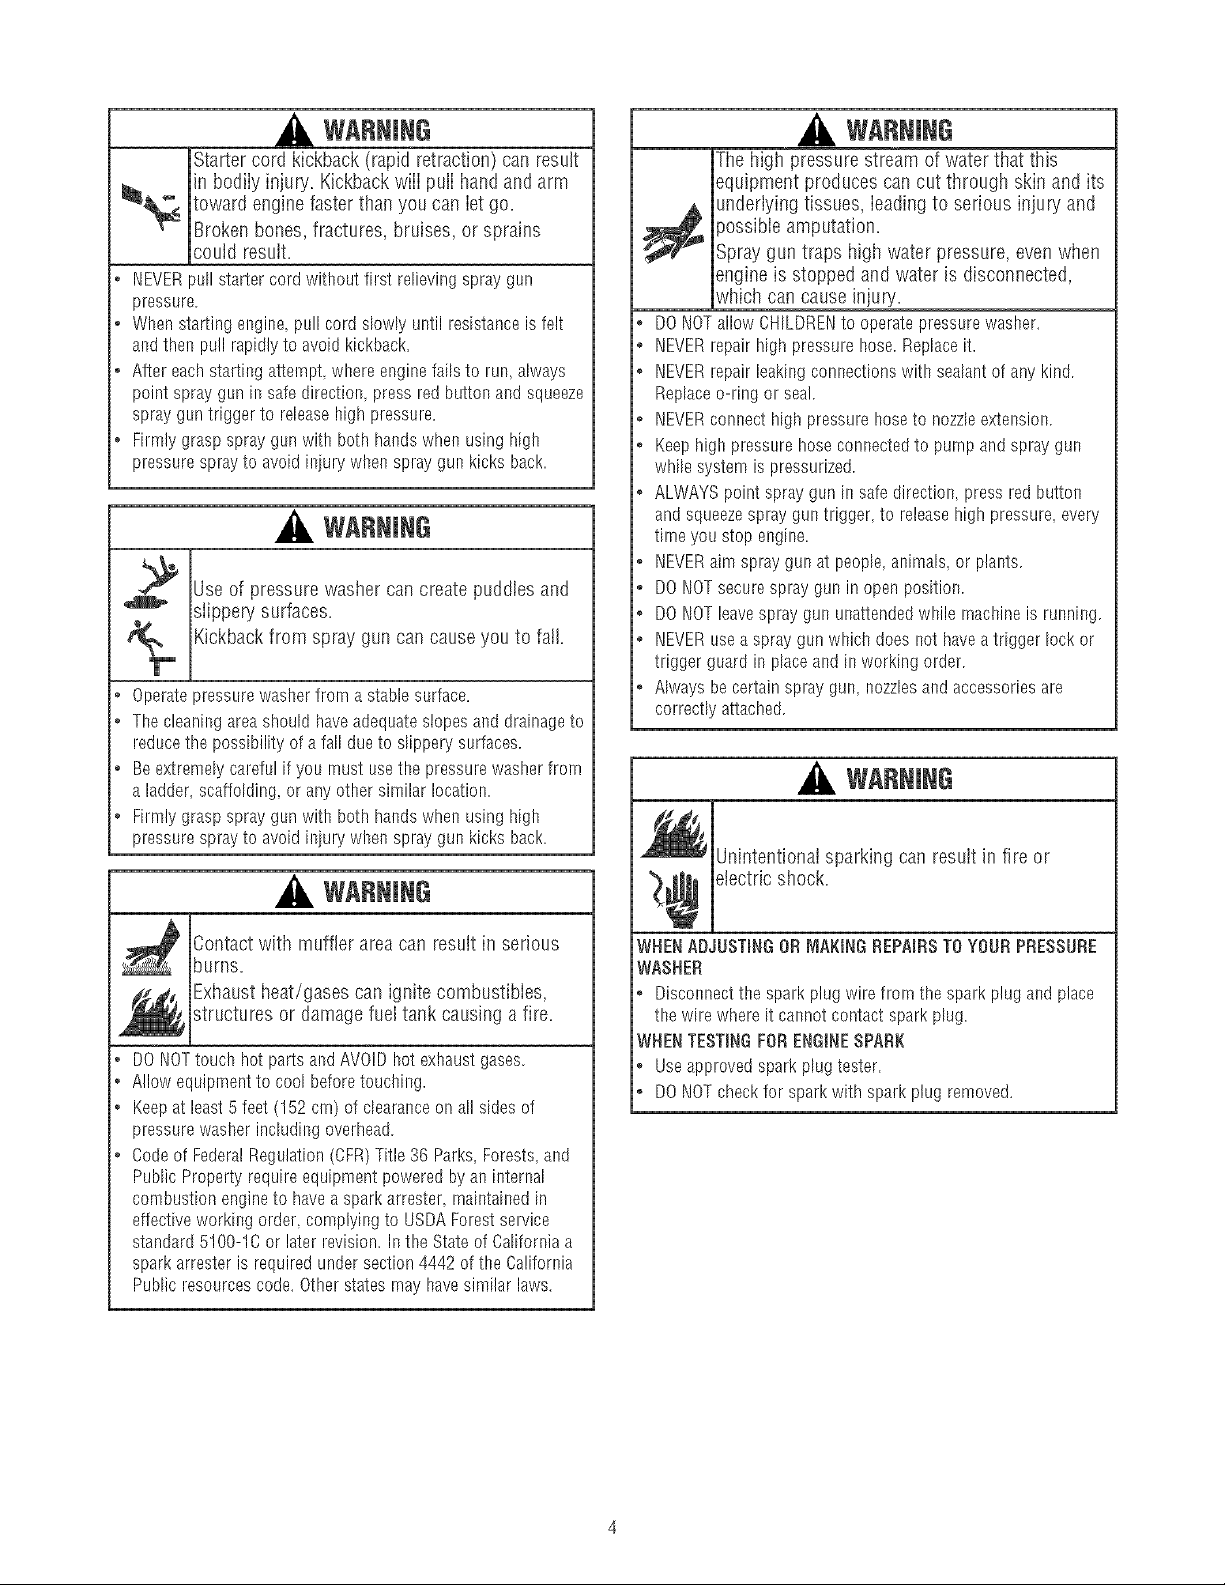
Starter cord kickback (rapid retraction) can result
in bodily injury. Kickback will pulI hand and arm
toward engine faster than you can Iet go.
Broken bones, fractures, bruises, or sprains
could result.
• NEVERpull starter cord without first relieving spray gun
pressure.
o When starting engine_pull cord slowly until resistance is felt
andthen pull rapidly to avoid kickback.
o After eachstarting atternpt where enginefails to run, always
point spray gun in safe direction press red button and squeeze
spray gun trigger to releasehigh pressure.
o Firmly grasp spray gun with both hands when using high
pressure spray to avoid iniury when spray gun kicks back.
WARNING
Useof pressure washer cancreate puddles and
slippery surfaces,
Kickbackfrom spray gun cancause you to fall,
* Operatepressure washer frorn a stable surface.
o The cleaningarea should haveadequateslopes and drainageto
reducethe possibility of a fall due to slippery surfaces.
o Be extremelycareful if you rnust usethe pressure washer from
a ladder, scaffolding, or any other similar location.
o Firmly grasp spray gun with both hands when using high
pressure spray to avoid injury when spray gun kicks back.
WARNING
The high pressure stream of water that thb
equipment produces can cut through skin and its
underlying tissues, ieading to serious injury and
_ossible amputation.
Spray gun traps high water pressure, even when
engine is stopped and water is disconnected,
which can cause injury.
• DONOTallow CHILDRENto operate pressure washer.
o NEVERrepair high pressure hose. Replaceit.
• NEVERrepair leakingconnections with sealantof any kind
Replaceo-ring or seal
o NEVERconnect high pressure hoseto nozzle extension.
• Keephigh pressure hose connectedto purnp and spray gun
while system is pressurized.
• ALWAYSpoint spray gun in safe direction, press red button
and squeezespray gun trigger, to release high pressure, every
tirne you stop engine.
• NEVERaim spray gutsat people, animals, or plants.
o DO NOTsecure spray gun in open position.
• DO NOTleavespray gun unattended while rnacbineis running.
o NEVERusea spray gun wlsichdoes not have atrigger lock or
trigger guard in place and in working order.
• Always be certain spray gun, nozzbs and accessories are
correctly attached.
WARNING
Unintentional sparking can result in fire or
WARNING
Contact with muffler area can result in serious
burns.
Exhaustheat/gases can ignite combustibles,
structures or damage fuel tank causing a fire.
* DO NOTtouch hot parts and AVOID hot exlsaustgases.
* Allow equipment to cool before touching.
o Keepat least 5 feet (152 crn) of clearanceon all sides of
pressure washer including overhead.
o Codeof FederalRegulation (CFR)Title 36 Parks, Forests,and
Public Property require equipment powered by an internal
combustion engine to have a spark arrester, rnaintainedin
effective working order, complying to USDAForestservice
standard 5100-1C or later revision. In the State of California a
spark arrester is required under section 4442 of the California
Public resources code. Other states rnay havesimilar laws.
'_¢ electric shock.
WHENADJUSTmNGORMAKING REPAIRSTOYOUR PRESSURE
WASHER
• Disconnectthe sparkplug wire frorn the spark plug and place
the wire where it cannot contact spark plug.
WHENTESTmNGFORENGINESPARK
• Useapproved spark plug tester.
o DONOTcheck for spark with spark plug removed.
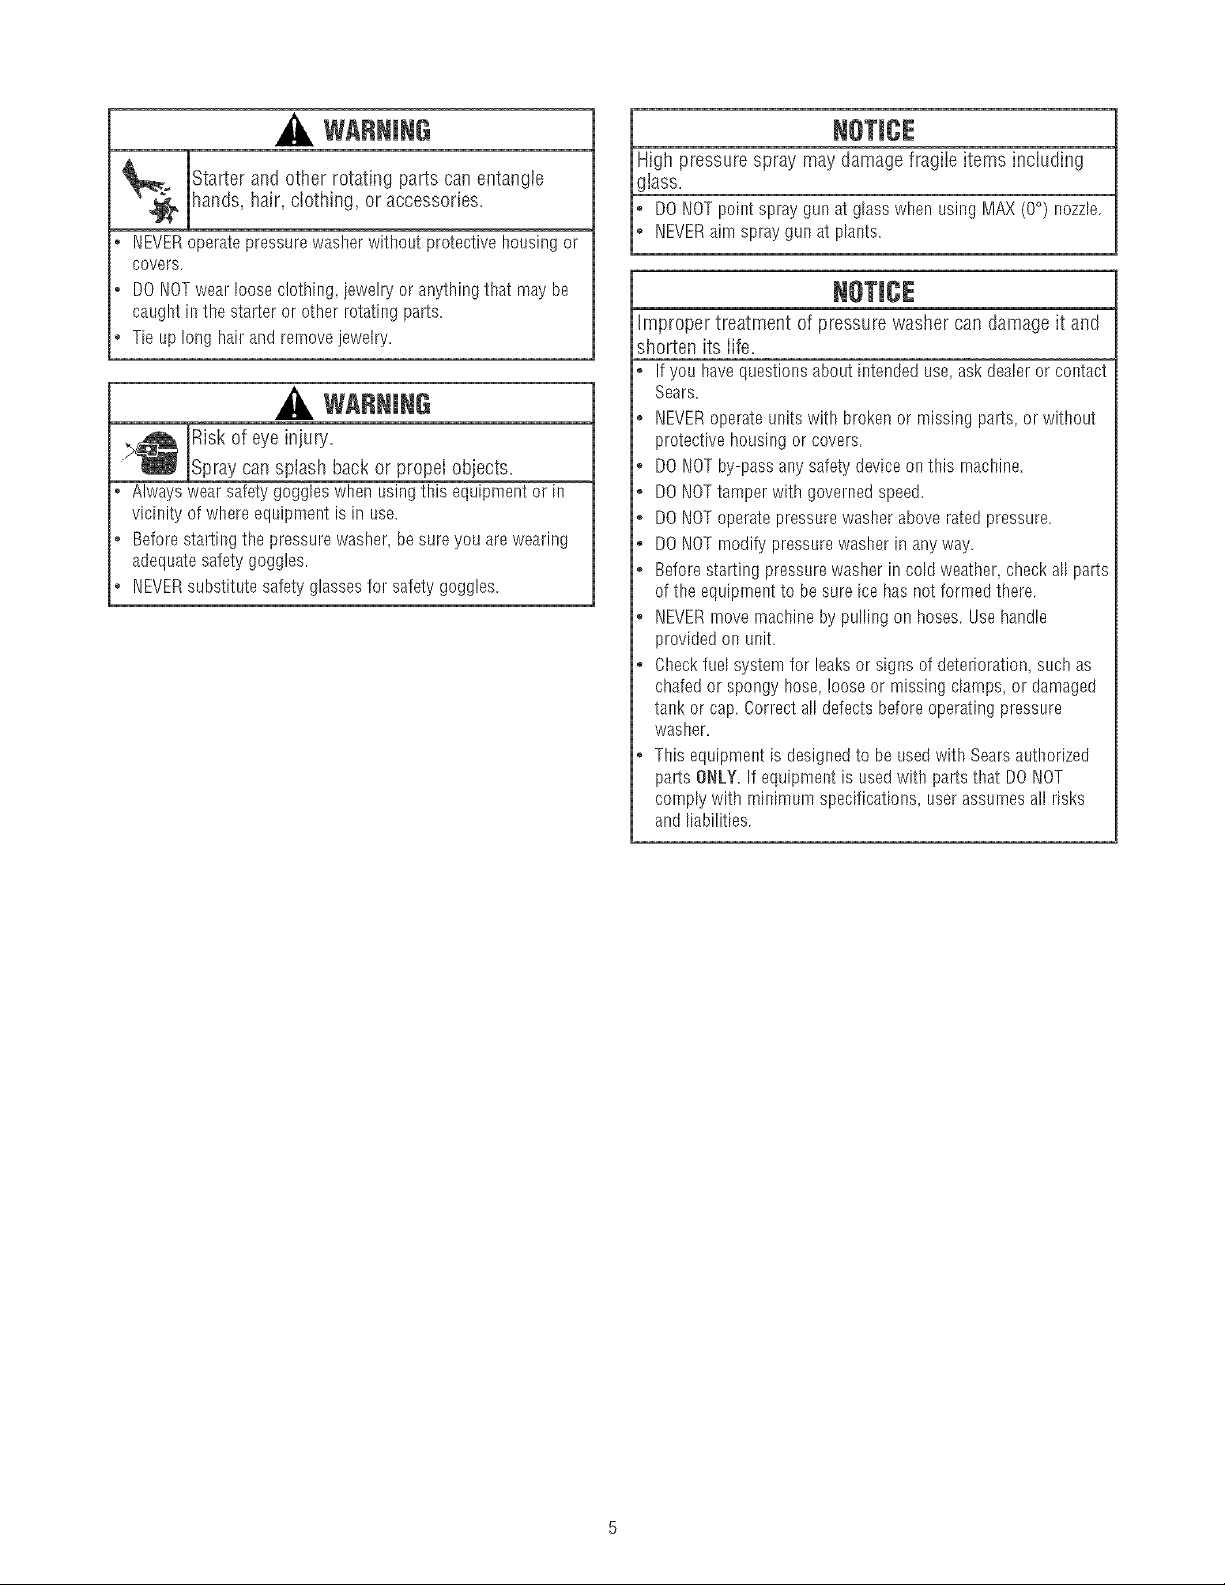
WARNING
Starter and other rotating parts canentangie
hands, hair, clothing, or accessories.
• NEVERoperatepressurewasherwithoutprotectivehousingor
covers.
• DONOTwea!looseclothingjewelryor anythingthat maybe
caughtinthestarterorotherrotati_gparts.
o Tieup longhai!andrernovejewelry.
WARNING
IRisk of eyeinjury=
..L..__jSpray cansplash back or propel objects.
Alwayswearsafetygoggleswhenusingthisequipmentor in
vicinityof whereequipmentis in use.
Beforestartingthepressurewasher,besureyouarewearing
adequatesafetygoggles.
NEVERsubstitutesafetyglassesfor safetygoggles.
High pressure spray may damagefragiie items inciuding
lass.
DONOTpointspraygunatglasswhenusingMAX(0°) nozzle.
NEVERaim spraygunatplants.
Improper treatment of pressure washer can damageit and
shorten its iife.
Ifyouhavequestionsaboutintendeduse,askdealeror contact
Sears.
NEVERoperateunitswith brokenormissingpa!rs,orwithout
protectivehousingor covers.
DONOTby-passanysafetydeviceonthis rnachine.
DONOTtamperwith governedspeed.
DONOToperatepressurewasheraboveratedpressure.
DONOTmodifypressurewasherinanyway.
Beforestartingpressurewasherincoldweathercheckallparts
oftheequiprner_tto besureicehasnot formedthere.
NEVERmovemachinebypullingon hoses.Usehandle
providedon unit.
Checkfuelsystemfor leaksorsignsofdeterioration,suchas
chafedor spongyhose,looseor missingclamps_or damaged
ta!_korcap.Correctalldefectsbeforeoperatingpressure
washer.
Thisequipmentisdesignedto beusedwith Searsauthorized
partsONLY.If equipmentis usedwithpartsthatDONOT
complywithminimumspecifications,userassumesall risks
andliabilities.
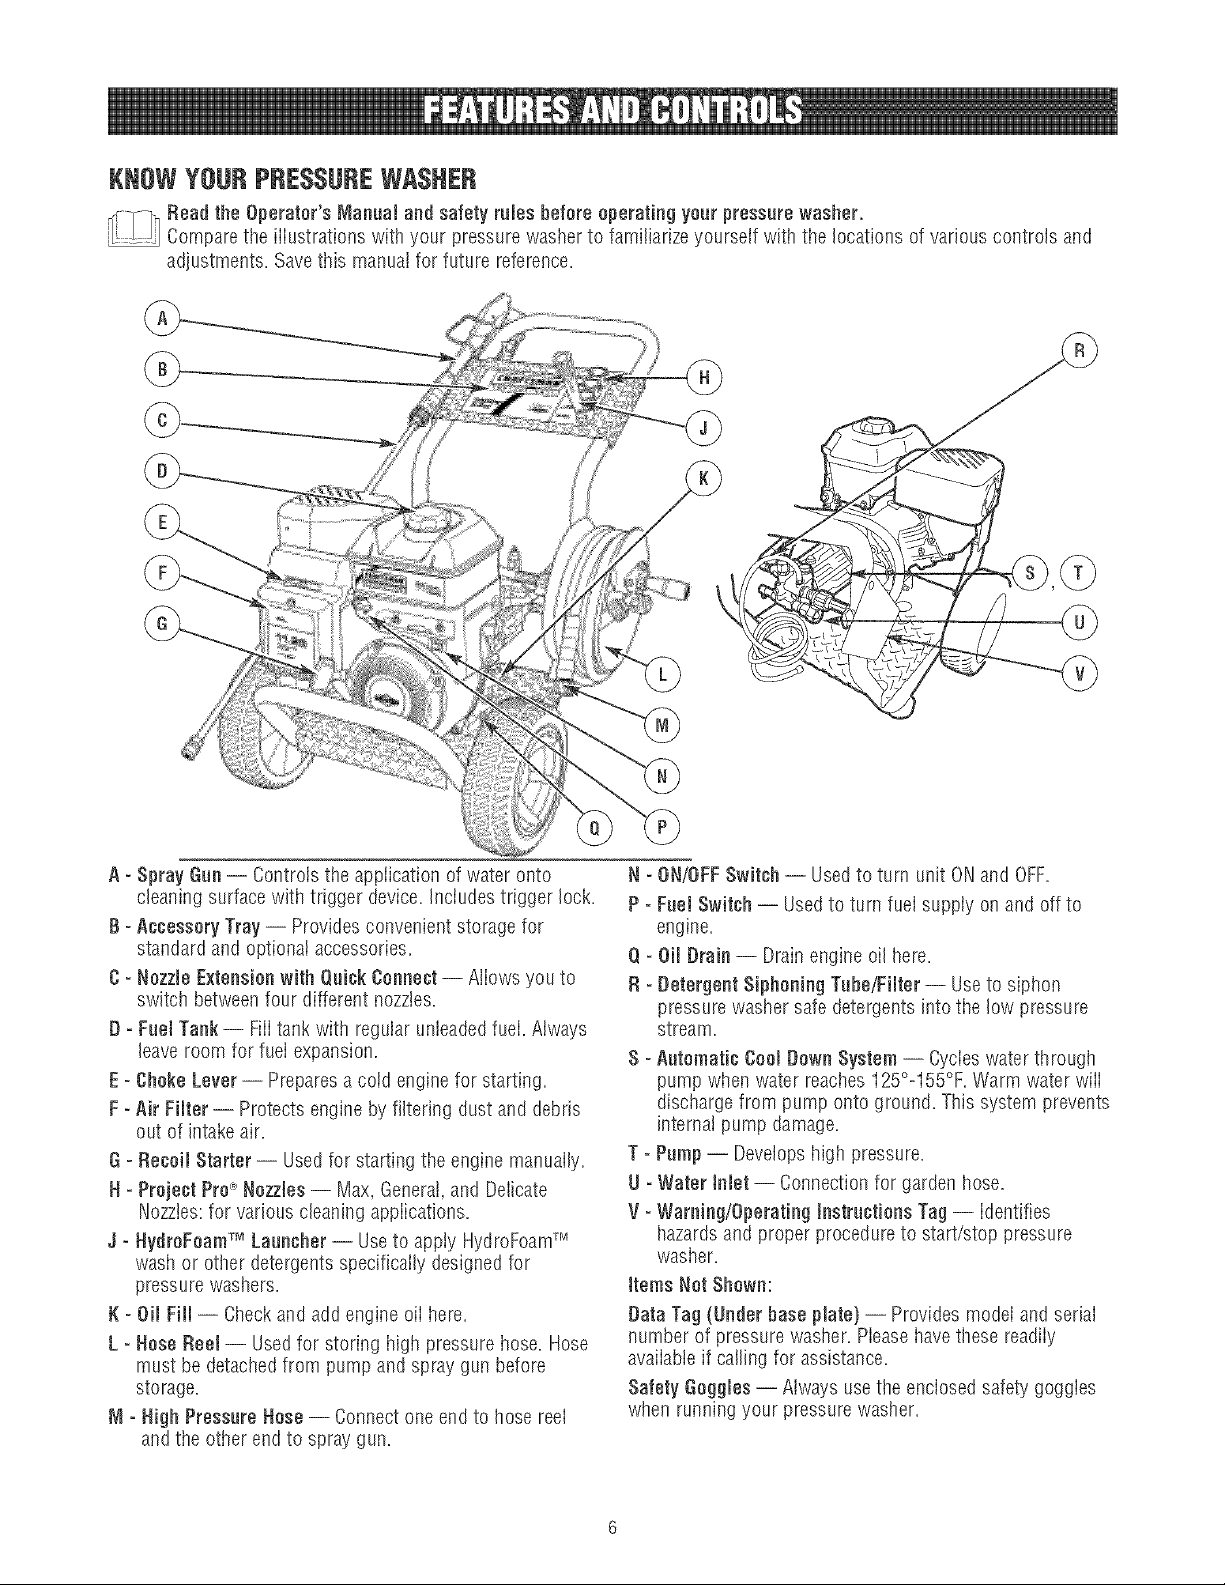
KNOWYOURPRESSUREWASHER
_Read the Operator'sManual and safety rules before operating your pressurewasher.
.... Comparethe iiiustrations with your pressurewasher to familiarizeyourself with the locationsof various controls and
adjustments. Savethis manualfor future reference.
A - Spray Can-- Controls the application of water onto
cleaning surfacewith trigger device.Inciudestrigger lock.
B - Accessory Tray -- Providesconvenient storage for
standard and optional accessories.
C=Nozzle Extensionwith Qaick Connect-- Allows you to
switch betweenfour different nozzles.
D =Fuel Tank-- Fill tank with regular unleadedfuel. Always
leaveroom for fuei expansion.
E =Choke Lever-- Preparesa coid engine for starting.
F - Air Filter -- Protectsengine by filtering dustand debris
out of intake air.
G - Recoil Starter -- Usedfor starting the enginemanually.
H =Project ProC_Nozzles -- Max, General,and Delicate
Nozztes:for various cleaning appiications.
J - HydroFoamTM Laancher -- Useto appiy HydroFoamTM
wash or other detergentsspecifically designed for
pressure washers.
K- Oil Fill -- Checkand add engine oil here.
L - Hose Reel -- Usedfor storing high pressure hose. Hose
must be detachedfrom pump and spray gun before
storage.
_1=High PressureHose -- Connectone end to hose reel
and the other end to spray gun.
N - ON/OFFSwitch -- Usedto turn unit ONand OFF.
P - Fael Switch -- Usedto turn fuel supply on and off to
engine,
Q =Oil Drain -- Drainengine oil here,
R =Detergent Siphoning Tahe/Filter-- Useto siphon
pressure washer safe detergentsinto the low pressure
stream,
S - Aatomatie Cool Down System-- Cycieswater through
pump when water reaches125°o155%. Warm water wiii
discharge from pump onto ground. This system prevents
internal pump damage,
T = Pump-- Developshigh pressure,
U - Water Inlet -- Connectionfor garden hose,
V =Warning/Operating tnetractions Tag -- Identifies
hazardsand proper procedureto start/stop pressure
washer.
ttems Not Shown:
Data Tag (Underbase plate) -- Providesmodel andserial
number of pressure washer. Pieasehavethese readiiy
avaiiabteif calling for assistance.
Safety Goggles-- Alwaysusethe enclosedsafety goggies
when running your pressure washer.
Your pressure washer requires some assembly and is ready
for use only after it has been properly serviced with the
recommendedoil and fuel.
If you haveany problems with the assembly ofyour pressure
washer, pleasecatl the pressure washer helplineat
1o800o222o3136.
UNPACKPRESSUREWASHER
1. Removeeverything from carton except pressure washer.
2. Opencarton completely bycutting eachcorner from top
to bottom.
3. Remove pressure washer from carton.
CARTONCONTENTS
CheckalI contents, if any parts are missing or damaged,calJ
the pressure washer hetpline at 1o808o222o3136.
* Main Unit
, Handle
, AccessoryTray
, High PressureHose
, Short High Pressure Hose
, Spray Gun
, NozzleExtensionwith Quick ConnectFitting
, HydroFoamTM Wash
. Oii Bottle
, HoseReelKit
, Parts Bag (which inciudes the foiiowJng):
, Operator's Manual
, Owner's Registration Card
, SafetyGoggles
, Bagcontaining 3 multi-colored ProjectPro_'Nozzies
, HydroFoamTM Launcher
, HydroFoamTM Launcher & Wash instruction Sheet
, FreshStart Fuel Cartridge
, HandieFasteningHardwareKit (which includes):
, Wireform (I}
° CarriageBolts (2)
, Plastic Knobs (3}
, TreeCiips (4)
Becomefamiiiar with eachpiecebefore assembiing the
pressure washer, identify aii contents with the iiiustration on
page 6. if any parts are missing or damaged,caiJthe
pressure washer helpJineat 1-880-222-3t36.
7. Connectwater supply to pump.
8. Attach nozzleextension to spray gun.
9. Select/attachquick connect ProjectPro_nozzleto nozzle
extension.
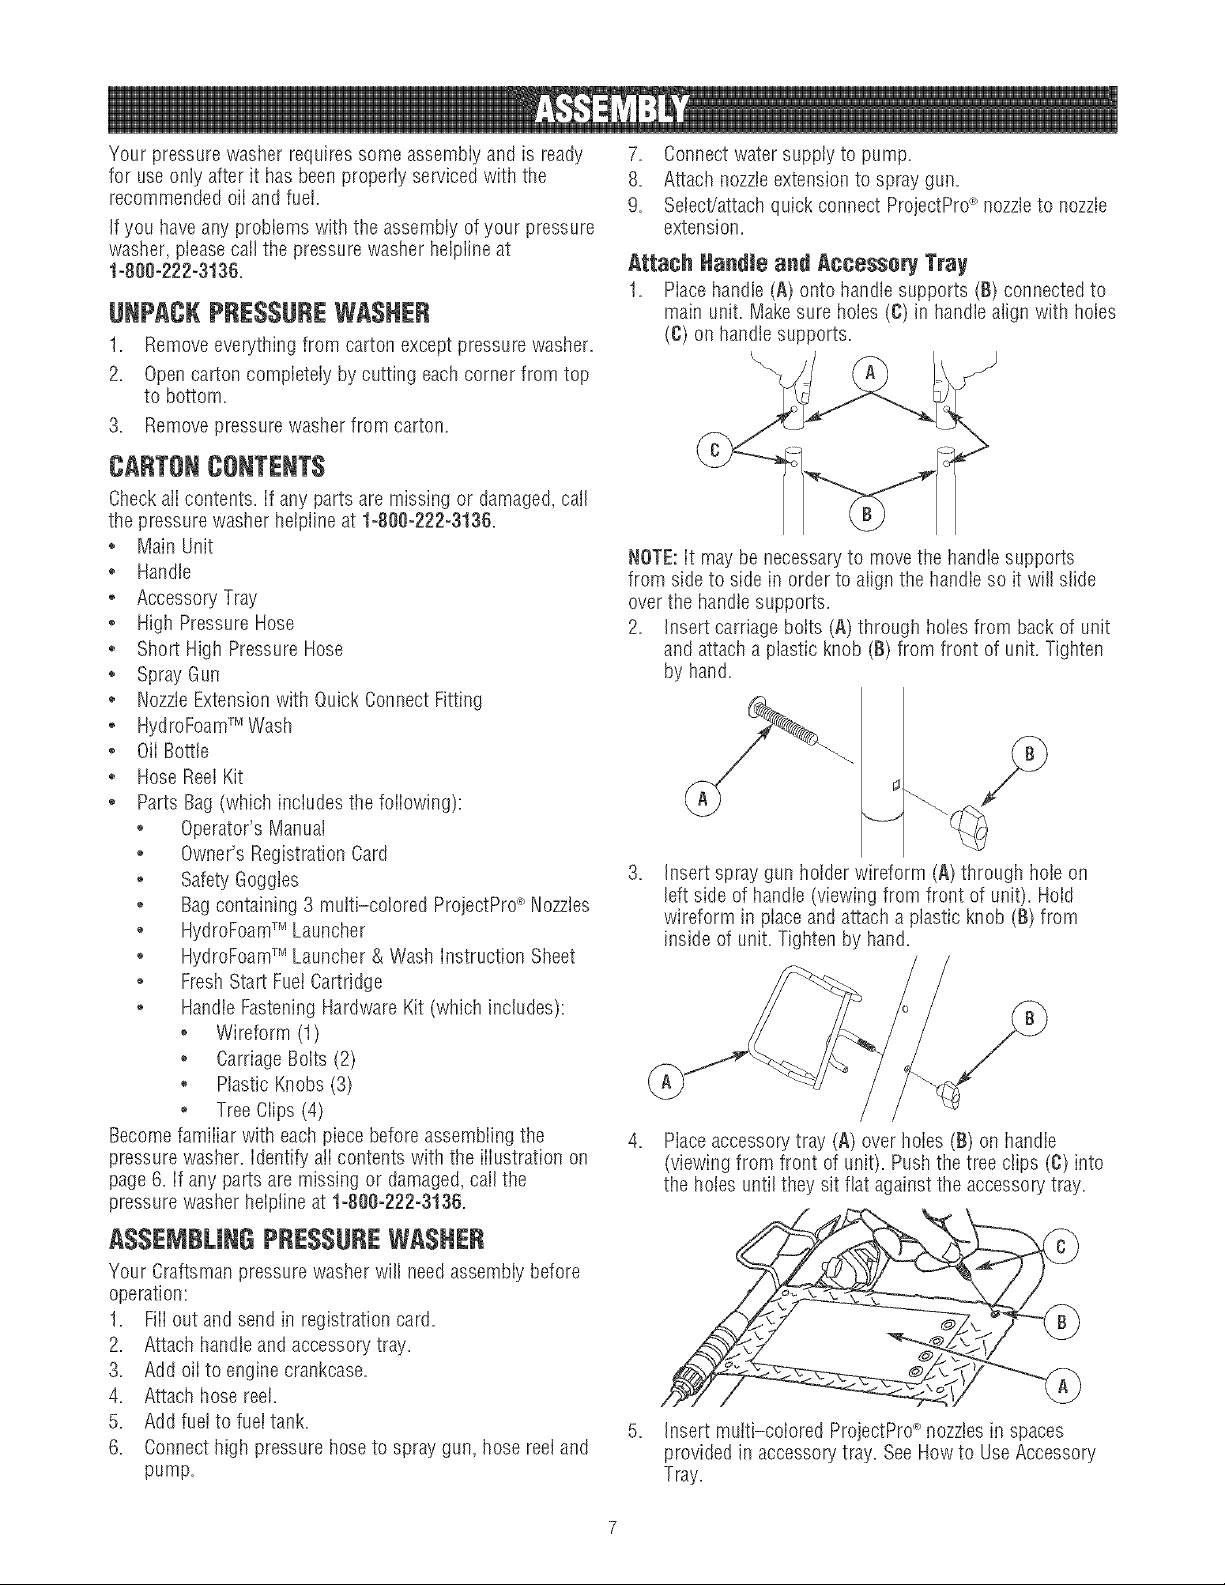
Attach ttandle and Accesso_ Tray
1. Placehandle (A) onto handlesupports (B) connected to
main unit. Make sure holes (C) in handlealign with holes
(C) on handle supports.
NOTE:it may be necessaryto move the handie supports
from sideto side in order to align the handle so it will slide
overthe handiesupports.
2. insert carriage bolts (A) througil holesfrom backof unit
and attacha plastic knob (B) from front of unit. Tighten
by hand.
Insert spray gun holder wireform (A} through hole on
left side of handle (viewing from front of unit). Hoid
wireform in piaceand attach a plastic knob (B) from
inside of unit. Tighten by hand.
4. Placeaccessory tray (A) over isoles(B) on handle
(viewing from front of unit). Pushthe tree clips (C} into
the holes until they sit fiat againstthe accessory tray.
ASSEMBLINGPRESSUREWASHER
Your Craftsmanpressure washer will need assembly before
operation:
1. FilI out and send in registration card.
2. Attach handleand accessorytray.
3. Add oii to engine crankcase.
4. Attach hose reel.
5. Add fuel to fuel tank.
6. Connect high pressure hoseto spray gun, hose reeland
pump.
5. Insert multi-colored ProjectPro_ nozzlesin spaces
provided in accessorytray. See Howto UseAccessory
Tray.
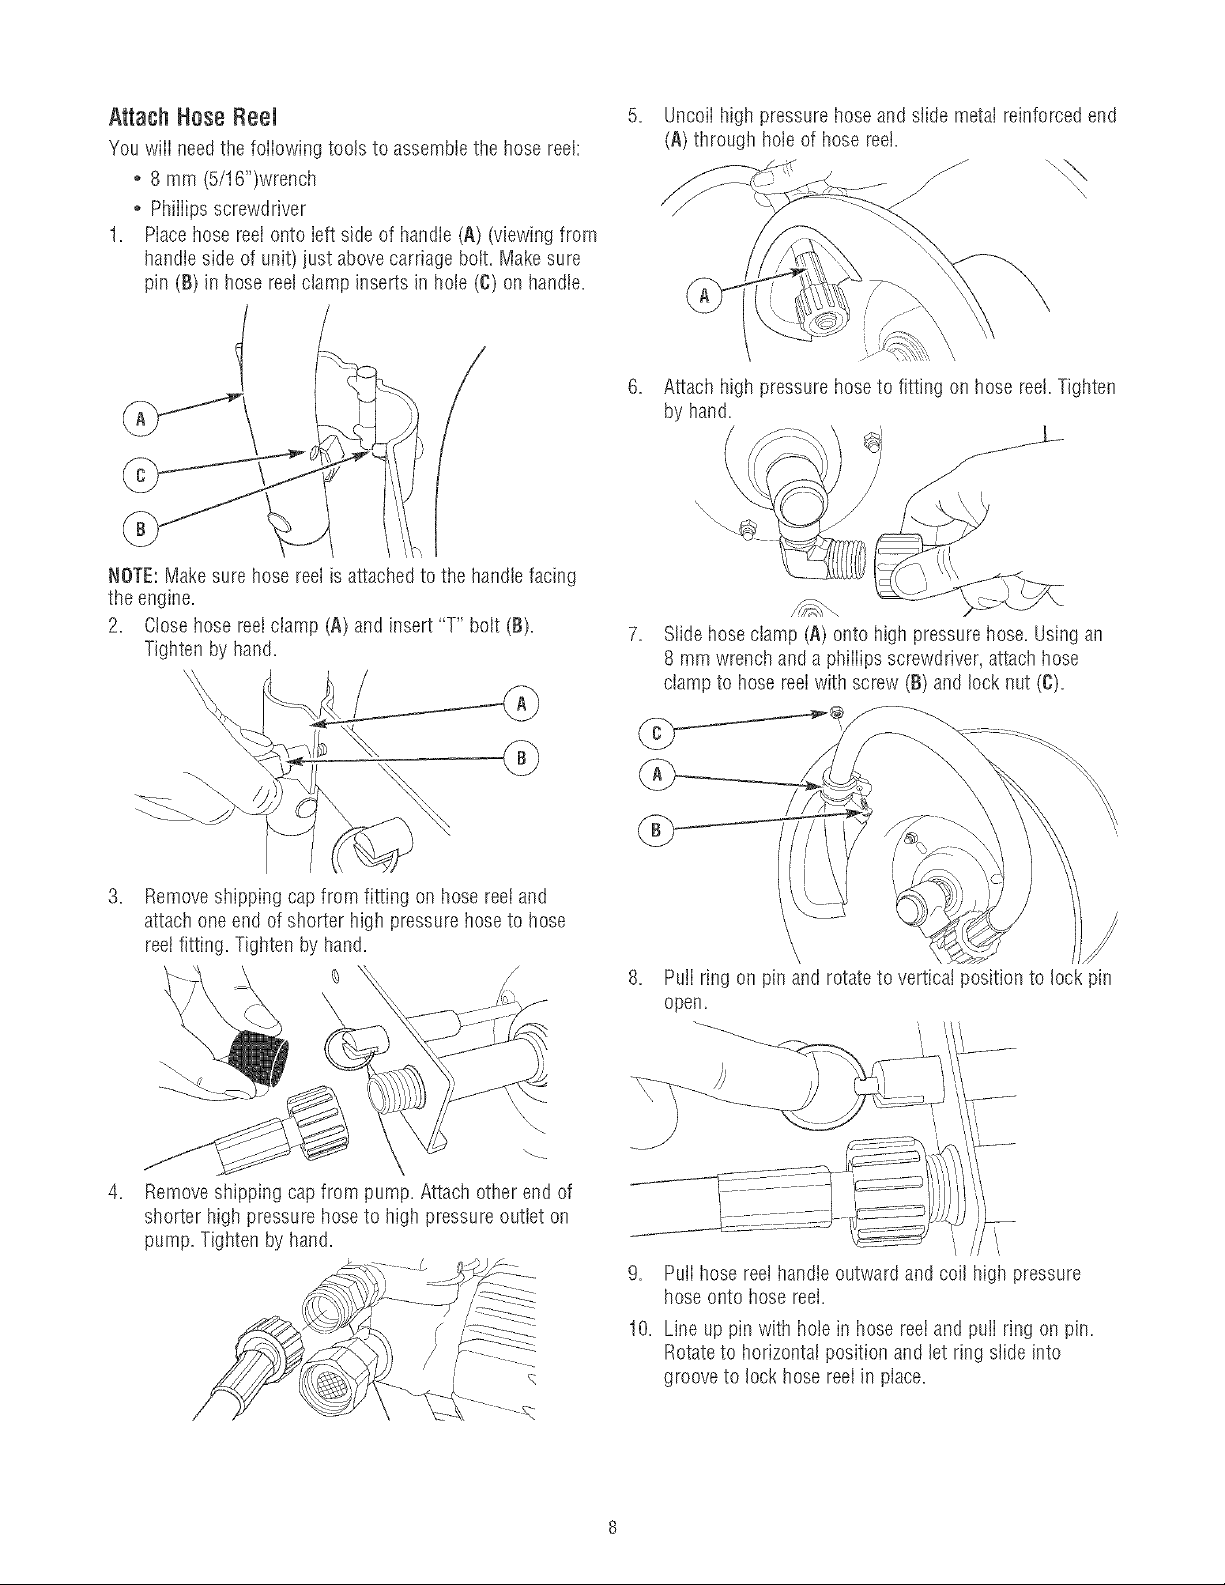
Attach Hose Reel
You wiii need the foiiowing tools to assemblethe hose reel:
o 8 mm (5/16")wrench
o Phiiiips screwdriver
1, Placehose reeI onto Ieft side of handle (A) (viewing from
handle side of unit) just abovecarriage bolt. Make sure
pin (B)in hose reelclamp inserts in hole (C)on handle,
I
NOTE:Makesure hose reel is attached to the handlefacing
the engine,
2, Close hosereeIciamp (A) and insert "T" bolt (B),
Tighten by hand,
Uncoil high pressure hose and slide metal reinforced end
(A) through hole of hose reel.
6, Attach high pressure hoseto fitting on hose reel.Tigilten
by hand.
7. Slidehosedamp (A) onto high pressure hose. Using an
8 mm wrench and a phiiiips screwdriver, attachhose
clamp to hose reeiwith screw (B) and lock nut (C).
.
Removeshipping cap from fitting on hose reetand
attach one end of shorter high pressure hoseto hose
reel fitting. Tighten by hand,
.
Removeshipping cap from pump. Attach other end of
shorter high pressure hose to high pressure outlet on
pump. Tighten by hand.
8. PulI ring on pin and rotate to vertical position to lock pin
open.
9, Puffhose reel handteoutward and coil higil pressure
hoseonto hose reei,
10, Line up pin with hote in hose reei and puii ring on pin,
Rotateto horizonta! position and let ring slide into
groove to lock hose reel in place,
Add Engine OiJ
1. Placepressure washer on a fiat, levelsurface.
2. Cleanarea around oii fiii and remove yeliow oii fiii cap.
NOTE:See Oil Recommendationsin Maintenancesection.
Verify provided oii bottie is the correct viscosity for current
ambient temperature.
3. Using oii funnel (optional), siowiy pour contents of
provided oil bottle into oil fill opening.
improper treatment of pressurewasher can damageit and
shorten its iife.
DONOTattempttocrankor startthe enginebeforeit hasbeen
properlyservicedwiththerecommendedoil.Thismayresultin
anenginefailure.
4. Replaceoil fill cap and fully tighten.
Add Fuel
Fuel must meet these requirements:
Clean,fresh, unleadedgasoline.
o A minimum of 87 octane/87 AKi (91 RON).Higil altitude
use, see High Altitude.
o Gasoiinewith upto 10% ethanol (gasohoi) or up to 15%
MTBE (methyl tertiary butyl ether) is acceptable.
WARNING
FueIand its vapors are extremely fiammabb and
explosive.
_l_ ire or explosion can causesevere burns or
WHENADDmNGFUEL
o TurnpressurewasherOFFandletit coolatleast2 minutes
o Fillfueltankoutdoors.
• DONOToverfilltank.Allowspaceforfue!expansion.
o Iffuelspills,waituntilit evaporatesbeforestartingengine.
• Keepfuelawayfromsparks,openflames,pilotlights,heat,and
o DONOTlight a cigaretteorsmoke.
1. Cieanareaaround fuel fiii cap, removecap.
2. Siowiy add regular unleadedfuel (A) to fuei tank (B). Be
death.
beforeremovingfuelcap.Loosencapslowly'to relievepressure
in tank.
otherignitionsources.
carefui not to overfiii. Aiiow about 15" (4 cm) (C) oftank
space for fuel expansion.
NOTICE
Avoid pressure washer damage.
Faiiureto foiiow Operator's Manuaifor fuel
recommendations voids warranty.
DONOTuseunapprovedgasolinesuchas E85.
DONOTmixoil in gasoline.
DONOTmodifyengineto runon alternatefuels.
To protect the fue! system from gum formation, mix in a fuel
stabiiizerwhen adding fuet. SeeStorage. Ali fuel is not the
same. if you experiencestarting or performanceproblems
after using fuel, switch to a different fuel provider or change
brands. This engine is certified to operateon gasoline. The
emission control system for this engine is EM(Engine
Modifications).
CAUTION! AIcohoI-blendedfuels (caiiedgasoiloI, ethanoi or
methanol) can attract moisture, which leadsto separationand
formation of acids during storage.Acidic gas candamagethe
fuel system ofan engine while in storage.
To avoidengineproblems,the fueIsystemshould betreated
with a fuel preserveror emptiedbefore storageof 30 days or
longer,if adding a fuel preserver, fiii the fuei tank with fresh
fuel. if oniy partiaiiy filied, air in the tank wiii promote rue!
deterioration during storage, if fuet preserver is not used,
drainthefuei tank, start the engineand ietit run untii the fuel
finesandcarburetorare empty. Usefreshfuel nextseason. See
Storagefor additionalinformation.
NEVERuseengine or carburetor cleaner products in the fuel
tank as permanent damagemay occur.
Fred1$tatlFuelCap
Adding fuel preserver helps keepfuet fresh and carburetors
cleanfor easier starting, aii season iong. This newfuei cap
automatically drips concentrated fuel preserver into your fuel
tank.
, DANGER
Contentsare harmful or fatal if swallowed. Avoid
contact to eyes,skin or clothing. DONOTtake
internaiiy.Avoid breathingthe mist or vapor.
Overexposureto eyesor skin can causeirritation.
KeepstabiIizerout of the reachof chiIdren.
Fuelstabilizer is a hazardouschemical.**
,* If SWALLOWED,callphysicianimmediately.
,, h_thecaseof anemergency,contacta physicianimmediately
andcall1-800-424-9300for materialsafetyirffonnation.
**Fuel stabilizer contains: 2,6-di-tret-butylphenol (128-39-2) and aliphatic petroleum
distillate (64742-47-8),
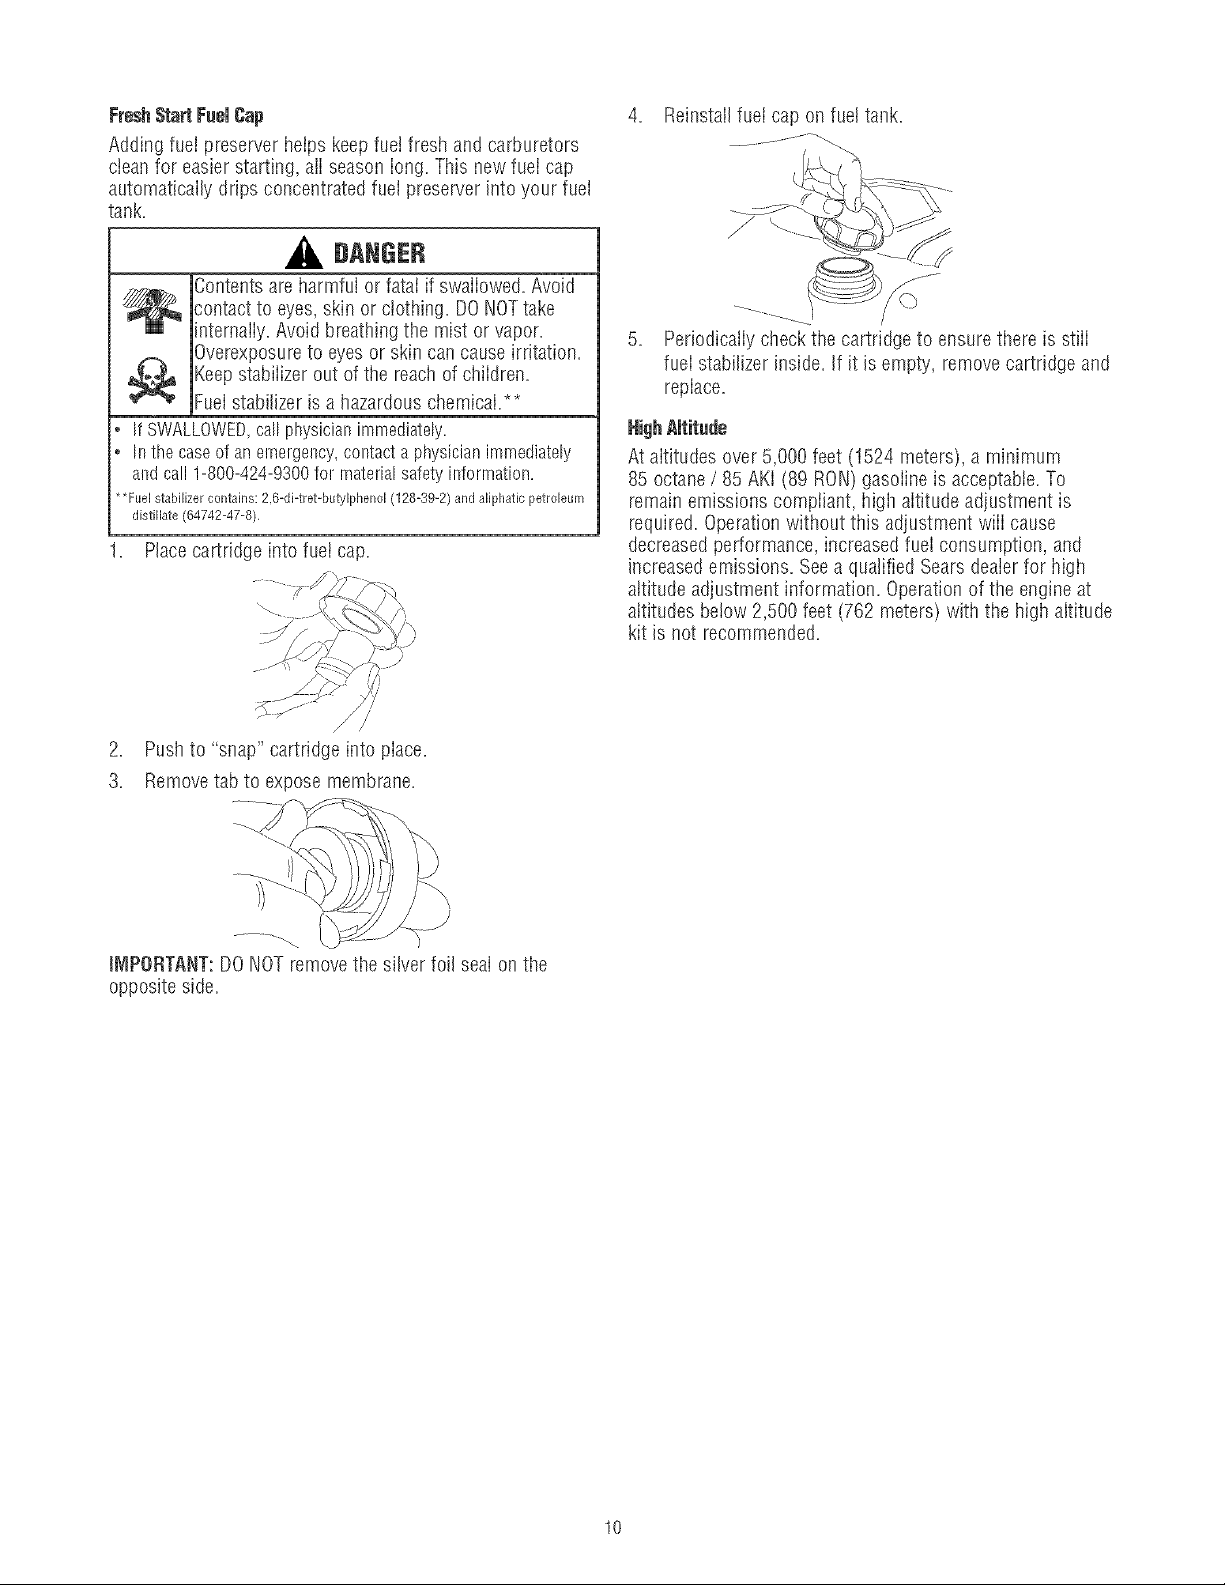
Placecartridge into fuel cap.
4. Reinstallfuel cap on fuettank.
J
Pedodicaiiy check the cartridge to ensurethere is stiii
fuei stabilizer inside. If it is empty, removecartridge and
replace.
At aititudes over 5,000 feet (1524 meters), a minimum
85 octane / 85 AKI (89 RON)gasoline is acceptable.To
remainemissions compiiant, higil aititude adjustment is
required. Operationwithout this adjustment wiii cause
decreasedperformance, increasedfueI consumption, and
increasedemissions. Seea qualified Searsdeaierfor higil
altitude adjustment information. Operationof the engine at
altitudes below 2,500 feet (762 meters)with the high altitude
kit is not recommended.
2. Push to "snap" cartridge into piace.
3. Removetab to expose membrane.
IMPORTANT:DONOT removethe silver foil seal on the
opposite side.
10
ConnectHose and Water Supply to Pump
3. Runwater through your garden hose for 30 seconds to
clean out any debris.
iMPORTANT:DONOTsiphon standing water for the water
suppty. Use ONLYcoid water (less than I O0°F).
4. Connectthe garden hose (notto exceed50 feet in
bngth) to the water inlet. Tigistenby hand.
NOTE:Removeand discard the stlipping capfrom the
pump's water inlet beforeattaching hoses.
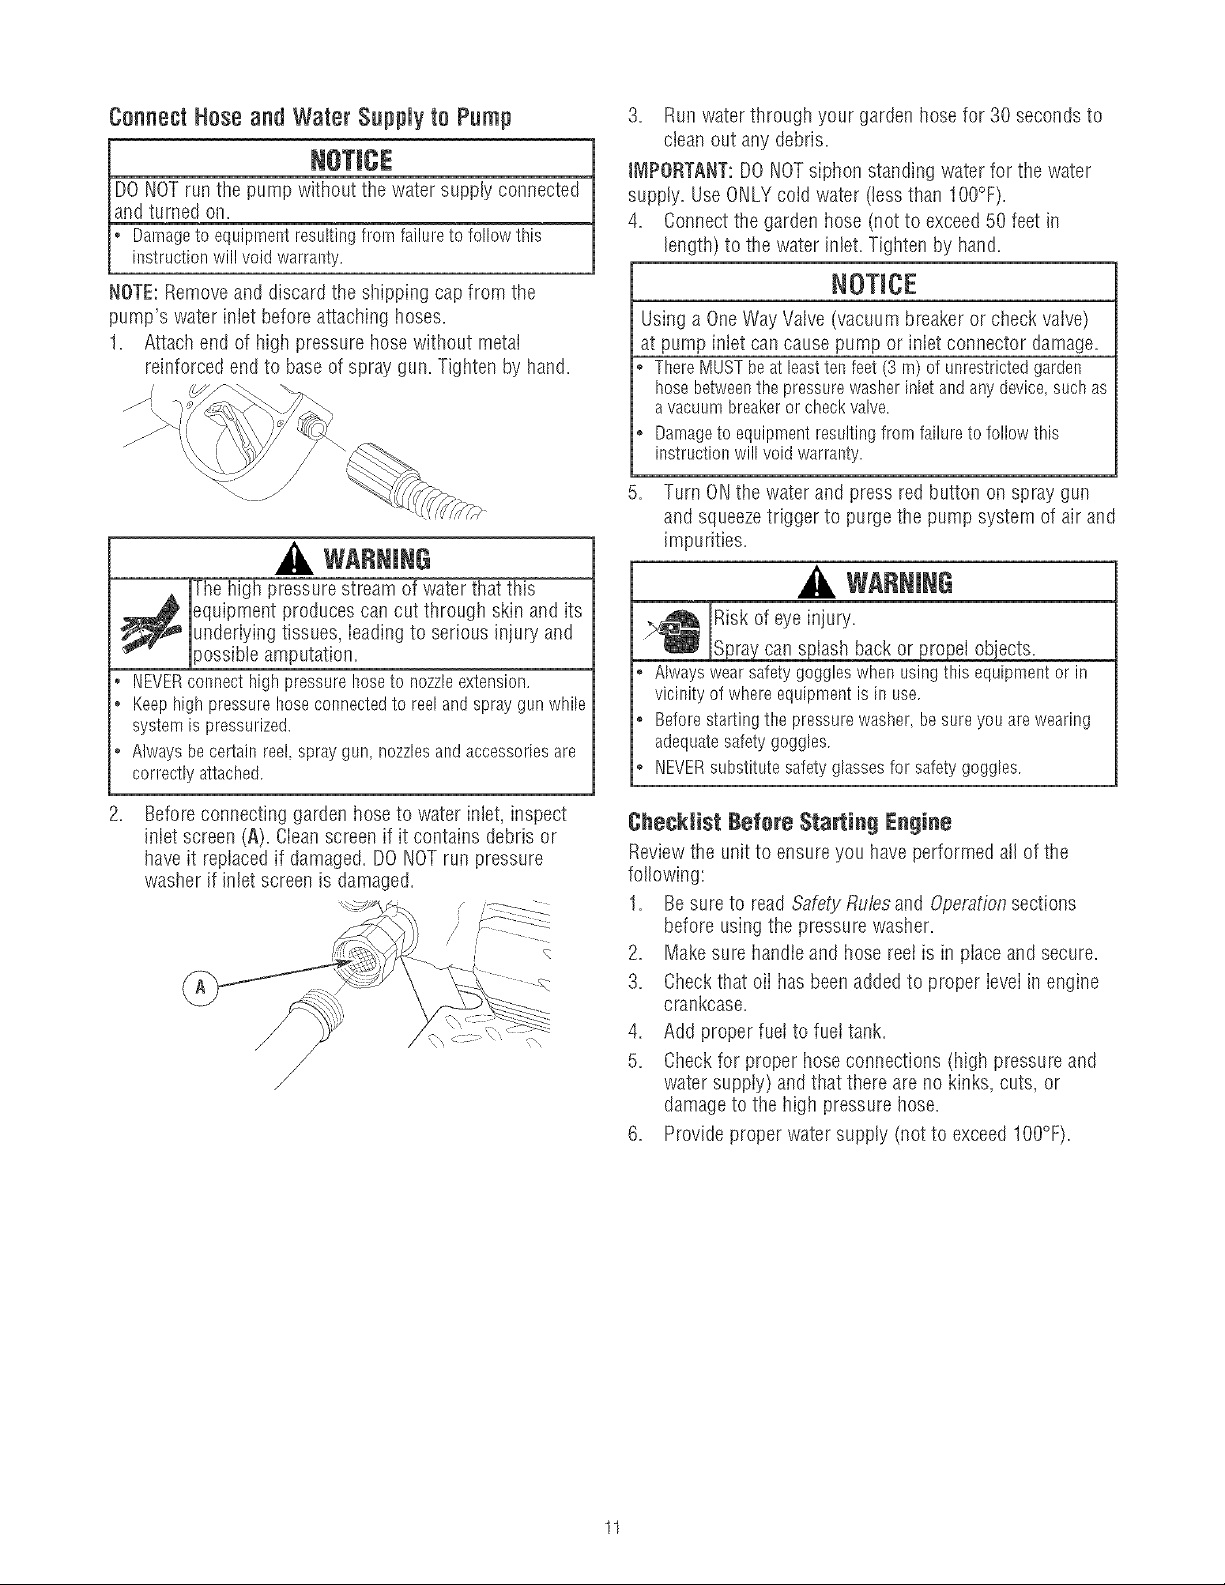
1. Attachend of higil pressure hosewithout metal
reinforced end to baseof spray gun. Tighten by hand.
WARNING
The high pressure stream of water that this
_ quipment produces can cut through skin and its
• NEVERconnect high pressure hoseto nozzleextension.
o Keephigh pressure hose cormectedto reel and spray gun while
system is pressurized.
o Always becertain reel, spray gun, nozzlesand accessories are
correctly attached.
.
underiying tissues, ieading to serious injury and
)ossibb amputation,
Beforeconnecting garden hoseto water inlet, inspect
inlet screen (A). Cleanscreen if it contains debris or
haveit replaced if damaged.DO NOTrun )ressure
washer if inlet screen is damaged.
/
?
NOTICE
Using a OneWay Vaive (vacuum breakeror checkvaive)
at pump inlet can cause pump or inlet connector damage.
ThereMUSTbeatleasttenfeet(3 m)ofunrestrictedgarden
hosebetweenthepressurewasherinletandan}/'device,suchas
avacuumbreakerorcheckvalve.
Darnageto equipmentresultingfromfailuretofollowthis
instructionwillvoidwarranty.
5. Turn ONthe water and press red button on spray gun
and squeezetrigger to purge the pump system of air and
impurities.
WARNING
,,_ Riskof eye injury.
_ jSpraycan splash back or propel objects.
Alwayswearsafetygoggleswhenusingthisequipmentor in
vicinityof whereequipmentisin use.
Beforestartingthe pressurewasher,besureyouarewearing
adequatesafetygoggles.
NEVERsubstitutesafetyglassesfor safetygoggles.
Checklist Before Starting Engine
Reviewthe unit to ensure you have performed atl of the
foflowing:
1. Besure to read Safety Rubs and Operationsections
before usingthe pressure washer.
2. Makesure handle and hose reetis in placeand secure.
3. Checkthat oii has beenadded to proper levelin engine
crankcase.
4. Add proper fuei to fuei tank.
5. Checkfor proper hoseconnections (high pressure and
water supply) and that there are no kinks, cuts, or
damageto the high pressure hose.
6. Provideproper water supply (not to exceedIO0°F).
11
HOWTOUSEYOURPRESSUREWASHER
If you haveany problems operatingyour pressure washer,
pleasecalIthe pressure washer heipline at 1-800-222-3136.
Pressure Washer Location
WANNING
Exhaustheat/gases can ignite combustibbs,
structures or damage fuei tank causing a fire.
o Keepatleast5ft. (152crn)clearanceonall sidesof pressure
washerincludingoverhead.
PressureWasherClearance
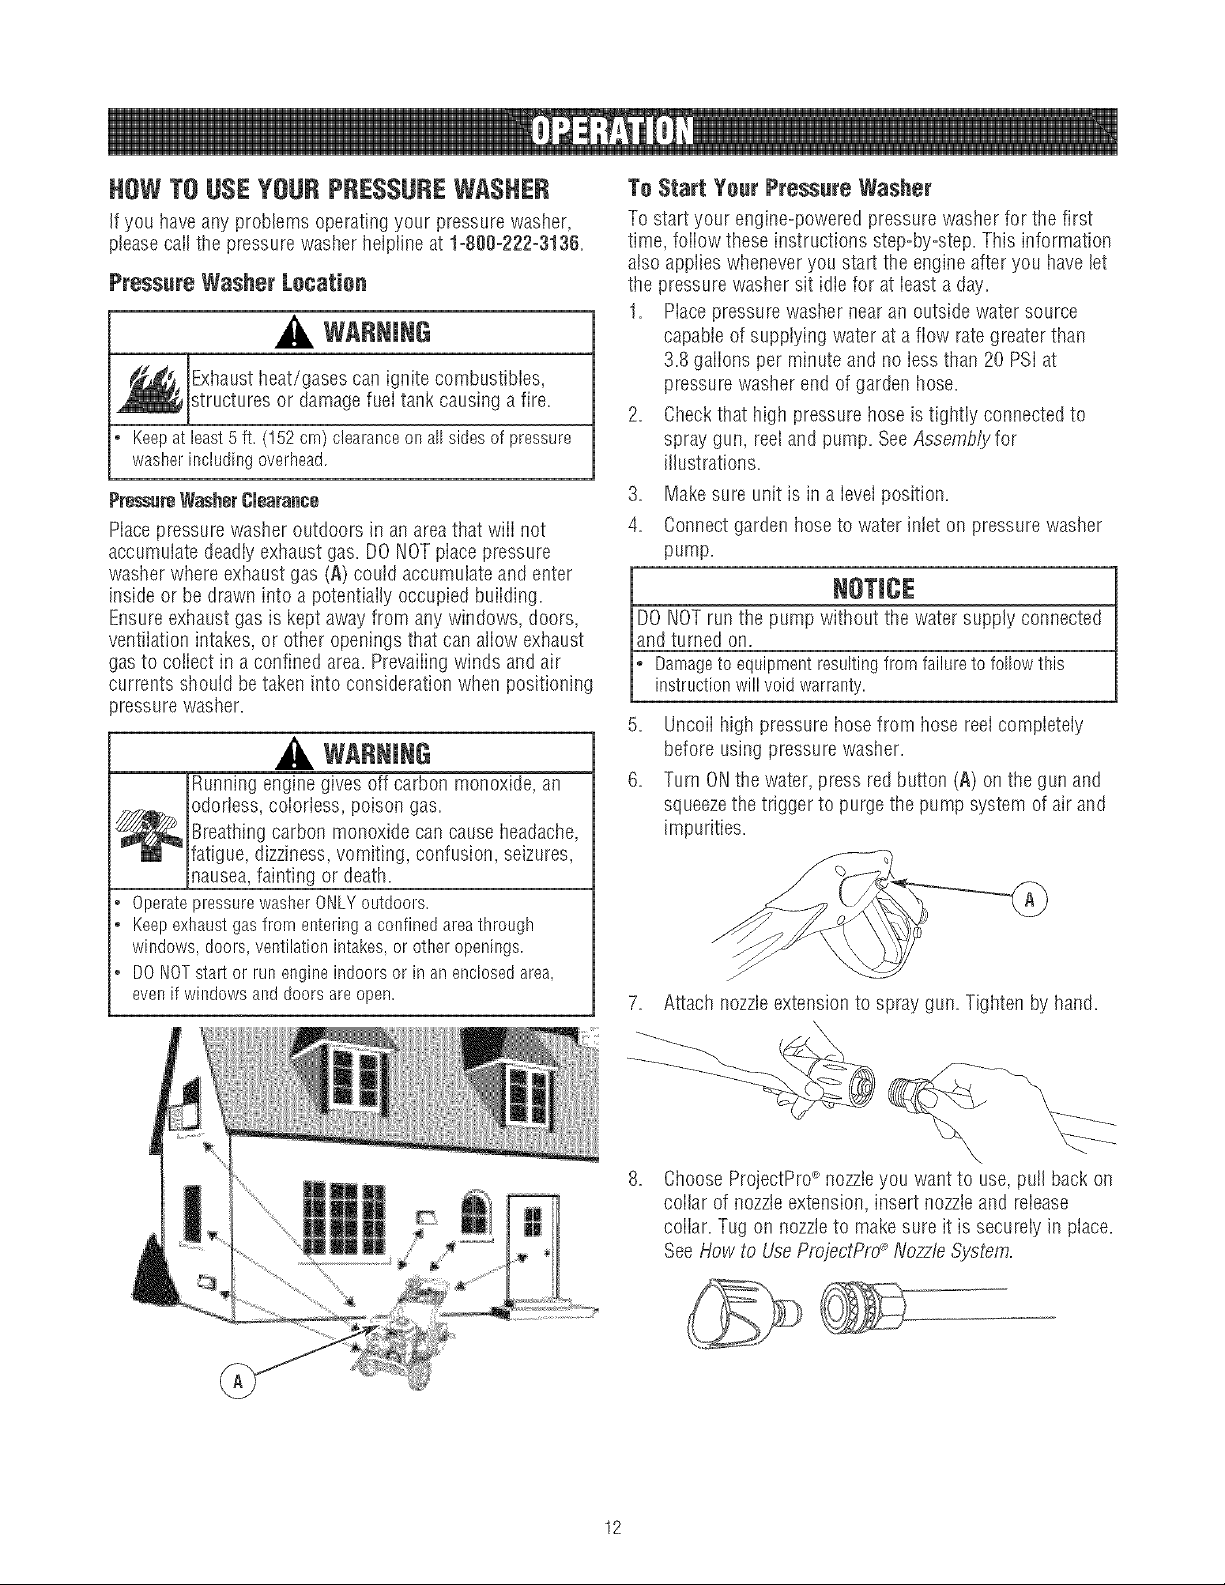
Macepressure wa@er outdoors in an areathat wiii not
accumulate deadiy exhaust gas. DO NOTpiacepressure
washer where exhaustgas (A) could accumulateand enter
inside or be drawn into a potentiaily occupied buiiding.
Ensureexhaust gas is kept awayfrom any windows, doors,
ventiiation intakes, or other openings that can aliow exhaust
gasto coiiect in a confined area. Prevaiiingwinds and air
currents should be taken into considerationwhen positioning
pressure washer.
WARNING
Runningengine gives off carbon monoxide, an
odorless, coiorless, poison gas.
_ reathingcarbon monoxide can causeheadache,
* OperatepressurewasherONLYoutdoors.
o Keepexhaustgasfromenteringaconfinedareathrough
* DONOTeta1 or runengineindoorsor in anenclosedarea,
fatigue, dizziness,vomiting, confusion, seizures,
nausea,fainting or death.
windows,doors,ventilationintakes,or otheropenings.
evenif windowsanddoorsareopen.
To Start Yeur Pressure Washer
To start your engine-powered pressurewasher for the first
time, foiiow these instructions step-by-step. This information
also applies wheneveryou start the engine after you havelet
the pressure washer sit idle for at bast a day.
1. Piacepressure washer nearan outside water source
capableof supplying water at a flow rategreater than
3.8 gaiions per minute and no iess than 20 PSi at
pressurewasher end of garden hose.
2. Checkthat high pressure hose istightiy connectedto
spray gun, reel and pump. SeeAssemb_for
illustrations.
3. Makesure unit is in a ieveiposition.
4. Connectgarden hose to water intet on pressure washer
pump.
i NOTlC(
DONOTrun the pump without the water supply connected
and turned on.
L amageto equipmentresultingfrom failureto followthis
instructionwillvoidwarrasty
5. Uncoii high pressure hose from hose reelcompbteiy
before using pressure washer.
6. Turn ONthe water,press red button (A) on the gun and
squeezethe trigger to purge the pump system of air and
impurities.
Attach nozzleextension to spray gun. Tigllten by hand.
ChooseProjectPro_ nozzleyou want to use, pull back on
coilar of nozzleextension, insert nozzleand release
coiiar. Tug on nozzleto makesure it is securely in place.
SeeHow to UseProjectPro_ NozzleSystem.
12
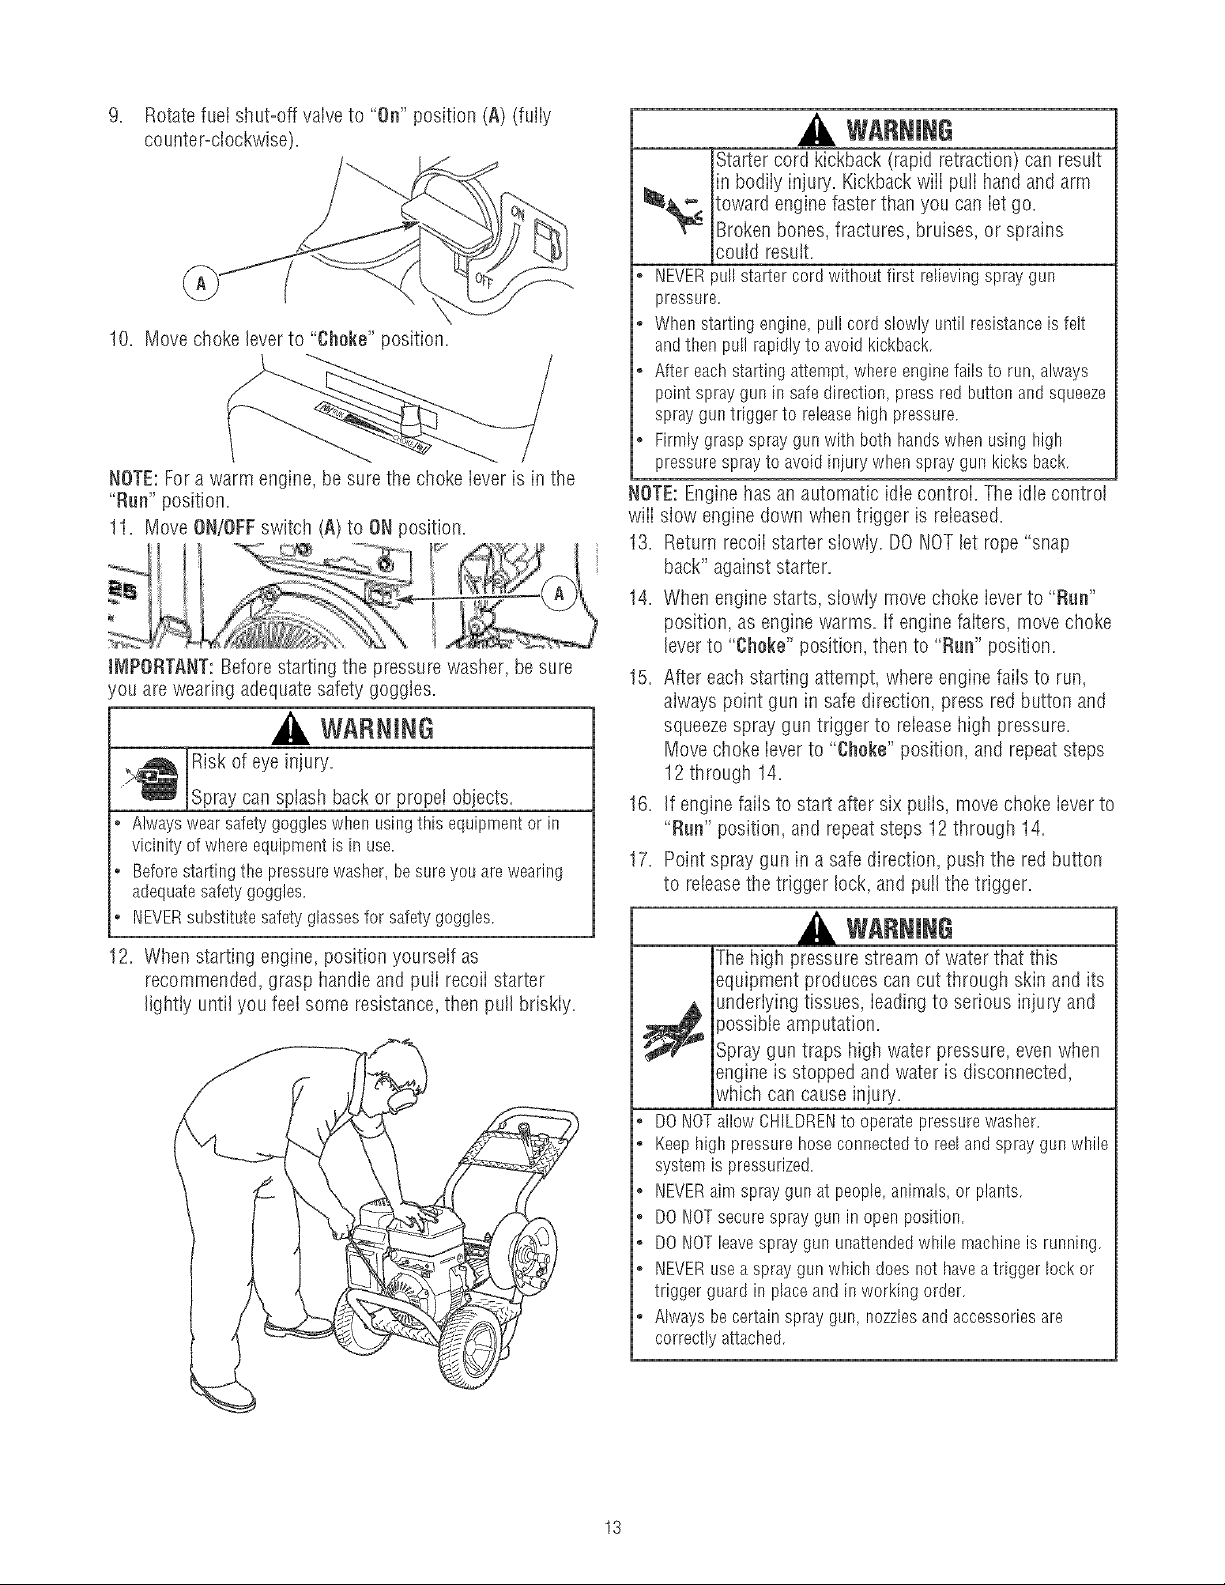
9. Rotatefueishut=offvalveto "On"position(A)(fully
counter=clockwise).
10.Movechokeleverto"Choke"position.
NOTE:For a warm engine, be sure the choke lever is in the
"Rue" position.
11. Move ON/OFFswitch (A) to ONposition.
iMPORTANT:Beforestarting the pressure washer, be sure
/ou are wearing adequatesafety goggles.
WARNING
_Spray cansp ash back or propel objects.
vicinityofwhereequipmentisinuse.
12. Whenstarting engine, position yourself as
Risk of eye injury.
Alwayswearsafetygoggleswhenusingthis equipmentor in
Beforestartingthepressurewasher,besureyouarewearing
adequatesafetygoggles.
NEVERsubstitutesafetyglassesforsafetygoggles.
recommended, grasp handle and puff recoii starter
lightly until you feel some resistance, then pulI briskly.
WARNING
Starter cord kickback(rapid retraction) can result
in bodily injury. Kickbackwill pu!I handand arm
toward enginefaster than you caniet go.
Brokenbones, fractures, bruises, or sprains
could result.
• NEVERpullstartercordwithoutfirst rdievingspraygun
pressure.
o Whenstartingengine,pullcordslowlyuntil resistanceisfelt
andthenpullrapidlyto avoidkickback.
o Aftereachstartingattempt,whereenginefailsto run, always
pointspraygunin safedirection,pressredbuttonandsqueeze
sprayguntriggerto releasehighpressure.
o Firmlygraspspraygunwithbothhandswhenusinghigh
pressuresprayto avoidiniurywhenspraygunkicksback.
NOTE:Enginehas an automatic idle controi. The idle control
wiii slow engine down whentrigger is released.
13. Return recoii starter siowiy. DONOTlet rope "snap
back"against starter.
14. When engine starts, siowiy movechoke ieverto "Run"
position, as engine warms, if engine faiters, move choke
leverto "Choke" position, t!_ento "Rue" position.
15. After eachstarting attempt, w!_ereenginefaiis to run,
always point gun in safe direction, press red button and
squeezespray gun trigger to releasehigh pressure.
Move choke leverto "Choke" position, and repeatsteps
12 through 14.
16. If enginefaiis to start after six puffs, movechoke ieverto
"Run" position, and repeatsteps 12 througil 14.
17. Point spray gun in a safe direction, push the red button
to releasethe trigger lock, and pulI the trigger.
WARNING
Thehigh pressurestream of waterthat this
equipment produces can cut through skin and its
_ nderlying tissues, ieadingto serious injury and
• DONOTallowCHILDRENtooperatepressurewasher.
o Keephighpressurehoseconnectedto reelandspraygunwhile
systemis pressurized.
o NEVERaimspraygunatpeople,animals,or plants.
• DONOTsecurespraygun inopenposition.
o DONOTleavespraygununattendedwhilernachineis running.
• NEVERuseaspraygunwhichdoesnothaveatriggerlockor
triggerguardin placeandinworkingorder.
o Alwaysbecertainspraygun,nozzlesandaccessoriesare
correctlyattached.
}ossibte amputation.
Spray gun traps high water pressure,evenwhen
engine is stopped and water is disconnected,
which can cause injury.
13
WARNING
Contact with muffler area can result in serious
burns.
Exhaustheat/gases can ignite combustibles,
structures or damage fuel tank causing a fire.
* DONOTtouchhot partsandAVOIDhotexhaustgases.
* Allowequipmentto coolbeforetouching.
o Keepatleast5feet (152crn)ofclearanceonall sidesof
pressurewasherincludingoverhead.
, Codeof FederalRegulation(CFR)Title36 Parks,Forests,and
PublicPropertyrequireequipmentpoweredby aninternal
combustionengineto haveasparkarrester,rnaintainedin
effectiveworkingorder,complyingto USDAForestservice
standard5!00-1C or laterrevision.Itsthe Stateof Californiaa
sparkarresteris requiredundersection4442of the California
Publicresourcescode.Otherstatesrnayhavesimilarlaws.
How to Stop Your Pressure Washer
1. Reieasespray gun trigger and let engine idte for two
minutes.
2. Move ON/OFFswitch to OFFposition.
WARNING
Backfire,fire or engine damagecould occur.
* DONOTstopenginebymovingchokeleverto "Choke"position.
3. ALWAYSpoint spray gun in a safe direction, press red
button and squeezespray gun trigger to releaseretained
high water pressure.
WARNING
The high pressure stream of water that this
equipment produces can cut through skin and its
_ nderlying tissues, ieadingto serious injury and
• Keephighpressurehoseconnectedto reelandspraygunwhile
systemispressurized.
o ALWAYSpointspraygunin safedirection,pressredbutton
andsqueezesprayguntrigger,to rebasehighpressure,every
time youstopengine.
)ossibbamputation.
Spray gun traps high water pressure,evenwhen
engine is stopped and water is disconnected,
which can cause injury.
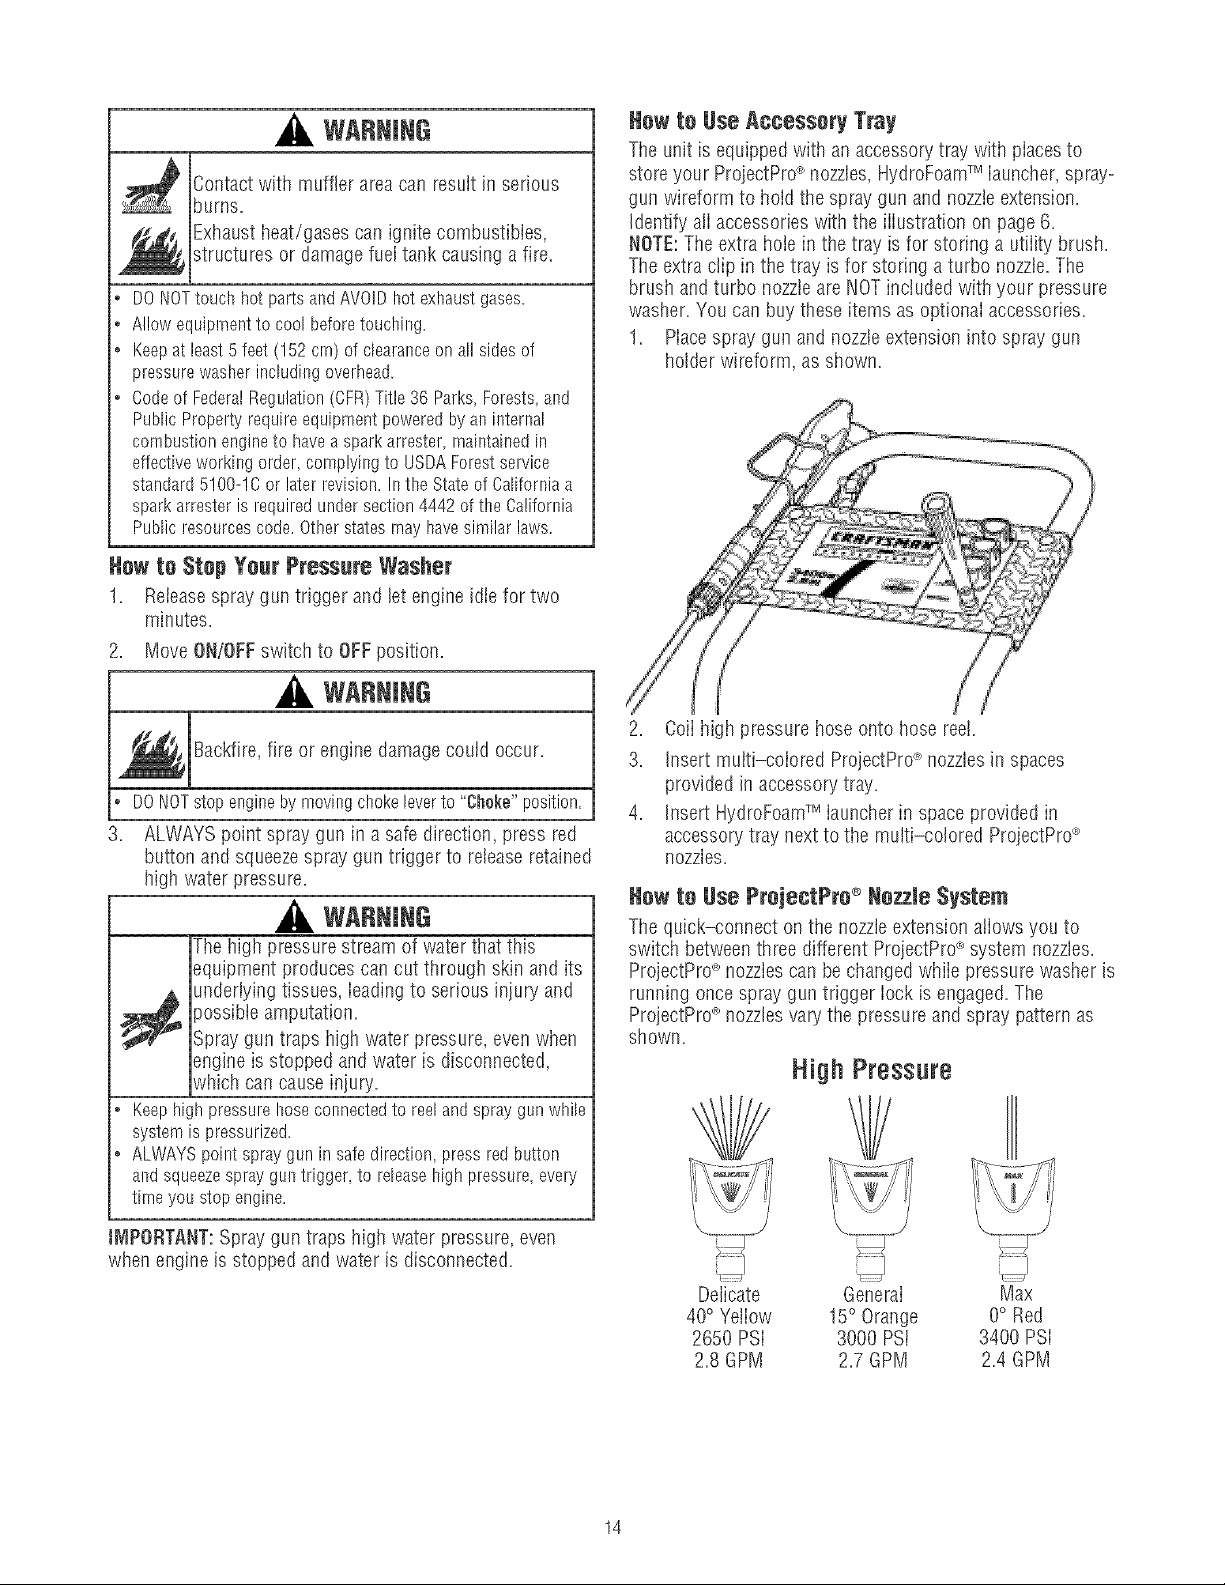
How to Use Accessory Tray
Theunit is equipped with an accessorytray with piacesto
store your ProjectPro_ nozzles,HydroFoamTM iauncher, spray-
gun wireform to hold the spray gun and nozzteextension.
identify ali accessorieswith the iiiustration on page6.
NOTE:The extra hob in the tray is for storing autiiity brush.
Theextra clip in the tray is for storing a turbo nozzle. The
brush and turbo nozzleare NOTincludedwith your pressure
washer.You can buythese items asoptionai accessories.
1. Piacespray gun and nozzleextension into spray gun
holder wireform, as shown.
2. Coii high pressure hose onto hose reel.
3. Insert muiti-colored ProjectPro_nozzlesin spaces
provided in accessorytray.
4. Insert HydroFoamTM iauncher in spaceprovided in
accessorytray next to the multi-colored ProjectPro_
nozzles.
How to Hoe ProjectPro ®Hozzle System
Thequick-connect on the nozzleextension atiows you to
switch betweenthree different ProjectPro_system nozzles.
ProjectPrd_nozzlescan be changedwhile pressure washer is
running once spray gun trigger Iock is engaged.The
ProjectPrd_nozzlesvary the pressure and spray pattern as
shown.
High Pressure
JNIPORTANT:Spraygun traps high water pressure,even
when engine is stopped and water is disconnected.
14
Delicate General
40°Yeiiow 15° Orange
2650 PSi 3000 PSi
2.8 GPM 2.7 GPM
"--.i-.......l...J
Max
O° Red
3400 PSi
2.4 GPM
Fellowthese instructionsto shaegePrejestPro®nozzles:
1. PuiI back collar on quick-connect and pull current
ProjectPro_>nozzle off. Store ProjectPro_'nozzlesin
holder provided on the accessorytray.
WARNING
The high pressure stream of water that this
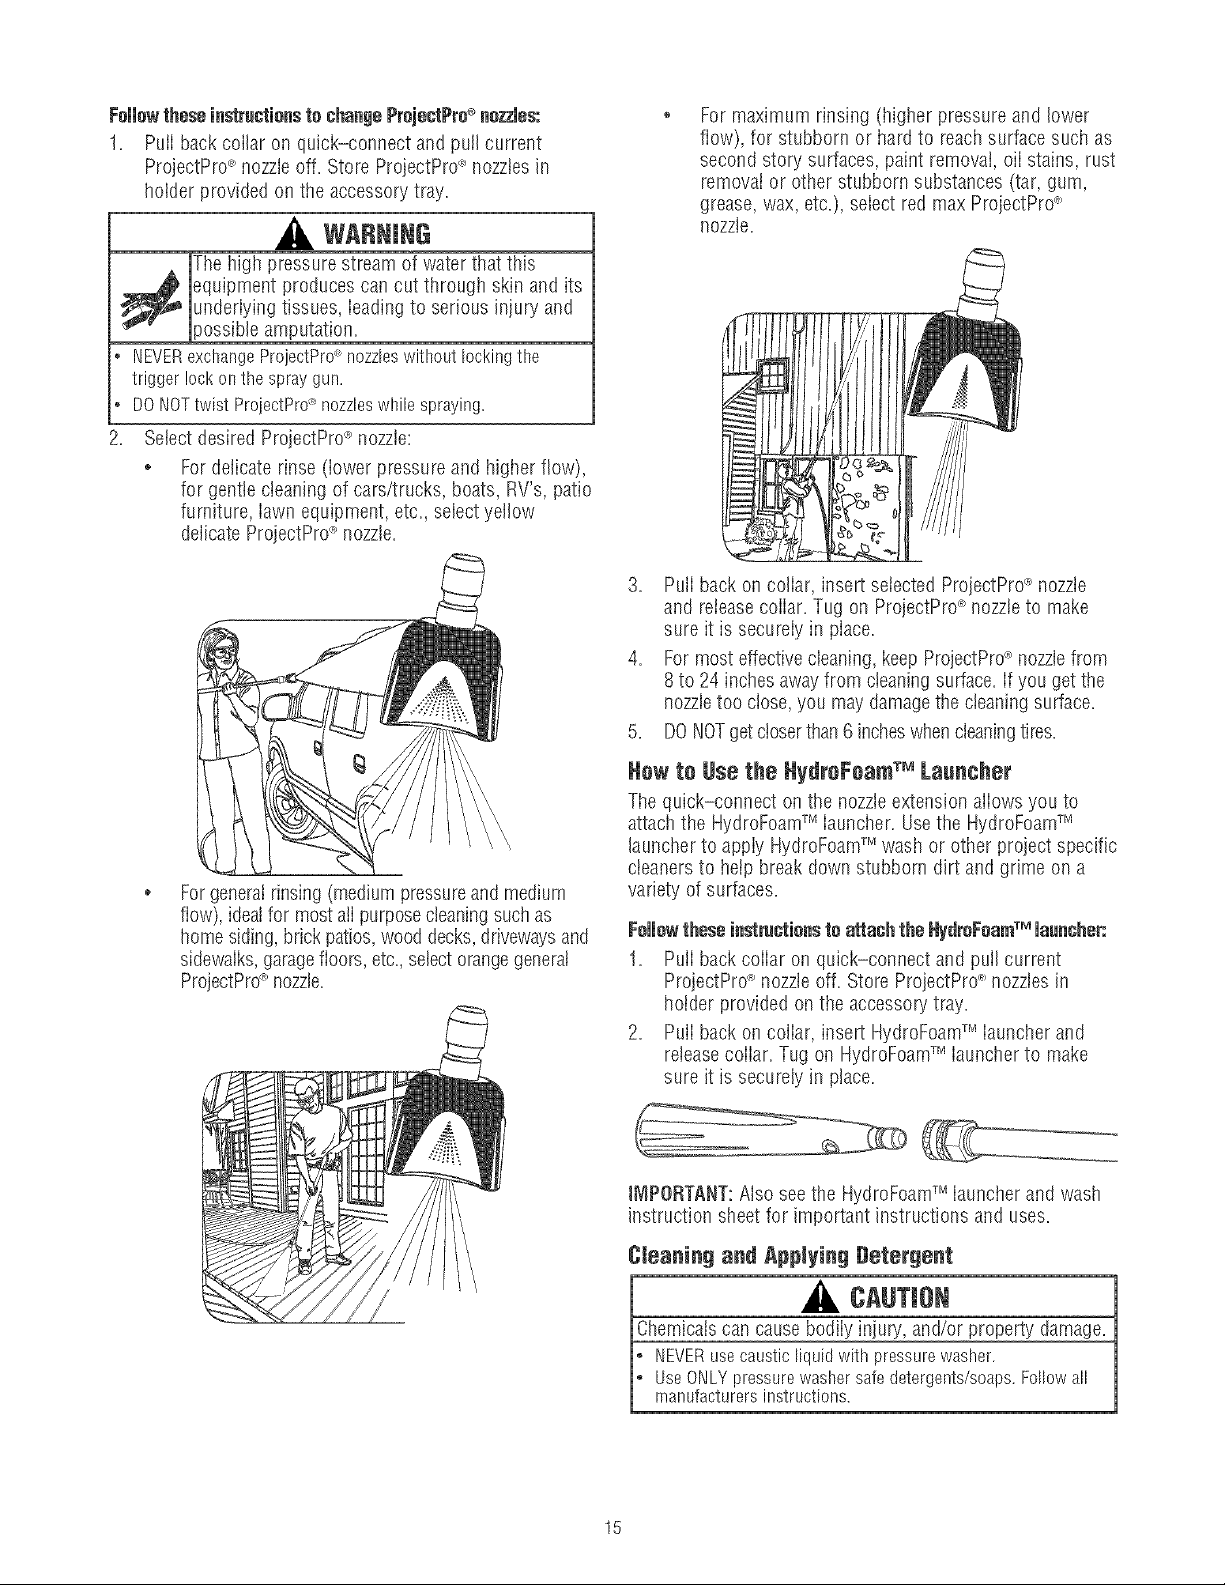
For maximum rinsing (higiler pressure and lower
flow), for stubborn or hard to reachsurface such as
second story surfaces, paint removal, eli stains, rust
removal or other stubborn substances (tar, gum,
grease, wax, etc.), select red max ProjectPro_'
nozzle,
_ quipment produces cancut through skin and its
* NEVERexchangeProjectPro__nozzleswithoutlockingthe
triggerlockonthe spraygun.
o DONOTtwist ProjectPro<'nozzleswhilespraying.
.
underiyingtissues, ieadingto serious injury and
)ossibleamputation.
Select desired ProjectPrd_nozzle:
o Fordelicate rinse (iower pressure and higher flow),
for genttecteaning of cars/trucks, boats, RV's, patio
furniture, iawn equipment, etc. selectyellow
delicate ProjectPro_nozzte.
Forgeneralrinsing(medium pressureand medium
flow), idealfor mostaiI purposecteaningsuch as
homesiding,brick patios,wooddecks,drivewaysand
sidewalks,garagefloors, etc.,selectorangegeneral
ProjectPro_>nozzte.
3. Pull back on collar, insert selectedProjectPro_nozzle
and releasecollar. Tug on ProjectPro_'nozzleto make
sure it is secureiy in piace.
4. Formost effectivecleaning,keepProjectPrd_nozzlefrom
8to 24 inchesawayfrom cleaningsurface. If you get the
nozzletoo close, you may damagethe cleaningsurface.
5. DONOTgetcloserthan6 incheswhencleaningtires.
Hew te 8se the HydreFeamTM Laancher
The quick-connect on the nozzleextension aliows you to
attach the HydroFoamTM iauncher. Usethe HydroFoamTM
launcherto appiy HydroFoamTM wash or other project specific
cteanersto heip break down stubborn dirt and grime on a
variety of surfaces.
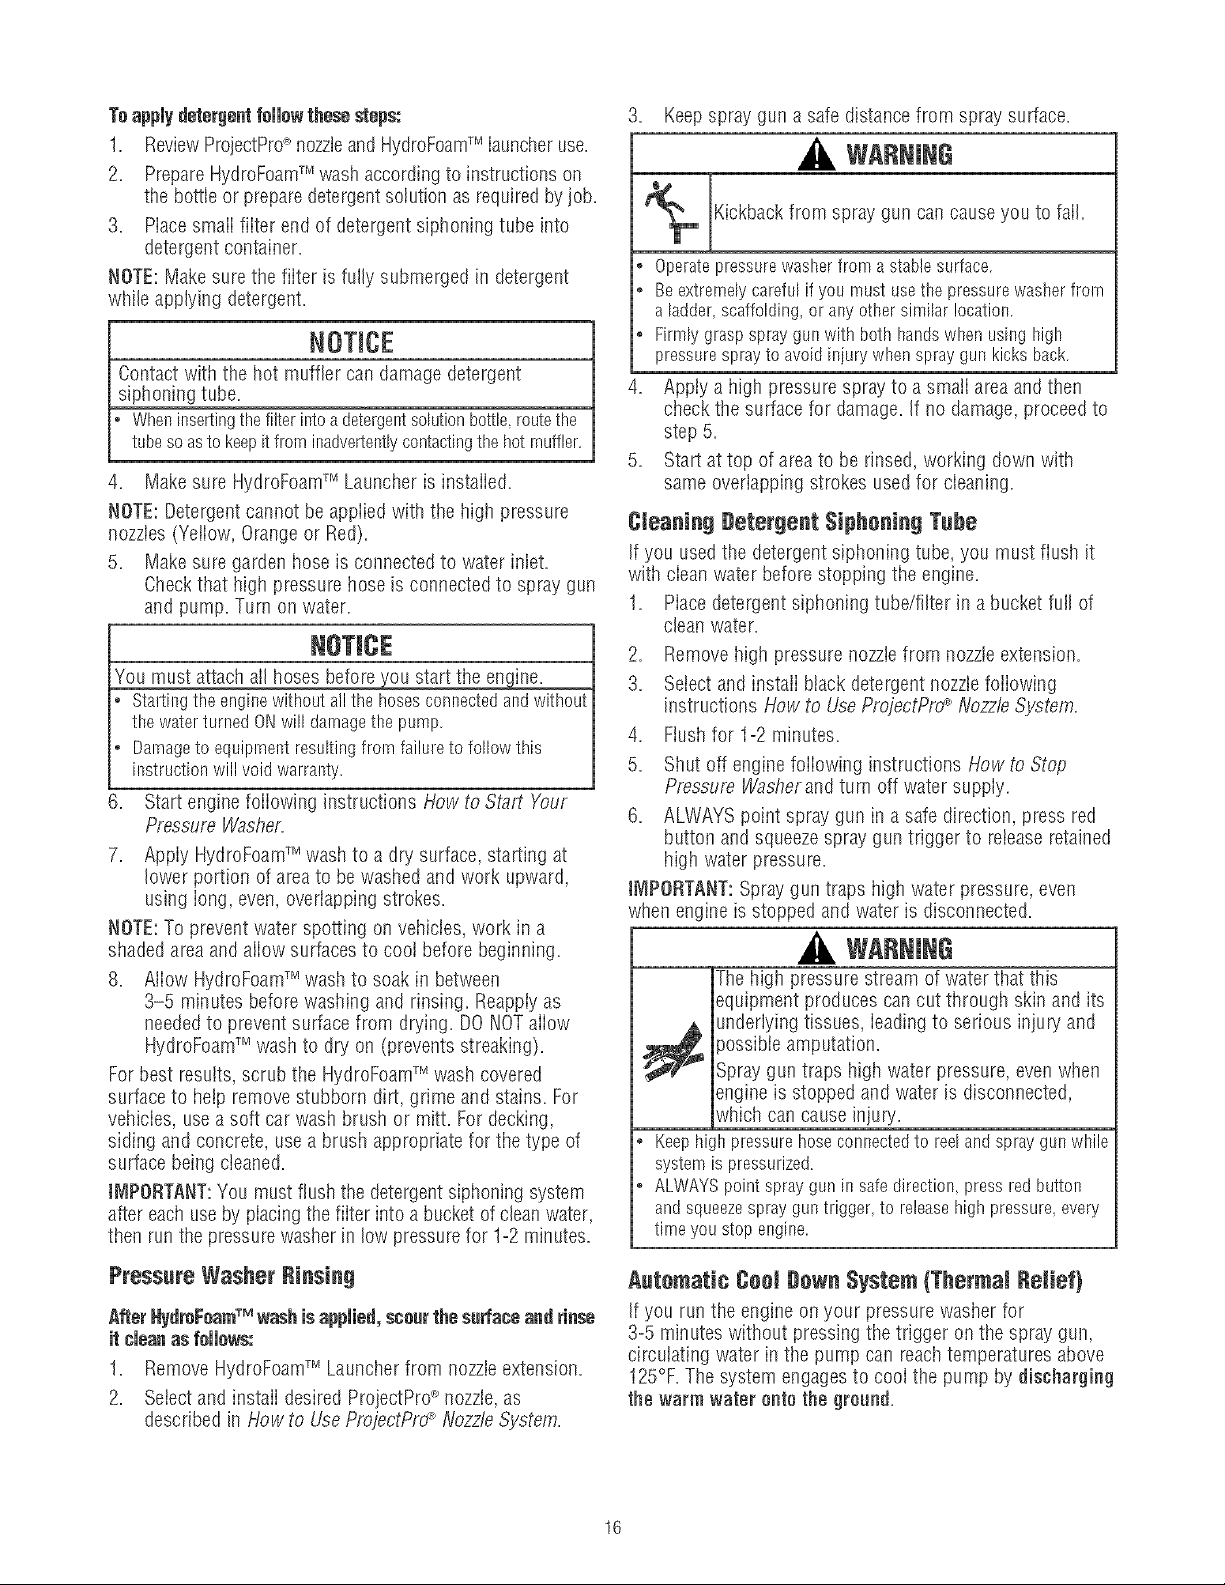
Followthese instructionsto attashthe HydreFearnTM lace€her:
1. Pull back collar on quick-connect and pull current
ProjectPrd_nozzleoff. Store ProjestPro_'nozzlesin
holder provided on the accessopj tray,
2. Pull back on collar, insert HydroFoamTM launcherand
releasecollar. Tug on HydroFoamTM launcherto make
sure it is securely in place.
IMPORTANT:Also see the HydroFoamTM launcher and wash
instruction sheet for important instructions and uses.
Cteaning and Applying Detergent
A CAUTJe
Chemicalscan causebodily injupj, and/or property damage.
UseONLYpressurewashersafedetergents/soaps.Followall
_ EVERusecausticliquidwithpressurewasher.
rnanufacturersinstructions.
15
Toapply detergentfellow these steps:
1. ReviewProjectPro_'nozzleand HydroFoamTM launcheruse.
2. PrepareHydroFoamTM wash accordingto instructions on
the bottle or preparedetergentsolution as requiredbyjob.
3. Mace smaii fiiter end of detergent siphoning tube into
detergent container=
NOTE:Makesure the fiiter is fully submerged in detergent
while applying detergent=
NOTICE
Contact with the hot muffler candamagedetergent
siphoning tube=
Wheninsertingthefilterintoadetergentsolutionbottle,routethe
tubesoastokeepitfrominadvertentlycontactingthehotrnuffler.
4. Make sure HydroFoamTM Launcheris installed.
NOTE:Detergentcannot be appiied with the high pressure
nozzles(Yeliow, Orange or Red).
5. Make sure garden hose is connectedto water iniet.
Checkthat high pressure hose is connectedto spray gun
and pump. Turn on water.
NOTICE
You must attachall hoses beforeyou start the engine=
Startingtheenginewithoutallthehosesconnectedandwithout
thewaterturnedONwill damagetbepump.
Darnageto equipmentresultingfrom failuretofollowthis
instructionwill void warranty.
6= Start engine foiiowing instructions How to Start Your
Pressure Washer=
7=
Appiy HydroFoamTM washto a dry surface, starting at
lower portion of areato be washed and work upward,
using iong, even, overlapping strokes=
NOTE:To prevent water spotting on vehicies,work in a
shadedareaand aliow surfacesto coot before beginning.
8= Aiiow HydroFoamTM wash to soak in between
3-5 minutes before washing and rinsing. Reappiyas
neededto prevent surface from drying. DONOTaiiow
HydroFoamTM wash to dry on (prevents streaking).
Forbest results, scrub the HydroFoamTM wash covered
surfaceto help remove stubborn dirt, grime and stains. For
vehicies, use a soft car wash brush or mitt. For decking,
siding and concrete, usea brush appropriate for the type of
surface being cleaned=
J_IPORTANT:You mustflush the detergentsiphoningsystem
after each use by piacingthe fiiter into a bucket of clean water,
then run the pressurewasherin low pressurefor 1-2 minutes.
3. Keepspray gun a safe distancefrom spray surface.
WARNING
Kickbackfrom spray gun cancauseyou to fail=
o Operatepressurewasherfrom astablesurface.
o Beextremelycarefulifyou mustusetbepressurewasberfrom
a ladder,scaffolding,or anyotbersimilarlocation.
* Firmlygraspspraygunwithboth handswbenusinghigh
pressuresprayto avoidiniurywhenspraygunkicksback.
4= Appty a high pressure spray to a smati areaand then
check the surface for damage=If no damage,proceedto
step 5=
Start at top of areato be rinsed, working down with
same overlapping strokes usedfor cleaning=
Cteauiug getergeut $ipheuiug Tube
If you usedthe detergentsiphoning tube, you must flush it
with cieanwater beforestopping the engine.
1= Piacedetergent siphoning tube/filter in a bucket full of
clean water.
.
Removehigh pressure nozziefrom nozzteextension.
3=
Selectand instaii btackdetergent nozzJefoiiowing
instructions How to UseProjectPrd_NozzleSystem.
,
Ftushfor 1-2 minutes.
5=
Shut off engine foiiowing instructions How to Stop
Pressure Washerand turn off water suppiy.
6= ALWAYSpoint spray gun in a safe direction, press red
button and squeezespray gun trigger to reiease retained
high water pressure=
iMPORTANT:Spraygun traps high water pressure,even
when engine is stopped and water is disconnected.
WARNING
Thehigh pressurestream of waterthat this
equipment produces can cut through skin and its
underlyingtissues, ieadingto serious injupj and
}ossibie amputation.
Spray gun traps high water pressure,evenwhen
engine is stopped and water is disconnected,
which can cause injury.
o Keephighpressurehoseconnectedto reelandspraygunwhile
systemis pressurized.
• ALWAYSpointsprayguninsafedirection,pressredbutton
andsqueezesprayguntrigger,to releasehighpressure,every
timeyoustop engine.
Pressure Washer Rinsing
After NydroFoamTM washis applied, eceor the sorfaoeandrinoe
it cleanas fellows:
1. RemoveHydroFoamTM Launcherfrom nozzleextension.
2. Seiectand instaii desired ProjectPro_ nozzle,as
described in How to UseProjeotPrd"__NozzleSystem.
Automatic Cool gewu System {Thermal lielief}
If you run the engineon your pressure washer for
3-5 minutes without pressing the trigger on the spray gun,
circuiating water in the pump can reachtemperatures above
125%=Thesystem engagesto cool the pump by discharging
the warm water onto the groond=
16
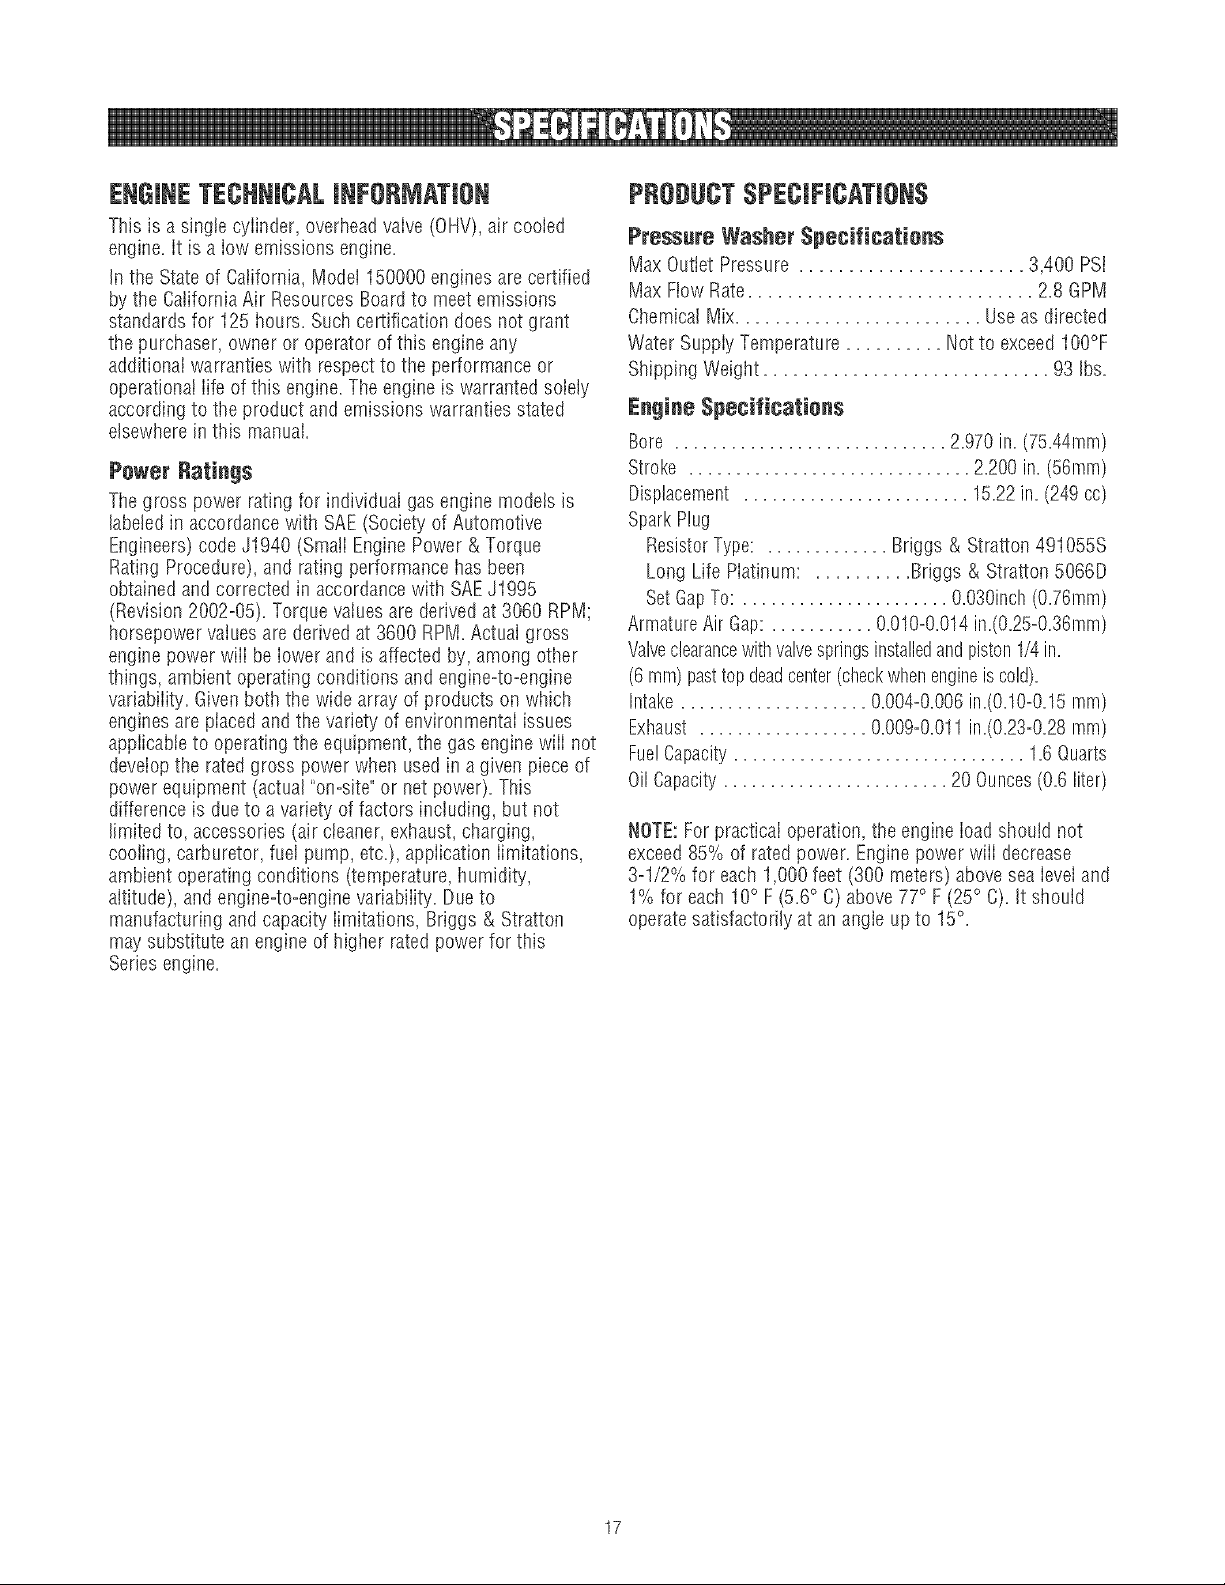
ENGINETECHNICALiNFORMATiON
This is a single cylinder, overheadvalve (OHV),air cooled
engine, it is a iow emissions engine.
Inthe Stateof California, Model 150000 enginesare certified
by the California Air Resources Boardto meet emissions
standardsfor 125 hours. Such certification does not grant
the purchaser, owner or operator of this engine any
additional warranties with respectto the performance or
operational iife of this engine. The engine is warranted solely
according to the product and emissions warranties stated
elsewherein this manual.
Power Ratings
Thegross power rating for individual gas engine models is
labeledin accordancewith SAE(Societyof Automotive
Engineers)code J1940 (Small Engine Power & Torque
Rating Procedure),and rating performance has been
obtained andcorrected in accordancewith SAEJ1995
(Revision2002=05).Torque values are derived at3060 RPM;
horsepower values are derivedat 3600 RPM. Actual gross
engine power wiii be lower and is affected by, among other
things, ambient operating conditions and engine-to-engine
variabiiity. Givenboth the wide array of products on which
enginesare piaced and the variety of environmentai issues
appiicabb to operatingthe equipment, the gas engine wiii not
developthe rated gross power when used ina given pieceof
power equipment (actual "on-site"or net power). This
difference is due to a variety of factors including, but not
limited to, accessories (air cleaner, exhaust,charging,
cooling, carburetor, fuel pump, etc.), appiication iimitations,
ambient operating conditions (temperature,humidity,
altitude), and engine-to-engine variabiiity. Due to
manufacturing and capacity iimitations, Briggs & Stratton
maysubstitute an engine of higher ratedpower for this
Seriesengine.
PRODUCTSPECiFiCATiONS
PressureWasherSpecifications
Max Outbt Pressure ....................... 3,400 PSi
Max Flow Rate............................. 2.8 GPM
ChemicalMix......................... Use as directed
Water SupplyTemperature .......... Not to exceed IO0°F
Shipping Weight ............................. 93 Ibs.
EngineSpecifications
Bore ............................. £970 in. (75.44turn)
Stroke .............................. 2.200 in. (56ram)
Displacement ........................ 15.22in. (249 cc)
SparkPlug
ResisterType: ............. Briggs & Stratton 491055S
Long Life Platinum: .......... Briggs & Stratton 5066D
SetGapTo: ...................... O.030inch(O.76mm)
ArrnatureAir Gap: ........... 0.010o0.014in.(O.25=O.36rnm)
Valveclearancewithvalvespringsinstalledand piston1/4in.
(6 rnrn)pasttop deadcenter(checkwhenengineiscold).
Intake.................... 0.004°0.006in.(0.10=0.15rnm)
Exhaust .................. 0.009o0.011in.(0.23=0.28rnrn)
Fue!Capacity............................... 1.6Quarts
OilCapacity........................ 20 Ounces(0.6 liter)
NOTE:For practical operation, the engine ioad should not
exceed 85% of rated power. Enginepower wiii decrease
3-1/2% for each 1,000 feet (300 meters) abovesea leveland
1% for each 10° F(5.6° C) above 77° F(25° C). It should
operatesatisfactorily at an angle up to 15°.
17
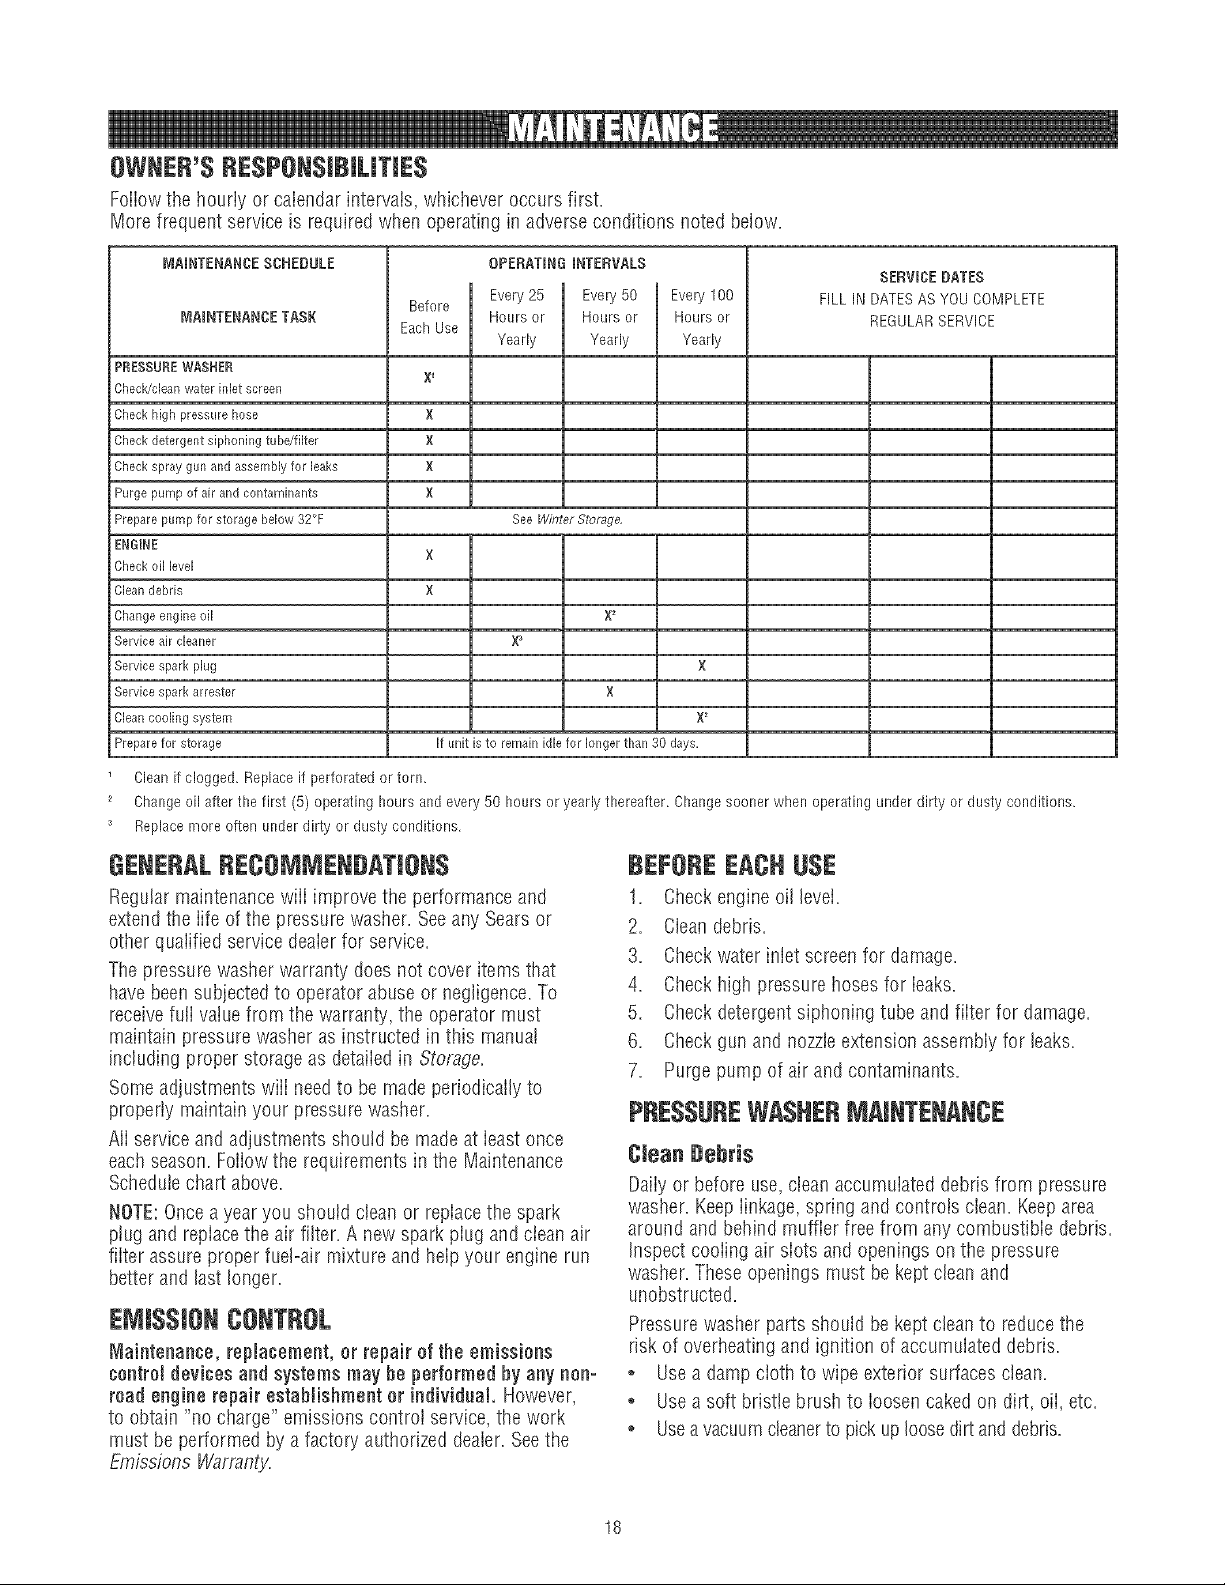
OWNER'SRESPONSiBiLiTiES
Foiiowthe hourly or calendar intervals, whichever occurs first.
More frequent service is required when operating in adverse conditions noted below.
MAINTENANCESCHEDULE
MNNTENANCETASK
PRESSUREW_,SHER
Check/clean water inlet screen
Check high pressure hose
Check detergent siphoning tube/filter
Checkspray gun and assembly for leaks
Purge pump of air and contaminants
Prepare pump for storage below 32°F
ENGINE
Check oil level
Clean debris
Changeengine oil
Service air cleaner
Service spark plug
Service spark arrestor
Clean cooling system
Prepare for storage
Cleanif clogged. Replaceif perforated or tern.
Change oil after the first (5) operating hours and every 50 hours or yearly thereafter. Changesooner when operating under dirty or dusty conditions.
Replacemore often under dirty or dusty conditions,
Before
EachUse
X 1
X
×
X
X
×
X
OPERATINGINTERVALS
Hours or Hoursor
Every 25 Evel_/50
Yearly Yearly
See Winter Stof_ge,
X_
×
if unit is to remain idle for longer than 30 days,
Evel_,lO0
Hours or
Yearly
SERVICEeATES
FILL IN DATESAS YOU COMPLETE
REGULARSERVICE
X
GENERALRECOMMENgATiON$
Regularmaintenancewiii improve the performance and
extendthe iife of the pressure washer. Seeany Searsor
other quaiified service deaierfor service.
Thepressure washer warranty doesnot cover items that
havebeen subjected to operator abuse or negligence.To
receivefuIi vatuefrom the warranty, the operator must
maintain pressure washer as instructed in this manual
including proper storage as detaiied in Storage.
Someadjustments wiii needto be madeperiodically to
properly maintain your pressure washer.
Ali serviceand adjustments should be madeat ieastonce
eachseason.Foliow the requirementsin the Maintenance
Scheduiechart above.
NOTE:Oncea year you should clean or replace the spark
ptug and repiacethe air filter. A new spark plug and ciean air
fiiter assure proper fuel-air mixture and helpyour engine run
better and last longer.
EJ J$$JONCONTROL
Maintenance, replacement, or repair of the emissions
¢ontromdevices and systemsmay heperformedby any non-
roadengine repairestablishment or individual.However,
to obtain "no charge" emissions controi service,the work
must be performed by a factory authorized dealer.Seethe
Emissions Warranty.
BEJ:OREEACHUSE
1. Checkengine oil level.
2. Cleandebris.
3. Checkwater inlet screen for damage.
4. Checkhigh pressure hoses for leaks.
5. Checkdetergent siphoning tube and filter for damage.
6. Checkgun and nozzleextension assembly for leaks.
7. Purge pump of air and contaminants.
PRESSUREWASHERMAINTENANCE
Clean Debris
Daily or before use,clean accumulated debris from pressure
washer. Keeplinkage, spring and controis clean. Keeparea
around and behind muffler free from any combustible debris.
inspect cooiing air siots and openings on the pressure
washer. Theseopenings must be kept cleanand
unobstructed.
Pressurewasher parts should be kept cieanto reducethe
risk of overheating and ignition of accumulated debris.
o Usea dampcloth to wipe exterior surfaces clean.
° Usea soft bristle brush to ioosencaked on dirt, oii, etc.
° Useavacuumcleanerto pick up loosedirt anddebris.
18

NOTICE
jImproper treatment of pressurewasher can damageit and
_tsq_fe,
W_orten _ ....
L: DONOTinsertanyobjectsthroughcoolingslots.
Check and (}mean JnJet Screen
Examinegarden hose inlet screen. Clean if it is clogged or
replaceif it is torn.
Check High Pressure Hnse
High pressure hoses can developleaks from wear, kinking,
or abuse. Inspect hose before each use. Checkfor cuts,
leaks,abrasions, bulging of cover, or damageor movement
of couplings. If any of these conditions exist, replacehose
immediately.
WARNING
Pressurestream
t produces cancut through skin and its
g tissues, ieadingto serious injury and
_"" jpossibleamputation.
NEVERrepairhighpressurehose.Replaceit.
ReplacementhoseratingMUSTexceedrnaxirnurnpressure
ratingof unit.
Check Detergent Siphoning Tube
Examinethe fiiter on the detergent tube and clean if ctogged.
Thetube should fit tightiy on the barbed fitting. Examinethe
tube for leaks or tears. Replacethe filter or tube if either is
damaged.
WARNING
Thehigh pressure stream of water that this
equipment produces can cut through skin and its
_ nderlying tissues, ieading to serious injury and
° Keephighpressurehoseconnectedto reelandspraygunwhile
systemis pressurized.
o ALWAYSpointspraygeminsafedirection,pressredbutton
andsqueezesprayguntrigger,to releasehighpressure,every
timeyoustop engine.
3= Remove nozzlefrom end of nozzleextension.
4. Usea smali paperclip to free any foreign material
B,
6.
jJ
)ossibie amputation.
Spraygun traps high water pressure, evenwhen
engine is stopped and water is disconnected,
which cancause injury.
clogging or restricting nozzle(A).
Removenozzleextension from spray gun.
Using a garden hose, removeadditionai debris by back
flushing water through nozzleextension. Backflush
between30 to 60 seconds.
Check Gun and Nezzle Extensiun
Examinethe hose connectionto the spray gun and make
sure it is secure. Test the trigger by pressing the red button
and making sure the trigger "springs back" into placewhen
you releaseit. You should not be able to press the trigger
without pressing the red button. Repiacespray gun
immediately if it fails any of these tests.
Nezzle Maintenance
A pulsing sensationfelt whiie squeezingthe spray gun trigger
may becaused by excessivepump pressure. Theprincipal
cause of excessivepump pressure is a nozzleclogged or
restricted with foreign materials, such asdirt, etc. Tocorrect
the probiem, immediately cleanthe nozzlefollowing these
instructions:
,
Shut off engine and turn off water supply.
2.
ALWAYSpoint spray gun in a safe direction, press red
button and squeezespray gun trigger to releaseretained
high water pressure.
.
Reinstaiinozzleinto nozzleextension.
8.
Reconnectnozzleextensionto spray gun.
9.
Makesure garden hose is connectedto water inlet.
Checkthat high pressure hose is connectedto spray gun
and pump. Turn on water.
10.
Start engine foliowing instructions How to Start Your
Pressure Washe,_
11=
Test pressure washer by operating with eachquick
connect nozzle.
B-Ring Maintenance
Purchasean O-Ring RepairKit atyour iocaI Searsor by
caiiing 1-800-4-MY-NOME (1-800-469-4663) or oniine at
www=sears=com=it is not included with the pressure washer.
This kit includes repiacemento-rings, rubber washer and
water inlet fiiter. Referto the instruction sheet provided in the
kit to serviceyour unit's o-rings=
WARNING
Thehigh pressurestream of waterthat this
_ quipment produces cancut through skin and its
• NEVERrepairleakingconnectionswithsealantof anykind.
Replaceo-ringor seal.
underlyingtissues, ieadingto serious injury and
_ossibleamputation.
19

Pump OiJMaintenance
DONOTattempt any oil maintenanceon this pump. This
modeldoes not require any pump oii maintenance.The pump
is pre=iubricatedand sealedfrom the factory, requiring no
additional lubrication for the life of the pump.
ENGINEMAINTENANCE
WARNING
Checkingeli Level
Oil Ieveishould be checkedprior to each use or at least every
5 hours of operation. Keepeli ieve! maintained.
1= Makesure pressure washer is on a ieveisurface.
2= Cleanareaaround eli fiii and remove eli fiil cap=
3= Verify eli is atthe point of overflowing at oil fill opening.
4. Replaceand tighten oil fill cap.
Unintentionalsparking can result in fire or
_¢ electric shock.
WHENAD3USTmNGOR_IAKmNGREPAmRSTOYOURPRESSURE
WASHER
o Disconnectthe sparkplugwirefromthesparkplugandplace
thewirewhereit cannotcontactsparkplug.
WHENTESTINGFORENGINESPARK
* Useapprovedsparkplugtester.
. DONOTcheckfor sparkwith sparkplugremoved.
Oil
eli Becemmendatiens
We recommendtile useof Briggs & Stratton Warranty
Certified otis for best performance. Other high=quality
detergent oiis are acceptable if ciassified for service SF,SG,
SH, SJ or higher. DONOTuse speciai additives.
Outdoortemperatures determine the proper eli viscosity for
the engine. Usethe chart to selectthe best viscosity for the
outdoor temperature rangeexpected.
oF
oc
'X 4o
86 _
104 ZIX'X
68
5o
32 _
14
-4
-22
| 30
:_ 0
_m _0
- -lO
oh--j k-- o
1, Makesure pressure washer is on a Ieveisurface.
2= Checkeli ievei as described in CheckLogOffLevel
3= If needed,slowly pour oil into oil fill openingto the point
of overflowing at eli fiii.
4= Replaceand tigilten oil fill cap=
Changethe engine oil after the first 5 hours and every
50 hours thereafter, if you are using your pressure washer
under extremely dirty or dusty conditions, or in extremely hot
weather, changethe oil more often.
CAUTION
Avoid prolonged or repeatedskin contact with usedmotor
oil.
Usedmotoroil hasbeenshownto causeskincancerincertain
laboratoryanimals.
Thoroughlywashexposedareaswithsoapandwater.
KEEPOUTOFREACHOFCHILDREN.DON'T
POLLUTE.CONSERVERESOURCES.RETURN
USEDOILTOCOLLECTIONCENTERS.
Changeoil while engine is still warm frem running,as
feiJows:
1. Makesure unit is on a ieveisurface.
2. Disconnect the spark piug wire from the spark piug and
placethe wire where it cannot contact spark plug.
3. Cleanareaaround oil drain plug (A). Theoil drainplug is
locatedat baseof engine, oppositecarburetor.
* Below40°F(4°C)theuseof SAE30will resultin hardstarting.
** Above80%(27%) theuseof 10W30maycauseincreasedoil
consumption.Checkoillevelmorefrequently.
certification mark and APi servicesymboi with
NOTE:Synthetic eli meeting ILSACGF=2,API
"SJ/CF ErIERGYCONSERVING"or higiler, is an
acceptabieeli at aii temperatures. Useof synthetic oil
doesnot alter required oil change intervals.
4. Removeeli drain piug and drain oil completely into a
suitable container.
5. Reinstalloil drain plug and tigilten securely. Removeoil
fill cap,
2O
 Loading...