

Page 1
&EAÑ&
owner’s
manual
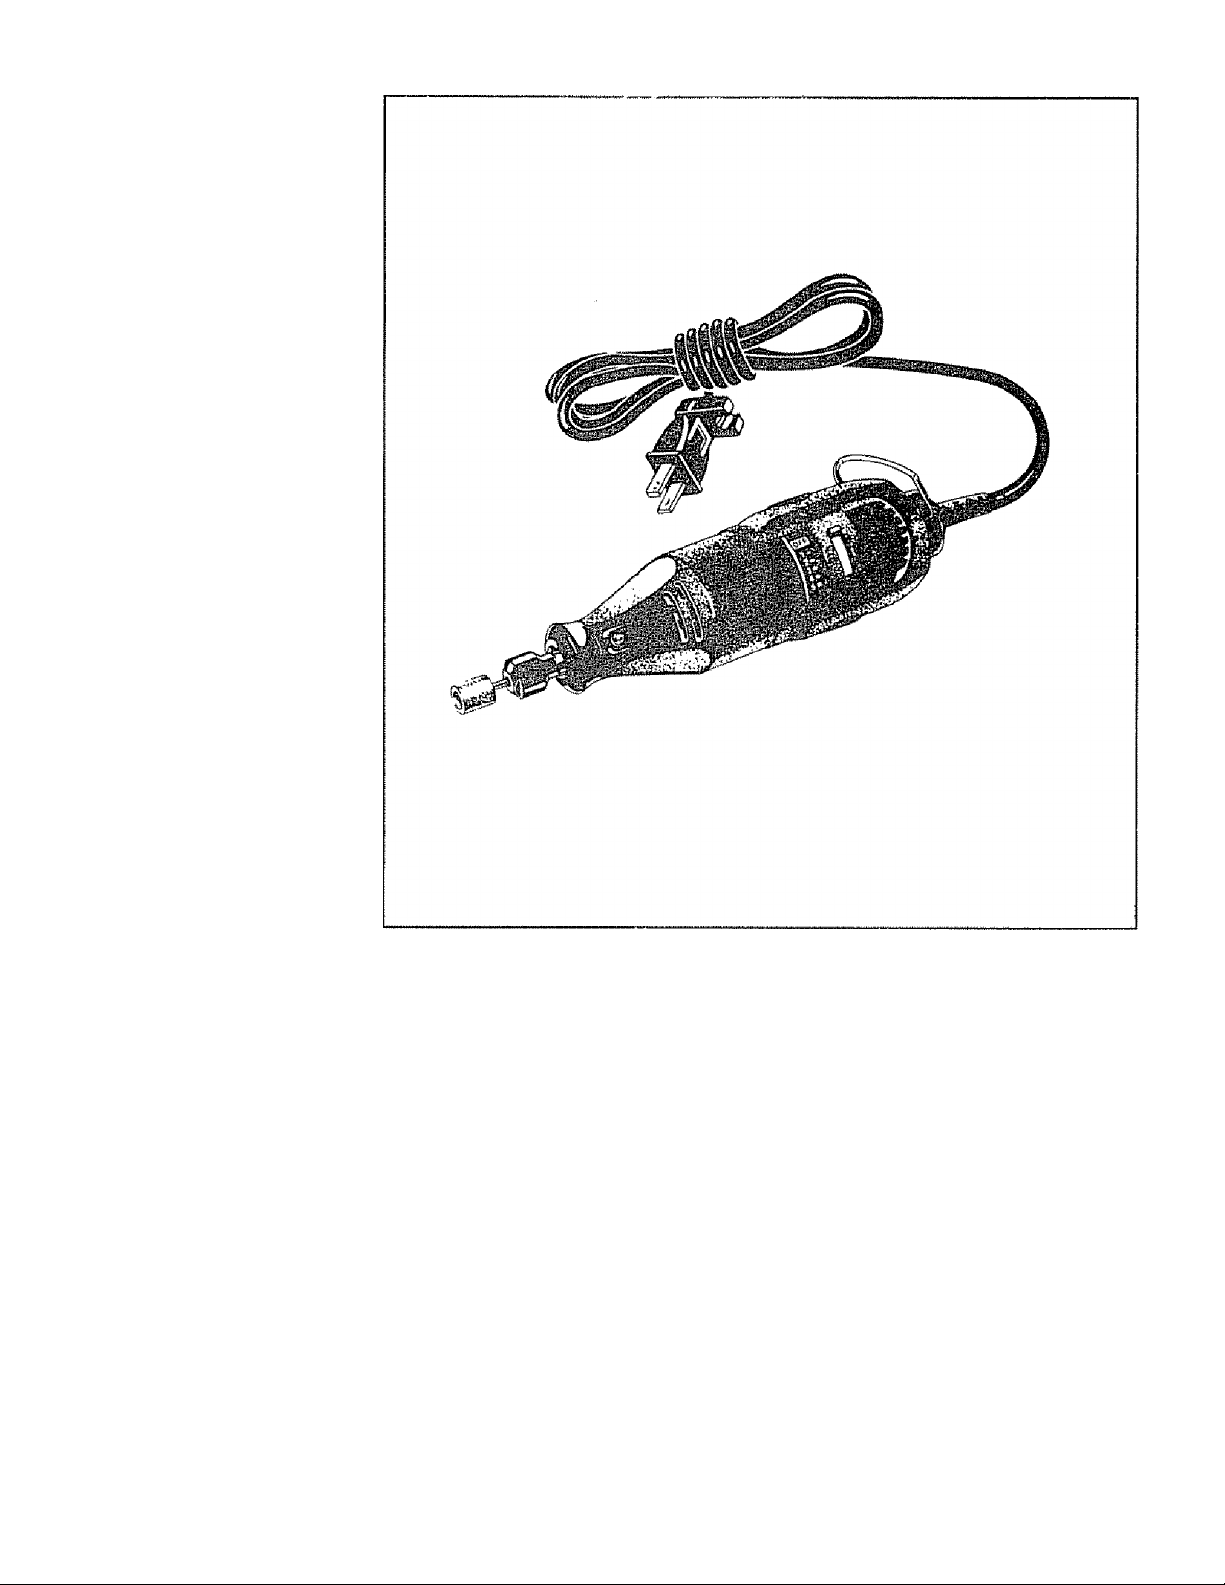
WARNING:
For your own safety,
read your owner’s
manual before
operating your
rotary tool.
MODEL
NOS.
572.610520
572.610530
&
572.610720
FOFtM NO 2610911273 2/S6
CiiFTS^ii.
ROTARY POWER TOOLS
Refer to your service diagram for specific warranty
information on your Craftsman Rotary Power Tool.
Consulte el diagrama de servicio para obtener
información específica de garantía para su
herramienta mecánica giratoria Craftsman.
¿Habla español? Ver página 7
® assembly ® operation ® maintenance ® repair parts
Sears, Roebuck and Co., Hoffman Estates. IL 60179 U.S.A.
PRINTED IN U,S A
Page 2

READ AND SAVE ALL THE FOLLOWING INSTRUCTIONS:
1. Keep work area clean — Ciuitered areas
and benches Invite Injuries
2. Avoid dangerous environment — Don't
expose tools to rain,, Don’t use power tools in
damp or wet locations. Don’t use power tools
in the presence of llammable liquids or gases
Avoid chemica! or corrosive environments,
Keep work area welt llt-
3- Guard against electric shock — Prevent
body contact with grounded surfaces For
example: pipes, radiators, refrigerator
enclosures
4* Keep children away — Do not let visitors
contact tool or extension cord All visitors
should be kept away from work areas
5. Store idle tools — When noi in use, tools
should be stored in dry, and high or locked-up
place — oul of reach of children,
6. Don’t force tool — It will do the job better
and safer at the rate for which It was intended
7. Use right tool — Don’t force small too! or
attachment !o do the job of a heavy-duty tool.
Oon 1 use tool for purpose not intended —™ for
example — don’t use circular saw for cutting
tree limbs or logs
8. Dress properly — Do not wear loose
clothing or jewelry. They can be caught in
moving parts Rubber gloves and non-skid
footwear are recommended when working
outdoors Wear protective half covering to
contain tong hair
9.. Use safety glasses — Also use face or
dust mask if cutting operation is dusty
10- Don’t abuse cord — Never carry tool by
cord or yank it to disconnect from receptacle
Keep cord from heat, oil, and sharp edges.
When using electric tools, basic safety precautions
electric shock and personal Injury, Including the following:
11. Secure work — Use damps or vise to
hold work. It's safer than using your hand and
It frees both bands to operate tool.
12. Don't over-reach — Keep proper fooling
and balance at all times,
13. Maintain tools with care — Keep tools
sharp and clean for better and safer
performance. Follow instructions for lubricat
ing and changing accessories Inspect tool
cords periodically and. if damaged, have
repaired by authorized service facility. Inspect
extension cords periodically and replace if
damaged. Keep handies dry. clean and free
from oil and grease
14. Disconnect tools — When not in use,
before servicing, and when changing
accessories, such as blades, bits, cutters
15. Remove adjusting keys and wrenches
— Form habit of checking to see that keys
and adjusting wrenches are removed from
tool before turning it on
16. Avoid unintentional starting — Don’t
carry plugged-in tool with finger on switch. Be
sure switch is off when plugged in,
17. Outdoor use extension cords —^ When
tool Is used outdoors, use only extension
cords Intended for use outdoors and so
marked
18. Stay alert — Watch what you are doing.
Use common sense. Do noi operate tool
when you are tired. Don’t use power tools
after taking drugs, alcohol or medications
19. Do not alter or misuse tool — These
tools are precision built. Any alteration or
modification not specified Is misuse and may
result in a dangerous condition-
should always bs followed to raduce the risk of lire,
20. Avoid gaseous areas — Do not operate
portable electric tools in gaseous or explosive
atmospheres Motors in these tools normally
spark, and the sparks might ignite fumes
21. Check for damaged parts — Before
further use of the tool, check for damaged
parts Check for alignment of moving parts,
binding of moving parts, breakage of parts,
mounting, and any other conditions that may
affect its Operation A part that is damaged
should be properly repaired or replaced by an
authorized service center before further use
of the toot Have defective switches replaced
by an authorized service center. Do not use
tool it switch does not turn it on and off,
22. Your tool Is double insulated — And no
grounding Is necessary The tool is equipped
with a two wire cord and two prong plug
which can be used in standard 120 volt
A.C. outlets- Use only identical
replacement parts when service is
required.
23. Polarized piugs ~ Your tool is equipped
with a polarized plug (one blade Is wider than
the other), this plug wilt fit in a polarized oultet
oniy one way If the plug does not fit fully in
the outlet, reverse the plug If it sti does not
fit, contact a qualified electrician to install the
proper outlet. To reduce the risk of electric
shock do not change the plug in any way,
24. Extension cords — An undersized cord
will cause a drop In line voltage, resulting in
loss of power and over-heating Use 18
gauge or heavier cord. NOTE: The smaller
the gauge number, the heavier the cord
(Extension cords are available)
25. WARNING: Use of damaged cords can
shock, bum or electrocute.
READ AND SAVE ALL THE PRECEDING INSTRUCTIONS
MAINTENANCE OF REPLACEABLE BRUSHES
Models 572 610520,572 610530 & 572 610720
The brushes should be Inspected frequently
when tools are used corttinuously. If your tool
runs sporadically, loses power, makes
unusual noises or runs at a reduced speed,
check the brushes To continue using the tool
in this condition will permanently damage
your tool
CURVED END OF BRUSH
With the cord unplugged, remove the brush
caps one at a time with a small screwdriver by
rotating cap counter-clockwise and check
each brush-
If the brush is less than 1/8" long and the end
surface of the brush that contacts the
commutator is rough and/or pitted, they
should be replaced Check both brushes
Usually the brushes will not wear out simul
taneously. If one brush is worn out, replace
both brushes Make sure the brushes are
installed as illustrated. The curved surface of
the brush must match the curvature of the
commutator,
After replacing brushes the tool should be run
at no-load; place it on a clean surface and run
it freely for 5 minutes before loading (or using)
the tool- This wi!i allow the brushes to “seaf
properly and will give you more hours of life
from each set of brushes. This will also
extend the total lite of your tool since the com
mutator surface will "wear" longer.
BEARINGS - Rotary Tool Nos,. 572.610520,
572.610530 & 572,610720 have double ball
bearing construction. Under normal use
neither type requires additional lubrication.
CAUTION:
Any servicing of this tool (Excluding brush re
placement for Models 572.610520,
572 510530 & 572 610720) should be
performed by an authorized service
representative
IMPORTANT!
Use of any accessories or attachments other
than those supplied by Sears may be
hazardous
Page 2
Page 3
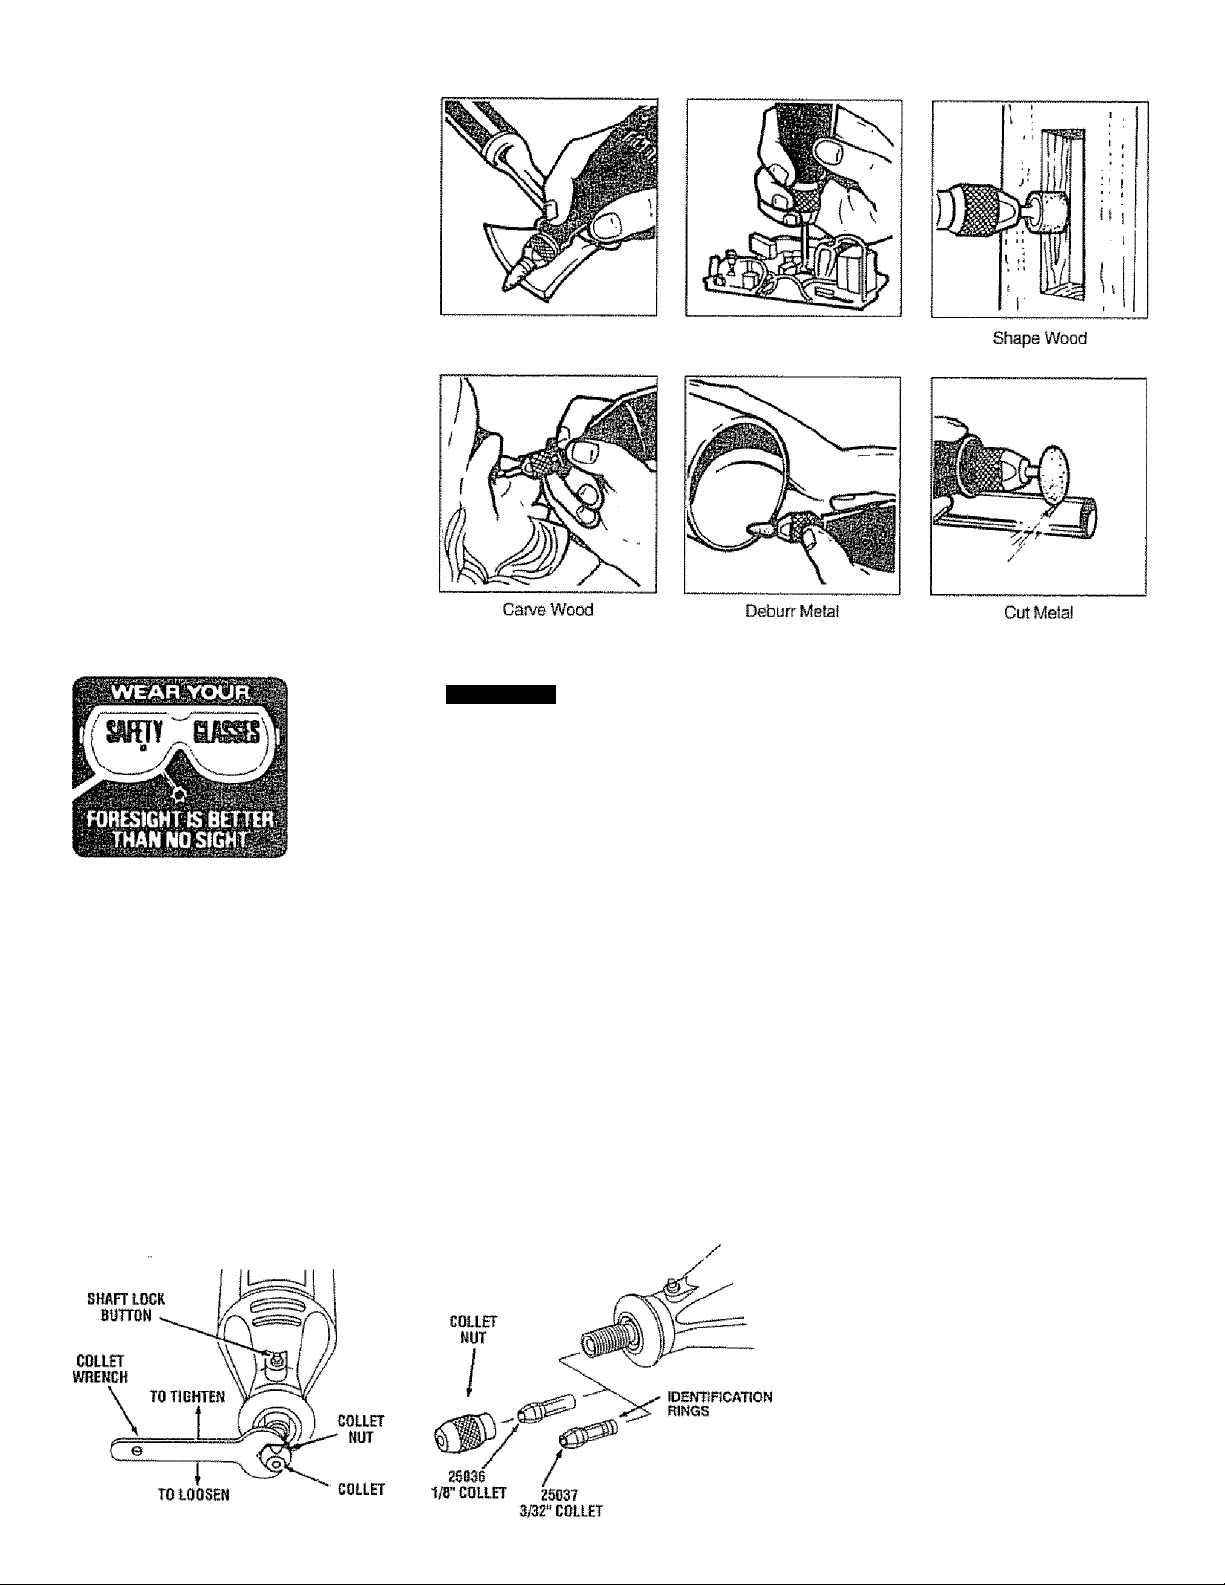
Here are examples
of what a SEARS
Craftsman tool can
do...
A, WARNING
objects being thrown Into the eyes, which can
result in severe eye damage. Always wear
safely glasses or eye shields before com
mencing power tool operation, We
recommend Wide Vision Safety Mask for use
over spectacles or standard safety glasses
Whenever you hoid the tool, be careful not to
cover the air vents with your hand. This blocks
the air flow and causes the motor to overheat
A WARNING
sories, changing collets or servicing your
rotary tool.
COLLET — To loosen, first press shaft iock
button and rotate the shaft by hand until the
lock engages the shaft preventing further
rotation.
The Operation of any power
tool can result in foreign
Always unplug rotary tool
before changing acces
Sharpen Tools
Do not engage (octc while the Rotary Tool Is running.
With the shaft lock engaged use the collet
wrench to toosen the collet nut if necessary.
Change accessories by inserting the new one
into the collet as far as possible to minimize
runout and unbalance. With the shaft lock
engaged, finger lighten the collet nut unlit the
accessory shank is gripped by the collet Avoid
excessive tightening of the collet nut. The
coliei system is a superior method of securing
accessories-
COLLETS " Two different size collets (see
illustration), to accommodate different shank
sizes, are available for your Rotary Tool,. To
Install a different collet, remove the coHel nut
and remove the old collet. Insert the unslotted
end of the collet in the hole in the end of tfje
tool shaft.. Replace collet nut on the shaft
Always use the coliet which matches the
shank size of the accessory you plan to
use. Never force a larger diameter shank into
a collet.
COLLCT iDENTIFlCATlON SMART — Collel sizes can
be identified by the rings on lha back end of collet
1/32' Collet has one (1) ririg
1/1B' Collet has two (2) rings
3/32’ Collet has threa (3) rings
1/8” Collet has no rifigs
Precise Drilling
BALANCING ACCESSORIES — For
precision work, it is important that all
accessories be in good balance (much the
same as the tires on your automobile), To true
up or balance an accessory, slightly loosen
collet nut and give the accessory or collet a 1/4
turn- Retighten collet nut and run the Rotary
Tool- You should be able to tell by the sound
and fee! If your accessory is running in
balance,. Continue adjusting in this fashion
until best balance is achieved To maintain
balance on abrasive wheel points, before each
use, with the wheel point secured in the collet,
turn on the Rotary too! and run the Dressing
Stone lighfiy against the revolving wheel point.
This removes high spots and trues up the
wheel point for good balance.
meter. Rotary Tool's high speed can cause
larger wheels to fly apart and could cause
injury.
SAFETY ^— Protect your eyes when grinding
or routing with the Rotary Tool .always wear
an approved type of safety glasses
Remember, your new Sears Rotary Tool is the
finest power tool of its kind. But its
performance is, .only as, good as the
accessories with which It is used- We
recommend only Sears accessories be used.
Use of any other accessories may create a
hazard. We hope you’ll enjoy many years of
trouble free pleasure from your Sears
Craftsman Rotary Power Too!
Do not Use grinding
wheels over 1" in dia
Pag© 3
USE ONLY RECOMMENDED
w Cw w'CJ w i* I
Page 4
Craftsman
Rotary Power
Tool
The Rotary Tooi is a handful of high-speed
power !t serves as a carver, a grinder,
polisher,
more
The Rotary Tool has a smali, poweriul elsclrfc
motor, is comfortable in the hand, and is
made to accept a large variety of accessories
including abrasive wheeis, drill bits, wire
brushes, polishers, engraving cutters, router
bits, and cutting wheels Accessories come irt
a variety of shapes and permit you to do a
number of different jobs. As you become
familiar with the range of accessories and
their uses, you will learn just how versatile the
Rotary Tool is. You'll see dozens of uses you
hadn't thought of before now
The real secret of the Rotary Tool is its speed.
To understand the advantages of Its high
speed, you have to know that the standard
portable electric driit runs at speeds up to
2,800 revolutions per minute. The Rotary Tool
operates at speeds up to 30,000 revolutions
per minute The typical eiectric drill is a iowspeed, high torque too!; the Rotary Tool is just
the opposite - a high-speed, low torque tool
The chief difference to the user is that in the
high speed tools, the speed combined with
the accessory mounted in the collet doss the
work. You don’t appiy pressure to the tool, but
simply hold and guide it In the iow speed
tools, you not only guide the toot, but also
apply pressure to it, as you do, for example,
when drilling a hole
It is this high speed, along with its compact
size and wide variety of special accessories,
that makes the Rotary Tool different from
other power tools The speed enables it to do
jobs low speed toots cannot do, such as
cutting hardened steel, engraving glass, etc.
Getting the most out of your Rotary Tod Is a
matter of learning how to let this speed work
for you
Using the
Rotary Power
Too!
Read the next seciions carefully They will
help you use your Rotary Tool correctly and
help you Select the correct accessory for your
job
..The first step in learning to use the Rotary
Tool is to get the "feel" of it. Hold it in your
hand and feel Its weight and balance. Feet the
taper of the housing. This taper permits the
Rotary Tool to be grasped much like a pen or
pencil
When you turn on the tool for the first time,
hold it away from your lace. Accessories can
be damaged during handling, and can fly
apart as they come up to speed This is not
common, but it does happen
Practice on scrap materiats first to see how
the Rotary Tooi cuts. Keep in mind that the
work is done by the speed of the tool and by
the accessory in the coitet. You should not
lean on or push the tool into the work
Sander, cutter, power brush, dril! and
Instead, lower the spinning accessory lightly
to the work and allow it to touch the point at
which you want cutting (or sanding or etching,
etc) to begin. Concentrate on guiding the tool
over the work using very iittie pressure from
your hand- Allow the accessory to do the
work-
Usually, it is best to make a series of passes
with the tooi rather than attempt to do all the
work In one pass To make a cut, for example,
pass the tool back and forth over the work,
much as you would a smali paint brush Cut a
little materiai on each pass until you reach the
desired depth. For most work, the deft, gentle
touch is best With it, you have the best
control, are less likely to make errors, and will
get the most efficient work out of the
accessory.
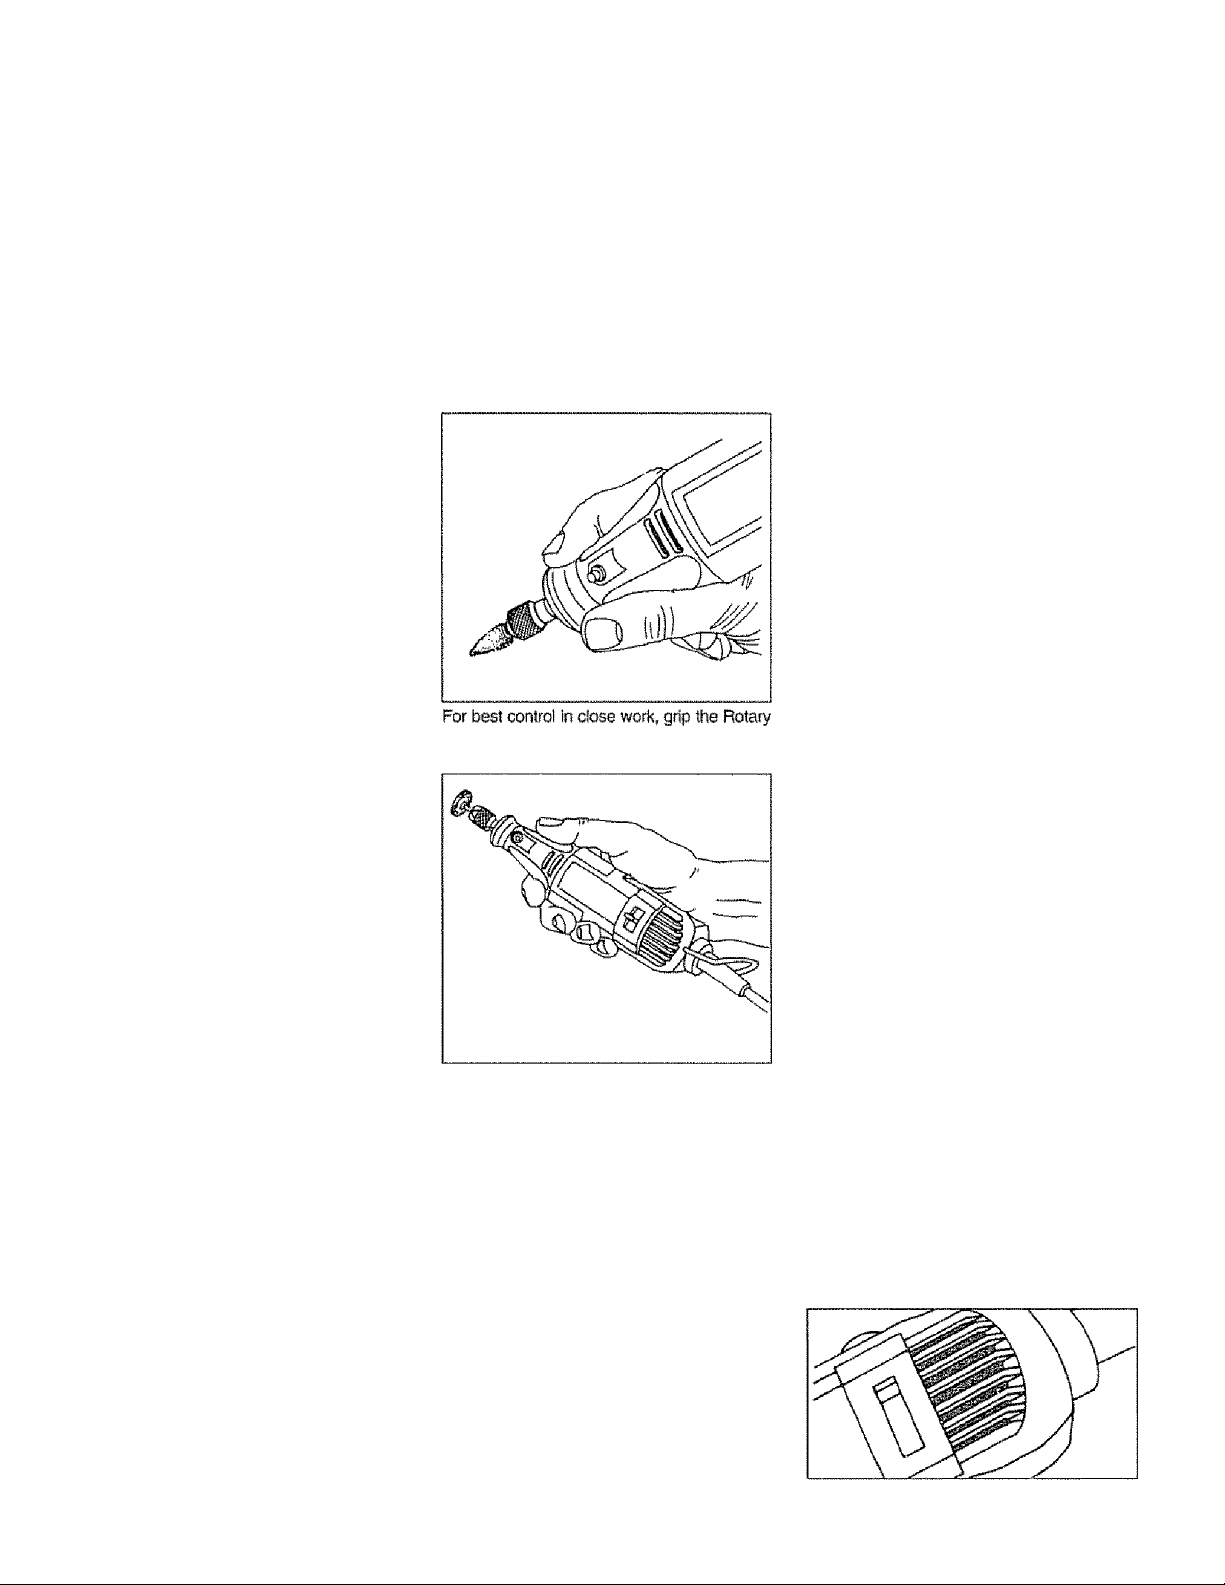
Tooi like a pencil between your thumb and
forefinger.
This is the "handgrip" method of holding the
tool used for operations such as grinding a flat
surface or using cutoff wheels.
SitIWftHNJNGi
speed cutters or tungstett carbide cutters,
always have the work securely clamped.
Never attempt to hold the work with one
hand while using any of these
accessories. The reason is that these
wheels will grab if they become slightly
canted in the groove, and can kfckback
causing loss of control resoiting in
serious injury. Your second hand should
be used to steady and guide the hand
holding the took When a cutoff wheel
grabs, the wheel itself usually breaks.
When the steel saw, high speed cutters or
tungsten carbide cutter grab, it may Jump
from the groove and you could lose
control of the tool
When using the steel
saws, cutoff wheels, high
Page 4
Operating Speeds
& Accessories
Set the speed indicator to fit the job; to
achieve the best job results when working
with different materials, the speed of the
Rotary Toot should be regulated. Only a full
wave output speed control such as the Sears
Model 2514 {available from catalog only)
should be used with the Model 572.610520,
Models 572.610530 & 572.610720 Rotary
Tools have an integral speed control and an
external speed control should never be used
with these tools
Xa eibJjSir'i this AAHf ctAAisH fAf oqaK IaK fictA
I iw* It Iw sJyill WjFiiWww ICi? iJww CA
practice piece of material. Vary speed to find
the best speed for the accessory you are
using and the Job to be done
There are three basic types of Rotary Tools:
single speed, two-speed and variable speed
models On the single speed model, there is
an ON-OFF switch. When the switch is on,
the tool runs at 28,000 RPM On the twospeed-mode!, there Is a LO and H! switch.
When the switch indicator Is on the low
setting, the tool runs at about 20,000 RPM.
When the switch indicator is on the high
setting, the tool runs at about 30,000 RPM,
On the variable speed model, there is a
switch indicator with a white line on it. Slide to
the number on the housing to select the
operating speed needed from 5,000 - 30,000
RPM You can refer to the charts on page 5 to
determine the proper speed, based on the
material being worked and the type of cutter
Of other accessory being used These charts
enable you to select both the correct acces
sory and the optimum speed at a glance
If you have a single-speed or two-speed
model, you will be able to use many
accessories to do a wide assortment of Jobs.
For the majority of applications, ai) models of
the Rotary Tool should be used at top speed
Needs for Slower Speeds
Certain materials, however, (some plastics,
for example) require a retativeiy slow speed
because at nigh speed the friction of the tool
generates heat and causes the plastic to meit
Slow speeds (15,000 RPM or iess) usually
are best for polishing operations employing
the felt polishing accessories. They may also
be best for working on deticate projects as
"eggsry" work, delicate wood carving and
fragile model parts You should always do
polishing with wire brush accessories at
slower speeds and never higher than 15,000
RPM
Higher speeds are better for carving, cutting,
routing, shaping, cutting dadoes or rabbets In
wood
Hardwoods, metals and glass require high
speed operation, and drilling should also be
done at high speeds
The speed of the Rotary Tool is cortlrolled by
setting this indicator on the housing,
a
Page 5

The Settings for Approximate Revaiuiions Per
Minute Rotary Toof Variabie Speed Model
672610530
To aid you in determining the optimum
operational speed for different materials and
different accessories, we have constructed a
series of tables that appear on page 5 By
Switch Setting Speed Range
1
2
3 12,000-17,000 RPM
4
4,500- 8,000 RPM
9,000-11,000 RPM
18,000-24,000 RPM
5 25,000 - 30,000 RPM
referring to these tables, you can discover the
recommended speeds for each type of
accessory Look these tables over and
become familiar with them,
Ultimately, the best way to determine the
correct speed for work on any material is to
practice for a few minutes on a piece of scrap,
NOTE: Speed is affected by voltage
changes. A reduced incoming voltage wilt
slow the RPM of the tool, especially at the
lowest setting,. If your tool appears to be
running slowiy increase the speed setting
accordingly.
The point to remember is this; You can do the
great majority of work with the single speed at
its regular speed of 2S.OOO RPM But for
certain materials and types of work, you need
slower speeds ~ which Is the reason the
variable speed models were developed
QDIPC 111 QcTTIlk||^Q * Speed for light cuts, caution burning on deep grooves.
O» Cod»# OC 1 1 t Dependifig on cutting direction, relative to grain.
STOCK
NUMBER
SOFT
WOOD
evert after referring to the chart You can
quickly learn that a slower or faster speed is
more effective just by observing what happens
as you make a pass or two at different speeds.
When working with plastic, for example, start
at a slow rate of speed and increase the speed
until you observe that the plastic is melting at
the point of contact Then back the speed off
slightly to get the optimum working speed
Some nilfis of thumb in regard to speed:
1 Plastic and materials that melt at low
temperatures should be cut at low speeds.
HARD
WOOD
LAMINATES
PLASTIC
HIGH SPEED CUTTERS
53101 5 5 1 3
25014,53102 5
3 2
STEEL ALUMINUM,
SRASSi ВТО»
2 4
1-2 2
2, Polishing, buffing and cleaning with a wire
brush should be done at speeds below
15,000 RPM to prevent damage to the
brush,
3 Soft wood should be cut at high speed
4 Iron or steel should be cut at top speed il
using tungsten carbide accessory, but at
slower speeds if using high speed steel
cutters If a high speed steel cutter starts to
chatter — this normally means it is running
too slow
5 Aluminum, copper alloys, lead alloys, zinc
alloys and tin may be cut at any speed,
depending on the type of cutting being
done Use paraffin or other suitable
lubricant on the cutter to prevent the cut
material from adhering to the cutter teeth
Increasing the pressure on the tool is not the
answer when it is not cutting as you think It
should Perhaps you should be using a
different cutter, and perhaps art adjustment in
speed would solve the problem. But leaning on
the too! seldom helps
SHELU CERAMIC
CaLASS
STONE I
26012,53070 5
53103. 25011
2S008
2S0l8 4
53074,53075
53076
25034 1
.................................1..........
«íbU-cO
25Ô24, 53000
531 ОТ, 53100,
53111, 53095, 53096
53090, 63091 5
53092
53078
2504Э, 25046
26057
2S0S8
53079, 53080
25062
25063
S3071, 52072, 53104 4
5 3 2
5 2
5 5 2
2 I 1-2
SMALL ENGRAVING CUTTERS
5
5*
5* ! 3* i 4 i 2
RUBBER POLISHING POINT
1
......................t... 2..............
CUTTING ACCisSORIES—SEE WARNING PAGE 7
5 5
HIGH SPEED ROUTER BITS
3 3
3 2*
5*
5 2*
ALUMINUM OXIDE GRINDING STONES
SILICON CARBIDE GRINDING STONES
1
I
— —p 1 :¡ 1 i............................................................ 2
TUNGSTEN CARBIDE CUftERS
4 1
5 5 1
3 5
2 2
1-2 1-2
2
5 1 4 ! 4 I 3
1 1 i 1 ^
S
1
1
1
1-2 1-1
1
1 1
1-2121 1-2
2 3
2 3
2
3
1-2
1
I
i
j
1-3
1-1
1-1
1-1
j I 2 ! 1 j 2 I 2
...................1.......1..........
Page 5
Page 6

Rotary Tool Accessories
The number and variety of accessories for the
Rotary Tool are almost limitless. There is a
category suited to almost any job you might
have to do — and a variety of sizes and
shapes within each category which enables
you to get the perfect accessory for every
need
Collets
If you expect to use a variety of accessories,
we recommend that in the beginning you
purchase a complete set of four coliels. Store
these so that you will have the proper size of
coiiet for any accessory or drill bit you want to
use. Currently, the No. 25036 1/8" and No25037 3/32" collets accommodate all of the
available Sears accessories,
Mandrels
A mandrel is a shank with a threaded or
screw head, and mandrels are required when
you use polishing accessories, cutting
wheels, sanding discs, and polishing points
The reason mandrels are used is that sanding
discs, cutting wheels and similar accessories
must be replaced frequently The mandrel Is a
permanent shank, allowing you to replace
only the worn head when necessary, thus
saving the expense of replacing the shaft
each lime.
crr|iB>
Screw Mandrel No. 5308S
This Is a screw mandrel used with the felt
polishing tip and felt polishing wheels.
C
=o
Small Screw Mandrel No. 25028
This is a mandrel with a small screw at Its Up,
and is used with emery cutting wheels,
sanding discs and polishing wheels
High Speed Cutters
Available in many shapes, high speed cutters
are used in carving, cutting and slotting In
Wood, plastics and soft metals such as
aluminum, copper and brass. These are the
accessories to use for freehand routing or
carving in wood or plastic, and for precision
cutting
Tungsten Carbide Cutters
These are tough, tong-lived cutters for use on
hardened steel, Bred ceramics and other very
hard maferiais- They can be used for
engraving on tools and garden equipment
Smalt Engraving Cutters
This group has a wide variety of sizes and
shapes, and are mads for intricate work on
ceramics (greenware), wood carvings, jewelry
and scrimshaw They often are used in
making complicated printed circuit boards,
They should not be used on steel and other
very hard materials but are excellent on
wood, plastic and soft metals Needs 3/32"
collet.
Aluminum Oxide Grindirtg Stones
Round, pointed, fiat — you name the shape
and there is one available in this category.
These are made of aluminum oxide and
cover virtually every possible kind of grinding
application, Use them for sharpenirtg lawrt
mower blades, screwdriver tips, knives,
scissors, chisels and other cutting tools. Use
to remove flash from metal castings,
d8burring_ any metal after cutting, smoothing
welded joints, grinding off rivets and removing
oist, In machine shops, high speed drills and
cutters normally are ground with aluminum
oxide wheels
Silicon Carbide Grinding Stones
Tougher than aluminum oxide points, these
are made especially for use on hard materials
such as glass and ceramics. Typical uses
might be the removal of stilt marks and
excess glaze on ceramics and engraving on
glass
Polishing Accessories
These include an impregnated polishing point
and an impregnated poiishing wheel for
bringing metal surfaces to smooth finish; a felt
polishing tip and felt polishing wheel, and
cioth polishing wheel, all used (or polishing
plastics, metals, jewelry and small parts. Also
included in this group is a polishing
compound (No. 2S031) for use with the felt
and doth polishers
Polishing points make a very smooth surface,
but a high luster is obtained using felt or cloth
wheels and poiishing compound.
No polishing compound is needed when
using the 25034 Polishing Wheel
Aluminum Oxide Abrasive Wheels
Use to remove paint, deburr metal, polish
stainless steel and other metais Available in
fine and medium grtts
Sanding Accessories
Sanding discs in fine, medium and coarse
grades are made to fit mandrel No. 25028,
They can be used for nearly any small sanding
fob you might have, from mode! making .to, fine,
fumilure finishing. In addition, there is the drum
Sander, a tiny drum which fits Into the Rotary
Tool and makes It possible to shape wood,
smooth fiberglass, sand inside curves and
other difficult places, and other sanding Jobs
You replace the sanding bands on the drum as
they become worn and lose their grit Bands
come in fine and coarse grades
cn=c(^|
О
Wire Brushes
Three different shapes of wire brushes are
available For best results wire brushes
should be used at speeds not greater than
15,000 Rpy, They remove rust from tools
and other metal surfaces, and clean and
burnish metal parts Use for such jobs as
cleaning electrical connections to assure
good conduction
Bristle Brushes
These are excellent cleaning toots on
silverware, jewelry and antiques. The three
shapes make it possible to get Into tight
corners and other difficuit places. Bristle
brushes can be used with polishing
compound for faster cleaning or polishing
MWARNiNà
least one minute before using wheel.
During this time no one is to stand In front
or in line with the brush, do not run in
excess of 15,000 RPM.
Cutting Wheels
These thin discs of emery or fiberglass are
used for slicing, cutting off and similar
operations Use them for cutting off frozen
boll heads and nuts, or to resloi a screw head
which has become so damaged that the
screwdriver won’t work in It. Fine for cutting
8X cable, small rods, tubing, cable and
cutting rectangular holes In sheet metal.
ilïWARNIN,Gi
cutters or tungsten carbide cutters,
always have the work securely clamped.
Never attempt to hold the work with one
hand while using any of these
accessories. The reason is that these
wheels will grab if they become slightly
canted In the groove, and can kickback
causing loss of control resulting in
serious Injury. Your second hand should
be used to steady and guide the hand
holding the tool. When a cutoff wheel
grabs, the wheel Itself usually breaks.
When the steel saws, high speed cutter or
tungsten carbide cutter grab, it may Jump
from the groove and you could lose
control of the tool.
Allow brushes to run at
operating speed for at
When using steel saws,
cutoff wheels, high speed
Pages
Page 7

incendio, sacudidas eléctricas y lesiones personales, incluyendo las sigulentesí
LEA Y GUARDE TODAS LAS INSTRUCCIONES SIGUIENTES:
1. Mantenga limpia al ares de trabajo — Las áreas y me
sas desordenadas invitan a que se produzcan accidentes
2. EüüB ios sniamos peligrosos — Mo exponga las tioframientes a !a ¡iuvia No uliBcs herramientas mecánicas en
iugares húmedos o mojados. Mo utilice iiarramisntas me
cánicas en presencia de líquidos o gasas inflamables. Eviie
los entornos en que haya productos químicos o qua sean
corrosivos Mantenga eí área de trabajo bien Iluminada
3 Pfoíéjase contra ias sacinlifias eíéctricas ~ Evite si
contacio del cuerpo con tes superifcies conectadas a
tiería. Por ejemplo: tuberias. radiadores y refrigeradores
4, Mantenga alejados a ios niños — No permita que ios
visitantes toquen la herramienta o el cordón de extensión
Todos tos visitantes deban marslenersa alejados de tes
áreas de trabajo.
S- Buartle las herramleirtas qae no eslá usando—Cuan
do las herramientas no se estén utilizando, deberán
guardarse en un lugar seco, aito o cerrada — (gara del
slcanoB de los niños
B, No tuerce la herramleiiiB — La herramienta hará sí tra
bajo mejor y con más seguridad a la capacidad para te cual
lue diseñada
7. Uiflics la beframiepta adecauda — No iueree una lierramienia pequeña o un accesorio pequeño a realizar si
trabajo de una herramienta pesada No utilice te berramiente para funciones para ias cuales tro lue diseñada —por ejemplo, no usa una sierra clrcutar para cortar ramas o
troncos de árboles.
8.I Vrsiasi sdecuodamenie — No se ponga ropa suelte ni
joyas Pueden quedar atrapadas en las piezas móvites Se
recomienda utilizar guantes de caucho y calzado ani)deslizante cuando se trabaja a la inteinparfe. Use cubiertas
protectoras para el pelo a fin de sujetar el pelo largo
9,, Uss gafas de seguridad — Use también usm careta o
una máscara conlra el polvo si ia operación de corte gene
ra polvo
ia. Nfl abase de! cardón — Nunca lleve la herramienía por
el cordón ni tire de él para desconectarlo del lomacorfisnte
Proteja el cordón del calor, e! aceito y tos bordes afilados
11. Pije la pieza ds trabaja — Utilice abrazaderas a un
lomilio de carpintero para sujetar la pieza da trabajo Es
más seguro que utilizar 1a mano y libera ambas itiattos
para manejar la íterramlenía
12. No intente alcanzar demasiado Isjas Manlsnga
urra posición y un equfflhríQ adecuados ert todo momenlo
13 Mantenga las herraraletrías eqn suidado — Conserve
tes tierramtontas afiladas y limpias para que funcionen
mejor y con mas seguridad Sipa las mstrucciones de lubri
cación y de cambio de aoeesrrrios Inspeccione periotficamenía los cordones de la harrarnierste y si están dañados,
hágalos reparar par un centro de servicio autorizado, inspeceiorte periódlcamento tos cordones ds extensión y
sustiiúyalos si están dañados Mantenga los mangos
secos, ¡impíos y libres de aceite y grasa
14., Descongele tas heíramlenias — Cuantío no se estén
tiiszanda, antes del servicio de ajustes y reparaciones y aJ
cambiar accesorios taies como hojas, brocas y cortadores
15- Quite tas ttavas de ajuste y fas (laves de apriete —
Forme e! hábito de asegurarse de que ¡as lavas de ajuste y
de aprieto se han quitado de !a herramienta antes de
encenderla
16 Evtfe s| arranque no Intencionado — No fievs la
herrarniente enchufada con el dedo en si irtterruptor Ase
gúrese de que ei mlerruptor eslá apagada cuando (a
herramienta está enchutada
17 A ta intemperie, utilice cordortes de extensión —
Cuantío la herramienía se utiliza a la intemperte, use tmicamente cordones de extensión diseñados para la utili
zación a te tatotrrpetie y marcados para ese propósito
18. Marttsngase alerta — Fíjese en fo que está haciendo
Use 8! santido común No utilice la herramienta cuantío
esté cansado No utilice herramientas mecánicas después
de lomar drogas, aícohoi o medícaraenlos
19.. No altera nt haga usa Inoorrecto de ia harramierila
— Estas herramientas están fabricadas con precisión
Cualquier ailaración o modificadón no especificada consíiluve Ш1 uso incorrecto y puede dar lugar a una situación
peligrosa
Al tilílizar herramíenlas eléctricas, siempre se deberán tomar
precauciones de seguridad básicas para reducir el riesgo de
20. Evile las áreas de jases — No ulice herramientas
eléctricas portátiles en atmósferas gaseosas o explosivas
Los motores de estas herramientas normalfiiente produ
cen chispas y las chispas pueden dar lugar a la ignición de
vapores.
21, Camprnebe si hay piezas dañadas — Antes d® volver
a utilizar la herramienta, compruebe si hay piezas dañadas.
Veriíiqua la aiineaclón de las piezas móviles, ia sujeción de
las piezas móviies, la ruptura tí# pieas, e( móntele y cuai-
quier aira situación que pueda afectar su iuncianannfónto
Una pieza que presenta daños debe ser reparada o
sustituida adecuadamente en un centro de servicio auto
rizado antes de seguir utilizando ia herramienta Haga que
cambien los interruptores tíaISGtuosos ert un centro de
servicio autarizado No uíiiics !a herramienta si al interrup
tor no la enciende o apaga
22, La herramienta cuenta con alslamieiito dalle ■— Y
tro es necesario conectarla a tierra La henamienta está
equipada con un cordón de dos alambres y un enchufe de
dos terminales que se pueden ufitízar en iamacBrrfentBS
estándar de 120 vollfas A C Util tea únleamanfa plazas
da repuesto idártficas cuando se nacesife realizar
SBriílKio de raparaalones,
23, Enchutas polarizados — La (terramlenla está equi
pada con un enchufe polarizado {una tarmirsal es más
ancha qua la ofraj. Este enehufe entrará an un tomacorrleníe polarizado solamente tía una manera Si ei
enchufe no entra por completo eti eí tomacarrianle. déie la
vueiía. Si sigue sin entrar, póngase en contacto con un
electricista oompetenta para instalar el tomacorrienfe
adecuado Para reducif si riesgo de sacudidas eléctricas,
rio haga ningún cambio en ei enchufe
24. Cordones de exiansfón — Un cordón da tamaño
msuficianle causará una caída de tensión de linea, dando
lugar a pérdida de potencia y racalantamianto Utilice un
cordón ds calibro 18 o más grueso ROTA: Cuanto más
pequeño as el número da calibre, más grueso es a)
cordón {Hay cordones de extensión disponibles.)
25. ADVERTENCIA — La utilización de cordones dañados
puede producir sacudidas eléctricas, quemar o electro-
cu lar
LEA Y CONSERVE TODAS LAS INSTRUCCIONES ANTERIORES
MAHTIRHVflEKTO DE ESCOBILLAS REEMPLAZABLES
Modelos 572 610520,572 61053D y 572 610720
Sa deberán inspeccionar las escobillas frecueiuamente
cuando las herramientas se utilicen de manera continua. Si
ia herramienta es utilizada espafádícamente, pierde paten
cia, hace ruidos extraños o funciona a velocidad reducida,
revise las escobiltas. El seguir utilizando ia herramienta en
este estado la dañará de manera permanente
EL EXTREMO CUBWOOE
LAESCDaiLLADÉBECOINCIDiR
CONIACURUATURADELA
CAJAPRQTECTORA
ESGQBtUA
MUELLE OE
I iWr-f /
ESCOBILLA
CURVATURA DE LA
CAIA PROTECTORA
TAPA DE U
ESCOBílLA
Con e! cordón desenchufado, saque las tapas de escobilla
una a una con un destoffiillatíor pequeño girando la lapa
en sentido contrarío al de las agujas del reta} y revise cada
escobilla
Si la escobilla tiene una lonoítud inferior a 1/8' y la super(fctg del extremo de la escobilla que hace contacto con el
conmutador está ásjrera y/o corroída, se deberá cambiar
Revise ambas escobillas. Normalmente, las escobilías no
S8 desgastarán simultánsarnonte- S¡ una escobilla está
desgastada, cambie ambas escobiilas Asegúrese de que
las escobillas se instalan tal como se muestra en (a ilus
tración La superficie curva de !a escobilla debe coincidir
con la curvatura det conmutador.
Después de cambiar las escsblitas, se deberá hacer
íunctonar la herramienta sin carga; colóquda sobre una
superficie limpia y hágala funcionar tlbrernento durante
5 minutos antes ds someter a carga {o utiiizar) la herramíenta Esfo parmitirá que las escobifías se asienten
adecuadamente y haré que caria juego de escobillas pro
porcione muchas más horas de servició. Esto también
prolongará la vida total de la herramienta, ya que te super
ficie del conmutador lardará más en desgastarse
RODAMIENTOS — Las lisrramionlas mocánioas gira
torias Has. 572.610520 572.61053D y 572,.810720 tienen
una coRstrucctón da todamleníos de bolas dables. Con
una uttnzación normal, ninguno de estos tipos tsquiero
tubrisación aflistonsl-
Pàgina 7
PREGAÜCION;
Todo e! servicio do ajustes y reparaciones de esta herra-
mianta (excluyendo-e! cambio de-BSCoWílas paro-ios
modetos 572.610520 572 610530 y 572,610720} deberá
ssf realizado por un representante ¡fe servicio autorizado
jlMPORTANTEi
La utilteacióft da accesorios o aditamentos que no sean Sos
suministrados por Sears puede ser peligrosa
Page 8
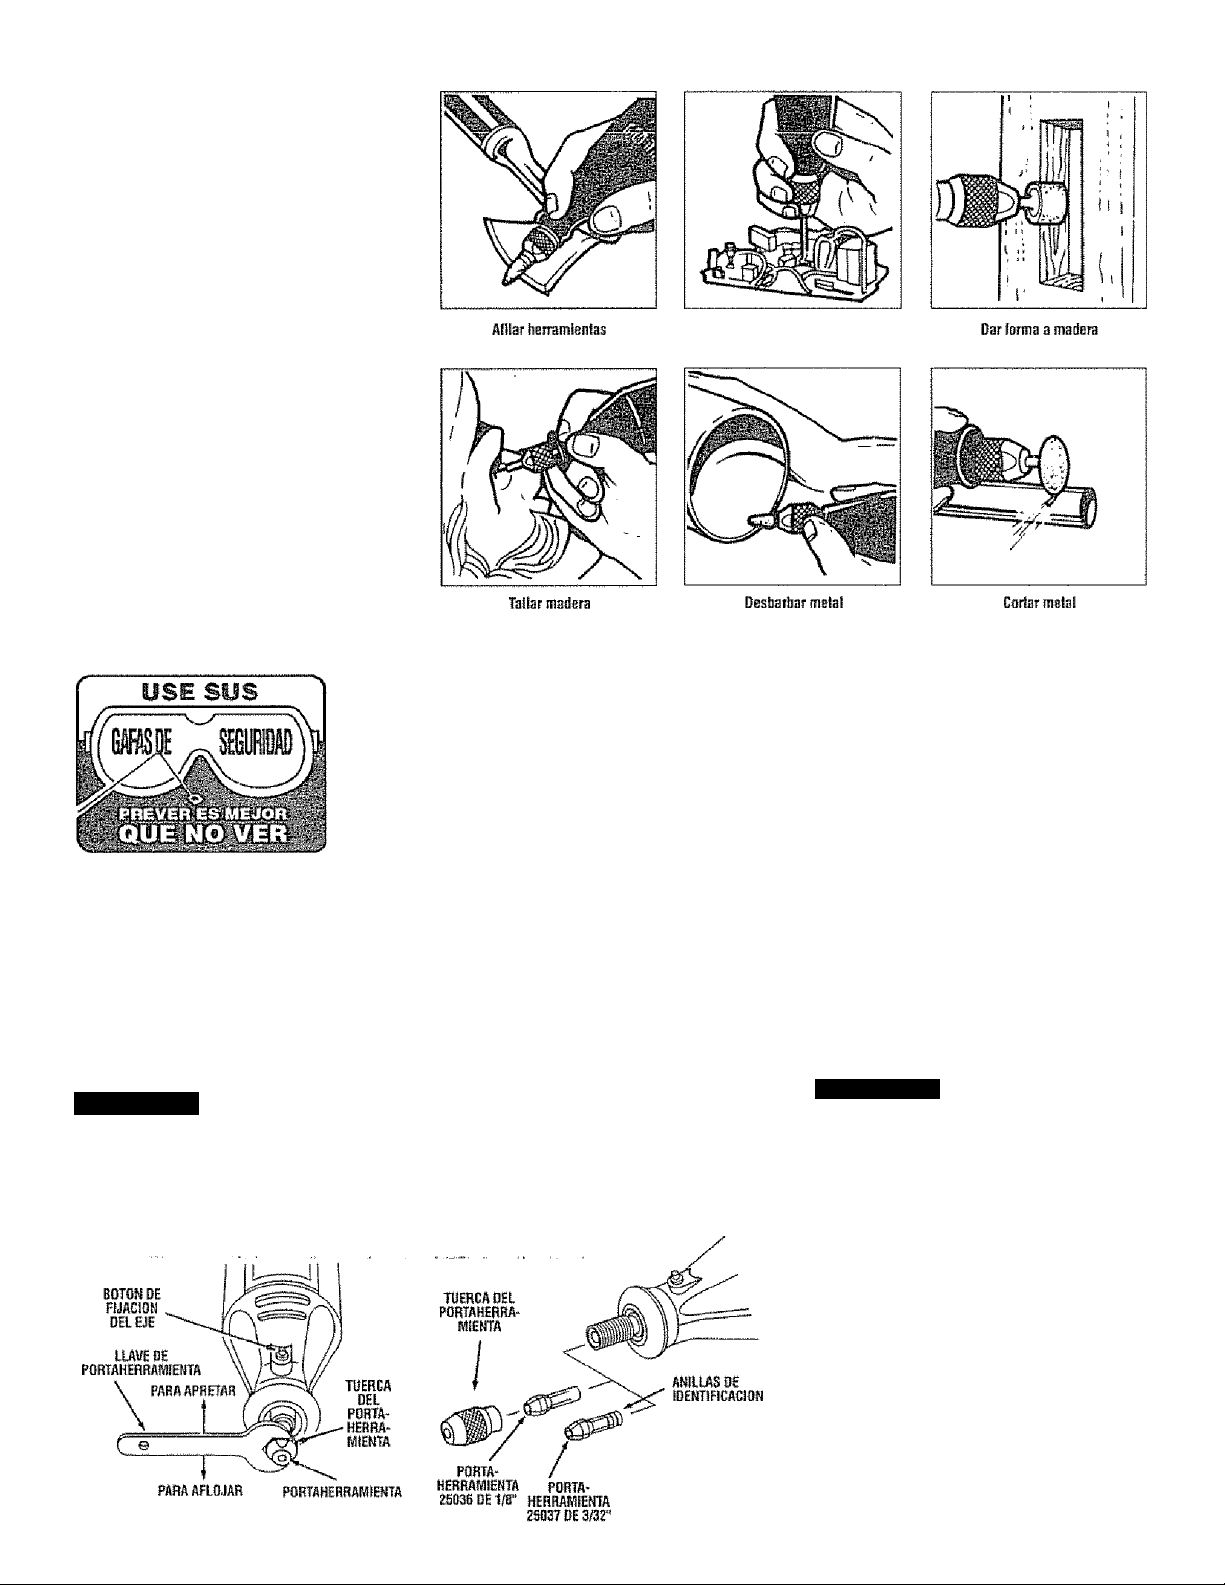
He aquí ejemplos
de lo que una
herramienta
Craftsman de
SEARS puede
hacer...
marcha,
Con b! cierre dei eje acoplado, utilice la liavi de poría-
herramlenta para aflojar te tuerca dei portatierramienta ert
caso de que sea necesario Cambie aGcesorJos iníroduDiendo el nuevo accesorio en e! portaherramienta hasta
donde se pueda para mlnlmHar el descefttrarnienlo y el
desequilibrlQ Con el cierre del eje acoplado, apriete la tuer
ca del portaherramienta con los dedos hasta que $1 porta-
»«ERItlíCIA
lugar a que objetos exlraños salgan riespadidos y caigan
en los ojos, lo cual puede tener como resuíladn lesiones
graves en los ojos, Use siempre gafas de seguridad o pro
tectores para los oíos antes de comenzar a hacer funcionar
la íierramienta mecánica RBComendaraos usar una más
cara de seguridad de amplia campa visual para utilización
sobre anteojos o galas de seguridad estándar.
Cuando aprre la berramienta, tenga cuidada de no cubrir
las aberturas de ventilación con la mano Esto bloquea el
flujo de aire y hace que el motor se recaüenie
i«6viai:ENil
cambiar accesorios, cambiar porlahcrramienlas o
Tsaliiar servicio de ajustes y reparaciones en ia
herramienta giratoria .
POflTAHERRAWÜENTA“ Para atlojarlo, Oprima primeto el
cierre det eje y gire el eje a mano hasta que el cierre acople
el eje. imptiendo así toda rotación posterior
Ei funcionamiento de cuaíquier
hetramieMa mecánica puede dar
Desenohufe siempre ia
herramienta giratoria antes de
herramienla agarre el cuerpo del accesorio Evite apretar
excesivamente ¡a tuerca del portaherramienta El sistema
de portaherramienta constituye un método excelente de
fijar accesorios
POBTAHERÍIAWHENTAS — Hay poflaherramíBntas de dos
tamaños distintos (vea la ilustración) disponibles para la
herraniienia giratoria con objeto de acomodar diíeremes
tamaños de cuerpo. Para instalar un portaherramienta dis
tinto, saque ia tuerca del portaherratrtienla y quite el portaherramiertla viejo Introduzca ei extremo no ranuratio dei
poítaherramienta en el agujero que se encuentra al final del
CUADRO DE iDENTIFICACiON DE RORTAHERRARliEMTAS — Los tamañas de portaherramienta se pue
den identificar por medio de las anillas que se encuentran
en e! extremo posterior del portaherramienta
a poilaherramísnta de 1/32' tiene (1) anilla
a portaherramienta tfa 1/1 S‘ tiene (2) anillas,
a portaherramienta de 3/32‘ tiene j3) anüias
Ei portaherramienta de 1/8' no tiene aniíiss
Taladrar ШП precisión
No acopie ol cierre misníras la
herramienta giratoria está en
eje dé ta herramienta Vuelva a colocar ia tuerca dei porta-
hBrramíerrta en el eje. Uülica siempre el partaherramianta
que correspanda ai lamais risi cuerpo del accesorio que
usted piensa utilizar. Nunca intente introducir a la tuerza
en un portaherramianta un cuerpo de diámetro más grande
que el que pueda aceptar dicho portaherramienta
EQUILIBRADO OE ACCESORIOS — Pata realizar trabaja de
precisión es importante que todos tos accesorios se sn-
cuertlren bien equibrados jde iranera muy parecida a tas
gofítas do su automóvi!) Para nivelar o equilibrar un acce
sorio. afloje iigerameníe la tuerca del portaherramienta y
haga girar el accssorio o el portaherramienta 1/4 de vuelta
Vuelva a apretar 1a tuerca dei portaherramienta y pDtsga en
marcha la herramierrla giratoria. Ei sonido y !a sensación
del accesorio deberán perniílírie saber si este está funcio
nando ds manera equiiibrada. Siga realizando ajustes de
esta manera hasta lograr el mejor equilibrio Para mantener
equilibradas tas fresas abrasivas, antes de cada ulilizadón.
can la fresa fijada de manera segura en el portaherrafflienta, encienda la herramienta giratoria y haga tuncionar
ia piedra de reacandlcionamiento apoyándola ligeramente
contra la fresa que gira Esto quita las partes que sobre
salen y niveia la fresa para que ésta queda bien equilibrada
Rd utlIíGs ruedas do amalar de
velocidad de ia herramienta giratoria puede hacer que
las ruedas mas grandes se rompan y salgan despedidas,
piídlendo causar lesiones.
SESUBIMD - Protéjase le$ ojos al amolar o fresar con la
herramierría giratoria . use siempre urras gafas de
seguridad de tipo aprobado
Recuerde, su nueva herramíenla giratoria de Sears es la
mejor herramienta mecánica de su dase Pero su rendi
miento sólo es tan bueno como los accesorios con íos que
se Utiliza, Recomendaffios que únicamertle se utilicen acce
sorios de Sears La utilización de cualquier otro accesorio
puede constituir on peligro. Esperarnos que ia herramienta
mecanioa giratoria Craftsman ds Sears le patitsita disfrutar
ds muchos años de saüsfacciótt sin problemas
mas da 1" de diametro. La alta
Página 8
USE UNICAMENTE
ACCESORIOS RECOMENDADOS
Page 9

no debe apoyarse sobre la hiframienta ni empujarla para
Herramienta
mecánica giratoria
Craftsman
La herraítiienla girasoria pone en la mano del usuario po
tencia a alta velocidad Sirve de (altadora- amoladora, puüdora. üladora, cortadora, capillo mecánico, taladro y más
La herramienta giratoria tiene un pequeño y potente motor
fliéctfico, se agarra cómodamente con ia mano y está he
cha para aceptar una amplia variedad de accesorios,
incluyendo ruedas abrasivas, brocas taladradoras, cepillos
de alafnbífl, pulidores, cortadores para grabar, brocas para
fresar y ruedas de corle Los accesorios vienen en íormas
diversas y te permiten a usted realizar varios trabafos diísrentes A medida que se vaya ísmillsrizando con la gama
de accesorios y sus usos, irá dándose cuenta de ta gran
versatilidad de ta herramienta giratoria Oescubrlfá dacenas de usos en los que no liabía pensado hasta ahora
El verdadero secreto de la herramienta gitaloria es su vetocidad Para entender las veníalas que ofrece su alta velo
cidad, usted te de saber que el taladro eléctrico portátil
estándar luncíona a velocidades de hasta 2,800 revolu
ciones por minuto. La herramiarita giratoria funcioria a
veiocidacles de hasta 30.000 revoluciones por minuto El
taladro eíéctrico típico es una herramienta de baja valocldad y par motor alto; la herramienta giratoria es justo lo
contrario •“ una herramienta de altó velocidad y par motor
baio La diferencia principal para el usuario es que en las
iierramierttas de alta velocidad, la vetocldad combinada
cotr el accesorio montado en el portaherramtenta realiza el
trabaio Usted no tiara que ejercer presión sobre la herra
mienta, sino simplemente sujetatla y guiarla En las herra
mientas de baja veiocidad, usted no soto lietie que guiar (a
herramienta, sino que además tiene que ejercer presión
sobre ella, tal como lo hace, por ejempio, al taladrar un
agujero
Esta alta velocidad, junto con su tamaño compacto y am
plia gama de accesorios especiales, es lo que hace que la
harramtebia giratoria sea distinta a otras herramientas me
cánicas La velocidad pertnile que la herramienta haga tra
bajos qua las herramientas de baja velocidad no pueden
hacer tales como corlar acero lemplado, grabar vidrio, etc
El sacar el mayor provecho a ta herramienta giratoria es
cussltón de aprender cómo dejar que la velocidad haga el
trabajo para ustsci
que entre an la pieza de trabajo
En vez de hacer esto, haga descender lentamente hasta la
pieza «e trabajo el accesorio mientras éste gira y deje que
toque e! punto en el cual usted quiere qua eotnienoe el
corte (o lijado o grabado, etc) Concéntrese en guiar te he
rramienta sobre la pieza de trabajo elsrdendo muy poca pre
sión con la mano De|0 que eí accesorio reaífco el trabajo
Normalmente, es mejor realizar una serie de pasadas con !a
herramienta en vez de intentar hacer todo eí trabajo en una
sola pasada Por ejemplo, para realizar un corte, pase la
hsrrafflíenta hacia adatante y hacia atrás sobre la pieza ds
Irabaj!) de manera muy parecida a eotriQ lo haría con una
brocha pequeña Corte un poco de material en cada pasada
hasta que llepue a (a prolutídldad deseada Para ia mayoría
de los trabajos, es mejor uiiitear un toque hábil y suave
Cofl éste, usted lagra el mejor control, reduce las posibili
dades de cometer errores y logrará que el accesorio realice
el trabajo de la manera más eíte posible
Para tener mejor control al realizar trabajo lino, agarre la
herramienta giratoria como un iápiz entre eS dedo pulgar y
g| dedo írtdice
Utilización de
la herramienta
Este as el método de “agarre'' para sujetar la lisíramíenla
mecánica giratoria
Lea las siguientes sBccíones cuidadosamente Le ayudarán
a utilizar la herramiertta giratoria correctamente y a seíecciemar el accesorio correcto para el trabajo que usted de
sea realizar
Erprimer psó para aprender a utilizar la herramienta gira
toria consiste en acostumbrase a la herramienta Téngala
an la mano y 8:<per¡meme la sensación que producen su
peso y equilibrio Toque la parte cónica de ta caja protec
tora Esta parle cónica permite agarrar la herramienta gira
toria de manera rauy parecida a como se agarra iwa pluma
o un lápiz
Cuando encienda la herramienla por primera vez. sostén
gala aisjada de la cara Los accBsortos pusdsn resultar
dafíactos durante el transporte o ef manejo y pueden salir
despedidos ai gattar velocidad Esto no es común, pero si
sucede
Practique primero en materiales da desecho para ver cómo
corta la herramienta giratoria Tenga en cuenta que el tra
bajo es realizado por la vatocidad de la herramienta y por ei
accesorio que se encuentra en el portaherramienla Usted
utilizado en operaciones talas como el amolado de una
superíicie plana o la utilización de ruedas de recortar
imOVERTEfieiAi
alta vsÍBsIdad o corladores de carburo de Sungsleno.
tenga siempre ta pieza de trabajo fija cen abrazaderas
Nunca intente sujetar ta pieza de trabajo can una mano
cuando este utilizando cualquiera de estos accesorios
La razón es que estas ruedas se atascaran si se ladean
ligeramente en la ranura y pueden experimentar retro
ceso, causando una perdida de control que tendrá como
resutíado lesiones grases La otra mano se debe utilisr
para afianzar y gufar ia mano que sujeta ta herramienta.
Cuando una rueda de rocetlar se atasca, normalmente la
propia rueda se rompe. Cuando la sierra de acero, los
coriadorís de alta velocidad a el cortador de carburo de
tungstene se atascan, es pasible que sallen y se salgan
de la ranura, con te que usted podría perder el cenirol de
la tierramisnla.
Al utilizar sierras de acero, rue
das de recortar, cortadores de
Página 9
Velocidades de
funcionamiento
y accesorios
Ajuste el intíicacior de velocidad de manera adecuada para
el trabajo que se va a realizar; para lograr tos mejores resul
tadas al trabajar con materiales diferentes, se deberá
regular la veiocidad de te herramienta giratoria Con el mo
delo 572 610520 sólo se debe usar un conimi de velocidad
de salida de onda completa tal como el rnodelo 2514 de
Sears (dispontbie a través del catalogo unicamente), Los
modelos 572 610530 y 572 610720 de ía herramienta
giratoria tlenert üti control de veiocidad integrai y nunca se
deberá Utilizar un control de veioctóatí externe con estas
herramientas
Can objeto de seisccionar la velocidad correcta para cada
trabajo, uticfl una pieza de maieriat de práctica Varíe ía
velocidad a fin de encontrar ia mejor velocidad para el
accesorio que usted está utilizando y el trabajo que va a
realizar.
Hay tres tipos básicos de herramientas giratorias; modelos
de una sola velocidad de dos vetocitísdes y de veiocidad
variable En los modelos de una sola velocidad hay un
interruptor "ON-ОЕГ (de eneendido y apagado). Cuantía й
interruptor está sncendido. la herramienta funciona a
28,000 RPM En el mortalo de dos velocidades hay un
interruptof de ALTA y BAJA velacidad Cuando ei indicador
del interruptor se encuentra en la posición baja, la
herramienta funciona a unas 20,000 RPM Cuando ei
indicatiQr dei interruptor se encuentra en la posición aba. la
herramienta funciona a unas 30,000 RPM En eS modelo de
velocidad variable hay un indicador dei interruptor que tiene
una línea blanca sobre ét Desticelo hasta ei número de ía
caja protectora para seleccionar ia velocidad de functana-
fíi lento que se necesita desde 5.000 hasta 30,000 RPM
Puede consultar ios cuadros de ia página 10 para
detorniinar la velocidad adecuada basándose en eí material
en el que se está írabajando y eí tipo de cortador и otro
accesorio que se está uliiízantío Estos cuadros ¡e permiten
seleccionar de un vistazo tanto el accesorio correcto como
ia veiocidad óptima
Si usted tiene un murielD de una sola veiocidad э de dos
velGCltíades, podrá utilizar muchos accesorios para realizar
una gran variedad de trabajos Para la mayoría de tas
aplicaciones, todos los modelos de la herramienta giratotia
ítebefán utitorse a máxima velocidad
Necesidades de yelocidades más lentas
Sin embargo, ciertos matertalss (algunos plásticos, por
ejempio) requieren una velocidad relativamente lenta
porque a alta velocidad ia fricción de ia herratnienta genera
cafar y hace que e! plástico se funda
Las veiocidades lentas (15CQ0 RPM o menos) norraal-
menls son mejores para operaciones de pulido utilizando
los accesorios de pulir de íieílro Puede que también sean
mejares para trabajar en proyectos delicados tales como
trabajo de tallado de ’cáscaras de huevo“, tallado de ma
dera delicada y trabaja con piezas frágiles de modelos
Slerapre debe pulir con accesorios de cepio de alambre a
velocidades más tenias y nunca superiores a 15,000 RPM
Las velocidades más altas son mejores para tallar, corlar,
íresar, dar forma y cortar esquinas o rebajos en madera
Las maderas duras, tos metales y si vidrio requieren un
ttmeionamienlo a alta velocidad, y el taladrado también
dóberá realizarse a atlas velocidades
La velocidad de te herramienta giratotia se controla ajus
tando este irrdicador en (a caja protectora
Page 10

Las posìctones correspondlerrtes a revoluciones por mi
nuto apfosiimadas para la lìerramienla giratoria tnodelo
572 610530 de veiocidad varìable son:
Posición del IntemiptorIntervalo de velocidad
1 4,500- 8,000 RPM
2 9,000-11.000 RPM
3 12.000-17.000 RPM
4 18.000 “24.000 RPM
S 25,000-30,000 RPM
KDTA; Las cambios de tonstün afeetan a ia vslocldad.
Una tansián de entmda laduclda hará bajar las RM de
la henamletilB, especialmente en la posioián más baja
Si parece que la herramienta íunciana déspoto, saieccione una posición de veluoidad más alia de manera
correspandienle.
a punto que hay que resordar es tí slquleníe: Usted puede
reatlar la mayor parte de los trabajos can e) moctelo de una
sola velocidad funcionando a su wlocidad norma! de 28,000
FIPM Pero para ciertos materiales y tipos de trabajo usted
rreceslla velocidades más lentas ~ esta es la rsén por ts
cual fueron desairoilados tos modelos de veloeiflad variabte-
Para ayudarle a deíBímiriar la velocidad de funcionamisfito
ópiima para diferentes msteriates y dlslintQS accesorioB,
hemos preparado una serie de tablas que aparecen en (a
página S Consultando dichas tablas usted puede deter
minar las velocidades recomendadas para cada tipo de ac
cesorio Eche un vistazo a esías tablas y familiarícese con
ellas
En üilima instancia, ia mejor maneta de determinar la velo
cidad correcta pata realizar trabajo en cualquier fTiaterW es
practicar durante unos minutos utilizando una pieza de
desecho. Inciuso después de consultar ai cuadro. Usted
puede descubrir rápidamente que una velocidad más lenta
o más rápida es mucho más eficaz sirapSemente obser
vando qué pasa cuando usted realiza una o dos pasadas a
diferentes velocidades Por ejemplo, al trabajar con plás
tico comience utilizando un régimen bajo de welociclacl y
aumente la velocidad hasta que observe que el plástica se
está fundiendo en s! punto de contacto Luego, reduzca (a
velocidad íigsrameníe para obtener la velocidad da trabajo
ópiimaAlgunas reglas prácticas en cuanto a velosidad:
t E) piásiico y los materiales que se funden a bajas tem
peraturas deberán cortarse a velocidades bajas
2 El pulido, el bruñido y !a limpieza con un cepillo de
alambre deberán reaíizarsa a velocidades Infefiores a
15,000 RPM para evitar que el cepillo sufra daños
3 La madera blanda se deberá cortar a ate velocidad
4 El hierro o el acero se deberán cortar a máxima veloci
dad si se utiliza eí accesorto de carburo de itmgsteno,
pero a velocidades más lemas si se utilizan cortadores
de acero da alta velocidad Si un cortador de acero de
alta velacidatí comienza a vibrar niidosaraente — nor
malmente esto síQtsffica que está íuncionando dema
siado despacio
5 El aluminio, las aleaciones de cobre, las ateacíones de
plomo, tes aleaclattes da slna y el estaño se podrán
cortar a cualquier velocidad, según el tipo de corte que
se está realizando Aplique al cortador parafina u otro
luWcants adecuado para evitar que el material cortado
se adhiera a tos dientes del cortador
El aumetitar la presión ejercida sobre la herramienta no es
ia solución cuando ésta no corta corno usted cree que
debería hacerlo, Tal vez usted deberla utilizar utt cortadar
diferente y quizás un ajuste de ia velocidad salucionarta el
problema Pero el apoyarse sobre te fierramlenta raramente
ayuda
POSICIONES DE V
NUMERO DE
ARTICULO
S i 1 Sk FTi ’ tleíacírlsá вага caries ligeros; precaución de no quemar en ranuras profundas
MADERA
BLANDA
MADERA
DURA
t Según Ib tlJreccIün de corte respecto a la veta.
MATEfiíALE S t
UKíMADOS MUÍSHU
PUS'RCO [
CORTADORES DE ALTA VELOCIDAD
53101 5 6 3 2
25014, 53102 5 3 2 1-2 2
25012, 53070 S s 2 3 5
53103,25011 5 3 2 2 2
25008 5 5 2 1-2 1-2
£5
líiOUlO 4 2 1-2 2 2
CORTADORES DE GRABAR PEQUEÑOS
53074, 53075
5
5 1 4 4 3
DoUíb 5* 5* i 3> 4 2
PUNTA DE PULIR DE CAUCHO
..............
2S534 ——] ^ ¡ ^ 1 ^ f 2 ! T 1 1 1
ACCESORIOS DE CORTE — VEA LA ADVERTENCIA DE LA PAGINA 7
25026 1 5 ! 5 !
25024,5308Б 1 i 1 5
SI>r»*%*'Ni'rT;í3 íJiC. vr^íittiiV M > AS “ АЛ ifislmwMkl*
Г4Л1ПДП fííaííClACi
53094 3 3 1
53107,53108, 53109,
3 2*
53111.53095, 63096
53090, 53091
53092
5
5
5»
2* I
PIEDRAS DE AMOLAR DE OXIDO DE ALUMINIO
53078 1
25053
r(-¡ti^4'%'*l 62 e (PÑi L7
1
1
25057 1 1 1-1
2505B
1
' PIEDRAS DE AMOLAR DE CARBURO DE SILICIO ' ............................................ ’ .........................................
5307Э, 53080
25062
25063
CORTADORES DE CARBURO DE TUNGSTENO
53071,52072, 53104 4 4 1 2
S3073, 53105 5 S 1 2
ALUMINO,
LATON, ETC.
CAPARAZON/
PIEDRA
4
1 1
1
1
3
1-2 1-1
1-2 1-1
1 1-1
[ 2 1
1-2
1
3
3
1-3
CERAiyilCA I VIDRIO
1
j
i
i 1
2 2
1 2
1 2 1
1-2
Págirra 1(3
Page 11

Accesorios para la herramienta giratoria
Et número y fa diversidad de accesorios para la herra
mienta giratoria sor casi iiimitados Hay una categoría
adecuada para casi lodos los trabajos qua usted tenga que
realizar — y una diversidad de tamaños y íormas dentro
de cada categoría que íe permiten a usted obtener e¡ acce
sorio perfecto para cada necesidad
Ports hBrrsntisniss
Si usted piensa utilizar diversos accesorios, !e recomen
damos que iiiicialinente compre uo juego compieto ds cua
tro partaterramlentas fiuórdetos con objalo de tener ei
tamaño adecuado de porlaherramienta para cualquier
accesolo o broca taladradora que quiera usar En la actua
lidad los portaberamientas No 25036 de 1/8", y No 25037
de 3/32" acomodan todos los accesorios Sears disponibles
Piedras de amolar de óxido de aluirtífiio
Redondas, puntiagudas, planas — diga qué forma quiere y
habrá alguna disponible en esta categoría Estas piedras
están hechas de ónldo de atuminio y cubrerr prácticamente
todos tos tipos posibles de aplicaciones de amolado üil*
celas para afilar hojas de cortadoras de césped, puntas
de deslorniliador, cuchillos. tijeBS, cinceles y oíros herra
mientas de corte ütiücslas para quitar rebabas de piezas
metálicas furttíitlas, desbarbar cualquier metal después da
cortarlo, alisar juntas soldadas, amolar remaches y quitar
herrumbre En los talleres de maquinaria, normalmente las
brocas y ios corladores de aita velocidad son amoladras con
muelas de óxido de aluminio
Cepilles de alambre
Hay tres formas ditereníss de cepillos da alambre dis
ponibles Para obtener mejores resultados, los cepillos ds
afambre se deberán utilizar a velocidades no superiores a
15,000 RPM Estos cepülos quitan herrumbre de las
herramientas y otras superficies msíálicas, y limpian y
bruñen piezas metálicas Ulllícelos para trabajos taies
como la limpieza de conexiones eléctricas para asegurarse
de que ía conducción es buena
VásISQOs
Un vastago es una espiga con una cabeza roscada o de
tornillo, y se requíBren vastagos cuando se utitan acce
sorios para piítir, ruedas de corle, discos de lijar y puntas
de pulir La razún por la cua! se utilizan vásíagos es que los
discos de lijar, ias ruedas de corte y accesorios similares
deber! ser sustituidos Irecuentemenís El vástago ss una
espiga permanente que permite que usted cambie
ünicaments la cabeza desgastada cuando sea necesario,
por lo que se ahorra ei costo de sustituir ei eje cada vez
Piedras de amolar de carburo de silicio
Más duras que las puntas de óxido de aluminio, estas pie
dras están hechas especialmente para la utilización sn
materiales duros tales como vidrio y cerámica, Algunos
usos típicos podrían ser la remoción de marcas que sobre
salgan y e! exceso de esmalte en cerámica, y si grabar en
vidrio
czzi:|»>
Vastago de tornillo No. 53089
Este es un vastago ds torniilo utilizado con la pimía de
pulir de fieltro y las ruedas da pulir de fieitro
O
Vastago de torniilo pequeño Ko. 25028
Este es uti vastago con un tomillo pequeño en la punta y
se utiliza cotí ruedas de corte de esmerit, discos de lijar y
ruedas de pulir
Cortadores de alta velocidad
Disponibles en muchas formas, los cortadores de alta veíDcMad se ufilizan para tallar, cortar y ranurar madera,
plásticos y metalas blandos tales como aiumlnio, cobre y
latón Estos son tos accesorios que se han de utilizar para
realizar a pulso fresado o tallado de madera o piástico y
para realizar cortes da precisión
Cortadores do carburo de tuogsteno
Estos son cortadores duros y de larga duración para utización en acero templado. Geramtsa cocida en horno y
otros materiales muy duros. Se pueden utilizar para grabar
en herramientas y equipos ¡tí iardin
Cortadores de grabar pequeños
Este grupa de corladores abarca una amplia gama da tama
ños y termas, y tos talladores están hechos para realizar
irabajo complicado en cerámica (del tipo no cosido e«
horno), tafiados ert madera, joyas y tallados en marfil, ca
parazones de moluscos o barbas de ballena Se uiizati
frecuenlements para hacer piacas de circuitos impresos
complicados Ns se debsrt utilizar en acero ni en otros mate-
riaies muy duros, paro son excelenles en madera, plástico y
malBles blandos Macesitan un portaherramíenta de 3/32‘
Accesorios para pulir
Entra estos accesorios se encuentran una punte de pulir
impregnada y una rueda de pulir Impregnada para dar un
acabado liso a las superficies metálicas; una punta de pulir
de fleliro y una rueda de pulir de fieltro, y una rueda de pulir
de tela Todos estos accesorios se utilizan para pulir plásti
cos, metales, joyería y pequeñas piezas También se en
cuentra en este grupo un compuesto para pulir (No 25031)
para utilizar con los pulidoras de tiellra y de tela
Íes puntas de pulir dejan una superticlB muy lisa, pero se
obtiene un brio mayor utiiizando ruedas de fieltrcr o de
tela y compuesto para puiir
No se necesita eompuesto para pulir cuando se utiliza la
rueda de pulir 2S034
Ruedas abrasivas de óxido de alumiuia
Se utilizan para quitar pintura, desbarbar metal y pulir
acero inoxidable y otros mslaíss Disponibles con grano
fino y mediano
Accesorios para lijar
Los discos tíe lijar da grado tino, mediano y gruesa están
hachos para acopiarse en e! vastago No 25028 Se
pueden utilizar para casi todos ios trabajos pequeños de
lijado que usted tenga que realizar, desde la fabricación de
modatos hasta el acabado de muebles finos. Además, está
e! lijador de tambor, un diminuto tambor que encaja en la
herramienta giratoria y que hace posible dar forma a
madera, alisar libra de vidrio, lijar sn ef interior de curvas y
otros lugares difíciles y realizar otras trabajas de lijado
Cambíe las bandas de lijar del tambor a medida que se
vayar! desgastando y pierdan el grano Las bandas vienen
en grados finos y gruesos
O
Cepilles áe cerda
Estos cepillos constituyen excetantes herrarnisnlas para la
limpieza da objetos da plata, joyas y anügflsdades. Las tres
íormas hacen posibíe tener acceso a rincones estrechos y
otros lugares dificiies Los cepilios de cerda se pueden
utilizar con compuesto para pulir con objeto de lograr una
limpieza o pulido más rápido
1йШ|СпТСНС1А
toíiOiDhSmiBnto durante a! menos un minuto antes de
utlilzar la rueda. Durante este Iferapo nadie debe
simarse detenie del cepillo o en Ипва con osle Para
obtener rnejores resultados, no haga lunefonar la
herramisnia a mas de 15,000 RPÜ
RuBClos ós corts
Estos delgados discos de esmeril o de fibra de vidrio se
utilizan para retranar, corlar y operBCiones simíteres Utilí
celos para cortar cabezas de perno y tuercas agarrotadas o
para volver a ranurar una cabeza de torniilo que esté tan
dañada que no permita usar un dastornltlador. Buenas para
cortar cable SX, varillas pequeñas, tubería, cable, y para
cortar agujeros rectanguiaras en chapa maláiiea
alta vslocídad o cortadores de carburo de tungsteno,
tenga siempre lo pieza de trabajo fijada can abrazaderas
de manera segura Nunca intente sujetar la pieza de tra
bajo con una mano cuando este utilizando cualquiera de
estos acossorÍDs . La razón es que estas ruedas se atas
caran si se tadean Ügeramenle en la ranura y pueden
experimeSlBr fólrooéso, cáusáñdó tina perdida de odn-
IfoJ que íerttfra como reauitado lesiones graves. La otra
mano S6 debe utilizar para afianzar y guiar la mano que
sujeta la hertatnSeríía. Cuaitíto una rueda de recorlar se
atasca, normaímsnie !a propia ruada se rompe. Cuando
las sierras do acero, el coriador de alia velocidad o el
cortadar de carburo de tungsteno se atascan, es posible
que sailBfl y se salgan de la ranura, con lo que usted po
dría perder ot control de !s herramiertta
Deje que ios sepíhos eslen en
marcha a la velocidad de
Ai utilizar sierras de acero,
ruedas do recortar, corladores de
Página i 1
Page 12

For the repair of replacement parts you need
delivered directly to your home
Call 7 ©in *** 7 pm, 7 days a week
1-800-366-PART
(1-800-366-7278)
Para ordenar piezas con entreQa a
domicilio -1-800-659-7084
For in-house major brand repair service
Call 24 hours a day, 7 days a week
1-800-4-REPAIR
(1800-473-7247)
Para pedir servicio de reparación a
domicilio -1-800-676-5811
For the location of a Sears Parts and
Repair Center in your
Call 24 hours a day, 7 days a week
1-800-488-1222
When requesting service or
ordering parts, always provide
the following information:
• Product Type • Pari Number
* Model Number •» Part Description
Cuando solicite servicio o pida
piezas, dé siempre fa siguiente
información:
•Tipo de producto • Número de
«Número de modelo • Descripción de la pieza
America’s Repair Specialists
 Loading...