

Craftsman 50239 Operator's Manual
50239-0M
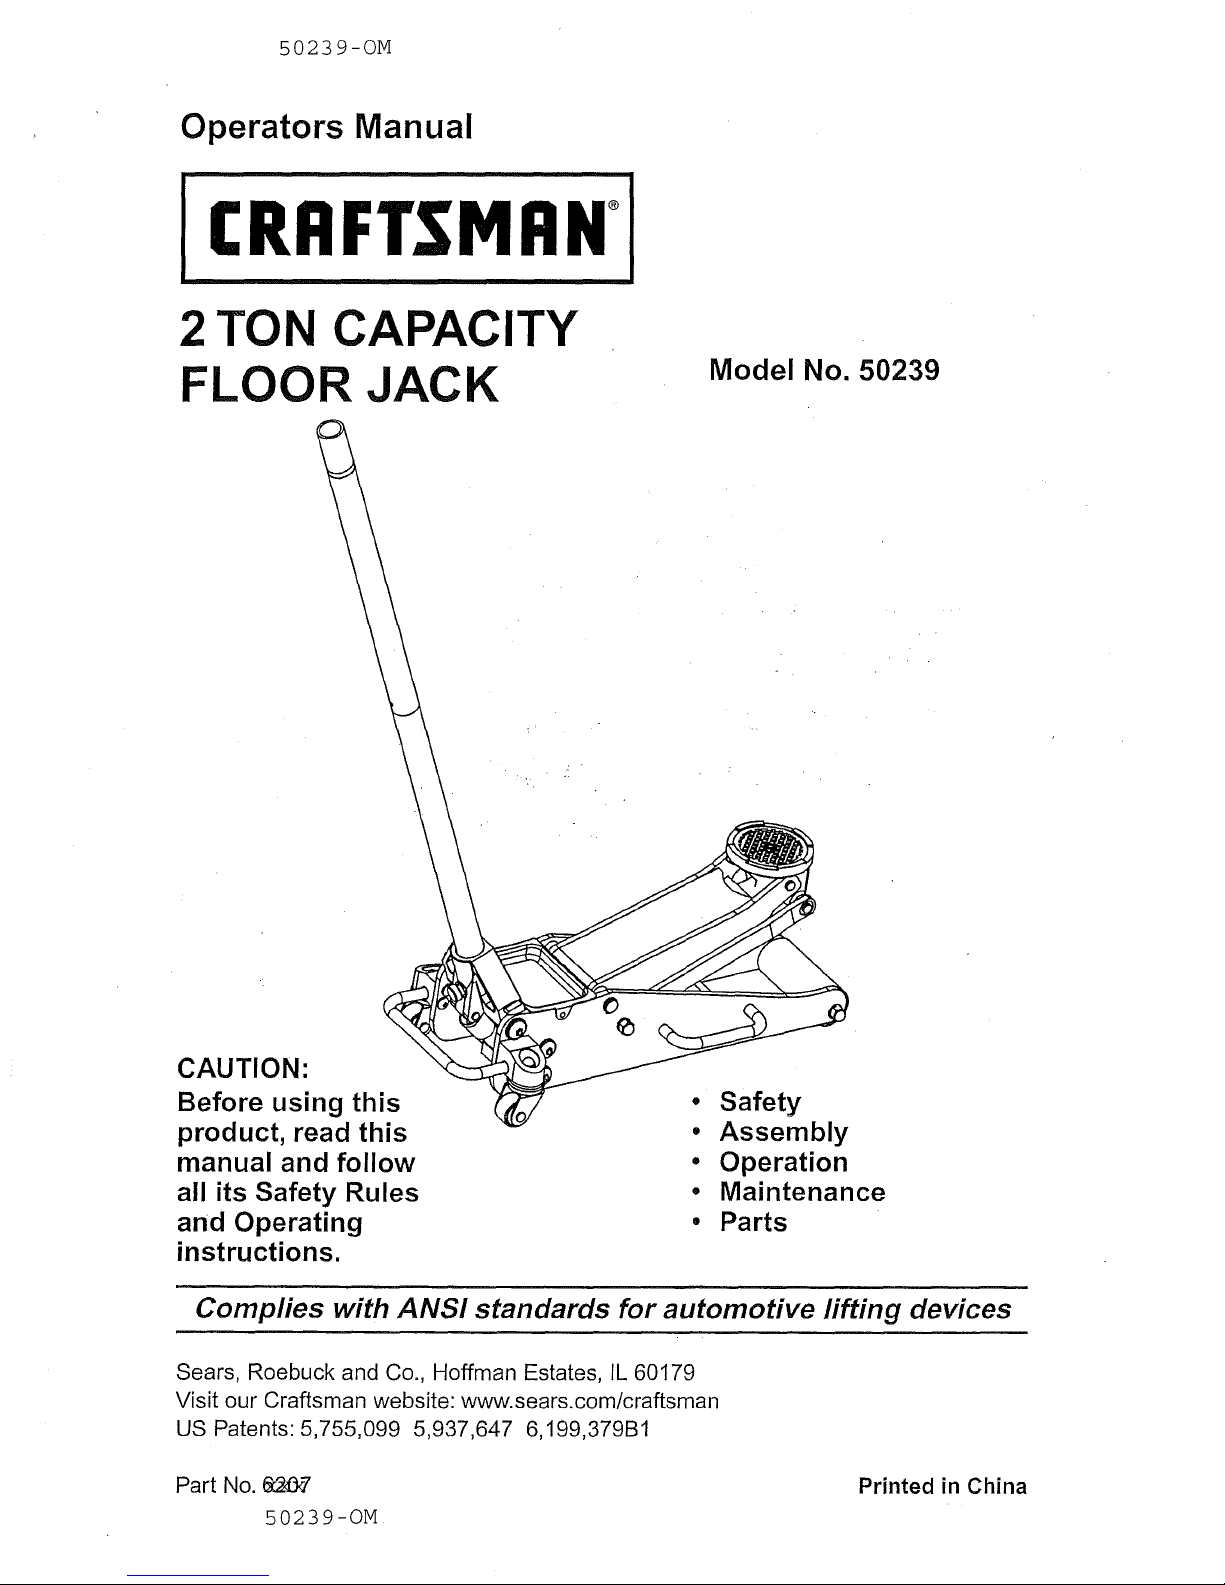
Operators Manual
(RRFTSMRH
2 TON CAPACITY
FLOOR JACK
Model No. 50239
CAUTION:
Before using this
product, read this
manual and follow
all its Safety Rules
and Operating
instructions.
• Safety
° Assembly
° Operation
° Maintenance
° Parts
Complies with ANSi standards for automotive lifting devices
Sears, Roebuck and Co., Hoffman Estates, IL 60179
Visit our Craftsman website: www.sears.com/craftsman
US Patents:5,755,099 5,937,647 6,199,379B1
Part No. e2_:7
50239-0M
Printed in China
Warranty ..... R 2
Save these instructions ..... R 2
Safety instructions ..... R 3
Assembly ..... R 3
Operation ..... R 4
Maintenance ..... R 5
Troubleshooting .....R 6
Parts ..... R 6
Service .....Back page
One Year Full Warranty on Craftsman Floor Jack
If within one year from date of purchase, this Craftsman floor jack fails due to a defect in
material or workmanship, return it to the nearest Sears store in United States and Sears
will replace it, free of charge.
If this floor jack is used for commercial or rental purposes, this warranty will apply for only
30 days from date of purchase.
This warranty gives you specific legal rights, and you may also have other rights which vary
from state to state.
Sears Roebuck and Co., Dept° 817WA, Hoffman Estales, IL 60179
For your safety, read, understand, and follow, the information provided with and on this
jack.
• The owner and operator of this equipment shall have an understanding of this jack and
safe operating procedures before attempting to use. The owner and operator shall be
aware that use and repair of this product may require special skills and knowledge.
Instructions and safety information shall be conveyed in the operator's native language
before use of this jack is authorized. If any doubt exists as to the safe and proper use of
this jack, remove from service immediately.
° Inspect before each use. Do not use if broken, bent, cracked, or damaged parts
(including labels) are noted. Any jack that appears damaged in any way, operates
abnormally or is missing parts, shall be removed from service immediately.
° If the jack has been or suspected to have been subjected to a shock load (a load
dropped suddenly, unexpectedly upon it), immediately discontinue use until jack has
beenchecked by a factory authorized service center. It is recommended that an annual
inspection be done by qualified personnel.
° Labels and Owner's Manuals are available from manufacturer (see PARTS section on
page 6).
2
WARNING
• Study, understand, and follow all
instructions with and on this device
before operating this device.
• Do not exceed rated capacity.
° Use only on hard, level surfaces capable
of sustaining rated capacity loads.
• Lift only on areas of the vehicle as
specified by the vehicle manufacturer.
• This is a lifting device only. Immediately
after lifting, support the vehicle with
appropriately rated vehicle stands.
• Never work on, under, or around a load
supported only by this device.
o Do not move or dolly the vehicle while on
the jack.
• No alterations shall be made to this
product.
° Failure to heed product markings or
warnings may result in personal injury or
property damage.
CAUTION BEFORE USING
Occasionally during shipment and/or
handling the hydraulic oil can become
unstable or air can get trapped in the
system, both of which can interfere with the
jacks lifting performance.
To stabilize the oil it is recommended to
cycle the jack a few times prior to putting
a load on it.
To release air from the hydraulic system:
° Open the release valve by turning the
jack handle counterclockwise, but
never by more than 1/2 full turns.
• Remove the air vent valve from the
cylinder. (see Fig. 4)
° Rapidly pump jack handle through
several full strokes.
° Replace the air vent valve into the
cylinder again and jack is now ready to
use.
BEFORE EACH USE
Make a visual inspection before each use
of the floor jack by checking for abnormal
conditions, such as cracked welds, leaks
and damaged, loose, or missing parts.
DAMAGE TO JACK
If you think jack has been subjected to an
abnormal load or shock, have it inspected
for damage at a Sears Service Center
before using it again.
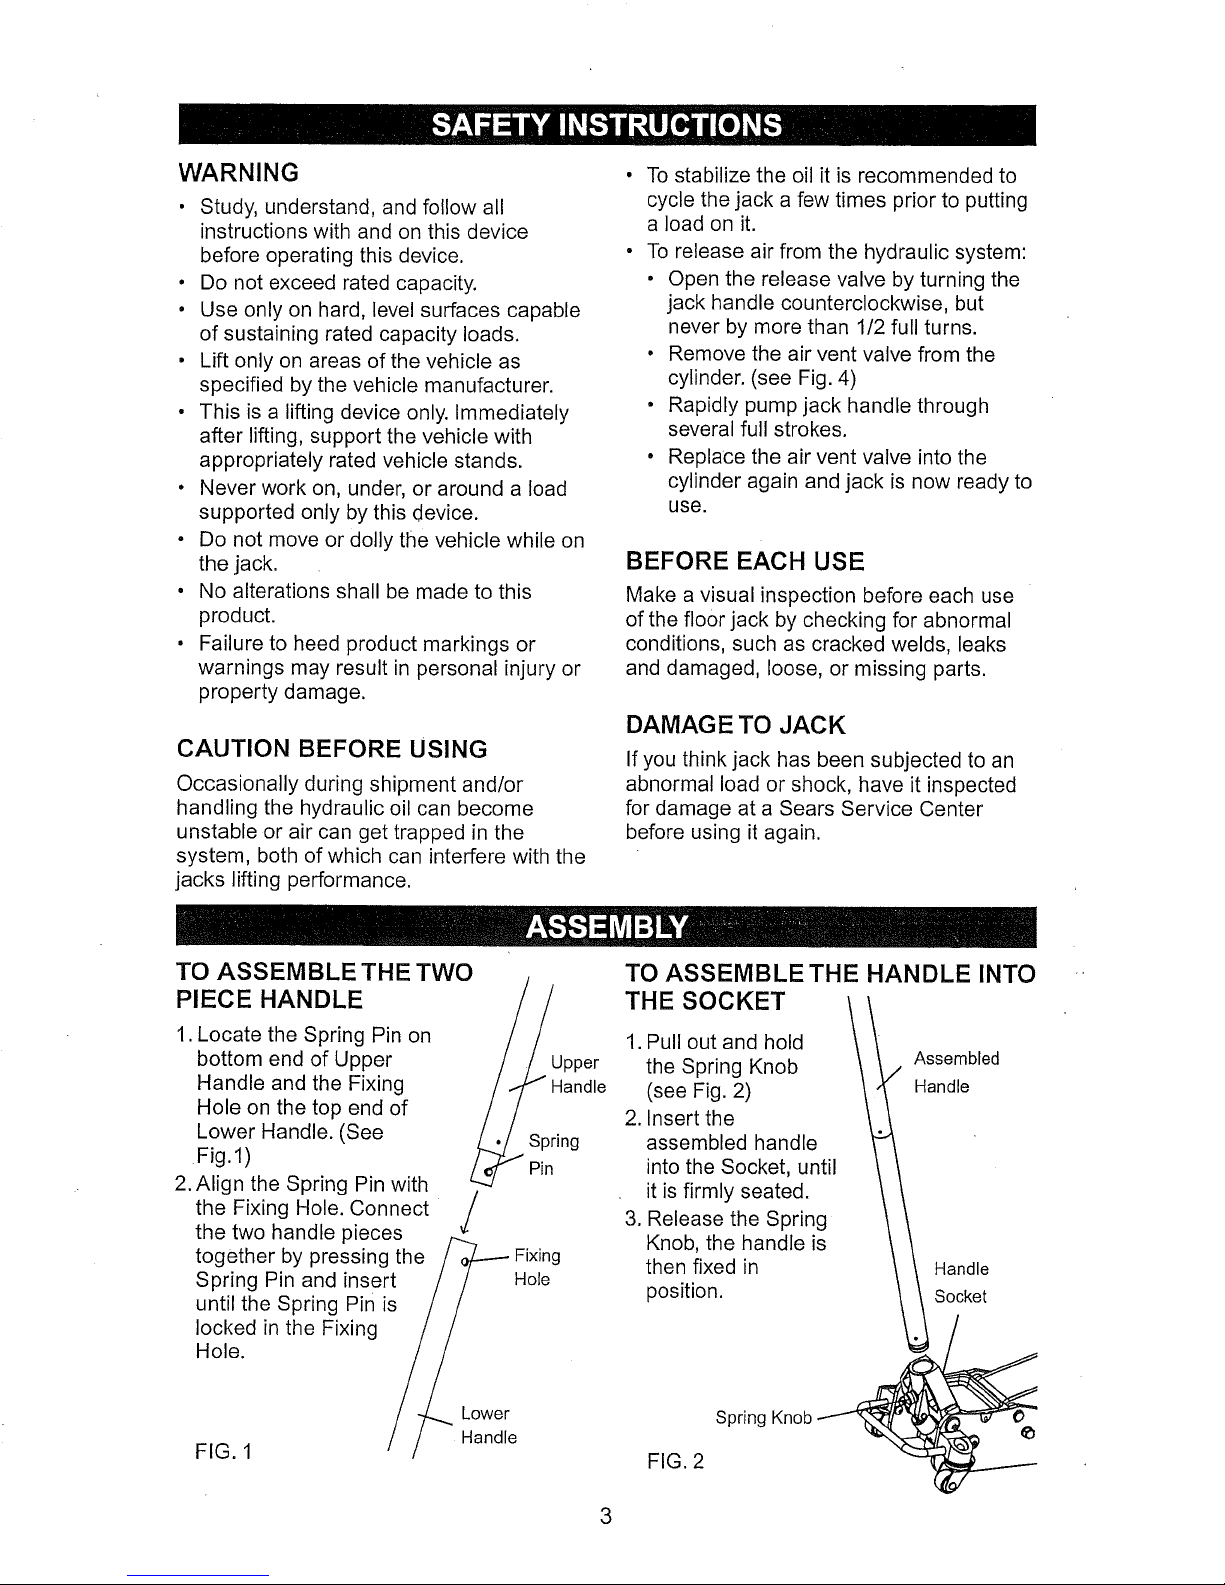
TO ASSEMBLE THE TWO
PIECE HANDLE
1. Locate the Spring Pin on
bottom end of Upper
Handle and the Fixing
Hole on the top end of
Lower Handle. (See
Fig.l)
2. Align the Spring Pin with
the Fixing Hole. Connect
the two handle pieces
together by pressing the
Spring Pin and insert
until the Spring Pin is
locked in the Fixing
Hole.
FIG. 1
TO ASSEMBLE THE HANDLE INTO
THE SOCKET
,_p8 pnrlpper 1.
andle 2.
ng
J 3.
Fixing
Hole
Lower
Handle
3
Pull out and hold
the Spring Knob
(see Fig. 2)
Insert the
assembled handle
into the Socket, until
it is firmly seated.
Release the Spring
Knob, the handle is
then fixed in
position.
FIG. 2 Spring Knob ._
Assembled
Handle
Handle
Socket
/
 Loading...