

Craftsman 48637613 Owner’s Manual
SEARS
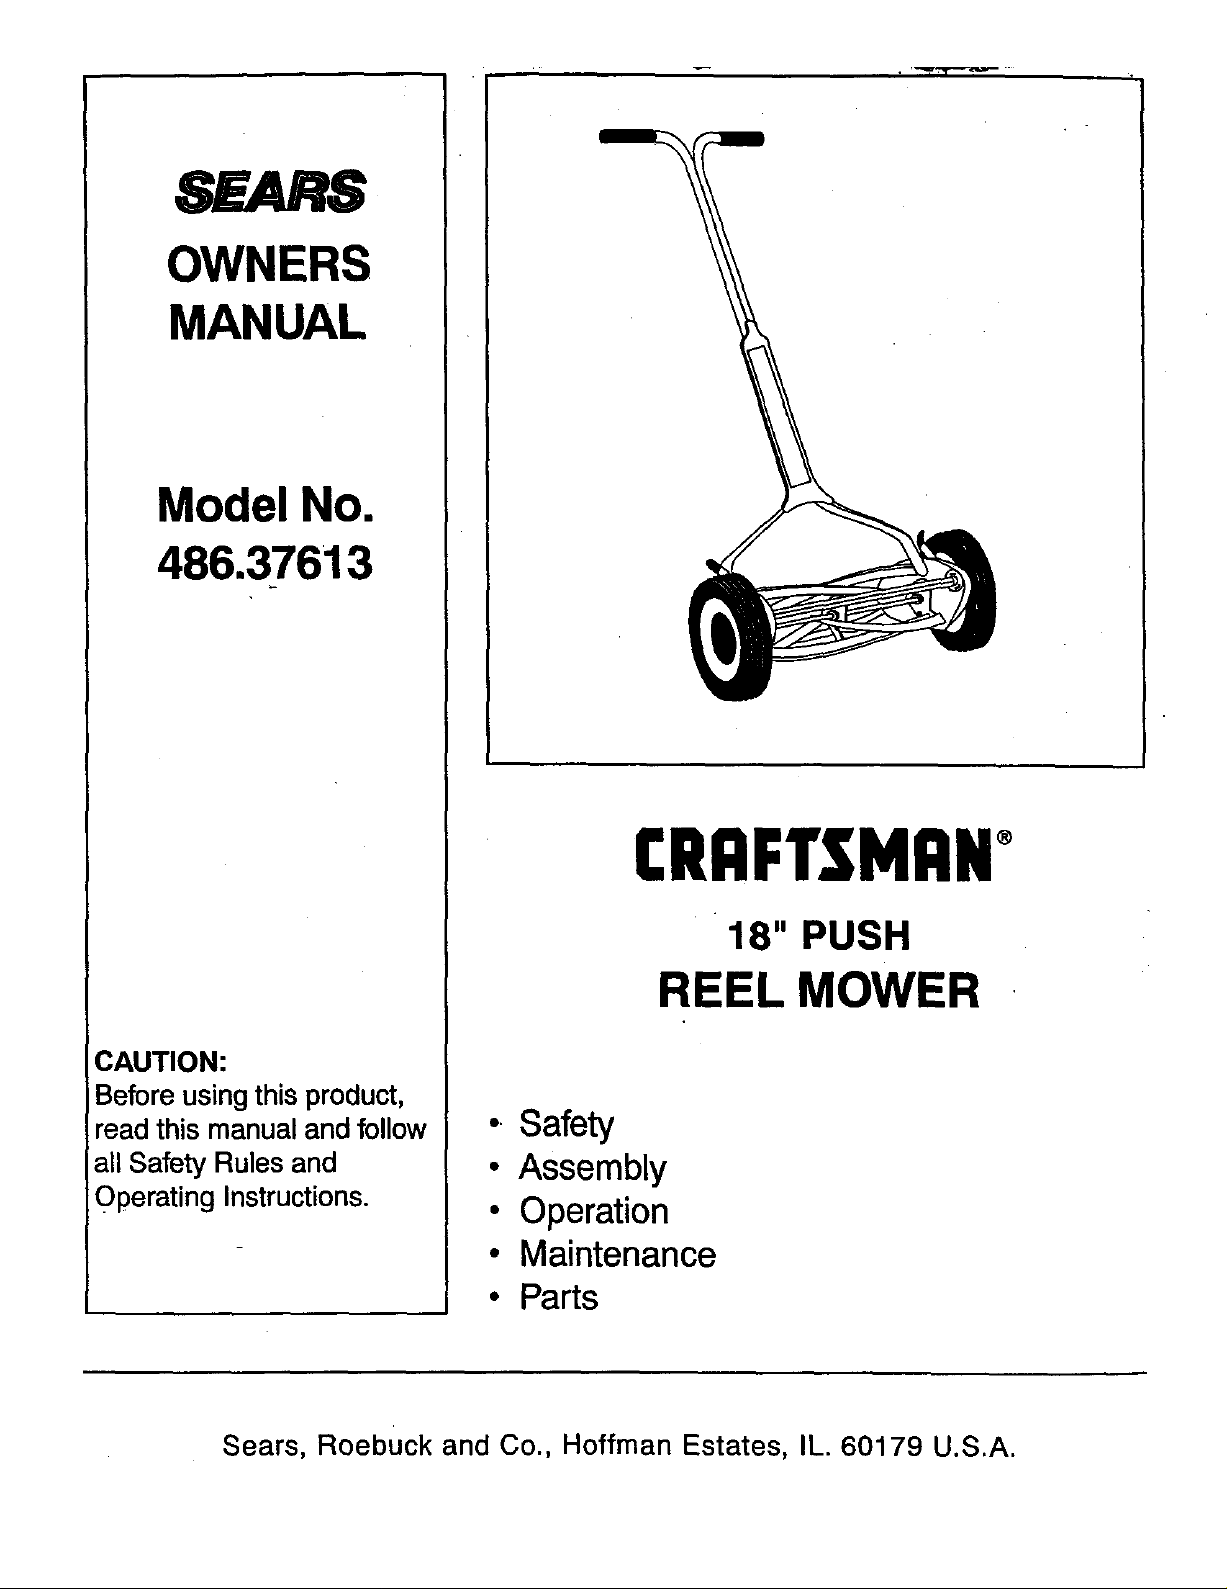
OWNERS
MANUAL
Model No.
486.37613
CAUTION:
Before usingthis product,
read this manual and follow
all Safety Rules and
OPerating Instructions.
CRAFTSMAN
18" PUSH
REEL MOWER
• Safety
• Assembly
• Operation
• Maintenance
• Parts
Sears, Roebuck and Co., Hoffman Estates, IL. 60179 U.S.A.
Safety Rules ............................................................ 2
Warranty .................................................................. 2
Full Size Hardware Chart ........................................ 3
Assembly ................................................................. 4
Operation ................................................................ 5
Maintenance ............................................................ 6
Any power equipment can cause injury if operated improperly or if the user does not understand how to operate
the equipment. Exercise caution at all times, when using power equipment.
• Read the reel mower owner's manual and know
how to operate the reel mower before using it.
• Never allow children to operate the reel mower.
Only persons well acquainted with these rules of
safe operation should be allowed to use the
mower.
• Keep the area of operation clear of all persons,
particularly small children and pets. Small over-
looked objects could be accidently thrown by the
mower.
• Thoroughly inspec_tthe area where the mower is to
be used and remove all stones, sticks, wire, bones
and other foreign objects which could be picked up
and thrown by the mower.
• Do not operate the mower when barefoot or when
wearing open sandals. Always wear substantial
footwear.
Storage .................................................................... 6
Service and Adjustments ........................................ 7
Troubleshooting ...................................................... 8
Repair Parts Illustration ......................................... 16
Repair Parts List ................................................... 11
Parts Ordering/Service ........................... Back Cover
• Mow only in daylight or in good artificial light.
• Never operate the mower in wet grass. Always be
sure of your footing. Keep a firm hold on the handle
and walk, never run.
• When cleaning, repairing or inspecting the mower,
make sure the blade and all moving parts have
stopped.
• Before attempting to unclog the mower, be surethe
blades have stopped completely.
• Mow across the face of slopes, never up and down.
Exercise extreme caution when changing direction
on slopes. Do not mow excessively steep slopes.
• Keep all nuts, bolts and screws tight to be sure the
equipment is in safe working condition.
• Follow all maintenance and lubrication instructions
as outlined in the maintenance section of this
manual.
I&
Look for this symbol to point out important safety precautions. It means--Attention!!
Become alertll Your safety is involved.
LIMITEDONEYEAR WARRANTYON CRAFTSMAN 18" REEL MOWER
For one year from the date of purchase, when this 18"reel mower is maintained and lubricatedaccording to the
operating and maintenance instructions inthe owner's manual, Sears wilt repair any defect in material or workman-
shipfree of charge. If this 18" reel mower is used for commercial or rental purposes, this warranty applies for only 90
days from the date of purchase.
This warranty does not cover repairs necessary because of operator negligence or abuse, including the failure to
maintain the equipment according to instructionscontained in the owner's manual.
WARRANTY SERVICE IS AVAILABLE BY CONTACTING THE NEAREST SEARS SERVICE CENTER/DEPART-
MENT IN THE UNITED STATES.
This warranty applies only while this product is in the United States.
This warranty gives you specific legal rights, and you may also have other rights which vary from state to state.
Sears, Roebuck and Co. D/817 WA. Hoffman Estates, Chicago, IL 60179
The model and serial numbers will be found on a decal
attached to the
You should record both the serial number and the date of
r
purchase and keep in a safe place for future reference.
MODELNUMBER:
SERIAL NUMBER:
DATE OF PURCHASE:
486.37613
E
jA
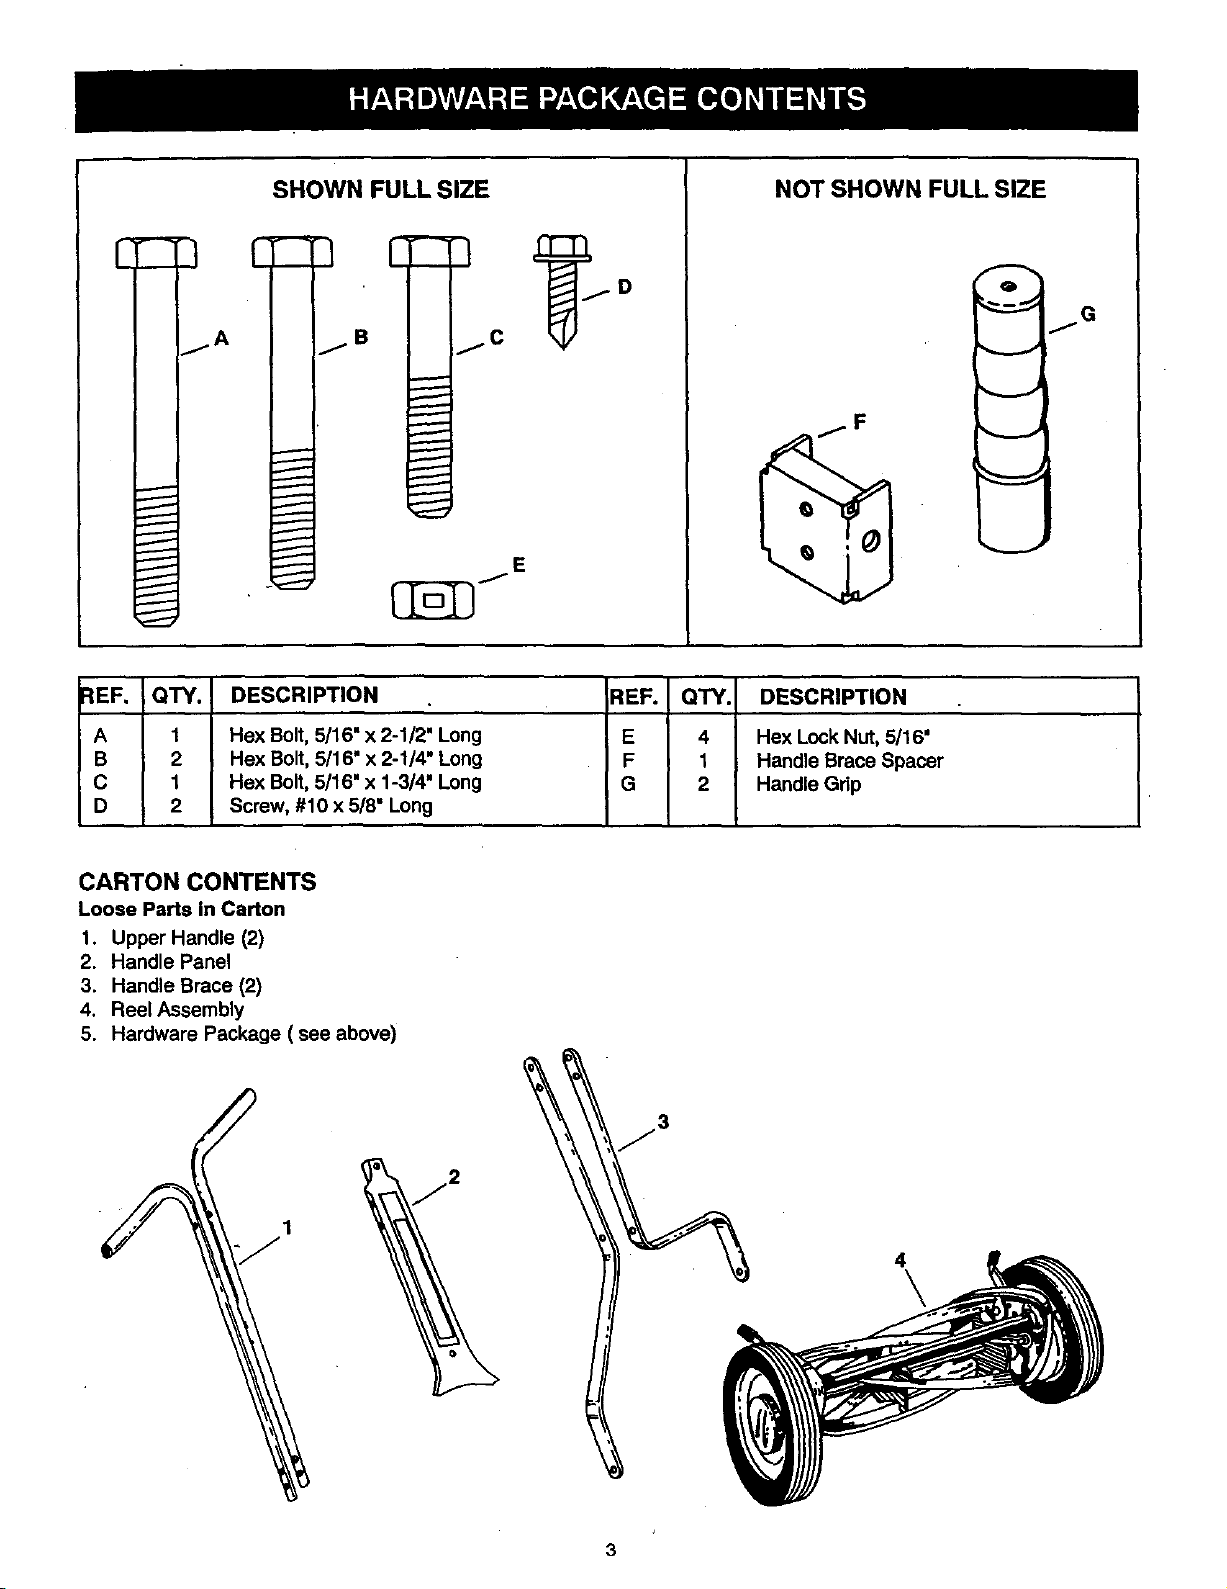
SHOWN FULL SIZE
I
NOT SHOWN FULL SIZE
o
G
f
I
I
I
I
I
I
I
REF. QTY.
A 1
B 2
C 1
D 2
1
I
DESCRIPTION
Hex Bolt, 5/16" x 2-1/2" Long
Hex Bolt, 5/16" x 2-1/4" Long
Hex Bolt, 5/16" x 1-3/4" Long
Screw, #10 x 5/8" Long
CARTON CONTENTS
Loose Parts in Carton
1. Upper Handle (2)
2. Handle Panel
3. Handle Brace (2)
4. Reel Assembly
5. Hardware Package ( see above)
E
REF. QTY.
E 4
F 1
G 2
DESCRIPTION
Hex Lock Nut, 5/16"
Handle Brace Spacer
Handle Gdp
4
TOOLS REQUIRED FOR ASSEMBLY
(1) 1/2" Wrench
(1) 5/16" Wrench
(1) Pliers
• Remove the reel mower, the loose parts and the
hardware package from the carton. Lay out the parts
and hardware as shown on page 3.
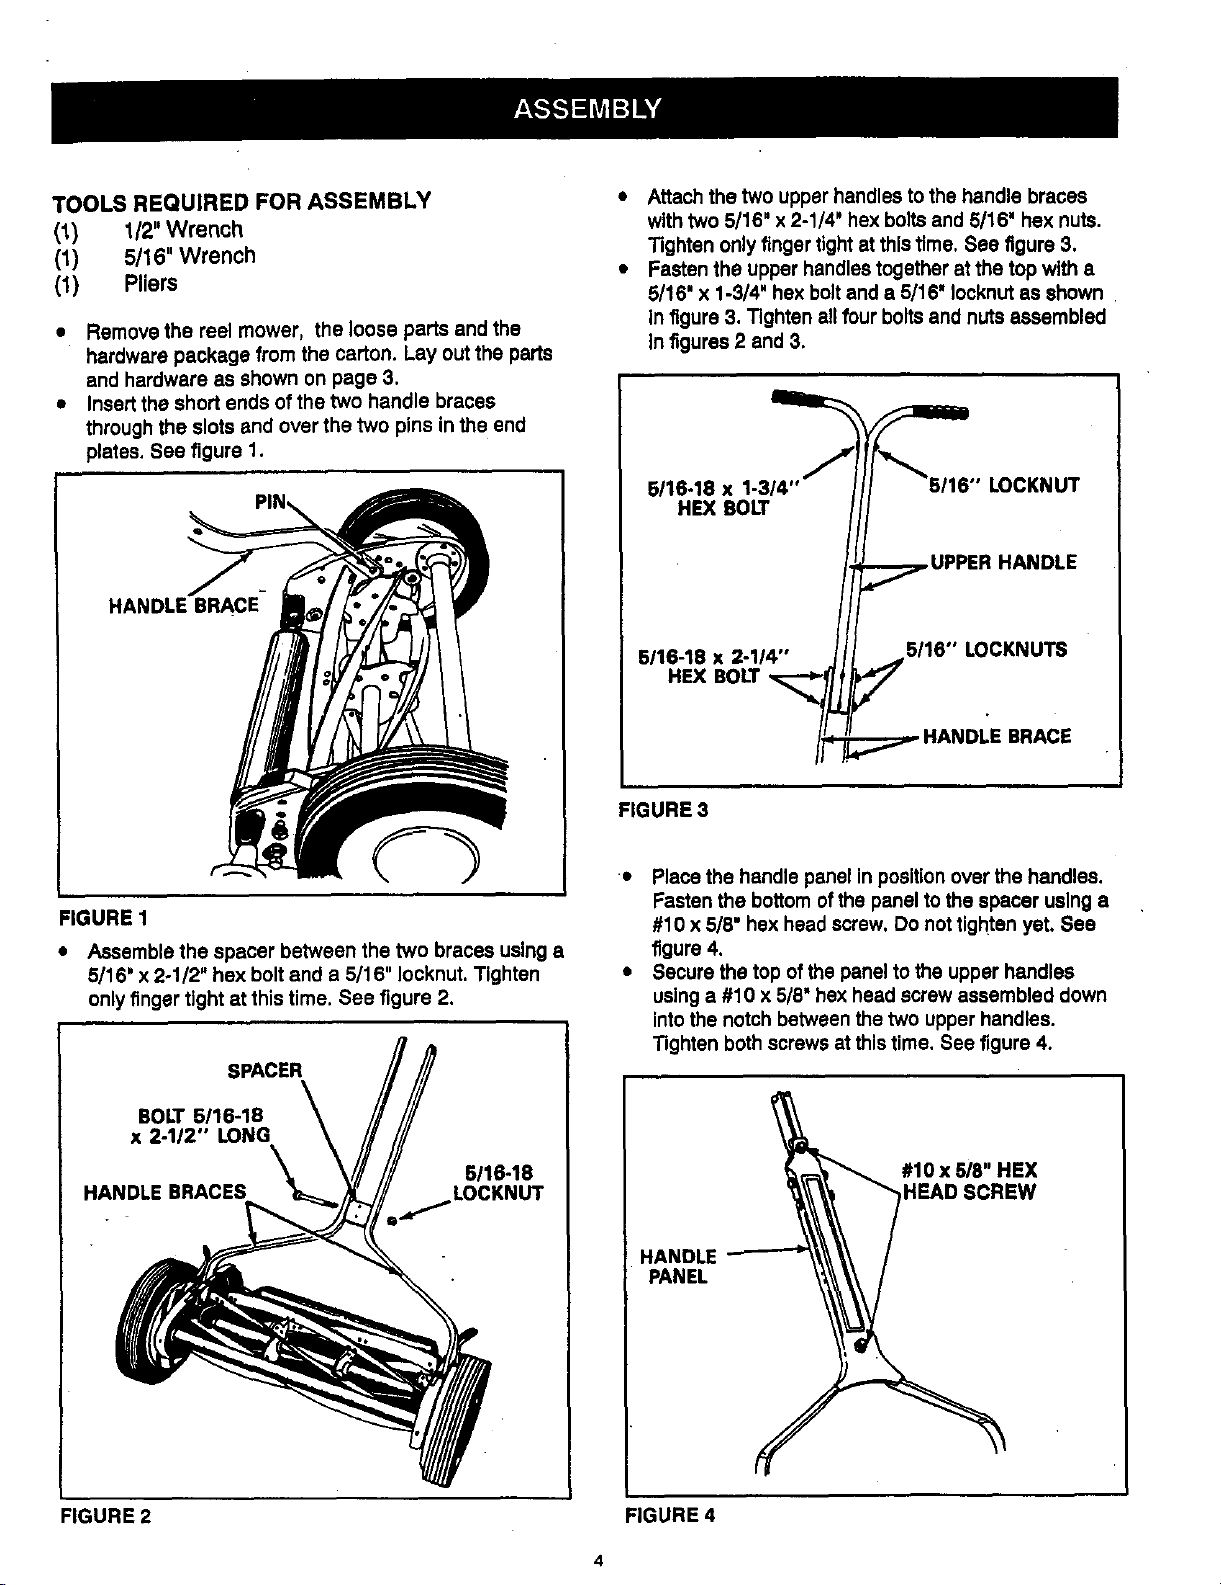
• Insert the short ends of the two handle braces
through the slots and over the two pins in the end
plates. See figure 1.
HANDLE BRACE
Attach the two upper handlesto the handle braCas
with two 5/16" x 2-1/4' hex bolts and 5/16" hex nuts.
Tighten onlyfinger tight at thistime. See figure 3.
Fasten the upper handlestogether at the top with a
5/16" x 1-3/4" hex boltand a 5/16" Iocknut as shown
In figure 3. Tighten all four boltsand nuts assembled
In figures 2 and 3.
FIGURE 1
• Assemble the spacer between the two braces using a
5/16" x 2-1/2" hex bolt and a 5/16" Iocknut. Tighten
only finger tight at this time. See figure 2.
SPACER
BOLT 5/16-18
x 2-1/2" LONG
HANDLE BRACES
5/16-18
LOCKNUT
FIGURE 3
• Place the handle panel in positionover the handlas.
Fasten the bottom of the panel to the spacer using a
#10 x 5/8" hex head screw, Do not tighten yet, See
figure 4.
• Secure the top ofthe panel to the upper handles
using a #10 x 5/8" hex head screw assembled down
intothe notch between the two upper handles.
Tighten both screws at this time. See figure 4.
#10 x 5/8" HEX
HEAD SCREW
HANDLE
PANEL
FIGURE 2
FIGURE 4
 Loading...