

Craftsman 486252443 Owner’s Manual

Owner's Manuam
5.5 HORSEPOWER
36" TOW-BEHIND
Modet No. 486.252443
®
CAUTION:
Before using this product, read
this manuaU and follow aH Safety
RuUes and
Operating Instructions.
• Safety
• Assembly
o Operation
mMPORTANT- READ THINSFIRST!!!
• Maintenance
For Missing Parts or AssembUy Questions
PUease Call 866-576-8388
Mon.-Fri. 7 am - 5 pm CST.
FAX 217-728-2032 or e-maiU info@agri-fab.com
Missing parts will be sent UPS in 24 hours directly to your home.
Sears, Roebuck and Co., Hoffman Estates, IL 60179 U.S.A.
www, sears,com/craftsman
PRBNTED BNU.S.A. FORM NO. 49637 (1/05)
• Parts
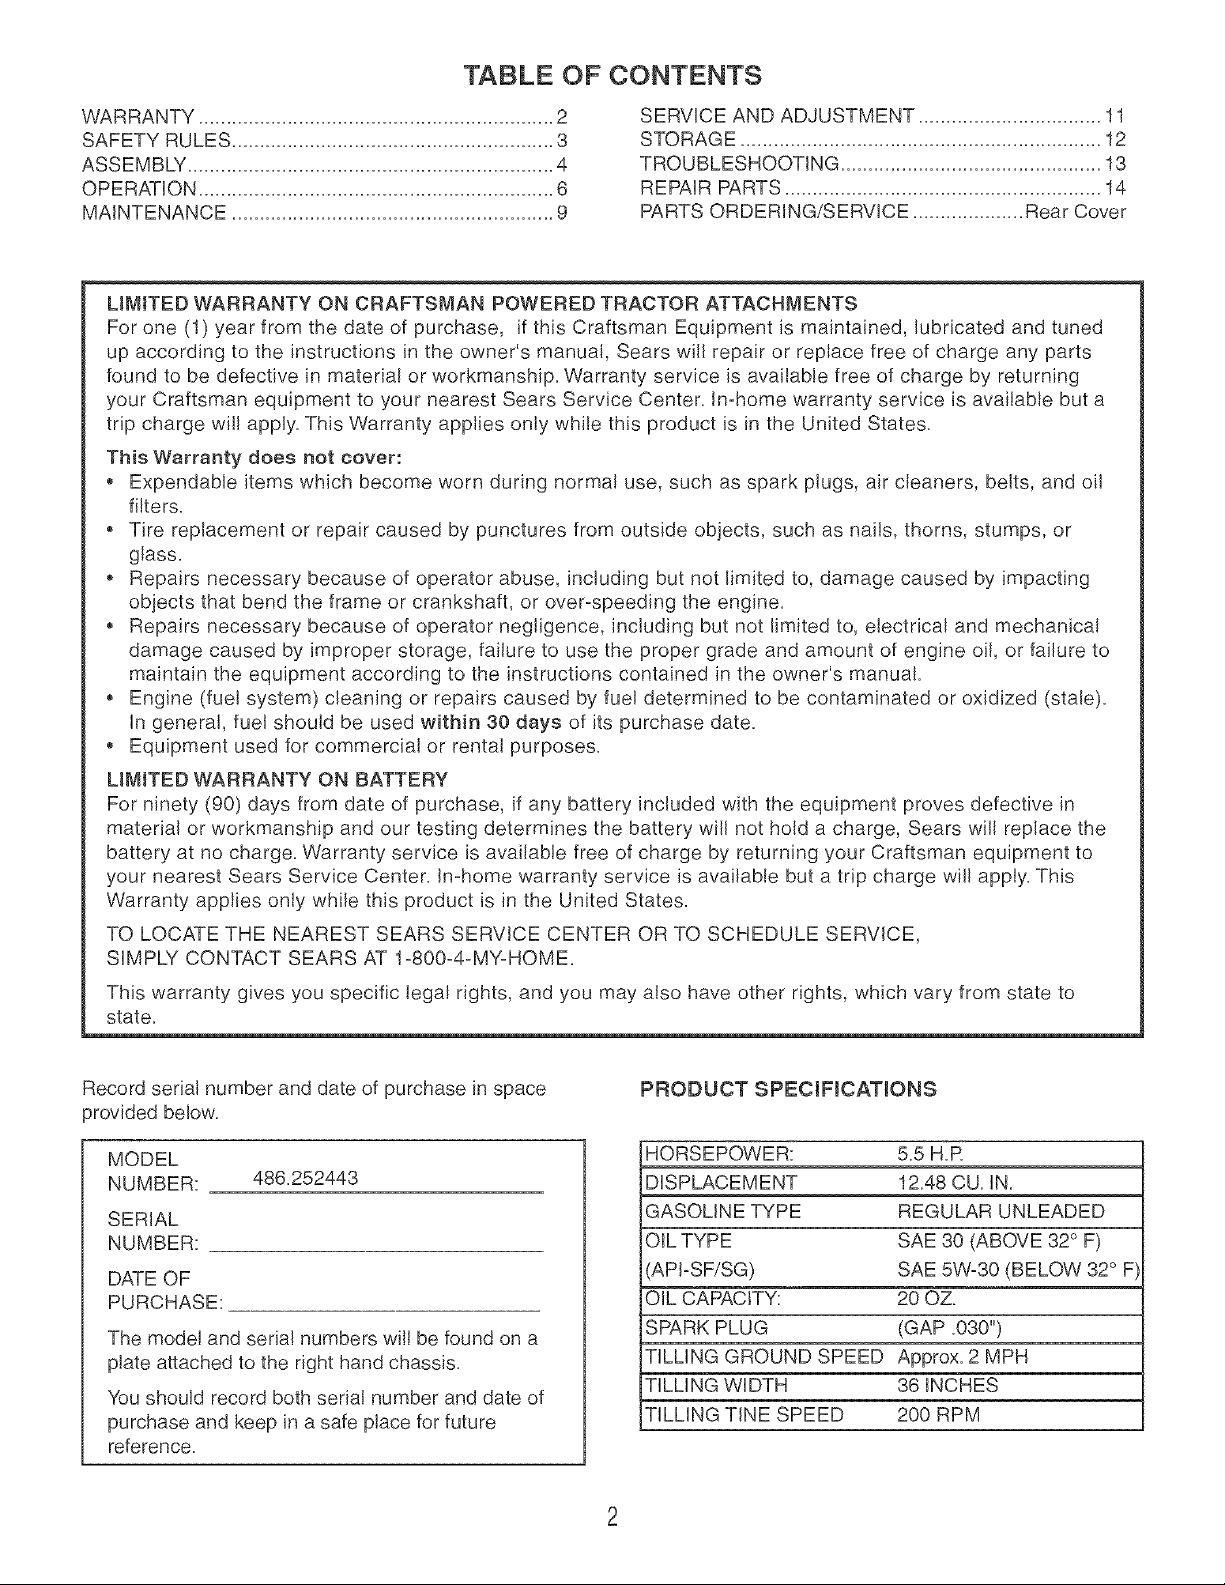
TABLE OF CONTENTS
WARRANTY ................................................................ 2
SAFETY RULES .......................................................... 3
ASSEMBLY .................................................................. 4
OPERATION ................................................................ 6
MAINTENANCE .......................................................... 9
LiMiTED WARRANTY ON CRAFTSMAN POWERED TRACTOR ATTACHMENTS
For one (1) year from the date of purchase, if this Craftsman Equipment is maintained, lubricated and tuned
up according to the instructions in the owner's manual, Sears will repair or replace free of charge any parts
found to be defective in materia! or workmanship. Warranty service is available free of charge by returning
your Craftsman equipment to your nearest Sears Service Center. In°home warranty service is available but a
trip charge wil! apply. This Warranty applies only while this product is in the United States.
This Warranty does not cover:
Expendable items which become worn during normal use, such as spark plugs, air cleaners, belts, and oil
filters.
Tire replacement or repair caused by punctures from outside objects, such as nails, thorns, stumps, or
glass.
Repairs necessary because of operator abuse, including but not limited to, damage caused by impacting
objects that bend the frame or crankshaft, or over°speeding the engine.
Repairs necessary because of operator negligence, including but not limited to, electrica! and mechanical
damage caused by improper storage, failure to use the proper grade and amount of engine oi!, or failure to
maintain the equipment according to the instructions contained in the owner's manual
Engine (fuel system) cleaning or repairs caused by fuel determined to be contaminated or oxidized (stab).
In general, fuel should be used within 30 days of its purchase date.
Equipment used for commercial or rental purposes.
LIMITED WARRANTY ON BATTERY
For ninety (90) days from date of purchase, if any battery included with the equipment proves defective in
material or workmanship and our testing determines the battery wil! not hold a charge, Sears will replace the
battery at no charge. Warranty service is available free of charge by returning your Craftsman equipment to
your nearest Sears Service Center. In-home warranty service is available but a trip charge wi!! apply. This
Warranty applies only while this product is in the United States.
TO LOCATE THE NEAREST SEARS SERVICE CENTER OR TO SCHEDULE SERVICE,
SIMPLY CONTACT SEARS AT I°800°4°MyoHOME.
SERVICE AND ADJUSTMENT ................................. 11
STORAGE ................................................................. 12
TROUBLESHOOTING ............................................... 13
REPAIR PARTS ......................................................... 14
PARTS ORDERING!SERVICE .................... Rear Cover
This warranty gives you specific lega! rights, and you may also have other rights, which vary from state to
state.
Record serial number and date of purchase in space
provided below.
MODEL
NUMBER: 486.252443
SERIAL
NUMBER:
DATE OF
PURCHASE:
The model and serial numbers will be found on a
plate attached to the right hand chassis.
You should record both serial number and date of
purchase and keep in a safe place for future
reference.
PRODUCT SPECIFICATIONS
_'HORSEPOWER: 5.5 H.R
DISPLACEMENT 12.48 CU. IN.
GASOLINE TYPE REGULAR UNLEADED
OIL TYPE SAE 30 (ABOVE 32° F)
APPSF/SG) SAE 5W-30 (BELOW 32° F
OIL CAPACITY: 20 OZ.
SPARK PLUG (GAP .030")
TILLING GROUND SPEED Approx. 2 MPH
TILLING WIDTH 36 INCHES
TILLING TINE SPEED 200 RPM
WARNING:Thiscuttingmachineiscapableofamputatinghandsandfeetandthrowingobjects.Failureto
observethefollowingsafetyinstructionscouldresultinseriousinjuryordeath.
IMPORTANT
Warnings,Cautions,andNotesareameansofattracting
attentiontoimportantorcriticalinformationinthis
manual.
Lookforthissymboltopointoutimportant
safetyprecautions.Itmeans-Attention!
BecomeAlert!YoursafetyJsinvolved.
TRAINING
ReadopeningandServiceinstructionscarefully.
Bethoroughlyfamiliarwiththecontrolsandthe
properuseoftheequipment.
• Neverallowchildrentooperatethemachine.Do
notallowadultstooperatethemachinewithout
properinstruction.
• Keeptheareaofoperationclearofallpersons,
particularlysmallchildrenandpets.
PREPARATION
• Checkthefuelandlubricationbeforestartingthe
engine.Donotfillthegasolinetankindoorswhen
theengineisrunningorwhiletheengineis stillhot.
Wipeoffanyspilledgasolinebeforestartingthe
engine.
• Inspecttheareatobetilled.Removeglass,wire,
metalobjects,largesticks,andstones.Avoid
undergroundpipesandwiring.
• Haveacompleteworkingknowledgeofyourtractor
andknowhowtohandleyourtractorwithatilleror
otherattachmentattached.
• Stopengineanddisconnectsparkplugleadwire
beforecleaningaugers,removingobstacles,or
makingadjustments,exceptforthosewhichmust
bedonewiththeenginerunning.
• Neverplacehandsorfeetunderorintorotating
partsorconcealedareas.Keephandsandfeet
clearlyawayfromaugerelements,belts,pulleys,
etc.whileengineis running.
• Wearsubstantialshoesandeyeprotectionwhile
usingtiller.
• Neverattempttomakeamaintenanceadjustment
whileengineisrunning,exceptonthecarburetor.
• Donotruntheengineindoors;carbonmonoxide
fumesaredangeroustoinhale.
• Neveroperatemachinewithoutproperguards,
plates,orothersafetyprotectivedevicesinplace.
• DisengagetheTineClutchLever,stoptillerand
tractorenginesbeforegettingoffthetractor.
• DisengagetheTineClutchLeverandstopthetiller
engineduringtransportationtoandfromthework
area.
MAINTENANCEANDSTORAGE
Followmaintenanceinstructionsasoutlinedinthis
manualandyourEngineOwner'sManualsupplied
withtheunit.
• Disconnectsparkplugwirebeforemakingmainte-
nanceadjustmentorrepair.
• Storegasolineinanapprovedmetalcontainerina
cool,dryplace.
• Safetyandperformancelevelscanbeassuredonly
bytheuseofspecifiedreplacementparts.
OPERATION
• Givecompleteandundividedattentiontothejobat
hand.Operatethetillerindaylightorgoodartificial
!_ght.
• Personalinjurymayresultfromcontactwiththe
augersordebristhrownbythismachine.Therefore,
alwaysstayasafedistanceawayfromtheaugers.
• Stopthetillerenginewhenleavingyourtiller
unattended.
• Checkbeforeeachuseforloosefastenersorparts.
• Neverstoretheequipmentwithgasolineinthetank
insideofabuildingwherefumesmayreachanopen
flameorspark.Al!owenginetocoolbeforestoringin
anenclosure.
WARNING:Thisunitisequopedwithan
internalcombustionengineandshould
notbeusedonornearanyunimproved
forest-coveredorgrass-coveredland
unlesstheengine'sexhaustsystemisequippedwitha
sparkarrestermeetingapplicablelocalorstatelaws
(ifany).Ifasparkarresteris used,itshouldbe
maintainedineffectiveworkingorderbytheoperator.
InthestateofCalifornia,theabovelawisrequiredby
law(Section4442oftheCaliforniaPublicResources
Code).Otherstatesmayhavesimilarlaws.Federal
lawsapplyonFederallands.Asparkarresterforthe
mufflerisavailablethroughyournearestSears
AuthorizedServiceCenter.
TO REMOVE UNiT FROM
TO iNSTALL THE TILLER
GAUGE WHEELS
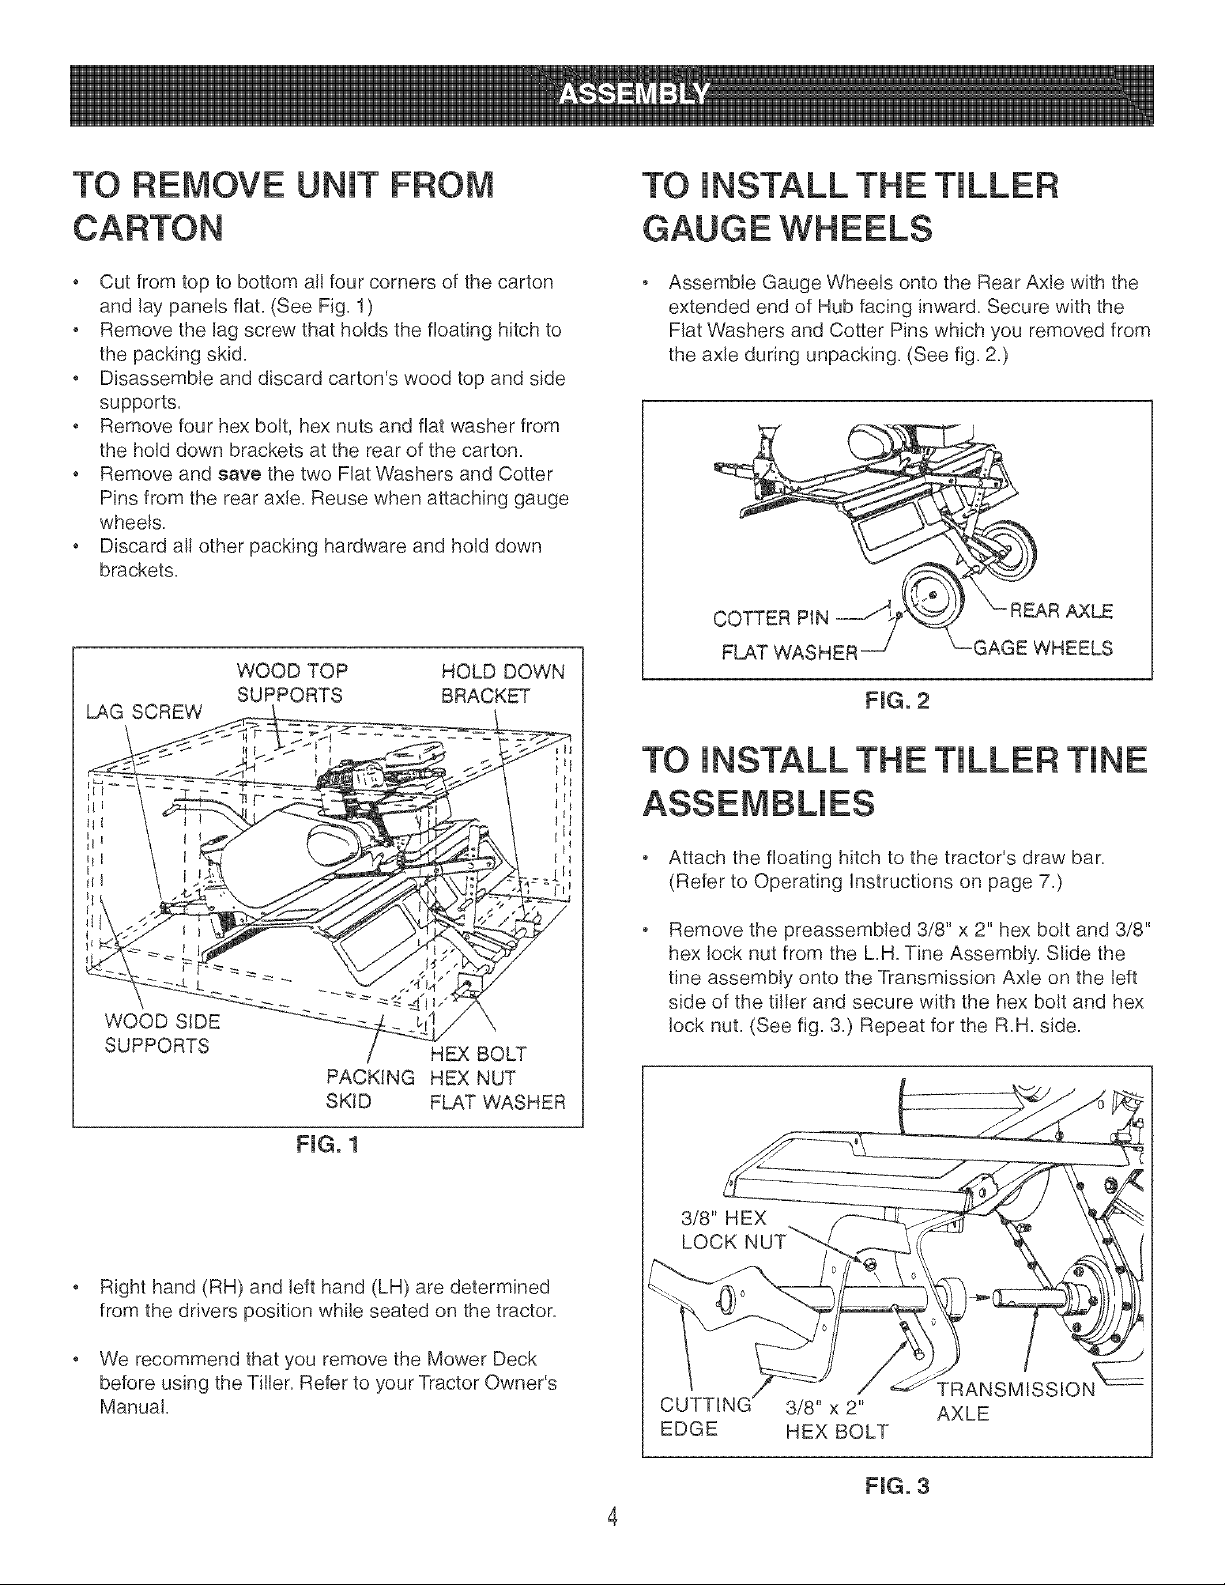
• Cut from top to bottom all four corners of the carton
and lay panels flat. (See Fig. 1)
• Remove the lag screw that holds the floating hitch to
the packing skid.
• Disassemble and discard carton's wood top and side
supports.
• Remove four hex bolt, hex nuts and fiat washer from
the hold down brackets at the rear of the carton.
• Remove and save the two Flat Washers and Cotter
Pins from the rear axle. Reuse when attaching gauge
wheels.
• Discard all other packing hardware and hold down
brackets.
WOOD TOP HOLD DOWN
SUPPORTS BRACKET
LAG SCREW
Assemble Gauge Wheels onto the Rear Axle with the
extended end of Hub facing inward. Secure with the
Flat Washers and Cotter Pins which you removed from
the axle during unpacking. (See fig. 2.)
TO INSTALL THE TILLER TINE
ASSEMBLIES
Attach the floating hitch to the tractor's draw bar.
(Refer to Operating instructions on page 7.)
L
WOOD SIDE -':
SUPPORTS
PACKING HEX NUT
SKID FLAT WASHER
HEX BOLT
FiG. 1
Right hand (RH) and left hand (LH) are determined
from the drivers position while seated on the tractor.
We recommend that you remove the Mower Deck
before using the Tiller. Refer to your Tractor Owner's
Manual.
Remove the preassembled 3/8" x 2" hex bolt and 3/8"
hex lock nut from the L.H. Tine Assembly. Slide the
tine assembly onto the Transmission Axle on the left
side of the tiller and secure with the hex bolt and hex
lock nut. (See fig. 3.) Repeat for the R.H. side.
3/8" HEX
LOCK
CUTTING 3/8" x 2"
EDGE HEX BOLT
FIG. 3
TRAN:
AXLE

TO iNSTALL (WHEEL)
WEIGHTS TO TILLER
NOTE: Weights are not furnished with the Tiller.
30 Ib. tractor wheel weights may be purchased to
mount to the Tiller if extra weight is required. (Refer
to the Operation section of this manual.)
• Remove two Carriage Bolts and Nuts from each Tine
Shield, located approximately 3ol/2" from the front
edge. See fig. 4.
• Place (Wheel) Weights on Tine Shield and secure
with long Bolts and Nuts furnished with the Weights.
See fig. 4.
LONG BOLT:
WHEEL
/ /
TINE
SHIELD
FIG° 4
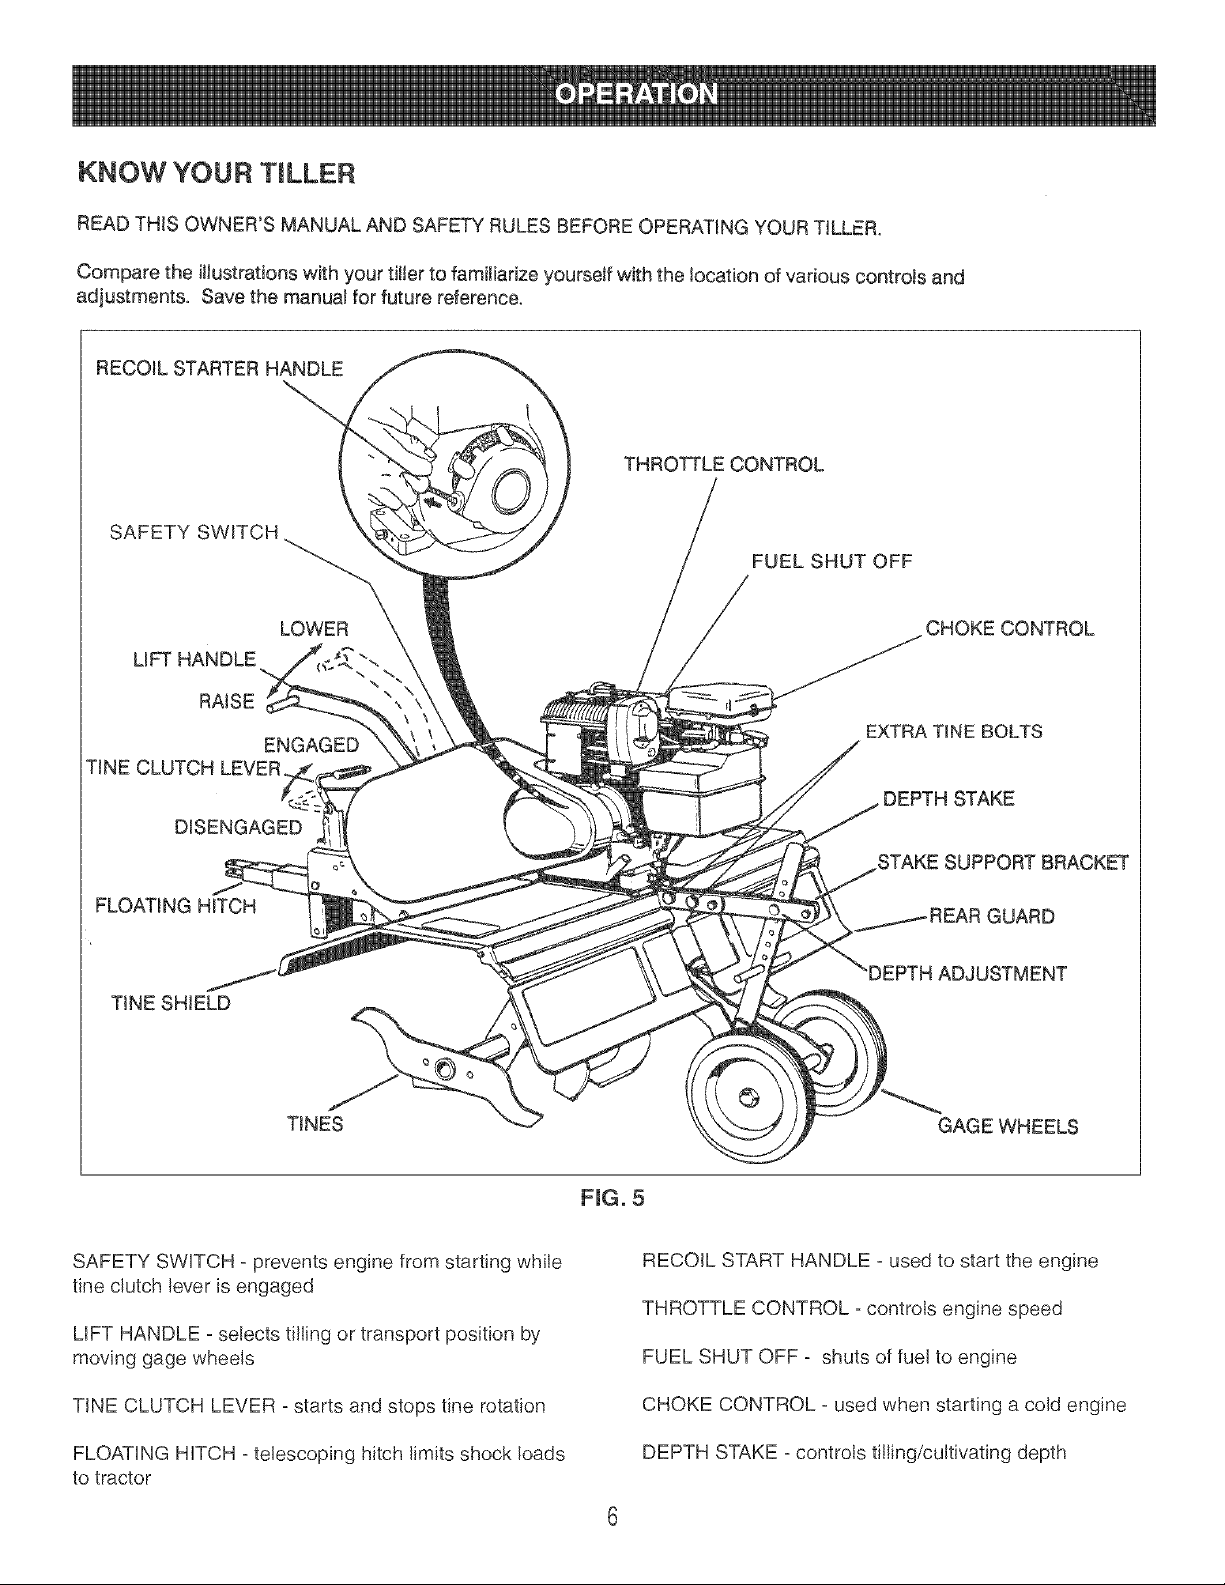
KNOW YOUR TILLER
READ THIS OWNER'S MANUAL AND SAFETY RULES BEFORE OPERATING YOUR TILLER.
Compare the illustrations with your titter to familiarize yourself with the location of various controls and
adjustments, Save the manuaNfor future reference.
RECOIL STARTER HANDLE
THROTTLE CONTROL
SAFETY SWITCH
LIFT HANDLE
RAISE
TINE CLUTCH LEVER
DISENGAGED
FLOATING HITCH
TINE SHIELD
LOWER
ENGAGED
TINES
FUEL SHUT OFF
CHOKE CONTROL
EXTRA TINE BOLTS
STAKE SUPPORT BRACKF
GUARD
ADJUSTMENT
GAGE WHEELS
SAFETY SWITCH - prevents engine from starting while
tine clutch lever is engaged
LIFT HANDLE - selects tilling or transport position by
moving gage wheels
TINE CLUTCH LEVER - starts and stops tine rotation
FLOATING HITCH - telescoping hitch limits shock loads
to tractor
FIG° 5
RECOIL START HANDLE - used to start the engine
THROTTLE CONTROL - controls engine speed
FUEL SHUT OFF - shuts of fuel to engine
CHOKE CONTROL - used when starting a cold engine
DEPTH STAKE - controls tilling/cultivating depth
 Loading...