

Craftsman 360.796900 User Manual

Operator’s Manual
CRRFTSMRH
PROFESSIONAL
3.4 HP, 2'Cycle
53 cc/3,2 cu. in.
235 mph/705 cfm
BACKPACK AIR BLOWER
Model 360.796900
CAUTION;
Before using this product, read this
manual and follow all Safety Rules and
Operating Instructions.
Sears. Roebuck and Co., Hoffman Estates, IL 60179 U.S.A
Visit Our Crafismari v/eOSiie -.vww sears com/crattsman
Safety
Assembly
Operation
Maintenance
Parts
Español

Dear Valued Customer,
When you operate your new Craftsman air blower don’t expect to hear the high-pitched engine noise commonly
associated with motorized power equipment. I
This is a blower designed to meet the needs of both professional and occasional users and comply with future noise
and emission standards. Many years of research and engineering went into creating this quieter, more efficient unit.
By redesigning the engine, fan, and blower housing components, noise emissions were cut by 50%. Engine speed
was lowered by 2,500 RPM, which reduces noise, fuel consumption, and emissions, while increasing operating time
between refueling with the added benefit of a longer engine life.
Incorporating a very powerful engine and specially designed high volume fan the Craftsman blower is able to achieve
maximum air power at only 4,800 RPM. Competitive blowers typically run at 7,000 to 8,000 RPM. This air blower is
quiet and powerful, features you and your neighbors will quickly appreciate.
TABLE OF CONTENTS
•
Wananty Pg. 2
Safety ' Pg. 3
Contents of Carton
Accessories Pg. 4
Assembly Pg. 4
Operation Pg. 5
Maintenance
Pg. 4
Pg. 7
Storage
•
Troubleshooting
•
California Emission Control
Warranty Statement
•
Parts
•
Español
Pg. 8
Pg. 9
Pg.i0
Pg.ll
Pg.l7
WARRANTY
LIMITED TWO YEAR WARRANTY
For two (2) years from the date of purchase if the backpack air blower is maintained, lubricated and tuned up
according to the instructions in the Operator’s Manual, Sears will repair or replace, free of charge, any parts found to
be defective in material or workmanship. If this product is used commercially, this warranty only applies for 90 days.
This warranty does not cover
• Expeiidable items which become worn during normal use, such as spark plugs and air filters.
• Repairs necessary because of operator abuse, negligence, improper storage, accident, or the failure to
maintain the equipment according to the instructions contained in the Operator’s Manual. '
Warranty service is available by returning the air blower to the nearest Sears Service Center in the United States. This
warranty gives you specific legal rights, and you may also have other rights which may vary from state to state.
Sears, Roebuck and Co., Dept. 81 TWA, Hoffman Estates, IL 60179
PRODUCT SPECIFICATIONS
Horse Power
РиеЮИ Capacity
РиеЮП Mix 40-1
^oark Plug Bosch WSR6F
(Gap .020 in) Champion RCJ-6Y
Air Velocity
Air Volume
Maximum RPM 4500 rpm
Dry Weight 20.5 lbs.
3.4
1.6 u.s. at.
235 mph
705 cfm
Model No. 360.796900
Serial No.
Date of Purchase________
The model and serial number will be
found to the left of the fuel cap. You
should record both serial number and
date of purchase and keep in a safe
place for future reference.
_____________
______________
I Sears, Roebuck and Co.

SAFETY INSTRUCTIONS
CAUTION: Always disconnect spark plug wire and place where it cannot contact spark plug to prevent
accidental starting when setting up, transporting, adjusting or making repairs.
TRAINING
Read the operator's manual carefully. Become familiar
with the controls and know how to operate your air
blower properly.
• Do not allow children to use your air blower. Never
allow adults to use air blower without proper
Instructions.
• Keep the area of operation clear of all persons,
especially small children and pets. .
• Use air blower only as described in this manual.
• Do not operate air blower if it has been dropped or
damaged in any manner. Always have damage
repaired before using your air blower.
• Do not use accessory attachments that are not
recommended by the manufacturer. Use of such
attachments may be hazardous.
PREPARATION
• Always wear safety glasses or eye shields when
starting and while using your air blower.
• Dress properly. Do not operate air blower when
barefoot or wearing open sandals. Wear only solid
shoes with good traction.
• Wear long-sleeved clothes that are snug fitting.
Avoid wearing loose clothing.
• Wear either tightly cuffed or cuffless pants.
• Wear hearing protection even when working for a
short period of time. Remember - hearing damage
is cumulative.
• Wear protective, non-slip gloves for safer
operation.,.
• Check fuel-tank before starting engine. Do not fill
fuel tank indoors, when the engine is running or
when the engine is hot. Allow the engine to cool
for several minutes before filling the fuel tank.
Clean off any spilled gasoline before starting the
engine.
• Always make adjustments before starting your air
blower. Never attempt to do this while the engine
is running.
• Use only in daylight or good artificial tight.
OPERATION
• Keep your eyes and mind on your air blower and
the area being blown. Don’t let other interests
distract you.
• Always be sure of your footing. Use extra caution
in wet or slippery areas. WALK - DONT RUN.
• Do not put hands or feet near rotating parts. Keep
clear of the nozzle opening at all times.
• Always stop the engine whenever you leave or are
not using your air blower.
• Before cleaning, inspecting, or repairing your air
blower, stop the engine and make absolutely sure
all moving parts have stopped. Then disconnect
the spark plug wire and keep it away from the
spark plug to prevent accidental starting.
• Do not adjust carburetor. Overspeeding, engine
damage or personal injury may result.
• Do not operate your air blower if it vibrates
abnormally. Excessive vibration is an indication of
damage: stop the engine, safely check for the
cause of vibration and repair as needed.
• Do not run the engine indoors. Exhaust fumes are
dangerous.
• Never operate your air blower without proper
guards, tubes, or other safety devices in place.
WARNING: California Proposition 65
The engine exhaust from this product contains
chemicals known to the State of California to
cause cancer, birth defects, or other reproductive
harm.
MAINTENANCE AND STORAGE
• Check the engine mounting bolts often to be sure
they are tightened properly.
■ Check all bolts, nuts, and screws at frequent
intervals for proper tightness to be sure air blower
is in safe working condition.
• Keep all safety devices in place and working.
• To reduce fire hazard, keep the engine free of
debris and excessive grease and oil. '
• Allow engine to cool before storing in any
enclosure.
• Never store air blower with fuel in the tank inside a
building where fumes may reach an open flame or
an ignition source such as hot water heater, spacé
heater, clothes dryer, etc.
CUSTOMER RESPONSIBILITIES
• Read and observe the Safety Rules.
• Follow a regular schedule in maintaining,
caring and using your air blower.
• Follow the instructions under the Maintenance and
Storage sections of this manual
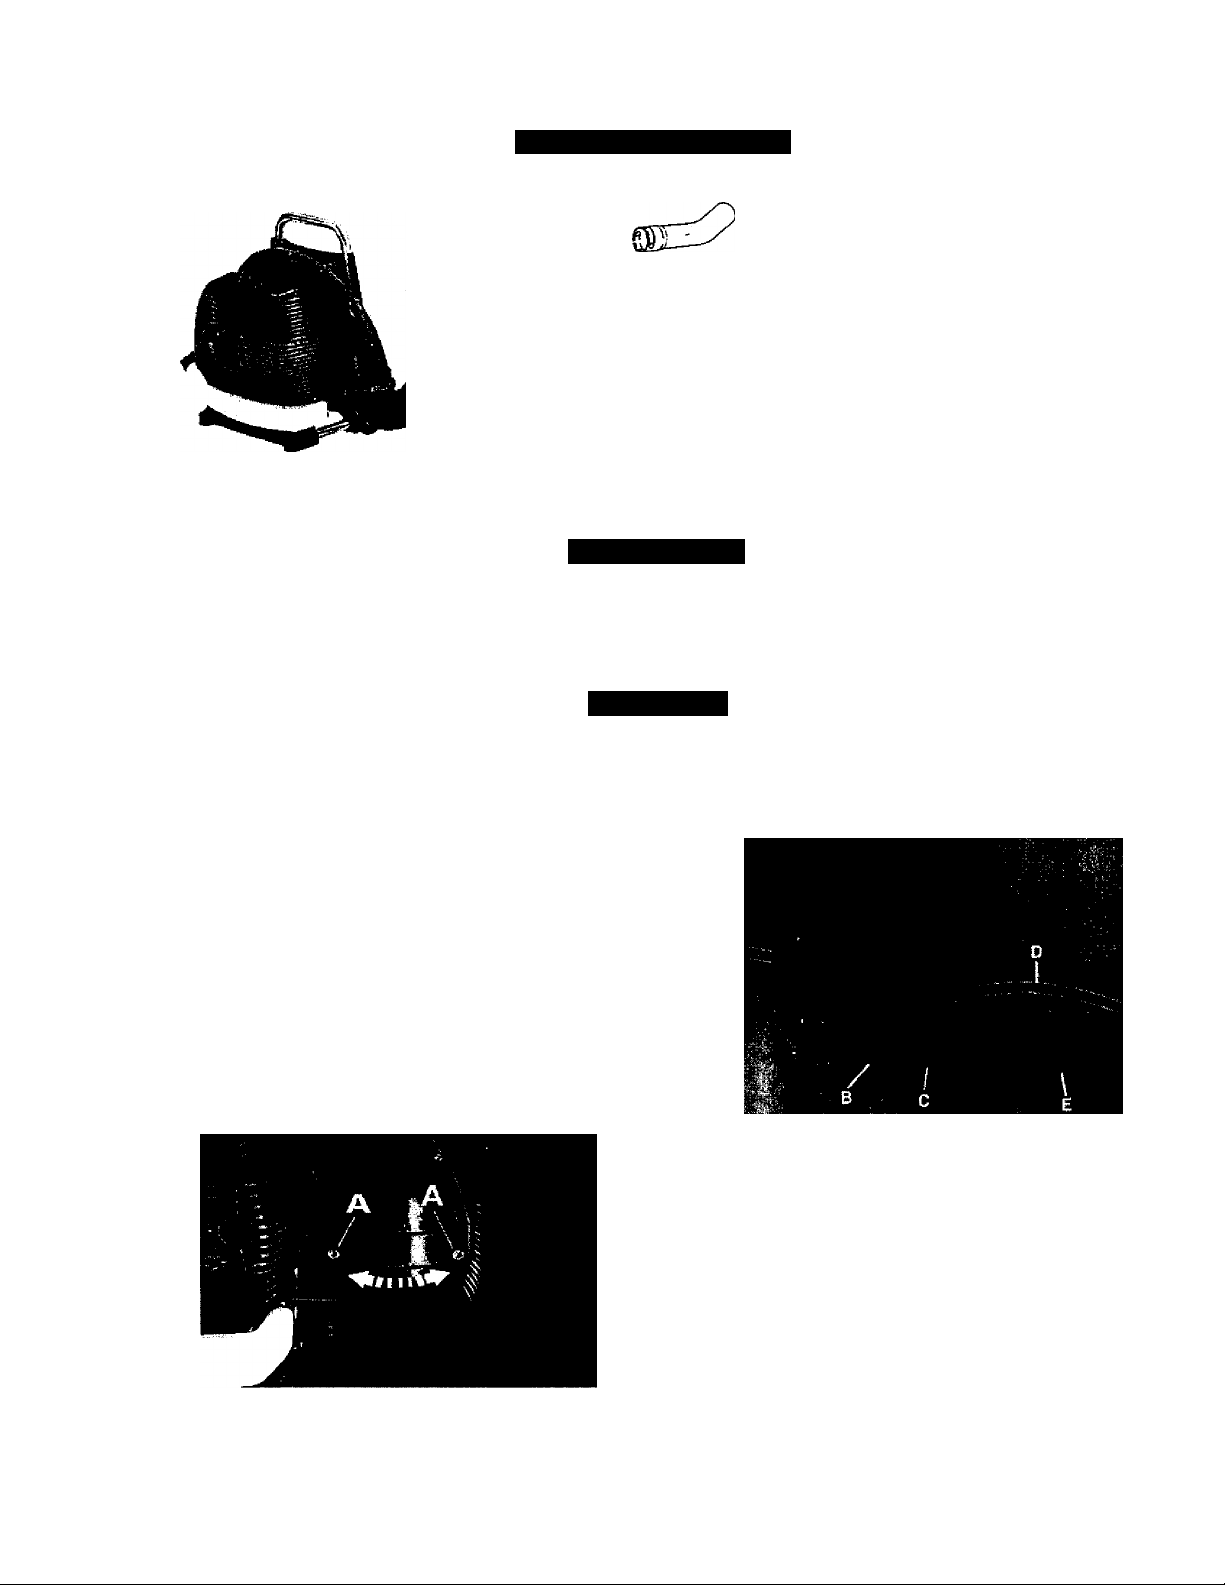
CONTENTS OF CARTON
Read these instructions and the operating manual in its entirety'before you attempt to operate your new air blower.
Blower Tube Curved Nozzle Tube
Clamp
Extension Tube
c
Blower
The following items for the operation of your blower are available at your nearest Sears store.
• Safety goggles • Air fitter
• Hearing protection • Fuel stabilizer
• Gloves • Sparkplug
• 2-Cycle air cooled engine oil • Gas can
Read these instructions and the operating manual in
its entirety before you attempt to assemble or operate
your new backpack air blower.
Your new backpack air blower has been assembled at
the factory except for the blower tubes. The necessary
clamps to complete assembly as well as a combination
wrench are included in the parts bag enclosed with the
unit.
To ensure safe and proper operation of your backpack
air blower, any clamp that you install must be
tightened securely.
Pleated Tube
Combi-Wrench
ACCESSORIES
ASSEMBLY
2. Slide the pleated tube (Fig. 2, E) onto the elbow
(Fig. 2, B) and secure with the clamp (Fig. 2, C)
that has an attached cable guide. Install throttle
cable (Fig. 2, D) into the clamp cable guide.
FIGURE 2
Q'
Clamp with
Cable Guide
HOW TO ASSEMBLE
1. The elbow tube is already inserted into the blower
housing. Insure that the two screws (Fig. 1, A) are
tight, but not so tight that the tube cannot be easily
swiveled.
FIGURE 1
3. Loosen the two screws (Fig. 3, H) on the bottom of
the attached handle clamp. Make sure that the
clamp goes over the top of the raised “T” on the
underside of the blower tube, and that the leg of
the “T” is aligned with the slot on the clamp. Push
blower tube into the pleated tube and secure with
the plastic clamp (Fig. 3, G). The multi-function
handle (Fig. 3, F) has a 2-inch adjustment range.
Locate the most comfortable handle location and
then tighten the multi-function handle to blower
with the two screws (Fig. 3, H).
FIGURE 3
4. Once the handle is secured, the blower tube with
;■ handle can be twisted and swiveled. Ensure that
the throttle cable does not become pinched or
trapped when swiveling handle.
5. Install the extension tube (if desired) onto blower
tube by aligning the tab on the extension with the
corresponding area on blower tube; then push
together and twist to secure.
6. Install the curved nozzle tube in the same manner.
Twist to secure.
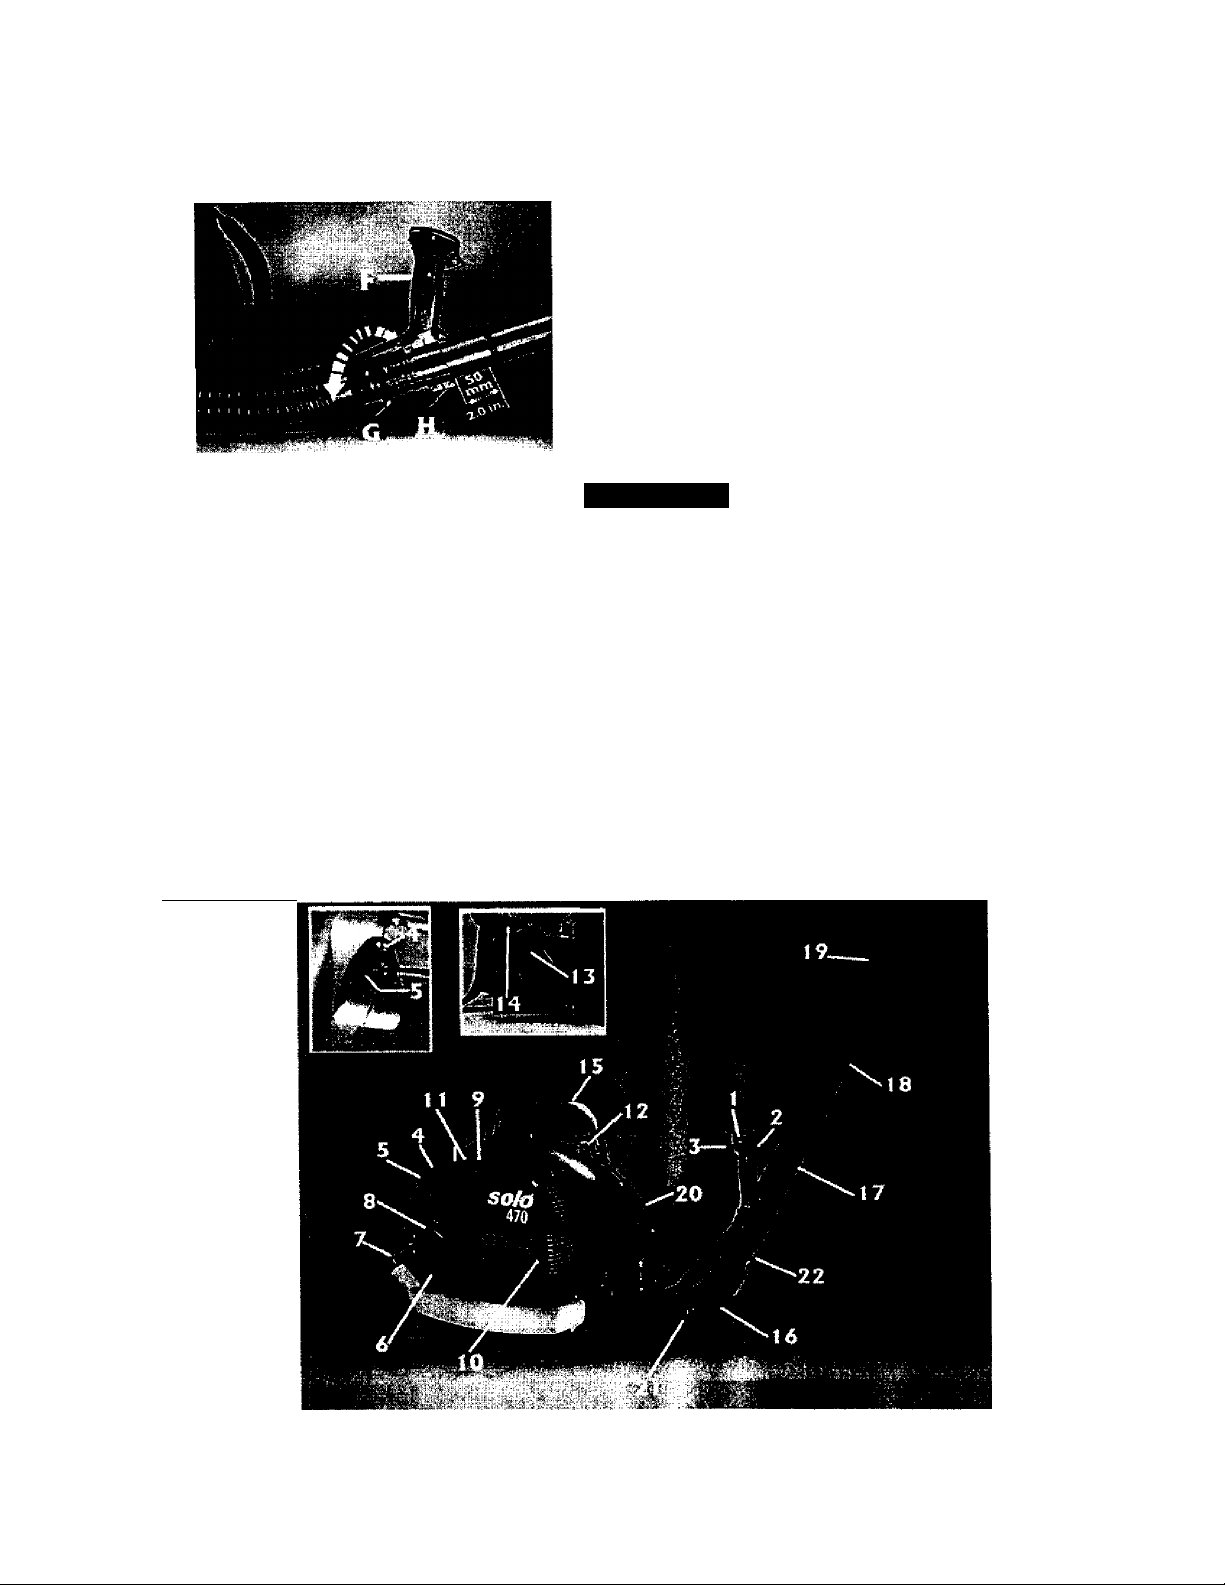
OPERATION
KNOW YOUR BACKPACK AIR BLOWER
Read this Operator’s Manual and Safety Instmctions before operating your backpack air blower. Compare the
illustration below (Figure 4) with your backpack air blower to familiarize yourself with the location of various controls
and adjustments. Save this manual for future reference.
1. On-off switch
2. Throttle lever
3. Speed lever
4. Primer
5. Choke lever
6. Air filter cover
7. Fuel tank cap
8. Starter rope handle
9. Sparkplug
10. Muffler
11. Carburetor adjustment screws
FIGURE 4
12. Anti-vibration springs
13. Quick release carrying strap
14. Carrying strap
15. Carrying frame
16. Pleated tube
17. Blower tube
18. Extension tube
19. Curved nozzle tube
20. Blower housing
21. Clamp
22.
Clamp with cable guide
 Loading...