


Operator's Manual
iPROFESSIONAL I
4.1 HP/2-Cycle
51 ccJ3.15 cu. in.
CHAIN SAW
Model No. 360.352001 - 20-inch Bar
NOTICE: There Is a typographlcal
_rror in this manual. The correct model
number is:
360.352010
CAUTION:
Before using this product, read this
manual and follow all its Safety
Rules and Operating Instructions.
Sears, Roebuck and Co., Hoffman Estates, IL 60179 U.S.A.
Visit our Craftsman website: www.sears.conYcraftsman
• Safety
• Operation
• Maintenance
• Service & Adjustments
• Parts LIBRARY:
• EspaSol
• Warranty Pg. 2
• Safety Pg. 3
• Assembly Pg. 4
• Contents of Carton Pg. 4
• Accessories Pg 5
• Operation Pg. 5
• How to Use Your Chain Pg. 5
Saw
• Safe Felling and Cutting Pg. 7
Techniques
UMITED TWO YEAR WARRANTY
For two (2) years from the date of pumhase if the chain saw is maintained, lubricated and tuned up according to the
instructions in the Operator's Manual, Sears will repair or replace, free of charge, any parts found to be defective in
material or workmanship. If this product ls used commemially, this viarranty only applies for 90 days.
This warranty does not cover:.
• Expendable items which become worn during normal use, such as spark plugs and air filters.
• Repairs necessary because of operator abuse, negligence, improper storage, accident or the failure to
maintain the equipment according to the instructionscontained in the operator's manual
Warranty service is available by returning the chain saw to the nearest Sears Service Center in the United States.
This warranty gives you specific legal fights, and you may also have other rightswhich may vary from state to state.
Sears, Roebuck and Co., Dept. 817WA, Hoffman Estates, IL 60179
• _ Maintenance Pg.10
• Service & Adjustments Pg.12
• Storage Pg.14
* Troubleshooting Pg.15
• California Emission Control Pg.15
Warranty Statement
• Parts Pg.17
• Espafiol Pg.21
PRODUCT SPECIFICATIONS
Horse Power _.
:ue-Otl Capacity,
:ueI-Oil Mix
_parkRug
'_Gap .020In)
DIITankCapacity
Engine
Displacement
Maximum RPM
Dry Weight
4.1
U.S.o1"20 oz.
40-I
BoschWSR6Y
Champion RCJ-bY
20 oz.
51 cc
12,500rpm
10.75lbs.
YlodelNo. 360.352001
Serial No.
Dateof Purchase
The model and serial number will be
found on the rear handle. You should
record both serial number and date of
purchase and keep in a safe place for
future reference.
2
(,,,"9'_!_1_ nk,"dllL_,=,_ijt]lllO]llU_o_
CAUTION: Always disconnect spark plug wire and place where it cannot contact sparl_plug to prevent
accidental starting when setting up, transporting, adjusting or making repairs.
TRAINING
Read the operator's manual carefully prior to
operation. Become familiar with the controls and know
how to operate your chain saw properly.
• Keep the area of operation clear of all persons,
especially small children and pets.
• Use the chain saw only as described in this
manual.
• Do not allow children to operate your chain saw.
Never allow adults to use the chain saw without
proper instructions.
• Do not operate the chain saw ifit has been
dropped or damaged in any manner. Always have
damage repaired before using your chain saw.
• Use only recommended Craftsman accessories
and replacement parts. Use of non-Craftsman
parts and accessories may be hazardous.
PREPARATION
• Always wear safety glasse s or eye shields when
starting and while using your Chain saw.
• Dress properly. Do not operate chain saw when
barefoot or wearing open sandals. Wear only solid
shoes with good traction.
• Wear long-sleeved clothes that are snug fitting.
Avoid wearing loose clothing.
• Wear either tightly cuffed or cuffless pants.
• Wear hearing protection even when working for a
short period of time. Remember - hearing damage
is cumulative.
• Wear protective, non-slip gloves for safer
operation.
• Always wear a =hard hat" in the working area.
Overhead hazards such as falling limbs present
danger of injury.
• Always wear safety boots with steel toes.
• Check fuel tank before starting engine. Do not fill
fuel tank indoors, when the engine is running or
when the engine is hot. Allow the engine to cool
for several minutes before filling the fuel tank.
Clean off any spilled gasoline before starting the
engine.
• Always make adjustments before starting your
chain saw. Never attempt to make adjustments
while the engine is running.
• Use only in daylight or good artificial light.
OPERATION
• Keep your eyes and mind on your chain saw. Do
not let yourselfbe distracted.
• Always be sure of your footing. Use extra caution
in wet or slipperygrass. WALK - DON_f RUN.
• Do not put hands or feet near rotating parts. Keep
clear of chain at all times.
• Always stop the engine whenever you leave or are
not using your chain saw.
• Before cleaning, inspecting, or repairing your
chain saw, stopthe engine and make absolutely
sure all movingparts have stopped. Then
disconnect spark plug wire and keep it away from
the sPark plug to prevent accidental starting.
• D° not adjust carburetor. Overspeeding engine
may result in engine damage or personal injury.
• Do not runthe engine indoors. Exhaust fumes are
dangerous.
• Never operate your chain saw without proper
guards or othersafety devices in place.
• Never remove hands from chain saw handles
when actively cuttingwith the saw.
WARNING: Ca/ifemia Proposition 65
The engine exhaust from this product contains
chemicals knownto the State of California to cause
cancer, birth defects, or other reproductive harm.
KICKBACK CONDITIONS AND PREVENTION
Kickback occurswhen the upper quadrant of the bar
nose contacts a solid object in the wood or is pinched.
This type of contactstops the chain for an instant. The
result is a lightningfast reverse reaction of the chain;
causing the bar to "kick"up and back toward the
operator. Under some circumstances the operator
(Fig. 1) may suffersevere or fatal injury. Kickback may
also occur during limbing (See LIMBING).
FIGURE 1
Kickback path
3
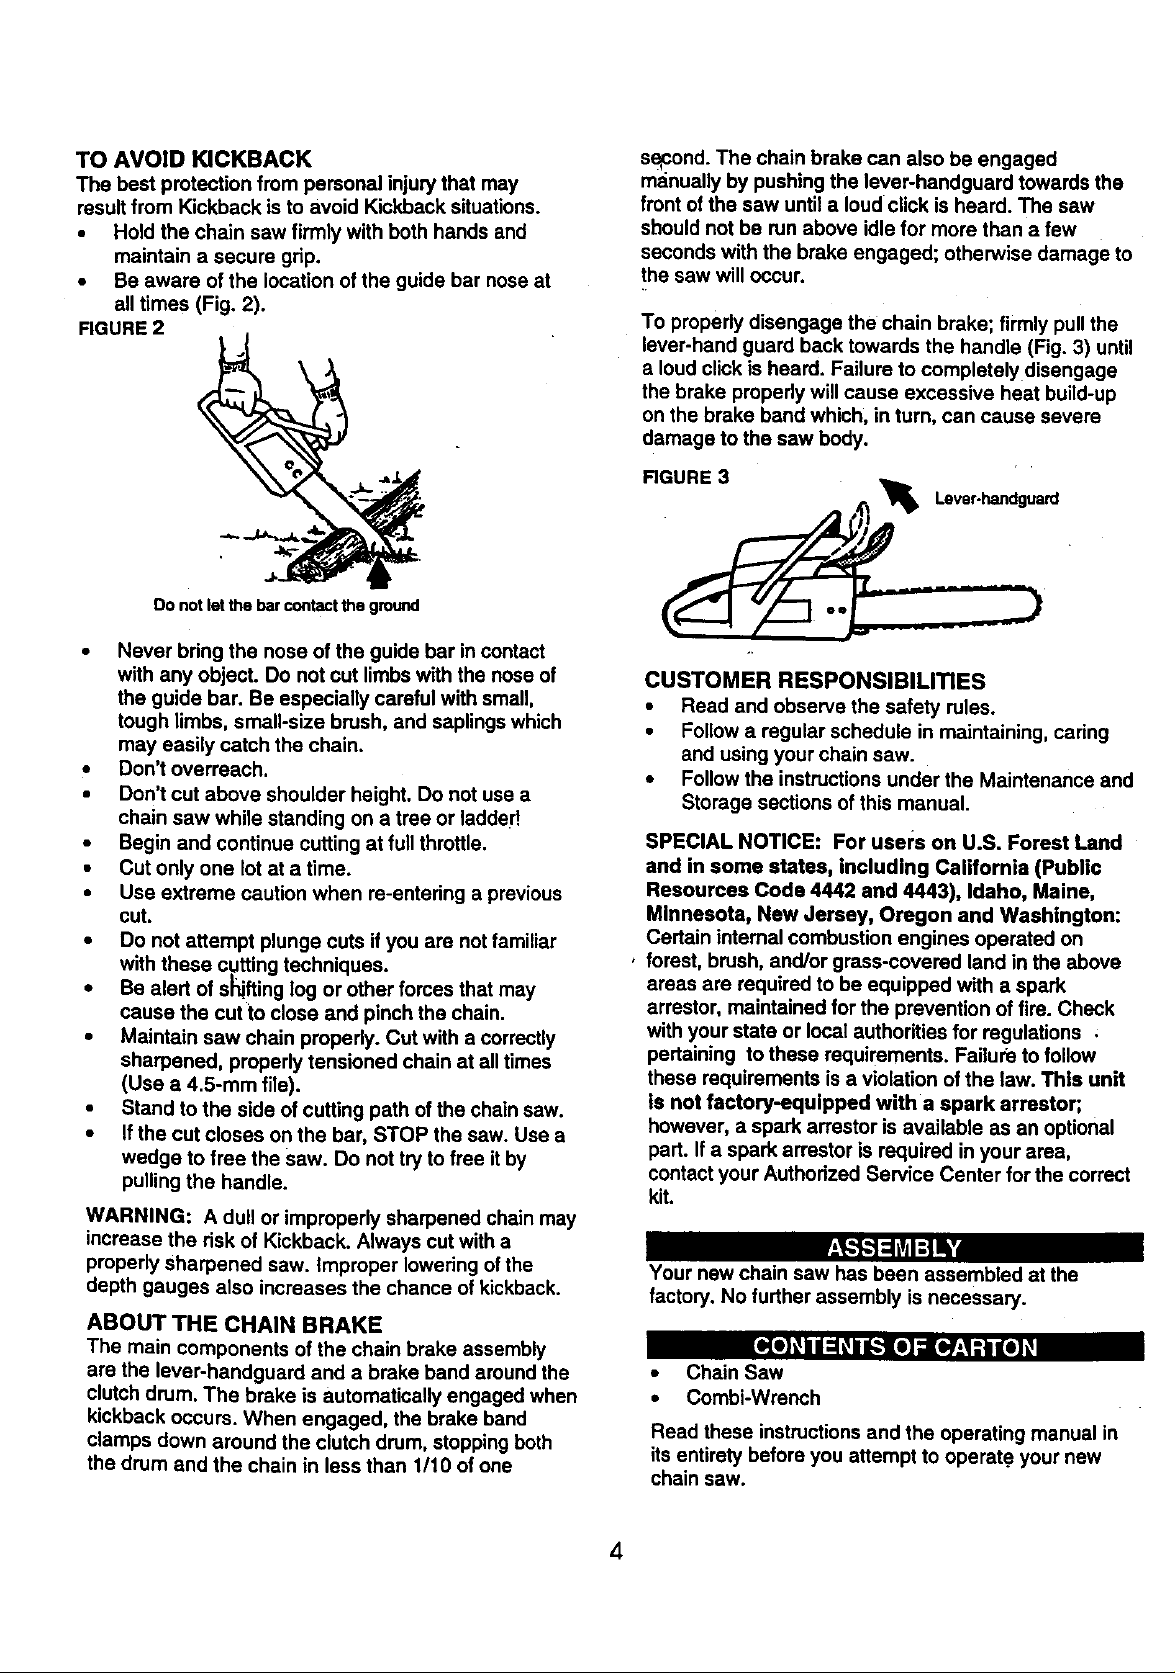
TO AVOID KICKBACK
The best protection from personal injury that may
result from Kickback is to avoid Kickback situations.
• Hold the chain saw firmly with both hands and
maintain a secure grip.
• Be aware of the location of the guide bar nose at
all times (Fig. 2).
FIGURE 2
Donot let the barcontacttheground
• Never bring the nose of the guide bar in contact
with any object. Do not cut limbs with the nose of
the guide bar. Be especially careful with small,
tough limbs, small-size brush, and saplings which
may easily catch the chain.
• Don't overreach.
• Don't cut above shoulder height. Do not use a
chain saw while standing on a tree or laddeH
• Begin and continue cutting at fullthrottle.
• Cut only one lot at a time.
• Use extreme caution when re-entering a previous
cut.
• Do not attempt plunge cuts ifyou are not familiar
with these cutting techniques.
• Be alert of shifting log or other forces that may
cause the cut to close and pinch the chain.
• Maintain saw chain properly. Cut with a correctly
sharpened, properly tensioned chain at all times
(Use a 4.5-mm file).
• Stand to the side of cutting path of the chain saw.
• If the cut closes on the bar, STOP the saw. Use a
wedge to free the saw. Do not try to free it by
pullingthe handle.
WARNING: A dull or improperly sharpened chain may
increase the dsk of Kickback. Always cut with a
properly sharpened saw. Improper lowering of the
depth gauges also increases the chance of kickback.
ABOUT THE CHAIN BRAKE
The main components of the chain brake assembly
are the lever-handguard and a brake band around the
clutch drum. The brake is automatically engaged when
kickback occurs. When engaged, the brake band
clamps down around the clutch drum, stopping both
the drum and the chain in less than 1/10 of one
s_cond. The chain brake can also be engaged
manually by pushing the lever-handguard towards the
front of the saw until a loud click is heard. The saw
should not be run above idle for more than a few
seconds with the brake engaged; otherwise damage to
the saw will occur.
To propedy disengage the chain brake; firmly pull the
lever-hand guard back towards the handle (Fig. 3) until
a loud click is heard. Failure to completely disengage
the brake propedy will cause excessive heat build-up
on the brake band which, in turn, can cause severe
damage to the saw body.
RGURE 3
• ,_,._ Lever.handguard
r •
CUSTOMER RESPONSIBILITIES
• Read and observe the safety rules.
• Follow a regular schedule in maintaining, caring
and using your chain saw.
• Follow the instructions under the Maintenance and
Storage sections of this manual.
SPECIAL NOTICE: For usel:s on U.S. Forest Land
and in some states, including California (Public
Resources Code 4442 and 4443), Idaho, Maine,
Minnesota, New Jersey, Oregon and Washington:
Certain internal combustion engines operated on
forest, brush, and/or grass-covered land in the above
areas are required to be equipped with a spark
arrestor, maintained for the prevention of fire. Check
with your state or local authorities for regulations •
pertaining to these requirements. Failure to follow
these requirements is a violation of the law. This unit
is not factory-equipped with a spark arrestor;,
however, a spark arrestor is available as an optional
part. If a spark arrestor is required in your area,
contact your Authorized Service Center for the correct
kit.
Your new chain saw has been assembled at the
factory. No further assembly is necessary.
• Chain Saw
• Combi-Wrench
Read these instructions and the operating manual in
its entirety before you attempt to operate your new
chain saw.
4
The following items for the operation of your chain saw are available at your nearest Sears store.-
, Safety goggles • Airfilter
• Hearing protection • Fuel Stabilizer
• Gloves * Spark plug
• 2-Cycle air cooled engine oil • Gas can
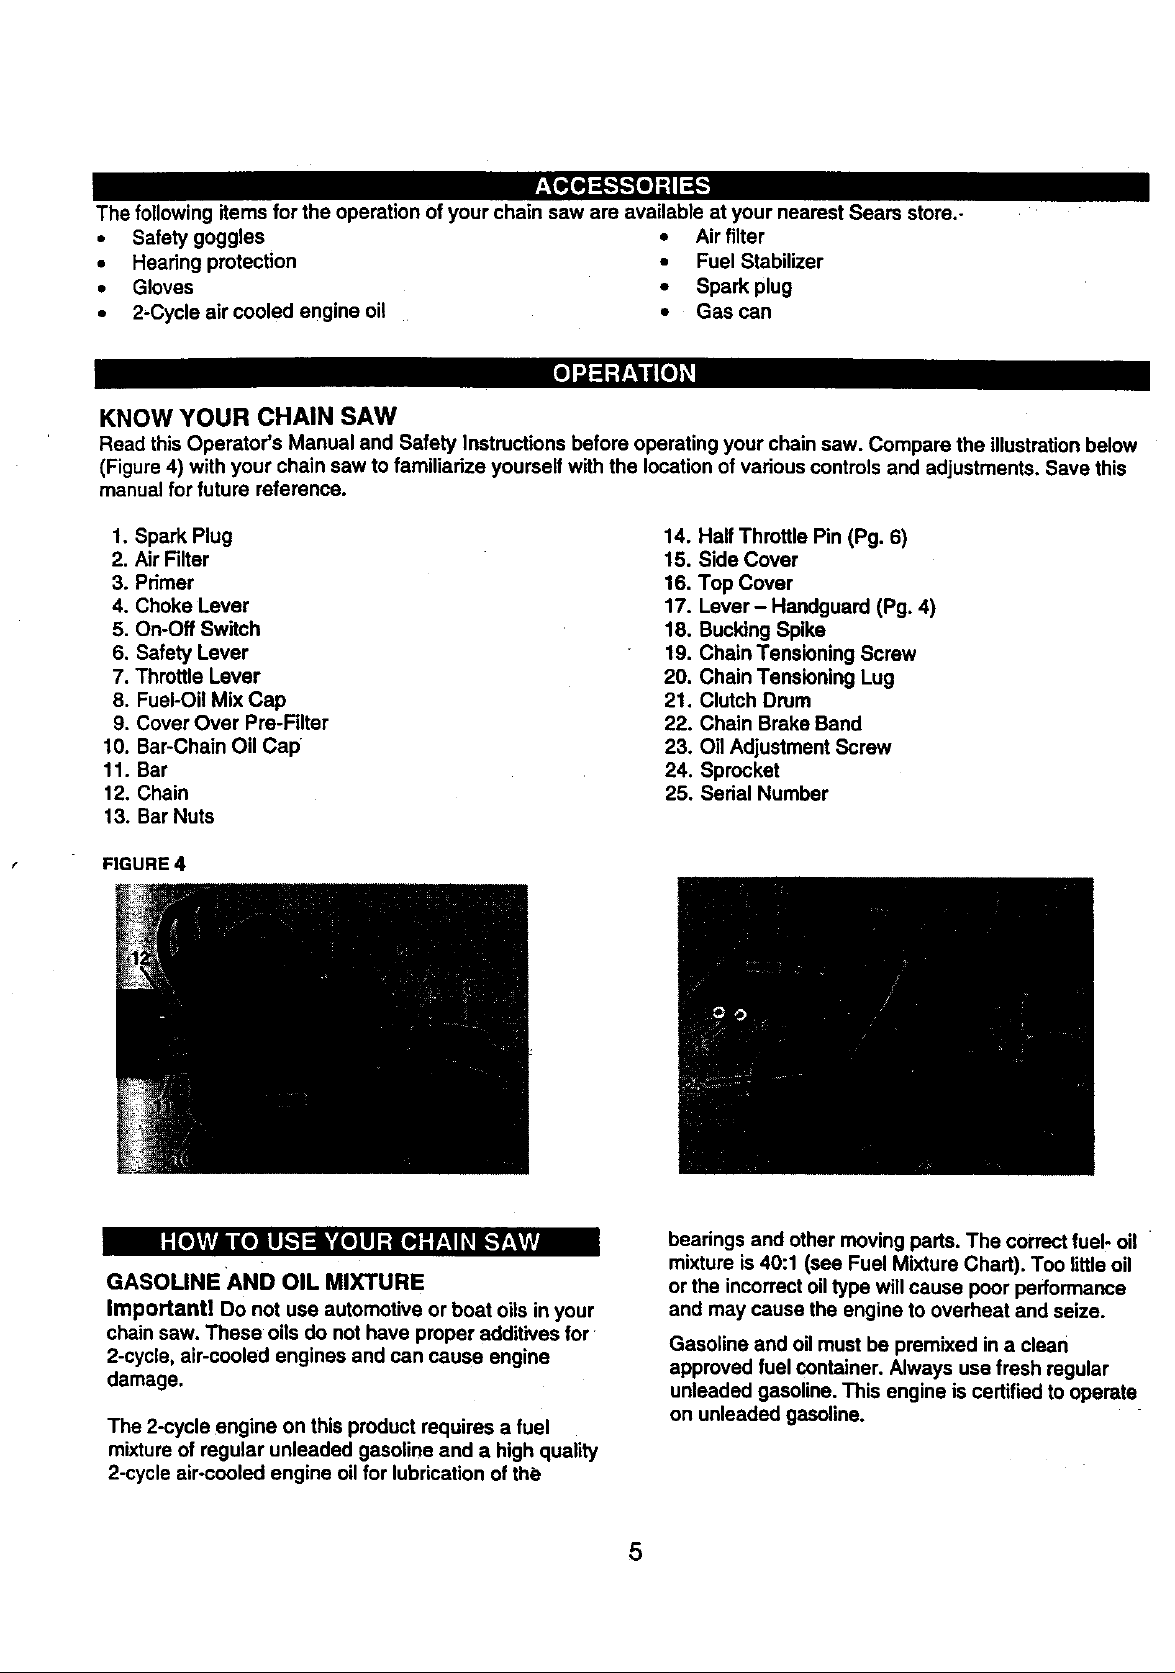
KNOW YOUR CHAIN SAW
Read this Operator's Manual and Safety Instructions before operating your chain saw. Compare the illustration below
(Figure 4) with your chain saw to familiarize yourself with the location of various controls and adjustments. Save this
manual for future reference.
1. Spark Plug
2. Air Filter
3. Primer
4. Choke Lever
5. On-Off Switch
6. Safety Lever
7. Throttle Lever
8. Fuel-Oil Mix Cap
9, Cover Over Pre-Filter
10. Bar-Chain Oil Cap
11. Bar
12. Chain
13. Bar Nuts
FIGURE 4
14. Half Throttle Pin (Pg. 6)
15. Side Cover
16. Top Cover
17. Lever- Handguard (Pg. 4)
18. Bucking Spike
19. Chain Tensioning Screw
20. Chain Tensioning Lug
21. Clutch Drum
22. Chain Brake Band
23. Oil Adjustment Screw
24. Sprocket
25. Serial Number
_,[o]l,_?jdo] [1_I= i'Lo]ll;7 [_ _?:lvlvA
GASOLINE AND OIL MIXTURE
Importantl Do not use automotive or boat oils in your
chain saw. These oils do not have proper additives for
2-cycle, air-cooled engines and can cause engine
damage.
The 2-cycle engine on this product requires a fuel
mixtureof regular unleaded gasoline and a high quality
2-cycle air-cooled engine oil for lubrication of the
bearings and other moving pads. The correct fuel- oil
mixture is 40:1 (see Fuel Mixture Chart). Too littleoil
or the incorrectoil type will cause poor performance
and may cause the engine to overheat and seize.
Gasoline and oil must be premixed in a clean
approved fuel container. Always use fresh regular
unleaded gasoline. This engine is codified to operate
on unleaded gasoline.
5
FUEL MIXTURE CHART
GASOUNE OIL
I Gallon 3.2 Ounces
2.5 Ganons 8.0 Ounces
MPORTANT! ,Alcohol blended fuels called gasohol
using ethanol or methanol) can attract moisture,
_hich leads to fuel - oil separation'and formation of
Lcidsduring storage. Acidic gas can damage the fuel
system of an engine while in storage. To avoid engine
problems, the fuel system should be emptied before
storage of 30 days or longer. Drain the gas tank, then
run the fuel out of the carburetor and fuel lines by
starling the engine and letting it run until it stops. Use
fresh fuel next season. See storage instructionsfor
eddltior_l information. Never use engine or carburetor
cleaner products in the fuel tank or permanent damage
may occur.
2-CYCLE OIL
Craftsman 2-cycle, air-cooled engine oil is specially
blended with fuel stabilizers. If you do not use this
Sears oil, you can add a fuel stabilizer, such as
Craftsman No. 33500, to your fuel mix.
FUEL STABILIZER
A fuel stabilizer is an acceptable altemative in
minimizing the formation of fuel gum deposits during
storage. Add stabilizer to gasoline mixture in fuel
storage container and mix well. Always follow the fuel
mix ratio found on the stabilizer container. Run engine
at least 5 minutes after adding stabilizer to allow the
stabilizer to reach the carburetor, You do not have to
drain the fuel tank for storage if you are using fuel
stabilizer.
BAR AND CHAIN OIL
We recommend a special chain oil (low sling, high
tack) to lubricate your bar and chain; consult your local
Sears retailer. During chain saw operations at
temperatures below freezing (0°C/32°F), the chain oil
viscosity increases creating an ovedoad to the
automatic oil pump. Overloading results in damage to
the driver gear, pump mechanism, and bar and chain.
A special cold-climate chain oil should be used. Refill
chain oil each time you refuel. CAUTION: Never use
waste engine oil; it will damage the pump.
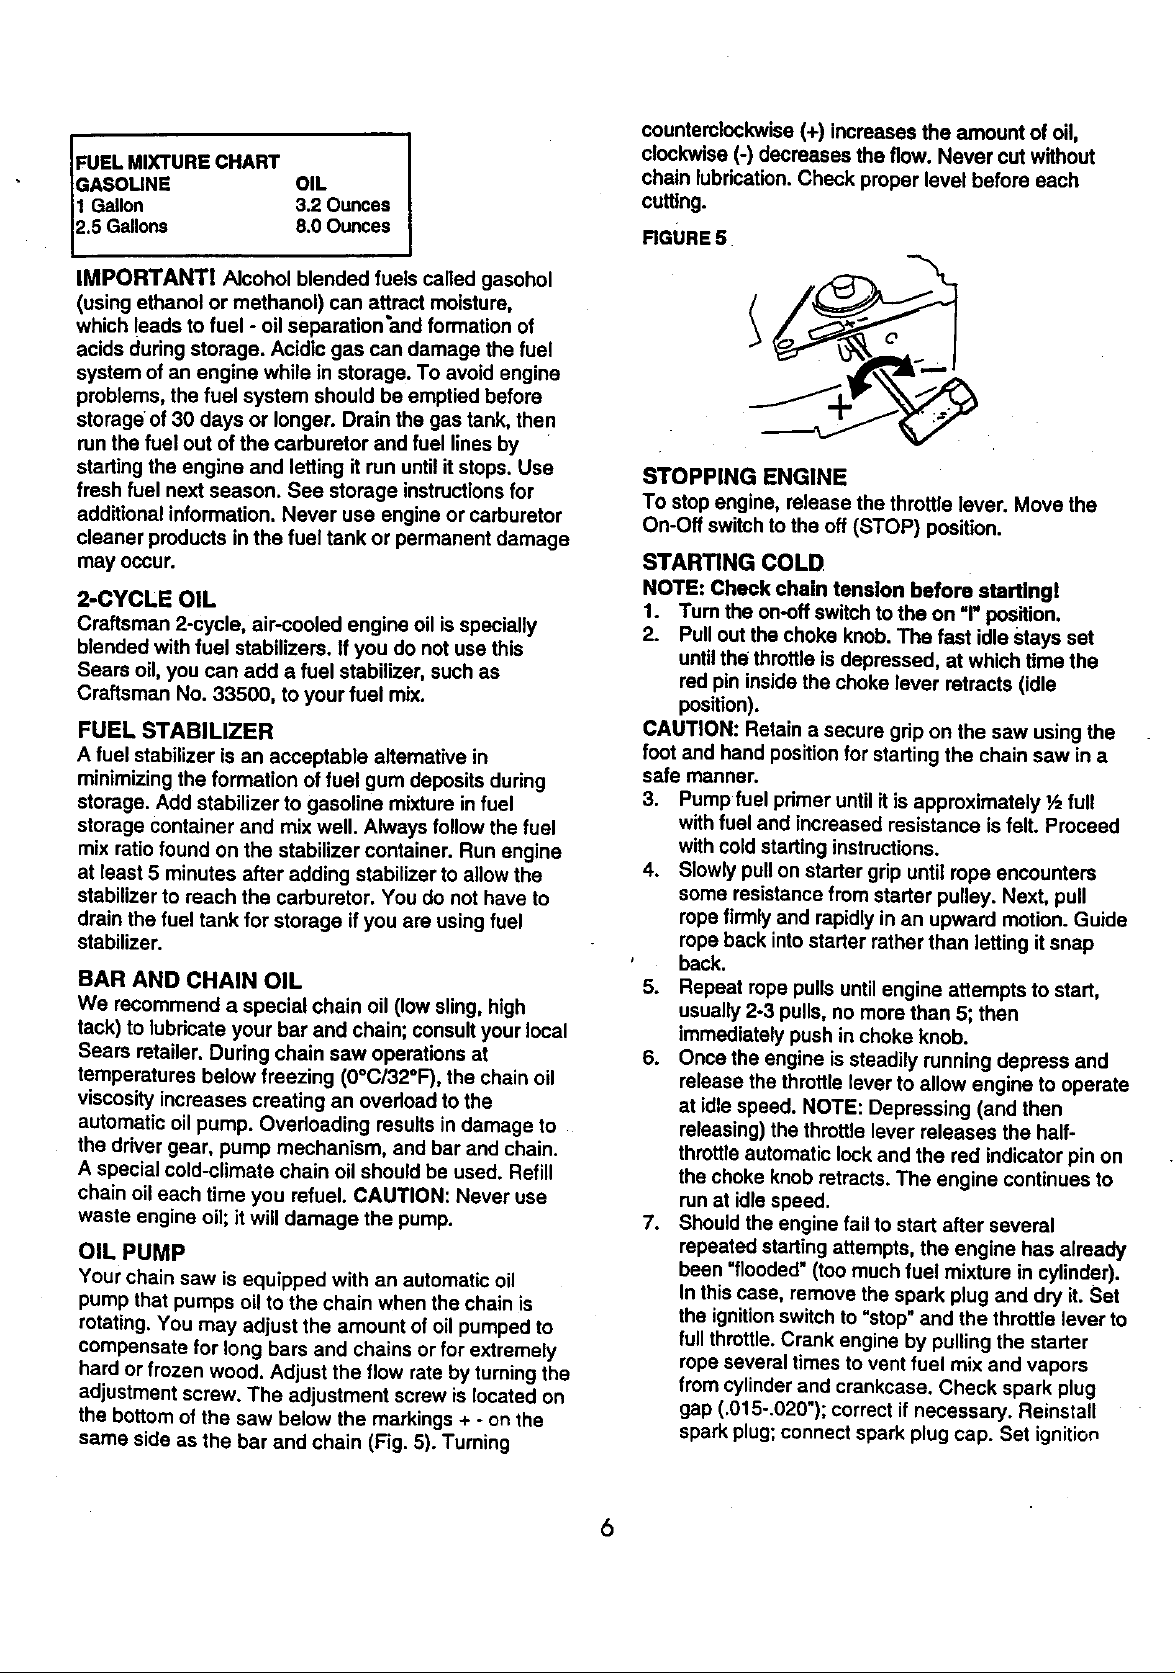
OIL PUMP
Your chain saw is equipped with an automatic oil
pump that pumps oil to the chain when the chain is
rotating. You may adjust the amount of oil pumped to
compensate for long bars and chains or for extremely
hard or frozen wood. Adjust the flow rate by turning the
adjustment screw. The adjustment screw is located on
the bottom of the saw below the markings + - on the
same side as the bar and chain (Fig. 5). Turning
counterclockwise (+) increases the amount of oil,
clockwise (-) decreases the flow. Never cut without
chain lubrication. Check proper level before each
cutting.
RGURE 5
STOPPING ENGINE
To stop engine, release the throttle lever. Move the
On-Off switch to the oft (STOP) position.
STARTING COLD
NOTE: Check chain tension before startingl
1. Tum the on-off switch to the on "1"position.
2. Pull out the choke knob. The fast idle stays set
untilthe throttle isdepressed, at which time the
red pin inside the choke lever retracts (idle
position).
CAUTION: Retain a secure gdp on the saw using the
foot and hand position for starting the chain saw in a
safe manner.
3. Pump fuel primer until it is approximately ½ full
with fuel and increased resistance is felt. Proceed
with cold starting instructions.
4. Slowly pull on starter grip until rope encounters
some resistance from starter pulley. Next, pu_l
rope firmly and rapidly in an upward motion. Guide
rope back into starter rather than letting itsnap
back.
5. Repeat rope pulls until engine attempts to start,
usually 2-3 pulls, no more than 5; then
immediately push in choke knob.
6. Once the engine is steadily running depress and
release the throttle lever to allow engine to operate
at idle speed. NOTE: Depressing (and then
releasing) the throttle lever releases the half-
throttle automatic lock and the red indicator pin on
the choke knob retracts. The engine continues to
runat idle speed.
7. Should the engine fail to start after several
repeated starting attempts, the engine has already
been "flooded"(too much fuel mixture in cylinder).
In this case, remove the spark plug and dry it. Set
the ignitionswitch to "stop"and the throttle lever to
fullthrottle. Crank engine by pulling the starter
rope several times to vent fuel mix and vapors
from cylinder and crankcase. Check spark plug
gap (.015-.020"); correct if necessary. Reinstall
spark plug;connect spark plug cap. Set ignition
b
STARTING WARM
I. Pull choke knob out.
2. Push choke knob back into open position, red
indicator pin on choke button remains visible.
3. Crank engine and allow to run briefly.
4. Depress throttle lever to allow engine to run at idle
speed (indicator pin disappears).
Ifyou are unsuccessful in starting the engine, consult
the Troubleshooting guide in your Craftsman chain
saw handbook or contact a Sears Sen/ice Center.
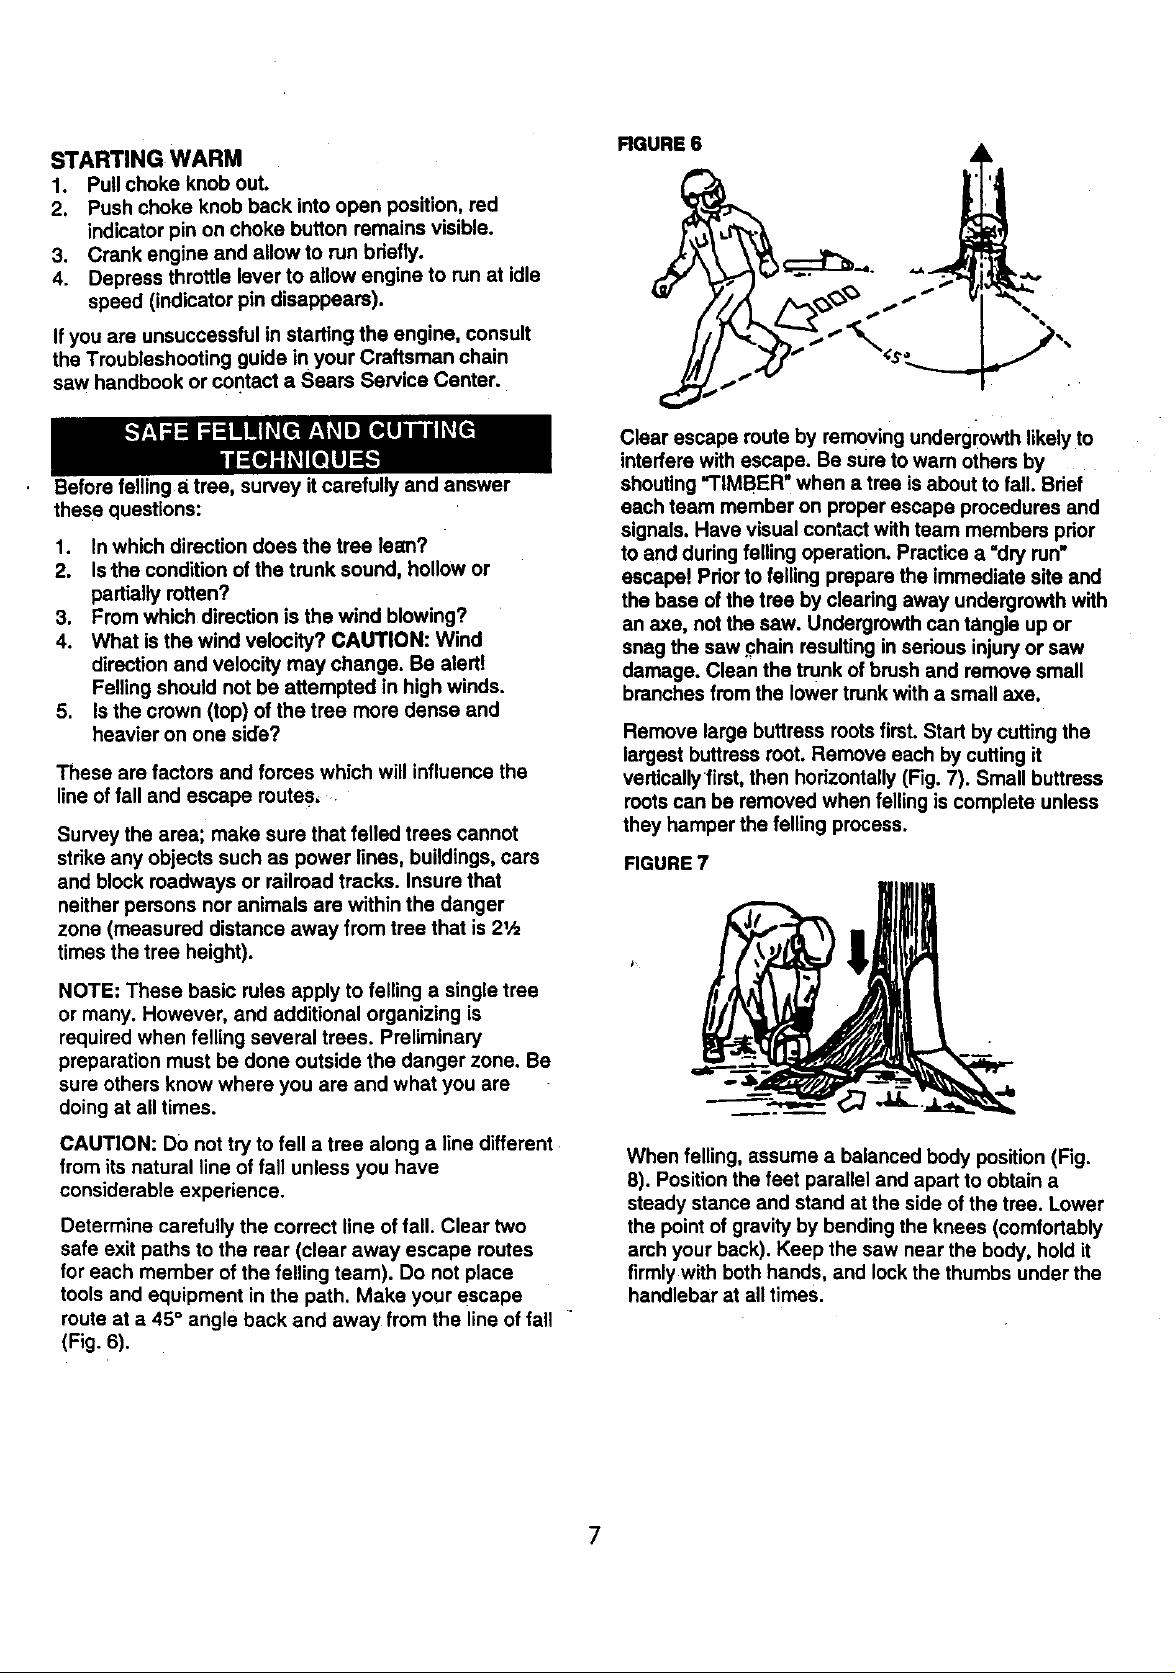
Before felling a tree, survey itcarefully and answer
these questions:
1. In which direction does the tree lean?
2. Is the condition of the trunk sound, hollow or
partially rotten?
3. From which direction is the wind blowing?
4. What is the wind velocity? CAUTION: Wind
direction and velocity may change. Be alert!
Felling should not be attempted in high winds.
5. Is the crown (top) of the tree more dense and
heavier on one side?
These are factors and forces which will influence the
line of fall and escape routes,
Survey the area; make sure that felled trees cannot
strike any objects such as power lines, buildings, cars
and block roadways or railroad tracks. Insure that
neither persons nor animals are within the danger
zone (measured distance away from tree that is21/=
times the tree height).
RGURE 6
Clear escape route by removing undergiowth likely to
interfere with escape. Be sure to warn others by ....
shouting =TIMBER" when a tree is about to fall. Brief
each team member on proper escape procedures and
signals. Have visual contact with team members prior
to and during felling operation. Practice a "dry run"
escape! Prior to felling prepare the immediate site and
the base of the tree by clearing away undergrowth with
an axe, not the saw. Undergrowth can tangle up or
snag the saw Fhain resulting in serious injuryor saw
damage. Clean the trunk of brush and remove small
branches from the lower trunk with a small axe.
Remove large buttress roots first. Start by cutting the
largest buttress root. Remove each by cutting it
vertically first, then horizontally (Fig. 7). Small buttress
rootscan be removed when felling is complete unless
they hamper the felling process.
RGURE 7
NOTE: These basic rules apply to felling a single tree
or many. However, and additional organizing is
required when felling several trees. Preliminary
preparation must be done outside the danger zone. Be
sure others know where you are and what you are
doing at all times.
CAUTION: DO not try to fell a tree along a line different
from its natural line of fall unless you have
considerable experience.
Determine carefully the correct line of fall. Clear two
safe exit paths to the rear (clear away escape routes
for each member of the felling team). Do not place
tools and equipment in the path. Make your escape
route at a 45 ° angle back and away from the line of fall "
(Fig. 6).
When felling, assume a balanced body position (Fig.
8). Position the feet parallel and apart to obtain a
steady stance and stand at the side ofthe tree. Lower
the point of gravity by bending the knees (comfortably
arch your back). Keep the saw near the body, hold it
firmlywith both hands, and lock the thumbs under the
handlebar at all times.
7

FIGURE 8
CAUTION: Maintain good footing, body balance and
insure a safe escape path has been established.
Never fell a tree without making a proper felling notch
(undercut).
The next cut (Fig. 11) is called the felling cut (back
cut). Make it at least 2" higher than the lower cut of the
felling notch by cutting horizontally and parallel to the
felling notch. Do not cut through to the felling notch.
Leave a "hinge" of uncut wood approximately 1/10 of
the tree diameter (Fig. 11).
CUTTING FELLING NOTCH
Start fellingby making a careful felling notch
(undercut) first (Fig. 9). This notch determines the line
of fall. Position it at a dght angle. Cut the felling notch
to a depth of about t/, of the trunk diameter. It must be
wide enough and should never be higher than its
depth.
FIGURE 9
Felling
To make the felling notch, start with the upper cut
facing the line of fall. This is a directional cut
downwards at an angle (Fig. 10, 1). Next, make the
lower felling notch cut. Cut hodzontally and straight
into the tree until it meets the upper cut forming a
wedge (Fig. 10, 2).
RGURE 10
WARNING: To avoid personal injury, do not cut
through the hinge! A proper hinge prevents the tree
from possibly =sitting back" or "butt kicking" the back of
the stump, twisting off the stump, or falling prematurely
and uncontrolled.
When felling a large tree, drive wedges into the felling
cut. Use only wooden or plastic wedges. Never use
steel or iron wedges which can cause kickback and
damage to the chain. Wedges prevent the tree from
settling back on the bar and help control the direction
of the fall toward the felling notch (fig. 12)o
FIGURE 12
SMALL TREES
If the trunk diameter issmaller than the guide bar
cutting length, be careful making the felling cut and
forming the hinge. Once the felling cut has been made,
,place the bucking spike at the base line dght behind
the hinge, and do a fan cut (Fig. 13).
FIGURE 13
The ex_ when the tree is on a slope; then the
lower cut should be on an upward angle to cut a
larger, more open wedge and to gain greater control
dudng the fall of the tree (Fig. 11).
FIGURE 11
Direction of fan cut
Hinge_
The bucking spike is the toothed metal piece attached
to the front of the saw body and found to the left of the
bar. With the bucking spike teeth against the logfirm
contact between the saw body and the log are
maintained. A fan cut isaccomplished by first
contacting the teeth of the bucking spike to the log and
then, using the bucking spike as the pivot point,
rotating the bar through the log in a counterclockwise
direction.
8

LIMBING (Removing limbs from felled trees)
WARNING: Of all the cutting operations, limbing is the
one that holds the most chance of unforeseen injury.
The danger of kickback is most prevalent during
limbing if the bar nose comes in contact with another
branch or the side of the tree (see "Kickback
Conditions and Prevention").
Professional loggers have developed various safe,
efficient and effective limbing techniques which you
must follow. The following instructions are a few of the
basic safe work habits for a chain saw operator while
limbing or removing branches from a tree.
.1. Before starting to limb, be sure the branch is on a
safe side of the log, uphill, and on the side
opposite of any potential motion the cut branch
might make (Fig. 14).
FIGURE 14
6. Craftsman saws are designed to allow the
powerhead to glide over the trunk during limbing.
Cut the branches in a swinging back and forth
movement with the saw remaining on the tree.
This is known as the =pendulum method."
7. Prior to cutting the branches, consider the
direction in which the branches may fall. This will
determine whether you cut from the top down
(overbuck, Fig. 16) or from below up (underbuck,
Fig. 17).
8. Watch out for branches under tension which can
snap back. Tension must be removed before
these branches can be safely cut. Beware of
potential kickback situations.
9. If large branches are to be used for firewood, cut
them to length while still attached to the tree. This
is an easier and safer method than bucking
branches on the ground (Fig. 16 & 17).
10. If you tire during limbing, STOP! Rest, then
resume work.
11. Never change the position of the feet or hands
while in the midst of a cut. ._
FIGURE 16
Overbucklng
2. Do not stand on a log while limbing. You may slip,
fall or the log may roll. Maintain sure footing.
3. Never use the bar nose to cut branches.
4. Bend the knees slightly. Position the right leg
behind the left side of the chain saw and the left
leg forward and outward away from contact range
of bar. Assume a comfortable stance with the feet
spread apart. CAUTION: If you change position,
the bar must always be on the side of the tree
opposite you. Keep the tree trunk between you
and the bar.
5. Rest the chain saw body on the trunk as much as
possible(Fig. 15).
FIGURE 15
FIGURE 17
Underbucking
9

BUCKING (The cutting of a log into sections):
1. Be alert to the stress and motion of logs. Always
position yourself to prevent the rolling of a cut log
section or the stress forces within a log from
acting against you.
2. Never stand directly behind the chain saw when
cutting. Stand to the left side of the cutting path of
the chain saw to reduce the chances of injury from
kickback or a broken chain shooting backwards
towards you (Fig. 18, 1).
3. Bend the knees slightly. Assume a comfortable
stance with the feet spread apart (Fig. 18, 2).
4. Keep the left elbow straightwhile cutting (Fig. 18,
3).
5. Lock the thumb under the handlebar (Fig. 18, 4).
FIGURE 18
FIGURE 20
WARNING: Logs and branches may be under stress
or tension. Before cutting check to see ifstress exists.
If stress does exists, start to cut on the right side of the
log or branch to prevent pinching and possible
kickback situations so that the branch does not whip
back and strike you.
9. If the chain bar is pinched while bucking, shut off
the engine immediately.
IMPORTANT! Ifthe bar and chain become pinched,
do not try to wrench or twist the bar free. Move the log
intoanother position or lift up with a rod or lever (Fig.
21).
FIGURE 21
6. Set the bucking spikes firmly against the log.
7. When cutting firewood, place the log on a suitable
support such as a saw buck (Fig. 19).
RGURE 19
8. Free hanging ends can be cut off without risk of
bar pinching. But if the wood is not to split or tear,
make an undercut (underbucking, Fig. 20, 1) of
about 1/3 the depth of the log diameter, then apply
the finishing cut (overbucking, Fig. 20, 2).
GENERAL RECOMMENDATIONS
The warranty on thischain saw does not cover items
that have been subjected to operator abuse or
negligence. To receive full value from the warranty,
operator must maintain chain saw as instructed in this
manual.
All items in the Maintenance section of this manual
should be checked at least once each season.
1. Service more often when operating in dusty or
dirtyconditions.
2. Once a year you should replace the spark plug
and clean or replace the air filter. A new spark
plug and a clean air filter assure proper air-fuel
mixture and help your engine run better and last
longer.
]0

MAINTENANCE SCHEDULE
FIGURE 22
m
Check for loose fasteners & parts
Checkfor,_damagedorworn parts
Check chai_tension X
Checkchainsharpness
:_efill.barand chainoil
Inspectbar
.?.leanenginecoolingfins X
_leanair filter& pre-filter
Replacesparkplug X
Cleanfuelfilter X
Inspectmuffler X
Cleansparkarrestor X
CHECK FOR LOOSE FASTENERS & PARTS
Check all fasteners, including nuts, bolts, screws and
clamps, to insure that they are tight and secure, If not,
make all necessary adjustments prior to using chain
saw.
CHECK FOR DAMAGED OR WORN PARTS
Replacement of damaged orworn parts should be
referred to your Sears Service Center
• On-Off Switch - Check function of the switch by
running the saw then turning the switch to the "off"
position. The engine should stop; then turnto the
"on"position and restart.
• Fuel Tank & Oil Tank - Do not use the saw if oilor
fuel leaks from the unit. NOTE: It is normal for a
small amount of oil to drip from the bar and the
side where the chain adjustment pin is located.
CHECK CHAIN TENSION
Ifthe chain is too loose it can come off the bar and
possibly cause injury. DO NOT operate the saw if the
chain is loose. To set your chain to the proper tension
refer to Chain Tension in the Service and Adjustment-
section.
x
x
x
X
X
X
CHECK CHAIN SHARPNESS
A sharp chain makes wood chips. A dullchain makes
a sawdust powder and cuts slowly. Chain sharpening
requires special tools. You can purchase sharpening
tools at Sears or go to a professional chain sharpener.
REFILL BAR AND CHAIN OIL
Your saw will use approximately one tank of bar oil for
every tank of fuel mix. Always fill bar oil tank when you
fill the fuel tank. For maximum bar and chain life,we
recommend you use Craftsman chain saw bar oil. If
Craftsman bar oil is not available, you may use a high
quality bar and chain oil. CAUTION: Only use bar and
chain oil; do not use motor oil. Motor oilwill damage
the saw.
INSPECT BAR
Keep bar rails square and flat. Check for inside groove
wear as follows. Place a straight edge (Fig. 23, A)
against side of bar and one cutter. If there is clearance
(Fig. 23, B) between bar and straight edge, the bar
rails are good. If the chain leans (Fig._24) and there is
no clearance between bar and straight'edge (Fig. 24,
B), the bar rails are wom. Straightening worn bars,
under certain circumstances, can only be done by
service technicians. Replace bar if un-repairable.
IMPORTANT: To prevent One-sided wear of the bar,
flip the bar over after each chain sharpening.
RGURE 23
ii
.-.%,.._
M Good
RGURE 24
r---1
_.j. ,._
M Wom
WARNING: Be Sure chain is properly tensioned. A
sagging chain (Fig. 25) can jump out of the bar groove
and even break.
FIGURE 25
1]
Sagging chain

Clean the oil inlet hole (Fig. 26, A) and the bar groove RGURE 28
priorto placing the chain in the bar groove.
FIGURE 26
Pre-fllter
REPLACE SPARK PLUG
Change your spark plug each year to make your
engine start easy and run better. Set spark plug gap at
.020".
With sprocket nose bars (Fig. 27), grease the bearings
of the sprocket with a grease gun containing bearing
grease. Pump the grease into the clean.edout holes
while rotating the sprocket. WARNING: Wear gloves
when handling chain to prevent injury.
RGURE 27
CLEAN FUEL FILTER
The fuel filter is located inside the fuel tank and is
attached to the fuel line. To clean, scrub with a small
brush. Replace if deteriorated,
INSPECT MUFFLER
Inspect muffler every 25 hours of use and replace if
corroded.
CLEAN SPARK ARRESTOR SCREEN (if installed)
After every 25 hours of use the spark arrestor screen
must be cleaned. Replace screen if deteriorating (part
no. 2048391).
To clean:
1. Remove screen.
IMPORTANTI The bar is designed specificallyto be a
track for the chain. Never use bar to pry, liftor twist.
2. Clean using a wire brush.
3. Reinstall.
CLEAN ENGINE COOLING RNS
For best performance, keep dirtfrom accumulating
around the engine cooling fins. Clogged cooling fins
cause the engine to run hotter and shorten engine life.
Cooling fins may be cleaned using a toothbrush or stiff
bdstle brush.
CHAIN TENSION
Correct chain tension isvery important to insure a long
service life for the chain. Check the chain tension each
[.,._=l;_rJ[_Idr-1_1,1-I m]lJl_-]l|_[:l_
time the saw is stopped and the bar and chain have
CLEAN AIR FILTER & PRE-FILTER
Your engine will not run properly and may be damaged
by using a dirty air filter and/or pre-filter. Replace if
deterioration occurs. Service more often ifyou use
your chain saw in very dusty or dirtyconditions.
To Clean Air Filter & Pre-Filter:
1. Remove air filter Cover.
2. Remove pre-fllter and air filter (Fig. 28). To
remove air filter, slide retaining clipoff and pull up
on air filter.
3. Clean air filter with soft brush or tap lightly, If
heavily soiled, rinse in a mild soap and water
cooled off. Check the tension and the chain and bar
lubdcation frequently during prolonged pedods of
cutting. Ifthe chain is loose, lubricate it well and let it
cool off before readjusting the tension.
WARNING: Be sure the chain is properly tensioned. A
sagging chain can jump out of the bar groove, break,
and cause sedous injury,
The chain tension needs adjusting ifthe chain is
sagging away from the underside of the bar when the
saw is held updght (Fig. 29).
RGURE29
solution. The pre-filter must be blown clean with
compressed air,
4. Dry air filter completely. Reassemble the pre-filter
and air filter; ensui'e that they are correctly seated
before reinstalling.
5. Replace filters if deteriorating,
Retainingclip
Air filter
12
Saggingchain

WARNING: Shut off engine before attempting to adjust
the chain tension. Additionally, disconnect the spark
plug wire. Wear gloves when handling chains to
prevent injury.
To adjust the tension:
1. Loosen the bar nuts using the Combi-wrench.
2. Turn the tension screw clockwise (Fig. 30, 1) until
'the chain touches and no longer sags at the
underside of the bar.
FIGURE 30
3. The saw chain is correctly tensioned when the
chain fits snuggly against the underside of the bar,
but can stillbe easily rotated on the bar by hand.
Be sure the chain fits correctly on the sprocket and
the bar (Fig. 30). NOTE: The chain will not rotate if
the chain brake is engaged.
4. Hold up the bar tip.Tighten the bar nuts securely
with the Combi-wrench provided. Only use the
provided Combi-wrench to tighten the bar nuts
(Fig. 31). CAUTION: Excessive force will stripthe
bar studs out of the saw case.
FIGURE 3i
RGURE 33
2. Clean the surface between the bar and the guide
plate (Fig. 34, A); and the oilier opening (Fig 34,
B).
3. Turn the chain tensioning screw (Fig. 34, C)
counterclockwise to position the tension lug (Fig.
34, D) to the far left.
4. Slide the bar over the tension tug and fit securely
into lughole. Failure to fit the lug into the hole may
resultin the tension screw being bent when the
side cover is tightened down.
RGURE 34
.
Feed the chain around the chain sprocket into the
bar groove (Fig. 35). Cutters (the sharp edge on
top) must point forward toward bar nose. Insure
the chain drive links engage the chain sprocket
and the sprocket nose on the bar.
FIGURE 35
INSTALLING NEW CHAIN
CAUTION: injury hazard! Wear safety gloves when
handling saw chain at any time.
1. Be sure chain brake is disengaged first (Fig. 32).
Pull backwards on hand guard until it clicks
audibly. Remove the two bar nuts (Fig. 33) and
side cover.
FIGURE 32
6. Attach the side cover and bar nuts by hand
tightening only. Lifting the bar nose slightly; turn
the chain clockwise and tighten the chain with the
tension screw until the chain touches the bar
without sagging. The chain tension is correct if the
chain is snug against the underside of the bar but
can stillbe easily rotated by hand. NOTE: The
chain will not rotate if the chain brake is engaged!
7. Hold her tip up; tighten bar nuts securely with
Combi wrench supplied. CAUTION: Excess force
will stripthe bar studs out of the case.
]3

NOTE:Checkchaintensionfrequently.Chaintension
willbeaffectedbysuchconditionsasdurationofwork,
outsidetemperature,hardnessofwood,lubrication,
etc.Ifthechainbecomesloose,shutoffsaw,loosen
retainingnutsandreadjustchainaccordingtoprevious
instructions.
CARBURETORADJUSTMENT
Tocomplywithemissionregulations,thecarburetor
mixtureispre-setatthefactoryandcannotbe
adjustedwithoutthepropertools.Anymixture
adjustmentmustbeperformedbyaservicecenter.
The idle speed can be adjusted. The idle speed set
screw is located on the top of the unit and to the left of
the spark plug. It is indicated by the letter "T.* To
adjust the idle speed, turn clockwise to increase and
counterclockwise to decrease idle speed. Idle speed is
2500 ± 100 RPM.
Prepare your chain saw for storage at the end of the
season or if the unit will not be used for 30 days or
more.
BEFORE STORING
1. Use soap and water to wipe down unit.
2. Be sure that all nuts, bolts, screws, and fasteners
are securely fastened. Inspect for damaged or
worn pads. Replace ifnecessary.
ENGINE
It is important to prevent gum deposits from forming in
essential fuel system parts such as the carburetor, fuel
filter, fuel hose, or tank during storage. Alcohol
blended fuels, such as gasohol, ethanol, or methanol,
can attract moisture, which leads to separation and
formation of acids during storage. Acidic gas can
damage the fuel system of an engine while in storage.
Do not store gasoline from one season to the next.
Two-cycle mix ages quickly and can cause engine
damage. Replace your gasoline container if it starts to
rust. Rust or dirt in your gasoline will cause engine
problems.
6, Pour a few drops of oil into the cylinder.
7. Pull the starter handle slowly to distribute the oil.
8. Replace with new spark plug.
STORAGE TIPS
If possible, store your unit indoors and cover itto give
it protection from dust and dirt. Do not use plastic.
Plastic cannot breath, which will allow condensation to
form and will cause your unitto rust. IMPORTANT!
Never cover chain saw while engine and muffler are
stillwarm.
To avoid engine problems, the fuel system should be
emptied before storage of 30 days or more.
Follow these instructions:
1. Drainthe fueltank
2. Start engine and let it run until the fuel lines and
carburetor are empty (The engine will stop.)
3. Use fresh gas next season.
4. If you use a fuel stabilizer, the gasoline can be left
in the tank. CAUTION: Never store chain saw
inside a building with fuel in the tank! Fumes can
concentrate and possibly reach a source of
ignition.Allow engine to cool before storage.
5. Remove spark plug.
14

PROBLEM
CAUSE SOLUTION
Engine does not start.
;hain rotates in idle mode.
Exhaust is smokey.
Chain cuts poody.
1, Fuel tank is empty.
2. Stale fuel mix.
3. Ignition switch off.
4. Spark plug fouled.
1. idle speed too fast.
•1. Idle speed mixture too rich,
2. Too much oil in fuel mixture.
3. Air filter clogged.
4. Choke only partially open.
1. Blunt chain or incorrectly
sharpened.
2. Carburetor adjusted
incorrectly.
3. Air filter clogged.
1, Refuel with fresh fuel.
2. Drain and flush the fuel
tank. Refuel with fresh fuel mix.
See =Fuel Mixture Chart" in
Operations.
3, Set switch to" I ."
4. Clean or replace plug.
1. Turn idle speed set screw
countemlockwise until
chain stops while the
engine idles.
1. Contact Sears Service Center.
2. Adjust the fuel-oil mixture
ratio. "_
3. Clean or replace air filter.
4. Open choke all the way.
1. Sharpen chain.
2. Contact Sears Service Center.
3. Clean or replace air filter.
The CaliforniaAirResourcesBoardandSears arepleased
to explainthe emissioncontrolsystemwarrantyonyour
1996 and laterlawn andgardenequipmentengine.In
Caiifomla,newlawnand gardenequipment enginesmust be
designed,built,andequippedto meetthe state's stflngent
anti-smog standards.Sears mustwarrantthe emission
controlsystemon yourfawn andgardenequipmentengine
forthepedodoftimelistedbelowprovidedthere has been
no abuse, neglect,or impropermaintenanceofyour lawn
and gardenequipmentengine.
Youremissioncontrolsystemincludespartssuchas the
carburetororfuel injectedsystem,theign'dionsystem,and
connectorsandotheremisslan-relatsdassemblies.
Where a warrantableconditionexists,Sears willrepairyour
lawnand gardenequipmentengineat no costtoyou
includingdiagnosis,parts,and labor.
MANUFACTURER'S WARRANTY COVERAGE:
The 1996 andlater lawnand gardenequipmentenginesare
warrantedfor twoyears. Ifany emission-mistedparton you
engineisdefective,thepartwillbe repairedor replacedby
Seam.
OWNER'S WARRANTY RESPONSIBILITIES:
As the lawn and garden equipment engine owner, you are
responsible for the pedormance of the required maintenance;!,
listed in your Operatol's Manual. Sears recommends that
youretainall receiptscoveringmaintenanceonyour lawn
and gardenequipmentengine.Searscannotdenywarranty
solelyforthe lack of receiptsor foryourfailureto ensurethe
performanceofall scheduledmaintenance.
Asthe lawnand gardenequipment engineowner,you
shouldhoweverbe awarethatSeam may denyyouwarranty
coverageifyourlawnand gardenequipmentengineor a
pert has faileddueto abuse, neglect,impropermaintenance
or unepprovedmodifications.
You are responsiblefor presentingyourlawn andgarden
equipmentengineto a Sears repaircenteras soon as a
problemexists.The warrantyrepairsshouldbe completedin
a reasonableamountof time, nottoexceed 30 days.
Ifyou haveany questionsregardingyourwarrantydghtsand
responsibilities,you shouldcontactSearsat 1-800-473-
7247.
A. WARRANTY COMMENCEMENT DATE
The warrantypedodbeginsonthe datethe equipment
ispurchasedbya retail customer.
a.
LENGTH OF WARRANTY COVERAGE
Sears warrants to the initial owner and each
subsequent purchaser that the engine is free from
defects in matedais and workmanship for a pedod of
two years from date of odginai purchase from Seam.
15

C. WHAT IS COVERED
1,gREPAIR OR REPLACEMENT OF PARTS
Repai_or replacementof anywarrantedpartwill
be performedatno chargetothe ownerata
warranty station.To locatea warrantystation,you
may callSears at 1-800-473-7247, (24 hours,7
daysa week).
WARRANTY PERIOD
Any warrantedpartwhichisnotscheduledfor
replacementas requiredmaintenance,orwhichis
scheduledonlyfor regularinspectionto theeffect
of "repairorreplaceas necessary"shallbe
warrantedfor the warrantypedod.Anywarranted
partwhichis scheduledfor replacementas
requiredmaintenanceshallbe warrantedfor the
peded.oftimeup to the first scheduled
replacementpointforthatpart.
e DIAGNOSIS
The ownershallnotbecharged fbrdiagnostic
labor,whichleadsto the determinationthat a
warrantedpart is defective,ifthe diagnosticwork
isperformedat Sears.
4. CONSEQUEN_ALDAMAGES
The enginemanufacturerisliablefordamagesto
the enginecomponentscausedbythe failure ofa
warrantedpartstillunderwarranty.
D.
WHAT IS NOT COVERED
1. Failurescausedbyabuse,neglect,orimproper
maintenance.
2. Add-on ormodifiedparts.The useofadd-onor
modified padscan be groundsfordisallowinga
warrantyclaim.The enginemanufacturerisnot
liabletocoverfailures of warrantedpartscaused
bythe use of add-onormodifiedpads.
3. Any indirectorconsequentialdamagesthat may
resultfrom thefailure or malfunctionoftheSears
product.Somestatesdo notallowtheexclusionor
limitationofconsequentialdamagessothese
limitationsmay notapplytoyou.
4. Normalservicerequirementsarisingdudngthe
warrantyperiodsuchas carburetororignition
adjustment,cleaning,normalwear,lubrication,
sparkplugs,filters,starterropes,etc.
5. Normalserviceworkoverand abovetherepairor
replacementofdefectivepads.
6. Anyfailurethat resultsfroman accident,customer
abuse, norrnslwear, neglector failureto operate
the productinaccordancewiththe instructions
providedin the OperatorsManual orprovidedwith
the product.
7. Pre-deliven/set-up time.
8. Operationofan engine withan incorrectfuel:oil
ratio,airfilterremovedor speedsin excessof
Sears' recommendations(ifapplicable).
9. Transpodationcostsassociatedwithdelivering and
rstumof producttoa Sears warrantystation.
E.
HOW TO RLE A CLAIM
Warrantyclaimsmay be submittedon severaldifferent
forms:
Seers WarrantyClaimRequest
OutdoorPower EquipmentInstitute
UniversalWarrantyCIalm Report
EngineServiceAssociationClaim
Warrantyclaims mustbe receivedat Seers within60
daysof the date of repairnotedonthe claim,
F,
WHERE TO GET WARRANTY SERVICE
Warrantyserviceor repairsshall be providedat Sears
ServiceCanters.Forthe addressof a ServiceCenter
nearyoucall Sears at 1-800-473-7247, (24 hours,7
daysa week).
G,
MAINTENANCE, REPLACEMENT AND REPAIR OF
EMISSION RELATED PARTS
Sears replacementpads must beused inthe
performanceofany warrantymaintenanceor repairs
on emission-relatedpads and willbe providedwithout
chargedudngthe warrantyperiod.
H.
EMISSION CONTROL WARRANTY PARTS LIST
Sears'warrantyincludesthe followingpads (unless
saidpad was scheduledforreplacementas required
maintenance):Air Filter,Fuel Filter,Carburetorand
internalpads, Choke Mechanism,IntakeManifold,
J
Spark Plug,Flywheel, IgnitionModule.
MAINTENANCE STATEMENTS
Follow normal maintenance service, recommended fuel
mixture (where applicable), lubrication, operation and
storage of the product as explained in the Operator's
Manual. The owner shall not be charged for diagnostic
labor, which leads to the determination that a
warranted part is defective, if the diagnostic work is
performed at Sears.
]6

CRAFTSMAN CHAIN SAW MODEL NO. 360.352001
140
141
14217 151
168 ","., •_'-- i
k,_ff W _el,wm,4m _g
187 I
188
189
I
q
201 ]
r5 130
131
"111
,.17
212
I
I
76 75
I
I
236 -
"I
200
LI
I
_3
1 _.o .
213 212 210
I
I 14. T
212
213

CRAFTSMANCHAINSAWMODELNO.360.352001
Poe.Number Part
.Number DescrlpUon
1 6073641 Air guide
2 0020148 Nut
3 0072145 Tendon spring
5 2400289
6 0010158 Screw
7 0034201 Clml_p
10 2100624DGN Crankcase, complete
11 0054252 Oil seal
12 0050187 Grooved bail bearing
13 0018267 Screw
14 0018336 Screw
15 20744160GN Pro-rifler cover
16 2500582 Pro-rifler assembly
17 0021232 Nut
18 2300489 Short circuit switch
19 2061473 Crankcase gasket
21 0040190 Pin
22 2700382 Check valve
23 2800285 Throffie linkage
24 2074908DGN ConsOle
25 6074401 Plug
26 0062256 O-ring
27 6400183 Pin
28 6074409 Stop plate
29 0018280 Screw
30 2042726 Stop plate
31 0018267 Screw
32 0073381 Torsion spring
33 0050188 Ball bearing
34 0054265 Oil seal
35 6063329 Oil hose
36 6400209 Pump housing
37 0062276 O-ring
38 0018280 Screw
39 6700124 Oil strainer
40 6063299 Hose
41 0044271 Rivet
42 6074447 Cover
45 0031529 FdcSon washer
46 0070265 Pressure spring
48 6031330 Pump piston _
49 6400207 Oil pump, complete
50 0055136 Circrip
51 0031209 Washer
52 6074976 Drivingworm
60 6042817 Washer
61 0071172 Clutch spring
62 3500405 Clutch, complete
63 _5_b_. _ Clutchdrom
64 0052257 Needle beadng
70 6200131 Broke band
71 0070254 Spring
72 6300208 Adjuster
75 6300175 Pressure plate
76 0070253 Spring
80 0031534 Washer
81 0055104 Washer
85 6074999 Brake band cover
86 0018280 Screw
90 6100371DGN Chain Guard
91 6074696 Guide shoe
92 00202147 Nut
110 2200238 Crankshaft
111 0075100 Disc spring
112 0052255 Needle beanng
115 0055287 Piston pin circlip
116 2031249 Piston pin
120 2200265 Piston
Pos. Part
Number Number Description
121 2048357 Piston dng
122 2061478 Cylinder foot gasket
125 2011756 C_er
128 0034201 Clrsiip
127 0010541 Screw
128 0094252 Spacer
129 2300730 Spark plug
130 0015286 Stud screw
131 2061441 Murilergesket
132 2500604 Muffler
135 0072144 Washer
136 00_8137 Lock nut
137 0018336 Screw
140 2061439 Manifold gasket
141 2300732 Manifold
142 0034201 Cirdip
143 0010112 Screw
144 2061443 Carburator gasket
150 2300709 Carburetor
151 6074916 Lever
152 2074441 Guide nozzle
153 . 6043247 Support
154 0018267 Screw
155 0034147 Spring dng
156 0015279 Screw
160 2500641 Air rifler assembly
161 0062246 O-ring
162 0011282 Screw
163 2074946 Profits
164 2074423 Filter housing
165 0018230 Tension screw
166 6032640 Chain tension bolt
168 6900814 Repair Idt
170 0018398 Screw
171 6643329 Guide plate
172 0010478 Screw
175 6900221N Guide par
176 6043323 Bucking spike
177 0034201 Clrdip
178 0010559 Screw
179 6071248 Scabbard
180 6900220N Chain
187 0030101 Washer
188 0072148 Tension spdng
189 0018327 Screw
190 2300752 Ignitioncoil
191 0084600 Spark plug cap
192 0073385 Contact spring
193 0064292 Hose
194 2063333 Grommet
195 0084702 Short circuitcable
196 0066335 Grommet
199 0066314 Grommet
200 2700345 Oil tank cap
201 0062288 O-dng
210 6300155 Rubber metal connection
211 0030115 Washer
212 0018280 Screw
213 0018274 Screw
214 0033318 Spacar tube
215 0018257 Screw
220 6074422DGN ProtesSve cap
?_22 6043352 Chain proteclJonplate
235 0510952 Carburetor gasket kit
236 0510951 Carburetor repair kit
240 0510953 Throttle axle k_t
241 0510965 Choke axle kfl'_
?
18

CRAFTSMAN CHAIN SAW MODEL NO. 360.352001
Pos. Number Pert
Number Descrlpfton Number Number Oes(:rlptlon
1
3
4
5
6
7
8
9
15
16
17
20
21
22
23
25
26
28
29
30
33
34
35
37
38
42
43
44
45
47
50
52
53
54
6100413DGN Main housing 57 0072140 Spring washer
0073392 Throt_e control spflng 58 6032639 BoR
2074429 Gas lever 60 0028118 Nut
0073339 Spring 61 6032669 Bolt
6074292 Stop lever 62 6063328 Fuel hose
6074443 Safetylever 63 0013214 Screw
20_381 Throttle linkage 64 2500744 Ventilation hose
0010531 Screw 65 0067124 Nipple
6073681 Gdp cup, left 66 6063304 Vent hose
0010512 Screw 67 6063302 Fuel hose
0010531 Screw 68 0073351 Hose inop
60736810GN Gdp cup, left 69 6063301 Hose guide
0070147 Spdng 70 2700321 Hose
6074381 Lever 71 0063191 Seallng cord
6031247 Pin 72 2074469 Plug
0061356 Gasket 73 2074470 Frame
27003.53 Tank lid 75 6073683 Cover, Black
0098140 Safetycetch 76 6800334 Screw
0018274 Screw 79 0018336 Screw
6800241 Handle bar 80 0018337 Screw
0094288 Rubber metal connection 82 6074993 Choke lever
0030102 Washer 83 6074992 Pin
0098141 Safety catch 85 2700322 Pdmer
0028130 Nut 86 0064407 Hose
0018274 Screw 87 0064432 I-k_e
0018274 Screw 88 6074958 Pdmer support
0010157 Screw 89 6042753 Isolating foil
0030102 Washer 90 0(_J4252 Rubber spacer
0098142 Safety catch 100 6073566 Hub cover, black
0098143 Safety catch 104 6074426 Choke lever
6800235 Hand protection . 105 0011258 Screw
0044280 Rivet 106 0030108 Washer
00G4152 Clr_ip 110 2700354 Fuel pick-up,complete
0010188 Screw 111 2700327 Fuelplck-up
• Pos. Pert
112 2700335 Fuel pick-up, ind in 6100402
5O
3 52
-_ --69
•" 68
58
111 _ 67
6O
I
112
76
74
79
89
8 88 82
_:6_ 8 I
19

CRAFTSMANCHAINSAWMODELNO.360.352001
Pos, Number
1
3
4
5
6
7
10
11
12
13
14
part Descdptlon
2600282DGN Starter, complete
0018336 Screw
2100o-78- Starter housing
0063186 Starter rope
2074206 Starter handle
2600283 Spring cassette
2074419 Starter pulley
0031260 Washer
2074209 Starter pawl
2074408 Template
0073365 Pin
J
o
J
2O


For in-home major brand repair service:
Call 24 hours a day, 7 days a week
1-800-4-MY-HOME = (1-800-469-4663)
Para pedir servicio de reparaci6n a domiciiio - 1-800-676-5811
In Canada for all your service and parts needs call
-1-800-665-4455
Au Canada pour tout le service ou les pi_ces
For the repair or replacement parts you need!
Call 6 aim. - 11 p.m. CST, 7 days a week
PartsDirect"
1-800-366-PART (1-800-366-7278)
Para ordenar piezas con entrega a domicilio - 1-800-659-7084
For the location of a Sears Service Center in your area:
Call 24 hours a day, 7 days a week
1-800-488-1222
To purchase orinquire about a Sears Maintenance Agreement:
Call 7 a.m. - 5 p.m. CST, Monday - Saturday
1-800-488-6655
r
HomeCentral
 Loading...