

Page 1
CRAFTSMAN
owners manual
MODEL NO.
35900
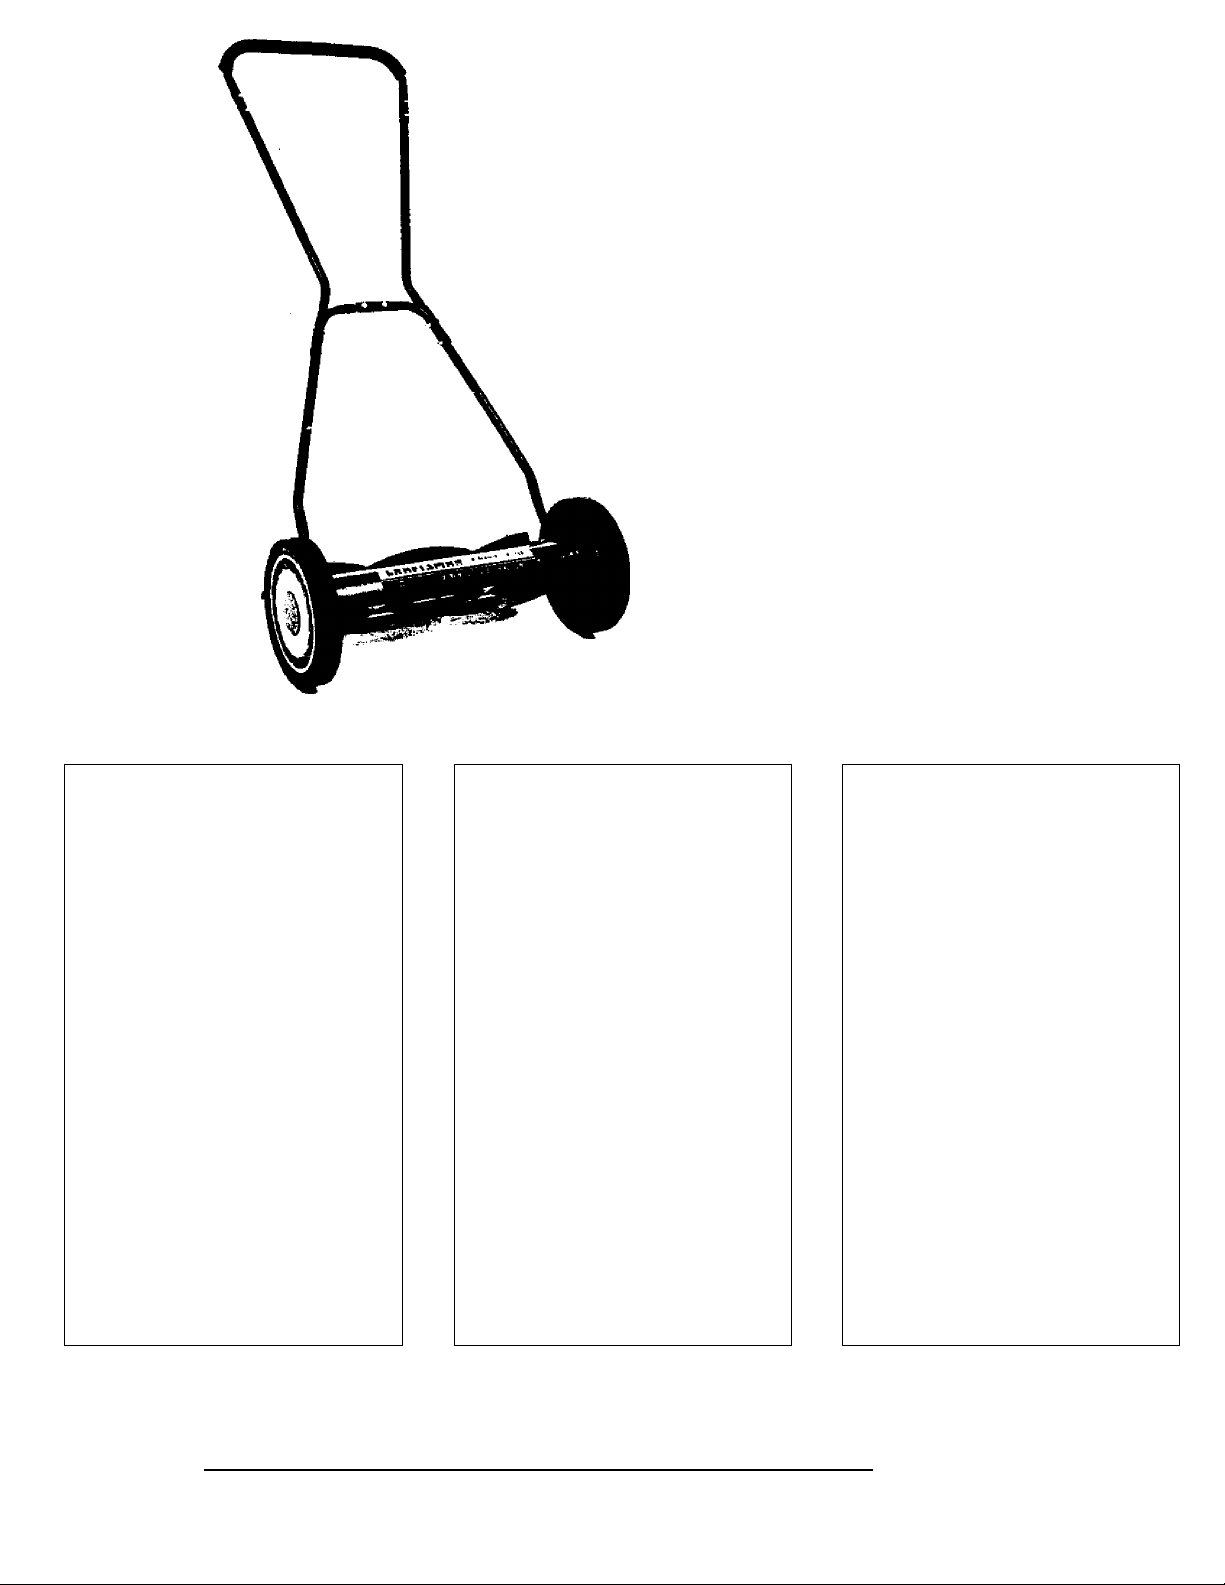
SEARS CRAFTSMAN
18” HAND LAWN MOWER
assembly
operating
repair parts
CAUTION:
Read RULES for Safe
OPERATION and
INSTRUCTIONS Carefully
manual del propietario
MODELO NO.
35900
SEARS CRAFTSMAN
RODADORA MANUAL
DE 18” (puigadas)
ensambiaje
operación
repuestos
PRECAUCION:
Lea cuidadosamente las
REGLAS de OPERACIÓN
segura y las instrucciones
owner manuel
MODELE NO.
35900
SEARS CRAFTSMAN
18”TONDEUSE
MANUELLE
assemblée
operation
pieces pour reparation .
ATTENTION:
Lisez attentivement toutes
ies instructions dans ce
manuel concernant Ternploi l’operation et l’utilisa
tion de votre tondeuse.
__ _ _ _ _ _
Part No. 31186
SEARS, CANADA INC, TORONTO ONTARIO MSB 2B8
Page 2

RULES-FOR SAFE OPERATION
1. Read and familiarize yourself with the methods of use.
2. Inspect your lawn amd remove foreign objects, etc,
3. Don’t operate mower when barefoot or wearing sandals.
4. Use caution - A mower is a precision piece of lawn care equip
ment and should be treated as such.
5. Don’t operate a damaged mower. Have repairs made before
returning to work.
6. Never place your hands or feet near a moving part.
7. Do not mow the lawn when it is wet enough to be slippery.
8. Always be sure of your footing. Walk, don’t run.
9. Keep all screws and nuts tight. Be sure equipment is in a safe
operating condition. Keep mower clean of dry grass and dirt.
ITEMS IN CARTON
One complete Hand Mower Chassis.
Two lower handle sections.
Two upper handle sections.
One handle grip section.
One plastic bag including hardware for assembly of
handle.
Six Vi’ X 1 Vi" handle bolts-
Eight Vi-20 handle nuls-keps.
Two w” X r handle bolts.
One foam grip.
Two retaining rings.
Do not use Key Numbers when ordering Repair
Parts, always use Part Numbers.
Your mower is right hand (R.H.) or left hand (LH.)
as you push.
REGLAS DE OPERACIÓN SEGURA
1.
Lea y familiarícese con las formas de uso.
2.
Inspeccione su césped y retire cualquier objeto extraño, etc.
3.
No opere la podadera descalzo o usando sandalias.
4.
Tenga cuidado. Una podadera es un aparato de precisión para el
cuidado del césped y deber ser tratada como tal.
5. No opere la podadera se está dañada. Repárela o mándela a
reparar antes de volver a usarla.
6. Mantenga las manos y los pies alejados de las partes móviles.
No corte el césped si está mojado o resbaladizo.
Tenga los pies firmes en todo momento. ¡No cora, camine!
Mantenga apretados todos los tornillos y tuercas. Asegúrese de
que su podadera esté en condiciones adecuadas para un uso
seguro. Manténgala limpia de hiertia seca y suciedad.
REGLES POUR L’UTILISATION DE LA TONDEUSE
1. Lisez attentivement et familiarisez vous avec le mode d’entretien.
2. Inspectez la surface de la pelouse à tondre et en retirer tous les
corps étrangers (outils, jouets, débris, etc.)
3. Ne pas utiliser la tondeuse lorsque vous êtes pied nus ou
lorsque vous portez des sandales.
4. Soyez prudent. Une tondeuse à gazon est une pièce
d’equipement spécifique pour l'entretien de la pelouse et doit en
tout temps être considérée de la sorte.
5. N’utilisez pas une tondeuse endommagée. Assurez vous que les
réparations nécessaires ont été effectueés avant de reprendre
son utilisation.
6. Ne jamais approcher les mains ou les pieds près des pièces
mobiles de la tondeuse.
7. Ne pas tondre la pelouse lorsqu'elle est mouillée au point d’être
glissante.
8. Poussez toujours á la même cadence, marchez NE COURREZ
PAS.
9. Guardez tous les vis et écrous bien sérrés. Assurez vous àvant
chaque emploi que l’équipement est en bonne condition de
marche. Guardez votre tondeuse propre. Débarrasez la du gasón
sec et de la saleté.
CONTENIDO DE LA CAJA
El chasis completo de la podadera manual.
Dos secciones de manija inferiores.
Dos secciones de manija superiores.
Una sección de mango de la manija.
Una bolsa de plástico con las piezas para el
ensamblaje de la manija.
Seis pernos de 1/4” x 1 1/4".
Ocho tuercas de 1/4-20.
Dos pernos de 1/4" x 1".
Un mango de espuma.
Dos aros de retención.
No utilice los números de clave para ordenar los
repuestos, utilice siempre tos números de repuesto.
El lado derecho e izquierdo de la podadera son
desde la perspectiva de quien la está empujando.
CONTENU DU CARTON
Le chassis complet d’une tondeuse.
Deux sections supérieures de la poignee.
Deux sections intérieure de la poignee.
Un section de poignee centrale
Un sac en plastique contenant le necessaire
pour assembler la poignee
Six boulons 1/4” X 1 1/4” pour la poignee
Huit écrous 1/4” - 20” pour la poignee
Deux boulons 1/4” X r pour la poignee
Un manchon en caoutchouc
Deux anneaux de retenue
Lorsque vous faites une commande indiquez le
numéro de la piece.
Votre tondeuse est main droite ou main gauche
suivant comme vous la poussez.
Page 3
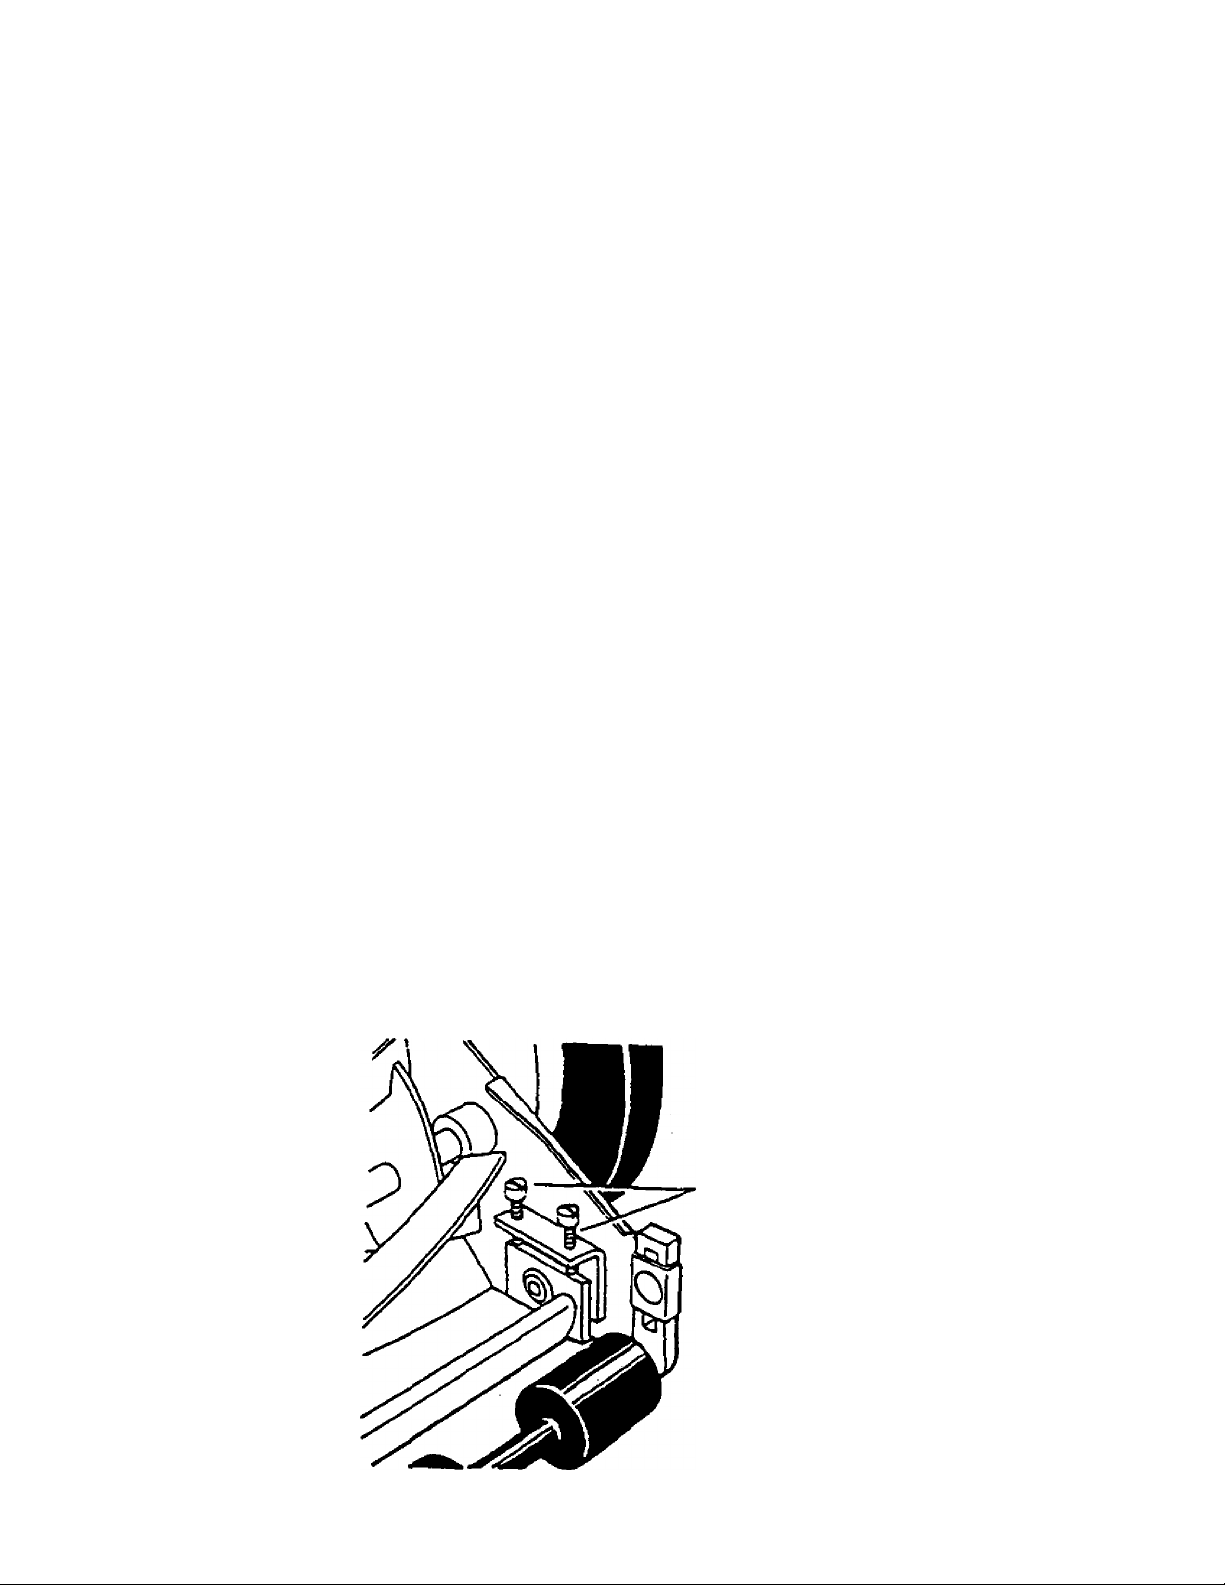
MOWER BLADE ADJUSTMENT
The blades have been preadjusted before leaving the factory.
Misalignment can occur resulting in blades that are too loose or too tight. If this happens, you will notice a rough,
uneven cut or a hard pushing mower.
All adjustments are made from the rear of the mower (opposite from the bar with the logo decal.) Each end of the cut
ting bar can be adjusted separately.
As you follow the instructions below, refer to Figure 1 for more information.
The cutting bar blade (located under the reel) pivots. The front screws move the cutter bar away from the blades, while
the rear screws move the cutting bar toward the blades.
Adjusting the screws is a very sensitive procedure. 1/16th of a turn is considered a major adjustment.
Before tightening one adjusting screw, be sure to loosen the opposing screw an equal amount.
LOOSENING THE BLADES
• The cutter bar blade must be moved further from the cutting reel.
• Loosen both back screws equally by turning them counter-clockwise.
• Tighten both front screws equally by turning them clockwise.
TIGHTENING THE BLADES
• The cutter bar must be moved closer to the cutting reel.
• Loosen both front screws equally by turning them counter-clockwise.
• Tighten both back screws equally by turning them clockwise.
CHECKING ADJUSTMENTS
Turn mower upside down.
Insert a piece of paper (i.e., writing or newspaper) between the cutter bar and the reel blades, and carefully turn the reel
blades by hand.
All blades should slice the paper evenly the entire length of the cutter bar while the reel turns smoothly.
if the mower has an uneven cut, an adjustment should be made to the appropriate side of the blades to attain an even
cutting action.
FIGURE 1
ILLJUSTRACIÓN 1
DESSIN 1
Adjusting Screws
Torniilos de ajuste
Vis d’ajustement
Page 4

10 9
9 10
23
^^31A 32 /
Page 5

18” HAND LAWN MOWERS
MODEL NUMBER 35900
Key N*.
PirtNa.
am
DeRep.
Humera Des Plecet
Nemera
1. 30122 Bal Cup
"10Ï37 ВаИ Bearing АеаетЫу
Z.
30004 Bearing Соле ^ ^ ^
3.
4.
30309
5. 30308-0-20 Dust Cap
6. 30307
7. Rachet Рам\
8. 10122-3-20
9. 30317-1 Axle Snap Ring
30926-1 Hub Cap
ii. 30337 Axle
11. B Э07ЭЗ Axle Nut
10446 Wheel & Бге
1Z.
13. 30660 Hex Head Bolt
14. 30(73043^20 “ Cover Plate
15.
10326-17-20
15. A 10326-16-20 Right Side Plate
16. 30990 Handle Retaining Ring
17. 10491-1-20 Shnib Bar Assy.
18. 30737-3 Left PlnkKi Gear
19. ЗОзоо
Pert Neme
Nómbn IM Repuetio
DeecripOon Dee Placee
Receptáculi) del caÿnete
Routle
Montaje del cofinete de bolas
Assemblaœ billee de leulement
Cono del co^e
Cone du coussinet
Spring, Reel Adj.
Resorte de p)uste det cilindro
Ressort d’alustemem (mamut
Cubierta contra polvo
Pmtíae ooussiere Inmveu)
Reel Spacer
Espadador del cUlndio
Rondelle
Tíinquete
Encllduetaoe á roctiel
Reel Assembly (Ind. Key Nos. 2 thru 6)
Montale del dllndro (Ind. tos nos. dave de 2 a 6)
Assenblage du moyeu (contient les pieces numéros
30137 • 30004 - 30309 - 303084320 - 303071
Aro en ‘E’ del eje
Anneau a oressíon (essieu)
lápacubo
Couverde du moyeu
Eje
£sâfiu._
.........................
Iberca del eje
Ecrou Hexaoanal oour t'essleu
Reuda - Llanta
Roue et Pneu
Perno de cabeza hexagonal
Boulon a téta hexagonale
Placa de la cubierta
Plague de couverture
Lett Side Plate
Placa lateral izquierda
Rxadnn latérale oauche ""32 . '
Placa lateral derecha
Fixation latirala dmita
Aro de retenddn de la manija
Anneau de Retenue
Ensamblé de la barra de protección
Barre de torsion
flAón Izquierdo
Engrenage i rognon oauche
Adjusting Screw 5(101 0«ci. h Key №н. 15 ï ISA)
Ibmillo de ajuste de 5/16 x 1
(sa incluye en los nos. daves 15 & ISA)
Vis d’ajustement (contient les pieces numéros
10326-16-20 et 10326-17-20)
RODADORAS MANUAL DE 18”
MODELO NO. 35900
Raq.
Req.
Necesseiit
2 20.
2
2
1
1
1
2
1
2
2
i
2
2
2
2
1 '
1
2
1
1
4
Key Ne.
Part Ha.
Clava
DtRap.
Humara
Humera Des Pieces
30737-2
21. ~~CütUr Bar BoltM X 11/S
И.
“31ИВ WIngNut ^
23. “31072 “ KoDar Bracket
24.
30119-2 Carriage Bolt 5/l0 X 11/4
■■5Î. »305-3-20
25. A 30519
26. 30320 Rolbr Section
27. 30071
28. 30319-3 Roller Tiibe
10016-11
29. 10473-1 Complete Handle Assam. 1
31107-14
30.
30. A 31107-15 Lower Handle Section LH 1
31. 31100 Handb Bolt 1/4-20-1’ 2
31. A 31100-2
30002 Hex Nut 1/4 Nylon Insert t
33. 310984
34. 310903 Handle Grip Section 1
35. 30948
36. 10474
18” TONDEUSE MANUELLE
MODELE NUMERO 35900
PartNamt
Nenrim Dit Rapuasto
Deseription Dea necea
Right Pxikm Gear
Piñón derecha
Engranaos a pignon droit
Ibmilio de la barra de corte, 3/8x11/8 pulgadas
Boulon-Bane das lames 3/8x11/6
Tuerca Heagonal
Ecrou Hexagonal
Soporte det rodillo
Loquet
Perno de carruaje de 5/16 x 11/4
Boulon 5/16x1 1/4
Cutter Bar Assy.
Baria da corta
Barre des lames
Cutter Bar Stud (Ind. In Key Nos. 15 &15Л)------------------------------------- 2--------Espdrrago de b barra de corte (sa hd. en bs nos. IS у ISA)
RM - Barra des tairres (conbant lea numeros IS el ISA)
Sección del rodUki
Section du Rouleau
Roller Spacer 2
Espadador del rodillo
Rondelle du Rouleau
Tubo del rodillo
Tubs du rouleau
Complete Roller Assembly
Montaje completa del rodillo
Assembla» oour le rouleau
Montrée completo de b manija
Assembla» pour b peionw
Lower Handle Section ITH 1
Secdon inleitor de b marbja mitad derecha
Section Doionee droite inferieure
Secdon Inferior de b man^a mitad izqdenb
SecUon Ddonee nucha kilérieute
Perno de b manija 1/4-20-1'
Boulon oour b Dolgnaa 1/4x2 ■
Handia Bolt 1/4 X11/4
Perno de b manija 1/4 x 11/4
Bodon Dour b Ddonw 1/4 x 1/4
Tuerca hexagonal. Inserto de nlón
Ecrou Hexaoonÿ
Center Handle Section 2
Secdon su»iior de b marbja
Section de ooionee sunedeura
Section del mango de b manija
Secdon de ooianee centrab
Foam Grip 1
Mango da espuna
Manchon de naionee en caoutchouc
Assam. Hardware
Paquete de terreterb
Assembla» de quincailbrb
Req.
Req.
Necemire
1
2
-------2--------
2
2
.......
1
7
1
1
6
1
Page 6

CUSTOMER RESPONSIBILITIES
Always use care when operating your lawn mower and keep clear of moving parts. Avoid striking or running into soiid objects or debris in
the area to be mowed. Be sure the mower is clean and follow a regular maintenance schedule in order to provide efficient and safe opera
tion. A well-cared-for lawn mower will last long and operate more efficiently.
TWO YEAR LIMITED WARRANTY ON CRAFTSMAN
MODEL 35900 LAWN MOWER
For two years from the date of purchase, when this Craftsman Lawn Mower is maintained and lubricated according to the instructions in the
owner’s manual. Sears will repair, free of charge, any defect in material and workmanship.
if this Craftsman Lawn Mower is used for commercial or rental purposes, this warranty applies for only 90 days from the date of pur
chase.
This warranty does not cover:
Expendable items which become worn during normal use.
Repairs necessary because of operator abuse or negligence, and the failure to maintain the equipment according to the instructions con
tained in the owner’s manual.
WARRANTY SERVICE IS AVAILABLE BY RETURNING THE CRAFTSMAN LAWN MOWER TO THE NEAREST SERVICE
CENTER/DEPARTMENT.
This warranty gives you specific legal rights, and you may also have other rights which vary from state to state.
SEARS.
RESPONSABILIDADES DEL CLIENTE
Siempre 0|юге su podadera con cuidado у manténgase alejado de l№ piezas rnóviles. Evite tos choques o cualquier otro contacto con
objetos sólidos o con desechos en el área que se corta. Asegúrese de que la podadera se mantenga limpia y observe un programa de
mantenimento regular, a fin de asegurar el uso eficiente y seguro del aplato. Una podadera bien cuidada durairá por muchos años y fun
cionará de una manera eficiente.
GARANTÍA LIMITADA DE DOS AÑOS PARA LA RODADORA CRAFTSMAN MODELO 35900
Durante dos años a partir de su fecha de compra, si esta podadera Craftsman recíble mantenimiento y lubricación de acuerdo con las
instrucciones del manual del propietario, Sears reparará gratuitamente cualquier defecto en materíales y mano de obra.
Si esta podadera Craftsman se utiliza para usos comerciales o renta, esta garanda solamente se aplica durante 90 días a partir de la fecha
de compra.
ESTA GARANTÍA NO CUBRE:
Partes desechadles que se desgastan durante el uso normal.
Reparaciones necesarias debido al abuso o negligencia del operador, o por falta de mantenimiento del equipo según las intrucciones del
manual del propietario.
EL SERVICIO DE GARANTIA SE OBTIENE HACIENDO LLEGAR LA RODADORA CRAFTSMAN AL CENTRO O DEPARTAMENTO DE
SERVICIO MÁS CERCANO.
Esta garantía le otorga derechos legales específicos. Es posible que usted tenga otros derechos adicionales seqún su lugar de residencia.
SEARS.
RESPONSABILITES DU CONSOMMATEUR
Faire toujours attention lorsque vous utilisez votre tondeuse. Enlever tous les débris avant de commencer. Ne la cogner pas contre des
objets durs ou des débris. Conservez votre tondeuse en bon état, et toujours propre. Familiarisez vous avec le mode d’entretien et suivez
les instructions suggérées pour garder votre tondeuse en bon état. Une tondeuse bien entretenue durera plus longtemps et marchera en
bonne condition.
DEUX ANS DE GUARANTIE LIMITEE POUR LE MODELE 35900 SEARS TONDEUSE
POUR DEAU ANS COMMENÇANT À LA DATE DE LACHAT, LORSQUE LA TONDEUSE SEARS EST MAINTENUE ET LUBRIFIÉE EN
SUIVANT LES INSTRUCTIONS DONNEES DANS CE MANUEL, SEARS FERA LES REPARATIONS GRATIS, EN CAS DE DEFAULT DANS
LE MATERIEL OU L’OUVRAGE.
CETTE GUARANTIE NE COUVRE PAS:
- LES ARTICLES USÉS PENDANT UN EMPLOI NORMAL.
- RÉPARATIONS NÉCESSAIRES CAUSÉES PAR LABUSE OU LA NÉGLIGENCE DU CONSOMMATEUR QUI N’A PAS SUIVI LES
INSTRUCTIQNS DANS CE MANUEL POUR MAINTENIR CETTE TONDEUSE EN BON ÉTAT DE MARCHE.
LE SERVICE DE CETTE GUARANTIE PEUT ÊTRE OBTENU EN RETOURNANT LA TONDEUSE AU CENTRE DE RÉPARATION SEARS
LE PLUS PROCHE
CETTE GUARANTIE VOUS DONNE DES DROITS TRÈS SPÉCIFIQUES, ET VOUS POUVEZ AVOIR ÉGALEMENT D’AUTRES DROITS,
QUI CHANGENT D’UN ÉTAT À UN AUTRE.
SEARS
Page 7

Dear Customer,
In manufacturing this product, many steps have been taken to provide you with the highest quality. Unfortunately, errors
or omissions occasionally occur. In the event that you find a missing or defective part, please contact your nearest Sears
store. .
SERVICE AND REPAIR PARTS
CALL 1-800-665-4455 *
Keep this number handy should you require a
service call or need to order repair parts.
If ordering parts make sure you have the name, make and
model no. of the merchandise and the name and number
of the part you wish to order.
If calling locally, please use one of the following numbers:
Regina - 566-5124 Montreal - 333-5740
Toronto - 744-4900 Halifax - 454-2444
Kitchener - 894-7590 Ottawa - 738-4440
Vancouver - 420-8211
If you have any suggestions that would help us to improve our assembly/operation instructions, or this product, please
write them down and mail it to: .
Sears Canada Inc.
222 Jarvis Street
Toronto, Ontario
MSB 2B8
Attention: Buyer Dept. S21
NAME :
ADDRESS:
POSTAL CODE:
COMMENTS:
Model No.
PHONE #:
 Loading...